

Page 1

User Guide
EM001
Page 2

Copyright © 2009.
All Rights Reserved.
eMachines User Guide
Original Issue: 06 / 2009
Model number: __________________________________
Serial number: ___________________________________
Purchase date: ___________________________________
Place of purchase: ________________________________
Visit http://registration.emachines.com and discover the benefits of being an eMachines
customer.
Page 3

Information for your safety and
comfort
Safety instructions
Read these instructions carefully. Keep this document for future reference. Follow
all warnings and instructions marked on the product.
Turning the product off before cleaning
Unplug this product from the wall outlet before cleaning. Do not use liquid
cleaners or aerosol cleaners. Use a damp cloth for cleaning.
CAUTION for plug as disconnecting device
Observe the following guidelines when connecting and disconnecting power to
the power supply unit:
Install the power supply unit before connecting the power cord to the AC power
outlet.
Unplug the power cord before removing the power supply unit from the
computer.
If the system has multiple sources of power, disconnect power from the system by
unplugging all power cords from the power supplies.
CAUTION for accessibility
Be sure that the power outlet you plug the power cord into is easily accessible and
located as close to the equipment operator as possible. When you need to
disconnect power to the equipment, be sure to unplug the power cord from the
electrical outlet.
Warnings
• Do not use this product near water.
• Do not place this product on an unstable cart, stand or table. If the product
falls, it could be seriously damaged.
• Slots and openings are provided for ventilation to ensure reliable operation
of the product and to protect it from overheating. These openings must not
be blocked or covered. The openings should never be blocked by placing the
product on a bed, sofa, rug or other similar surface. This product should
never be placed near or over a radiator or heat register, or in a built-in
installation unless proper ventilation is provided.
• Never push objects of any kind into this product through cabinet slots as they
may touch dangerous voltage points or short-out parts that could result in a
fire or electric shock. Never spill liquid of any kind onto or into the product.
• To avoid damage of internal components and to prevent battery leakage, do
not place the product on a vibrating surface.
i
Page 4

:
• Never use it under sporting, exercising, or any vibrating environment which
will probably cause unexpected short current or damage rotor devices, HDD,
Optical drive, and even exposure risk from lithium battery pack.
Safe listening
Follow these instructions, suggested by hearing experts,to protect your hearing.
• Gradually increase the volume until you can hear it clearly and comfortably
and without distortion.
• After setting the volume level, do not increase it afteryour ears adjust.
• Limit the amount of time listening to music at high volume.
• Avoid turning up the volume to block out noisy surroundings.
• Turn the volume down if you can’t hear people speaking near you.
Using electrical power
• This product should be operated from the type of power indicated on the
marking label. If you are not sure of the type of power available, consult your
dealer or local power company.
• Do not allow anything to rest on the power cord. Do not locate this product
where people will walk on the cord.
• If an extension cord is used with this product, make sure that the total
ampere rating of the equipment plugged into the extension cord does not
exceed the extension cord ampere rating. Also, make sure that the total
rating of all products plugged into the wall outlet does not exceed the fuse
rating.
• Do not overload a power outlet, strip or receptacle by plugging in too many
devices. The overall system load must not exceed 80% of the branch circuit
rating. If power strips are used, the load should not exceed 80% of the power
strip's input rating.
• This product's AC adapter is equipped with a three-wire grounded plug. The
plug only fits in a grounded power outlet. Make sure the power outlet is
properly grounded before inserting the AC adapter plug. Do not insert the
plug into a non-grounded power outlet. Contact your electrician for details.
ii
Warning! The grounding pin is a safety feature. Using a power
outlet that is not properly grounded may result in electric shock
and/or injury.
Note: The grounding pin also provides good protection from
unexpected noise produced by other nearby electrical devices that
may interfere with the performance of this product.
Page 5

• Use the product only with the supplied power supply cord set. If you need to
replace the power cord set, make sure that the new power cord meets the
following requirements: detachable type, UL listed/CSA certified, type SPT-2,
rated 7 A 125 V minimum, VDE approved or its equivalent, 4.6 meters (15
feet) maximum length.
Product servicing
Do not attempt to service this product yourself, as opening or removing covers
may expose you to dangerous voltage points or other risks. Refer all servicing to
qualified service personnel.
Unplug this product from the wall outlet and refer servicing to qualified service
personnel when:
• the power cord or plug is damaged, cut or frayed
• liquid was spilled into the product
• the product was exposed to rain or water
• the product has been dropped or the case has been damaged
• the product exhibits a distinct change in performance, indicating a need for
service
• the product does not operate normally after following the operating
instructions
Note: Adjust only those controls that are covered by the operating
instructions, since improper adjustment of other controls may result
in damage and will often require extensive work by a qualified
technician to restore the product to normal condition.
CAUTION: Danger of explosion if battery is incorrectly replaced. Replace
only with the same or equivalent type recommended by the
manufacturer. Dispose of used batteries according to the manufacturer’s
instructions.
Additional safety information
Your device and its enhancements may contain small parts. Keep them out of the
reach of small children.
Disposal instructions
Do not throw this electronic device into the trash when discarding.
To minimize pollution and ensure utmost protection of the global environment,
please recycle. For more information on the Waste from Electrical and Electronics
Equipment (WEEE) regulations, visit
http://www.acer-group.com/public/Sustainability/sustainability01.htm.
http://www.acer-group.com/public/Sustainability/sustainability04.htm.
iii
Page 6

:
Mercury advisory
For projectors or electronic products containing an LCD/CRT monitor or display:
Lamp(s) inside this product contain mercury and must be recycled or disposed of
according to local, state or federal laws. For more information, contact the
Electronic Industries Alliance at www.eiae.org
information, check www.lamprecycle.org
. For lamp-specific disposal
.
ENERGY STAR
Acer's ENERGY STAR qualified products save your
money by reducing energy cost and protecting the
environment without sacrificing features or performance.
Acer is proud to offer our customers products with the
ENERGY STAR mark.
What is ENERGY STAR?
and prevent greenhouse gas emissions by meeting strict energy efficiency
guidelines set by the U.S. Environmental Protection Agency.
committed to offer products and services worldwide that help customers save
money, conserve energy and improve the quality of our environment. The more
energy we can save through higher energy efficiency, the more we reduce
greenhouse gases and the risks of climate change. More information refers to
http://www.energystar.gov
Products that are ENERGY STAR qualified use less energy
Acer is
or http://www.energystar.gov/powermangement.
Note: The statement above is applicable only to Acer system
with an ENERGY STAR sticker.
Acer ENERGY STAR qualified products:
• Produce less heat and reduce cooling loads, and warmer climates.
• Automatically go into "display sleep" and "computer sleep" mode after
10 and 30 minute of inactivity respectively.
• Wake the computer from sleep mode by pushing keyboard or moving
mouse.
• Computers will save more than 80% energy at "sleep" mode.
ENERGY STAR and the ENERGY STAR mark are registered U.S. marks
iv
Page 7

Tips and information for comfortable use
Computer users may complain of eyestrain and headaches after prolonged use.
Users are also at risk of physical injury after long hours of working in front of a
computer. Long work periods, bad posture, poor work habits, stress, inadequate
working conditions, personal health and other factors greatly increase the risk of
physical injury.
Incorrect computer usage may lead to carpal tunnel syndrome, tendonitis,
tenosynovitis or other musculoskeletal disorders. The following symptoms may
appear in the hands, wrists, arms, shoulders, neck or back:
• numbness, or a burning or tingling sensation
• aching, soreness or tenderness
• pain, swelling or throbbing
• stiffness or tightness
• coldness or weakness
If you have these symptoms, or any other recurring or persistent discomfort and/or
pain related to computer use, consult a physician immediately and inform your
company's health and safety department.
The following section provides tips for more comfortable computer use.
Finding your comfort zone
Find your comfort zone by adjusting the viewing angle of the monitor, using a
footrest, or raising your sitting height to achieve maximum comfort. Observe the
following tips:
• refrain from staying too long in one fixed posture
• avoid slouching forward and/or leaning backward
• stand up and walk around regularly to remove the strain on your leg muscles
• take short rests to relax your neck and shoulders
• avoid tensing your muscles or shrugging your shoulders
• install the external display, keyboard and mouse properly and within
comfortable reach
• if you view your monitor more than your documents, place the display at the
center of your desk to minimize neck strain
Taking care of your vision
Long viewing hours, wearing incorrect glasses or contact lenses, glare, excessive
room lighting, poorly focused screens, very small typefaces and low-contrast
displays could stress your eyes. The following sections provide suggestions on how
to reduce eyestrain.
Eyes
• Rest your eyes frequently.
• Give your eyes regular breaks by looking away from the monitor and
focusing on a distant point.
v
Page 8

:
• Blink frequently to keep your eyes from drying out.
Display
• Keep your display clean.
• Keep your head at a higher level than the top edge of the display so your
eyes point downward when looking at the middle of the display.
• Adjust the display brightness and/or contrast to a comfortable level for
enhanced text readability and graphics clarity.
• Eliminate glare and reflections by:
• placing your display in such a way that the side faces the window or any
light source
• minimizing room light by using drapes, shades or blinds
• using a task light
• changing the display's viewing angle
• using a glare-reduction filter
• using a display visor, such as a piece of cardboard extended from the
display's top front edge
• Avoid adjusting your display to an awkward viewing angle.
• Avoid looking at bright light sources, such as open windows, for extended
periods of time.
Developing good work habits
Develop the following work habits to make your computer use more relaxing and
productive:
• Take short breaks regularly and often.
• Perform some stretching exercises.
• Breathe fresh air as often as possible.
• Exercise regularly and maintain a healthy body.
vi
Warning! We do not recommend using the computer on a couch or
bed. If this is unavoidable, work for only short periods, take breaks
regularly, and do some stretching exercises.
Page 9

Contents
Chapter 1: Checking Out Your Computer . . . 1
About this guide . . . . . . . . . . . . . . . . . . . . . . . . . . . . . 2
Product Registration . . . . . . . . . . . . . . . . . . . . . . . . . . 2
Front . . . . . . . . . . . . . . . . . . . . . . . . . . . . . . . . . . . . . . . 3
Back . . . . . . . . . . . . . . . . . . . . . . . . . . . . . . . . . . . . . . . . 4
Chapter 2: Setting Up and
Getting Started. . . . . . . . . . . . . . . . . . . . . . . . . 7
Working safely and comfortably . . . . . . . . . . . . . . . . 8
Avoiding discomfort and injury from repetitive
strain . . . . . . . . . . . . . . . . . . . . . . . . . . . . . . . . . . . 8
Preparing power connections . . . . . . . . . . . . . . . . . . . 9
Protecting from power source problems . . . . . . . 9
Checking the voltage selection . . . . . . . . . . . . . . 10
Connecting to a broadband modem or network . . 11
Connecting a dial-up modem . . . . . . . . . . . . . . . . . . 11
Using the World Wide Web . . . . . . . . . . . . . . . . . . . . 12
Connecting to a Web site . . . . . . . . . . . . . . . . . . . 13
Downloading files . . . . . . . . . . . . . . . . . . . . . . . . 14
Ethernet networking . . . . . . . . . . . . . . . . . . . . . . . . . 15
Wired Ethernet networking . . . . . . . . . . . . . . . . . 15
Establishing your Ethernet network connection 20
Testing your network . . . . . . . . . . . . . . . . . . . . . . 20
Adding a printer to your network . . . . . . . . . . . 21
Sharing resources . . . . . . . . . . . . . . . . . . . . . . . . . 21
Using the network . . . . . . . . . . . . . . . . . . . . . . . . 23
Chapter 3: Troubleshooting . . . . . . . . . . . . . 25
First steps . . . . . . . . . . . . . . . . . . . . . . . . . . . . . . . . . . 26
Troubleshooting . . . . . . . . . . . . . . . . . . . . . . . . . . . . . 26
Add-in cards . . . . . . . . . . . . . . . . . . . . . . . . . . . . . 27
Audio . . . . . . . . . . . . . . . . . . . . . . . . . . . . . . . . . . . 27
CD or DVD drives . . . . . . . . . . . . . . . . . . . . . . . . . 27
DVD drives . . . . . . . . . . . . . . . . . . . . . . . . . . . . . . . 27
vii
Page 10

Contents
Ethernet . . . . . . . . . . . . . . . . . . . . . . . . . . . . . . . . 27
Expansion cards . . . . . . . . . . . . . . . . . . . . . . . . . . 29
File management . . . . . . . . . . . . . . . . . . . . . . . . . 29
Hard drive . . . . . . . . . . . . . . . . . . . . . . . . . . . . . . . 29
Internet . . . . . . . . . . . . . . . . . . . . . . . . . . . . . . . . . 31
Keyboard . . . . . . . . . . . . . . . . . . . . . . . . . . . . . . . . 33
Memory . . . . . . . . . . . . . . . . . . . . . . . . . . . . . . . . . 33
Memory card reader . . . . . . . . . . . . . . . . . . . . . . 34
Modem (cable or DSL) . . . . . . . . . . . . . . . . . . . . . 34
Modem (dial-up) . . . . . . . . . . . . . . . . . . . . . . . . . . 34
Monitor . . . . . . . . . . . . . . . . . . . . . . . . . . . . . . . . . 37
Mouse . . . . . . . . . . . . . . . . . . . . . . . . . . . . . . . . . . 38
Networks . . . . . . . . . . . . . . . . . . . . . . . . . . . . . . . . 39
Optical disc drives . . . . . . . . . . . . . . . . . . . . . . . . . 39
Passwords . . . . . . . . . . . . . . . . . . . . . . . . . . . . . . . 41
Power . . . . . . . . . . . . . . . . . . . . . . . . . . . . . . . . . . 41
Printer . . . . . . . . . . . . . . . . . . . . . . . . . . . . . . . . . . 42
Sound . . . . . . . . . . . . . . . . . . . . . . . . . . . . . . . . . . 43
Recovering your system . . . . . . . . . . . . . . . . . . . . . . . 44
Creating recovery discs . . . . . . . . . . . . . . . . . . . . 45
Recovering pre-installed software and drivers . 46
Returning your system to its factory condition . 47
Telephone support . . . . . . . . . . . . . . . . . . . . . . . . . . 49
Before calling Customer Care . . . . . . . . . . . . . . . 49
Self-help . . . . . . . . . . . . . . . . . . . . . . . . . . . . . . . . 50
Appendix A: Regulations and safety notices. 51
viii
Page 11

Chapter 1
Checking Out Your
Computer
1
Page 12

Chapter 1: Checking Out Your Computer
About this guide
This guide includes information and
maintenance instructions that are specific to
your model of computer. Some illustrations in
this guide may look different than your
computer because hardware options and port
locations may vary.
Product Registration
When using your computer for the first time,
it is recommended that you immediately
register it. This will give you access to some
useful benefits, such as:
• Faster service from our trained
representatives
• Membership in the eMachines
community: receive promotions and
participate in customer surveys
• The latest news from eMachines
Hurry and register, as other advantages await
you!
How to Register
During the initial startup of your notebook or
desktop, a window will invite you to register.
Please fill in the mandatory fields and click
Next. The second window you'll see contains
optional fields that will help us to provide you
with a more personable customer service
experience.
Another Option
Another way to register your eMachines
product is to visit our website at
http://registration.emachines.com. Choose
your country and follow the simple
instructions.
After we receive your product registration, you
will be sent a confirmation email with
important data that you should keep in a safe
place.
2
Page 13

Front
Component Icon Description
DVD/CD drive Use this drive to listen to audio CDs,
Memory card
reader
Power
button/power
indicator
USB ports Plug USB (Universal Serial Bus) devices
Microphone
jack
Headphone jack Plug powered, analog front speakers, an
install games and programs, watch
DVDs, and store large files onto
recordable discs (depending on drive
type). This drive may be a CD, recordable
CD, DVD, recordable DVD, Blu-ray, or
HD DVD drive.
Insert a memory card from a digital
camera, MP3 player, PDA, cellular
telephone, or other device into the
memory card reader.
Press this button to turn the power on
or off. You can also configure the power
button to operate in Standby/Resume
mode or Hibernate mode. The power
indicator lights when the computer is
turned on.
(such as a USB external drive, printer,
scanner, camera, keyboard, or mouse)
into these ports.
Plug a microphone into this jack. This
jack is color-coded pink.
external amplifier, or headphones into
this jack. This jack is color-coded green.
3
Page 14
Chapter 1: Checking Out Your Computer
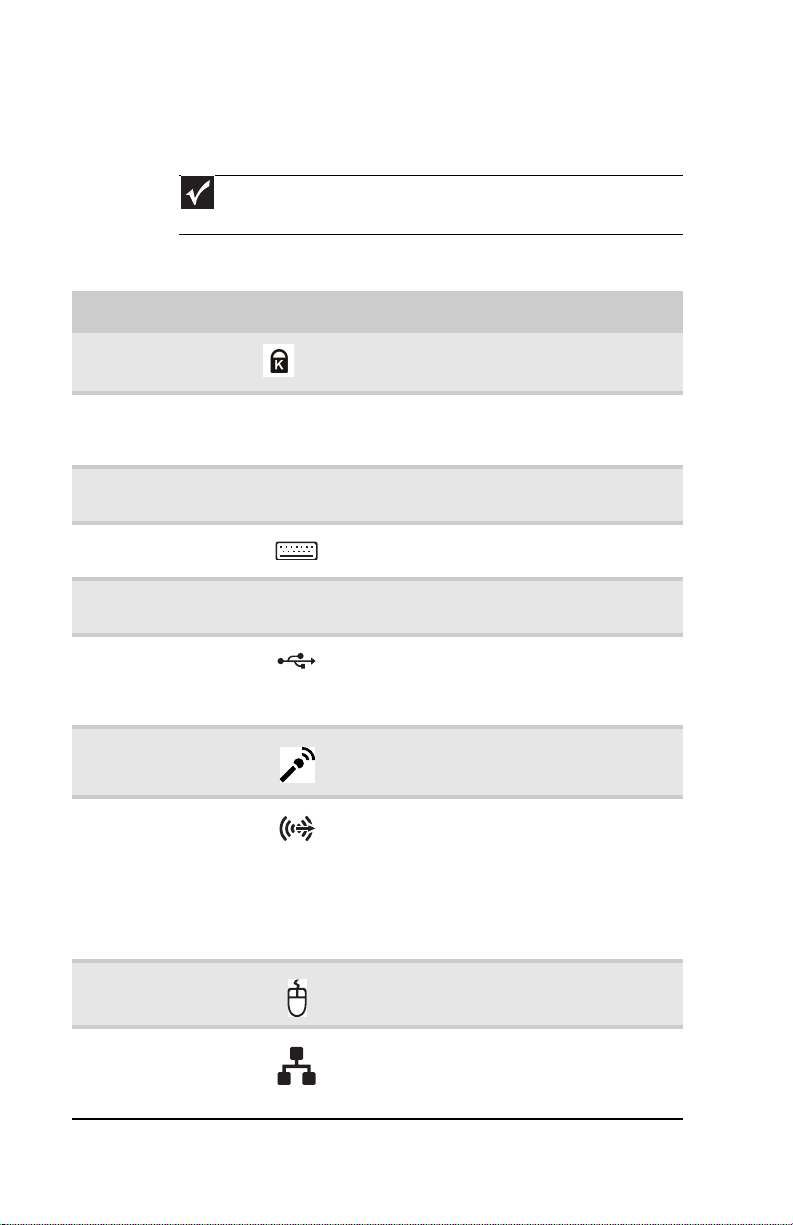
Back
Important
Your computer’s hardware options and port locations may
vary from this illustration.
Component Icon Description
Kensington lock
slot (optional)
Voltage switch The switch is preset at the factory.
Power connector Plug the power cord into this
PS/2 keyboard
port
Monitor (VGA)
port
USB ports Plug USB (Universal Serial Bus) devices
Microphone jack
(pink plug)
Headphone/analo
g speakers jack
(green plug)
-ORFront speakers
jack
Connects to a Kensington-compatible
computer security lock.
Make sure that this is set to the
correct voltage for your area.
connector.
Plug a PS/2 keyboard into this port.
Plug a VGA (blue connector) monitor
cable into this port.
(such as a USB Iomega™ Zip™ drive,
printer, scanner, camera, keyboard, or
mouse) into these ports.
Plug a microphone into this jack.
This jack is user configurable for one
of the following:
Headphone: Plug headphones or
amplified speakers into this jack
(Default).
Stereo out: Plug your front left and
right speakers into this jack.
PS/2 mouse port Plug a PS/2 mouse into this port.
Ethernet
(network) jack
Plug an Ethernet network cable or a
device (such as a DSL or cable modem
for a broadband Internet connection)
into this jack.
4
Page 15

Component Icon Description
Center/subwoofer
jack (orange plug)
(optional)
Surround L/R
speaker jack
(black plug)
Audio in/side
speaker jack (blue
plug)
-ORSide speaker jack
ESATA port
(optional)
Serial port
(optional)
HDMI port
(optional)
ESATA
HDMI
Plug your center speaker and
subwoofer into this jack.
Plug your rear right and left speakers
into this jack.
This jack is user configurable for one
of the following:
Stereo in: Plug an external audio
input source (such as a stereo) into
this jack so you can record sound on
your computer (Default).
Stereo out: Plug your side left and
right speakers into this jack.
Enables fast external disk access.
Connects to devices such as terminals
and various peripherals.
Supports high definition digital video
connections.
5
Page 16

Chapter 1: Checking Out Your Computer
6
Page 17

Chapter 2
Setting Up and
Getting Started
7
Page 18

Chapter 2: Setting Up and Getting Started
Working safely and comfortably
Before using your computer, follow these
general guidelines for setting up a safe and
comfortable work area and avoiding
discomfort and strain:
• Keep hands and arms parallel to the
floor.
• Adjust the screen so it is perpendicular to
your line of sight, and the top of the
screen is no higher than eye leve.
• Place your feet flat on the floor or on a
footrest.
• Keep ventilation openings clear of
obstructions.
Avoiding discomfort and injury from repetitive strain
8
• Vary your activities to avoid excessive
repetition.
• Take breaks to change your position,
stretch your muscles, and relieve your
eyes.
• Find ways to break up the work day, and
schedule a variety of tasks.
Page 19

Preparing power connections
Protecting from power source problems
Warning
High voltages can enter your computer through both the
power cord and the modem connection. Protect your computer by
using a surge protector. If you have a telephone modem, use a surge
protector that has a modem jack. If you have a cable modem, use
a surge protector that has an antenna/cable TV jack. During an
electrical storm, unplug both the surge protector and the modem.
During a power surge, the voltage level of
electricity coming into your computer can
increase to far above normal levels and cause
data loss or system damage. Protect your
computer and peripheral devices by
connecting them to a
absorbs voltage surges and prevents them
from reaching your computer.
An
uninterruptible power supply
supplies battery power to your computer
during a power failure. Although you cannot
run your computer for an extended period of
time with a UPS, a UPS lets you run your
computer long enough to save your work and
shut down your computer normally.
surge protector
(UPS)
, which
9
Page 20

Chapter 2: Setting Up and Getting Started
Checking the voltage selection
Caution
If you set the voltage selection switch incorrectly, your system
will be damaged. Make sure this switch is set correctly for your
location before turning on your computer. In the United States, the
utility power is supplied at a nominal 115 volts at 60 Hz. The power
supply should always be set to this when your computer is operating
in the United States. In other areas of the world, such as Europe,
the utility power is supplied at 230 volts at 50 Hz. If your computer
is operating in an environment such as this, the voltage switch
should be moved to 230.
The
power supply
computer, provides power to the system
board, add-in cards, and peripheral devices.
The power supply’s voltage selection for your
location is typically set at the factory, but you
can change it to match the electrical service
available in your usage area (such as while in
another country). Use the power selection
switch on the back of your computer to set the
voltage to 115V or 230V.
To set the voltage selection switch:
1 Disconnect your computer’s power cable.
2 Use a tool such as an opened paper clip
to slide the voltage selection switch to
the correct voltage position. The switch is
located on the back of your computer,
near the power cable connector. For the
location, see “Back” on page 4.
, a component built into your
10
Page 21

Connecting to a broadband modem or network
Important
Your computer may be equipped with a built-in Ethernet
(network) jack. For information about setting up a wired or wireless
Ethernet network.
You can connect your computer to a cable or
DSL (
broadband
Ethernet network.
To connect to a broadband modem or to an
Ethernet network:
1 Insert one end of the network cable into
the network jack on the back of your
computer. For the location, see “Back”
on page 4.
2 Insert the other end of the network cable
into a cable modem, DSL modem, or
network jack.
) modem or to a wired
Connecting a dial-up modem
Warning
To reduce the risk of fire, use only No. 26 AWG or larger
telecommunications line cord.
Your computer may have a 56K modem that
you can use with a standard telephone line to
connect to the internet or fax documents.
To connect the modem:
1 Insert one end of the modem cable into
the modem jack on the modem at the
back of your computer. For the location,
see “Back” on page 4.
11
Page 22

Chapter 2: Setting Up and Getting Started
2 Insert the other end of the modem cable
into a telephone wall jack. (The modem
will not work with digital or PBX
telephone lines.)
3 If you want, you can connect a telephone
to the PHONE jack on the modem on the
back of your computer.
Using the World Wide Web
The World Wide Web is a multimedia window to the
Internet that gives you access to millions of
information sources.
Information on the Web comes to you on
which are electronic documents that you view using a
Web page display program called a
use any of the commercially available Web browsers,
like Microsoft Internet Explorer or Netscape Navigator.
Web pages can contain text, animations, music, and
other multimedia features. A group of related Web
pages is called a
to shop, track investments, read the news, download
programs, and much more.
You can explore a Web site or visit other Web sites by
clicking areas on a Web page called
A link may be colored or underlined text, a picture, or
an animated image. You can identify a link by moving
the mouse pointer over it. If the pointer changes to a
hand, the item is a link.
To learn more about using the Web browser features,
click Help in the menu bar.
Web site
. You can access Web sites
links
Web pages
browser
or
. You can
hyperlinks
,
.
12
Page 23

Connecting to a Web site
After you set up an account with an Internet service
provider (ISP), you can access the many information
sources on the World Wide Web.
To connect to a Web site:
1 Connect to your Internet account.
2 Depending on the method you use to connect to
your Internet account, you may need to start
your Web browser. Click (Start), then click
Internet. Your default Web browser opens
showing an opening page or welcome screen.
3 To go to a different Web site, type the
(called a
in the browser address bar (for example
www.emachines.com), then click GO
browser address bar.
- OR On the current Web page, click a link to a Web
site.
click Start, then click Help and Support. Type connecting to a Web
site in the Search Help box, then press E
The Web browser locates the server computer on
the Internet,
computer, and displays the page on the site that
you requested.
URL
for “Universal Resource Locator”)
Help
For more information about connecting to a Web site,
downloads
address
on the
NTER.
(transfers) data to your
Sometimes Web pages display slowly. The speed that
a Web page displays on your screen depends on the
complexity of the Web page and other Internet
conditions. Additionally, the speed of your connection
will determine how fast Web pages display.
13
Page 24

Chapter 2: Setting Up and Getting Started
Downloading files
Caution
To protect your computer against viruses, make sure that you
scan the files you download.
Downloading
is the process of transferring files from
a computer on the Internet to your computer.
To download files or programs from a Web site:
1 Connect to your Internet account.
2 In the address bar, type the address of the Web
site that contains the file or program you want
to download, then press E
NTER.
- OR Click a link on a Web page to navigate to the
Web site containing the file that you want to
download.
3 Create or locate the folder where you want to
store the file on your computer.
4 Click the link on the Web page for the file that
you want to download.
5 Follow the on-screen instructions for saving the
file in the folder that you want. A copy of the
file is downloaded to your computer. The time
that it takes to transfer the file to your computer
depends on file size and Internet conditions.
6 Open the folder that you created.
7 Install or view the downloaded file by
double-clicking it. If applicable, follow the
instructions provided on the Web site to run or
install the program.
14
Help
For more information about downloading files, click
Start, then click Help and Support. Type downloading files in the
Search Help box, then click E
NTER
Page 25

Ethernet networking
Wired Ethernet networking
An wired Ethernet network consists of two or more
computers connected together through an Ethernet
cable. This connection type is commonly used in offices
around the world and can be used to build computer
networks in the home.
Ethernet, Fast Ethernet, or Gigabit Ethernet
Important
Check local code requirements before installing Ethernet cable
or other wiring in your home or office. Your municipality may
require you to obtain a permit and hire a licensed installer.
Ethernet is available at three different speeds.
Standard Ethernet runs at 10 Mbps, Fast Ethernet runs
at 100 Mbps, and Gigabit Ethernet runs at 1000 Mbps.
Most home networks are built using Standard or Fast
Ethernet components. Business networks are typically
built using Fast or Gigabit Ethernet components.
To create a wired Ethernet network, you or your
electrician must install special Ethernet cables in your
home or office.
Using a router
The most common way to set up a wired Ethernet
network is Dynamic Host Control Protocol (DHCP)
using a router. A DHCP network configuration uses a
router to automatically assign IP addresses to each
computer or network device. For information on
setting up a router, see the router’s documentation.
Example router-based Ethernet network
The following is an example of a wired Ethernet
network. The network is made up of a router, a cable
or DSL modem, your computers, and cables connecting
each of these components. The router is the central
control point for the network.
Tip
To add the ability to access a wireless Ethernet network to
your wired Ethernet network, connect an access point to the router
or use a router that has a built-in access point.
15
Page 26

Chapter 2: Setting Up and Getting Started
Cable/DSL
modem
Router
Attached to the router are all of your computers or
Ethernet-ready devices. Also connected to the router
is a cable or DSL modem that provides access to the
Internet.
16
Equipment you need for a router-based Ethernet network
Important
For best results, all Ethernet components should be either
standard Ethernet (10 Mbps), Fast Ethernet (100 Mbps or 10/100),
or Gigabit Ethernet (1000 Mbps or 10/100/1000). A mixture of
components rated at different speeds will result in your network
running at the speed of the slowest rated component
For a wired Ethernet network you need:
• Two or more computers with Ethernet jacks
• One router
• One broadband Internet connection (optional)
• Ethernet cables connecting all of the network
equipment
.
Page 27

When buying your router, be sure the model includes
everything your network needs, including:
• Internet security features, such as a firewall, to
protect your network from unwanted intruders
• 4-port switch to eliminate the need for
additional network hardware
• DHCP server/dynamic IP address assignment to
automatically configure network and IP
addresses
Determining if an Ethernet card is already installed on your computer
Setting up wired Ethernet network hardware
Making sure your broadband connection works
Important
If you do not have a broadband connection already installed,
make the necessary arrangements with your ISP. Be sure to find out
how soon after the installation the line will be activated.
Broadband Internet settings differ from ISP to ISP. Before you begin
setting up your network, you should contact your ISP for any specific
instructions they have for setting up a network.
Before you change anything about your home setup,
make sure that your broadband connection is working
correctly. To test the connection, log onto the Internet
using your current setup. If the connection is not
working, contact your Internet service provider.
Installing Ethernet cards and drivers
After you have determined the type of Ethernet you
are using for your network, you need to install
Ethernet cards and drivers on the computers that do
not have Ethernet already installed. Use the
documentation that comes with your Ethernet cards
for instructions on installing the card and any required
drivers.
Plug your Ethernet cable into your computer’s jack and
the router or the cable or DSL modem at this point, if
you have not already done so.
17
Page 28

Chapter 2: Setting Up and Getting Started
Connecting network cables
We recommend using category 5 (
twisted-pair cable (about 1/4-inch diameter with a thin
outer-jacket, containing eight color-coded wires), and
equipment compatible with this type of cable. This
type of cable is equipped with RJ-45 connectors (like
a large telephone jack connector, but with eight pins)
on each end.
Cat 5 cables are available in two different types;
straight-through cables, used to connect computers to
a router, and crossover cables, used to connect two
computers.
To determine which type of cable you have, hold both
ends of the cable with the connectors facing away
from you and with the spring clip on the bottom. For
straight-through cable, the wires on both connectors
are attached to copper pins in the same order (same
colors, left to right). For a crossover cable, the wires
on each connector are attached to the copper pins in
a different order (different colors, left to right).
Setting up a network using a router
If you are setting up a network for more than two
computers and you will be connecting your network
to a high-speed Broadband Internet connection (cable
or DSL modem), we recommend the use of a router.
A router lets you access the Internet connection from
any network computer. The router can assign IP
addresses to the computers on the network and can
provide firewall protection for your network as well.
Cat 5
), unshielded,
18
Page 29

In addition to a router, you need a straight-through
Router
WAN port
Cable/DSL
modem
cable for each computer you want to connect to the
network.
To set up a network using a router:
1 Plug one end of the power adapter into the AC
connector on the router and the other end into
a grounded, 110V electrical outlet.
2 Turn on your computers.
3 Plug one end of a straight-through network
cable into any numbered port on the router
(except the WAN port). The WAN port is used to
connect the router to the DSL or cable modem
and is identified by a label or a switch. Plug the
other end of the cable into the network jack on
the computer. As each computer is connected to
the router, the corresponding green indicator
should light on the front of the router, indicating
a good connection.
4Repeat 3 for each computer on the network.
5 For an Internet connection, plug a
straight-through cable into the WAN port on the
router and the other end into the Ethernet jack
on the DSL or cable modem.
19
Page 30

Chapter 2: Setting Up and Getting Started
Establishing your Ethernet network connection
Naming the computers and the workgroup
Important
You must give each computer on the network a unique
Computer Name and the same Workgroup Name.
Make sure that you have set up your router (wired
network) or access point (wireless network). If you are
setting up a wired network, make sure that you have
connected the network cabling.
Configuring the TCP/IP protocol
A networking protocol is a language computers use to
talk to each other. One of several available protocols
must be set up on each computer you plan to use on
your network. We recommend you use the
Transmission Control Protocol/Internet Protocol
(TCP/IP), which is widely accepted and compatible for
local area networks (LANs), as well as for Internet
communications.
When networking is set up in Windows, TCP/IP is
automatically installed as the default protocol.
Using a DHCP server
In order to use the TCP/IP protocol on a computer with
a router or access point router, the protocol must be
set to “Obtain an IP address from a DHCP server.” This
is typically preset when you receive your computer.
Configuring your router
After you have named your computers and set up
TCP/IP on them, you can configure your router using
your Web browser. For instructions, see your router’s
documentation.
Testing your network
Now that your home network is set up, log onto one
of your computers and access a favorite Internet Web
site.
20
Page 31

Adding a printer to your network
Instead of plugging a printer into each of your
computers, you can add a printer to your network. To
add a printer to the network, do one of the following:
• Connect your printer to your networked
computer, then share the printer. For
information about sharing printers, see “Sharing
drives and printers” on page 21.
• Connect your printer to your router or access
point if the router or access point includes a USB
or parallel port. For more information, see the
instructions that came with your router or access
point.
• Use a printer that has built-in networking.
• Use a print server.
Sharing resources
With a network, you can share your Internet
connection, drives, and printers.
Sharing drives and printers
With a network, you can
hard drives and DVD drives) and printers among the
computers connected to the network.
Important
To share a printer among the network computers, each
computer must have the shared printer’s drivers installed. Follow the
instructions included with your printer to install the printer drivers
on each computer.
After the drives and printers on each network
computer are shared, you can access them as though
they were attached directly to your computer. Then
you can:
share
drives (for example
• View a network drive
• Open and copy files stored on other network
computers
• Print documents on network printers
Sharing drives or folders
To share drives or folders:
1 Click (Start), then click Computer.
21
Page 32

Chapter 2: Setting Up and Getting Started
2 Right-click the drive or folder that you want to
share, then click Share. The Properties dialog box
opens.
If you share a drive, the entire contents of that
drive will be available to everyone on your
network. If you share a folder, only the contents
of that folder will be available to everyone on
the network.
3 Click the Sharing tab.
22
Click Share.
- OR If Share is grayed out, click Advanced Sharing to set
sharing for this drive or folder.
4 Click OK, then click Close.
Un-sharing drives and folders
To un-share drives or folders:
1 Click (Start), then click Computer.
2 Right-click the drive or folder that you want to
un-share, then click Share.
3 Click Advanced Sharing, then click Share this folder
(or drive) to uncheck the box.
4 Click Apply, then click OK.
Page 33

Using the network
After the drives and printers on each network
computer are shared, you can:
• View shared drives and folders
• Map a network drive
• Open and copy files stored on other network
computers
• Print documents on network printers
Creating a shortcut to a network drive
After a shortcut is created on a computer for a drive
or folder on another computer, the contents of the
drive or folder can be accessed as if the drive were
attached directly to the computer.
For example, a shortcut is created on computer 2 to
the Documents folder on computer 1. To access the
Documents folder on computer 1 from computer 2,
double-click the shortcut icon.
Opening files across the network
To open files across the network:
1 Start the program for the file you want to open.
2 Click File, then click Open.
3 Browse to the network drive that contains the
file you want to open.
4 Double-click the folder containing the file, then
double-click the file.
23
Page 34

Chapter 2: Setting Up and Getting Started
Copying files across the network
To copy files across the network:
1 Click (Start), then click Computer. The
window opens.
2 Browse to the network drive that contains the
file you want to copy.
3 Browse to the file you want to copy.
4 Right-click the file, then click Copy.
5 Right-click the folder where you want to copy the
file to, then click Paste.
Computer
Printing files across the network
Important
Before you can print a file across the network, you must install
the driver for the printer on the computer you are sending the file
from. You can obtain the printer driver and installation instructions
from the CD that shipped with your printer or from the
manufacturer’s Web site.
To print files across the network:
1 Open the file you want to print, then click Print.
2 Click the arrow button to open the printer name
list, then click the network printer.
3 Click Print.
24
Page 35

Chapter 3
Troubleshooting
25
Page 36

First steps
If you have problems with your computer, try
these things first:
• Make sure that the power cord is
• If you use a power strip or surge
• If a peripheral device (such as a keyboard
• Make sure that your hard drive is not full.
• If an error message appears on the
• If you added or removed peripheral
• If an error occurs in a program, see the
Chapter 3: Troubleshooting
connected to your computer and an
AC outlet and that the AC outlet is
supplying power.
protector, make sure that it is turned on.
or mouse) does not work, make sure that
all connections are secure.
screen, write down the exact message.
The message may help Customer Care in
diagnosing and fixing the problem.
devices, review the installation
procedures you performed and make
sure that you followed each instruction.
program’s printed documentation or the
online help.
Help
For more information about troubleshooting, click Start,
then click Help and Support. Type troubleshooting in the Search
box, then press E
NTER.
Troubleshooting
Troubleshooting topics are listed in
alphabetical order.
26
Page 37

Add-in cards
The computer does not recognize an add-in card
• Shut down and restart your computer.
• Make sure that you have installed the
required software. For more information,
see the documentation that came with
your add-in card.
Audio
See “Sound” on page 43.
CD or DVD drives
See “Optical disc drives” on page 39.
DVD drives
• See “CD or DVD drives” on page 27.
Ethernet
You cannot see the other computers on your network
• Make sure that your Ethernet cable is
plugged into the Ethernet jack on your
computer. Make sure that the other end
is plugged into a router.
• Make sure that all computers are
plugged into a powered electrical outlet
and turned on.
• Make sure that the router is plugged into
a powered electrical outlet and turned
on. Most routers have lights that indicate
they are working. For more information,
see the documentation that came with
your router.
• Make sure that all computers on your
network have the same workgroup
name.
27
Page 38

Chapter 3: Troubleshooting
• Make sure that all computers are using
the same Subnet Mask.
• If you assigned IP addresses to the
computers, make sure that all computers
have different IP addresses. For home
networks, IP addresses should be
192.168.N.N where N is a number you
assign between 0 and 254. The first N
should be the same for all computers on
your network and the second N should be
different for all computers on your
network.
The computer does not recognize an add-in Ethernet card
• Shut down and restart your computer.
• Make sure that you have installed the
required software. For more information,
see the documentation that came with
your Ethernet card.
• Reseat the card. For more information
about your Ethernet card, see the
documentation that came with your
Ethernet card.
28
Your Ethernet network is running slower than you expect
• If your Ethernet network is running
slower than you expect, check the speed
of each Ethernet component. For best
results, all Ethernet components should
be standard Ethernet (10 Mbps), Fast
Ethernet (100 Mbps or 10/100 Mbps), or
Gigabit Ethernet (1000 Mbps or
10/100/1000 Mbps). A mixture of
Ethernet, Fast Ethernet, and Gigabit
Ethernet components will result in your
network running at the slowest
component speed.
Page 39

Expansion cards
The computer does not recognize an expansion card
• Shut down and restart your computer.
• Make sure that you have installed the
required software. For more information,
see the documentation that came with
your expansion card.
File management
Help
For more information about restoring deleted files, click Start,
then click Help and Support. Type System Restore in the Search box, then
NTER.
press E
A file was accidentally deleted
If a file was deleted while holding down the
S
HIFT key, the file cannot be restored.
To restore deleted files:
1 Double-click the Recycle Bin icon.
2 Right-click the file you want to
restore, then click Restore. The file is
restored to the place where it was
originally deleted from.
If the Recycle Bin was emptied before
you try to restore a file, the file
cannot be restored.
Hard drive
You see an “Insufficient disk space” error message
• Delete unnecessary files from the hard
drive using Disk Cleanup.
Help
For more information about file management, click
Start, then click Help and Support. Type file management in the
Search box, then press E
NTER.
29
Page 40

Chapter 3: Troubleshooting
• Empty the Recycle Bin by right-clicking
the Recycle Bin icon, then clicking Empty
Recycle Bin.
Caution
All deleted files will be lost when you empty the
Recycle Bin.
• Save your files to another drive. If the
hard drive is full, copy any files not
regularly used to backup media, then
delete them from the hard drive.
You see a “Data error” message
• This may be the result of a defective area
on the hard drive. To fix hard drive
problems, run the Error checking
program.
The hard drive cannot be accessed, or you see a “General failure reading drive C” error message
• Restart your computer.
• Press CTRL+ALT+DEL to restart your
computer.
• If your computer has been subjected to
static electricity or physical shock, you
may need to reinstall the operating
system.
30
Page 41

Internet
You see a “Non-system disk” or “disk error” error message
• Your hard drive may have become
damaged.
See also “Modem (dial-up)” on page 34.
You cannot connect to the Internet
• If you are using a dial-up modem, make
sure that the modem cable is plugged
into the modem jack and not the
Ethernet network jack. See your setup
poster to make sure that the connections
have been made correctly.
- OR If you are using a cable or DSL modem,
make sure that the modem cable is
plugged into the Ethernet network jack
and not the modem jack. See your setup
poster to make sure that the connections
have been made correctly.
• Make sure that your account with your
Internet service provider (ISP) is set up
correctly. Contact your ISP technical
support for help.
• Make sure that you do not have a
problem with your modem. For more
information, “Modem (dial-up)” on
page 34.
Help
For more information about troubleshooting Internet
connections, click Start, then click Help and Support. Type
troubleshooting connections in the Search box, then press E
NTER.
31
Page 42

Chapter 3: Troubleshooting
You see an “Unable to locate host” message and are unable to browse the Internet
• This problem can occur when you have
typed a URL (Web address) incorrectly,
you have lost your Internet connection,
or your ISP is having technical difficulties.
• Double-check the URL or try a different
URL. If the error message still appears,
disconnect from the ISP connection and
close your browser, then reconnect and
open the browser. If you still get the
error, your ISP may be having technical
difficulties.
Connecting to a Web site takes too long
Many factors can affect Internet performance:
• The condition of the telephone lines in
your residence or at your local telephone
service
• The condition of the Internet computers
to which you connect and the number of
users accessing those computers
• The complexity of graphics and
multimedia on Web pages
• Having multiple Web browsers open,
performing multiple downloads, and
having multiple programs open on your
computer
32
People are sending you e-mail messages, but you have not received any mail
• Click the receive button in your e-mail
program.
• Make sure that your account with your
Internet service provider (ISP) is set up
correctly. Contact your ISP for technical
support.
Page 43

Keyboard
The keyboard does not work
• Make sure that the keyboard cable is
plugged in correctly. For more
information, see the poster that came
with your computer.
• Remove all extension cables and switch
boxes.
• Clean the keyboard by using an aerosol
can of air with a narrow, straw-like
extension to remove dust and lint
trapped under the keys.
• Try a keyboard that you know works to
make sure that the keyboard port works.
• Reinstall the keyboard device driver.
A keyboard character keeps repeating or you see a “keyboard stuck” or “key failure” error message
• Make sure that nothing is resting on the
keyboard.
• Make sure that a key is not stuck. Press
each key to loosen a key that might be
stuck, then restart your computer.
Liquid spilled in the keyboard
• If you spilled liquid in the keyboard, turn
off your computer and unplug the
keyboard. Clean the keyboard and turn it
upside down to drain it. Let the keyboard
dry before using it again. If the keyboard
does not work after it dries, you may
need to replace it.
Memory
click Start, then click Help and Support. Type memory error in the Search
box, then press E
Help
For more information about troubleshooting memory errors,
NTER.
You see a “Memory error” message
• Use a third-party diagnostic program to
help determine if a memory module is
failing.
33
Page 44

Chapter 3: Troubleshooting
You see a “Not enough memory” error message
• Close all programs, then restart your
computer.
Memory card reader
Drive letters for the memory card slots do not appear in the My Computer window
• Reboot your computer.
Modem (cable or DSL)
• See the documentation that came with
your modem for additional
troubleshooting information.
Modem (dial-up)
See also “Internet” on page 31.
Your modem does not dial or does not connect
• Make sure that the modem cable is
plugged into the modem jack and not
the Ethernet network jack. See your
setup poster to make sure that the
connections have been made correctly.
• Make sure that your computer is
connected to the telephone line and the
telephone line has a dial tone.
• Make sure that the modem cable is less
than 6 feet (1.8 meters) long.
• Remove any line splitters or surge
protectors from your telephone line,
then check for a dial tone by plugging a
working telephone into the telephone
wall jack.
• If you have additional telephone services
such as call waiting, call messaging, or
voice mail, make sure that all messages
are cleared and call waiting is disabled
before using the modem. Contact your
telephone service to get the correct code
to temporarily disable the service. Also
make sure that the modem dialing
properties are set correctly.
34
Page 45

Help
For more information about dialing properties, click
Start, then click Help and Support. Type dialing in the Search box,
then press E
NTER.
• Disconnect any answering machine, fax
machine, or printer that is on the same
line as the modem. Do not connect these
devices to the same telephone line as the
modem.
• Make sure that you are not using a
digital, rollover, or PBX line. These lines
do not work with your modem.
• Check for line noise (scratchy, crackling,
or popping sounds). Line noise is a
common problem that can cause the
modem to connect at a slower rate, abort
downloads, or even disconnect. The
faster the modem, the less line noise it
can tolerate and still work correctly.
Listen to the line using your telephone.
Dial a single number (such as 1). When
the dial tone stops, listen for line noise.
Wiggle the modem cable to see if that
makes a difference. Make sure that the
connectors are free from corrosion and
all screws in the wall or telephone wall
jack are secure.
You can also call your telephone service
and have the telephone line checked for
noise or low line levels.
35
Page 46

Chapter 3: Troubleshooting
• Try another telephone line (either a
different telephone number in your
house or a telephone line at a different
location). If you can connect on this line,
call your telephone service.
• Try connecting with the modem at a
lower connection speed. If reducing the
connect speed lets you connect, call your
telephone service. The telephone line
may be too noisy.
You cannot connect to the Internet
• The ISP may be having technical
difficulties. Contact your ISP for technical
support.
• See if the modem works with a different
communications program. The problem
may be with just one program.
• Review the troubleshooting information
under “Internet” on page 31.
Your 56K modem does not connect at 56K
Current FCC regulations restrict actual data
transfer rates over public telephone lines to
53K. Other factors, such as line noise,
telephone service provider equipment, or ISP
limitations, may lower the speed even further.
If your computer has a v.90 modem, the speed
at which you can upload (send) data is limited
to 33.6K. If your computer has a v.92 modem,
the speed at which you can upload data is
limited to 48K. Your ISP may not support 48K
uploads.
36
Your fax communications program only sends and receives faxes at 14,400 bps when you have a 56K modem
• Current fax technology only supports a
maximum send and receive rate of
14,400 bps.
Page 47

The modem is not recognized by your computer
• Make sure that the line connected to the
modem is working and plugged into the
appropriate port on your computer. See
your setup poster to make sure that the
connections have been made correctly.
• If the modem shares the telephone line
with another device, make sure that the
telephone line is not in use (for example,
someone is on the telephone, or another
modem is in use).
• Use the modem cable that came with
your computer. Some telephone cables
do not meet cable standards and may
cause problems with the connection.
• Shut down and restart your computer.
• Run Windows modem diagnostics.
Help
For more information about modem troubleshooting,
click Start, then click Help and Support. Type modem
troubleshooting in the Search box, then press E
The modem is noisy when it dials and connects
When your modem tries to connect to another
modem, it begins
is a digital “getting acquainted” conversation
between the two modems that establishes
connection speeds and communication
protocols. You may hear unusual handshaking
sounds when the modems first connect. If the
handshaking sounds are too loud, you can turn
down the modem volume.
handshaking
NTER.
. Handshaking
Monitor
The screen resolution is not correct
• Change the screen resolution from the
Display Settings
The computer is running but there is no picture
dialog box.
• Make sure that the monitor is plugged in
and turned on. If the monitor is turned
on, the power LED should be lit.
• Adjust the brightness and contrast
controls to the center position.
37
Page 48

Chapter 3: Troubleshooting
• Make sure that the monitor cable is
connected to the video port on the back
of your computer.
• Check the cable for bent or damaged
pins.
• Reinstall the device driver.
• Connect a monitor that you know works
to your computer.
The color is not uniform
• Make sure that the monitor warms up for
at least 30 minutes before making a final
judgment about color uniformity.
The text on the display is dim or difficult to read
• Adjust the brightness and contrast
controls.
• Change the display settings. For more
information.
For more information about display types, see
your monitor and video card documentation.
Help
For more information about changing the screen resolution,
click Start, then click Help and Support. Type screen resolution in the
Search box, then press E
NTER.
Mouse
38
The mouse does not work
• Make sure that the mouse cable is
plugged in correctly.
• Shut down and restart your computer.
• Remove all extension cables and switch
boxes.
• Try a mouse you know is working to
make sure that the mouse port works.
Page 49

The mouse works erratically
• If the mouse pointer begins moving
erratically across the computer display or
becomes difficult to control precisely,
cleaning the mouse will likely improve its
accuracy.
• Clean the mouse by wiping the bottom
with a clean, damp cloth. Make sure that
the optical sensor is clean and free of
debris.
Networks
You cannot connect to your company network
Every network is unique. Contact your
company computer department or network
administrator for help. For more information
about setting up a network in your home.
Help
For more information about network troubleshooting, click
Start, then click Help and Support. Type network troubleshooting in the
Search box, then press E
Optical disc drives
The computer does not recognize a disc or the CD or DVD drive
• Make sure that the disc label is facing up,
then try again.
• Try a different disc. Occasionally discs are
flawed or become scratched and cannot
be read by the disc drive.
• If you are trying to play a DVD, make sure
that you have a DVD drive.
• Your computer may be experiencing
some temporary memory problems. Shut
down and restart your computer.
• Some music CDs have copy protection
software. You may not be able to play
these CDs on your computer.
• Clean the disc.
• Restart your computer, then enter the
BIOS Setup utility by pressing and
holding F1 while your computer restarts.
Make sure that the IDE controllers are
enabled.
NTER.
39
Page 50

Chapter 3: Troubleshooting
• Make sure that the drive is configured
correctly by following the instructions in
the drive documentation.
• Reinstall the device driver.
An audio CD does not produce sound
• Make sure that the disc label is facing up,
then try again.
• Some music CDs have copy protection
software. You may not be able to play
these CDs on your computer.
• Make sure that the volume controls are
turned up.
• Make sure that the mute controls are
turned off.
• Make sure that the speaker cables are
connected correctly and securely.
• Shut down and restart your computer.
• Clean the disc.
• Reinstall the audio device drivers.
A DVD movie will not play
• Make sure that you have a DVD drive.
• Make sure that the disc label is facing up,
then try again.
• Try a different disc. Occasionally discs are
flawed or become scratched and cannot
be read by the DVD drive.
• Shut down and restart your computer.
• Clean the disc.
• Reinstall the device driver.
• Make sure that the DVD program has
been installed on your computer.
40
Page 51

Passwords
Power
• DVDs and DVD drives contain
codes
that help control DVD title exports
and help reduce illegal disc distribution.
To be able to play a DVD, the disc’s
regional code and your DVD drive’s
regional code must match.
The regional code on your DVD drive is
determined by your computer’s delivery
address. The regional code for the United
States and Canada is 1. The regional code
for Mexico is 4. Your DVD drive’s regional
code must match the regional code for
the disc. The regional code for the disc is
on the disc, disc documentation, or disc
packaging.
If the DVD movie does not play, the disc’s
regional code and your DVD drive’s
regional code may not match.
Your computer does not accept your password
regional
• Make sure that CAPS LOCK is turned off,
then retype the password.
Your computer will not turn on
• Make sure that the power cord is
connected to an AC power source and to
your computer, and that your computer
is turned on.
• If your computer is plugged into a surge
protector, make sure that the surge
protector is connected securely to an
electrical outlet, turned on, and working
correctly. To test the outlet, plug a
working device, such as a lamp, into the
outlet and turn it on.
• Make sure that the power cord is free
from cuts or damage. Replace any
damaged cables.
41
Page 52

Printer
Chapter 3: Troubleshooting
The printer will not turn on
• Make sure that the printer is online.
Many printers have an online/offline
button that you may need to press.
• Make sure that the power cable is
plugged into an AC power source.
The printer is on but will not print
• Check the cable between the printer and
your computer. Make sure that it is
connected to the correct port.
• Make sure that the printer is online.
Many printers have an online/offline
button that you may need to press so the
printer can start printing. Press the
button to put the printer online.
• Check the cable for bent or broken pins.
• If the printer you want to print to is not
the default printer, make sure that you
have selected it in the printer setup.
• Reinstall the printer driver. See the guide
that came with your printer for
instructions on installing the printer
driver.
42
You see a “Printer queue is full” error message
• Make sure that the printer is not set to
work offline.
• Wait until files have been printed before
sending additional files to the printer.
• If you print large files or many files at one
time, you may want to add additional
memory to the printer. See the printer
documentation for instructions for
adding additional memory.
You see a “Printer is out of paper” error message
After adding paper, make sure that the printer
is online. Most printers have an online/offline
button that you need to press after adding
paper.
Page 53

Sound
Help
For more information about printer troubleshooting, click
Start, then click Help and Support. Type printer troubleshooter in the
Search box, then press E
You are not getting sound from the speakers
NTER.
• Make sure that the speakers are turned
on.
• Make sure that the volume controls are
turned up.
• Make sure that mute controls are turned
off.
• If you are using external speakers, see the
speaker setup poster to check your
speaker connections.
• Make sure that the universal jacks are
configured correctly.
Help
For more information about sound troubleshooting, click Start,
then click Help and Support. Type sound troubleshooter in the Search box,
then press E
NTER.
43
Page 54

Chapter 3: Troubleshooting
Recovering your system
You can solve most computer problems by following
the information in “Troubleshooting” on page 25 or
in the technical support pages at
www.emachines.com
involve reinstalling some or all of the computer’s
software (also called
system). eMachines provides everything you need to
recover your system under most conditions.
Caution
To prepare your computer for additional system recovery
options, you should create a set of recovery discs as soon as possible.
Recovery discs take some time to create, but for long-term reliability,
the effort is worth it. For instructions, see “Creating recovery discs”
on page 45.
To recover your system:
1 Create recovery discs as soon as you can.
You can use these discs later for recovering your
system from significant hardware and software
problems. For instructions, see “Creating
recovery discs” on page 45.
2 Perform minor fixes.
If only one or two items of software or hardware
have stopped working correctly, the problem
may be solved by reinstalling the software or the
device drivers. To recover software and drivers
that were pre-installed at the factory, see
“Recovering pre-installed software and drivers”
on page 46. For instructions on reinstalling
software and drivers that were not pre-installed,
see that product’s documentation or technical
support Web site.
3 Revert to a previous system condition.
If reinstalling software or drivers does not help,
then the problem may be solved by returning
your system to a previous state when everything
was working correctly. For instructions, see
“Returning your system to its factory condition”
on page 47.
4 Reset your system to its factory condition.
If nothing else has solved the problem and you
want to reset your system to factory condition,
see “Returning your system to its factory
condition” on page 47.
. Problem solving may also
recovering
or
restoring
your
44
Page 55

Creating recovery discs
If your computer experiences problems that are not
recoverable by other methods, you may need to
reinstall the Windows operating system and
factory-loaded software and drivers. To reinstall using
discs, you must create the set of recovery discs
beforehand.
To create recovery discs:
1 Click (Start), All Programs, eMachines, then click
eMachines Recovery Management.
Recovery Management
2 To create recovery discs for the hard drive’s entire
original contents, including Windows OS and all
factory-loaded software and drivers, click Create
factory default disc.
- OR To create recovery discs for only the
factory-loaded software and drivers, click Create
driver and application backup disc.
Important
We recommend that you create each type of recovery
disc as soon as possible.
3 Insert a blank disc into the drive indicated in the
Burn to list, then click Next. The first disc begins
recording, and you can watch its progress on the
screen.
eMachines
opens.
When the disc finishes recording, the drive ejects
it.
4 Remove the disc from the drive and mark it with
a permanent marker.
Important
Write a unique, descriptive label on each disc, such as
“Windows Recovery Disc 1 of 2.” or “Apps/Drivers Recovery
disc.”
5 If multiple discs are required, insert a new disc
when prompted, then click OK. Continue
recording discs until the process is complete.
45
Page 56

Chapter 3: Troubleshooting
Recovering pre-installed software and drivers
As a troubleshooting step, you may need to reinstall
the software and device drivers that came pre-installed
on your computer from the factory. You can recover
using either your hard drive or the backup discs you
have created.
• New software—If you need to recover software
that did
computer, you need to follow that software’s
installation instructions.
To recover your pre-installed software and drivers:
1 Click (Start), All Programs, eMachines, then click
eMachines Recovery Management.
Recovery Management
- OR If you are recovering from your driver and
application recovery disc, insert it into the disc
drive, then go to Step 3 after the
Application Recovery
2 Click the Restore tab, then click Reinstall
applications/drivers. The
Recovery
not
come pre-installed on your
opens.
main menu opens.
eMachines Application
main menu opens.
eMachines
eMachines
46
3 Click Contents. A list of software and device drivers
opens.
4 Click the install icon for the item you want to
install, then follow the on-screen prompts to
complete the installation. Repeat this step for
each item you want to reinstall.
Page 57

Returning your system to its factory condition
In case your computer experiences problems that are
not recoverable by other methods, you may need to
reinstall everything to return your system to its factory
condition. You can reinstall using either your hard
drive or the recovery discs you have created.
Caution
This complete recovery deletes everything on your hard drive,
then reinstalls Windows and all software and drivers that were
pre-installed on your system. If you can access important files on
your hard drive, back them up now.
• If you can still run Windows OS, see “Recovering
from within Windows OS” on page 47.
• If you cannot run Windows OS and your original
hard drive is still working, see “Recovering from
the hard drive during startup” on page 48.
• If you cannot run Windows OS and your original
hard drive has been completely re-formatted or
you have installed a replacement hard drive, see
“Recovering from your recovery discs” on
page 48.
Recovering from within Windows OS
To reinstall Windows OS and all pre-installed
software and drivers:
1 Click (Start), All Programs, eMachines, then click
eMachines Recovery Management.
Recovery Management
2 Click the Restore tab, then click Restore system to
factory default. The
opens.
opens.
Confirm Restoration
eMachines
dialog box
3 Click Ye s, then click Start. A dialog box displays
information about the hard drive that the
operating system will be recovered to.
Caution
Continuing the process will erase all files on your hard
drive.
47
Page 58

Chapter 3: Troubleshooting
4 Click OK. The recovery process begins by
restarting your computer, then continues by
copying files to your hard drive. This process may
take a while, but a
Management
When the recovery has finished, a dialog box
prompts you to restart your computer.
5 Click OK. Your computer restarts.
6 Follow the on-screen prompts for first-time
system setup.
screen shows you its progress.
eMachines Recovery
Recovering from the hard drive during startup
To reinstall Windows OS and all pre-installed
software and drivers:
1 Turn on your computer, then press A
during startup.
Management
2 Click Restore system from factory default.
Caution
Continuing the process will erase all files on your hard
drive.
eMachines Recovery
opens.
LT+F10
48
3 Click Next to continue. Your hard drive’s original,
factory-loaded contents are recovered. This
process will take several minutes.
Recovering from your recovery discs
To reinstall Windows OS and all pre-installed
software and drivers:
1 Turn on your computer, insert the first system
recovery disc into your optical disc drive, then
restart your computer.
Caution
Continuing the process will erase all files on your hard
drive.
2 During startup, press F12 t
The bo
device to start from, such as the hard drive or an
optical disc.
3 Use your arrow keys to select CDROM/DVD, then
press E
disc you inserted.
ot menu is where you can select which
NTER. Windows installs from the recovery
o open the boot menu.
Page 59

4 Insert the second recovery disc when prompted,
then follow the on-screen prompts to complete
the recovery.
Telephone support
Before calling Customer Care
If you have a technical problem with your
computer, follow these recommendations
before contacting Customer Care:
• Make sure that your computer is
connected correctly to a grounded
AC power outlet that is supplying power.
If you use a surge protector, make sure
that it is turned on.
• If a peripheral device, such as a keyboard
or mouse, does not appear to work, make
sure that all cables are plugged in
securely.
• If you have recently installed hardware or
software, make sure that you have
installed it according to the instructions
provided with it. If you did not purchase
the hardware or software from
eMachines, see the manufacturer’s
documentation and technical support
resources.
• If you have “how to” questions about
using a program, see:
• Online Help
• Printed documentation
• The Microsoft Windows
documentation
• The software publisher’s Web site
49
Page 60

Self-help
Chapter 3: Troubleshooting
• See the troubleshooting section of this
chapter.
Warning
To avoid bodily injury, do not attempt to troubleshoot
your computer problem if:
- Power cords or plugs are damaged
- Liquid has been spilled into your computer
- Your computer was dropped
- The case was damaged
Instead, unplug your computer and contact a qualified
computer technician.
• Have your customer ID, serial number,
and order number available, along with
a detailed description of your problem,
including the exact text of any error
messages, and the steps you have taken.
• Make sure that your computer is nearby
at the time of your call. The technician
may have you follow troubleshooting
steps.
If you have
how-to
questions about using your
eMachines-supplied hardware or software, see
the following resources:
• The printed or online documentation
that came with your hardware or
software. In many cases, additional
product information and online
documentation for eMachines-supplied
hardware can be found in our Web site’s
Documentation Library.
• The software publisher’s Web site.
Help
For more how-to information about Windows, click Start, then
click Help and Support. Type practice in the Search box, then
NTER.
press E
50
Page 61

Appendix A
Regulations and safety
notices
51
Page 62

Appendix A: Regulations and safety notices
Taking care of your computer
Please read the important instructions listed in this section. Following
these instructions will help you maximize the durability of your
computer.
Important tips
• Do not expose the computer to direct sunlight. Do not place it near
sources of heat, such as a radiator.
o
• Do not expose the computer to temperatures below 0
above 50
• Do not subject the computer to magnetic fields.
• Do not expose the computer to rain or moisture.
• Do not spill liquid on the computer.
• Do not subject the computer to heavy shock or vibration.
• Do not expose the computer to dust and dirt.
• Never place the system on uneven surfaces.
• Do not step on the power cord or place heavy objects on top of it.
Carefully route the power cord and any cables away from personal
traffic.
• When unplugging the power cord, do not pull on the cord itself but
pull on the plug.
• The total ampere rating of the equipment plugged in should not
exceed the ampere rating of the cord if you are using an extension
cord. Also, the total current rating of all equipment plugged into a
single wall outlet should not exceed the fuse rating.
o
C (122oF).
C (32oF), or
Cleaning and servicing
To clean your computer and keyboard
1 Turn off the computer and unplug the power cord.
2 Use a soft cloth moistened with water and gently wipe the exterior
of the computer and the keyboard. Do not use liquid or aerosol
cleaners.
To clean your pointing device
To clean a regular mouse (with rubber ball)
1 Open the circular cover at the base of the mouse.
2 Take out the rubber ball and wipe it with a soft, damp cloth.
3 Put the ball back and replace the cover.
52
Page 63

To clean an optical mouse
For users of an optical mouse, refer to the documentation that came with
your mouse for maintenance instructions.
To clean your monitor
Make sure that you keep your screen clean. For cleaning instructions,
refer to the documentation that came with your monitor.
When to contact a service technician
• If you dropped and damaged the computer
• If liquid has been spilled into the computer
• If the computer is not operating normally
• If a computer problem persists even after you have checked and
applied the troubleshooting tips discussed in the "Frequently asked
questions" section on page 16
• If your problem is not listed in the "Frequently asked questions"
section on page 16
• If you want to replace or upgrade any of your computer's internal
components
Asking for technical assistance
For technical assistance, contact your local dealer or distributor. You may
also access the Web site (http://www.acer.com/support/index.htm)
for information on how and where to contact the service centers
available in your area.
53
Page 64

Appendix A: Regulations and safety notices
Regulations and safety notices
FCC notice
This device has been tested and found to comply with the limits for a Class B
digital device pursuant to Part 15 of the FCC rules. These limits are designed to
provide reasonable protection against harmful interference in a residential
installation. This device generates, uses, and can radiate radio frequency energy
and, if not installed and used in accordance with the instructions, may cause
harmful interference to radio communications.
However, there is no guarantee that interference will not occur in a particular
installation. If this device does cause harmful interference to radio or television
reception, which can be determined by turning the device off and on, the
user is encouraged to try to correct the interference by one or more of the
following measures:
• Reorient or relocate the receiving antenna.
• Increase the separation between the device and receiver.
• Connect the device into an outlet on a circuit different from that to which
the receiver is connected.
• Consult the dealer or an experienced radio/television technician for help.
Notice: Shielded cables
All connections to other computing devices must be made using shielded cables to
maintain compliance with FCC regulations. In compliance with FCC regulations,
use shielded cables to connect to other computing devices. A dual-link cable is
recommended for DVI output.
Notice: Peripheral devices
Only peripherals (input/output devices, terminals, printers, etc.) certified to
comply with the Class B limits may be attached to this equipment. Operation with
non-certified peripherals is likely to result in interference to radio and TV
reception.
Caution
Changes or modifications not expressly approved by the manufacturer could void
the user's authority, which is granted by the Federal Communications Commission,
to operate this computer.
Operation conditions
This device complies with Part 15 of the FCC Rules. Operation is subject to the
following two conditions: (1) this device may not cause harmful interference, and
(2) this device must accept any interference received, including interference that
may cause undesired operation.
54
Page 65

Notice: Canadian users
This Class B digital apparatus complies with Canadian ICES-003.
Remarque à l'intention des utilisateurs canadiens
Cet appareil numérique de la classe B est conforme a la norme NMB-003 du
Canada.
Declaration of Conformity for EU countries
Hereby, Acer, declares that this PC series is in compliance with the essential
requirements and other relevant provisions of Directive 1999/5/EC.
Compliant with Russian regulatory certification
Notice for Australia
For safety reasons, only connect headsets with a telecommunications compliance
label. This includes customer equipment previously labelled permitted or certified.
Notice for New Zealand
1 The grant of a Telepermit for any item of terminal equipment indicates only
that Telecom has accepted that the item complies with minimum conditions
for connection to its network. It indicates no endorsement of the product by
Telecom, nor does it provide any sort of warranty. Above all, it provides no
assurance that any item will work correctly in all respects with another item
of Telepermitted equipment of a different make or model, nor does it imply
that any product is compatible with all of Telecom's network services.
2 This equipment is not capable, under all operating conditions, of correct
operation at the higher speeds for which it is designed. Telecom will accept
no responsibility should difficulties arise in such circumstances.
3 Some parameters required for compliance with Telecom's Telepermit
requirements are dependent on the equipment (PC) associated with this
device. The associated equipment shall be set to operate within the following
limits for compliance with Telecom's Specifications:
a There shall be no more than 10 call attempts to the same number within
any 30 minute period for any single manual call initiation, and
b The equipment shall go on-hook for a period of not less than 30 seconds
between the end of one attempt and the beginning of the next call
attempt.
4 Some parameters required for compliance with Telecom's Telepermit
requirements are dependent on the equipment (PC) associated with this
55
Page 66

Appendix A: Regulations and safety notices
device. In order to operate within the limits for compliance with Telecom's
specifications, the associated equipment shall be set to ensure that automatic
calls to different numbers are spaced such that there is not less than 5
seconds between the end of one call attempt and the beginning
of another.
5 This equipment shall not be set up to make automatic calls to Telecom's 111
Emergency Service.
6 This device is equipped with pulse dialing while the Telecom standard is
DTMF tone dialing. There is no guarantee that Telecom lines will always
continue to support pulse dialing.
7 Use of pulse dialing, when this equipment is connected to the same line as
other equipment, may give rise to bell tinkle or noise and may also cause a
false answer condition. Should such problems occur, the user should NOT
contact the telecom Fault Service.
8 This equipment may not provide for the effective hand-over of a call to
another device connected to the same line.
9 Under power failure conditions this appliance may not operate. Please ensure
that a separate telephone, not dependent on local power, is available for
emergency use.
Laser compliance statement
The CD or DVD drive used with this computer is a laser product.
The CD or DVD drive's classification label (shown below) is located on the drive.
CLASS 1 LASER PRODUCT
CAUTION: INVISIBLE LASER RADIATION WHEN OPEN. AVOID EXPOSURE
TO BEAM.
Digital audio output statement
The optical connector contains no laser or light emitting diode (LED) more than
Class I.
Radio device regulatory notice
Note: Below regulatory information is for models with wireless LAN
and/or Bluetooth only.
General
This product complies with the radio frequency and safety standards of any
country or region in which it has been approved for wireless use. Depending on
configurations, this product may or may not contain wireless radio devices (such as
wireless LAN and/or Bluetooth modules). Below information is for products with
such devices.
56
Page 67

List of applicable countries
EU member states as of July 2009 are: Belgium, Denmark, Germany, Greece, Spain,
France, Ireland, Italy, Luxembourg, the Netherlands, Austria, Portugal, Finland,
Sweden, United Kingdom, Estonia, Latvia, Lithuania, Poland, Hungary, Czech
Republic, Slovak Republic, Slovenia, Cyprus and Malta, Bulgaria and Romania.
Usage allowed in the countries of the European Union, as well as Norway,
Switzerland, Iceland and Liechtenstein. This device must be used in strict
accordance with the regulations and constraints of the country of use. For further
information, please contact the local office in the country of use.
57
Page 68

Appendix A: Regulations and safety notices
Acer America Corporation
333 West San Carlos St., San Jose
CA 95110, U. S. A.
Tel : 254-298-4000
Fax : 254-298-4147
www.acer.com
Federal Communications Commission
Declaration of Conformity
This device complies with Part 15 of the FCC Rules. Operation is subject to the
following two conditions: (1) this device may not cause harmful interference, and
(2) this device must accept any interference received, including interference that
may cause undesired operation.
The following local Manufacturer /Importer is responsible for this declaration:
Product: Personal Computer
Trade Name: eMachines
Model Number: XXX series
SKU Number: XXX-xxx,
Name of Responsible Party: Acer America Corporation
Address of Responsible Party: 333 West San Carlos St.
Contact Person: Acer Representative
Phone No.: 254-298-4000
Fax No.: 254-298-4147
("x" = 0~9, a ~ z, A ~ Z or Blank)
San Jose, CA 95110
U. S. A.
58
Page 69

8F, 88, Sec. 1, Hsin Tai Wu Rd., Hsichih
Acer Incorporated
Taipei Hsien 221, Taiwan
Declaration of Conformity
We,
Acer Incorporated
8F, 88, Sec. 1, Hsin Tai Wu Rd., Hsichih, Taipei Hsien 221, Taiwan
Contact Person: Mr. Easy Lai, e-mail:easy_lai@acer.com.tw
And,
Acer Europe SA
Via Cantonale, Centro Galleria 2 6928 Manno Switzerland
Hereby declare that:
Product: Personal Computer
Trade Name: eMachines
Model Number: XXX series
SKU Number:XXX-xxx (“x” = 0~9, a ~ z, A ~ Z or Blank)
Is compliant with the essential requirements and other relevant provisions of the
following EC directives, and that all the necessary steps have been taken and are
in force to assure that production units of the same product will continue comply
with the requirements.
EMC Directive 2004/108/EC as attested by conformity with the following
harmonized standards:
-. EN55022, AS/NZS CISPR22, Class B
-. EN55024
-. EN55013 (Applicable to product built with TV tuner module)
-. EN55020 (Applicable to product built with TV tuner module)
-. EN61000-3-2 Class D
-. EN61000-3-3
Low Voltage Directive 2006/95/EC as attested by conformity with the following
harmonized standard:
-. EN60950-1
-. EN60065 (Applicable to product built with TV tuner module)
Council Decision 98/482/EC (CTR21) for pan- European single terminal connection
to the Public Switched Telephone Network (PSTN).
RoHS Directive 2002/95/EC on the Restriction of the Use of certain Hazardous
Substances in Electrical and Electronic Equipment
-. The maximum concentration values of the restricted substances by weight
in homogenous material are:
Lead 0.1% Polybrominated Biphenyls (PBB’s) 0.1%
Mercury 0.1% Polybrominated Diphenyl Ethers (PBDE’s) 0.1%
Hexavalent
0.1% Cadmium 0.01%
Chromium
59
Page 70

Appendix A: Regulations and safety notices
Easy Lai, Manager Date
Jul.9. 2009
Regulation Center, Acer Inc.
The standards listed below are applied to the product if built with WLAN module
or wireless keyboard and mouse.
R&TTE Directive 1999/5/EC as attested by conformity with the following
harmonized standard:
• Article 3.1(a) Health and Safety
-. EN60950-1
-. EN62311
• Article 3.1(b) EMC
-. EN301 489-1
-. EN301 489-3 (Applicable to non-bluetooth wireless keyboard mouse
set).
-. EN301 489-17
• Article 3.2 Spectrum Usages
-. EN300 440-2 (Applicable to non-bluetooth wireless keyboard mouse
set).
-. EN300 328
-. EN301 893 (Applicable to 5GHz high performance RLAN).
Year to begin affixing CE marking 2009.
60
Page 71

Page 72

Remark: All images are for reference purposes only.
Actual configuration may vary.
V09A8
 Loading...