

Page 1

Bedienungsanleitung
Chronograph
dEutsch
Page 2

- 2 -
Sehr geehrter Kunde, Sehr geehrte Kundin.
W
ir beglückwünschen Sie zum Erwerb Ihrer ELYSEE.
Diese Uhr ist mit einem hochwertigen Chronographen-Werk ausgestattet.
INhalt
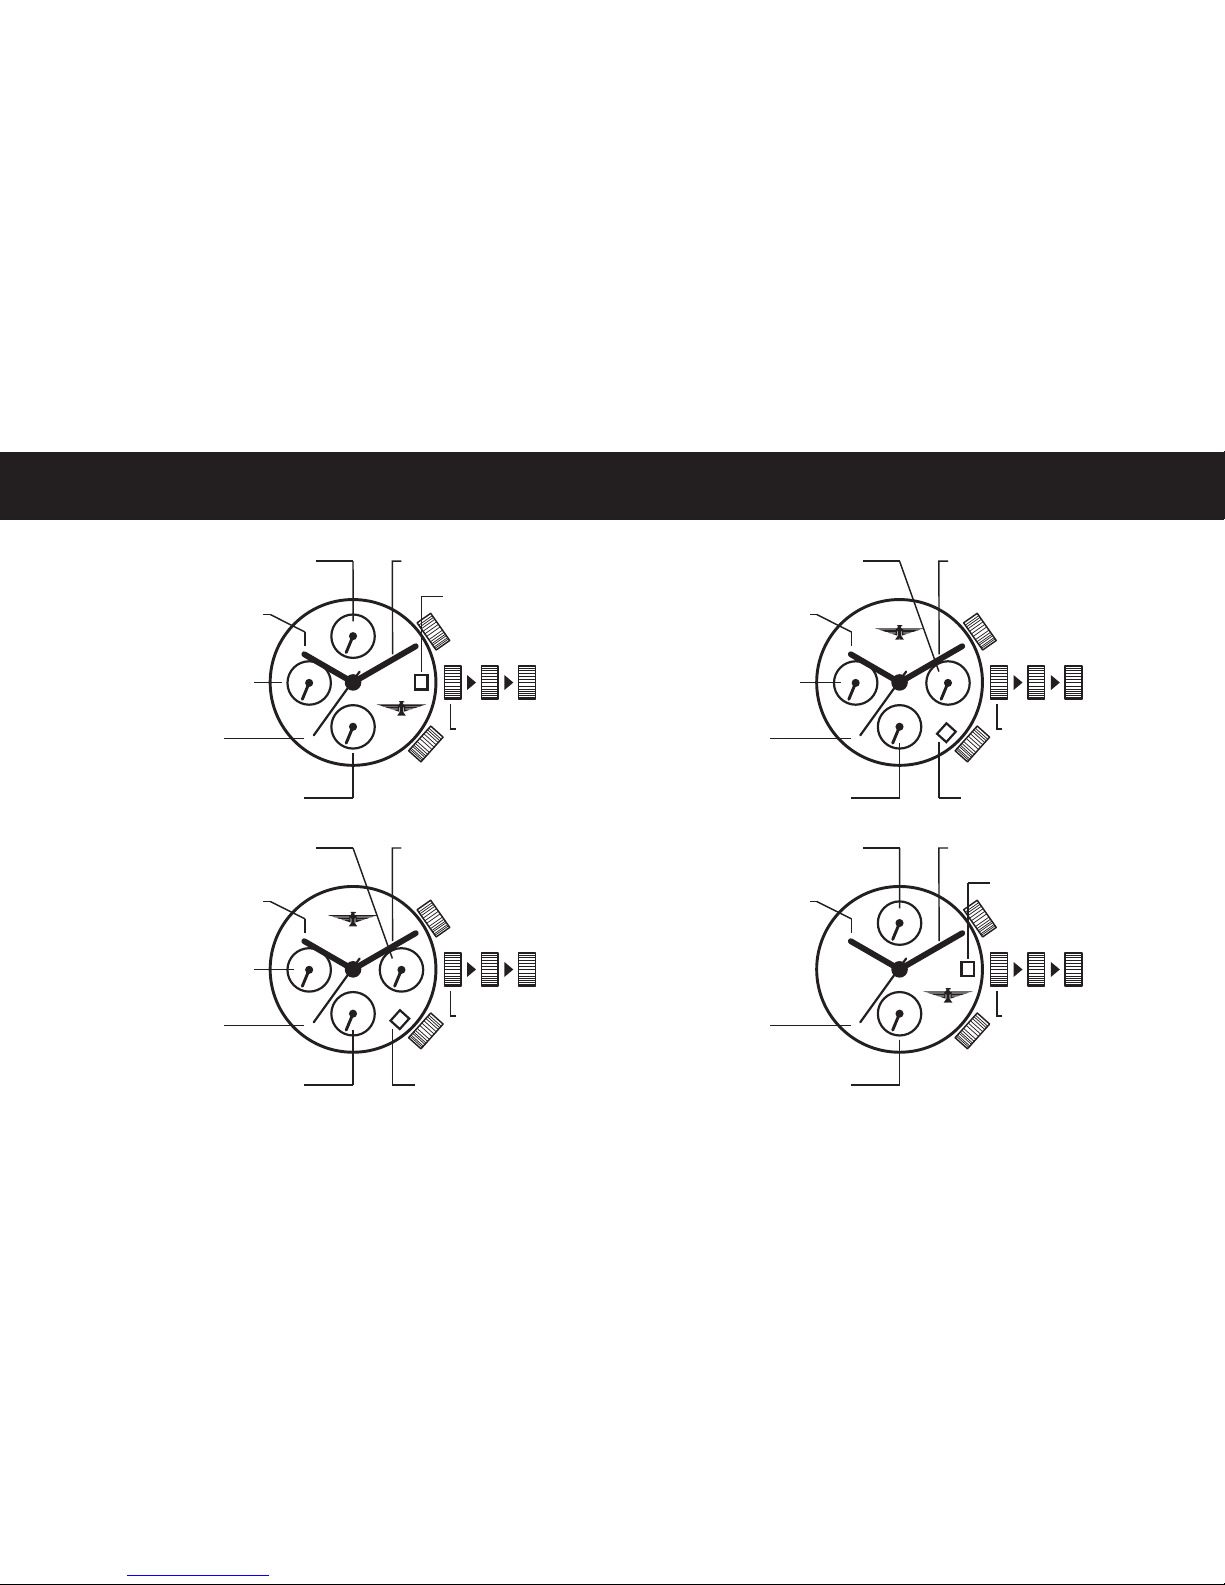
Displays 3+4
Einstellen der Uhrzeit 5
Einstellen des Datums 6
Bedienung des Chronographen 7
Rückstellung des Chronographen 8
Wasserdichtigkeit 9
Page 3
- 3 -
KRONE
NORMAL-POSITION
MINUTENZEIGER
SEKUNDENZEIGER
des Chronographen
1/20 SEKUNDENZEIGER
des Chronographen
STUNDENZEIGER
1 2
MINUTE
des Chronographen
normale SEKUNDE
DATUM
KRONE
NORMAL-POSITION
MINUTENZEIGER
SEKUNDENZEIGER
des Chronographen
1/20 SEKUNDENZEIGER
des Chronographen
STUNDENZEIGER
1 2
MINUTE
des Chronographen
normale SEKUNDE DATUM
KRONE
NORMAL-POSITION
MINUTENZEIGER
SEKUNDENZEIGER
des Chronographen
1/20 SEKUNDENZEIGER
des Chronographen
STUNDENZEIGER
1 2
MINUTE
des Chronographen
normale SEKUNDE DATUM
KRONE
NORMAL-POSITION
MINUTENZEIGER
SEKUNDENZEIGER
des Chronographen
MINUTE des Chronographen
STUNDENZEIGER
1 2
normale SEKUNDE
DATUM
Anzeige
6S10
6S20
6S30
OS11
Page 4
- 4 -
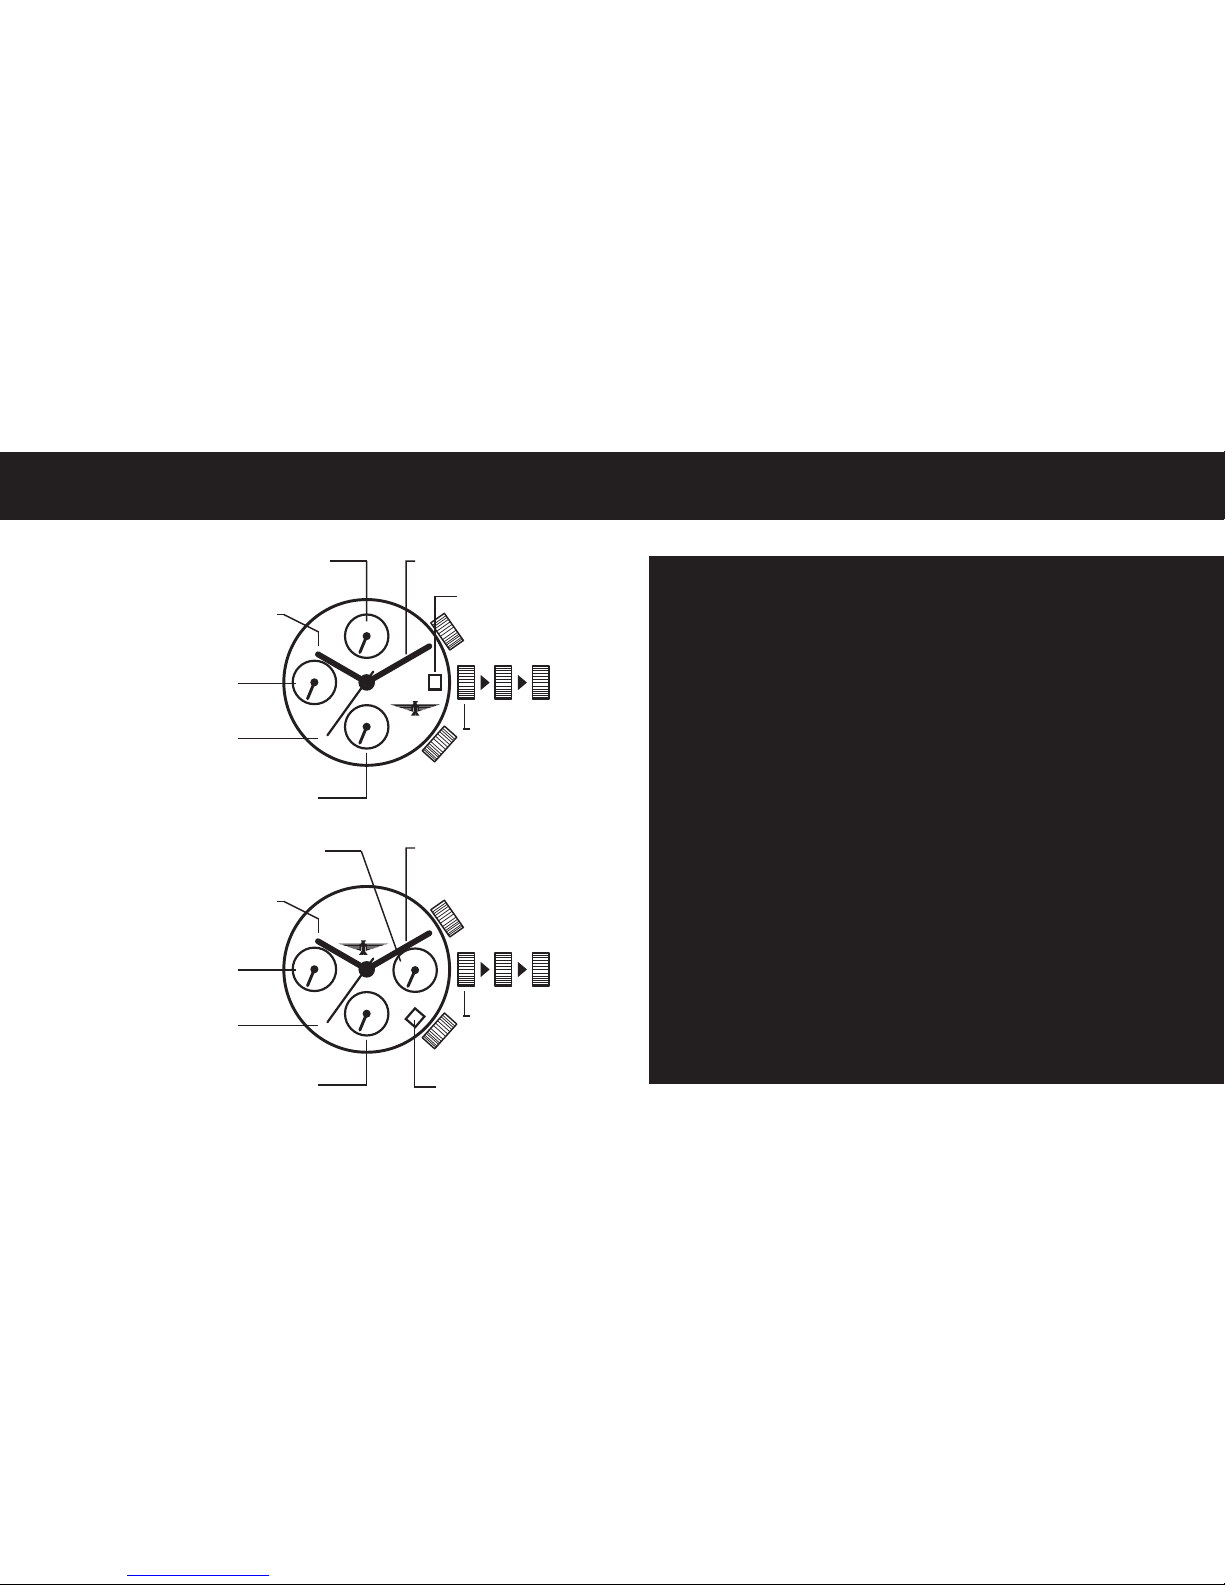
KRONE
NORMAL-POSITION
MINUTENZEIGER
SEKUNDENZEIGER
des Chronographen
MINUTENZEIGER
des Chronographen
STUNDENZEIGER
1 2
STUNDENZEIGER
des Chronographen
normale SEKUNDE
DATUM
KRONE
NORMAL-POSITION
MINUTENZEIGER
SEKUNDENZEIGER
des Chronographen
STUNDENZEIGER
1 2
MINUTENZEIGER
des Chronographen
normale SEKUNDE* DATUM
24-Stunden-Anzeige
Anzeige
OS10/1AOS20/2A/21
*
optionale Funktion
!
Die hier gezeigten Abbildungen
sind als Beispiele für die
mögliche Gestaltung Ihrer
ELYSEE-Uhr zu betrachten.
N
icht alle Chronographen
aus dem Hause ELYSEE sind
identisch aufgebaut, unterscheiden
sich jedoch nicht in der Handhabung zur Einstellung der Zeit, des
Datums und der Bedienung und
Reset des Chronographen.
Page 5

- 5 -
1
Ziehen Sie die Krone an Position 2.
2
Drehen Sie die Krone, um die Stunden- und Minutenzeiger einzustellen.
3
Nach Einstellung der Uhrzeit drücken Sie die Krone wieder in die
Ausgangsposition zurück.
EINSTELLEN Der Uhrzeit
Page 6

- 6 -
1
Ziehen Sie die Krone bis Position 1 heraus.
2
Drehen Sie die Krone entgegen dem Uhrzeigersinn,
um das Datum einzustellen.
!
Wird das Datum zwischen 21.00 und 01.00 Uhr nachts eingestellt, kann
es passieren, dass der Datumswechsel am nächsten Tag nicht stattndet.
Daher stellen Sie bitte das Datum außerhalb dieses Zeitraumes ein.
3
Nach Einstellung des Datums drücken Sie bitte die Krone in die
Ausgangsposition zurück.
EINSTELLEN DES Datums
Page 7

- 7 -
1
Mit jedem Drücken von Knopf „A“ wird die Messung gestartet oder
gestoppt.
2
Drücken Sie Knopf „B“, um den Chronographen auf Null zurückzustellen.
Messen der Zeit mit dem Chronographen
Page 8

- 8 -
Sie sollten diesen Vorgang ausführen, wenn der Sekundenzeiger des Chronographen nicht exakt auf die Nullposition zurückkehrt, nachdem der Chronograph auf „0“ gestellt wurde, und nachdem die Batterie ausgetauscht wurde.
1
Ziehen Sie die Krone in Position 2.
2
Drücken Sie Knopf „A“, um den Sekundenzeiger des Chronographen auf
die Null-Position zu stellen.
3
Wenn die Zeiger wieder exakt auf Position „0“ stehen, stellen Sie die
Uhrzeit ein und drücken die Krone wieder in Normalposition.
!
Drücken Sie die Krone jedoch nicht wieder in die Normalposition während
der Sekundenzeiger des Chronographen sich noch nicht auf der Position
„0“ bendet. Die Uhr nimmt dann die Zwischenposition als Nullstellung an.
Rückstellung des Chronographen
Page 9
- 9 -
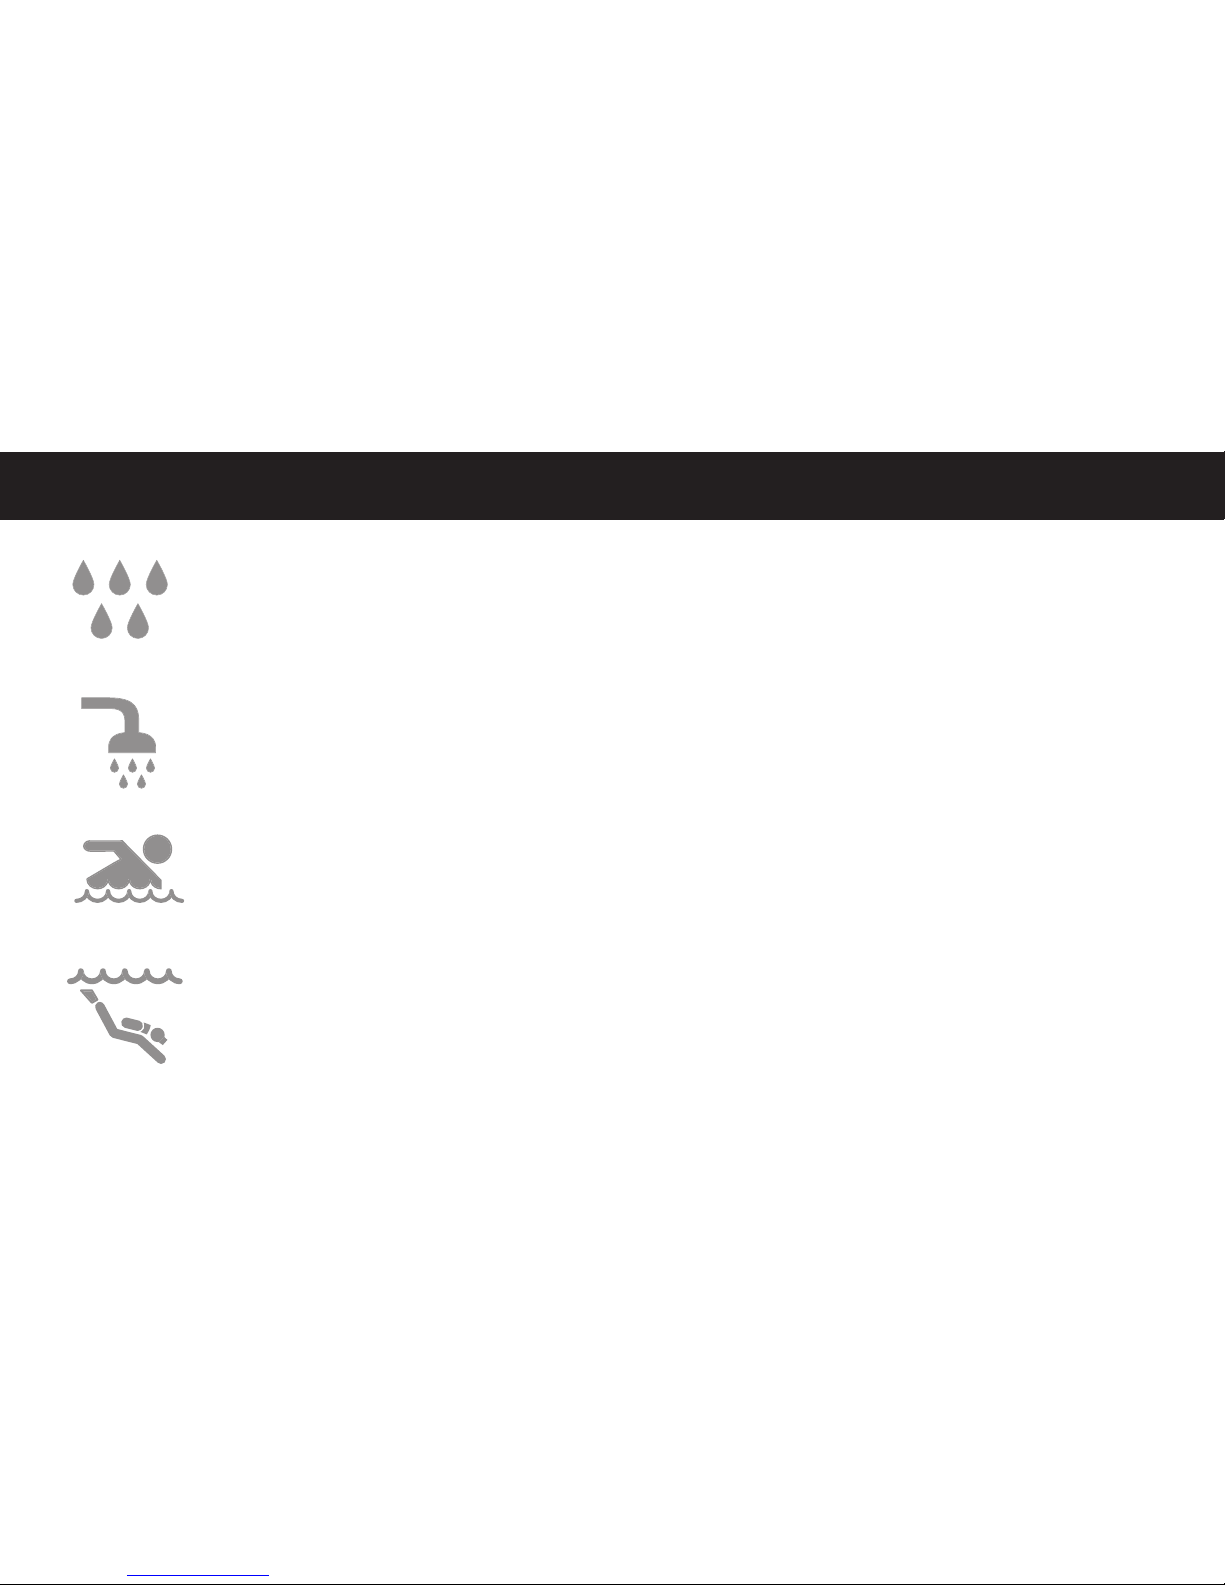
Wasserdichtigkeit
3 ATM beständig gegen Spritzer, Schweiss, Regentropfen
5 ATM wasserdicht, möglichst jedoch nicht Schwimmen
10 ATM zum Schwimmen oder Schnorcheln geeignet
20 ATM zum Schwimmen, Schnorcheln und Tauchen mit
Pressluftfl asche geeignet
Die Angaben zur Wasserdichtigkeit nden Sie auf dem Gehäuseboden Ihrer Uhr!
Page 10

- 10 -
Page 11

instruction manual
Chronograph
English
Page 12

- 12 -
Dear Customer.
C
ongratulations on the purchase of your ELYSEE-Timepiece. Your ELYSEE-wristwatch is equipped with a high-quality Citizen/Miyota-movement.
Content
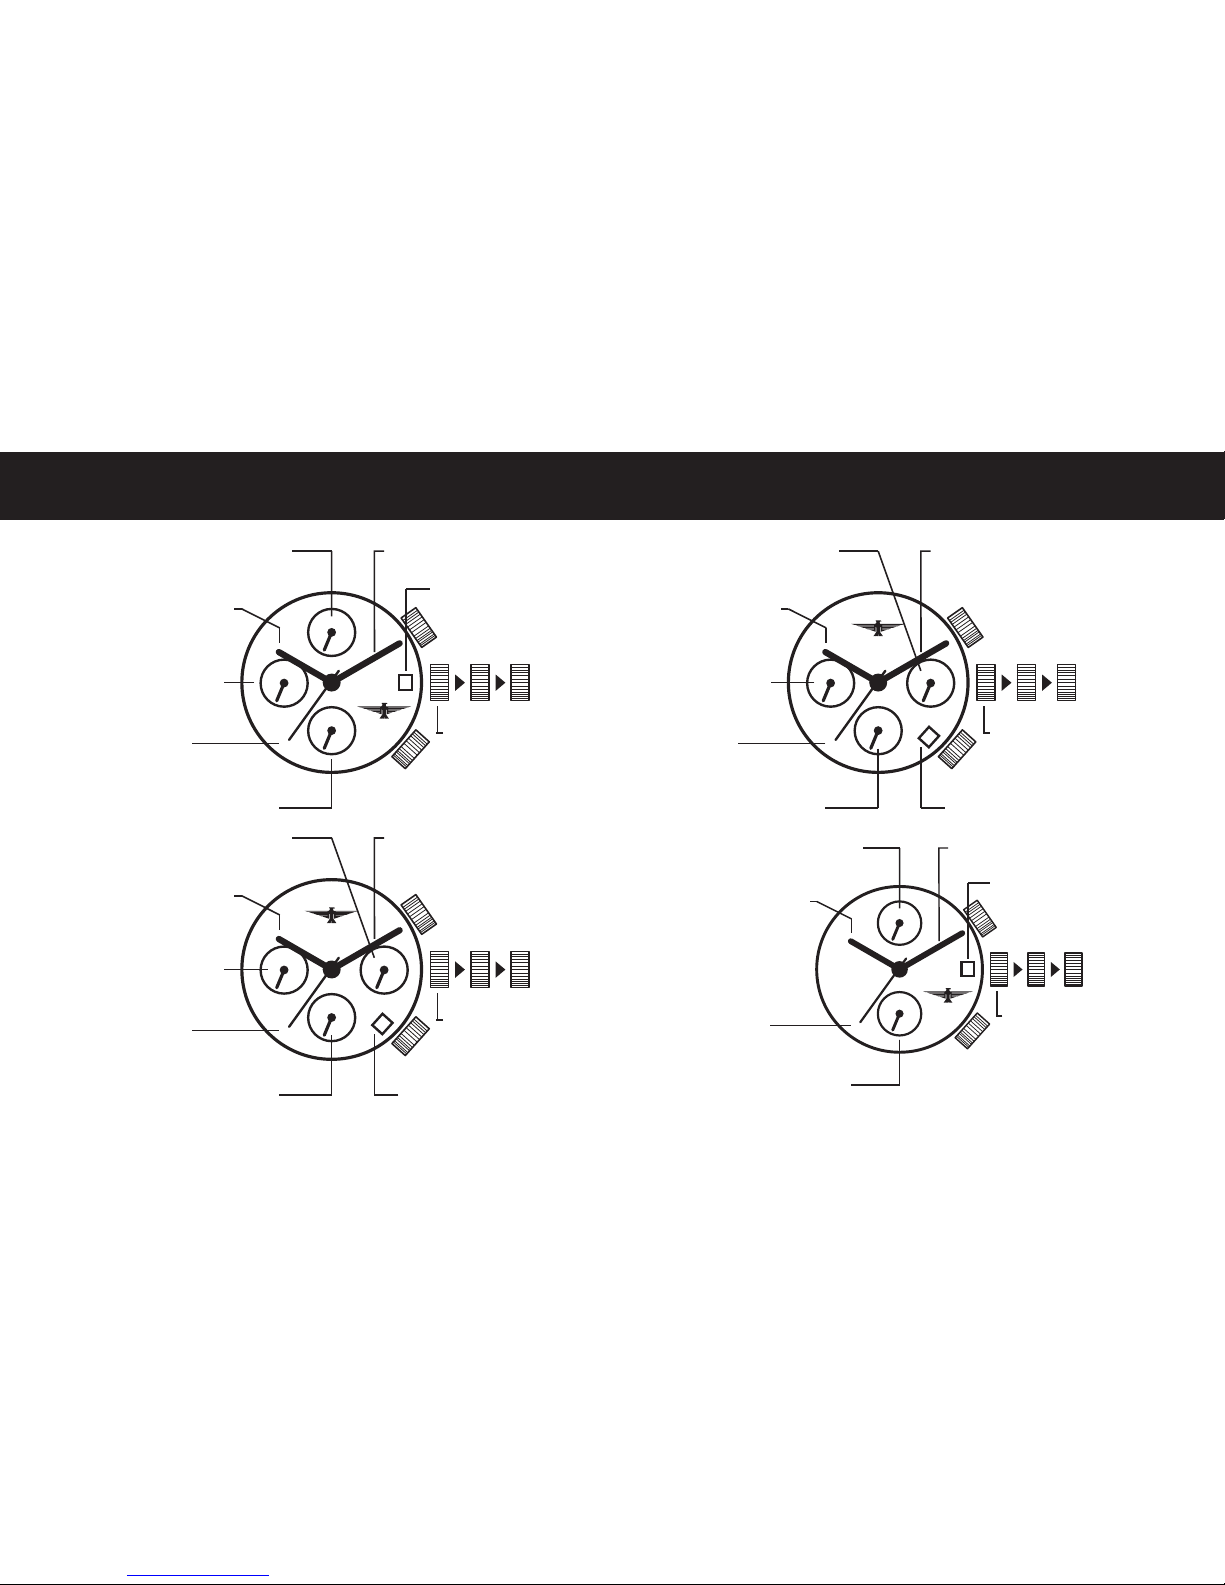
Displays 12+13
Setting the time 14
Setting the date 15
Operating of the Chronograph 15
Chronograph-Reset 16
Water resistance 18
Page 13
- 13 -
crown
normal position
minute hand
Chronograph
second hand
Chronograph
1/20 second hand
hour hand
1 2
Chronograph
minute hand
small second
date
crown
normal position
minute hand
Chronograph
second hand
Chronograph
1/20 second hand
hour hand
1 2
Chronograp
minute hand
small second date
crown
normal position
minute hand
Chronograph
second hand
Chronograph
1/20 second hand
hour hand
1 2
Chronograph
minute hand
small second date
KRONE
NORMAL-POSITION
MINUTENZEIGER
SEKUNDENZEIGER
des Chronographen
MINUTE des Chronographen
STUNDENZEIGER
1 2
normale SEKUNDE
DATUM
Display
6S10
6S20
6S30
OS11
Page 14
- 14 -
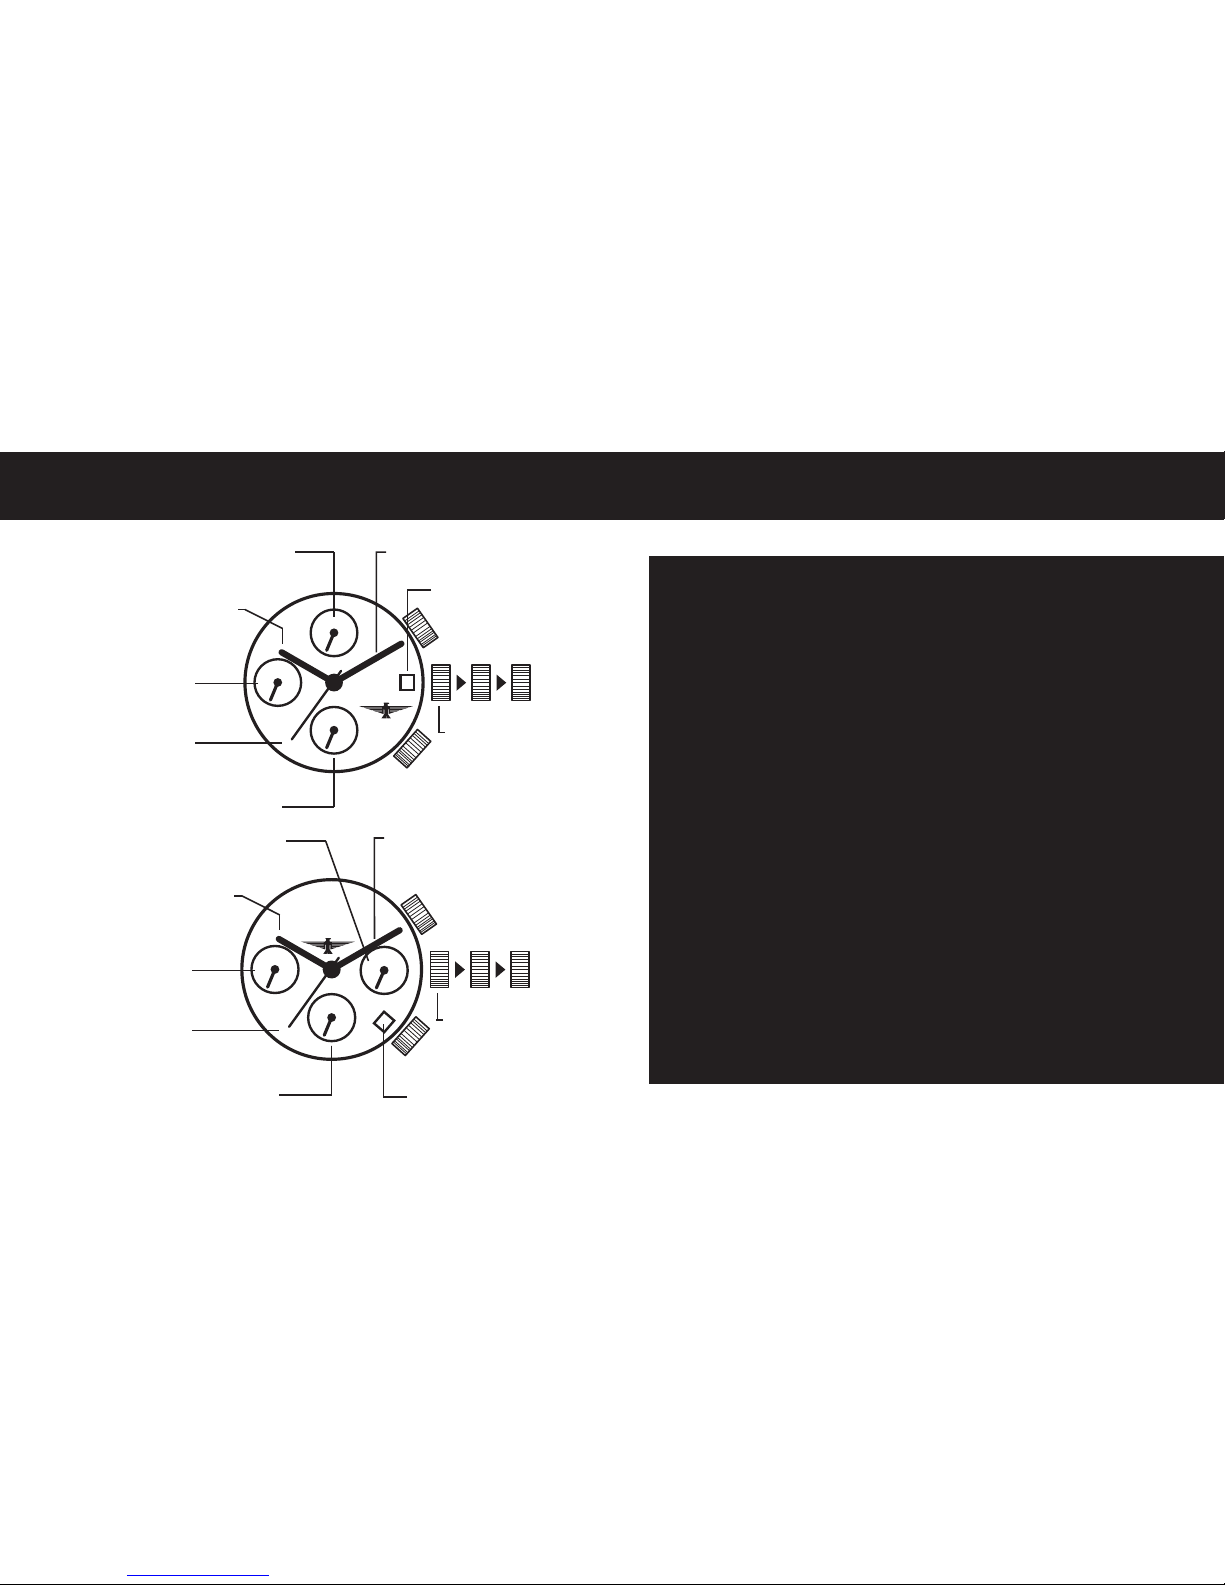
crown
normal position
minute hand
Chronograph
second hand
Chronograph minute hand
hour hand
1 2
Chronograph
hour hand
small second
date
crown
normal position
minute hand
Chronograph
second hand
hour hand
1 2
Chronograph
minute hand
small second* date
24 hour indication
Display
OS10/1AOS20/2A/21
*
optional function
!
The images shown here are
just examples for the possible
design of your ELYSEE watch.
N
ot all chronographs of ELYSEE
are identical in structure, but
not differ in the handling to set the
time, date, and the operation and
reset the chronograph.
Page 15

- 15 -
1
Pull the crown out to position 2.
2
Turn the crown to adjust the time.
3
After adjusting the time pull back the crown into the basic position.
Setting The time
Page 16

- 16 -
1
Please pull out the crown into position 1.
2
Turn the crown to adjust the date.
!
Please don‘t adjust the date between 9pm and 4am. Otherwise it can
happen that the change of the date on the following day won‘t take place.
3
After adjusting the date pull back the crown into the normal position.
!
Some ELYSEE watches have a screw down crown.
First screw the crown to adjust the time.
Please do not forget to screw the crown after adjusting the time!
Setting the date
Page 17

- 17 -
To measure time with the Chronograph:
1
By pressing the pusher A you start and stop the Chronograph.
2
By pressing the button B, all hands will be put back to position „0“.
Operating of the Chronograph
Page 18

- 18 -
You should always carry out a reset, if the ‚second-hand‘ won‘t be in position
„0“ again or every time after changing the battery.
1
Pull out the crown into position 2.
2
By pressing the pusher A you can reset the ‚second-hand‘ of the Chrono-
graph to position „0“.
3
After being back exactly on position „0“, please adjust the time and pull
back the crown into the basic position.
!
Don‘t pull back the crown into the basic position, while the ‚second-hand‘
won‘t be back on position „0“, since the ‚second-hand‘ will take the
moment/position you act like this as his new „0“-position.
Chronograph-Reset
Page 19
- 19 -
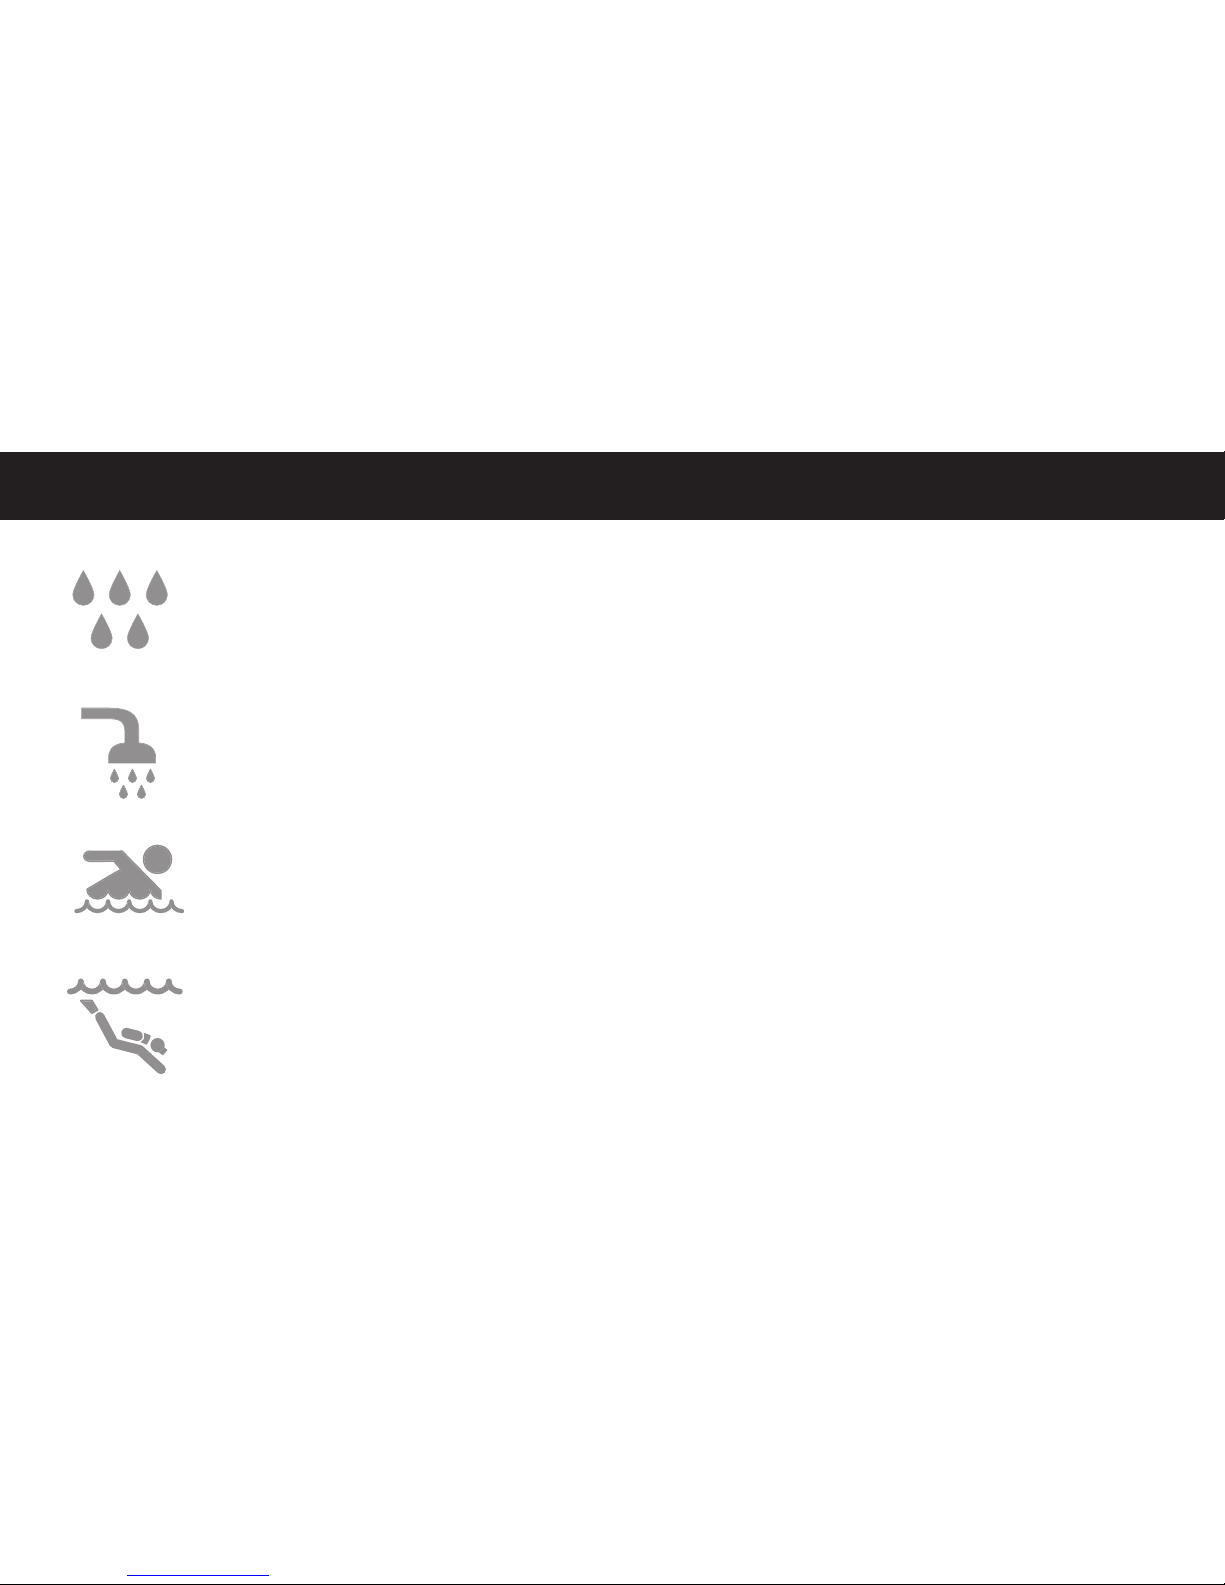
Wasserdichtigkeit
3 ATM Resistable agains splashes, raindrops, exudation etc.
5 ATM Water resistant, do not wear while swimming or taking
a shower.
10 ATM Watch can be used for swimming or snorkeling.
20 ATM Can be used for swimming, snorkeling and diving.
The details of the water-tightness can be found on the case back of your clock!
Page 20

www.elysee-watches.com
ELYSEE Uhren GmbH
Heerdter Lohweg 212 · 40549 Düsseldorf
Tel +49 211 522 89 40 · Fax +49 211 522 89 429
 Loading...