

Page 1
E1 500
USER GUIDE
Page 2

Congratulations! you are now part of the Elwing Family.
Congratulations for your new purchase! We'd like to thank you for the
You feedback on the board and on the way you ride it is important to us
and to many. Feel free to share your feedback and videos on your social
Before you start riding, please make sure you read the instructions and
P.S: Join the Elwing Board Riders group on Facebook !
trust you put on us.
media using #elwingboards !
wear a helmet.
Ride safe and enjoy!
Quentin, Gael, Pierre, Antoine.
The Elwing Team.
Page 3
Always wear protective gears including a helmet, knee, elbow and
1.
wrist guards.
Respect local regulations concerning electric skateboards. Respect
2.
cyclists, pedestrians, drivers. You NEVER have priority. If there is no
regulation, please avoid using your board in public places.
E1 500
At Elwing Boards, we focus on creating high quality products,
respecting the best concepts in the skateboard industry and
integrating the latest electric technology.
IMPORTANT
Please read carefully the whole guide before using your new
board.
Please read the following safety recommendations before
using your board:
Using an electric skateboard is not recommended for people younger
3.
than 14 years old.
Never use an electric skateboard under the influence of alcohol
4.
or drugs.
5.
Do not use an electric skateboard on a wet surface. Avoid rough
surfaces. The best use is on smooth and clean surfaces.
6. The electric brake only helps to slow down. It will NOT completely
stop. Control your speed at any time.
7. Check all the screws and bolts before each session. Mistreating your
Elwing Boards may cause the loss of the warranty.
8. This electric skateboard is made for cruising, not for skateboard tricks..
9.
Elwing is not liable for any damage or injury caused by unsafe or
faulty repairs. Any repairs made to this product by unauthorized service
technicians are the responsibility of the owner.
10. Enjoy riding your Elwing board!
2
.
.
Page 4
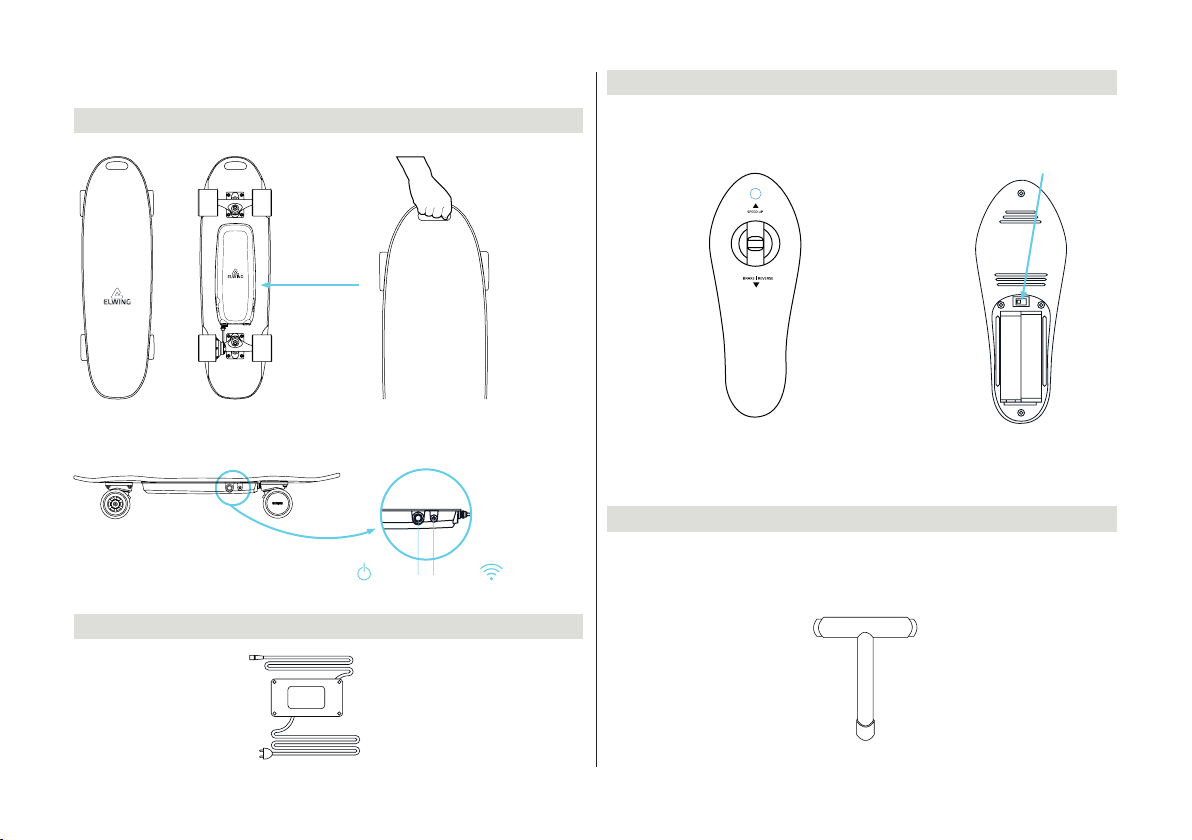
DESCRIPTION
1.
SKATEBOARD
3.
REMOTE
SLIDER
Kids safety
slow mode
Top view Back view
Side view
2.
CHARGER
The battery
the main switch
The sync button
mode button
(FAST/SLOW)
4.
SKATE TOOL
3
SPEED
Front view
Wheels
nut key
ON/OFF
button
Back view
Allen
wrench 3,1
Kingpin
nut key
Truck nut key
Page 5
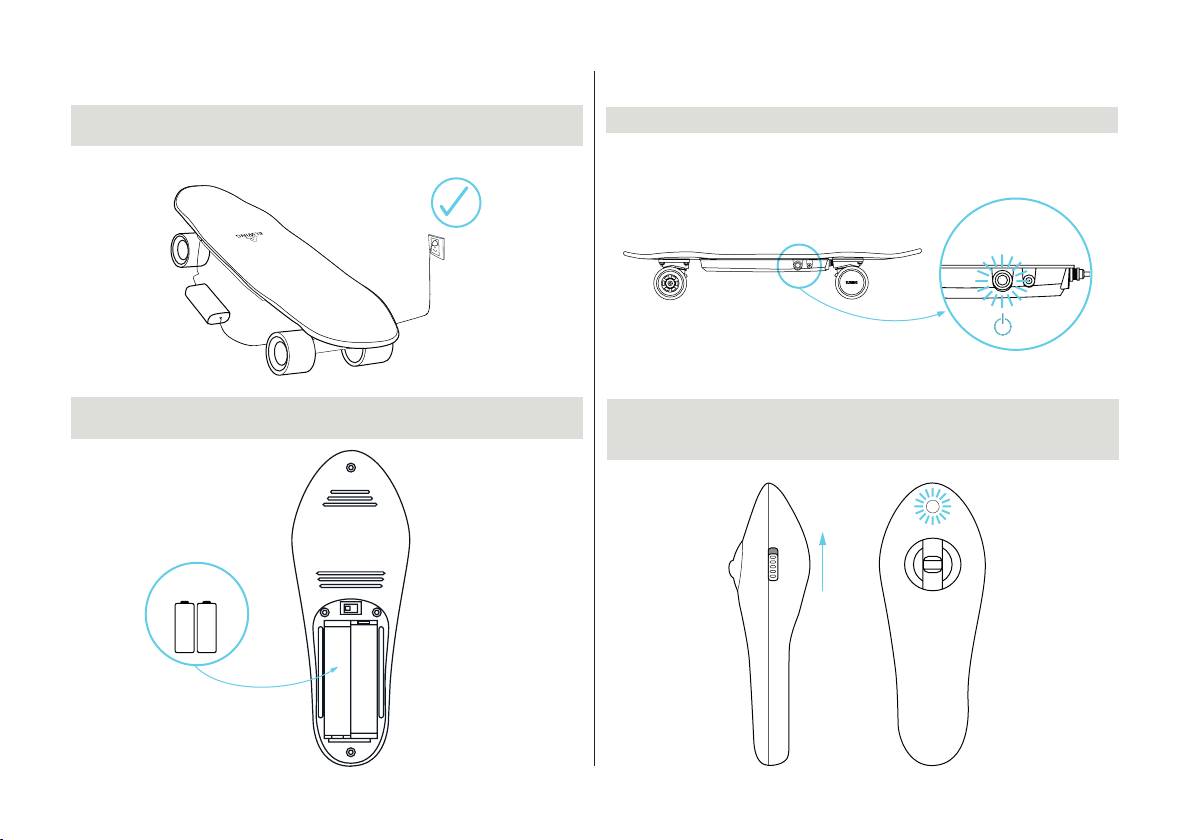
INSTALLATION
RECHARGE THE ELWING BOARD BATTERY BEFORE ITS FIRST
1.
USE.
2.
PUT THE 2 BATTERIES (STANDARD AAA) IN THE REMOTE
CONTROL.
2 batteries
SWITCH ON
SWITCH ON THE BOARD. THE SWITCH LED WILL FLASH ONCE.
1.
Side view
SWITCH THE REMOTE CONTROL ON. THE LED ON THE REMOTE
2.
WILL FLASH BLUE EVERY 3 SECONDES, MEANING THE
REMOTE IS ON.
ONOFF
Back view
4
Page 6
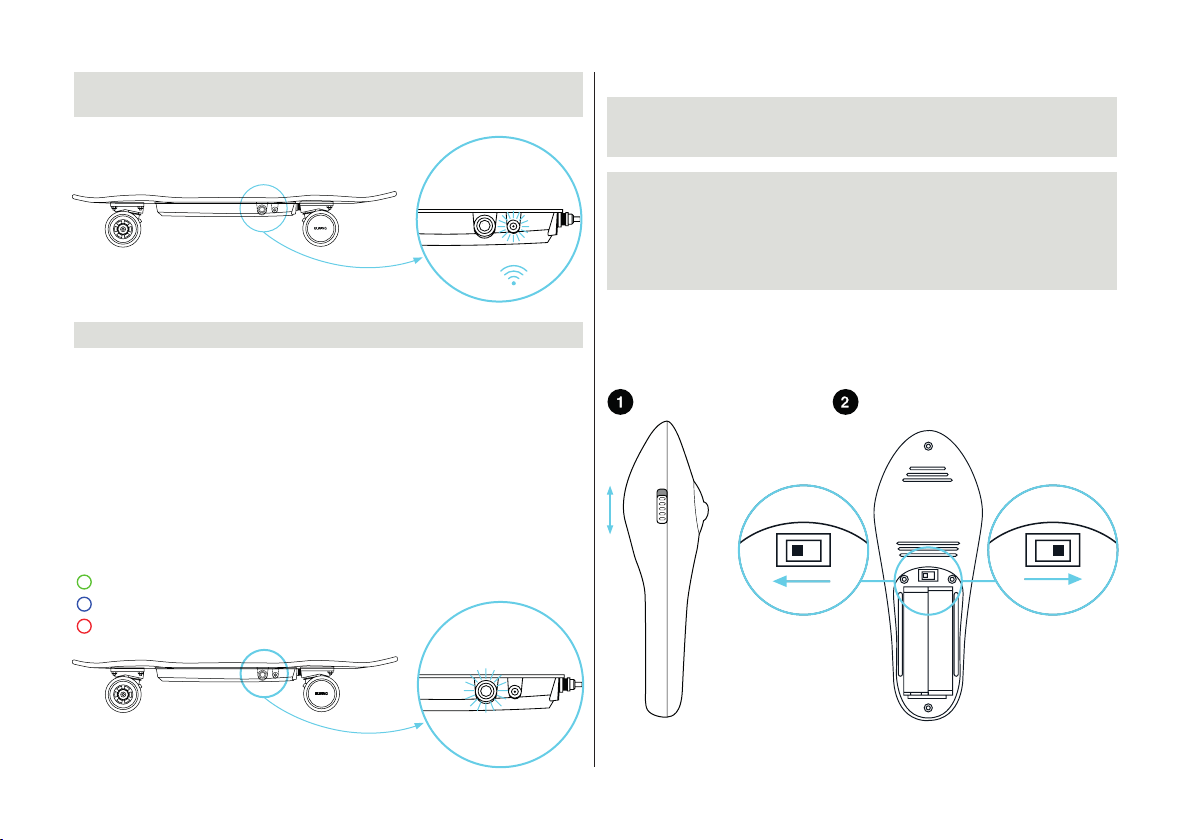
THE SYNC BUTTON IS BLINKING BLUE, MEANING THAT THE
1.
CONNECTION WITH THE BOARD IS SUCCESSFUL.
Side view
YOU’RE GOOD TO GO !
2.
Note: If you need to change to a new remote control,
please synchronize the new one before its first use.
MODE
FAST/SLOW: CHOSE YOUR MODE ON THE LEFT SIDE OF THE
1.
REMOTE.
KIDS SAFETY SLOW MODE: THERE IS AN EXTRA BUTTON
2.
INSIDE THE BATTERY COMPARTMENT TO DISABLE THE SLOW
MODE FUNCTION. PULL THE BUTTON TO THE LEFT AND THE
SKATEBOARD SETTINGS WILL BE BLOCKED ON SLOW MODE
WITH SMOOTH ACCELERATION, SMOOTH BRAKING AND
SLOWER MAX SPEED.
Note: We recommend to use the SLOW mode for
beginners.
BATTERY GAUGE
When the board is switched on and connected to
the remote you can check the battery gauge on
the power switch.
Full power
Medium battery
Low battery
Side view
To the Left To the Right
Fast
Slow
Kids Safety slow
Mode
Side view
5
Back view
Unlock fast Mode
Page 7
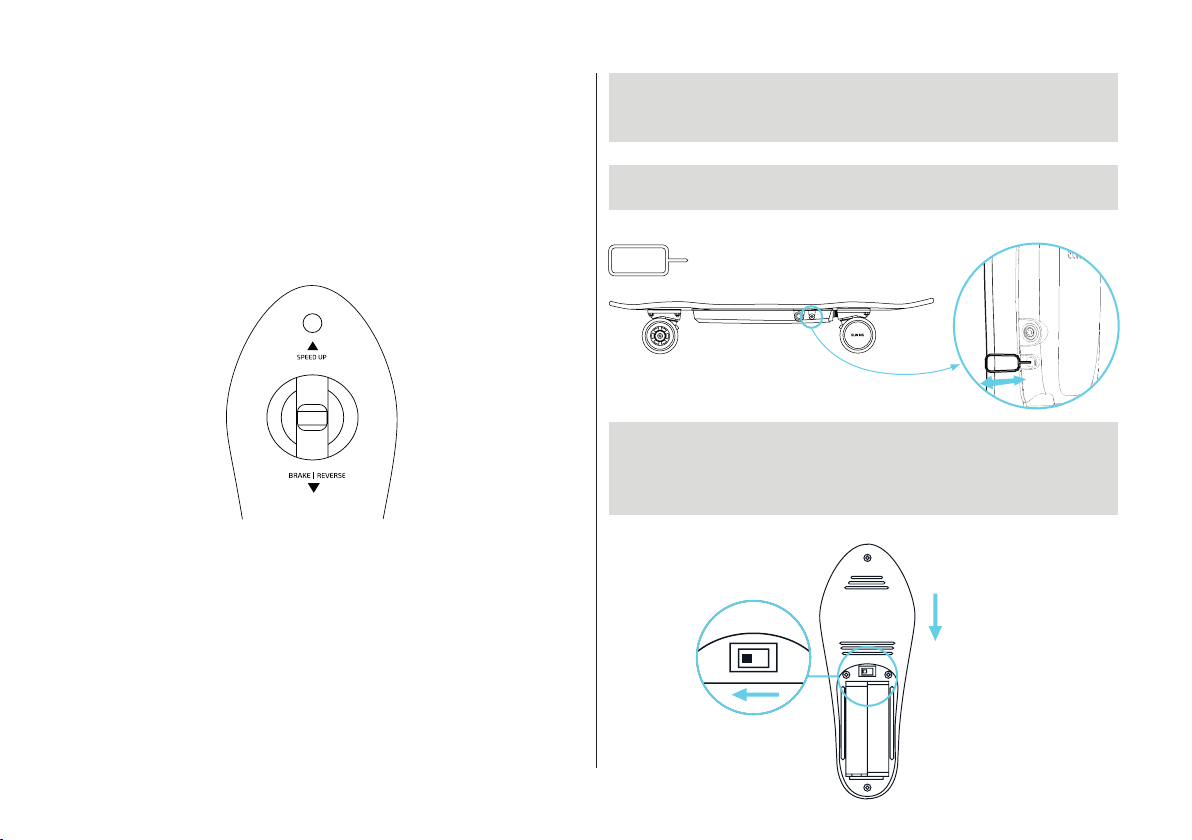
REVERSE FUNCTION
FORWARD / BACKWARD: Push the main button forward
to speed up
Once the board has stopped, the reverse can start if you
keep pulling the joystick.
Note: When you go reverse you can brake by pushing the
joystick
progressively. Pull it backwards to brake.
forward.
1. PLEASE MAKE SURE THAT THE BOARD AND THE REMOTE ARE
SWITCHED OFF. THE REMOTE IS ON «SLOW MODE»,
AND THE «CHILD SAFETY» IS ON
2. SWITCH THE BOARD ON. USE A PAPERCLIP TO PRESS THE SYNC
BUTTON. THEN THE SYNC BUTTON WILL TURN OFF.
Paperclip
Side view
3.
REMOTE IS OFF. ACTIVATE THE SLOW MODE WITH THE BUTTON
ON THE SIDE. INSIDE THE AAA BATTERY COMPARTEMENT YOU
WILL FIND THE KID SAFETY MODE, PRESS IT TO THE LEFT
(TURTLE MODE).
SYNCHRONIZATION
When the remote is synchronized with the board
the sync button on the board is blinking blue.
If for some reason this button is not blinking
blue
anymore this means the remote is not synchronized
with the board
synchronise the remote (or a new
anymore. This is the process to
remote to the
board).
To the left
Slow mode is
activated
6
Back view
Page 8
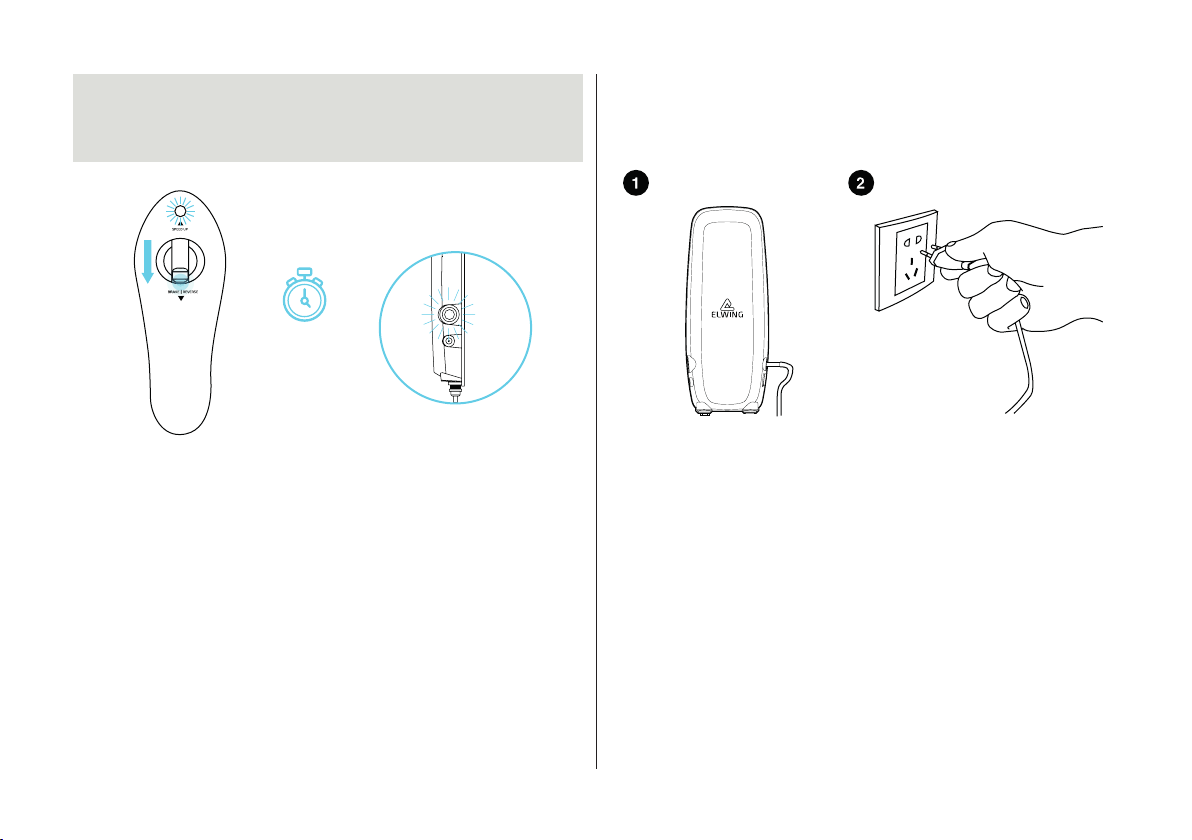
FOR 6 SECONDS. THE REMOTE WILL BLINK BLUE 3 TIMES IN A
4.
ROW AND THEN THE SYNC BUTTON ON THE BOARD WILL BLINK
BLUE WHICH CONFIRMS THAT THE CONNECTION IS NOW
SUCCESSFUL.
Hold 10
seconds
Note: Do not use any other charger to charge the
Elwing Board.
accidents.
It could damage the board and produce
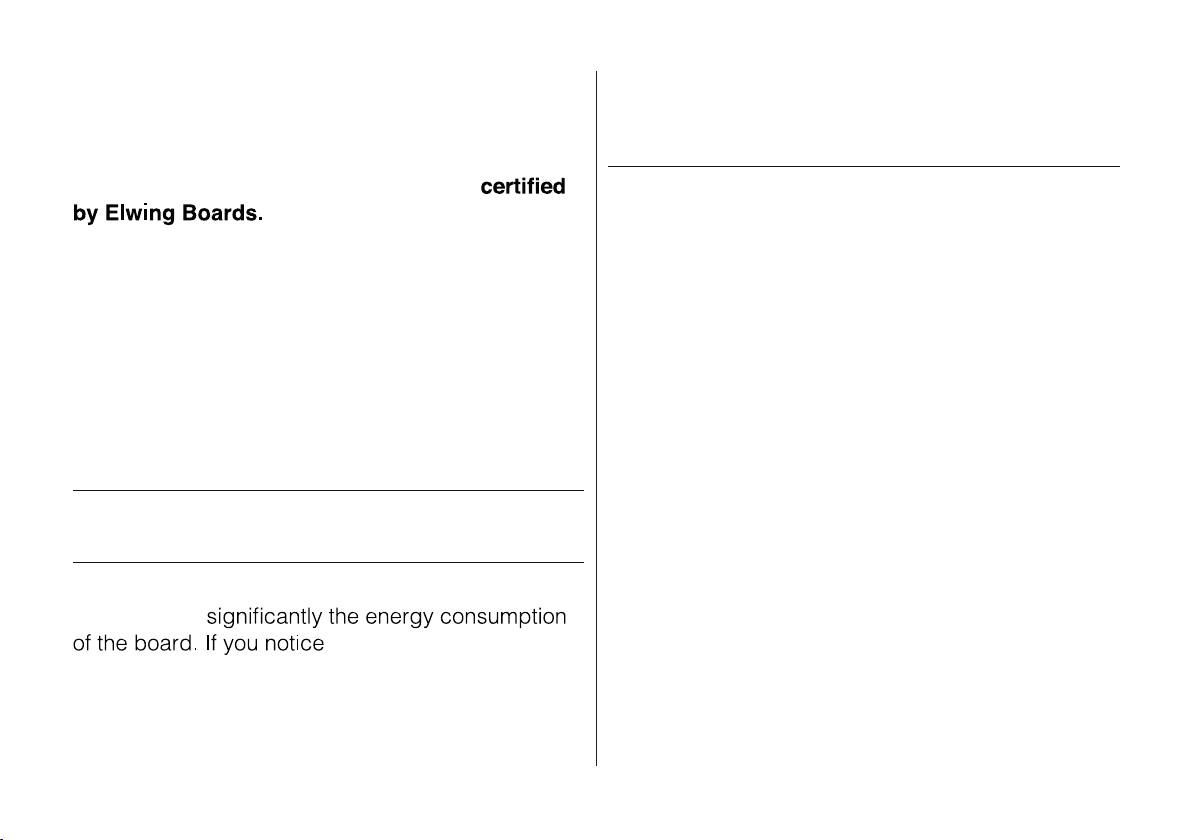
CHARGE
This electric skateboard comes with an external
charger.P lug the charger on the skateboard, then
on the wall plug. The charger
when charging which turns green when the
charging
is complete. Keep the Elwing Board full
charged as much as possible.
Elwing Board unused for over 2 months. Even if you
do
not use it, please recharge the battery every 2
months to make sure the
damage.
shows a red LED
Do not leave the
battery will not get
BATTERY
Avoid negative temperatures or above 40°C.
Do not let the board without use or charge for
over 1 month. Do not disassemble the power drive
and electronic components.
Do not short circuit.
7
Page 9
WARNING
Risk of explosion if the battery is not correctly
replaced. Use ONLY
batteries that are identical
as the original batteries, provided and
MAINTENANCE
1. Battery: The Elwing Board is equipped with a
Lithium-ion battery
discharged over 500 times, After which the
that can be charged and
battery
might lose around 20% of its capacity.
2. Wheels: The warranty does not cover normal
wear and tear
3. Bearings: Damaged bearings can be dangerous
and increase
4. Motor: The motor is extremely resistant. If it ever
makes any abnormal
noise, please contact us for
maintenance.
5. Check all the screws and bolts before each
session.
or abnormal noise, please replace them with any
standard skateboard
bearing on the market.
To reduce the risk of getting the bearings
damaged, please avoid contact with water and dust.
8
Page 10

ROUBLESHOOTING
f your Elwing Board is not running, please make
ure your battery is full. if your Elwing board is
ot running properly or make
top using it immediately.
f your Elwing Boards does not work,
lease check the following:
anormal noise,
9
Page 11
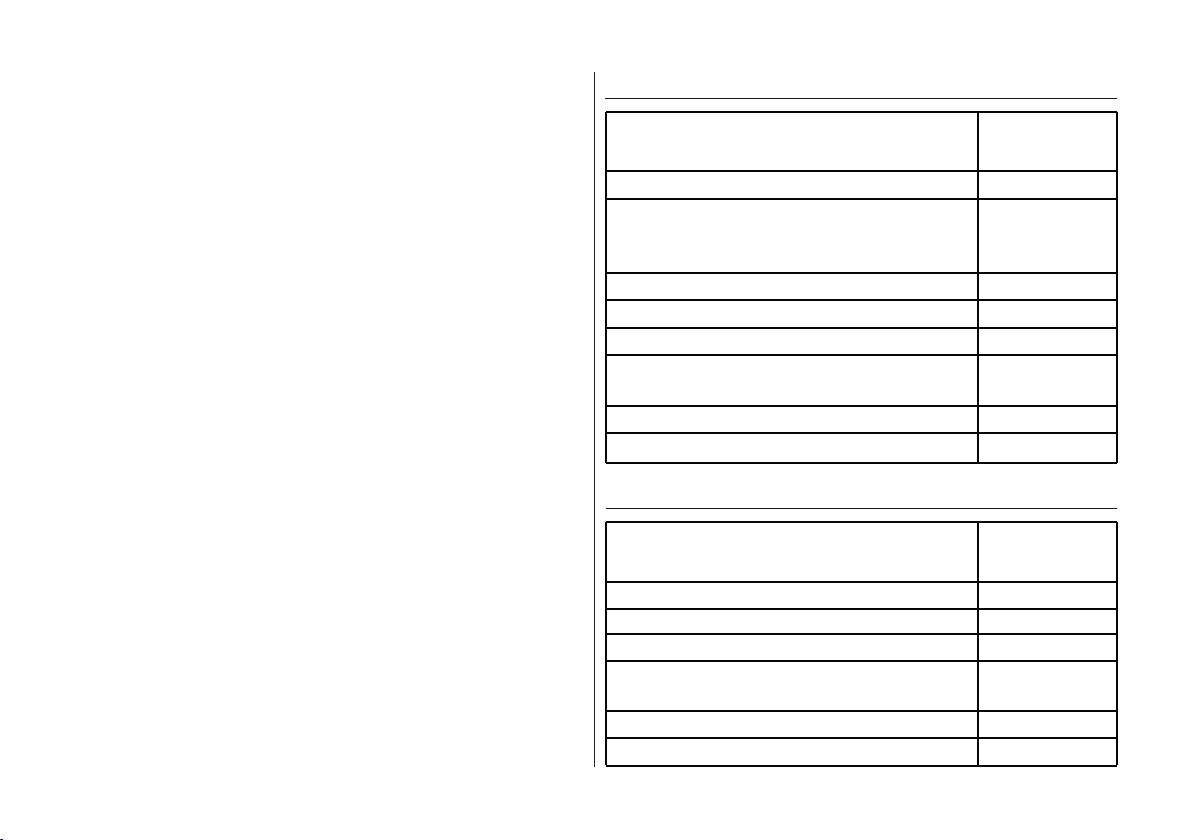
CERTIFICATIONS
Brand: ELWING
ELWING TECHNOLOGIES LTD declares that the
products listed above comply with European and
US guidelines below:
- CE marking
- Toy Safety Directive (TSD)
- Machinery Directive (MD)
- EMC
- LVD
- RoHS
- Battery Directive
- FCC
- UL (for charger)
SKATEBOARD
APPROVAL TEST
STANDARDS
Machinery Directive (MD) 2006/42/EC
Electro-Magnetic Compatibility (EMC)
Directive 2014/30/EU - recast of 2004
- recast of 2004/108/EC
Toys Safety Directive (TDS) 2009/48/EC
Directive 2014/81/EU
Directive 2014/84/EU
Directive 2014/79/EU
FCC - ID
RoEHS
EN60204
EN55014,
EN61000
EN62115
BPA
Nickel
TCEP, TCPP,
TDCP
PART 15C
2011/65/EU
BATTERY PACK EBP10S
APPROVAL TEST
STANDARDS
CE-EMC
FCC-VOC
Battery Directive
UN 38.3 (air and sea)
CE-LVD
RoHS
EN61000
PART 15B
2006/66/EC
ST/SG/
AC.10/11/Re v.6
EN-62133
2011/65/EU
10
Page 12
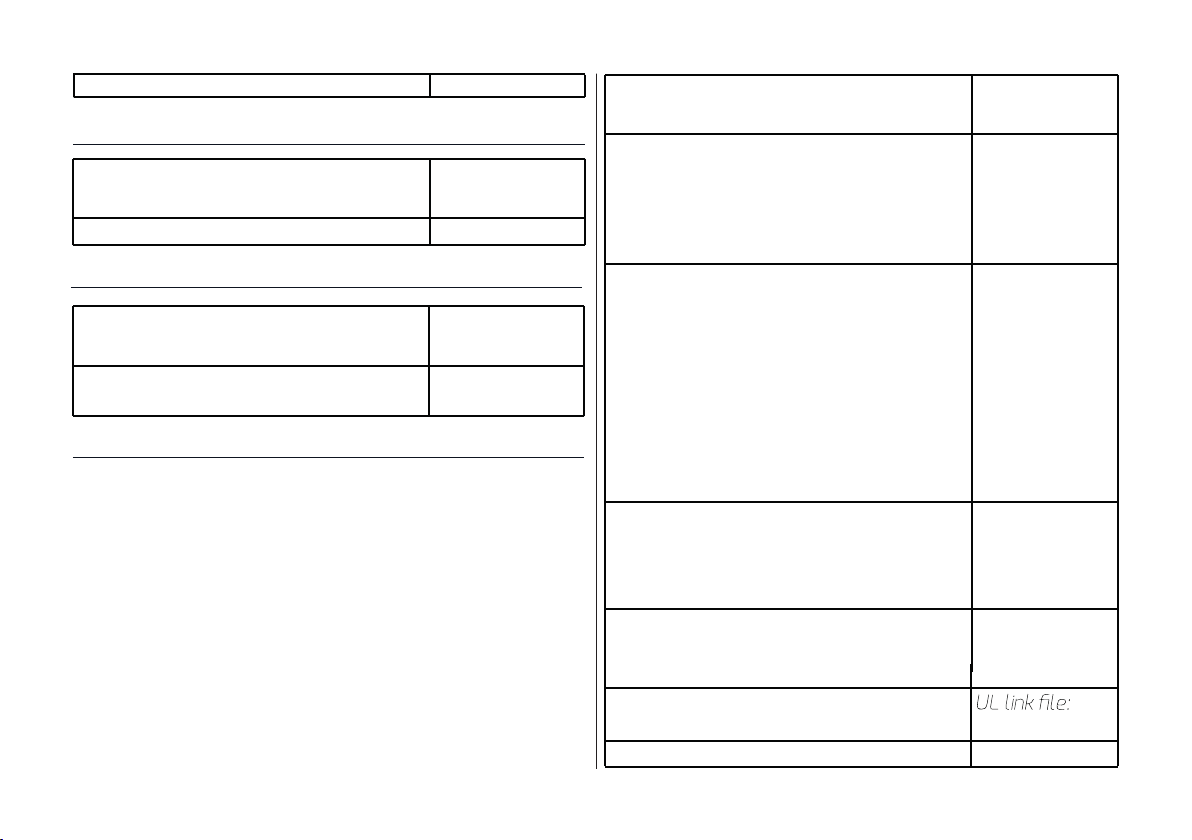
RoSH 2011/65/EU
REMOTE
APPROVAL TEST
STANDARDS
FCC-ID P ART 15C
COLOR BOX
APPROVAL TEST
STANDARDS
Packaging and Packaging Waste
Directive 94/62/EC
94/62/EC
AC/DC ADAPTER 42V2A
APPROVAL TEST
STANDARDS
CE-LVD Directive 2014/35/EU
CE-EMC
RoHS
FCC
FCC
UL for Canada
EN60335-2-29:
2004/A2:2010
EN60335-1:
2012/A11:2014
EN62233:2008
EN55014-1:
2006+A1:2009
+A2:2011
EN61000-32:2014
EN61000-3-3:
2013
E55014-2:1997
+A1:2001+A2:
2008
RoHS directive
2011/65/EU
recasting 2002
/95/EC
FCC Part
Subpart B
B: Oct. 1, 2009
EPBUE340833
EPBU7E340833
15
Class
11
Page 13

Page 14
Elwing Tech SAS
87 Quai des Queyries - Darwin Bastides
33100 BORDEAUX
France
 Loading...