

Page 1
Manuale utente - User guide
Manuel utilisateur - Benutzerhandbuch
Instrucciones usuario - Manual do Usuario
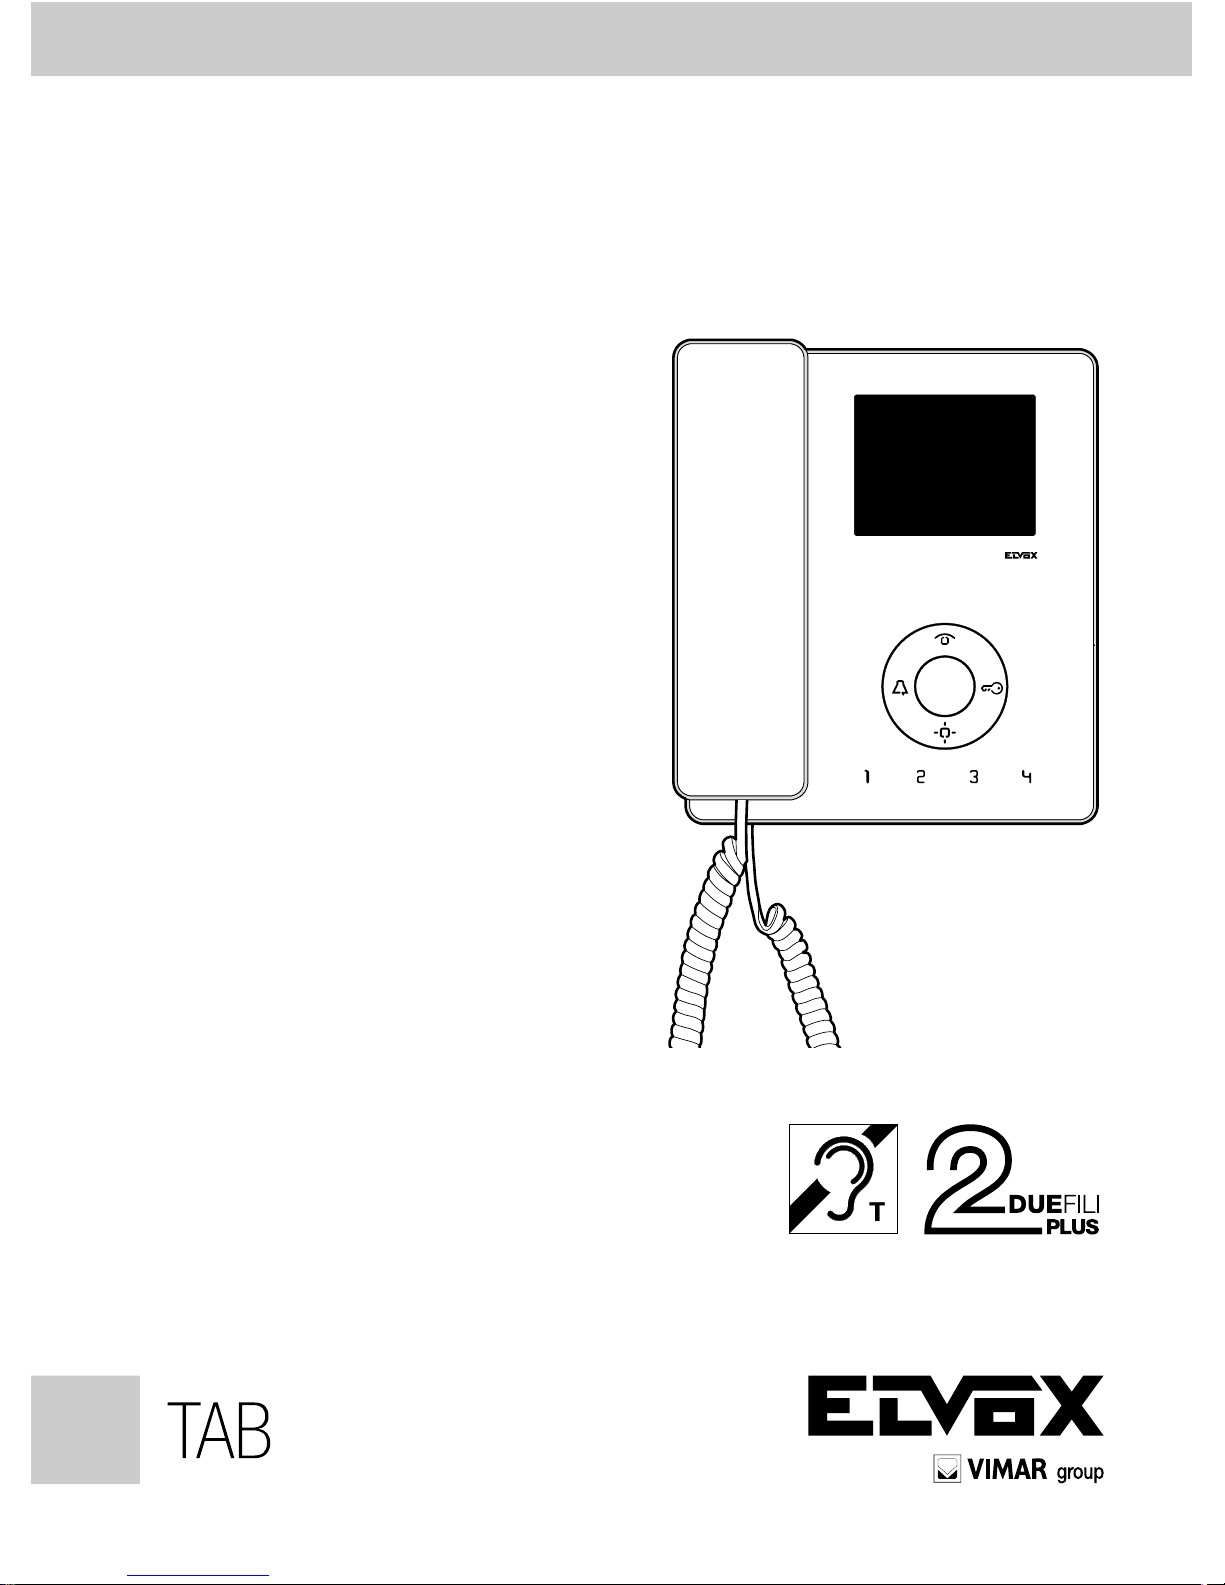
Art. 7529, 7529/D*
DUE FILI ELVOX
*
Page 2

2
IT
E1 E2 E3
E4
B
A
C
D
A Autoaccensione: per l’autoinserimento/autoaccensione del videocitofono.
B
Esclusione della suoneria: Durante la chiamata, disattiva la suoneria.
C
Serratura: comando per l’apertura serratura.
D
Ausiliario 1 (Luce scale): Per servizio ausiliario.
E1
Pulsante 1: Pulsante programmabile per attivazione servizio ausiliario o
chiamata intercomunicante.
E2
Pulsante 2: Pulsante programmabile per attivazione servizio ausiliario o chia-
mata intercomunicante.
E3
Pulsante 3: Pulsante programmabile per attivazione servizio ausiliario o chia-
mata intercomunicante.
E4
Pulsante 4: Pulsante programmabile per attivazione servizio ausiliario o chia-
mata intercomunicante.
Pulsanti
Page 3
3
IT
Segnalazioni:
B In funzionamento normale:
- Luce lampeggiante: segnala che il videocitofono sta ricevendo una
chiamata (da targa esterna o da apparecchio intercomunicante).
- Luce fissa: suoneria esclusa (funzione utente assente).
- Luce fissa con lampeggio ogni 10s: a suoneria esclusa se sono state
inviate chiamate dalla targa, il LED lampeggia con un numero pari alle
chiamate ricevute dalla targa (rimangono memorizzate fino a 4 chiamate). Il reset della memorizzazione dei lampeggi avviene al ripristino
del volume della suoneria.
C
In funzionamento normale:
- Luce fissa: segnalazione di porta aperta se almeno in una targa è stato
installato il sensore.
In funzionamento regolazione:
- Luce lampeggiante: segnala che il citofono è in fase di regolazione del
volume della suoneria o scelta della melodia.
I H
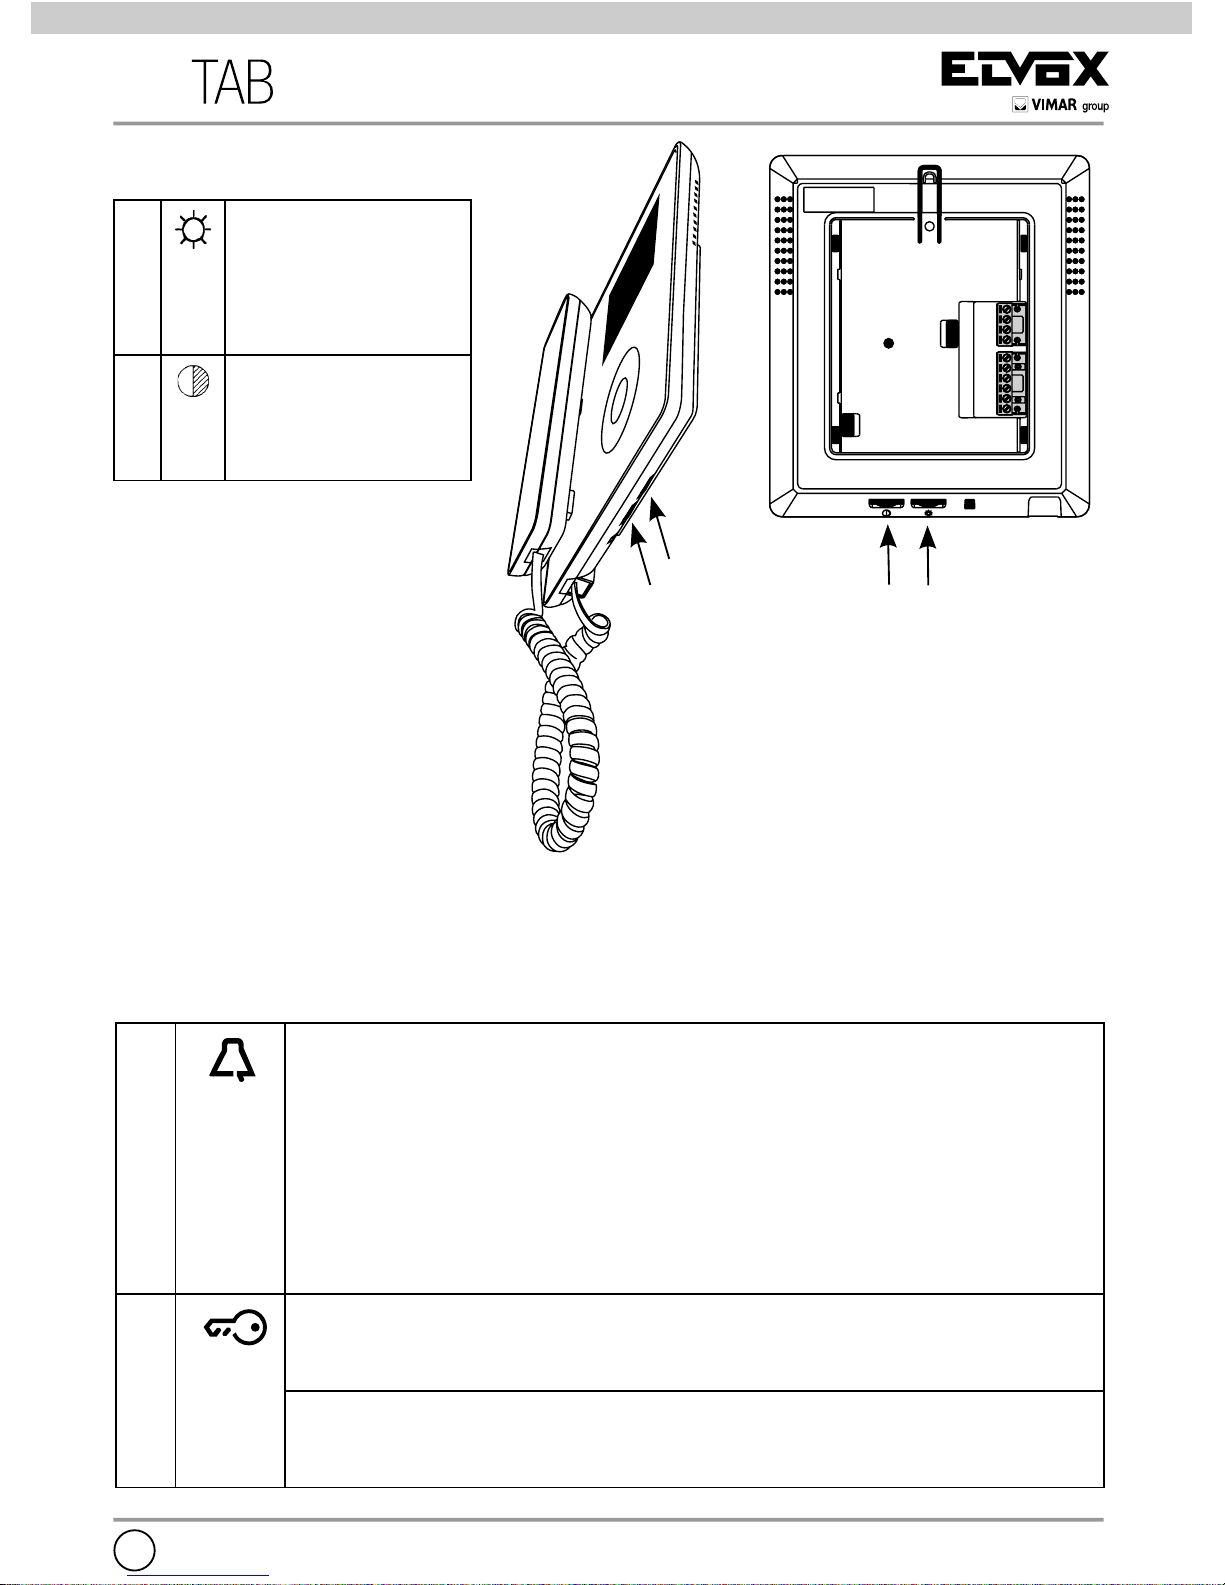
Regolazioni:
H Regolazione della
luminosità: con-
sen te di va ria re la
luminosità dello
scher mo.
I
Regolazione del
contrasto:
consente
la regolazione del
con tra sto.
I
H
Page 4

4
Funzionamento
Risposta ad una chiamata
All’arrivo di una chiamata da targa esterna
o da apparecchio intercomunicante, si può
rispondere durante o al termine del ciclo di
suoneria. Per rispondere si deve sollevare il
microtelefono, per terminare la comunicazione riagganciare.
Ricevere una chiamata fuori porta
Il videocitofono può essere chiamato da un
pulsante fuoriporta. Premendo il pulsante
fuoriporta il videocitofono suona con un
tono differente da quello ottenuto con la
chiamata da targa esterna o intercomunicante. Per terminare la suoneria sollevare il
microtelefono.
Inviare una chiamata intercomunicante
Per inviare una chiamata verso un altro
interno, è necessario sia stato programmato
uno o più pulsanti.
Per chiamare, sollevare il microtelefono e
premere il pulsante programmato e riferito
all’interno da chiamare. Durante la chiamata
il videocitofono emette un tono in modo da
avvertire che la chiamata è in atto oppure, se
il citofono/videocitofono è occupato in altra
comunicazione nel videocitofono chiamante
si sentirà un tono che avverte che l’utente
chiamato è occupato.
Quando l’interno chiamato risponde, automaticamente si attiva la comunicazione, per
terminare la conversazione riagganciare il
microtelefono. La durata massima in conversazione è pari a 5 minuti (di default).
Esclusione della suoneria durante una
chiamata (Funzione “Mute”)
Al ricevimento di una chiamata da targa
esterna, da apparecchio intercomunicante
o da chiamata fuoriporta tramite dispositivo
Art. 6120, è possibile silenziare la suoneria
di chiamata premendo il tasto B.
Comando serratura
Premendo il pulsante serratura (con microtelefono agganciato o in conversazione), si
invia il comando di apertura serratura alla
targa (di default l’ultima targa chiamante).
Autoaccensione
- Autoaccensione con tasto dedicato
(tasto A):
per fare l’autoaccensione e comunicare
con la targa master, fare una breve
pressione sul tasto A (autoaccensione)
per accendere il monitor e sollevare il
microtelefono per attivare la comunicazione. Per chiudere la comunicazione
riagganciare.
Chiamata a un centralino portineria
Per effettuare una chiamata ad un centralino
portineria (se presente nell’impianto): sollevare il microtelefono e inviare la chiamata
premendo il tasto C (serratura).
Funzione audiolesi (solo per Art. 7529/D)
L’Art. 7529/D è dotato di una bobina interna
che permette l’utilizzo anche a portatori di
protesi acustica. Per questo tipo di funzionamento, è necessario commutare l’apparecchio acustico in posizione “T”, tuttavia per
un corretto funzionamento dell’apparecchio
acustico, fare riferimento al relativo manuale
di istruzioni.
Nota: l’eventuale presenza di oggetti metallici o apparecchi elettronici, può compromettere la qualità del suono percepito sull’apparecchio acustico.
IT
Page 5

5
Configurazioni
Scelta delle melodie di chiamata
Le suonerie di chiamata sono selezionabili
tra 10 diverse melodie e regolabili. Sono
inoltre distinguibili tra chiamate esterne,
intercomunicanti e fuoriporta (nel caso
descritto sotto). La scelta delle melodie
viene fatta con videocitofono in stand-by e
microtelefono agganciato.
Il pulsante per entrare in configurazione è il
tasto A (autoaccensione).
Il tasto E1 permette di selezionare la melodia per CHIAMATA DA TARGA.
Il tasto E2 permette di selezionare la melodia per CHIAMATA INTERCOMUNICANTE.
Il tasto E3 permette di selezionare la melodia per CHIAMATA FUORIPORTA (esclusivamente utilizzando modulo di interfacciamento pulsante Art. 6120 o pulsante di
chiamata da pianerottolo Vimar). Nel caso
di chiamata fuoriporta mediante pulsante
collegato direttamente ai morsetti FP e M del
videocitofono, la suoneria non può essere
cambiata.
Configurazione:
1) Premere il tasto A (autoaccensione) e
mantenere premuto (per 2 s), fino a
quando il LED C (serratura), inizia a
lampeggiare ed il videocitofono emette
una segnalazione acustica.
2) premere e mantenere premuto il tasto
riferito alla suoneria da scegliere (tasto
E1/tasto E2/tasto E3), fino a quando si
inizia a sentire la melodia sul videocitofono.
3) premere ripetutamente il tasto (tasto E1/
tasto E2/tasto E3) per selezionare il tipo
di melodia desiderata.
4) Scelta la suoneria desiderata, per memorizzare premere il tasto A o non toccare
nessun tasto per 5s. Terminata la configurazione il LED lampeggiante si spegne.
Regolazione del volume della suoneria
Il volume della suoneria è regolabile su 6
livelli più esclusione.
Il pulsante per entrare in regolazione è il
tasto A (autoaccensione)
Il tasto B (campanella) permette di diminuire
il volume della melodia.
Il tasto C (chiave) permette di aumentare il
volume della melodia.
La regolazione del volume della suoneria
viene fatta con videocitofono in stand-by e
microtelefono agganciato.
Configurazione:
1) Premere il tasto A e mantenere premuto
(per 2 s) fino a quando il LED C (serratura) inizia a lampeggiare ed il videocitofono emette una segnalazione acustica.
3) Premere il tasto B per diminuire, C per
aumentare il volume. Ad ogni pressione
corrisponde un livello del volume.
4) Selezionato il volume desiderato, per
memorizzare premere il tasto A o non
toccare nessun tasto per 5s. Terminata
la configurazione il LED lampeggiante si
spegne e si sente un “bip”.
Esclusione della suoneria (Funzione
utente assente)
Con la stessa procedura descritta sopra
per la regolazione del volume, premendo
più volte il tasto B si arriva a punto in cui
la suoneria viene disattivata. Lo stato di
“Suoneria esclusa” viene segnalato dall’accensione del LED di illuminazione tasto B
(suoneria esclusa) a luce fissa.
Se con suoneria esclusa il videocitofono
riceve una chiamata da targa, il LED/tasto
B lo segnala con un lampeggio per ogni
chiamata a cui non è stato risposto, per un
massimo di 4 chiamate (i lampeggi vengono
segnalati ogni 10s). Al ripristino almeno del
livello minimo del volume suoneria, viene
resettata questa segnalazione.
IT
Page 6

6
EN
A Self-start: for self-start/auto-activation of interphone
B
Ringtone muting: Mutes ringtone during call.
C
Door lock: Lock opening command
D
Auxiliary 1 (Stair light): For auxiliary service
E1
Button 1: Programmable button to activate auxiliary service or inter-
communicating call
E2
Button 2: Programmable button to activate auxiliary service or inter-
communicating call.
E3
Button 3: Programmable button to activate auxiliary service or inter-
communicating call
E4
Button 4: Programmable button to activate auxiliary service or inter-
communicating call
Buttons:
E1 E2 E3
E4
B
A
C
D
Page 7
7
EN
Signals:
Settings:
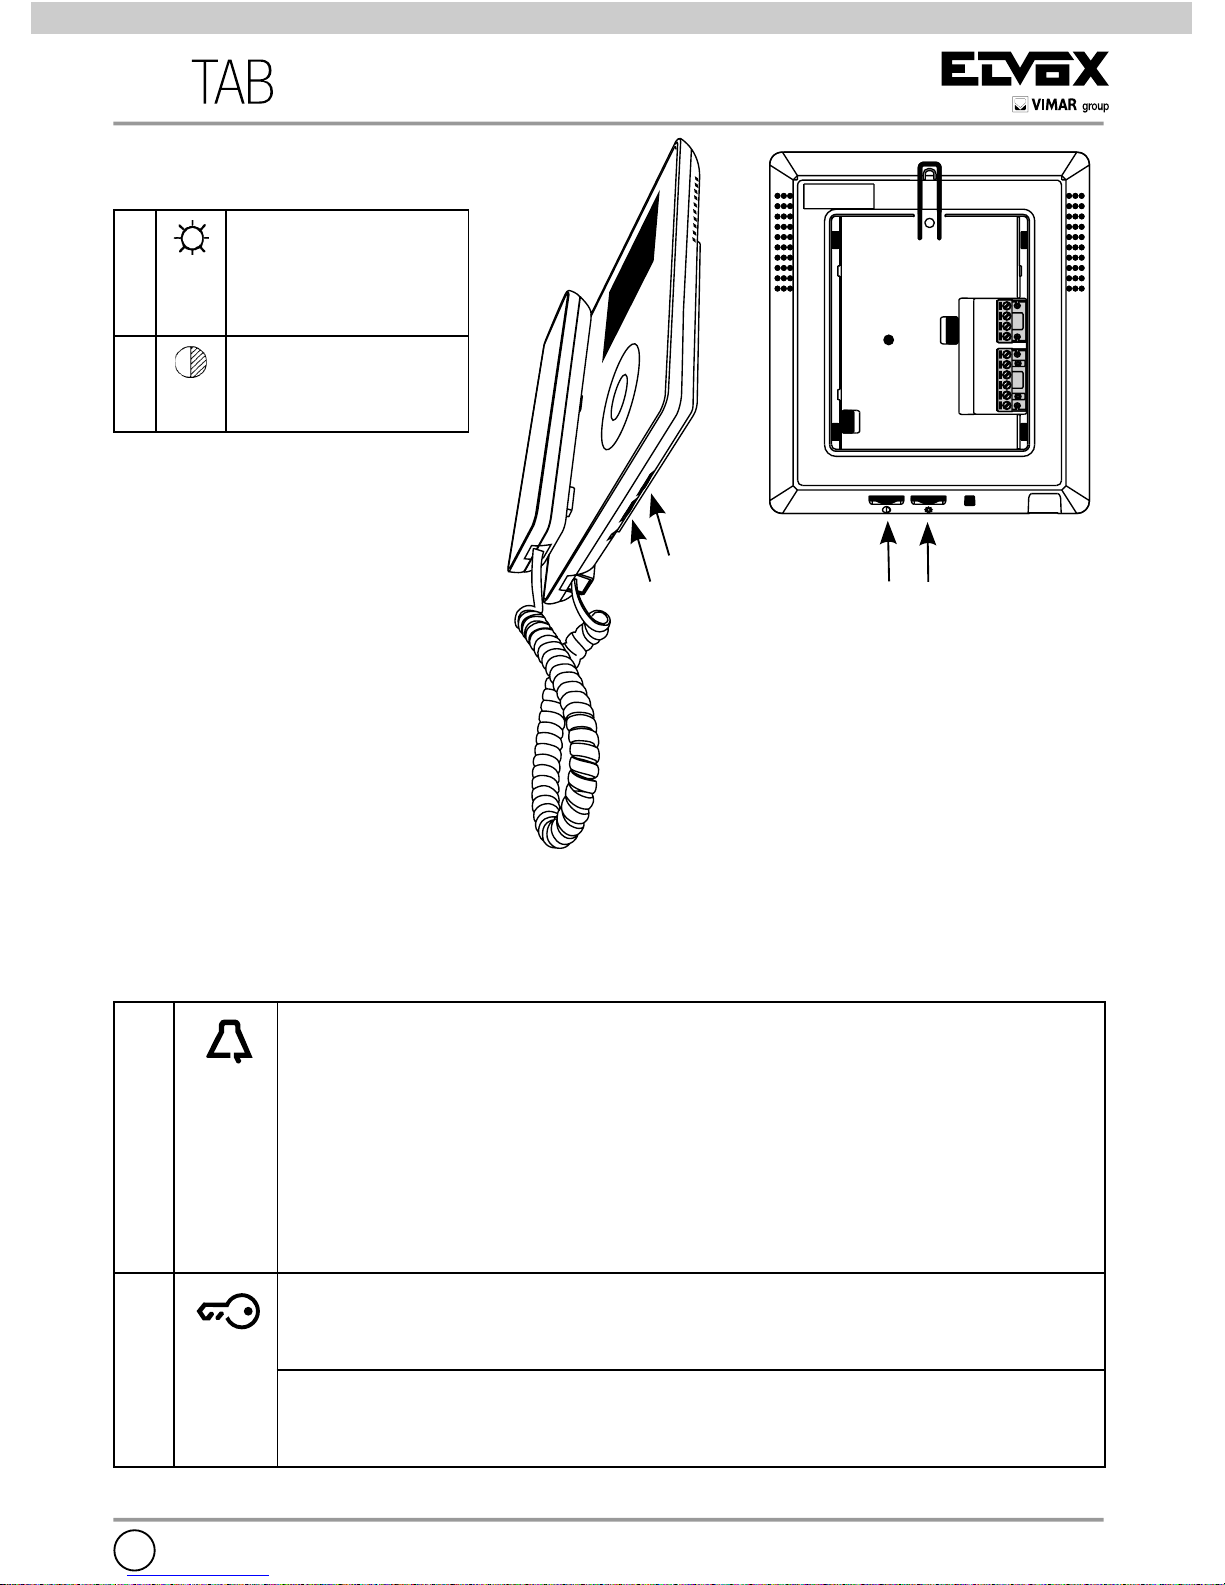
H Brightness setting:
allows the screen
brightness to be
adjusted.
I
Contrast setting:
allows contrast to be
adjusted.
B During normal operation:
- Flashing light: indicates that the interphone is receiving a call (from
outdoor entrance panel or from an intercommunicating device).
- Steady light: ringtone muted (User Away function).
- Steady light flashing every 10s: if calls have been made from the
entrance panel while the ringtone was muted, the LED flashes a number
of times equal to the number of calls received from the entrance panel
(up to 4 calls are memorised). The flash log is reset when the ringtone
volume is restored.
C
During normal operation:
- Steady light: indicates that the door is open if the sensor has been
installed on at least one entrance panel.
During adjustment:
- Flashing light: indicates that ringtone selection or volume adjustment is
in progress.
I H
I
H
Page 8

8
Operation
Answering a call
A call from the outdoor entrance panel or
from an intercommunicating device can be
answered during the chime cycle or once it
has ended. To answer, lift the handset; to
end the call, replace the handset.
Receiving a door call
The monitor can receive calls from a door
call button.
When the door call button is pressed, the
monitor emits a different tone to the one
used for outdoor entrance panel calls or
intercommunicating calls. To stop the chime,
lift the handset.
Making an intercommunicating call
To make a call to another indoor unit, one or
more buttons must have been programmed.
To make the call, press the button programmed for the relevant indoor unit. During
the call, the monitor emits a tone in order
to signal that the call is being made. If the
interphone/monitor is already engaged in
another call, a tone will be heard on the
monitor making the call to indicate that the
user receiving the call is busy.
When the indoor unit receiving the call
answers, communication begins automatically. Replace the handset to end the
conversation.
The maximum conversation time is 5 minutes (default).
Muting the ringtone during a call (Mute
function)
When receiving a call from an outdoor
entrance panel or from an intercommunicating device or a door call via device 6120,
the call ringtone can be muted by pressing
button B.
Door lock command
Press the lock button (with the handset
hooked on or in conversation) to send a
lock opening command to the entrance
panel (by default, the last entrance panel to
make a call).
Self-start
- Self-start with dedicated button (button A):
to use the self-start function and com-
municate with the master entrance
panel, briefly press button A (self-start)
to turn on the monitor and lift the handset to start the conversation. Replace
the handset to end the conversation.
Calling a porter switchboard
To call a porter switchboard (if present in the
system): lift the handset and press button C
(lock) to make the call.
Hearing aid function (art. 7529/D only)
Art. 7529/D has an internal coil which allows
hearing aid wearers to use the device. In
this operating mode, the hearing aid must
be switched to the “T” position. However, for
correct operation of the hearing aid refer to
its instruction manual.
Note: metal objects or electronic equipment
in the vicinity may affect the quality of the
sound received by the hearing aid.
EN
Page 9

9
Configurations
Choice of ringtones
10 different ringtones can be selected.
Different ringtones can also be set for outdoor, intercommunicating and door calls
(see below). The ringtones must be selected
with the monitor on stand-by and the handset on the hook.
The button for entering configuration mode
is button A (self-start).
Button E1 selects the ringtone for
ENTRANCE PANEL CALL.
Button E2 selects the ringtone for
INTERCOMMUNICATING CALL.
Button E3 selects the ringtone for DOOR
CALL (exclusively using the button interface
module 6120 or Vimar landing call button). In
the case of a door call by means of a button
connected directly to the monitor’s terminals
FP and M, the ringtone cannot be changed.
Configuration:
1) Press button A (self-start) and hold
down (for 2 s) until the LED C (lock)
begins flashing and the monitor emits an
audible signal.
2) Press and hold down the button for the
chosen ringtone (button E1/button E2/
button E3) until the ringtone is heard on
the monitor.
3) Press the button repeatedly (button E1/
button E2/button E3) to select the desired type of ringtone.
4) After choosing the desired ringtone,
press button A or refrain from touching
any buttons for 5s to save. After completing the configuration, the LED flashes
and then turns off.
Ringtone volume adjustment
The ringtone volume can be set to 6 levels
plus mute.
Press button A (self-start) to enter configuration mode.
Press button B (bell) to lower the ringtone
volume.
Press button C (key) to increase the ringtone
volume.
The ringtone volume must be adjusted with
the monitor on stand-by and the handset
on the hook.
Configuration:
1) Press button A and hold down (for 2 s)
until the LED C (lock) begins flashing
and the monitor emits an audible signal.
3) Press button B to lower or button C to
increase the volume. Each time the buttons are pressed the volume changes
by one level.
4) After choosing the desired volume,
press button A or refrain from touching
any buttons for 5s to save. After completing the configuration, the flashing LED
goes off and a “beep” is emitted.
Muting the ringtone (User Away function)
Using the volume adjustment procedure
described above, pressing button B a sufficient number of times results in the ringtone
being muted. The “Ringtone muted” status
is indicated by the button B LED (ringtone
muted) lighting up steadily.
If the monitor receives a call from the entrance panel while the ringtone is muted, this is
indicated by the LED/button B emitting one
flash for each unanswered call up to a maximum of 4 calls (these flashes occur every
10 s). When the ringtone volume is restored,
at least to its minimum level, this indication
will be reset.
EN
Page 10

10
FR
A Auto-allumage : insertion automatique/auto-allumage du moniteur.
B
Exclusion de la sonnerie : Désactive la sonnerie durant l’appel.
C
Gâche : commande l’ouverture de la gâche.
D
Auxiliaire 1 (Éclairage escaliers) : Pour service auxiliaire.
E1
Bouton 1 : Bouton programmable pour la validation du service auxiliaire
ou appel intercommunicant.
E2
Bouton 2 : Bouton programmable pour la validation du service auxiliaire
ou appel intercommunicant.
E3
Bouton 3 : Bouton programmable pour la validation du service auxiliaire
ou appel intercommunicant.
E4
Bouton 4 : Bouton programmable pour la validation du service auxiliaire
ou appel intercommunicant.
Boutons-poussoirs
E1 E2 E3
E4
B
A
C
D
Page 11

11
FR
Signalisations :
Réglages :
B En mode normal :
- Clignotante : indique que le moniteur reçoit un appel (depuis la plaque
de rue ou un appareil intercommunicant).
- Fixe : exclusion de la sonnerie (fonction utilisateur absent).
- Allumée avec clignotement toutes les 10 s : avec exclusion de la
sonnerie si des appels sont partis de la plaque de rue, la led clignote
le nombre de fois qu’il y a eu d’appels reçus depuis la plaque de rue
(peut mémoriser jusqu’à 4 appels). Les clignotements mémorisés se
remettent à zéro après avoir rétabli le volume de la sonnerie.
C
En mode normal :
- Allumée : signale la porte ouverte si au moins une plaque de rue
dispose du capteur.
En mode réglage :
- Clignotante : indique que le poste est en phase de réglage du volume
de la sonnerie ou du choix de la mélodie.
I H
I
H
H Réglage de la
luminosité : per-
met de modifier
la luminosité de
l’écran.
I
Réglage du contraste : permet de
régler le contraste.
Page 12

12
Fonctionnement
Réponse à un appel
Lorsqu’un appel arrive d’une plaque de
rue ou d’un poste intercommunicant, il est
possible de répondre durant ou à la fin du
cycle de sonnerie. Pour répondre, soulever
le combiné ; le reposer pour terminer la
communication.
Recevoir un appel de palier
Possibilité d’appeler le moniteur à partir d’un
bouton palier. En appuyant sur le bouton de
palier, la sonnerie du moniteur est différente
de celle qui signale l’appel provenant de la
plaque de rue ou d’un poste intercommunicant. Soulever le combiné pour interrompre
la sonnerie.
Effectuer un appel intercommunicant
Pour appeler un autre poste interne, une ou
plusieurs touches doivent être programmées
à cet effet. Pour appeler, soulever le combiné et appuyer sur la touche programmée
et se référant au poste interne à appeler.
Durant l’appel, le moniteur émet une tonalité
pour signaler l’appel en cours ou, s’il est
occupé dans une autre communication, le
poste qui appelle recevra une tonalité signalant cette situation.
Lorsque le poste interne appelé répond, la
communication est automatiquement validée ; pour terminer la communication, raccrocher le combiné. La durée maximum de
conversation est de 5 minutes (par défaut).
Exclusion de la sonnerie durant un appel
(Fonction « Mute »)
Lorsqu’un appel arrive d’une plaque de rue,
d’un poste intercommunicant ou du palier à
travers le dispositif art. 6120, il est possible
d’exclure la sonnerie d’appel en appuyant
sur la touche B.
Commande gâche
En appuyant sur le bouton gâche (avec le
combiné raccroché ou en mode conversation), la plaque de rue reçoit la commande
d’ouverture de la gâche (par défaut, sur
la dernière plaque de rue ayant effectué
l’appel).
Auto-allumage
- Auto-allumage avec touche dédiée
(touche A) :
Pour procéder à l’auto-allumage et com-
muniquer avec la plaque maître, appuyer
brièvement sur la touche A (auto-allumage) pour allumer le moniteur et soulever
le combiné pour permettre la communication. Raccrocher pour terminer la
communication.
Appel à un standard
Pour appeler un standard (si l’installation
le prévoit) : soulever le combiné et lancer
l’appel en appuyant sur la touche C (gâche).
Fonction avec boucle auditive (uniquement pour art. 7529/D)
L’art. 7529/D est doté d’une bobine interne
qui permet son utilisation de la part de
personnes portant des appareils acoustiques. Pour ce type de fonctionnement, il est
nécessaire de commuter l’appareil acoustique sur la position « T ». Pour ne pas compromettre le fonctionnement de l’appareil
acoustique, consulter sa notice d’utilisation.
Remarque : la présence éventuelle d’objets
métalliques ou d’appareils électroniques
peut compromettre la qualité de la réception
sur l’appareil acoustique.
FR
Page 13

13
Configurations
Choix des mélodies d’appel
Possibilité de choisir parmi 10 mélodies
différentes et réglables. Il est possible de
distinguer les appels de rue, intercommunicants et de palier (dans le cas décrit
ci-après). Pour choisir les mélodies, le poste
doit être en mode veille et le combiné doit
être raccroché.
Le bouton permettant d’accéder à la configuration est la touche A (auto-allumage).
La touche E1 permet de sélectionner
la mélodie pour un APPEL DEPUIS LA
PLAQUE DE RUE.
La touche E2 permet de sélectionner la mélodie pour un APPEL INTERCOMMUNICANT.
La touche E3 permet de sélectionner la
mélodie pour un APPEL PALIER (en utilisant exclusivement le module d’interface
bouton art. 6120 ou le bouton d’appel palier
Vimar). En cas d’appel palier via le bouton
relié directement aux bornes FP et M du
moniteur, il sera impossible de modifier la
sonnerie.
Configuration :
1) Appuyer 2 secondes sur la touche A
(auto-allumage) jusqu’à ce que la led
C (gâche) commence à clignoter et le
moniteur émette un signal sonore.
2) Appuyer et garder le doigt sur la touche
de la sonnerie à choisir (touche E1/
touche E2/touche E3) jusqu’à ce que
le poste émette la mélodie sur le moniteur.
3) Appuyer plusieurs fois sur la touche
(touche E1/touche E2/touche E3) pour
sélectionner la mélodie préférée.
4) Après avoir choisi une sonnerie, la
mémoriser en appuyant sur la touche A
ou ne toucher aucune touche pendant
5 s. Une fois la configuration terminée,
la led qui clignotait s’éteint.
Réglage du volume de la sonnerie
Il est possible de régler le volume de la son-
nerie sur 6 niveaux plus l’exclusion.
Le bouton permettant d’accéder au réglage
est la touche A (auto-allumage).
La touche B (clochette) permet de réduire le
volume de la mélodie.
La touche C (clé) permet d’augmenter le
volume de la mélodie.
Pour régler le volume de la sonnerie, le
moniteur doit être en mode veille et le combiné doit être raccroché.
Configuration :
1) Appuyer 2 secondes sur la touche A
jusqu’à ce que la led C (gâche) commence à clignoter et le moniteur émette
un signal sonore.
3) Appuyer sur la touche B pour réduire
le volume et sur la touche C pour augmenter le volume. Le volume augmente
ou diminue d’un niveau chaque fois que
l’on appuie sur la touche.
4) Après avoir réglé le volume, le mémoriser en appuyant sur la touche A ou
ne toucher aucune touche pendant 5
s. Une fois la configuration terminée,
la led qui clignotait s’éteint et un bip
retentit.
Exclusion de la sonnerie (fonction utilisateur absent)
Suivre la même procédure que pour le réglage du volume, appuyer plusieurs fois sur la
touche B jusqu’à ce que la sonnerie soit désactivée. La led de la touche B s’allume pour
signaler la condition « sonnerie exclue ».
Si le moniteur reçoit un appel provenant de
la plaque de rue alors que la sonnerie est
exclue, la led/touche B clignote chaque fois
qu’un appel n’a pas reçu de réponse, pour
un maximum de 4 appels (la led clignote
toutes les 10 secondes). La led cesse de
clignoter dès que l’on remet le volume minimum de la sonnerie.
FR
Page 14

14
DE
A Selbsteinschaltung: Für die Selbsteinschaltung/automatische
Zuschaltung des Monitors.
B
Ruftonabschaltung: Deaktivierung des Ruftons während des Rufs.
C
Türöffner: Steuerung für die Öffnung des Türschlosses.
D
Zusatzfunktion 1 (Treppenhauslicht): Für Zusatzfunktion
E1
Taster1: Auf die Aktivierung der Zusatzfunktion oder Internruf program-
mierbarer Taster
E2
Taster 2: Programmierbarer Taster zur Aktivierung einer Zusatzfunktion
oder eines Internrufs.
E3
Taster 3: Auf die Aktivierung der Zusatzfunktion oder Internruf program-
mierbarer Taster
E4
Taster 4: Auf die Aktivierung der Zusatzfunktion oder Internruf program-
mierbarer Taster
Taster:
E1 E2 E3
E4
B
A
C
D
Page 15

15
DE
Anzeigen:
B Im Normalbetrieb:
- Blinkendes Licht: Der Monitor empfängt gerade einen Anruf (vom
externen Klingeltableau oder von der Internsprechstelle).
- Dauerlicht: Rufton abgeschaltet (Funktion Teilnehmer abwesend).
- Dauerlicht mit Blinksignal alle 10 s: Wenn der Gong abgeschaltet
ist und vom Klingeltableau angerufen wurde, blinkt die LED so oft,
wie Anrufe vom Klingeltableau eingegangen sind (es bleiben bis zu 4
Anrufe gespeichert). Sobald die Lautstärke des Gongs wiederhergestellt wird, erfolgt ein Reset der gespeicherten Blinksignale.
C
Im Normalbetrieb:
- Dauerlicht: Tür offen, wenn mindestens in einem Klingeltableau der
Sensor installiert ist.
Im Einstellmodus:
- Blinkendes Licht: Am Haustelefon wird gerade die Gonglautstärke
eingestellt oder die Melodie gewählt.
Einstellungen:
I H
I
H
H Helligkeitsregelung:
Dient zum Einstellen
der Bildschirmhelligkeit.
I
Kontrastregelung:
Dient zum Einstellen des
Bildschirmkontrastes.
Page 16

16
Funktionsweise
Entgegennahme eines Anrufs
Ein vom externen Klingeltableau oder von
einer Internsprechstelle eingehender Anruf
kann während oder am Ende des Läutzyklus’
entgegengenommen werden. Um den Anruf
entgegenzunehmen, den Hörer abnehmen,
um das Gespräch zu beenden, Hörer wieder
auflegen.
Entgegennahme eines Etagenrufs
Der Monitor kann von einem Etagenruftaster
angerufen werden. Wird der Etagenruftaster
gedrückt, läutet das Haustelefon mit einem
anderen Ton als bei einem Anruf vom externen Klingeltableau oder bei einem Internruf,
die Dauer des Läutzyklus hängt davon ab.
Zum Abstellen des Gongs den Hörer abnehmen.
Ausführen eines Internrufs
Um eine andere Internsprechstelle anzurufen, müssen ein oder mehrere Taster entsprechend programmiert worden sein.
Um den Anruf zu tätigen, den Hörer
abnehmen und den programmierten
Taster drücken, der der anzurufenden
Internsprechstelle zugeordnet wurde.
Während des Anrufs gibt das der Monitor
einen Signalton ab, um darauf hinzuweisen,
dass das Gespräch aktiv ist. Führt der
angerufene Teilnehmer gerade ein anderes
Gespräch, ist im anrufenden Monitor ein
Signalton zu hören, der darauf hinweist,
dass der angerufene Teilnehmer besetzt ist.
Wenn die angerufene Internsprechstelle
antwortet, wird die Verbindung automatisch
hergestellt. Zum Beenden des Gesprächs
den Hörer wieder auflegen. Die maximale Gesprächsdauer beträgt 5 Minuten
(Standardkonfiguration).
Ruftonabschaltung während eines
Anrufs (Funktion „Mute“)
Wenn ein Anruf vom externen Klingeltableau,
ein Intern- oder ein Etagenruf eingeht, kann
mit der Vorrichtung Art. 6120 der Rufton
abgestellt werden, in dem die Taste B
gedrückt wird.
Türöffnerbefehl
Bei Drücken des Türöffners (mit Hörer
aufgelegt oder in Gespräch) wird der
Türöffnerbefehl an das Klingeltableau
gesendet (defaultmäßig das Klingeltableau,
das zuletzt angerufen hat).
Selbsteinschaltung
- Selbsteinschaltung mit Funktionstaste
(Taste A):
Um die Selbsteinschaltung durch-
zuführen und die Kommunikation mit
dem Master-Klingeltableau zu aktivieren,
kurz auf die Taste A (Selbsteinschaltung)
drücken, um den Monitor einzuschalten, und den Hörer abnehmen, um die
Verbindung herzustellen. Zum Beenden
des Gesprächs den Hörer wieder auflegen.
Anruf an eine Pförtnerzentrale
Um eine Pförtnerzentrale anzurufen (sofern
in der Anlage vorhanden): Den Hörer abnehmen und den Anruf durch Drücken der Taste
C (Türöffner) ausführen.
Hörgeschädigtenfunktion (nur Art.
7529/D)
Der Art. 7529/D ist mit einer internen
Spule ausgestattet, dank der das Gerät
auch von Hörgeräteträgern benutzt werden
kann. Für diese Funktionsweise muss das
Hörgerät auf “T” eingestellt werden. Für
den korrekten Betrieb des Hörgeräts die
Bedienungsanleitungen desselben befolgen.
Hinweis: Eventuell vorhandene
Gegenstände aus Metall oder elektronische
Geräte können die am Hörgerät empfangene Tonqualität beeinträchtigen.
DE
Page 17

17
Konfigurationen
Wahl der Rufmelodie
Die Ruftöne können unter 10 verschiedenen
einstellbaren Melodien gewählt werden. Des
Weiteren kann zwischen Extern-, Intern- und
(im unten beschriebenen Fall) Etagenrufen
unterschieden werden. Zur Wahl der
Melodien muss der Monitor auf Standby
geschaltet und der Hörer aufgelegt sein.
Die Konfiguration wird mit der Taste A
(Selbsteinschaltung) geöffnet.
Mit der Taste E1 wird die Melodie für den
RUF VOM KLINGELTABLEAU gewählt.
Mit der Taste E2 wird die Melodie für den
INTERNRUF gewählt.
Mit der Taste E3 wird die Melodie für den
ETAGENRUF gewählt (nur bei Verwendung
des Taster-Schnittstellenmoduls Art. 6120
oder Etagenruftaster Vimar). Bei Etagenruf
mit direkt an den Klemmen FP und M des
Monitors angeschlossenem Taster kann der
Rufton nicht geändert werden.
Konfiguration:
1) Die Taste A (Selbsteinschaltung)
gedrückt halten (2 Sek.), bis die LED C
(Türöffner) zu blinken beginnt und der
Monitor einen Signalton abgibt.
2) Die Taste des zu wählenden Ruftons
(Taste E1/Taste E2/Taste E3) gedrückt
halten, bis die Melodie am Monitor zu
hören ist.
3) Mehrmals die Taste (Taste E1/Taste E2/
Taste E3) drücken, um die gewünschte
Melodie zu wählen.
4) Nach Wahl des gewünschten Ruftons
mit der Taste A speichern oder 5
Sekunden lang keine Taste betätigen.
Nach erfolgter Konfiguration erlischt die
blinkende LED.
Einstellung der Ruftonlautstärke
Die Ruftonlautstärke kann auf 6 Stufen plus
Stummschaltung eingestellt werden.
Einstellung wird mit der Taste A
(Selbsteinschaltung) geöffnet
Mit der Taste B (Glocke) wird die Melodie
leiser gestellt.
Mit der Taste C (Schlüssel) wird die Melodie
lauter gestellt.
Zur Einstellung der Ruftonlautstärke muss
der Monitor auf Standby geschaltet und der
Hörer aufgelegt sein.
Konfiguration:
1) Die Taste A gedrückt halten (2 Sek.), bis
die LED C (Türöffner) zu blinken beginnt
und der Monitor einen Signalton abgibt.
3) Die Taste B drücken, um leiser zu stellen,
mit C lauter stellen. Jeder Tastendruck
entspricht einer Lautstärkestufe.
4) Nach Wahl der gewünschten Lautstärke
mit der Taste A speichern oder 5
Sekunden lang keine Taste betätigen.
Nach erfolgter Konfiguration erlischt
die blinkende LED und es ertönt ein
„Piepton“.
Ruftonabschaltung (Funktion Teilnehmer
abwesend)
Mit derselben Prozedur, wie oben für die
Lautstärkeregelung beschrieben, wird durch
mehrmaliges Drücken der Taste B der Punkt
erreicht, an dem der Rufton ganz deaktiviert wird. Der Status „Rufton abgeschaltet“ wird durch das Aufleuchten der LEDTastenbeleuchtung B (Rufton abgeschaltet)
mit Dauerlicht angezeigt.
Wenn am Monitor ein Anruf eingeht, solange
der Rufton abgeschaltet ist, werden maximal
4 Rufe von der LED/Taste B angezeigt,
die für jeden unbeantworteten Anruf ein
Mal blinkt (die Blinksignale erfolgen alle 10
Sekunden). Sobald wenigstens die kleinste
Lautstärkestufe des Ruftons wiederhergestellt wird, wird diese Anzeige zurückgesetzt.
DE
Page 18

18
ES
A Autoencendido: para la activación automática/autoencendido del por-
tero automático.
B
Exclusión del timbre: desactiva el timbre durante la llamada.
C
Cerradura: mando para la apertura de la cerradura.
D
Auxiliar 1 (luz de escalera): para servicio auxiliar.
E1
Tecla 1: Tecla programable para la activación del servicio auxiliar o
llamada intercomunicante.
E2
Tecla 2: tecla programable para la activación del servicio auxiliar o
llamada intercomunicante.
E3
Tecla 3: tecla programable para la activación del servicio auxiliar o
llamada intercomunicante.
E4
Tecla 4: tecla programable para la activación del servicio auxiliar o
llamada intercomunicante.
Teclas:
E1 E2 E3
E4
B
A
C
D
Page 19

19
ES
B En funcionamiento normal:
- Luz parpadeante: indica que el monitor está recibiendo una llamada
(desde la placa externa o desde el aparato intercomunicante).
- Luz fija: timbre excluido.
- Luz fija con parpadeo cada 10 segundos: con el timbre excluido si se
producen llamadas desde la placa, el led parpadea indicando el número
de llamadas recibidas (quedan memorizadas hasta 4 llamadas). El
reset de la memorización de los parpadeos se realiza al restablecer el
volumen del timbre.
C
En funcionamiento normal:
- Luz fija: indica que la puerta está abierta si al menos en una placa está
instalado el sensor.
En funcionamiento de ajuste:
- Luz parpadeante: indica que el portero automático está en fase de
ajuste del volumen del timbre o selección del tono.
Señalizaciones:
Ajustes:
H Ajuste del brillo:
permite variar el brillo
de la pantalla.
I
Ajuste del contraste: permite regular
el contraste.
I H
I
H
Page 20

20
Funcionamiento
Respuesta a una llamada
Al llegar una llamada desde la placa externa
o el aparato intercomunicante, se puede
contestar durante o al final del ciclo del
timbre. Para contestar hay que descolgar
el microteléfono y colgarlo para finalizar la
comunicación.
Recibir una llamada desde fuera de la
puerta
Se puede llamar al videoportero desde una
tecla fuera de la puerta. Al apretar la tecla
fuera de la puerta, el portero automático
suena con un tono distinto al de la llamada
desde la placa externa o intercomunicante. Para silenciar el timbre, descuelgue el
microteléfono.
Enviar una llamada intercomunicante
Para enviar una llamada hacia otra extensión, es necesario programar previamente
una o varias teclas. Para llamar, descuelgue
el microteléfono y pulse la tecla programada
correspondiente a la extensión que desea
llamar. Durante la llamada el monitor emite
una señal acústica para avisar que se está
produciendo la llamada o bien, si el monitor
o está comunicando, en el monitor llamante
se escucha una señal que avisa que el
usuario llamado está comunicando.
Cuando la extensión llamada contesta, se
activa automáticamente la comunicación;
para finalizar la conversación, cuelgue el
microteléfono. La duración máxima de la
conversación es de 5 minutos (por defecto).
Exclusión del timbre durante una llamada
(función “Mute”)
Al recibir una llamada desde la placa externa, desde el aparato intercomunicante o
desde fuera de la puerta mediante el dispositivo Art. 6120, es posible silenciar el timbre
de llamada pulsando la tecla B.
Mando cerradura
Al pulsar la tecla cerradura (con el microteléfono colgado o durante la conversación),
se envía la orden de apertura de la cerradura a la placa (por defecto la última placa que
ha llamado).
Autoencendido
- Autoencendido con tecla dedicada
(tecla A):
Para el autoencendido y comunicar con
la placa Master, pulse brevemente la
tecla A (autoencendido) y descuelgue
el microteléfono para activar la comunicación. Para finalizar la comunicación,
cuelgue el microteléfono.
Llamada a una centralita de conserjería
Para realizar una llamada a una centralita
de conserjería (si la hay en la instalación),
descuelgue el microteléfono y envíe la llamada pulsando la tecla C (cerradura).
Función audífono (solo para Art. 7509/D)
El Art. 7509/D está provisto de una bobina
interna que permite su utilización también
a personas con audífono. Para este tipo
de funcionamiento, es necesario conmutar
el aparato acústico en posición “T”, sin
embargo para el correcto funcionamiento del mismo, consulte el correspondiente
manual de instrucciones.
Nota: la posible presencia de objetos
metálicos o aparatos electrónicos puede
perjudicar la calidad del sonido percibido
con el audífono.
ES
Page 21

21
Configuraciones
Elección de los tonos de llamada
Los timbres de llamada se pueden elegir entre 10 tonos distintos y ajustables.
Además, es posible distinguir entre llamadas externas, intercomunicantes y fuera de
la puerta (en el caso descrito más abajo).
La selección de los tonos se realiza con el
monitor en stand-by y con el microteléfono
colgado.
La tecla para entrar en la configuración es la
A (autoencendido).
La tecla E1 permite seleccionar el tono para
la LLAMADA DESDE LA PLACA.
La tecla E2 permite seleccionar el tono para
la LLAMADA INTERCOMUNICANTE.
La tecla E3 permite seleccionar el tono para
LLAMADA DESDE FUERA DE LA PUERTA
(utilizando exclusivamente el módulo de
conexión por interfaz Art. 6120 o la tecla
de llamada desde el rellano Vimar). Si la
llamada desde fuera de la puerta se realiza
con la tecla conectada directamente a los
bornes FP y M del monitor, no se puede
cambiar el tono.
Configuración:
1) Pulse la tecla A (autoencendido) y man-
téngala pulsada (durante 2 segundos),
hasta que empiece a parpadear el led
verde G (cerradura) y el monitor emita
una señal acústica.
2) Pulse y mantenga pulsada la tecla cuyo
tono desea configurar (tecla E1/tecla
E2/tecla E3) hasta escuchar el tono en
el monitor.
3) Pulse repetidamente la tecla (E1/E2/E3)
para seleccionar el tipo de tono deseado.
4) Una vez seleccionado el tono deseado,
para memorizarlo pulse la tecla A o bien
no toque ninguna tecla durante 5 segundos. Una vez finalizada la configuración,
se apaga el led parpadeante.
Ajuste del volumen del timbre
El volumen del timbre se puede ajustar en 6
niveles, además de su exclusión.
La tecla para entrar en el ajuste es la A
(autoencendido)
La tecla B (timbre) permite disminuir el volumen del timbre.
La tecla C (llave) permite aumentar el volumen del timbre.
El ajuste del volumen del timbre se realiza
con el monitor en stand-by y con el microteléfono colgado.
Configuración:
1) Pulse la tecla A y manténgala pulsada
(durante 2 segundos), hasta que empiece a parpadear el led verde G (cerradu-
ra) y el monitor emita una señal acústica.
3) Pulse la tecla B para disminuir o C para
aumentar el volumen. A cada presión le
corresponde un nivel de volumen.
4) Una vez seleccionado el volumen deseado, para memorizarlo pulse la tecla A
o bien no toque ninguna tecla durante 5
segundos. Una vez finalizada la configuración, se apaga el led parpadeante y se
escucha un “bip”.
Exclusión del timbre (función usuario
ausente)
Con el mismo procedimiento arriba indicado
para el ajuste del volumen, pulsando varias
veces la tecla B se llega al punto en que se
desactiva el timbre. El estado de “Timbre
excluido” se señaliza con el encendido del
led F (timbre excluido) con luz fija.
Si con el timbre excluido el monitor recibe
una llamada desde la placa, el led rojo lo
indica con un parpadeo para cada llamada
sin contestar, hasta un máximo de 4 llamadas (los parpadeos se producen cada 10
segundos). Al restablecer al menos el nivel
mínimo del volumen del timbre, se resetea
esta señalización.
ES
Page 22

22
PT
A Auto-acendimento: para a auto-activação/auto-acendimento do tele-
fone.
B
Exclusão da campainha: Durante a chamada, desactiva a campainha.
C
Trinco: comando para a abertura do trinco.
D
Auxiliar 1 (Luz das escadas): Para serviço auxiliar.
E1
Botão 1: Botão programável para activação do serviço auxiliar ou cha-
mada intercomunicante.
E2
Botão 2: Botão programável para activação do serviço auxiliar ou cha-
mada intercomunicante.
E3
Botão 3: Botão programável para activação do serviço auxiliar ou cha-
mada intercomunicante.
E4
Botão 4: Botão programável para activação do serviço auxiliar ou cha-
mada intercomunicante.
Botões
E1 E2 E3
E4
B
A
C
D
Page 23

23
PT
B No funcionamento normal:
- Luz intermitente: assinala que o telefone está a receber uma chamada
(da botoneira externa ou do aparelho intercomunicante).
- Luz fixa: campainha excluída.
- Luz fixa com intermitência a cada 10s: com a campainha excluída
se tiverem sido enviadas chamadas da botoneira, o LED pisca com um
número equivalente às chamadas recebidas da botoneira (ficam memorizadas até 4 chamadas). O reset da memorização das intermitências
ocorre ao restabelecer o volume da campainha.
C
No funcionamento normal:
- Luz fixa: sinal de porta aberta se o sensor tiver sido instalado em pelo
menos uma botoneira.
No funcionamento de regulação:
- Luz intermitente: assinala que o telefone está na fase de regulação do
volume da campainha ou de escolha da melodia.
Sinais:
Regulações:
H Regulação da lumi-
nosidade: permite
variar a luminosidade do ecrã.
I
Regulação do contraste: permite a
regulação do contraste.
I H
I
H
Page 24

24
Funcionamento
Resposta a uma chamada
Ao chegar uma chamada da botoneira externa ou do aparelho intercomunicante, podese responder durante ou no fim do ciclo
da campainha. Para responder, deve-se
levantar o microtelefone, para terminar a
comunicação, deve-se voltar a pousá-lo.
Receber uma chamada de patamar
O monitor pode ser chamado a partir de
um botão de patamar. Premindo o botão de
patamar, o telefone toca com um tom diferente do obtido com a chamada da botoneira
externa ou intercomunicante. Para silenciar
a campainha, levante o microtelefone.
Enviar uma chamada intercomunicante
Para enviar uma chamada para um outro
interno, é necessário que tenha sido programado um ou mais botões.
Para chamar, levante o microtelefone e
prima o botão programado e referente ao
interno a chamar. Durante a chamada, o
monitor emite um tom para alertar que a
chamada está em curso ou, se o telefone/
monitor estiver ocupado com outra comunicação, ouvir-se-á no monitor chamador
um tom que alerta que o utilizador chamado
está ocupado.
Quando o interno chamado responde, a
comunicação activa-se automaticamente;
para terminar a conversação, volte a pousar
o microtelefone. A duração máxima da conversação é de 5 minutos (por defeito).
Exclusão da campainha durante una chamada (Função “Mute”)
Ao receber uma chamada de uma botoneira
externa, de um aparelho intercomunicante
ou uma chamada de patamar através do
dispositivo Art. 6120, é possível silenciar a
campainha de chamada premindo a tecla B.
Comando do trinco
Premindo o botão do trinco (com microtelefone pousado ou em conversação), envia-se
o comando de abertura do trinco à botoneira
(por defeito, a última botoneira chamadora).
Auto-acendimento
- Auto-acendimento com tecla dedicada (tecla A):
para fazer o auto-acendimento e comu-
nicar com a botoneira master, prima
brevemente a tecla A (auto-acendimento) para ligar o monitor e levante o
microtelefone para activar a comunicação. Para encerrar a comunicação,
pouse o microtelefone.
Chamada para uma central de portaria
Para fazer uma chamada para uma central
de portaria (se presente na instalação):
levante o microtelefone e envie a chamada
premindo a tecla C (trinco).
Função para pessoas com deficiência
auditiva (apenas para o Art. 7509/D)
O Art. 7509/D é dotado de uma bobina interna que permite a utilização inclusivamente
a portadores de prótese auditiva. Para este
tipo de funcionamento, é necessário comutar o aparelho auditivo para a posição “T”;
todavia para um funcionamento correcto
do aparelho auditivo, consulte o respectivo
manual de instruções.
Nota: a eventual presença de objectos
metálicos ou aparelhos electrónicos pode
comprometer a qualidade do som recebido
no aparelho auditivo.
PT
Page 25

25
Configurações
Escolha das melodias de chamada
Os toques de chamada podem ser seleccionados entre 10 melodias distintas e são
reguláveis. São ainda distinguíveis entre
chamadas externas, intercomunicantes e
de patamar (no caso descrito abaixo). A
escolha das melodias é feita com o telefone/monitor em stand-by e o microtelefone
pousado.
O botão para entrar na configuração é a
tecla A (auto-acendimento).
A tecla E1 permite seleccionar a melodia
para a CHAMADA DA BOTONEIRA.
A tecla E2 permite seleccionar a melodia
para a CHAMADA INTERCOMUNICANTE.
A tecla E3 permite seleccionar a melodia
para a CHAMADA DE PATAMAR (exclusivamente utilizando o módulo de interface de
botão Art. 6120 ou o botão de chamada de
patamar Vimar). No caso de uma chamada
de patamar mediante botão ligado directamente aos terminais FP e M do telefone, o
toque não pode ser mudado.
Configuração:
1) Prima a tecla A (auto-acendimento) e
mantenha-a premida (durante 2 s), até o
LED verde C (trinco), começar a piscar
e o telefone emitir um sinal sonoro.
2) Prima e mantenha premida a tecla refe-
rente à campainha a escolher (tecla E1/
tecla E2/tecla E3), até começar a ouvir
a melodia no telefone.
3) Prima repetidamente a tecla (tecla E1/
tecla E2/tecla E3) para seleccionar o
tipo de melodia desejada.
4) Uma vez escolhido o toque desejado,
para memorizar, prima a tecla A ou
não toque em nenhuma tecla durante
5s. Terminada a configuração, o LED
intermitente apaga-se.
Regulação do volume da campainha
O volume da campainha é regulável em 6
níveis mais exclusão.
O botão para entrar na regulação é a tecla A
(auto-acendimento)
A tecla B (campainha) permite diminuir o
volume da melodia.
A tecla C (chave) permite aumentar o volume da melodia.
A regulação do volume da campainha é
feita com o telefone/monitor em stand-by e
o microtelefone pousado.
Configuração:
1) Prima a tecla A e mantenha-a premida
(durante 2 s) até o LED verde G (trinco)
começar a piscar e o telefone emitir um
sinal sonoro.
3) Prima a tecla B para diminuir, C para
aumentar o volume.
A cada acto de premir corresponde um
nível do volume.
4) Uma vez seleccionado o volume desejado, para memorizar, prima a tecla A ou
não toque em nenhuma tecla durante 5s.
Terminada a configuração, o LED intermitente apaga-se e ouve-se um “bip”.
Exclusão da campainha (Função de utilizador ausente)
Com o mesmo procedimento descrito acima
para a regulação do volume, premindo
várias vezes a tecla B chega-se ao ponto
em que a campainha é desactivada. O estado de “Campainha excluída” é assinalado
pelo acendimento do LED F (campainha
excluída) com luz fixa. Se, com a campainha
excluída, o telefone receber uma chamada
da botoneira, o LED vermelho assinala-o
com uma intermitência para cada chamada que não tiver sido atendida, para um
máximo de 4 chamadas (as intermitências
são assinaladas a cada 10s). Ao restabelecer pelo menos o nível mínimo do volume da
campainha, é feito o reset deste sinal.
PT
Page 26

26
IT
EN
FR
Maintenance
Clean the monitor using a soft cloth, which can be dry or slightly dampened with water. Do
not pour water directly onto the screen and do not use any type of chemical product.
NOTES FOR USER:
- Do not open or tamper with the set.
- Avoid impact or blows to the set since these could break and lead to dangerous scattering
of fragments.
- In case of failure, modification or maintenance of the units (power supply, etc.) contact
only specialized technicians.
- Operating temperature: 0° ÷ 40° C
- Do not expose the appliance to dripping, sprinklings of water and do not put any object
filled with water on it. Do not obstruct the ventilation openings.
- Warning: to avoid hurting oneself, this appliance must be fixed to the wall according to
the installation instructions.
Entretien
Effectuer le nettoyage en utilisant un chiffon doux et sec ou légèrement humide (uniquement avec de l’eau). Ne pas verser d’eau directement sur l’écran et n’utiliser aucun type de
produit chimique.
CONSEILS POUR L’USAGER:
- Ne pas ouvrir et ne pas modifier l’appareil.
- Eviter les chocs à l’appareil qui pourraient provoquer la rupture et donc la projection de
fragments.
- En cas de panne, de modification ou de maintenance aux appareils de l’installation (ali-
mentation etc.) se servir de personnel spécialisé.
- Temperature de fonctionnement: 0° ÷ 40° C
- Ne pas exposer cet appareil à égout, jets d’eaux, et ne mettre aucun objet plein d’eau sur
le même. Ne pas obstruer les fentes pour la ventilation.
- Attention: pour éviter de se blesser, cet appareil doit être fixé au mur selon les instruc-
tions pour l’installation.
Manutenzione
Eseguire la pulizia utilizzando un panno morbido. Non versare acqua direttamente sullo
schermo e non utilizzare alcun tipo di prodotto chimico.
AVVERTENZE PER L’UTENTE:
- Non aprire o manomettere l’apparecchio.
- Evitare urti o colpi all’apparecchio che po treb be ro pro vo ca rne la rottura con con se guen te
proiezione di fram men ti.
- In caso di guasto, modifica o intervento sugli apparecchi del l’im pian to (ali men ta to re ecc.)
avvalersi di personale specializzato.
- Temperatura di funzionamento: 0° ÷ 40° C
- Non esporre l’apparecchio a stillicidio a spruzzi d’acqua, e non porre sopra di esso alcun
oggetto pieno di liquido. Non ostruire le aperture di ventilazione
- Attenzione: per evitare di ferirsi, questo apparecchio deve essere assicurato alla parete
secondo le istruzioni di installazione.
FR
EN
IT
Page 27

27
Manutenção
Limpe com um pano macio e seco ou ligeiramente humedecido com água. Não deite água
directamente sobre o ecrã e não utilize nenhum tipo de produto químico.
CUIDADOS A TER PELO UTENTE:
- Não abrir o aparelho.
- Evitar choques ou pancadas no aparelho pois podem pro vo car a ruptura com a consequente projecção de fragmentos.
- No caso de avaria, modificação ou intervenção nos aparelhos da instalação (alimentador,
etc.) recorrer a pessoal especializado.
- Temperatura de funcionamento: 0° ÷ 40° C.
- Não expôr a aparelhagem à estilicídio, borrifos de agua e não colocar nenhum objeito
cheno de líquido sobre éle. Não obstruir a fentas para a ventilação.
- Atenção: para evitar de se ferir, este aparelho deve ser fixado à parede según as
instruções para a instalação.
Mantenimiento
Limpie con un paño suave y seco o ligeramente humedecido con agua. No rocíe el agua
directamente en la pantalla y no utilice ningún tipo de producto químico.
CONSEJOS PARA EL USUARIO:
- No abrir o manipular el aparato.
- Evitar choques o golpes al aparato que prodrían pro vo car la rotura con consiguiente
proyección de fragmentos.
- En caso de avería, modificación o intervención en los aparatos de la instalación (alimen-
tador etc.) interpelar personal especializado.
- Temperatura de funcionamiento: 0° ÷ 40* C
- No exponer el aparato a estilicidio, rociadas de agua y no poner algún objeto lleno de
líquido sobre él. No obstruir las aperturas para la ventilación.
- Atención: para evitar de herirse, este aparato debe ser fijado a la pared según las instruc-
ciones para la instalación.
DE
ES
PT
Pflege
Verwenden Sie zur Reinigung ein weiches und trockenes oder leicht mit Wasser angefeuchtetes Tuch. Gießen Sie kein Wasser direkt auf den Bildschirm und vermeiden Sie
chemische Reinigungsprodukte.
ANWEISUNGEN FÜR DEN BENUTZER
- Gerãt nicht öffnen.
- Vermeiden Sie Stöße und Schläge. Dies kann zum Bruch der Bildröhre führen.
- Im Falle eines Defektes, Änderung oder Wartung der Geräte (z.B. Netzgerät, etc.) wen-
den Sie sich nur an Fachpersonal.
- Betriebstemperatur: 0° ÷ 40° C
- Das Gerät auf Tropfen, Wassersträhle nicht ausstellen, und keine Flüssigkeitvoll-Objekte
über es setzen. Die Schlitzen für die Lüftung nicht verstopfen.
- Achtung: Um zu vermeiden sich zu verwunden, dieses Gerät muss an die Wand befes-
tigt werden.
PT
ES
DE
Page 28

Il prodotto è conforme alla direttiva
europea 2004/108/CE e successive.
Product is according to EC Directive
2004/108/EC and following norms.
Le produit est conforme à la directive
européenne 2004/108/CE et suivantes.
Das Produkt entspricht den europäischen
Richtlinien 2004/108/EG und Nachfolgenden.
El producto es conforme a la directiva
europea 2004/108/CE y sucesivas.
O produto está conforme a directiva
europeia 2004/108/CE e seguintes.
Vimar SpA: Viale Vicenza, 14
36063 Marostica VI - Italy
Tel. +39 0424 488 600 - Fax (Italia) 0424 488 188
Fax (Export) 0424 488 709
www.vimar.com
S6I.752.901 04 1407
VIMAR - Marostica - Italy
 Loading...