

Page 1
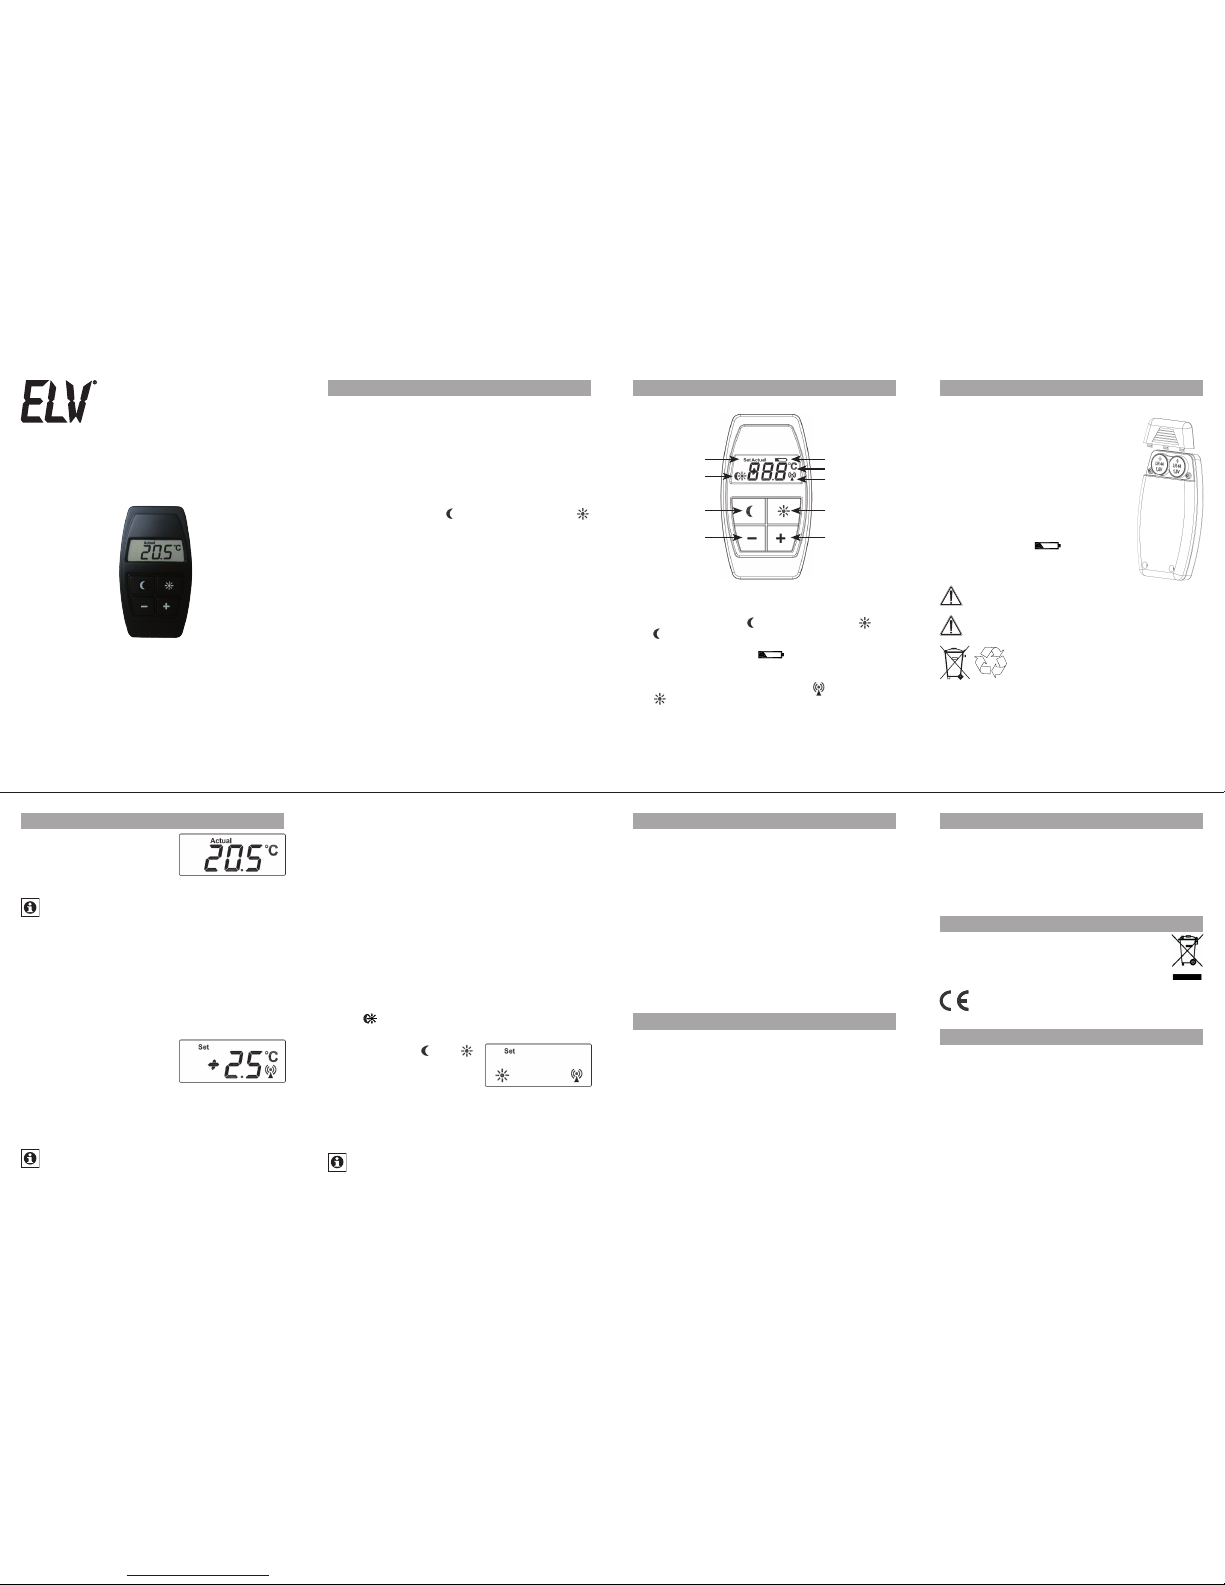
Funk-Fernbedienung
ETH comfort
Bedienungsanleitung
1. Bestim mungsgemäßer Eins atz
Die Fernbedienung dient zur komfortablen Anpassung der
Raumtemperatur. Ist die Fernb edienung an eine n Wandthermostat oder Funk-Elektronik-Thermostat angelernt
(siehe 5), können die se Systemkomponenten Be fehle der
Fernbedi enung empf angen und u msetzen.
Durch einen integrierten Temperatursensor wird zudem die
aktuell e Umgebungstemper atur im Display darges tellt.
Zwei Bediena rten sind mit der Fern bedienu ng möglich:
Einstelle n einer rela tiven Temperaturänder ung (-/+)•
Umstellen auf Absenk- ( •
) oder Komforttemper atur (
)
Betreibe n Sie das Ge rät nur in Innenräumen und verm eiden Sie de n Einfluss vo n Feuchtig keit, Stau b sowie Son nen- oder Wä rmebestrahlung.
Jeder andere Einsa tz als in dieser Be dienungsanleitu ng
beschri eben ist n icht bestimmungsg emäß und f ührt zu
Ga ra nti e- un d Ha ft ung sa us sc hlu ss . Di es gil t a uch fü r Um bauten und Veränderun gen.
Die Geräte sind aus schließli ch für den privaten Geb rauch
gedacht.
2. Tasten u nd Disp lay 3. Batterien e inlegen (wech seln)
Die Fernbe dienung wird mit 2 LR44-Batter ien betri eben.
Ziehen Sie d en Batteriefachde ckel •
ab.
Legen Sie 2 n eue LR44- Batteri en •
polungsr ichtig in das Batteri efach
ein.
Batteriefachdec kel wieder a ufsetze n •
und einras ten lassen.
Bei zwei Be dienunge n je Tag beträgt
die Lebens dauer neuer Batter ien ca.
4 Jahre.
Ein Batter iesymbol (
) im Display
weist dara uf hin, dass d ie Batter ien
auszutau schen sin d.
Normale Bat terien dürfe n niemals aufgela den werden. Es besteht Explo sionsge fahr.
Batterien nicht ins Fe uer werf en!
Batterien nicht kur zschließen!
Verbrau chte Bat terien gehören nicht in
den Haus müll ! Ent sorgen Sie diese in
Ihrer ör tlichen Ba tteries ammelstelle!
4. Bedi enung
In de r Fe rn be die nu ng ist ei n Te mpera tursens or i nteg riert. Nach
einem kurzen Tastendruck wird
die aktuell e Is t-Tempe ratu r im
Display an gezeigt.
Bitte beachte n Sie, dass die gemessene Temperatur
durch Körper wärme beeinflusst werde n kann. Wenn
Sie die Fernbedienung länger in der Hand halten oder
in eine r Hosentasch e trag en, ka nn die Temperatu r sta rk
von der im Raum a bweichen.
Neben der A nzeige der Ist-Temperatur sind zwei Bedienarten mö glich:
Einstellen einer relative n Temperaturän derung:
Dadurch wird die aktuelle So ll-Temperatur im Raum u m
den in der Fernbedi enung einge stellten Wer t erhöht (z. B.
+2.5°C) oder reduz iert (z. B. -1.0°C).
Mit den Tasten -/+ lässt sich die •
Temperatur in 0.5°C-S chritten
erhöhen bz w. reduziere n.
Nach dem letzten Tastendru ck •
wird mit kur zer Verzöge rung die
Temperaturänderung übertr agen und das Sendesymbol
erscheint im Display.
Nach 10 Sekunde n Inaktiv ität schal tet sich das Di splay •
aus.
So lange das Display noch aktiv ist, führt eine erneu-
te Änd er un g de r Te mp era tu r da zu , da ss nur di e Tem -
peratu r-Diffe renz üb ertragen wird. Sollte sich da s
Display nac h 10 Sekunden bere its deakt iviert ha ben, beginnt die Temper aturände rung wieder bei 0°C.
Beispiel:
Im Wandthermostat is t eine Soll-Temperatur von 18°C •
eingestellt.
In der Fernbedi enung wird eine Temperaturä nderung •
von „+0.5°C“ einge stellt und gesendet.
Die Soll-Temperatur im Wandthermosta t ändert sich •
auf 18.5°C.
Innerhalb von 10 S ekunden wird die „+“ Taste erneut •
2-mal gedrückt.
Im Display d er Fernbedienung ändert sich die Anzei -•
ge auf „+1.5°C“.
An den Wandth ermostat wird nur die Differenz von „+1°C“ •
gesende t und die Temperat ur erhöht s ich auf 19.5°C.
Sollte das Display der Fernbedi enung nach 10 Sekunden •
inaktiv sein und es wird eine Temper atur von „+2.0°C“
eingeste llt, wird sic h die Soll-Temperatu r im Wandthermostat um 2.0°C auf 21.5°C erh öhen.
Komfort-/Absenktemperatur
Mit den
-Tas te n wi rd di e im Wan dt he rm ost at od er F unk Elektronik-Thermostat hinterlegte Komfort-/Absenktemperatur he rgestellt.
Mit D ruck auf di e •
- ode r Taste lässt sich en tsprechend
die Absenk- oder Komforttemperatur he rstellen.
Nach dem Tastendruck wird mit kurzer Verzögerung •
die Information übertragen und das Sendesymb ol erscheint im D isplay.
Nach 10 Sekunden Inaktivität schaltet sich das Dis-•
play aus.
Nach einer kurzen Verzögerung wird 5 Sekunden lang
ges end et, dabe i e rsc heint das Sendesym bol im
Display. Wird währe nd dieser 5 Sekunden eine erneute Bedienung durchgeführ t, wird die Änderu ng erst
nach Ablau f der zuvorigen 5 Sekunden gesen det.
5. Anle rnen an Funkkomp onenten
Damit Funk-Komponenten miteinander kommunizieren können, müssen Si e an einande r an gelernt sein. Di e
Fernbedi enung kann an Systemkomponenten wie einen
Funk-Elektronik-Thermostat oder Wandthermostat angelernt we rden.
Zuerst mus s der Empfänge r, z. B. ein Wandthermost at, •
in den Anlernmodu s versetzt werden. Lesen Sie dazu die
Bedienun gsanlei tung des en tsprechenden Ger äts.
Dann muss die Fernbedi enung zum Anlernen ein Si-•
gnal ausse nden. Drücken Sie dazu eine der Tasten
2 bis 3 Mal.
Bitte beach ten Sie, dass dazu die Bat terien bereits ein-•
gelegt se in müssen.
Beim Sende n erscheint das Sen desymbol i m Display.•
Eine Fe rnbedienung kann an b eliebig viele Stell antrieb e
oder Wandth ermostate angelernt werden.
6. Hinweise zum Fun kbetrieb
Die Funk-Übertr agung wird auf einem nicht exklusiven
Übertragungsweg realisiert, weshalb Störungen nicht ausgeschlossen we rden können. Störeinflü sse kön nen u. a.
durch Schaltvorgänge, Elektromoto ren oder auch defekte
Elektro geräte her vorgerufen werde n.
Die Rei chweite in Gebäu den kann star k von d er im Freifeld abweichen. A ußer de r Sende leistung und den Empfangseigenschaften der Empfänger spielen Umwelteinflüsse wie Luftfeuchtigkeit neben baulichen Ge gebenheiten
eine wichti ge Rolle.
Hiermit erklärt die ELV Elektronik AG, dass sich dieses
Gerät in Übe reinstimmung mit den grundlege nden Anforderungen und den anderen relevanten Vorschriften der
Richtlini e 1999/5/EG befindet. Die vollst ändige Konform itätserk lärung fin den Sie unte r www.elv.de.
7. Sicherh eitsh inweise
Die Geräte sind keine Spielzeuge, erlauben Si e Kin dern
nicht damit zu spielen. Verpackungsma terial nicht achtlos
liegen las sen, dies kann für Kinder zu eine m gefährlichen
Spielzeug werden.
Öffnen Sie d as Gerät nich t, es enthält keine d urch den
Anwender zu warte nden Teile. I m Fehler fall schicken Sie
das Gerät a n den Ser vice.
8. Ents orgungshinweis
Gerät n icht im H ausmü ll entsorgen!
Elektr onisch e Gerä te s ind ent sprech end der
Richtlini e über El ektro- und Elek tronik-Altgeräte
über die örtlichen S ammelste llen fü r Elek tronikAltgeräte z u entsorgen!
Das CE-Zeic hen ist ein Freiverkehrsze ichen, das
sich aus schließli ch an die Behörde n wendet und
keine Zusich erung von Eigenschaf ten beinhaltet.
9. Technisc he Eigenscha ften
Versorgun gsspann ung: 3 V
Batterien: 2x LR44
Batterielebens dauer: ca. 4 Jahre
(bei 2 Bedi enungen je Tag)
Sendefre quenz: 868,3 MHz
Reichweite im Freifeld: 30 m
Gehäuse abmessung: 41 x 74 x 15 mm (B x H x T)
Technisc he Ände rungen, die zu r Verbesserun g
diene n, sind vo rbehalten.
Lesen Sie diese An leitung sorg fältig, um das Gerä t in Betrieb zu nehm en. Bewahren Sie die Anleitung zum späte ren Nachschlagen au f.
5
2
6
3
7
4
8
A (Set) Soll-Temperat ur, (Actual) Is t-Temperatur
B Absenktemperatur (
), Komforttemperatur (
)
C
-Taste: Absenktemp eratur he rstellen
D Minus-Taste (-): Soll-Temperatur reduz ieren
E Batter ie-leer-Symbol (
)
F Tempera turanzeig e: relative Temper aturänderung
(Set) oder Is t-Temperatur (Actua l)
G Sendesymbol / Funküb ertragung (
)
H
-Taste: Komforttemp eratur he rstellen
I Plus-Taste (+): Soll-Temperatur erhö hen
A E
H
I
G
F
C
D
B
1. Ausgabe De utsch 08/2009
Dokumen tation © 2009 ELV Elekt ronik AG
Alle Rech te vorbehalten.
90394, V1.0, w ww.elv.com
ELV Elekt ronik AG · PF 1000 · D-2 6787 Leer
Page 2
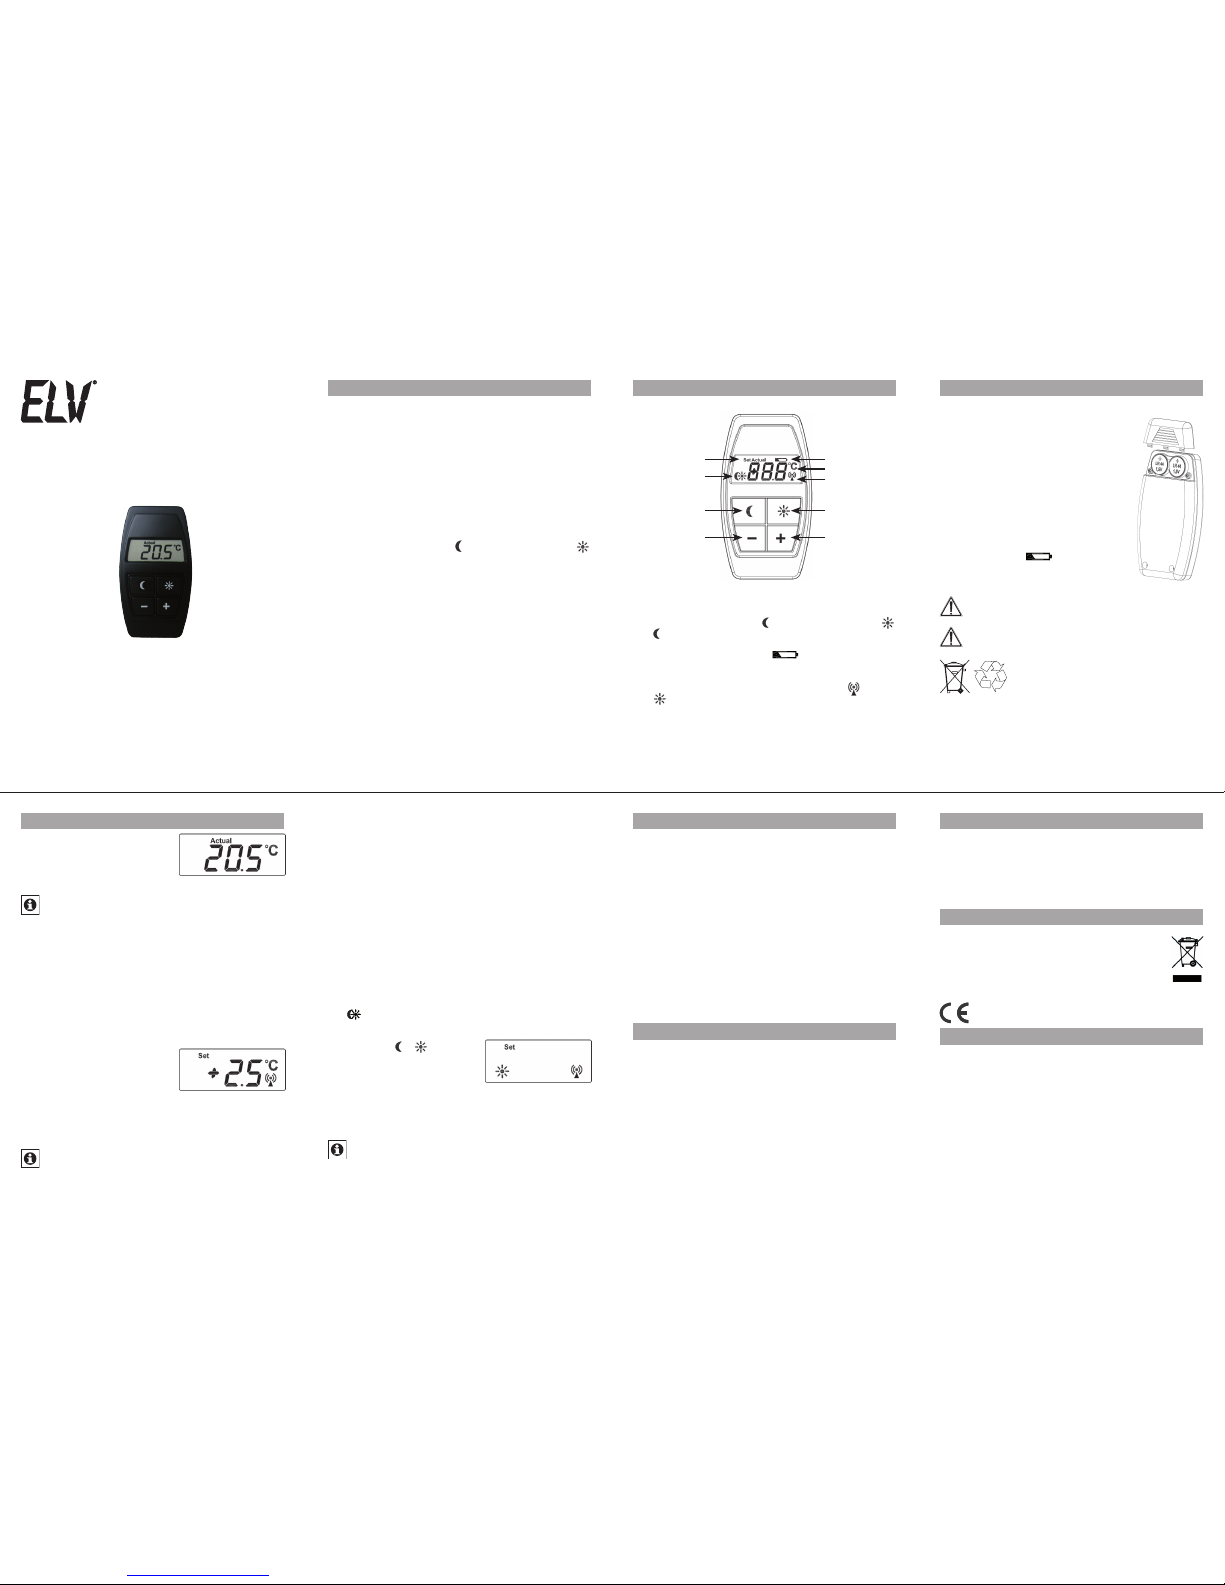
Radio remote control
ETH comfort
Operating Manual
1. Intend ed use
The remote c ontrol is a user-friend ly device fo r changing
the temperature in a room. If the remote control ha s been
ta ug ht- in t o a wal l th er mo st at o r a r ad io ele ct ro nic th er mostat contro ller for radi ators (see 5), the se system comp onents can receive commands from the remote control and
implemen t them.
An integrated temperature sensor also detects the current
ambient temperature, which can b e see n on the remote
control’s disp lay.
The remo te control can be used to p erform two types of
operation:
Implemen ting a relati ve tempera ture chang e (-/+)•
Switching to the set-back ( •
) o r c o m f o r t t e m p e r a t u r e (
)
The device may only be operated indoors an d mu st be
protected from the ef fects of damp and dust, as well as
solar or he at radiatio n.
Using the re mote control for any pu rpose oth er than tha t
described in this operating manual does not fall within
the sc ope of inte nded us e and sha ll inval idate any
warrant y or liability. Th is al so applies to any conve rsion
or modifica tion work.
This device is intended for private us e only.
2. But tons and displ ay
3. Inse rtin g (replacing) batter ies
The remote control run s on two LR44 ba tteries.
Remove the bat tery compartme nt •
cover.
Insert t wo new LR44 batteries in t he •
batter y compar tment (making sure
that you inse rt them th e right way
round).
Replace th e batter y compartment •
cover and latc h it into position.
If the remote control is used twice a
day, new batteries will have a ser vice
life of approx imately fou r years.
A batter y symbol (
) on the display
indicates t hat the batteries need to be
replaced.
Never recharge standard batteries. Doing so will
present a r isk of explos ion.
Do not throw batteries i nto a fire.
Do not shor t-circuit batteries.
Used batteries should not be disposed
of with regular domestic waste. Instead,
take them to your loc al battery disposal point.
4. Oper ation
The remote control features an
integr ated te mpera ture se nsor.
Pre ssin g a butt on br ief ly will
ca us e th e cu rr en t ac tu al t em pe rature to appe ar on the disp lay.
Please note that the detected temperature may be
affecte d by body heat. If you hold the remote control
in your hand for a long pe riod or carry it a round in a
trouser pocket, the tem perature m easured by the sensor
may be very differe nt to the room’s actual ambient temperature.
As well a s display ing the a ctual te mperature, the re mote
control can also be use d to perfo rm two types of operatio n:
Implementi ng a rela tive tempera ture ch ange:
Here, the room’s current set temperature is increased (e.g.
+2.5°C) or decrea sed (e.g. -1.0°C) by the value se t on the
remote cont rol.
The -/+ buttons are used to in-•
crease or decrease the temperature in 0.5°C inc rements .
Once the buttons have been •
pressed as ma ny times as required, there is a short de lay before the temperature change is transmitted and the
transmis sion symbol appear s on the displ ay.
The display s witches of f after 10 seconds of inactivity.•
If the display is still active, changing the tempera ture
again will cause only the new temperature differen ce
to be transmitted. If the display has already switched
off after 10 seconds of inac tivity, the tempera ture change
starts a gain from 0°C.
Example:
A set temperature of 18°C has been set at the wall ther-•
mostat.
A tempera ture change of “+0.5°C” is se t on the remote •
control an d transmitted.
The set temperature at the wall thermos tat changes •
to 18.5°C.
The “+” button is presse d twice m ore within 10 s ec-•
onds.
The remote control’s displ ay changes to “+1.5°C”.•
Just th e difference of “+1°C” is transmit ted to the wa ll •
thermostat and the tem perature increase s to 19.5°C.
If the remote control’s display has become inactive afte r •
10 second s and a temperature of “+2.0°C” is t hen set ,
the set tempera ture at the wall thermo stat increa ses by
2.0°C to 21.5°C.
Comfor t temperatu re/Set- back tem perature
The
buttons are used to activate the comfort/se t-back
temperatures stored in the wall thermostat or th e r adio
electronic thermo stat.
Pressing the •
or
button activates the c orresponding setback or comf ort temp erature.
Onc e the b utton has be en •
pressed , there is a short delay before the information
is transmitte d and the transmi ssion symbol appears
on the display.
The display s witches of f after 10 seconds of inactivity.•
Afte r a sho rt d elay, five seconds of transmis sion
starts , during which time the tra nsmissi on symbol is
visible on the display. If a new operation is performed
during these five sec onds, the cha nge will not be transmitted unt il the five seco nds have elapsed.
5. Teaching-in to ra dio components
In order to enable communication between radio c omponents, the dev ices have to be taught-in to one another.
The remote control ca n be tau ght-in to system components such as a ra dio elec tronic th ermostat for rad iators
or a wall thermostat.
First of all, t he receive r (a wall thermostat, for example) •
must be set to teach-in mod e. For more info rmation on
this, refer to the operating manual for the re levant device.
Next, the remote control has to transmit a signal in •
order to be taught-in. To do this, press one of the
buttons t wo or three tim es.
Please note that the b atterie s must have al ready b een •
inserted.
During tr ansmiss ion, the tr ansmiss ion symbol appear s •
on the display.
A remote control can be taught-in to as many actuators or
wall thermostats as you wish.
6. Infor mation about r adio operati on
Radi o tr ansmis sion is per formed on a non -exclus ive
transmis sion path, whic h mean s that there i s a po ssibility of inte rferen ce occurring. Inte rferen ce can be c aused
by, amongst other things, switching operations, ele ctrical
motors or de fective ele ctrical devices.
Th e r ang e o f tr an sm is sio n w ith in bui ld in gs c an di ffe r g re atly from that available in the open air. Besides the transmitti ng p ow er a nd the re cep ti on c ha ra cte ri st ics of t he rec ei ver, environme ntal factors suc h as humidity in the vicinity
have an important role to play, as do on-site structural/
screening conditions.
ELV Elektro nik AG hereby de clares that th is devic e conforms with the essential re quirements and oth er relevant
regulations of Directive 1999/5/EC. The full declarat ion of
conformi ty is provid ed at www.elv.de.
7. Safety in structions
This device is not a toy; do not allow childr en to play with
it. Do not leave packaging material lying around, as it can
be dangerous in the han ds of a child.
Do not o pen the device: it does not contain any components that n eed to be serviced by the user. In the event
of an error, please r eturn the devi ce to our service department.
8. Disp osal instruc tions
Do not dis pose of the devic e with regular
domest ic waste.
Electron ic equipme nt must be disposed of
at local collection p oints for waste electr onic
equipmen t in complia nce with the Waste
Electric al and Electronic Equi pment Dir ective.
The CE Marking is simply an offi cial symbol rela ting to the free movement of a product; it does not
warrant a pr oduct’s cha racteri stics.
9. Technical char acter istic s
Supply volt age: 3 V
Batteries: 2x LR44
Batter y life: 4 years app rox.
(at two opera tions per day)
Transmissio n frequen cy: 8 68.3 MHz
Range of tra nsmissi on
in the open ai r: 30 m
Housing dimensions: 41 x 74 x 15 mm (W x H x D)
We reser ve the right to make any tech nical change s
that co nstit ute an improvem ent to th e device .
Please read th is manual ca refully in order to help you put
the device into operation. Kee p the manual han dy so you
can refer to it a t a later date.
5
2
6
3
7
4
8
A Set temper ature, actu al temper ature
B Set-back temperature (
), comfort te mperature (
)
C
button: act ivates the set-back tempe rature
D Minus butto n (-): reduces th e set temper ature
E “Bat tery empty” symb ol (
)
F Tempe rature disp lay: relative temperature change
(set) or current temper ature (actu al)
G Transmission symbo l/radio transmission (
)
H
button: act ivates the co mfort tem perature
I Plu s button (+): increases the set temperature
A E
H
I
G
F
C
D
B
Issue 1 Eng lish 08/2009
Documen tation © 2009 ELV Elek tronik AG
All right s reserved.
90394, V1.0, w ww.elv.com
ELV Elekt ronik AG · P.O.Box 1000 · D-26 787 Leer
 Loading...