

Page 1

Fast Fold Screen User Manual
General Notes
1. Thank you for choosing our projection screen for your home or business. Please read the user manual carefully before
proceeding. Follow the provided instructions to complete installation quickly and safely and keep in a safe place for
future reference.
2. Only use attachments and accessories approved by the manufacturer.
3. To avoid damaging the screen, do not fold the screen or touch the screen directly with your hands, tools, or any other
abrasive/sharp object.
4. When not in use, disassemble the screen to protect the optical surface from dirt, dust, grime, or any other impurities.
Store the screen in the carrying case provided.
5. When cleaning, use a soft damp cloth with warm water or diluted liquid detergent to remove any marks on the casing
or on the screen surface. Never attempt to use any solutions containing corrosive chemicals or abrasive cleaners on the
screen surface.
6. Do not use in a wet environment.
7. Spare parts should be stored out of reach of small children in accordance with household safety.
8. We will not be responsible for damages done due to user error or false operation.
Safety Guide
1. When using the screen, place it on a flat, stable surface and ensure the joints are locked and the hand screws are
secure.
2. If the screen is being used outdoors, ensure there are no environmental hazards which could cause damage to screen
and others around it. This includes but is not limited to wind, precipitation, flying objects, and pets.
3. Although the frame is aluminum, the weight of the screen can do damage as well as the case. Take caution to carefully
assemble the screen and use in a place with no hazards.
4. The screen should only be operated by adults.
5. Do not climb on the screen of hang things from it. This can cause the screen to fall and cause damage or injury to
others.
Page 2
Packing List
• Screen fabric
• Screen fabric case
• 2 folding legs
• 1 screen frame
• Aluminium storage box
• Hand screws
Assembly Notes
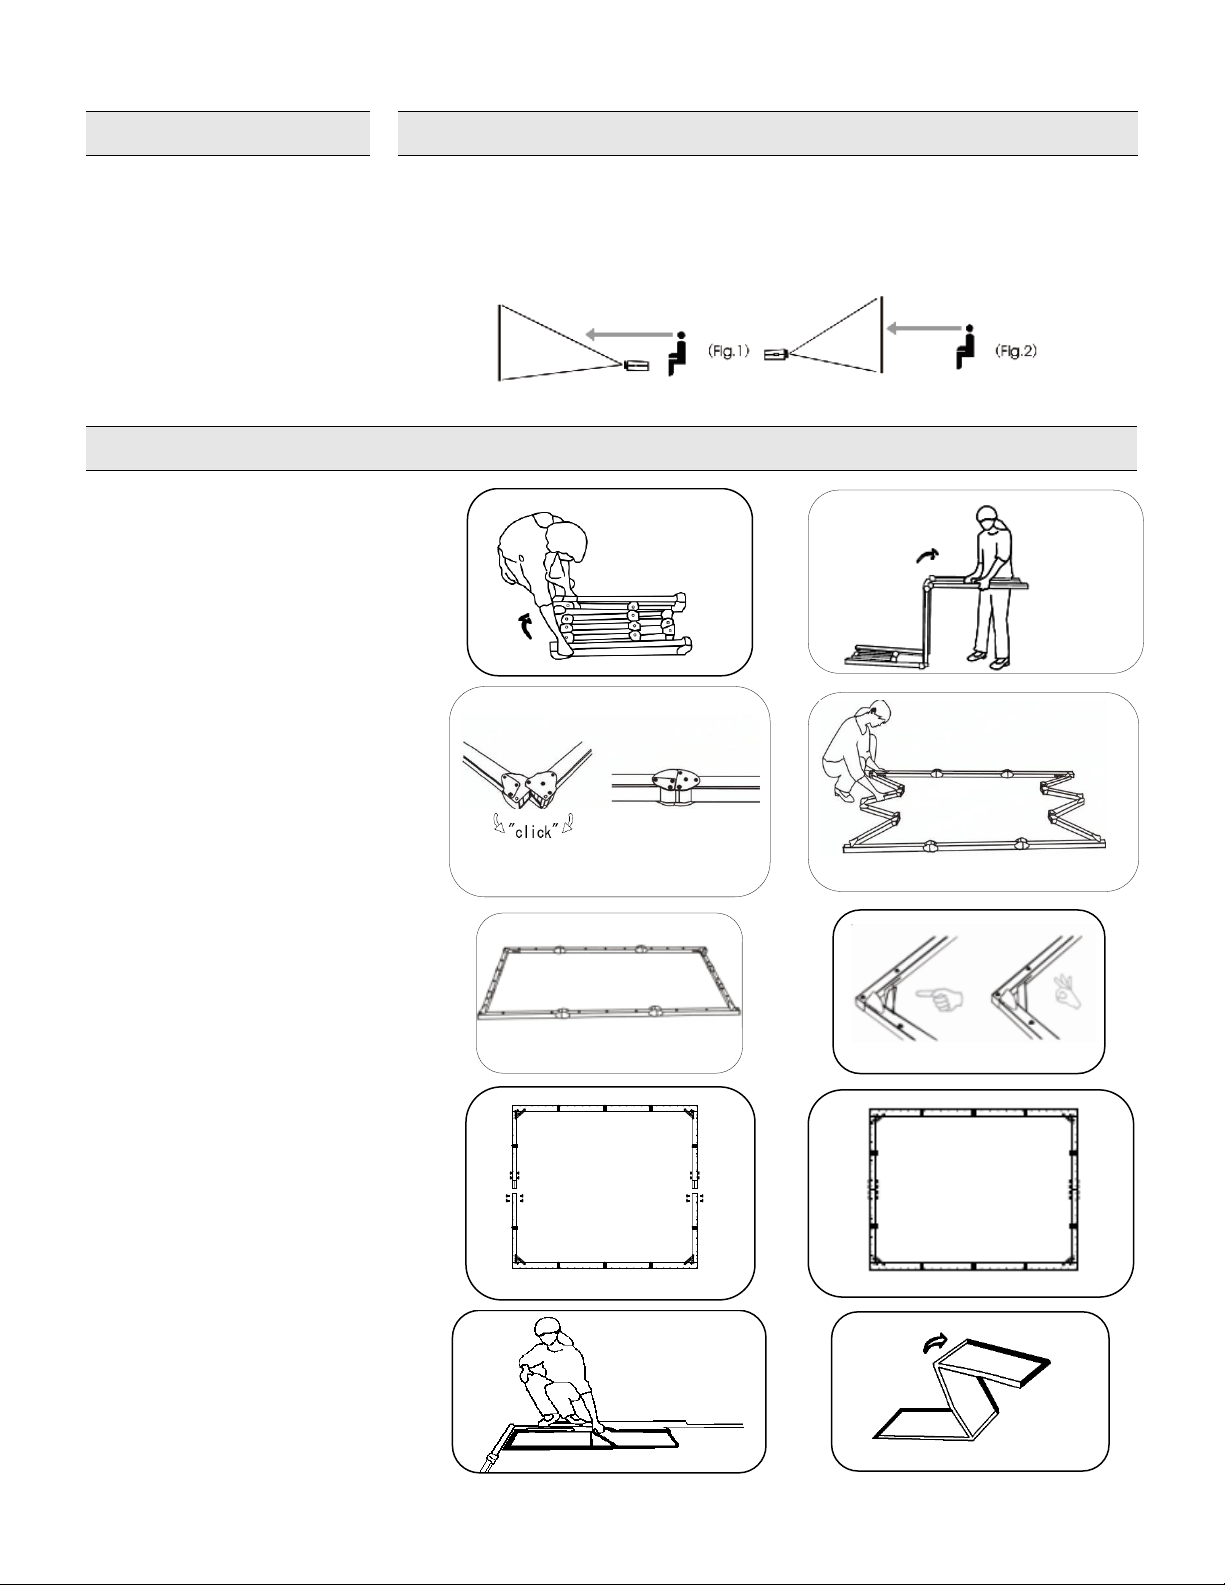
• Clear a space on the floor large enough for screen assembly.
• Ensure you know which side of the projection screen is the front and which is the
back. This can be distinguished by the card which is on the corner of the fabric
screen or in the bag
• See Figure 1 for front projection and Figure 2 for rear view projection.
Assembly Instructions
1. Take the frame out of the box and
place it on a flat surface. First check
that the snaps are on top and if so,
proceed to unfold the longer sections
first.
2. Unfold the frame until the latch on
the hinge “clicks” into place. Repeat the
procedure for the shorter sections.
3. Make sure all 4 corners of the frame
are at 90° and that the hinged support
bar is straight and not bent.
If your screen has a 200” or greater
diagonal, the frame will come in 2
parts. Attach the upper frame to the
lower frame and fasten 2 frames with
M8×16 screws.
4. Take the screen fabric out of the bag
and put it inside the frame next to the
corner. Unfold as shown in the
diagram.
Page 3
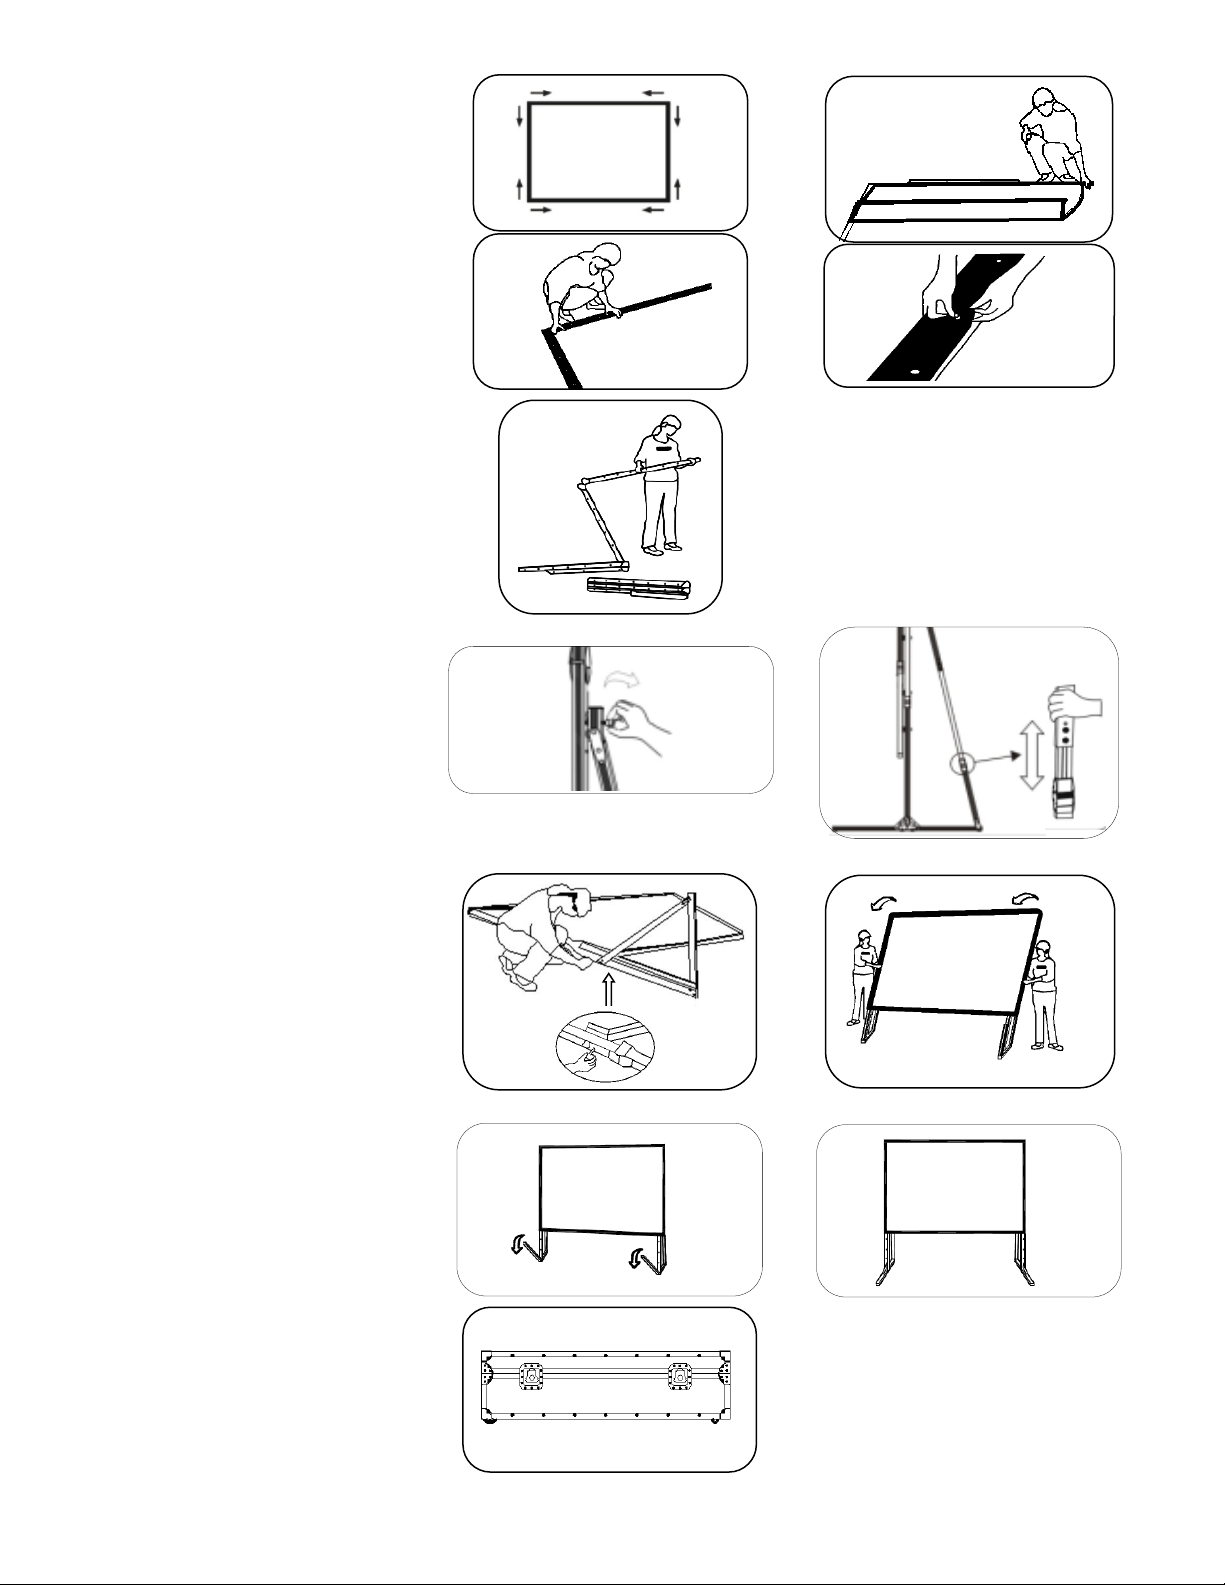
5. Once the screen fabric is fully
unfolded, secure it to the frame with
the snaps. Secure the snaps starting
from the corners and working towards
the middles. Secure the shorter side
before the longer side.
6. Take the folding legs out of the box
and unfold as shown. Make sure the
hinges click into place.
If the diagonal of your screen is 200” or
greater, use the hand screws to secure
the support leg to the vertical leg in an
appropriate position. The support leg
can be adjusted to an appropriate
length. If the frame is attached to the
legs higher up than the support leg, the
support leg should also be attached
higher up.
7. Lay the frame on the floor and
position the legs over the sides of the
frame at the desired height. Use the
hand screws to loosely attach the
frame. Repeat with the other leg and
when in the desired position, proceed
tightening both sides firmly.
8. When the frame is in the vertical
position, fold the front facing feet of
the legs out. Assembly is completed
and the projection screen will be stable
on a flat surface.
9. After using the screen, disassemble
the screen and store it in the box
provided. To disassemble the screen,
implement the assembly procedure in
reverse order.
 Loading...