

Page 1

Quick Start Guide Eltako GFVS-Safe IV
1
Quick Start Guide
Eltako GFVS-Safe
IV
© 2017 ELTAKO GmbH
Page 2

Quick Start Guide Eltako GFVS-
2
Contents
1
Scope of supply ...........................................................................................................................4
2
Technical data ..............................................................................................................................4
3 Connections on the Eltako GFVS-Safe IV..................................................................................5
4 First start-up ................................................................................................................................6
4.1 Start-up ...................................................................................................................................6
4.2 Menu .......................................................................................................................................7
4.2.1
Eltako GFVS 4.0 software ................................................................................................7
4.2.2
PCT 14 .............................................................................................................................7
4.2.3
Select language ................................................................................................................8
4.2.4
Network settings ...............................................................................................................8
4.2.5
Remote settings ...............................................................................................................8
4.2.6
BSC-BAP finder ................................................................................................................9
4.2.7
GFVS 4.0 settings ............................................................................................................9
4.3
Presettings ............................................................................................................................ 10
4.3.1
License ........................................................................................................................... 10
4.3.2
Database ........................................................................................................................ 10
4.3.3
Network .......................................................................................................................... 10
5 Eltako quickcon® technology ................................................................................................... 11
6 System tools .............................................................................................................................. 17
6.1
GFVS tools ............................................................................................................................ 17
6.1.1
Save, restore or delete database ................................................................................... 18
6.1.2
System backup ............................................................................................................... 20
6.1.3
Delete license in case of license problems ..................................................................... 22
6.1.4
Restore factory settings .................................................................................................. 23
6.1.5
GFVS settings ................................................................................................................ 25
6.1.6
GFVS update .................................................................................................................. 26
6.2
Bap-Finder ................................................................ ................................ ............................ 26
6.3
Code Meter ................................ ................................ ................................ ........................... 27
6.4
Change web code ................................................................................................................. 27
7 System settings ......................................................................................................................... 27
7.1
Network settings ................................................................................................................... 28
7.2
Remote settings .................................................................................................................... 28
Page 3

Quick Start Guide Eltako GFVS-Safe IV
3
7.3
Date/time............................................................................................................................... 29
7.4
Search monitor ...................................................................................................................... 29
7.5
Display resolution .................................................................................................................. 30
7.6
OSD keyboard ...................................................................................................................... 30
7.7
Technical Support (TeamViewer) .......................................................................................... 31
7.8
Copy background images ..................................................................................................... 31
8 Switch off Eltako GFVS-Safe IV ................................ ................................ ................................ 32
9 Conformity ................................................................................................................................. 32
10 Technical Support ..................................................................................................................... 33
Page 4

Quick Start Guide Eltako GFVS-Safe IV
4
General
Please read these instructions carefully to avoid problems when using the product. Eltako GmbH will not
assume any liability for defects arising from the improper use or non-observance of the instructions for use
(incorrect installation, incorrect start-up, maloperation, etc.).
The intended use of the GFVS-Safe IV with LAN, WLAN and as required M2M communication is the
visualisation of sensor information, actuator switch states and meter consumption data and the control of
actuators.
1
Scope of supply
• Eltako GFVS-Safe IV
• External power supply unit
• 1 x Ethernet connecting cable 2 m RJ45
• Associated antenna
• Eltako GFVS 4.0 software packet incl. license key
• Quick start guide (this manual)
2
Technical data
Processor: Intel® Atom™ J1900
RAM: 4 GB DDR3L
Hard Disk memory: 120 GB SSD
Graphic card: Intel® HD Graphics
Interfaces: 1 x LAN RJ-45 Intel®
10/100/1000 1 x WLAN 2.4 GHz
1 x USB 3.0
2 x USB 2.0
1 x HDMI
1 x RS232
1 x line out
1 x line in
Power consumption without GSM modem: 11 W
With GSM modem: 13 W
Size: 199 x 180 x 39 mm
Page 5
Quick Start Guide Eltako GFVS-Safe IV
5
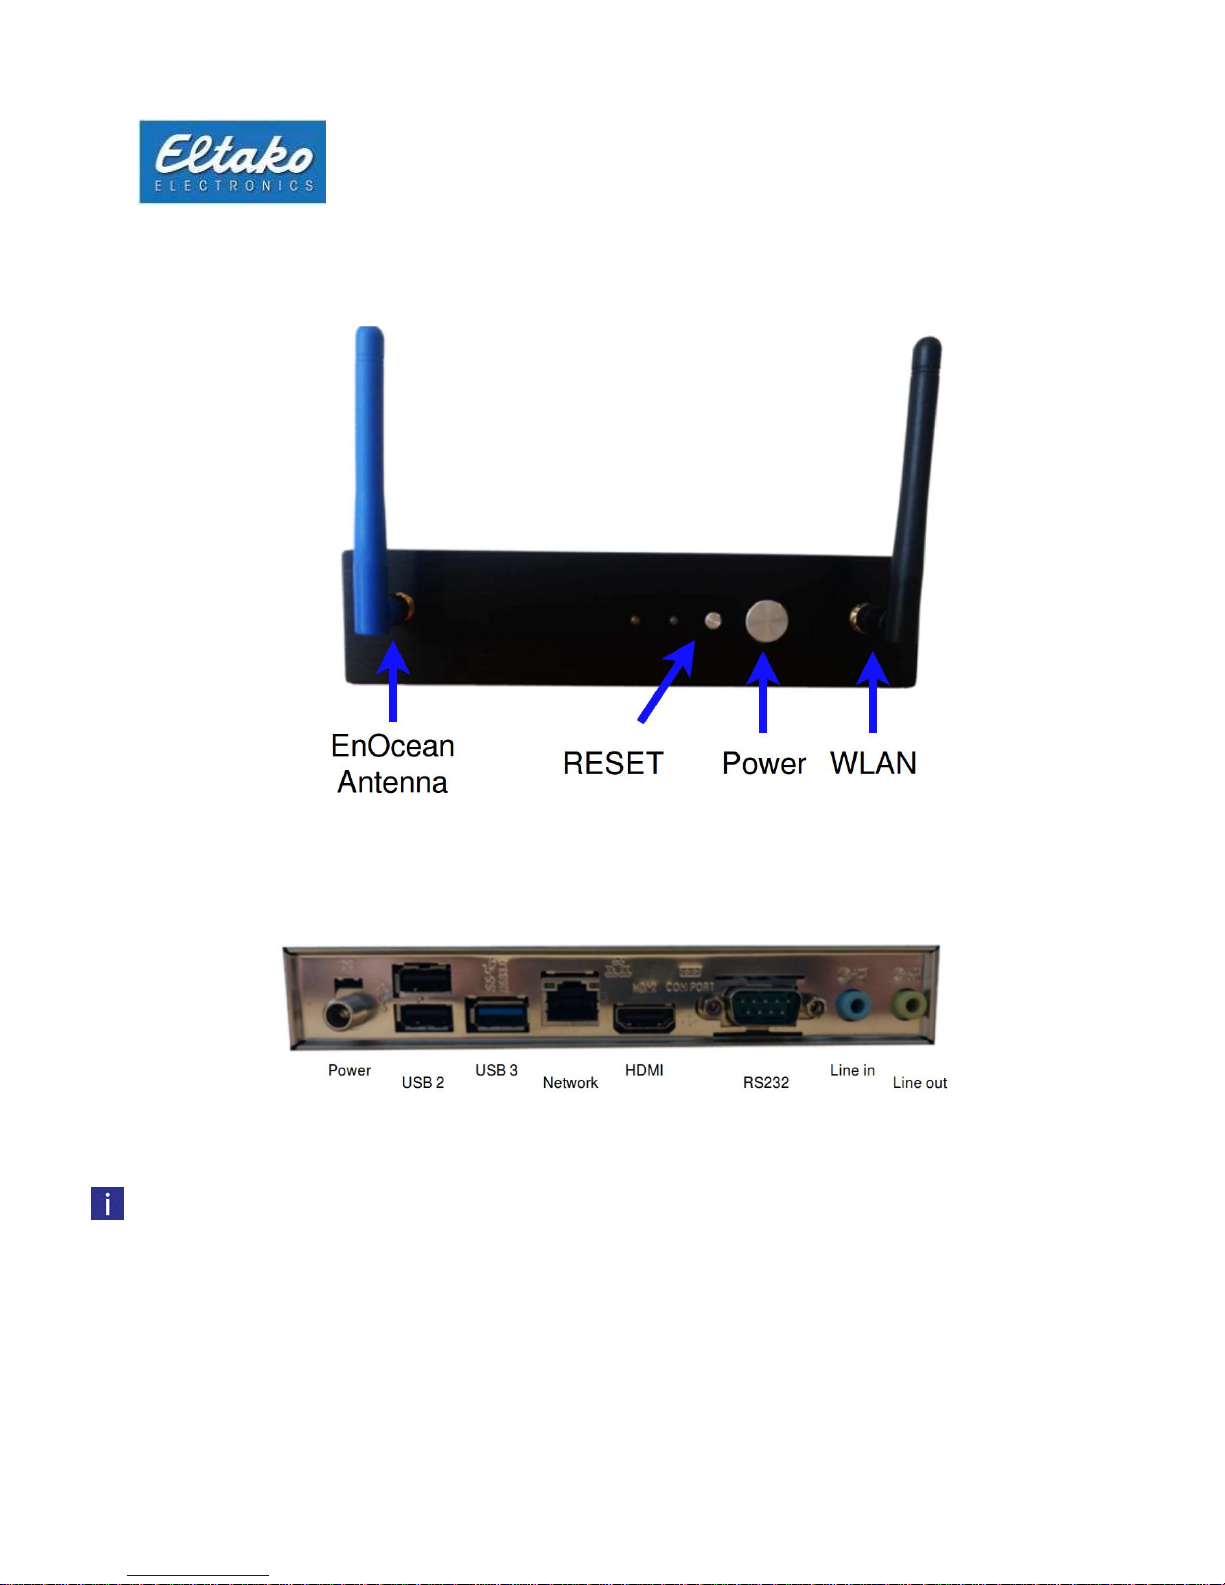
3 Connections on the Eltako GFVS-Safe IV
When installing, pay attention to the right cooling. One of the three air vents must be at the top.
Figure 1: Front view
Figure 2: Rear connections
Page 6
Quick Start Guide Eltako GFVS-Safe IV
6
4 First start-up
4.1 Start-up
Install the blue EnOcean, the black WLAN and the optional blue GSM antenna to the
connections provided (see Figures 1 and 2).
Plug the external power supply unit into a 230 V socket and connect it to the
GFVS Safe IV. The blue LED indicates power supply.
To configure the GFVS software, connect a monitor to the VGA or HDMI port and a keyboard
and mouse to the USB ports.
Alternatively, you can connect a PC via remote control (VNC) via network to the Eltako
GFVS-Safe IV and carry out configuration.
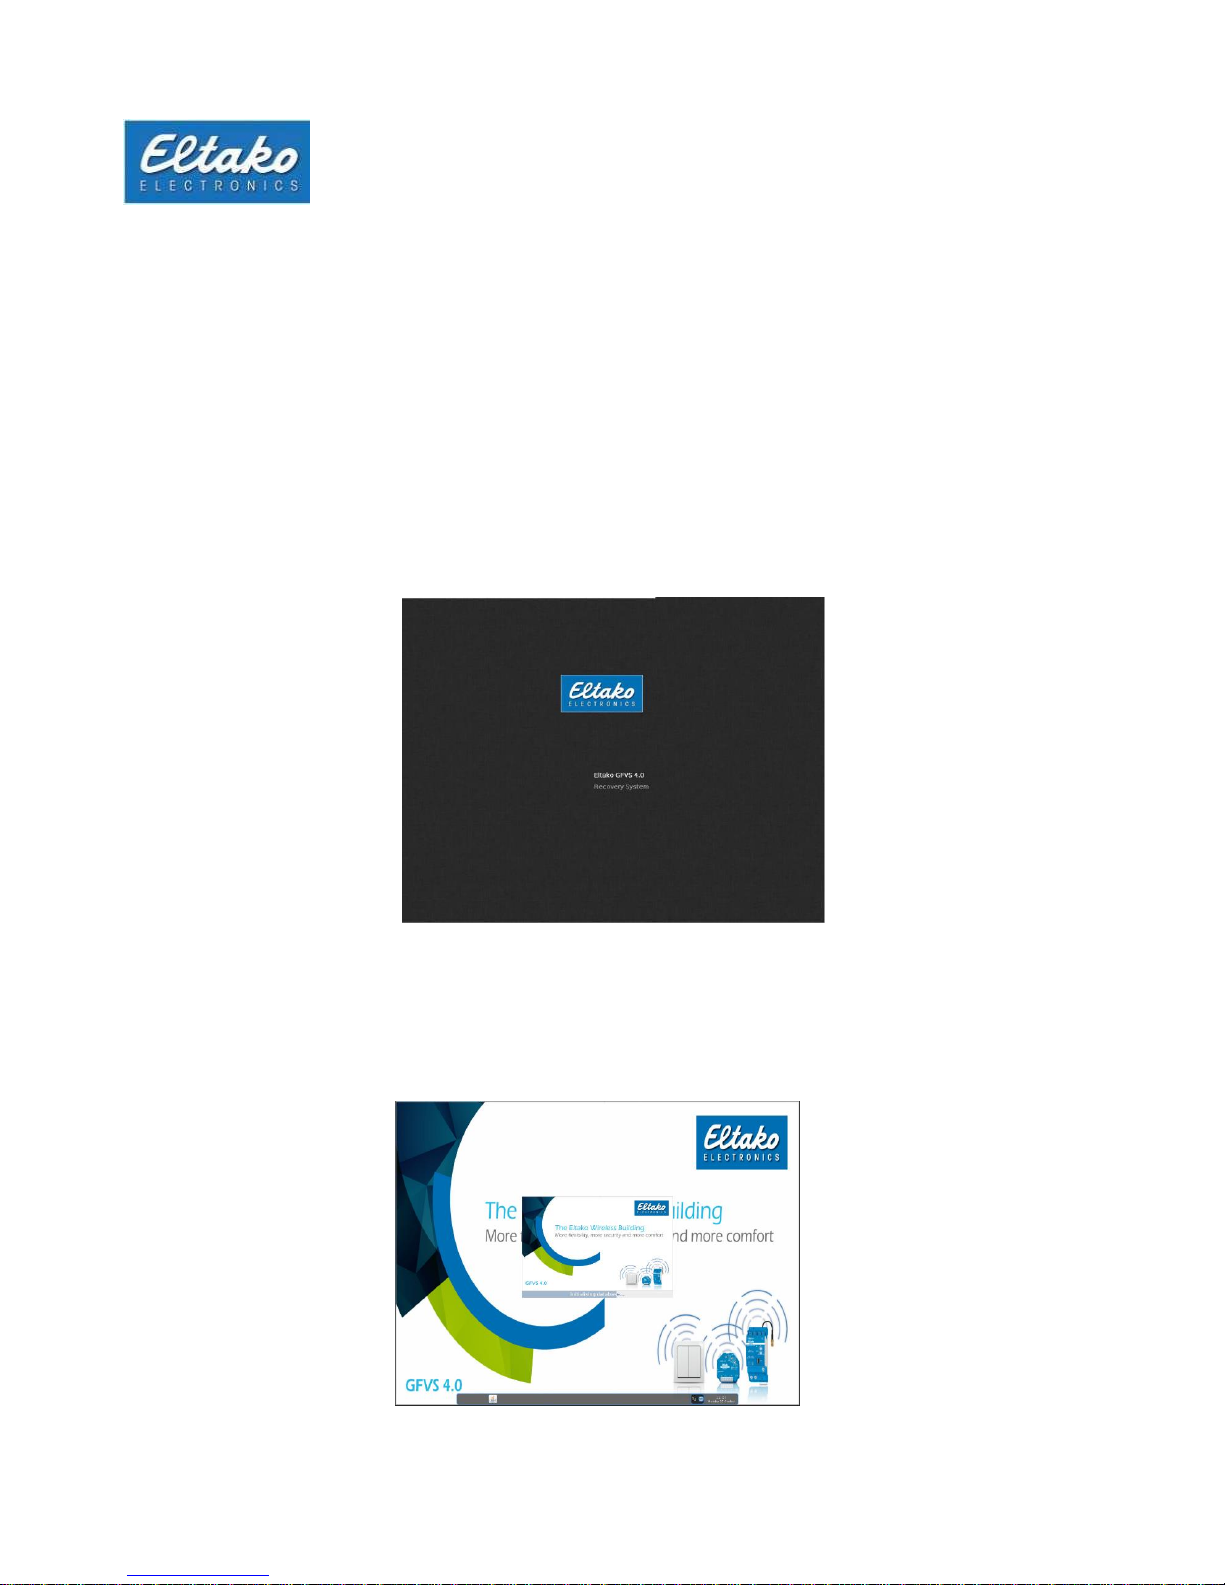
Then you can switch on the Eltako GFVS-Safe IV. During the run-up, you will see the dialog
below:
As required, you can switch to recovery mode to reset the system to factory settings. If you make no
subsequent input, the Eltako GFVS-Safe IV restarts after 10 seconds.
The Eltako GFVS 4.0 software is already installed and starts automatically after switch-on:
Figure 3: Start view
Figure 4: Start the Eltako GFVS 4.0-Software
Page 7
Quick Start Guide Eltako GFVS-Safe IV
7
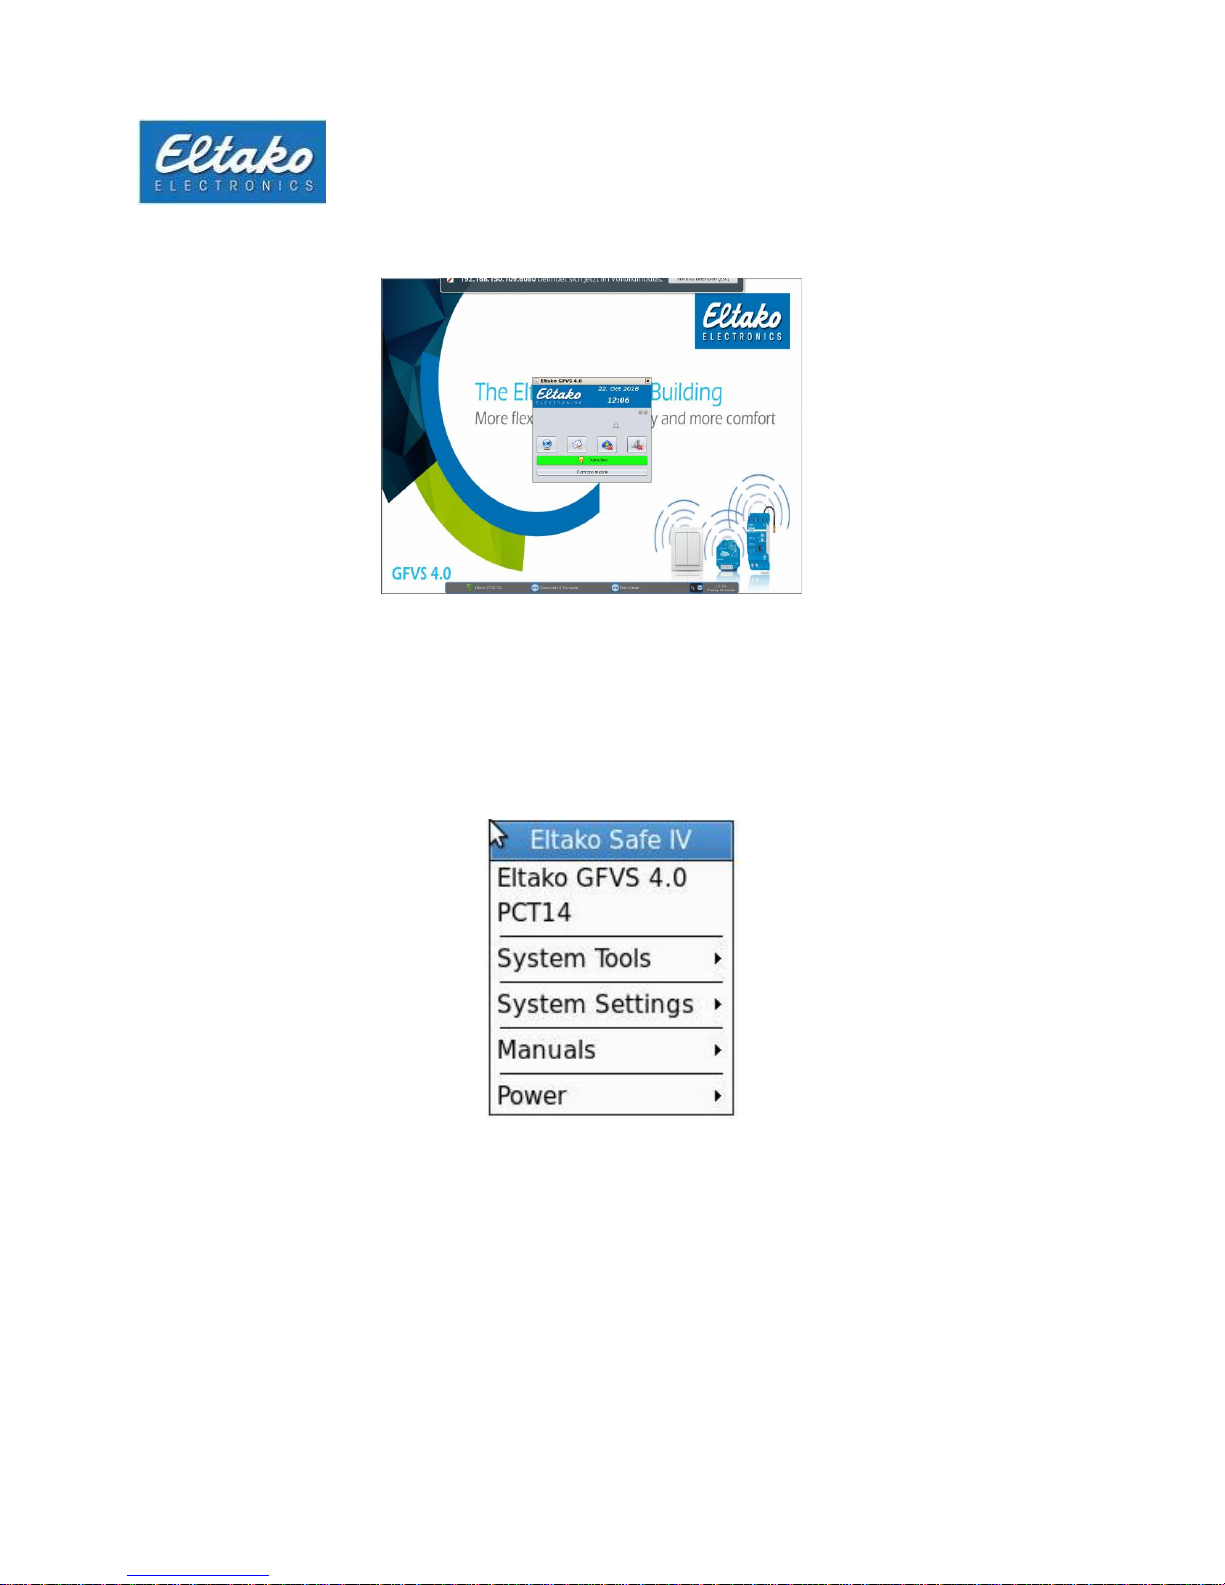
The Eltako GFVS 4.0 software starts.
A task bar appears at the bottom of the screen. Icons are displayed for network connection as well as the
date and time.
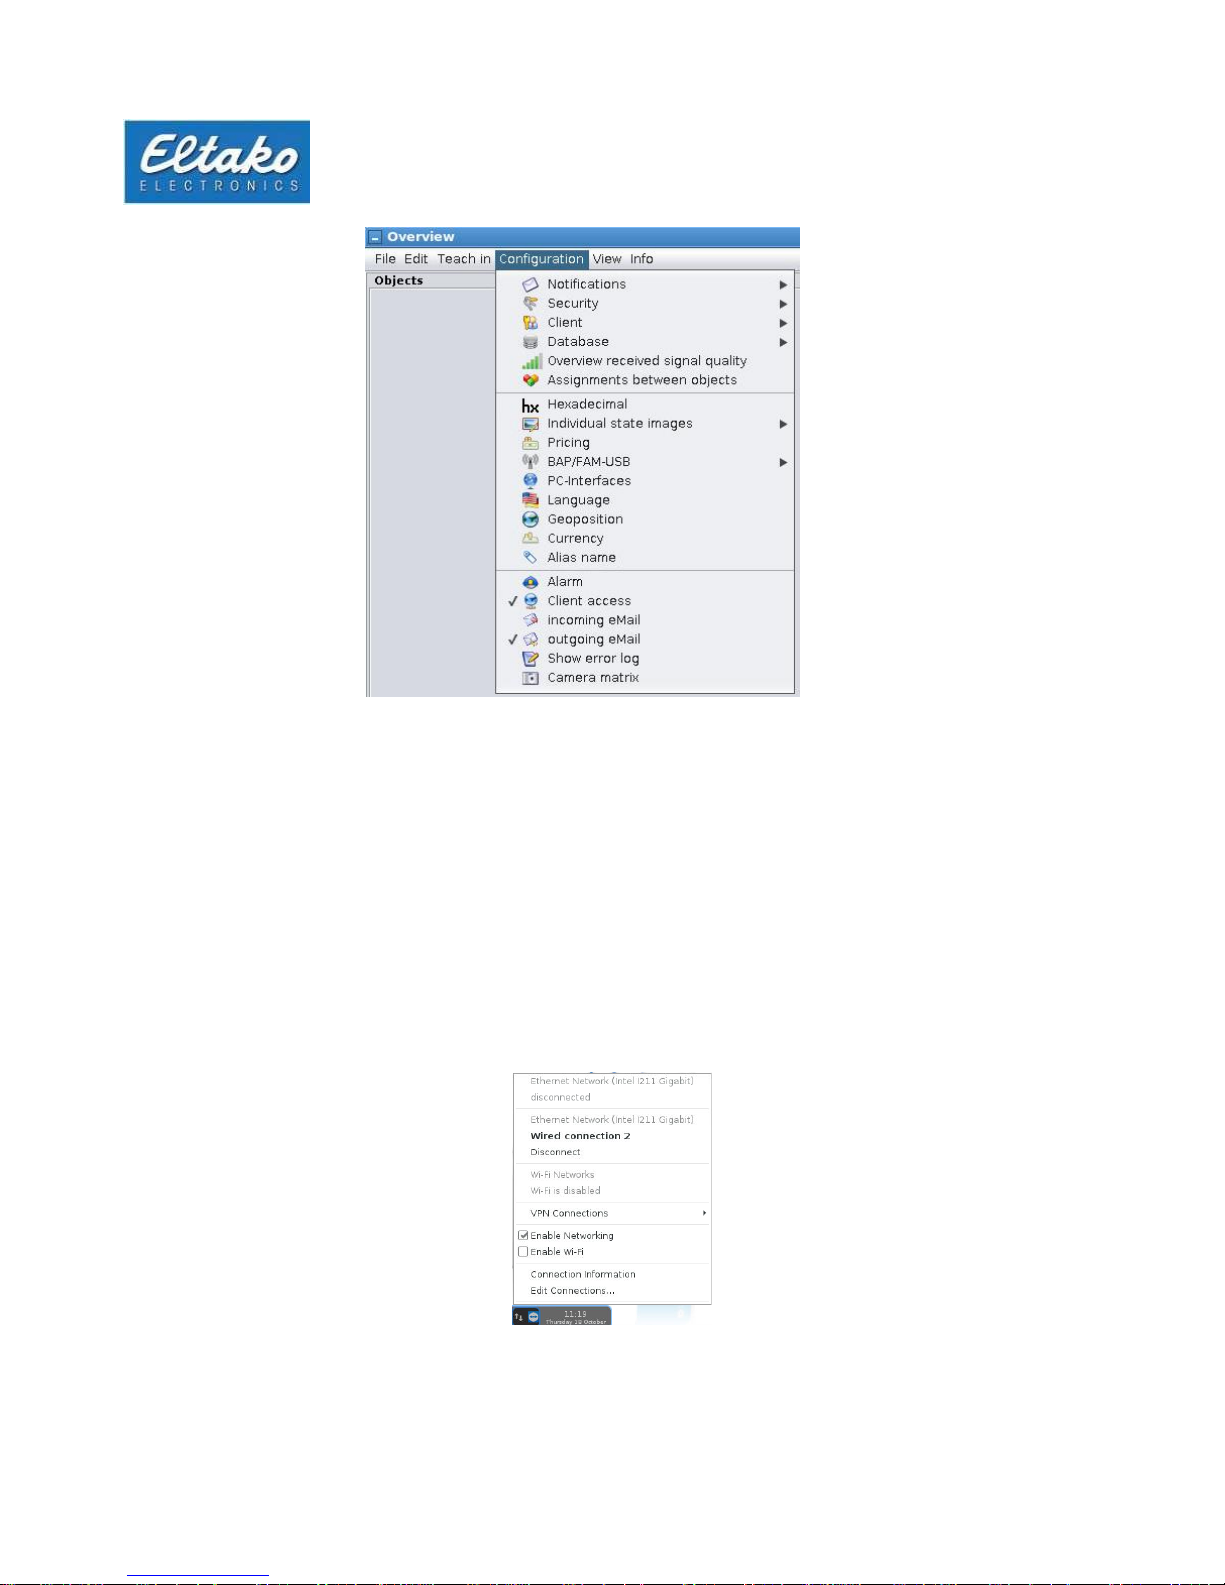
4.2 Menu
Open the menu by right-clicking on the background.
4.2.1
Eltako GFVS 4.0 software
If required, the Eltako GFVS 4.0 software can be started by clicking the menu option “GFVS 4.0”. Open a
detailed instruction manual using “Manuals - Eltako GFVS 4.0 manual”.
4.2.2
PCT 14
The PCT 14 (version 7.6) is integrated In the GFVS Version 4.0 and higher.
Figure 5: The Eltako GFVS 4.0 software starts.
Figure 6: Eltako GFVS-Safe IV menu
Page 8
Quick Start Guide Eltako GFVS-Safe IV
8
4.2.3
Select language
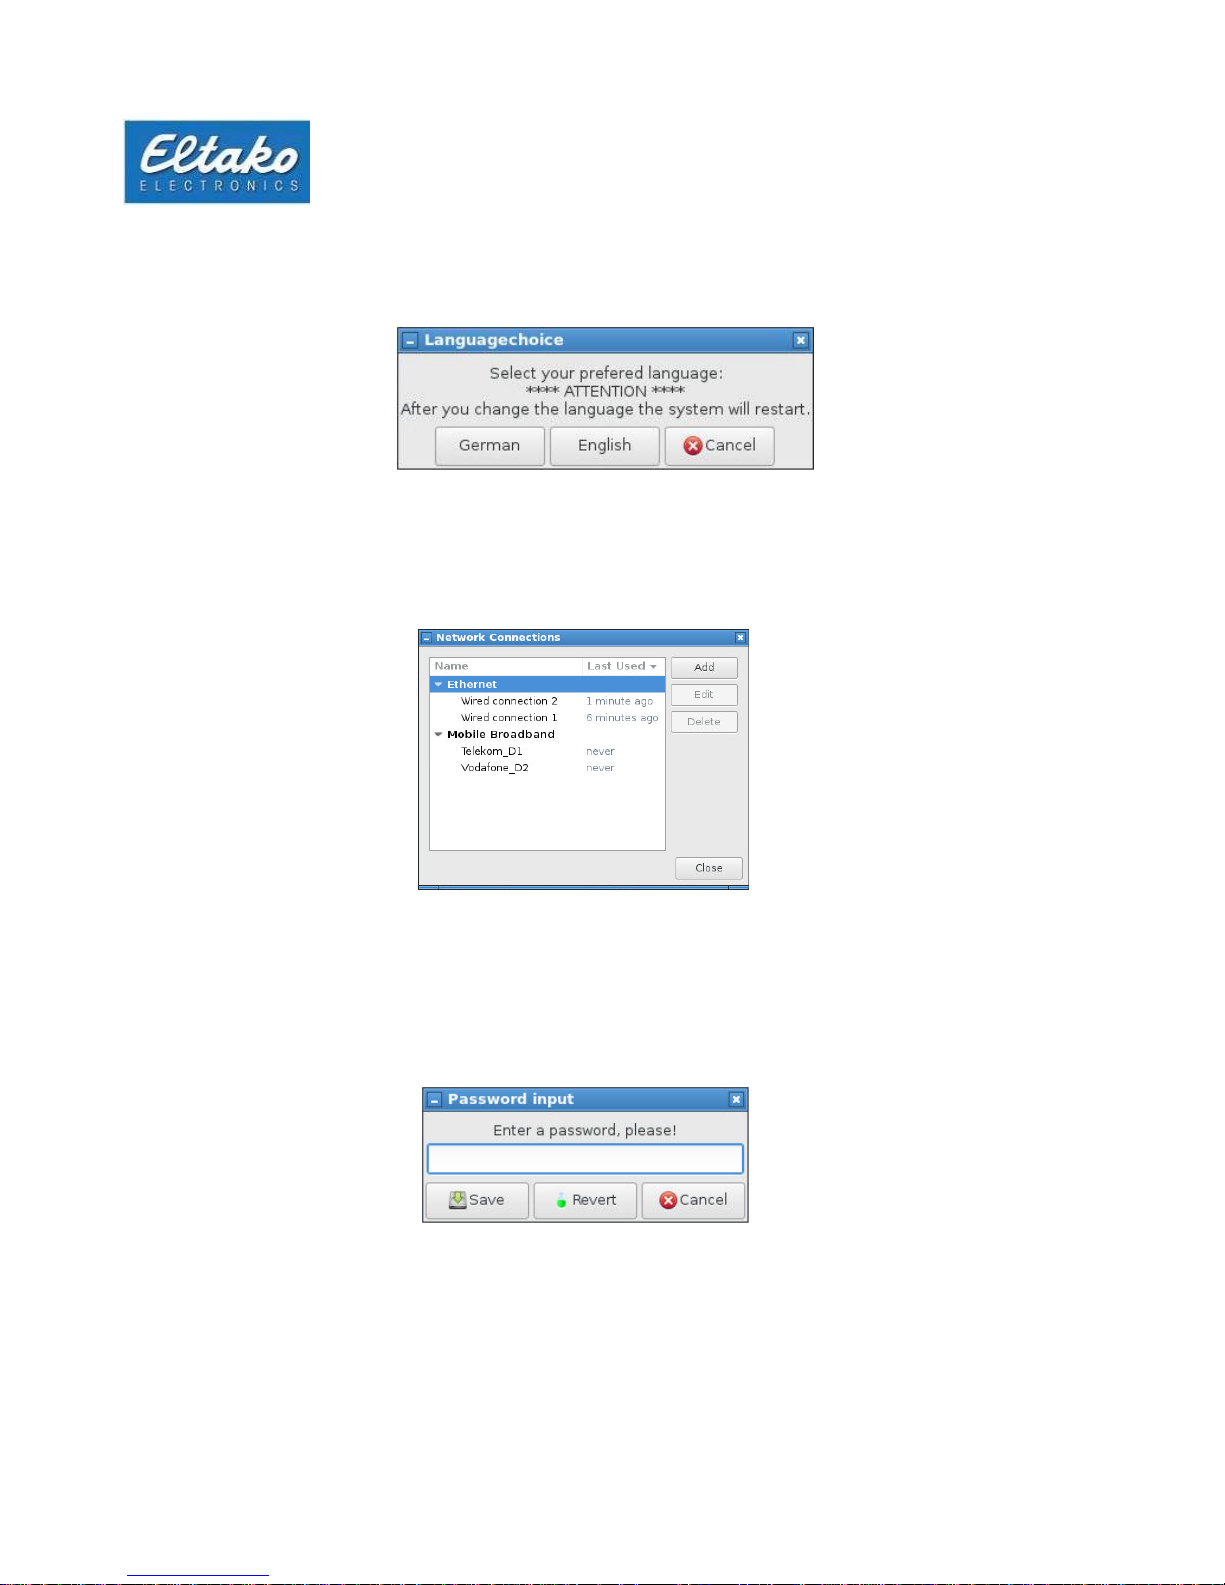
Change the language by using the menu option “System settings - Select language”. The GFVS must be
connected to change the language.
4.2.4
Network settings
Adapt the configuration of the network cards using “System settings - Network settings”.
The LAN interface is set up to operate in a network with DHCP.
4.2.5
Remote settings
A device-specific password was set in the as-delivered state. It is located on the rear of the device. It
can be overwritten by entering a new password.
Figure 7: Language selection
Figure 8: Network settings
Figure 9: Remote settings
Page 9
Quick Start Guide Eltako GFVS-Safe IV
9
When the password is reset, the MAC address of the active network unit is set.
Note: Change the preconfigured password immediately or deactivate the service so that no
unauthorised person can connect to the system.
4.2.6
BSC-BAP finder
The BSC-BAP finder is for configuring TF-IP-Con, BAP, BIER or IPG170(P) and is opened with menu option
“System tools - BSC-BAP Finder”. Open detailed instructions using “Manuals - BSC-BAP Finder”.
4.2.7
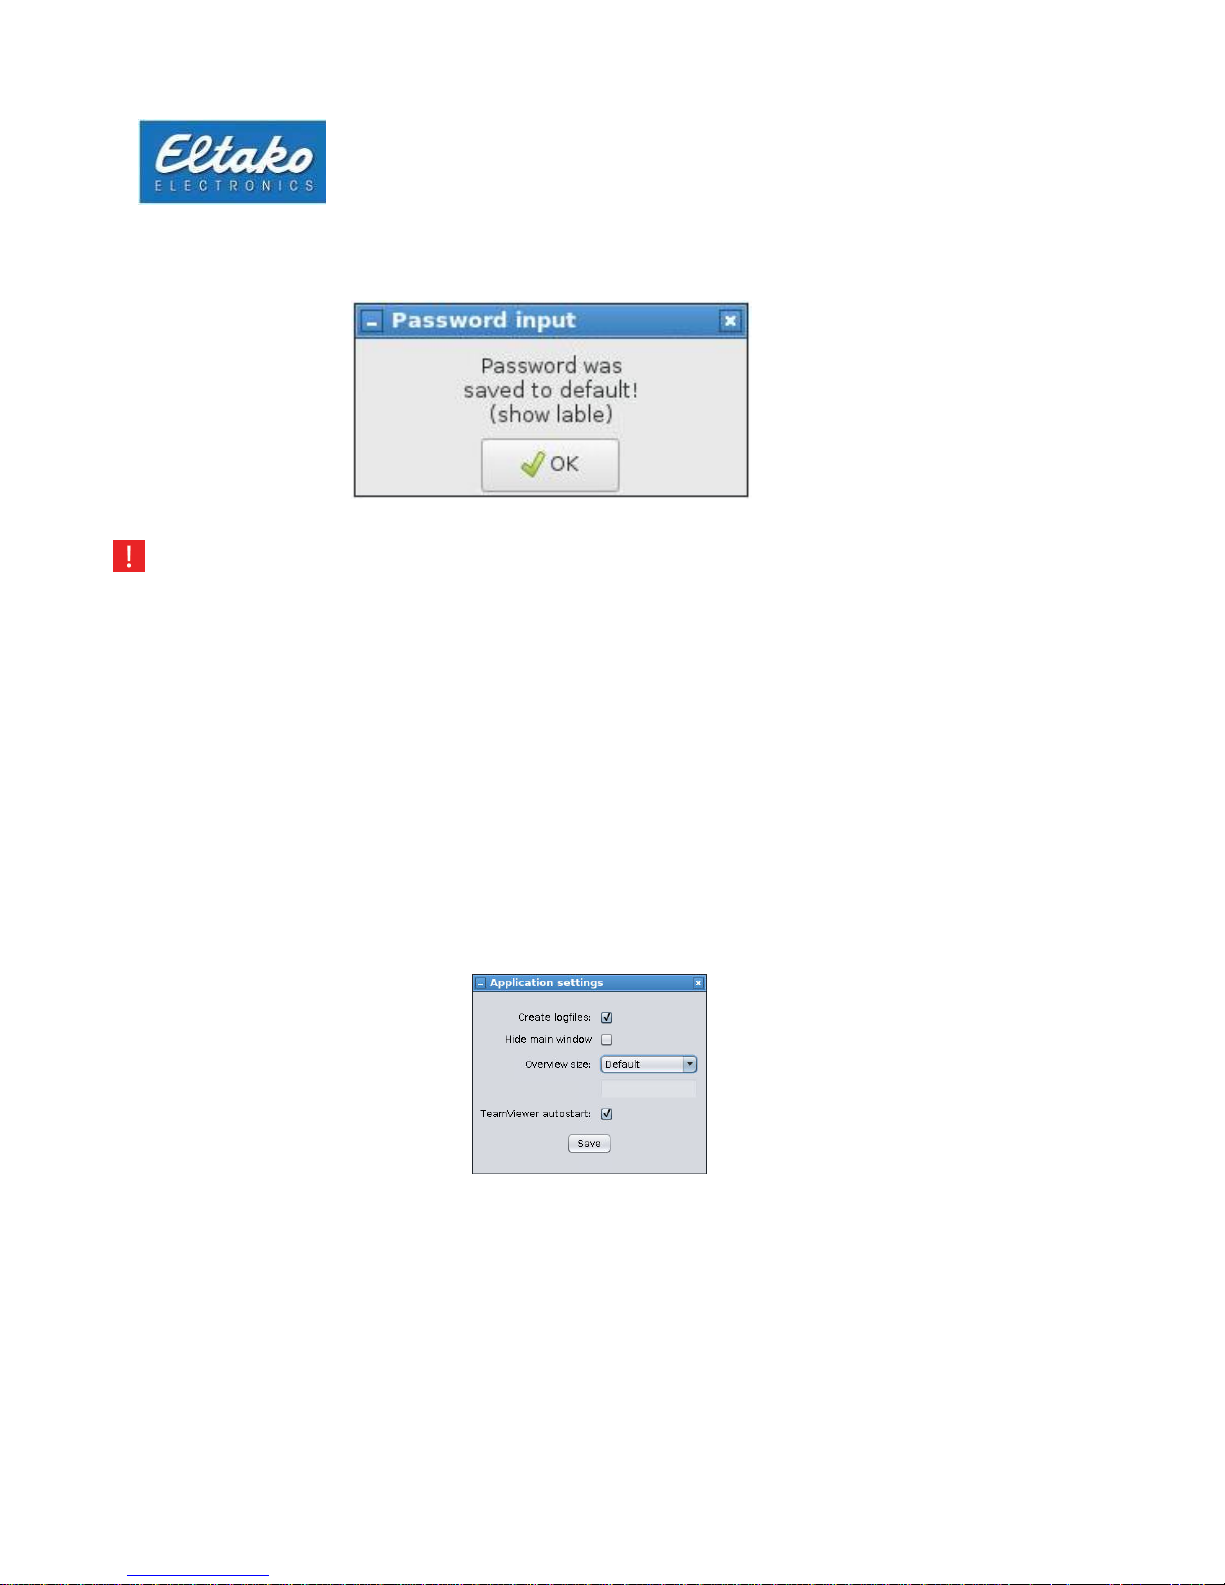
GFVS 4.0 settings
This dialog is opened using “System tools - GFVS settings”. The option “Create log files” creates log
files which track any errors and provide assistance to Technical Support.
Adapt the size of the overview window to the connected PC client using “Overview size”.
“TeamViewer Autostart” starts TeamViewer to the Autostart routine. A reboot is needed to accept the
setting.
“Hide main window” starts the Eltako GFVS 4.0 software with the overview window. The buttons in
the main window are integrated in the “Configuration” menu.
Figure 10: MAC address of Ethernet interface
Figure 11: Program settings
Page 10
Quick Start Guide Eltako GFVS-Safe IV
10
Figure 12: Configuration menu
4.3
Presettings
4.3.1
License
The Eltako GFVS-Safe IV is delivered with an activated Eltako GFVS 4.0 license. If it is necessary to
carry out a repeat activation, an Eltako GFVS 4.0 license key is included. However, it must be released
by Eltako before activation. Contact Technical Support for this.
4.3.2
Database
PostgreSQ database is set up for data management.
4.3.3
Network
The LAN interface is set up to operate in a network with DHCP.
Go to [Link information] and an information window appears containing all active interface interfaces and
their settings.
Figure 13: Configuration menu
Page 11

Quick Start Guide Eltako GFVS-Safe IV
11
Figure 14: Configuration menu
5 Eltako quickcon® technology
This allows the simple connection of an Eltako GFVS Server to a Mobile Client without any knowledge
of how to handle IP address translations (e.g. DynDNS) or port blocking.
Important: Using the app creates data traffic which may entail additional costs
independent of the mobile radio contract.
Download the Eltako GFVS Tablet or the Eltako GFVS Mobile Client from the App Shop of your mobile radio
system (iPhone->iTunes, Android -> Google Play) and install it.
Figure 15: Use of encrypted links without port blocking or IP address translation
Page 12

Quick Start Guide Eltako GFVS-Safe IV
12
Configuration of Mobile Client and Eltako GFVS Server
First create a profile in the Eltako GFVS 4.0 software using “Configuration - Client - Profile
manager“. This defines the rights of the Mobile Client in the Eltako GVFS 4.0 software.
Then create a new device in the Eltako GFVS 4.0 software using “Configuration - Client - Eltako GFVS 4.0
Mobile”.
Figure 16: Profile manager
Figure 17: Create Mobile Client
Page 13

Quick Start Guide Eltako GFVS-Safe IV
13
GFVS Client
Then assign the user to the corresponding access profile and save your settings. Also enter the name of
the smartphone or tablet.
Right-click on the client set up and then on “Show QR code”.
Figure 18: Name Mobile Client
Figure 19: Show QR code
Page 14

Quick Start Guide Eltako GFVS-Safe IV
14
Open the GFA2 app on the appropriate device and go to Create profile.
Drag the bright area of the display over the displayed QR code of the GFVS server. As soon as the GFA2
recognises the QR code, the screen switches to the access profiles. Swipe left over the newly set-up access
profile to rename it.
Figure 20: Create a profile
Figure 21: Create a profile
Page 15

Quick Start Guide Eltako GFVS-Safe IV
15
Highlight the “Eltako GFVS 4.0” text to rename the profile.
Figure 22: Rename profile
Figure 23: Rename profile
Page 16

Quick Start Guide Eltako GFVS-Safe IV
16
Press the icon to return to the profile overview.
Access your GFVS server by tapping the corresponding profile.
Figure 24: Select profile
Figure 25: Server access
Page 17

Quick Start Guide Eltako GFVS-Safe IV
17
6 System tools
6.1
GFVS tools
Right-click on the background to view the menu. Use “System tools - GFVS tools” to access a dialog in
which you can save or restore the system and/or the database.
The following dialog appears:
Figure 26: “System tools” menu
Figure 27: Eltako GFVS System Tools
Page 18

Quick Start Guide Eltako GFVS-Safe IV
18
6.1.1
Save, restore or delete database
To save your database, click “Save database”. A grey bar appears at the bottom of the window.
As soon as the database is saved, a new dialog appears. Confirm by clicking “OK”.
Figure 28: “Save database” is executed
Figure 29: Save database successful
Page 19

Quick Start Guide Eltako GFVS-Safe IV
19
If you want to restore an older database, select the required database from the dropdown box.
Alternatively, select a database with the as-delivered state of the Eltako GFVS-Safe IV.
Figure 30: Restore database
After you select a database, press the button “Restore database”.
The dialog confirms that the database was successfully restored. Click “OK”. To delete a backup of the
database, select the database from the dropdown box and then confirm by clicking the button “Delete
database backup”:
The dialog below asks you whether if you want really delete the database backup. Confirm by clicking
“Yes” to delete the selected database or select “No” to cancel the process.
Figure 31: Restore successful
Figure 32: Delete backup
Page 20

Quick Start Guide Eltako GFVS-Safe IV
20
6.1.2
System backup
Click the button “Save system” and your system is saved.
The following dialog appears:
Figure 33: System backup
Figure 34: User backup
Page 21

Quick Start Guide Eltako GFVS-Safe IV
21
If the backup was successful, another dialog appears. End this dialog by clicking “OK”. The dropdown box
“Maximum number of system backups” indicates how many backups of your system are saved. Use the
menu option “Restore system backup” to play back an earlier backup.
The backup contains the system state at the time of the backup. If changes were made in the GFVS since
that time, the state of the database required must be played back.
Note: Make sure that the Eltako GFVS-Safe IV is not unplugged from the power source during
the playback process.
Figure 36: Restore backup
Figure 35: Restore backup
Page 22

Quick Start Guide Eltako GFVS-Safe IV
22
Use ‘Delete system backup’ to remove backups which are no longer necessary.
6.1.3
Delete license in case of license problems
Caution: Only execute this process on the instruction of Support. The license must first be released for
repeat activation. The button “Delete license” deletes your Eltako GFVS 4.0 license. Click on it to open a
window to enter the password. Password: 0000 Only use this option on the instruction of Eltako GFVS 4.0
Support. Please note that you cannot use the Eltako GFVS 4.0 software without a valid license. A web
access is also required to activate the new license.
Confirm the deletion process by pressing “Yes”. Then enter a new license in the next dialog to activate it.
Figure 37: Restore backup
Figure 38: Delete license
Figure 39: Enter new license key
Page 23

Quick Start Guide Eltako GFVS-Safe IV
23
6.1.4
Restore factory settings
The system is reset to the as-delivered state. This is only necessary in exceptional cases.
Figure 40: Restore factory settings
Figure 41: Restore factory settings
Page 24

Quick Start Guide Eltako GFVS-Safe IV
24
Figure 42: Restore factory settings
When you confirm the repeat question, the system reboots and executes the restore process.
Figure 43: Restore process
Page 25

Quick Start Guide Eltako GFVS-Safe IV
25
6.1.5
GFVS settings
Additional settings can be made to the GFVS server under the menu option “GFVS Settings”.
Create log files: Creates log files which log the behaviour of the GFVS software.
Hide main window: After activating the menu option, the GFVS software starts without the
small start window every time. The start procedure goes directly to the
overview window. The setting options of the start window are then
displayed in the overview under [Configuration].
Overview window size: If one or more PC clients are in use, you can set a standard size for the
overview window here. The icons and controls are positioned at the
same spot on each client.
TeamViewer Autostart: When the function is activated, the system is started with TeamViewer
every time.
It is not recommended to activate this function or leave it active if no support ticket
exists or a support is pending.
Figure 44: Program settings
Figure 45: Configuration
Page 26

Quick Start Guide Eltako GFVS-Safe IV
26
6.1.6
GFVS update
Use “System tools - GFVS update” to update the firmware in the Eltako GFVS-Safe IV or the Eltako GFVS
4.0 software. If there is an update for your system, confirm the window with “Yes”. Depending on the size
of the update and the web access used, the procedure may take some time. Internet access is needed.
6.2
Bap-Finder
The Bap-Finder software is for finding and configuring IPG-170 and TF-IP-Con. The software assists in
network configuration. For more details please refer to the corresponding documentation.
Figure 46: Update
Figure 47: BAP-Finder
Page 27

Quick Start Guide Eltako GFVS-Safe IV
27
6.3
Code Meter
Settings in the Code Meter control centre are only carried out by Support.
6.4
Change web code
Web access to the GFVS is activated by setting the web code. The website can be reached at “http://IP
address” to upload/download files. The IP address of the GFVS server can be displayed in the network
administrator.
7 System settings
Other settings can be carried out in the menu option “System settings”.
Figure 48: “System settings” menu
Page 28

Quick Start Guide Eltako GFVS-Safe IV
28
7.1
Network settings
Appropriate configurations can be carried out in the Network settings menu option.
Go to the associated network interface and carry out the configuration under [Edit].
We advise you to assign the server with a fixed IP address. However, make sure that the
address is not outside the IP range of the local DHCP server.
7.2
Remote settings
Access by VNC to the GFVS server is activated in the as-delivered state. The default password is located
on the rear of the device.
We urgently advise you to change this directly after start-up.
Figure 49: Network settings
Figure 50: Configuration
Page 29

Quick Start Guide Eltako GFVS-Safe IV
29
7.3
Date/time
You can change the date and time in the dialog under the menu option “System settings - Date/time”.
Automatic clock synchronisation can be activated in the Configuration option.
7.4
Search monitor
If several monitors are connected to the GFVS server, you can define which the primary clock is with this
menu option.
Figure 51: Time and date settings
Figure 52: Clock synchronisation
Page 30

Quick Start Guide Eltako GFVS-Safe IV
30
7.5
Display resolution
If there are problems with a monitor, the required resolution and refresh rate of the connected monitor can be
set here.
7.6
OSD keyboard
Figure 54: OSD keyboard
Country-specific keyboard assignments can be made here.
Figure 53: Display resolution
Page 31

Quick Start Guide Eltako GFVS-Safe IV
31
7.7
Technical Support (TeamViewer)
TeamViewer offers the possibility of remote access by Technical Support.
7.8
Copy background images
If you want to use your own background images and user-defined icons in the Eltako GFVS 4.0 software,
you can copy them from a USB stick to the Eltako GFVS-Safe IV.
Note: The following folder structure must be set up on an empty USB stick:
/hc_import/pictures/*.*. Otherwise, the images are not copied.
The menu option “System settings - Import-Export” opens the window “Data transmission”. Tick the
checkbox in front of “Import directory” and then click the button “Import” to copy all the files from the folder
on the USB stick to the hard disk. The “Delete” button deletes the import, export or log directory depending
on whether the tick is set or not.
Figure 55: TeamViewer
Figure 56: Copy images and icons
Page 32

Quick Start Guide Eltako GFVS-Safe IV
32
8 Switch off Eltako GFVS-Safe IV
Right-click on the background to open the “Power” menu.
Here you can choose whether you want to start, restart or switch off the GFVS-Safe IV in Recovery
Mode.
9 Conformity
Eltako GmbH hereby declares that the wireless system type GFVS-Touch IV complies with Directive
2014/53/EU. The full wording of the EU Declaration of Conformity is available at the following web address:
www.eltako.com
Figure 57: “Power” menu
Page 33

Quick Start Guide Eltako GFVS-Safe IV
33
10 Technical Support
For support, please contact:
Eltako GmbH
Hofener Strasse 54
70736 Fellbach
Germany
Product consulting and technical information:
Tel: +49 (0)711 943500-02
or by email to: Technik-Beratung@eltako.de
Customer service and order processing
Tel: +49(0)711 94350001
Fax: +49(0)711 5183740
Kundenservice@eltako.de
 Loading...