

Page 1
00-4518 Cover 12/1/06 5:38 PM Page 1
6740
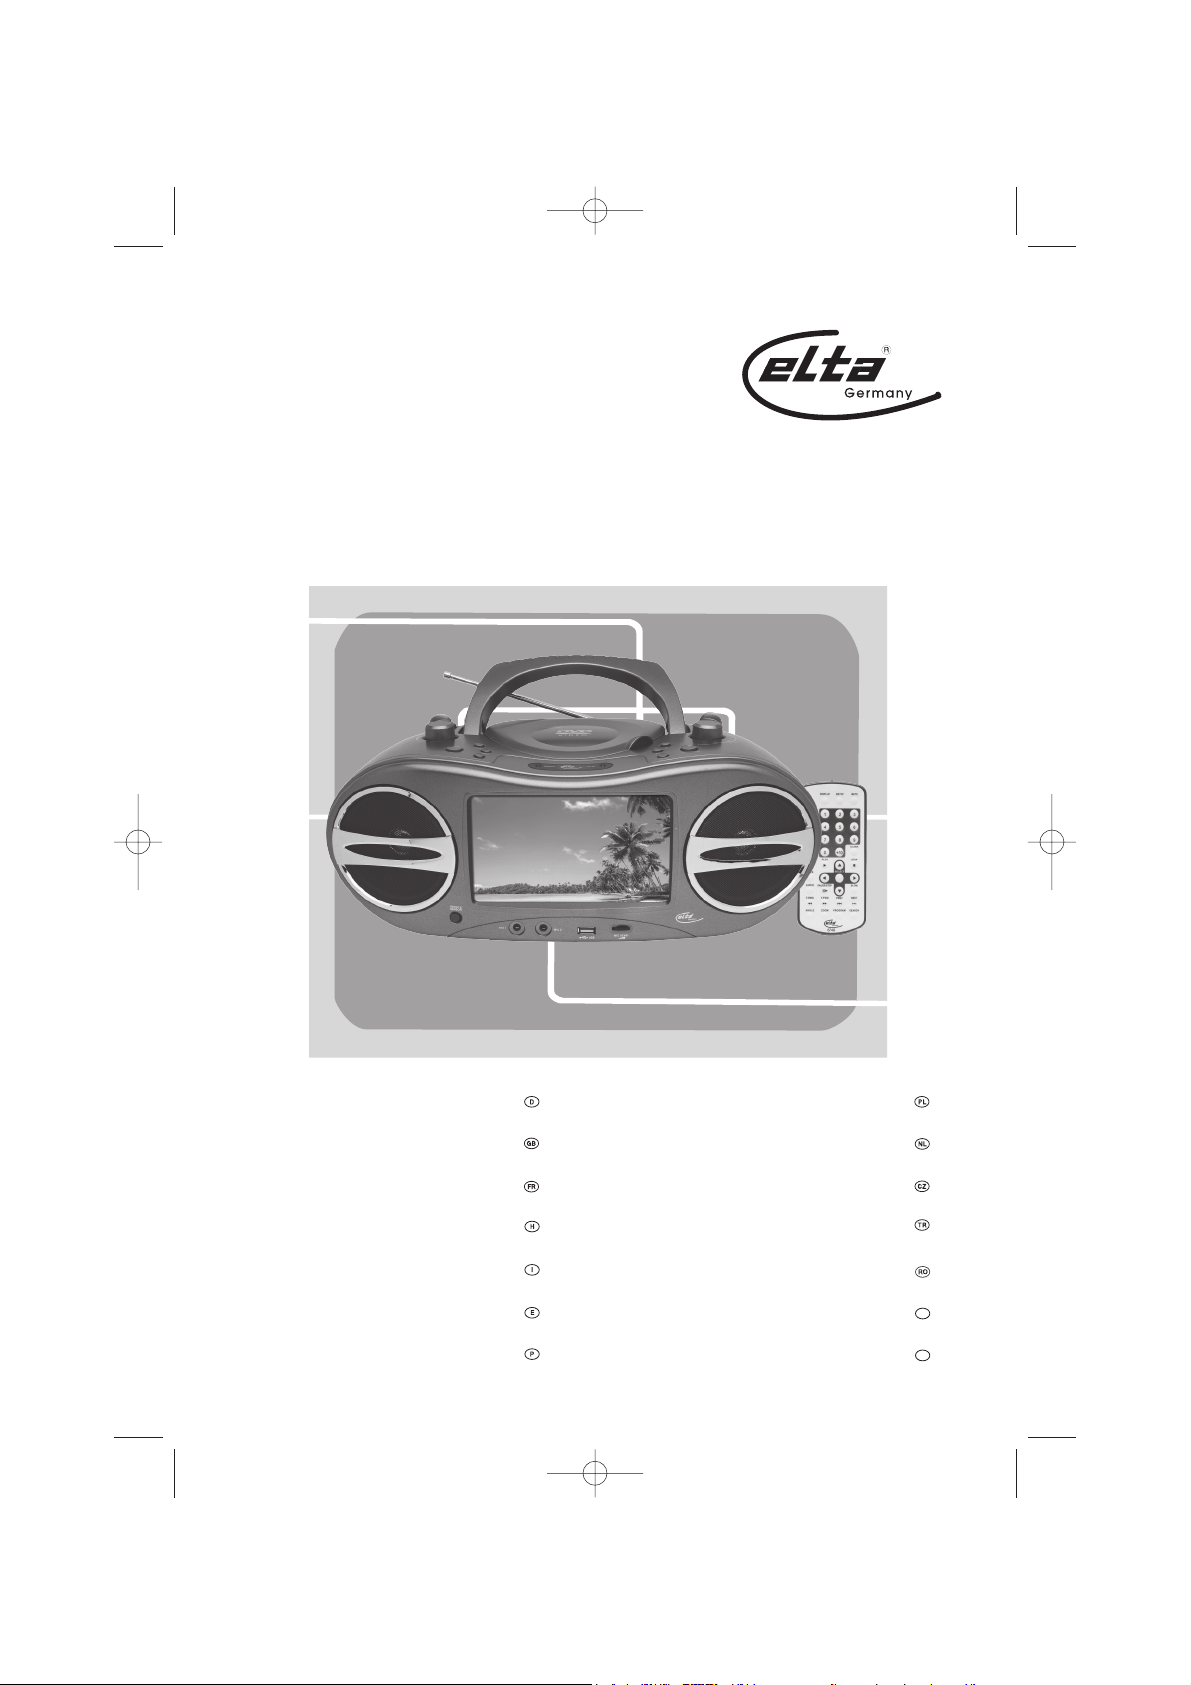
Tragbares Radio mit eingebautem
DVD-Player und 7“ TFT-Bildschirm
Portable Radio with built-in DVD
Player and 7” TFT Screen
Radio Portable avec Lecteur DVD
intégré, Ecran TFT 7’’
Hordozható rádió beépített DVD-
lejátszóval és 7 collos TFT képernyővel
Radio portatile con lettore DVD
integrato e schermo TFT da 7”
Radio portátil con reproductor
DVD y pantalla TFT de 7” integrados
Rádio Portátil com Leitor DVD
incorporado e ecrã TFT de 7”
Radio przenośne z wbudowanym
odtwarzaczem DVD oraz ekranem 7” TFT
Draagbare Radio met ingebouwde
DVD-speler en 7” TFT-scherm
Přenosné rádio se zabudovaným DVD
přehrávačem a 7” TFT obrazovkou
Dahili DVD çalarlı ve 7” TFT
ekranlı seyyar radyo
Radio Portabil cu DVD Player
Incorporat si Ecran de 7” TFT
Портативно радио с вграден ДВД
плеър и 7-инчов TFT екран
Портативный радиоприемник со встроенным
DVD-проигрывателем и 7” TFT экраном
BG
RU
Page 2
2.
MODELL: 6740
Tragbares Radio mit eingebautem DVD-Player und 7“ TFT-Bildschirm
SICHERHEITSHINWEISE
VORSICHT
STROMSCHLAGGEFAHR
NICHT ÖFFNEN
VORSICHT: ZUR VERMEIDUNG VON
Der Blitz im gleichseitigen
Dreieck weist auf gefährliche
Hochspannung im Gerät hin,
die zu Stromschlag führen
kann.
STROMSCHLAG GERÄTEGEHÄUSE
NICHT ÖFFNEN.
ES BEFINDEN SICH KEINE VOM
VERBRAUCHER WARTBAREN
TEILE IM INNERN DES GERÄTS.
REPARATUR UND WARTUNG NUR
DURCH FACHPERSONAL.
Das Ausrufungszeichen
imgleichseitigen Dreieck
weist auf wichtige
Bedienungs- und
Wartungsanleitungen hin.
WEITERE INFORMATIONEN
Achtung bei Kleinteilen und Batterien, bitte nicht Verschlucken, dies kann zu ernsthaften
Schädigungen oder Erticken führen. Achten Sie insbesondere bei Kindern darauf, dass Kleinteile
und Batterien außerhalb deren Reichweite sind.
Wichtige Hinweise zum Gehörschutz
Vorsicht:
Ihr Gehör liegt Ihnen und auch uns am Herzen.
Deshalb seien Sie bitte vorsichtig beim Gebrauch dieses Gerätes.
Wir empfehlen: Vermeiden Sie hohe Lautstärken.
Sollte das Gerät von Kindern verwendet werden, achten Sie darauf, dass das Gerät nicht zu laut
eingestellt wird.
Achtung!
Zu hohe Lautstärken können bei Kindern irreparable Schäden hervorrufen.
Lassen Sie NIEMALS Personen, und insbesondere keine Kinder, Gegenstände in Löcher,
Schächte oder andere Öffnungen des Gehäuses stecken; dies könnte zu einem tödlichen
elektrischen Schlag führen. Das Gerätegehäuse, darf nur von ausgebildetem Fachpersonal
geöffnet werden.
Bitte verwenden Sie das Gerät nur seiner vorhergesehenen Bestimmung entsprechend. Das
Gerät ist ausschließlich für den Einsatz in Wohn- und Geschäftsbereichen bestimmt.
Bitte bewahren Sie die Bedienungsanleitung auch für eine spätere Verwendung sorgfältig auf.
Hinweise zum Umweltschutz
Dieses Produkt darf am Ende seiner Lebensdauer nicht über den normalen Haushaltsabfall
entsorgt werden, sondern muss an einem Sammelpunkt für das Recycling von elektrischen und
elektronischen Geräten abgegeben werden. Das Symbol auf dem Produkt, der Gebrauchsanlei
tung oder der Verpackung weist darauf hin.
Die Werkstoffe sind gemäß ihrer Kennzeichnung wieder verwertbar. Mit der Wiederverwendung,
der stofflichen Verwertung oder anderen Formen der Verwertung von Altgeräten leisten Sie einen
wichtigen Beitrag zum Schutze unserer Umwelt.
Bitte erfragen Sie bei der Gemeindeverwaltung die zuständige Entsorgungsstelle.
Page 3
Behindern Sie nicht die Belüftung des Gerätes, wie etwa mit Vorhängen, Zeitungen, Decken oder
mit Möbelstücken, die Belüftungsschlitze müssen immer frei sein. Überhitzung kann Schäden
verursachen und die Lebensdauer des Gerätes verkürzen.
Hitze und Wärme
Setzen Sie das Gerät nicht direkter Sonnenstrahlung aus. Achten Sie darauf, dass das Gerät
keinen direkten Wärmequellen wie Heizung oder offenem Feuer ausgesetzt ist. Achten Sie darauf,
dass die Lüftungsschlitze des Gerätes nicht verdeckt sind.
Feuchtigkeit und Reinigung
Dieses Produkt ist nicht wasserfest! Tauchen Sie den Player nicht in Wasser ein und lassen ihn
auch nicht mit Wasser in Berührung kommen. In den Player eindringendes Wasser kann ernsthafte
Schäden verursachen.
Verwenden Sie keine Reinigungsmittel, die Alkohol, Ammoniak, Benzen oder Schleifmittel
enthalten, da diese den Player beschädigen können. Verwenden Sie zum Reinigen ein weiches,
feuchtes Tuch.
Batterien fachgerecht entsorgen
Batterien gehören nicht in den Hausmüll. Die Batterien müssen bei einer Sammelstelle für Altbatterien abgegeben werden. Werfen Sie Batterien niemals in Feuer.
WICHTIGE SICHERHEITSHINWEISE
1. ALLE ANWEISUNGEN LESEN - Vor Betrieb des Geräts sollten Sie alle Sicherheits- und
Bedienungsanleitungen lesen.
2. ANWEISUNGEN AUFBEWAHREN - Die Sicherheits- und Bedienungsanleitungen sollten für zukünftigen
Bezug aufbewahrt werden.
3. WARNUNGEN BEACHTEN - Die Warnungen auf dem Gerät und in der Bedienungsanleitung sollten
beachtet werden.
4. ANWEISUNGEN BEFOLGEN - Alle Bedienungs- und Verwendungsanweisungen sollten befolgt werden.
5. WASSER UND FEUCHTIGKEIT - Dieses Gerät nicht in der Nähe von Wasser verwenden, z.B. in der
Nähe einer Badewanne, eines Waschbeckens, einer Küchenspüle, eines Waschkübels, in einem nassen
Keller, in der Nähe eines Schwimmbeckens usw.
6. BELÜFTUNG - Schlitze und Öffnungen im Gehäuse dienen der Belüftung. Sie sind für zuverlässigen
Betrieb des Gerätes und Schutz vor Überhitzung erforderlich und dürfen nicht blockiert oder abgedeckt
werden. Die Öffnungen sollten niemals dadurch blockiert werden, dass das Gerät auf ein Bett, ein Sofa,
einen Teppich oder eine ähnliche Oberfläche gestellt wird. Das Gerät sollte nur dann in Einbauinstallierung
wie in einem Bücherschrank oder einem Regal verwendet werden, wenn angemessene Belüftung
vorgesehen ist bzw. die Anweisungen des Herstellers befolgt worden sind.
7. WÄRME - Das Gerät sollte fern von Wärmequellen wie Radiatoren, Heizkörpern, Öfen und anderen
wärmeerzeugenden Geräten (einschließlich Verstärkern) aufgestellt werden.
8. STROMVERSORGUNG - Dieses Gerät sollte nur mit der auf dem Typenschild angegebenen
Stromversorgungsart betrieben werden. Wenn Sie nicht sicher sind, was für eine Stromversorgung Sie
haben, so wenden Sie sich bitte an Ihren Fachhändler oder Ihr Elektrizitätswerk. Beziehen Sie sich für
Batteriebetrieb oder andere Stromquellen bitte auf die Bedienungsanleitung.
9. NETZKABELSCHUTZ - Netzkabel sollten so verlegt werden, dass möglichst nicht darauf getreten wird
und dass sie nicht eingeklemmt werden, mit besonderer Beachtung der Kabel an Steckern,
Verlängerungskabeln und dem Austritt des Kabels aus dem Gerät.
10. NICHTBENUTZUNG – Ziehen Sie bei längerer Nichtbenutzung Netzstecker und Antennenkabel ab.
11. EINDRINGEN VON FREMDKÖRPERN UND FLÜSSIGKEITEN -
durch die Öffnungen in das Gerät schieben, da diese unter hoher Spannung stehende Teile berühren oder
kurzschließen können, wodurch es zu Feuer oder Stromschlag kommen kann. Niemals Flüssigkeiten
irgendwelcher Art auf dem Gerät verschütten. Bitte demontieren Sie das Gerät nicht!
12. BESCHÄDIGUNG, DIE EINE WARTUNG ERFORDERT -
sich an einen autorisierten Kundendienst, wenn:
Niemals Objekte irgendwelcher Art
Ziehen Sie stets den Netzstecker und wenden
3.
Page 4

4.
a. Das Netzkabel oder der Stecker beschädigt ist;
b. Flüssigkeit oder Fremdkörper in das Gerät eingedrungen sind;
c. Das Gerät Regen oder Feuchtigkeit ausgesetzt war;
d. Das Gerät nicht wie gewöhnlich funktioniert. Stellen Sie nur jene Steuerungen ein, die in der
Bedienungsanleitung beschrieben sind;
e. Das Gerät fallen gelassen oder beschädigt wurde;
f. Das Gerät schwere Veränderungen der Leistungsmerkmale zeigt.
13. WARTUNG - Versuchen Sie nicht, das Gerät selbst zu warten, da Sie sich durch Öffnen bzw. Entfernen
von Abdeckungen hohen Spannungen und sonstigen Gefahren aussetzen können. Wenden Sie sich mit
Wartung und Reparaturen stets an einen autorisierten Kundendienst.
14. REINIGUNG – Ziehen Sie vor dem Reinigen den Netzstecker. Benutzen Sie keine flüssigen oder
Sprühreiniger, sondern nur ein feuchtes Tuch. Folgen Sie den Reinigungshinweisen in der
Bedienungsanleitung.
15. GEWITTER – Ziehen Sie während eines Gewitters und bei längerer Nichtbenutzung Netzstecker und
Antennenkabel als zusätzlichen Schutz gegen Überspannung ab.
16. SICHERHEITSÜBERPRÜFUNG – Verlangen Sie nach einer Wartung stets eine Sicherheitsüberprüfung
durch den Kundendienst.
17. ÜBERLASTUNG – Überlasten Sie Steckdosen und Verlängerungskabel nicht, das kann zu Feuer und
Stromschlag führen.
18. ELEKTROSTATISCHE ENTLADUNG - Wenn ein Fehler angezeigt wird oder eine Fehlfunktion besteht,
das Netzkabel rausziehen und alle Batterien entfernen. Danach das Netzkabel wieder anschließen.
ACHTUNG
DIESER CD-PLAYER IST EIN KLASSE 1 LASERPRODUKT UND BENUTZT SICHTBARE/UNSICHTBARE
LASERSTRAHLEN, DIE ZU GEFÄHRLICHER STRAHLENBELASTUNG FÜHREN KÖNNEN. BITTE
BETREIBEN SIE DEN CD-PLAYER ENTSPRECHEND DER BEDIENUNGSANLEITUNG.
STEUERUNGEN ODER EINSTELLUNGEN ANDERS ALS IN DIESER BEDIENUNGSANLEITUNG
BESCHRIEBEN KÖNNEN ZUR FREISETZUNG GEFÄHRLICHER STRAHLUNG FÜHREN.
ZUR VERMEIDUNG VON FEUER, STROMSCHLAG UND STÖRUNGEN NUR EMPFOHLENES ZUBEHÖR
VERWENDEN UND GERÄT WEDER REGEN NOCH FEUCHTIGKEIT AUSSETZEN.
WEITERE HINWEISE ZUM GERÄT
Aufstellort des Gerätes
• Vermeiden Sie Vibrationen, Stöße oder geneigte Oberflächen, hierdurch können Komponenten erheblich
beschädigt werden.
• Keine schweren Gegenstände auf den Player stellen.
• Den Player niemals auf Verstärker oder andere Geräte stellen, die heiß werden können.
Magnetische Gegenstände meiden
• Magnetische Gegenstände vom Player entfernt halten, wie beispielsweise nicht abgeschirmte Lautsprecher.
Kondensation:
Feuchtigkeit kann sich in folgenden Fällen auf den Linsen bilden:
• Nach dem Einschalten eines Heizgerät.
• In einem dampfigen oder sehr feuchten Raum.
• Nach dem Umsetzen des Players von einer kalten in eine warme Umgebung.
In diesem Fall sind Fehlfunktionen nicht auszuschließen. Schalten Sie das Gerät nicht ein und benutzen es für
etwa 1 Stunde nicht, bis es ausgetrocknet ist.
Page 5

Umsetzen des DVD-Players
• Entfernen Sie vor einem Transport des Players die CD.
Es empfiehlt sich auch bei Nichtbenutzung des Players die CD zu entfernen und den Player auszuschalten.
Energie sparen
• Es empfiehlt sich bei Nichtbenutzung den DVD-Player auszuschalten.
Bei längerer Nichtbenutzung den Netzstecker aus der Steckdose ziehen.
ANSICHT DER BEDIENELEMENTE / ANSCHLÜSSE
Bedienelemente
Vorderansicht
1 2
1. LAUTSPRECHER
2. REMOTE SENSOR
3. MIC 1 BUCHSE
4. MIC 2 BUCHSE
5. USB PORT
6. MIC LEVEL EINSTELLUNG
7. TFT-DISPLAY
8. BETRIEBSARTSCHALTER
9. HANDGRIFF
10. VOLUME DREHKNOPF
11. BBS TASTE
12. ADJ EINSTELLUNG
13. PREV TASTE
14. NEXT TASTE
15. POWER LED
16. KLAPPE CD-LAUFWERK
Draufsicht
121314
15
1617181920
11
5
3
4
7
6
1
8910
21
222324
Geräterückseiteansicht
26
28
25 29
27
32
30 31
17. GRIFF ZUM ÖFFNEN DER CD-KLAPPE
18. FM ST. LED
19. FR TASTE
20. STOP TASTE
21. PLAY/PAUSE TASTE
22. FF TASTE
23. TUNING DREHKNOPF
24. FREQUENZBEREICH WAHLSCHALTER
25. TELESKOP-ANTENNE
26. VIDEO AUSGANGSBUCHSE
27. AUDIO AUSGANGSBUCHSE RECHTS
28. AUDIO AUSGANGSBUCHSE LINKS
29. BATTERIEFACH
30. TFT ON/OFF SCHALTER
31. AC BUCHSE
32. PHONES BUCHSE
5.
Page 6

6.
Tasten auf der Fernbedienung und ihrer Funktion
1. P/N: Umschalten des TV-Systems
2. REPEAT A-B: Bereich zwischen den Punkten A und B
DISPL AY SETUP
P/N
1
2
3
4
5
6
7
8
9
10
11
12
13
1
A-B
4
AT
REPE
1/ALL
7
U
MEN
0
SUBTI TLE PLAY STOP
TITLE
AUDI
O
PAUSE/ STEP SLOW
F.BWD
F.FWD PREV NEXT
ANGL
E ZOOM
SELEC
+10
MUTE
3
2
5
6
8
9
CLEAR
T
SEARC
HPROGR AM
14
15
wiederholen.
16
3. REPEAT 1/ALL: Wiederholungsbetriebsarten
4. MENU: Hauptmenü (DVD) / PBC ein-/ausschalten (VCD)
5. SUBTITLE: Untertitelsprache
6. PLAY: Wiedergabe
17
7. TITLE: Titel (DVD)
8. AUDIO: Audiosprache
9. PAUSE/STEP: Pause/Einzelschritt
18
10. F.BWD: Schneller Rücklauf
11. F.FWD: Schneller Vorlauf
19
20
12. ANGLE: Blickwinkel (DVD)
21
13. ZOOM: Bild vergrößern/verkleinern
14. DISPLAY: Einblendung Informationsbanner
22
15. SETUP: Systemeinstellung
23
16. MUTE: Stummschaltung
24
17. ZIFFERNTASTEN
25
18. CLEAR: Löschen
26
19. STOP: Beenden
20. SELECT: Auswahl
21. PFEILTASTEN
22. SLOW: Zeitlupe
23. NEXT: Weiter
24. PREV: Zurück
25. SEARCH: Suchen
26. PROGRAM: Programmierte Wiedergabe
INSTALLATION UND ANSCHLUSS
Auspacken:
Nehmen Sie Ihren portablen DVD-Player vorsichtig aus der Verpackung. Bitte heben Sie die Verpackung zur
weiteren Verwendung auf. Entfernen Sie alle Klebestreifen.
Befestigung der Geräteaufsteller:
Setzen Sie die zwei Teile der beiden
Aufstellers zusammen.
Page 7

Stecken Sie die beiden Geräteaufsteller in die Einsätze auf
der Unterseite des Players und schieben sie in ihre Position,
bis sie einrasten.
Durch Hochklappen der Aufsteller kann der Player in eine
geeignete Betrachtungsposition gebracht werden.
Batterien:
Dieses Gerät arbeitet mit 8 Batterien Typ „UM2“ oder „C“.
Wir empfehlen die Benutzung von Alkali-Batterien für eine
längere Spielzeit.
Einsetzen der Batterien
1. Entfernen Sie den Batteriefachdeckel durch leichtes
Herunterdrücken und schieben ihn nach außen. Setzen Sie
8 Batterien Typ „UM-2“ oder „C“ ein. ACHTEN SIE BEIM
EINSETZEN DER BATTERIEN AUF DIE NEBEN
DEM BATTERIEFACH DARGESTELLTE POLARITÄT (+/-)
2. Schieben Sie die Abdeckung wieder auf das Batteriefach.
HINWEIS: Alte Batterien können anschwellen und auslaufen. Entnehmen Sie erschöpfte Batterien oder wenn
Sie das Gerät für einen längeren Zeitraum nicht benutzen, damit das Gerät nicht beschädigt wird.
HINWEIS: Der Batteriebetrieb wird automatisch eingeschaltet, wenn der Netzstecker aus der Steckdose oder
der Rückseite des Geräts gezogen wird.
GRUNDLEGENDER ANSCHLUSS
Es empfiehlt sich der Anschluss an einen Multi-System Fernseher.
Stellen Sie sicher, dass der Player und andere Geräte ausgeschaltet sind und der Netzstecker gezogen ist,
bevor Sie die Verbindungen herstellen.
Lesen Sie vor dem Anschluss weiterer Gerät die Anweisungen.
Beachten Sie beim Anschluss von Audio- und Videokabeln die Farbkodierung.
Hinweise:
• Während der Wiedergabe einer DVD kann die Lautstärke des Fernsehers niedriger als
bei Fernsehsendungen sein. Passen Sie in diesem Fall die Lautstärke an.
• Wenn der DVD-Player über einen Videorekorder an den Fernseher angeschlossen ist,
kann bei einigen DVD das Bild nicht normal wiedergegeben werden. Schließen Sie In
diesem Fall den Player nicht über einen VCR an.
• Bei Anschluss an einen Fernseher kann das eingebaute TFT-Display mit dem Schalter
TFT ON/OFF ausgeschaltet werden.
7.
Page 8

8.
Anschluss an einen Fernseher
RL
Zum Video-Eingang (gelb)
Zum Audio-Eingang (rot, weiß)
Audio-/Videokabel
Zur Steckdose
Netzkabel
ANSCHLUSS VON MIKROFON UND KOPFHÖRER
1. Anschluss eines Mikrofons.
• Schließen Sie ein Mikrofon an eine der MIC-Buchsen an.
2. Stellen Sie den MIC Level auf den gewünschten Pegel.
3. Schließen Sie einen Kopfhörer an die Kopfhörerbuchse an.
3
1 1 2
Page 9

VORBEREITUNG DER FERNBEDIENUNG
Einsetzen der Batterie A
Setzen Sie die Batterie unter Beachtung der Polarität (+) und
(-) ein, wie in der Abbildung rechts dargestellt.
Hinweise zur Fernbedienung
• Benutzen Sie eine CR2025 Lithium-Knopfzelle.
• Die Batterie hält normalerweise über ein Jahr, die
Lebensdauer hängt jedoch von der Nutzungshäufigkeit der
Fernbedienung ab.
• Lässt die Reichweite der Fernbedienung nach, dann ist die
Batterie erschöpft und Sie müssen die Batterie ersetzen.
• Batterie nicht aufladen, kurzschließen, zerlegen, erhitzen
oder ins Feuer werfen.
• Lassen Sie die Fernbedienung nicht fallen, treten nicht
darauf und stoßen sie auch anderweitig nicht hart an,
Fehlfunktionen können die Folge sein.
• Bei längerer Nichtbenutzung entnehmen Sie bitte die
Batterie.
Reichweite der Fernbedienung B
Richten Sie die Fernbedienung von nicht mehr als 7 m
Entfernung im Winkel von 60º auf das Sensorfenster vorn im
Gerät aus.
Hinweise zur Reichweite der Fernbedienung:
• Richten Sie keine hellen Lampen auf das Sensorfenster.
• Die Reichweite hängt von der Helligkeit des Raums ab.
• Gegenstände zwischen Fernbedienung und Sensorfenster
blockieren die Übertragung.
• Benutzen Sie die Fernbedienung nicht gleichzeitig mit
Fernbedienungen für andere Geräte.
A
L
++
i
t
h
C
i
u
m
2r
0
C
3
2
V
5
e
s
l
c
l
2
B
FERNBEDIENUNGS-SENSOR
30
30
DISPLAY SETUP
P/N
1
2
A-B
4
5
AT
REPE
1/ALL
7
8
MEN
U
0
+10
SUBTITL
E PLAY STOP
TITLE
T
SELEC
AUDI
O
PAUSE/STEP SLOW
F.BWD
F.FWD PREV NEXT
ANG
LE ZOOM
7 m
MUT
E
3
6
9
R
CLEA
SEARC
HPROGRAM
BEDIENUNG
GRAPHISCHE BENUTZERSCHNITTSTELLE
Informationen und Einstellungen können auf dem Bildschirm des Fernsehers oder DVD-Players angezeigt
werden.
VORBEREITUNG
Schalten Sie den Fernseher ein und wählen den Video-Eingangsmodus.
9.
Page 10

10.
INBETRIEBNAHME
1. Schalten Sie den Player ein.
2. Öffnen Sie die Klappe des CD Laufwerks.
3. Legen Sie eine CD mit dem Aufdruck nach oben auf die schwarze Halterung mit den 3 Halteclips.
4. Schließen Sie die Klappe des CD Laufwerks wieder, der Ladevorgang beginnt nun automatisch.
5. Wenn ein Menübildschirm auf dem Fernseher erscheint, wählen Sie mit den Pfeiltasten oder den
Zifferntasten den gewünschten Track aus und starten die Wiedergabe mit SELECT auf der Fernbedienung
oder mit PLAY/PAUSE am Gerät.
EINSTELLEN DER LAUTSTÄRKE
Stellen Sie die Lautstärke am Gerät mit dem VOLUME Drehknopf zwischen MIN und MAX ein.
AKTIVIEREN DER BASS-VERSTÄRKUNG
Drücken Sie die Taste BBS am Gerät. Der Bass erklingt voller und kräftiger. Ein erneutes Drücken der Taste
BBS schaltet die Bass-Verstärkung wieder aus.
KAPITEL/TRACK VORWÄRTS ODER RÜCKWÄRTS
DVD:
Mit den Tasten NEXT oder PREV können Sie während der Wiedergabe zum nächsten oder vorherigen Kapitel
springen.
VCD/CD:
Mit den Tasten NEXT oder PREV können Sie während der Wiedergabe zum nächsten oder vorherigen Track
springen.
SCHNELLER VOR- UND RÜCKLAUF
Durch mehrfaches Drücken der Tasten F.FWD oder F. BWD auf der Fernbedienung oder mit FF oder FR am
Player können Sie die CD vorwärts oder rückwärts mit den Geschwindigkeiten X2, X4, X8, X20 und wieder
normal durchsuchen.
Während der Suche wird die Lautstärke heruntergeregelt
Setzen Sie die normale Wiedergabe mit PLAY fort.
PAUSE ODER EINZELBILD-WIEDERGABE (CD/MP3)
Mit der Taste PAUSE/STEP auf der Fernbedienung wird die Wiedergabe unterbrochen. Setzen Sie die
normale Wiedergabe mit PLAY fort
PAUSE ODER EINZELBILD-WIEDERGABE (VCD/DVD)
Im Pausemodus geht der Player bei jedem Tastendruck auf PAUSE/STEP auf der Fernbedienung ein Bild
weiter. Setzen Sie die normale Wiedergabe mit PLAY oder erneuten Drücken von PAUSE/STEP fort.
WIEDERGABE BEENDEN
Beenden Sie die Wiedergabe mit einem Tastendruck auf STOP auf der Fernbedienung oder am Player. Der
Player aktiviert die Wiederaufnahmefunktion, wenn STOP einmal gedrückt wurde. Das erneute Drücken von
PLAY startet die Wiedergabe an der Stelle, an der die Wiedergabe angehalten wurde. Öffnen Sie die Klappe
des CD Laufwerks oder drücken STOP ein zweites Mal zum Löschen der
Wiederaufnahmefunktion.
Page 11

ZEITLUPE
nur VCD/DVD
Drücken Sie während der Wiedergabe die Taste
SLOW auf der Fernbedienung. Die CD wird zuerst
mit halber Geschwindigkeit wiedergegeben. Jeder
weitere Tastendruck verringert die Wiedergabege
schwindigkeit (bis zu 1/7 der normalen Geschwindigkeit).
Setzen Sie die normale Wiedergabe mit PLAY fort.
EINMAL/ALLE WIEDERHOLEN
Drücken Sie während der Wiedergabe die Taste
REPEAT 1/ALL auf der Fernbedienung.
DVD
Ein oder alle Kapitel/Titel werden wiederholt.
VCD/CD
Eine oder alle Tracks wiederholt.
HINWEIS: Bei VCD funktioniert REPEAT 1/ALL nur
bei ausgeschaltetem PBC.
BEVORZUGTE SZENE SUCHEN
1. Drücken Sie während der Wiedergabe die Taste
SEARCH auf der Fernbedienung und markieren
mit den Pfeiltasten das wiederzugebende
Element (Titel, Kapitel oder Kapitelzeit).
2. Geben Sie die gewünschte Nummer oder Zeit mit
den Zifferntasten ein.
3. Bestätigen Sie mit SELECT und die Wiedergabe
der gefundenen Szene startet.
4. Beenden Sie das Suchmenü durch Drücken von
SEARCH.
A-B WIEDERHOLUNG
1. Drücken Sie während der Wiedergabe die Taste
REPEAT A-B zum Einstellen des Anfangspunkts
(A) der Wiederholung.
2. Drücken Sie die Taste erneut und setzen den
Endpunkt (B). Der Player wiederholt automatisch
den Bereich zwischen Punkt A und B.
3. Ein erneutes Drücken dieser Taste kehrt zur
normalen Wiedergabe zurück.
PROGRAMMIERTE WIEDERGABE (BIS ZU 16
SPEICHERPLÄTZE)
1. Rufen Sie mit PROGRAM während der
Wiedergabe das Programmiermenü auf.
2. Wählen Sie die Speicherorte mit den Pfeiltasten
und geben dann den gewünschten Titel/Kapitel
mit den Zifferntasten ein.
Hinweis: Die Eingabe einer führenden Null ist
nicht notwendig. Geben Sie mit der Taste +10 auf
-
der Fernbedienung die Zehnerstelle für
Kapitel/Titel/Track ein. Wenn die
Kapitel/Titel/Track-Nummer größer als 10 ist,
drücken Sie zuerst +10 und dann die Einerstelle.
Zahleneingaben größer als die Gesamtanzahl der
Kapitel/Titel/Track-Nummern auf der CD sind
sinnlos.
Beispiel:
Für die Eingabe von Track 3 drücken Sie "3".
Für die Eingabe von Track 12 drücken Sie "+10"
und dann "2".
Für die Eingabe von Track 21 drücken Sie
zweimal "+10" und dann "1".
3. Starten Sie die programmierte Wiedergabe mit
PLAY im Menü oder auf der Fernbedienung. Durch
erneutes Drücken von PROGRAM beenden Sie die
Programmierung.
4. Zum Löschen programmierter Elemente wählen Sie
das Element aus und drücken CLEAR auf der
Fernbedienung. Um alle Elemente zu löschen,
wählen Sie <LÖSCHEN> im Menü und drücken
dann SELECT auf der Fernbedienung.
5. Sie können den Programmiermodus auch durch
Löschen aller Elemente im Programmiermenü
beenden.
ZOOM (VCD/DVD)
Mit fortgesetztem Drücken von ZOOM auf der
Fernbedienung können Sie 2-, 3- und 4-fach in das
Bild hineinzoomen und auf 1/2, 1/3, 1/4 der normalen
Größe herauszoomen.
Wenn das Bild bei einem 1/4 der Größe ist, kehrt ein
weiterer Tastendruck auf ZOOM zur normalen
Anzeigegröße zurück.
In dem vergrößerten Bild können Sie sich mit den
Pfeiltasten bewegen.
ON SCREEN DISPLAY INFORMATIONEN
Wenn der Player eingeschaltet und eine CD eingelegt
ist, drücken Sie wiederholt DISPLAY auf der
Fernbedienung. Auf dem Bildschirm oben erscheint
ein Informationsbanner (aktueller Disktyp,
Titelnummer, Kapitelnummer, Wiedergabezeit,
Audiosprache, Audiotyp, Untertitelsprache und
Multi-Blickwinkel, usw.).
ÄNDERN DER AUDIOSPRACHE (DVD/VCD)
Sie können die anfangs eingestellte Audiosprache in
eine andere Sprache ändern (Das ist nur bei CD’s
möglich, die mehrere Audiosprachen enthalten).
DVD
Drücken Sie AUDIO während der Wiedergabe einer
DVD.
11.
Page 12
12.
Es wird in die nächste Audiosprache umgeschaltet
wird gewählt und diese wird auf dem Bildschirm im
Informationsbanner angezeigt.
Hinweis: Audio kann in 8 Sprachen wiedergegeben
werden. (abhängig von der DVD)
VCD
Drücken der Taste AUDIO während der Wiedergabe
einer VCD ändert die Audioausgabemodus: MONO L,
MONO R oder STEREOTON.
HINWEIS: Wenn keine Audiosprache aufgezeich
net wurde, hat diese Taste keine Funktion.
MULTI-BLICKWINKEL (NUR DVD)
Zeigen Sie während der Wiedergabe mit ANGLE die
Anzahl der aufgezeichneten Blickwinkel an und
wählen den gewünschten Blickwinkel der Szene aus.
Hinweis: Nur bei DVD’s mit Multi-Blickwinkel Szenen
ist diese Funktion einsetzbar. Auswahl von Szenen,
die aus verschiedenen Blickwinkeln aufgenommen
wurde (Begrenzt durch die auf der DVD gespeicherten
Kamerawinkel).
ÄNDERN DER UNTERTITEL-SPRACHE (NUR DVD)
Drücken Sie SUBTITLE während der Wiedergabe
einer DVD. Die auf dem Bildschirm angezeigte
Untertitelsprache ändert sich mit jedem Tastendruck.
Sobald die gewünschte Untertitelsprache im Informationsbanner angezeigt wird, lassen Sie die Taste los
und die Untertitel werden in dieser Sprache angezeigt.
Hinweis: Diese Funktion arbeitet nur bei DVD’s, die mit
Untertiteln in mehreren Sprachen aufgezeichnet
wurden. Untertitel können in maximal 32 Sprachen
angezeigt werden (abhängig von der disk).
WIEDERGABE VON VCD’s MIT DER PBC FUNK
TION
Nach dem Laden einer VCD 2.0/1.0 mit PBC zeigt der
Bildschirm das Diskformat und danach ein Menü an.
Wählen Sie den gewünschten Track mit den Ziffern
tasten aus: Drücken Sie für Track 1 bis 9 die entspre
chende Taste des Ziffernblocks 1 - 9. Mit der Taste „0“
wählen Sie Track 10 aus. Wenn die Tracknummer 10
überschreitet, drücken Sie zuerst die Taste +10 und
dann eine Zifferntaste 1 - 9.
Schalten Sie PBC mit einem Tastendruck auf MENU
ein- oder aus. Es werden nur 9 Vorschaubilder bei
ausgeschaltetem PBC-Modus angezeigt.
DVD
Um während der Wiedergabe zum Hauptmenü
zurückzukehren, drücken Sie die Taste MENU.
TITEL: Wiedergabe des Titels einer DVD.
-
-
-
-
WIEDERGABE VON MP3/MPEG 4
1. Legen Sie eine Mp3/MPEG 4 CD in das
CD-Laufwerk ein. Der Bildschirm zeigt alle
Verzeichnisse auf der CD nach einigen Sekunden
an.
HINWEIS: Falls sich Titel im Root-Verzeichnis
befinden, startet automatisch die Wiedergabe der
ersten Datei.
2. Wählen Sie ein Verzeichnis mit den Pfeiltasten aus
und bestätigen mit SELECT.
3. Die Dateien in diesem Verzeichnis werden
angezeigt und mit den Pfeiltasten kann eine Datei
ausgewählt werden. Mit SELECT starten Sie die
Wiedergabe.
4. Mit NEXT und PREV können sie eine Datei direkt
auswählen.
5. Ändern Sie mit REPEAT 1/ALL den
Wiedergabemodus:
LIED WIEDER - Wiederholen einer Datei.
ORDNER WIEDER - Wiederholen aller Dateien in
dem aktuellen Verzeichnis.
ALLE WIEDER - Wiederholen aller Dateien auf der
aktuellen Disk.
AUS - Beenden der Wiederholmodi.
WIEDERGABE VON KODAK PICTURE CD/JPEG
CD
Nach dem Einlegen einer Kodak Picture CD startet
automatisch eine Diashow.
Die Verzeichnisse einer JPEG CD werden nach dem
Laden auf dem Bildschirm angezeigt. Wählen Sie mit
den Richtungstasten das gewünschte Verzeichnis aus
und bestätigen mit der Taste SELECT.
Die Dateien dieses Verzeichnisses werden angezeigt
und Sie können Ihr bevorzugtes Bild mit den Pfeiltasten oben/unten auswählen. Mit SELECT wird die
Wiedergabe gestartet.
Eine Vorschau des Bilds wird beim Scrollen durch die
Dateinamen angezeigt.
BEDIENUNG VON KODAK PICTURE CD/JPEG CD
1. WIEDERHOLUNGSMODI
Drücken Sie die Taste 1/ALL zum Ändern des
Wiederholungsmodus bei der Wiedergabe.
LIED WIEDER- Wiederholt das aktuelle Bild.
ORDNER WIEDER- Wiederholt alle Bilder des
aktuellen Verzeichnisses
ALLE WIEDER- Wiederholt alle Bilder auf der
aktuellen CD.
AUS- Beendet die Wiederholungsmodi.
Zum Aufrufen des Vorschaumodus drücken Sie
während der Wiedergabe STOP.
Page 13

2. ZUM NÄCHSTEN/VORHERIGEN BILD
SPRINGEN
Springen Sie mit NEXT zum nächsten oder mit
PREV zu vorherigen Bild.
Wenn mehrere Sekunden keine Taste gedrückt
wurde, wird automatisch zum nächsten Bild
gesprungen.
3. BILD DREHEN
Mit der Pfeiltaste rechts drehen Sie das Bild um
90° im Uhrzeigersinn und mit der Pfeiltaste links
gegen den Uhrzeigersinn.
4. BILD SPIEGELN
Spiegeln Sie mit der Pfeiltaste oben das Bild
vertikal.
Spiegeln Sie mit der Pfeiltaste unten das Bild
horizontal.
5. BILD HEREIN/HERAUSZOOMEN
Durch wiederholtes Drücken der Taste ZOOM auf
der Fernbedienung können Sie 2-, 3- und 4-fach in
das Bild hineinzoomen oder auf 1/2, 1/3, 1/4 der
normalen Größe herauszoomen.
Wenn der Zoomfaktor bei 1/4 ist, kehrt ein weiterer
Tastendruck auf ZOOM zur normalen
Anzeigegröße zurück.
Um in dem vergrößerten Bild verdeckte Bereiche
anzeigen zu lassen, können Sie mit den Pfeiltasten
den angezeigten Ausschnitt bewegen.
6. BILDÜBERGÄNGE IN DER DIASHOW
Drücken Sie während einer Diashow zyklisch die
Taste PROGRAM, um einen der folgenden
Bildübergänge auszuwählen.
WIPE TOP : Von oben wischen.
WIPE BOTTOM: Von unten wischen.
WIPE L: Von links wischen.
WIPE R: Von rechts wischen.
DIAGONAL WIPE L TOP: Diagonal von links
oben wischen.
DIAGONAL WIPE R TOP: Diagonal von rechts
oben wischen.
DIAGONAL WIPE L BOTTOM: Diagonal von
links unten wischen.
DIAGONAL WIPE R BOTTOM: Diagonal von
rechts unten wischen.
EXTEND FROM CENTER H: Horizontal von
der Mitte kommend erweitern.
EXTEND FROM CENTER V: Vertikal von der
Mitte kommend erweitern.
COMPRESS TO CENTER H: Horizontal zur
Mitte hin komprimieren.
COMPRESS TO CENTER V: Vertikal zur Mitte
hin komprimieren.
WINDOW H: Horizontaler Jalousie-Effekt.
WINDOW V: Vertikaler Jalousie-Effekt.
WIPE FROM EDGE TO CENTER: Vom Rand
zur Mitte wischen.
RANDOM: Zufälliger Bildübergangseffekt.
NONE: Bildübergänge ausgeschaltet.
EINSTELLUNG VON FARBE UND HELLIGKEIT
(LCD-BILDSCHIRM)
Stellen Sie mit der Taste ADJ am Gerät die Farbe,
Helligkeit und den Kontrast ein. Einmaliges Drücken
der Taste ruft die Farbeinstellung auf. Mit den Tasten
NEXT und PREV wird die Farbe eingestellt. Zweima
liges Drücken ruft die Helligkeitseinstellung und
dreimaliges Drücken die Kontrasteinstellung auf.
VERWENDUNG EXTERNER SPEICHERMEDIEN
(USB)
Vorbereitung des Players für die Verwendung
externer Speichermedien
1. Schalten Sie den Player ein und drehen den
Betriebsartschalter in die DVD Position. Die
POWER LED leuchtet auf.
2. Stecken Sie einen USB-Speicherstick mit Musik-,
JPEG- oder Videodateien in den USB Port. Der
USB-Speicherstick wird erkannt und nach einigen
Sekunden gelesen. Der Bildschirm zeigt jetzt alle
vorhandenen Verzeichnisse an.
3. Sie können die Dateien in dem Speicherstick wie
eine MP3/MPEG 4 CD wiedergeben.
Hinweis: Vergewissern Sie sich, dass sich keine
CD im CD-Laufwerk befindet, wenn Sie den
USB-Speicherstick einstecken.
KARAOKE-FUNKTION MIT 2 MIKROFONEN
Verbinden Sie ein Mikrofon mit einer der beiden
Mikrofonbuchsen MIC1 oder MIC 2.
Sie können nun die Lautstärke des Mikrofonsignals
mit dem Regler für die Mikrofonlautstärke MIC LEVEL
an die Gesamtlautstärke anpassen.
-
13.
Page 14
14.
GRUNDEINSTELLUNGEN
Mit den Grundeinstellungen können Sie bevorzugte
Einstellungen für Ihren Player vornehmen. Nach
Eingabe der Grundeinstellungen werden diese in
Ihrem Player gespeichert und können jederzeit
geändert werden.
ALLGEMEIN
1. Drücken Sie SETUP auf der Fernbedienung.
2. Verwenden Sie die Pfeiltasten zur Auswahl der zu
ändernden Option und bestätigen mit SELECT.
Die Einstellungsseite wird mit weiteren Optionen
auf dem Bildschirm angezeigt. Nehmen Sie
Veränderungen wieder mit den Pfeiltasten vor
und bestätigen diese mit SELECT.
3. Wechseln Sie mit den Pfeiltasten zu einer anderen
Einstellung auf der Haupt-Einstellungsseite.
4. Beenden Sie die Haupt-Einstellungsseite mit der
Taste SETUP auf der Fernbedienung.
1. SYSTEM EINSTELLUNG
SYSTEM SETUP
TV SYSTEM
SCREE
N SAVER
TV TYPE
PASSWORD
RATING
DEFAULT
EXIT SETUP
1.1 TV SYSTEM – Auswählen des TV-Modus.
Optionen: NTSC, PAL, PAL60, AUTO
Bitte wählen Sie eine der Option entsprechend
zu Ihrem Fernseher aus.
1.2 BILDSCHIRMSCH – Wenn der Player zwei
Minuten nicht bedient wird, bewegt sich ein DVD
Logo zum Schutz Ihres Fernsehers über den
Bildschirm.
Optionen:
EIN: Der Bildschirmschoner ist eingeschaltet.
AUS: Der Bildschirmschoner ist ausgeschaltet.
1.3 TV TYP – Auswahl des TV-Formats. Bitte
wählen Sie diese Option entsprechend zu
Ihrem Fernseher aus.
Optionen:
4:3PS : Pan & Scan
4:3LB : Letterbox
16:9 : 16:9 Breitbildschirm
1.4 KENNWORT – Eingabe eines Kennworts zum
Freigeben des Systems.
Folgende Schritte sind nötig:
1.4.1 Rufen Sie die SYSTEM EINSTELLUNG auf
und wählen die Option KENNWORT mit den
Pfeiltasten aus. Dann wählen Sie mit der
rechten Pfeiltaste das Eingabefeld aus.
1.4.2 Geben Sie das Benutzerkennwort "0000" zum
Freigeben ein. In diesem Fall wählen Sie das
Eingabefeld zum Ändern des Kennworts erneut
aus und geben eine neue 4-stellige Zahl ein.
Bestätigen Sie erneut mit SELECT. Wenn das
Kennwort geändert wurde, müssen Sie zum
Freigeben des Systems das neue Kennwort
eingeben.
1.4.3 Wenn Sie Ihr Kennwort vergessen haben, können
Sie das Hauptkennwort "8200" zum Freigeben des
Systems verwenden.
HINWEIS: Wenn im freigegebenen System ein
falsches Kennwort eingegeben wurde, wird das
System gesperrt.
1.5 KINDERSICHERUNG – Einstellen der Einstufung.
Wenn Sie die Einstufung der Kindersicherung
ändern möchten, geben Sie bitte zuerst das
Kennwort zum Freigeben ein.
Optionen: 1 KID SAFE/2 G/ 3 PG/ 4 PG 13/ 5 PG-R
/ 6 R/7 NC-17/ 8 ADULT
1.6 WERKSEINSTELLUNG – Rückstellen auf die
Werkseinstellungen.
Optionen: ZURÜCKSETZEN
2. SPRACHEINSTELLUNG
LANGUAGE SE TUP
OSD LANGUAGE
O LANG
AUDI
E LANG
SUBTITL
MEN
U LANG
EXIT SETUP
2.1 OSD SPRACHE – Einstellung unterschiedlicher
Sprachen für das On Screen Display.
Optionen: ENGLISCH DEUTSCH SPANISCH FRANZÖ
SISCH PORTUGIESISCH ITALIENISCH
2.2 AUDIO SPRACHE – Auswahl der bevorzugten
Audiosprache (nur DVD, benötigt
Softwareunterstützung von der Disk).
Optionen: ENGLISCH SPANISCH PORTUGIESISCH
ITALIENISCH FRANZÖSISCH DEUTSCH NIEDER
-
LÄNDISCH JAPANISCH
2.3 UNTERT SPRACH – Auswahl der bevorzugten
Untertitelsprache (nur DVD, benötigt
Softwareunterstützung von der Disk).
-
Page 15

Optionen: ENGLISCH SPANISCH PORTUGIESISCH ITALIENISCH FRANZÖSISCH DEUTSCH
NIEDERLÄNDISCH AUS
2.4 MENU SPRACHE - Auswahl der bevorzugten
CD-Menüsprache (nur DVD, benötigt
Softwareunterstützung von der Disk)
Optionen: ENGLISCH SPANISCH PORTUGIE
SISCH ITALIENISCH FRANZÖSISCH DEUTSCH
NIEDERLÄNDISCH JAPANISCH
3. AUDIO EINSTELLUNG
AUDIO SET UP
AUDIO OUT
EXIT SETUP
3.1 AUDIO AUSGABE - Einstellung des digitalen
Ausgabeformats.
ANALOG: Wenn der digitale Ausgang nicht an
einen Verstärker angeschlossen ist, wählen Sie
bitte diese Option.
SPDIF/RAW: Verwendet in einem „Home
Theatre“. Es wird 5.1 Audio ausgegeben.
4.1 HELLIGKEIT - Einstellen der Bildschirm-Helligkeit.
Optionen: 0/2/4/6/8/10/12
4.2 KONTRAST - Einstellen des
Bildschirm-Kontrasts.
Optionen: 0/2/4/6/8/10/12
4.3 FARBE -
Einstellen der Bildschirm-Farbintensität.
Optionen: -6/-4/-2/0/+2/+4/+6
4.4 SÄTTIGUNG - Einstellen der Bildschirm-Sättigung.
Optionen: 0/2/4/6/8/10/12
5. LAUTSPRECHER
SPEAKER SET UP
DOWNMIX
EXIT SETUP
5.1 DOWNMIX
Optionen: LT/RT STEREOTON –
Links/Rechts Mixmodus
Wählen Sie diese Einstellung,
wenn Sie keinen 5.1 Kanal-Verstärker
angeschlossen besitzen.
SPDIF/PCM: Es werden nur zwei Kanäle
ausgegeben, aber die Audioausgabe erfolgt in
höherer Qualität.
4. VIDEO EINSTELLUNG
VIDEO SETUP
BRIGHTNESS
CONTRAST
HUE
SATURATION
EXIT SETUP
15.
Page 16

16.
RADIOBETRIEB
RADIO
1. Drehen Sie den Betriebsartschalter in die RADIO Position.
2. Wählen Sie den gewünschten Frequenzbereich mit dem Frequenzbereich-Wahlschalter aus. Stellen Sie die
Lautstärke auf einen angenehmen Pegel.
3. Suchen Sie Radiosender durch Drehen des TUNING Drehknopfs (Drehen Sie den Knopf nach links oder
rechts, bis Sie den besten Empfang haben).
4. Die eingebaute AM-Antenne und die externe FM-TELESKOPANTENNE sind richtungsabhängig.
• Für den FM-Empfang ziehen Sie die Teleskop-Antenne vollständig heraus und drehen sie die Position mit
dem besten Empfang.
• Bei AM-Empfang drehen Sie das komplette Gerät in die Position mit dem besten Empfang.
5. Stellen Sie die Lautstärke auf einen angenehmen Pegel.
6. Zum Ausschalten des Radios drehen Sie den Betriebsartschalter in die OFF Position.
HINWEISE:
• Wenn ein einzelner FM (STEREO) Sender schwach ist oder Sie viel Hintergrundrauschen hören, stellen
Sie den Frequenzbereich-Wahlschalter in die FM (MONO) Position. Dadurch verbessert sich oftmals der
Empfang.
• Wenn der Frequenzbereich-Wahlschalter in der Position FM ST steht und ein Stereoprogramm
empfangen wird, leuchtet die FM ST LED auf dem Player auf.
BUCHSE FÜR STEREOKOPFHÖRER
Das Gerät ist auf der Rückseite mit einer Buchse für Stereokopfhörer ausgerüstet, so dass Sie andere
Personen nicht stören. Stecken Sie die Kopfhörer (nicht mitgeliefert) in die Buchse und stellen die Lautstärke
auf einen angenehmen Pegel.
HINWEIS: Bei Anschuss externer Kopfhörer wird der werden die Lautsprecher des Players abgeschaltet.
Page 17

FEHLERSUCHE
Sollte sich mit dem System ein Problem ergeben, dann überprüfen Sie zunächst mit dieser Liste, bevor Sie
sich an den Kundendienst wenden.
Symptom
Das Gerät lässt sich nicht
einschalten oder schaltet sich
Vergewissern Sie sich, dass der Netzstecker gut in der Steckdose sitzt.
Schalten Sie das Gerät aus und dann wieder ein.
plötzlich aus.
Die Batterien sind eingelegt, aber
Überprüfen Sie, ob die Batterien erschöpft sind. Ersetzen Sie die Batterien.
das Gerät lässt sich nicht
einschalten oder schaltet sich
plötzlich aus.
Die Fernbedienung funktioniert nicht.
Vergewissern Sie sich, dass die Batterie richtig herum eingelegt wurde.
Überprüfen Sie, ob die Batterie erschöpft ist. Ersetzen Sie die Batterie.
Richten Sie die Fernbedienung direkt auf den Fernbedienungssensor auf der
Vorderseite des DVD-Players.
Entfernen Sie Hindernisse zwischen Fernbedienung und dem
Fernbedienungssensor.
Kein Bild und Ton
Vergewissern Sie sich, dass das A/V-Kabel richtig angeschlossen ist.
Vergewissern Sie sich, dass die Disk eine DVD (Regionalcode 1 oder alle),
DVD-RW, VIDEO CD oder AUDIO CD ist.
Überprüfen Sie, ob die Disk verkratzt oder verschmutzt ist.
Kein Bild
Kein Ton
Verzerrtes Bild oder Ton
REINIGUNG UND PFLEGE
Vergewissern Sie sich, dass die beschriftete Seite der CD nach oben zeigt.
Die Leselinse des DVD-Players kann verschmutzt sein. Wenden Sie sich für
eine Linsenreinigung an den Kundendienstcenter.
Vergewissern Sie sich, dass der TV-Kanal bei Verwendung eines
Fernsehers auf VIDEO oder AV eingestellt ist.
Überprüfen Sie, ob die die Batterien richtig eingelegt wurden und das
Netzkabel angeschlossen ist.
Vergewissern Sie sich, dass das LCD-Display eingeschaltet ist.
Überprüfen Sie die Lautstärkeeinstellung. Wenn diese auf MIN gestellt
wurde, erhöhen Sie den Lautstärkepegel.
Überprüfen Sie, ob die Kopfhörer in die Kopfhörerbuchse eingesteckt sind.
Die Lautsprecher können nicht zusammen mit den Köpfhörern verwendet
werden.
Die CD ist verkratzt oder verbogen.
Überprüfen/Lösung
Reinigung des LCD-Displays
• Zum Reinigen des Displays schalten Sie das Gerät aus und wischen das Display mit einem weichen Tuch
ab.
Reinigung des Gehäuses
• Es ist ein weiches und trockenes Tuch zu verwenden. Wenn die Oberflächen extrem verschmutzt sind, ist ein
weiches Tuch zu benutzen, welches leicht mit einer milden Waschlösung angefeuchtet wurde.
17.
Page 18

18.
• Keine starken Lösungsmittel, wie Alkohol, Benzin oder Verdünner verwenden, da diese die Oberfläche des
Geräts beschädigen können
BEHANDLUNG UND PFLEGE VON CD’S
Behandlung von CD’s
• Die CD’s nur am Rand anfassen, so dass keine Fingerabdrücke auf die Oberfläche
kommen. Fingerabdrücke, Schmutz und Kratzer können Springen und Verzerrungen
verursachen.
• Schreiben Sie nicht mit einem Kugelschreiber oder einem anderen Stift auf die
bedruckte CD-Seite.
• Verwenden Sie kein Benzin, Verdünner und Flüssigkeiten gegen statische
Aufladungen.
• Lassen Sie CD’s nicht fallen oder verbiegen sie.
• Legen Sie nur eine CD in das CD-Laufwerk ein.
• Schließen Sie nicht das CD-Laufwerk, wenn die CD nicht richtig eingelegt wurde.
Reinigen von CD’s
• Reinigen Sie CD’s mit einem weichen Tuch
• Reinigen Sie CD’s von innen nach außen
Aufbewahrung
• Nach der Wiedergabe CD’s in ihren Hüllen aufbewahren.
TECHNISCHE SPEZIFIKATIONEN
Spannungsversorgung: AC 230V ~ 50 Hz
Batteriebetrieb: 8x UM- 2/ Baby
(nicht mitgeliefert)
Fernbedienung: CR2025
TFT-Farbbildschirm: 7“ (15,5 cm)
Frequenzbereich: MW (AM) / UKW (FM)
Frequenzbereich: AM 525 - 1615 kHz
FM 87.5 - 108 MHz
Leistungsaufnahme: 25 W
Unterstützte TV Systeme: NTSC/PAL
/PAL60/AUTO
Betriebstemperatur: +5°C bis +35°C
Dauerbetrieb: 150 Minuten
Abmessungen: 406x236x149,5
(L x B x H)
Gewicht: ca. 3 kg
Luftfeuchtigkeit im Betrieb: 10 % bis 75 %
Unterstützte Disks:
1. DVD-VIDEO Disk
12 cm einseitig, eine Schicht
12 cm einseitig, zwei Schichten
12 cm zweiseitig, eine Schicht
8 cm einseitig, eine Schicht
8 cm einseitig, zwei Schichten
8 cm zweiseitig, eine Schicht
2. VIDEO CD/CD-DA/CD-R/CD-RW/MP3 -CD
12 cm Disk
8 cm Disk
Audio Ausgangssignal:
1. DVD (lineares Audio)
(1) Frequenzbereich: 20 Hz-20 kHz (48 kHz
Sampling) & 20 Hz
– 20kHz (96 kHz
Sampling)
(2) Signal-Rauschabstand: > 65 dB
(3) Dynamikbereich: 90 dB
(4) Gleichlaufschwankungen: unterhalb des
messbaren Pegels
2.CD Audio:
(1) Frequenzbereich: 20 Hz-20 kHz
(2) Signal-Rauschabstand: > 65 dB
(3) Dynamikbereich: 90 dB
(4) Gleichlaufschwankungen: unterhalb des
messbaren Pegels
Änderungen, auch ohne Vorankündigung,
vorbehalten.
Page 19

GARANTIE UND KUNDENDIENST
Vor der Auslieferung werden unsere Geräte einer strengen Qualitätskontrolle unterworfen. Sollte trotz aller
Sorgfalt bei der Produktion oder während des Transports dennoch ein Schaden entstanden sein, dann
wenden Sie sich bitte an den Kundendienst in Deutschland (Tel. 01805/355 460, 0,12 €/Min.). Neben den
gesetzlichen Gewährleistungsansprüchen leisten wir eine 24-monatige Garantie (siehe beiliegende
Garantiekarte) ab Kaufdatum. Während dieses Zeitraums beseitigen wir kostenlos alle Mängel, die auf
Fabrikations- oder Materialfehler zurück zu führen sind, entweder durch Reparatur oder Umtausch. Mängel in
Folge unsachgemäßer Behandlung, durch Eingriffe oder Reparaturen Dritter oder Anbau von nicht originalen
Teilen sind von der Garantie nicht abgedeckt.
Kontakt
Besuchen Sie unsere Homepage unter
Für technische Fragen zu dem gekauften Produkt:
Hotline Tel: 01805/355460 (0,12 EUR/Min)
Fax: 01805/258619 (0,12EUR/Min)
Aus dem Ausland erreichen Sie unseren Service unter:
365 Tage im Jahr -Montag bis Sonntag
http://www.elta.de
elta Service-Center
Breitefeld 15
64839 Münster
Hotline: +49 6071/3902909
service@elta.de
19.
Page 20

20.
MODEL: 6740
Portable Radio with built-in DVD Player and 7” TFT Screen
SAFETY INSTRUCTIONS
WARNING:
RISK OF ELECTRIC SHOCK
DO NOT OPEN
CAUTION: TO REDUCE THE
A triangle with a lightning
symbol draws the user's
attention to "dangerous
voltage" without insulation in
the cabinet which may be
high enough to entail a risk of
electric shock.
RISK OFELECTRIC SHOCK.
DO NOT REMOVECOVER (OR BACK).
THERE ARE NO USER
SERVICEABLEPART INSIDE.
REFER SERVICING TO QUALIFIED
ERVICE PERSONNEL.
FURTHER INFORMATION
Beware of small pieces and batteries, do not swallow them. It may be hazardous to your health
and lead into suffocation. Please, Make sure to keep small devices and batteries out of the reach
of children.
Important advice regarding hearing protection
Caution:
You care for your hearing, and so do we.
Therefore, use caution while using this appliance.
Our recommendation: Avoid high volumes.
Children should be supervised while using headphones; make sure that the appliance is not set to
high volume.
Caution!
High volumes may cause irreparable damage to children’s ears.
A triangle with an
exclamation mark draws the
user's attention to important
instructions for use and
maintenance in the
accompanying manual,
which should be studied.
NEVER let allow anyone, especially children, to put objects into the holes, slots or openings on
this devise. This may lead into death due to electric shock. The device must only be opened by a
qualified assistant.
Only use the appliance for its intended purpose.
This device may only be used in housings and business premises.
Please keep this instruction manual for further reference.
Instructions on environment protection
Do not dispose of this product in the usual household garbage at the end of its life cycle; hand it
over at a collection point for the recycling of electrical and electronic appliances. The symbol on
the product, the instructions for use or the packing will inform about the methods for disposal.
The materials are recyclable as mentioned in its marking. By recycling, material recycling or other
forms of reutilization of old appliances, you are making an important contribution to protect our
environment.
Please inquire at the community administration for the authorized disposal location.
Page 21

Do not obstruct the ventilation of the device. Make sure, that no curtains, newspapers, furniture or
any other type of object are blocking the ventilation system of the apparatus. The ventilation system
must be clear of objects at all times! Overheating may lead into serious damage of the device and
reduce its performance and lifespan.
Heat and warmth
Do not expose the appliance to direct sunlight. Make sure that the appliance is not subject to direct
heat sources such as heaters or open fire. Make sure that the ventilation slots of the appliance are
not covered.
Moisture and cleaning
This appliance is not waterproof! Do not immerse player in water. Do not allow player to come in
contact with water. If water gets inside the player it may cause serious damage. Do not use cleaning
agents that contain alcohol, ammoniac, benzene or abrasives as these could damage the player.
For cleaning, use a soft, moistened cloth.
Professional recycling
Batteries and packaging should not be disposed of in the trash. Batteries must be handed over to a
collection centre for used batteries. Separating disposable packaging materials is ecologically
friendly.
SAFETY INSTRUCTIONS
1. READ INSTRUCTIONS - All the safety and operating instructions should be read before the unit is
operated.
2. RETAIN INSTRUCTIONS - The safety and operating instruction should be retained for future reference.
3. HEED WARNINGS - All warnings on the unit and in the operating instructions should be adhered to.
4. FOLLOW INSTRUCTIONS - All operating instructions should be followed.
5. WATER AND MOISTURE - The appliance should not be used near water, for example, near a bathtub,
washbowl, kitchen sink, laundry tub, swimming pool or in a wet basement.
6. VENTILATION – Openings in the device serve its proper ventilation, are necessary for the operation and
prevent overheating. The unit should be situated so that its location or position does not interfere with its
proper ventilation. Do not place on bed, sofa, rug or similar surface that may block the ventilation
openings, in a built-in installation, such as a bookcase or cabinet that may impede the flow of air through
the ventilation openings.
7. HEAT - The unit should be situated away from heat sources such as radiators, stoves, or other appliances
(including amplifiers) that produce heat.
8. POWER SOURCE - The unit should be connected to power supply only of the type described in the
operating instructions or as marked on the unit.
9. POWER CORD PROTECTION - Power supply cords should be routed so that they are not likely to be
walked on or pinched by items placed upon or against them.
10. NON-USE – During longer periods of non-use please disconnect from mains power supply and antenna.
11. OBJECT and LIQUID ENTRY - Care should be taken so that objects do not fall and liquids are not spilled
into the enclosure through openings. Do not disassemble.
12. DAMAGE REQUIRING SERVICE - The unit should be serviced by qualified service personnel when:
a. The power-supply cord or plug has been damaged.
b. Objects have fallen into, or liquid has been spilled into the unit enclosure.
c. The unit has been exposed to rain or moisture.
d. The appliance has been dropped, or the enclosure damaged. Only use controls and adjustments as
specified in the manual.
e. The unit does not appear to operate normally.
f. The unit displays serious changes in its performance.
13. SERVICING - The user should not attempt to service the unit beyond that described in the user operating
instructions. All other servicing should be referred to qualified service personnel.
21.
Page 22

22.
14. CLEANING – Disconnect from mains power supply before cleaning. Do not use liquid or spray cleaners,
only use a damp cloth. Follow the care and maintenance instructions in this manual.
15. LIGHTNING – During lightning and longer periods of non-use please disconnect from mains power supply
and antenna.
16. SAFETY CHECK – After servicing the unit ask the customer service for a safety check.
17. OVERLOAD – To avoid fire and electric shock do not overload wall outlets and convenience receptacles.
18. ELECTROSTATIC DISCHARGE – Disconnect from mains power supply and remove batteries if unit
malfunctions. Reconnect after a short time.
CAUTION
THIS CD PLAYER IS A CLASS I LASER PRODUCT. HOWEVER, THIS CD PLAYER USES A
VISIBLE/INVISIBLE LASER BEAM, WHICH COULD CAUSE HAZARDOUS RADIATION EXPOSURE. BE
SURE TO OPERATE THE CD PLAYER CORRECTLY AS INSTRUCTED.
USE OF CONTROLS OR ADJUSTMENTS OR PERFORMANCE OF PROCEDURES OTHER THAN THOSE
SPECIFIED HEREIN MAY RESULT IN HAZARDOUS RADIATION EXPOSURE.
TO REDUCE THE RISK OF FIRE OR ELECTRIC SHOCK AND ANNOYING INTERFERENCE USE ONLY
THE RECOMMENDED ACCESSORIES.
FURTHER INFORMATION
Setting up location of the device
• Avoid vibrations, impact or tilted surfaces as the internal parts may be seriously damaged.
• Do not place heavy objects on the player.
• Never place the Player on amplifiers or other devices, which can become hot.
Avoid magnetic objects
• Keep magnetic objects such as speakers, at a distance from the player.
Condensation:
Moisture may concentrate on the lens if one of the following situations occurs:
• After turning on a heater.
• In a steamy or very humid room.
• After moving the player from a cold environment to a warm one.
If condensation takes place, correct operation may not be possible or the unit might not work correctly. Do not
turn on and do not use it for about 1 hour, until the player is dry.
Moving of the DVD player
• Before moving remove the CD from the player.
It is suggested to remove the CD and to turn off the player for periods of non use.
Saving energy
• It is recommended if the player is not used, to turn the function switch to the “OFF” position. If the player is
not used for a long period of time, the player should be unplugged from the AC socket.
Page 23

LOCATION OF CONTROLS / CONNECTIONS
Controls
1 2
1. SPEAKERS
2. REMOTE SENSOR
3. MIC 1 Jack
4. MIC 2 Jack
5. USB Port
6. MIC LEVEL Adjustment
7. TFT-DISPLAY
8. FUNCTION SWITCH
9. CARRY HANDLE
10. VOLUME control
11. BBS button
12. ADJ button
13. PREV button
14. NEXT button
15. POWER LED
16. CD Door
Front view
5
3
4
Top view
121314
15
1617181920
11
7
6
1
8910
21
222324
Rear view
26
28
25 29
27
32
30 31
17. OPEN button CD tray
18. FM ST. LED
19. FR button
20. STOP button
21. PLAY/PAUSE button
22. FF button
23. TUNING control
24. BAND switch
25. Telescopic antenna
26. VIDEO output jacks
27. AUDIO output jacks right
28. AUDIO output jacks left
29. Battery compartment
30. TFT ON/OFF switch
31. AC jack
32. PHONES jack
23.
Page 24

24.
Buttons on the remote control an their functions
1. P/N: Changing the TV system
2. REPEAT A-B: Repeat a section between A and B.
DISPL AY SETUP
P/N
1
2
3
4
5
6
7
8
9
10
11
12
13
1
A-B
4
AT
REPE
1/ALL
7
U
MEN
0
SUBTI TLE PLAY STOP
TITLE
AUDI
O
PAUSE/ STEP SLOW
F.BWD
F.FWD PREV NEXT
ANGL
E ZOOM
SELEC
+10
MUTE
3
2
5
6
8
9
CLEAR
T
SEARC
HPROGR AM
14
15
3. REPEAT 1/ALL: Repeat modes
16
4. MENU: Main menu (DVD) / PBC on/off (VCD)
5. SUBTITLE
6. PLAY
7. TITLE (DVD)
17
8. AUDIO: Audio language
9. PAUSE/STEP
10. F.BWD: fast backward
18
11. F.FWD:fast forward
12. ANGLE (DVD)
19
20
13. ZOOM
21
14. DISPLAY: Showing an information banner
15. SETUP
22
16. MUTE
23
17. NUMERICAL KEYS
24
18. CLEAR
25
19. STOP
26
20. SELECT: Selection
21. ARROW KEYS
22. SLOW: Slow motion
23. NEXT
24. PREV
25. SEARCH
26. PROGRAM: Program playback
INSTALLATION AND CONNECTION
Unpacking:
Take out carefully your portable DVD player from the packing. Please keep the packing for further use.
Remove all adhesive strips.
Attachment of the positioners of the player:
Assemble the two parts of both positioners.
Page 25

Install the two positioners into the insets at the bottom side of
the player and push them into their position, until they snap
in.
By lifting the positioners the player can be set into a suitable
viewing position.
Batteries:
This system is designed to operate on 230V 50Hz AC mains
power supply or 8 batteries type “UM2” or “C”. We
recommend the usage of alkaline batteries for a longer
play time.
Inserting of batteries
1. Remove the battery compartment cover by gently pushing
downwards and pushing outward and insert 8 batteries
type “UM-2” or “C” (preferably alkaline).
PLEASE OBSERVE RIGHT POLARITIES WHICH ARE
MARKED WITH “+” AND “-“ BESIDE THE BATTERY COMPARTMENT.
2. Replace the cover by pushing onto battery compartment.
NOTE: Old batteries may swell and leak. To avoid damage to your device, remove the batteries when the unit
is to be stored for long periods of time or if the batteries become exhausted.
NOTE: To usage of battery power will be automatically turned on, if the AC plug is removed from both the wall
outlet and the back of the set.
BASIC CONNECTION
It is recommended the player to be connected to a multi-system TV set.
Ensure that the player and other equipment to be connected to the unit are in the standby or off mode and
disconnect the AC power cords before building up a connection between them.
Read the instructions before connecting other equipment.
Observe the color coding when connecting audio und video cables.
Notes:
• During the DVD playback the TV volume may be at a lower level than during TV broadcasts. In this case
adjust the volume to the desired level.
• If the DVD player is connected to a TV set via a video cassette recorder, the picture may not be played back
normally with some DVDs. In this case do not connect the player via the VCR.
• When connecting to a TV set the built in TFT-Display can be turned off with the TFT ON/OFF switch.
25.
Page 26

26.
Connection to a TV set
RL
To a power socket
AC Power cord
To the video input connector (yellow)
To the audio input connector (red, white)
Audio/video cable
CONNECTION OF MICROPHONE AND HEADPHONES
1. Connection of a microphone.
• Connect a Microphone to one of the MIC jacks.
2. Adjust the MIC level to the desired level.
3. Connect a headphone to the phone jack.
3
1 1 2
Page 27

PREPARATION OF THE REMOTE CONTROL
Installation of the battery A
Insert the battery while observing the correct (+) and (-)
polarity as illustrated at the right side.
Notes about the remote control
• Use one CR2025 lithium button cell.
• The battery usually will work for about one year; this depends
on how often the remote control unit is used.
• If the remote control unit fails to work even when it is
operated near the player, replace the battery.
• Do not attempt to recharge, short-circuit, disassemble, warm
up or throw the battery into the fire.
• Do not drop, step on or otherwise impact the remote control.
This may lead to malfunction.
• If the remote control unit is not going to be used for a long
time, remove the battery.
Remote control operation range B
Direct the remote control unit from no more than about 7 m
from the remote control sensor and within an angle about 60°
towards the sensor window on the front of the player.
Notes about the operation range of the remote control:
• Do not direct bright lamps towards the sensor.
• The operation range depends on the brightness of the room.
• Objects between the remote control and sensor window
block the transmission.
• Do not use the remote control at the same time with remote
controls of other devices.
A
L
++
i
t
h
C
i
u
r
m
2
0
C
3
2
V
5
e
s
l
c
l
2
B
SENSOR OF THE REMOTE CONTROL
7 m
30
30
DISPLAY SETUP
E
MUT
P/N
3
1
2
A-B
4
5
6
AT
REPE
1/ALL
7
8
9
MEN
U
R
CLEA
0
+10
SUBTITL
E PLAY STOP
TITLE
T
SELEC
AUDI
O
PAUSE/STEP SLOW
F.BWD
F.FWD PREV NEXT
ANG
SEARC
LE ZOOM
HPROGRAM
OPERATING INSTRUCTIONS
GRAPHIC USER INTERFACE
Information and settings can be displayed on the screen of the TV set or DVD player.
PREPARATION
Turn on the TV set and select the video input mode.
27.
Page 28

28.
OPERATION
1. Turn on the player.
2. Open the CD tray.
3. Place a CD with the labeled side upwards on the black mounting plate with the 3 retaining tie-clips.
4. Close the CD tray again and the playback starts automatically.
5. When a menu screen appears on the TV set, select the desired track with the arrow keys or the numeric
keys and start the playback with SELECT on the remote control or with PLAY/PAUSE on the device.
SETTING OF THE VOLUME LEVEL
Adjust the volume at the device with the VOLUME rotary control between MIN and MAX.
ACTIVATION OF THE BASS INTENSIFICATION
Press the BBS key at the device. The bass sounds out more fully and more strongly. Renewed pressing of the
BBS key turns off the bass intensification.
CHAPTER/TRACK FORWARD OR BACKWARD
DVD:
During the playback you can skip to the next or previous chapter with the NEXT or PREV keys.
VCD/CD:
During the playback you can skip to the next or previous track with the NEXT or PREV keys.
FAST FORWARD AND BACKWARD
By pressing of the F.FWD or F. BWD keys on the remote control or FF or FR buttons on the player several
times you can scan the CD forward or backward at X2, X4, X8, X20 or normal speed.
During the scan operation the volume level is lowered.
Press the PLAY key to resume the normal playback.
PAUSE OR FRAME PLAYBACK (CD/MP3)
During playback, press PAUSE/STEP on the remote control to pause. Continue the normal playback with
PLAY.
PAUSE OR FRAME PLAYBACK (VCD/DVD)
In the pause mode the player goes on one frame with each key press on PAUSE/STEP on the remote control.
Continue the normal playback with PLAY or press PAUSE/STEP again.
STOP PLAYBACK
During playback press the STOP button on the remote control or on the player to stop the playback. The player
activates its resume function if STOP is pressed once. Press the PLAY button again to start the playback at the
location it stopped previously. Open the CD tray or press the STOP button a second time to clear the resume
function.
Page 29

SLOW MOTION
VCD/DVD only
During the playback press the SLOW button on the
remote control. First the disc will be played with half
speed. Each further pressing of the button reduces
the playback speed (up to 1/7 of the normal speed).
Continue the normal playback with PLAY.
REPEAT ONCE/REPEAT ALL
During playback press the key REPEAT 1/ALL on
the remote control.
DVD
One or all chapters/titles will be repeated.
VCD/CD
One or all tracks will be repeated.
NOTE: With a VCD REPEAT 1/ALL works only if
PBC is turned off.
SEARCH FOR A PREFERRED SCENE
1. During playback press the SEARCH key on the
remote control and highlight the item to be played
back (title, chapter or chapter time).
2. Enter the desired number or time with the
numeric keys.
3. Confirm with the SELECT key and the playback of
the found scene starts.
4. To exit the search menu, press the SEARCH key.
REPEAT A-B
1. During the playback press the REPEAT A-B key
to set the start point (A) for repetition.
2. Press this key again to set the end point (B). The
player automatically starts to repeat the section
between point A and B.
3. Press this key once again to resume the normal
playback.
PROGRAMMED PLAYBACK (UP TO 16 MEMORY
LOCATIONS)
1. During the playback press PROGRAM to invoke
the program menu.
2. Select memory location(s) with the arrow keys
and then enter the desired titles/chapters
numbers with the numeric keys.
Note: The input of a leading zero is not
necessary. Enter with the +10 key on the remote
control the tenth of the chapter/title/track number.
If the chapter/title/track number is larger than 10,
press first the +10 key and then the unit digit. The
input of numbers larger than the total number of
title/chapter/track numbers on the CD is useless.
Example:
To enter track 3, press "3".
To enter track 12, press "+10" and then "2".
To enter track 21, press "+10" twice and then "1".
3. Start the programmed playback with PLAY in the
menu or on the remote control. By pressing
PROGRAM again you can complete the
programming mode.
4. To delete the programmed items, select the items
and then press the CLEAR key on the remote
control. To clear all items, select the <CLEAR> in
the menu and then press the SELECT key on
remote control.
5. You can also finish the program mode by deleting
all the items in the program menu.
ZOOM (VCD/DVD)
By continued pressing of ZOOM on the remote control
you can zoom out 2, 3 and 4 times and zoom in 1/2,
1/3, 1/4 of the normal size of the picture.
If the picture is at 1/4 of its size, a further pressing of
the ZOOM key returns to the normal displaying size.
In the enlarged picture you can move with the arrow
keys.
ON SCREEN DISPLAY INFORMATION
When the player is turned on, press the DISPLAY key
on the remote control continuously. On the top of the
screen an information banner (current CD type, title
number, chapter number, playtime, audio language,
audio type, subtitle language and multi angle, etc.) is
displayed.
CHANGING THE AUDIO SOUNDTRACK
LANGUAGE (DVD/VCD)
You can change the initial adjusted audio language to
another language (Only possible with discs, which
contain several audio languages).
DVD
During the playback of a DVD press the AUDIO key.
The next audio language will be switched over and will
be displayed in the information banner on the screen.
Note: Audio can be played back in 8 languages
(depending on the DVD).
VCD
Pressing the AUDIO button during the playback of a
VCD changes the audio output mode: MONO L,
MONO R or STEREO.
NOTE: If no audio language is recorded this key
does not have any function.
29.
Page 30

30.
MULTI-ANGLE VIEWING (DVD ONLY)
During the playback press the ANGLE key to display
the number of recorded perspectives and select the
desired perspective of the scene.
Note: Only with DVD’s with multi perspectives of a
scene this function is applicable. Selection of scenes,
which were recorded from different perspectives
(limited by on the DVD stored camera angles).
CHANGING OF THE SUBTITLE LANGUAGE (DVD
ONLY)
During the playback of a DVD press SUBTITLE. The
subtitle language shown on the screen will change
with each pressing of the key.
As soon as the desired subtitle language is displayed
in the information banner release the key and the
subtitles are shown in this language.
Note: This function works only with DVD’s, which were
recorded with subtitles in several languages.
Subtitles can be displayed in maximally 32 languages
(depending on the disc).
VCD PLAYBACK WITH THE PBC FUNCTION
After loading a VCD 2.0/1.0 with PBC the screen
displays the disc format and afterwards a menu.
Select the desired track with the numeric keys: Press
for track 1 to 9 the appropriate key of the numeric
block 1 - 9. With the key “0” select track 10. If the track
number exceeds 10, press first the key +10 and then a
numeric key 1 - 9.
Turn on or off the PBC by pressing the MENU key. If
the PBC mode is turned off only 9 preview pictures are
shown.
REP 1 – Repeat one file.
REP DIR - Repeat all files in the current folder.
REP ALL – Repeat all files on the current CD.
OFF – Cancel all repeating modes.
PLAYBACK OF KODAK PICTURE CD/JPEG CD
After inserting a Kodak a Picture CD a slideshow
starts automatically.
After loading the folders of a JPEG CD are displayed
on the screen. Select with the arrow keys the desired
folder and confirm with the SELECT key.
The files of this folder will be displayed and you are
able to select your favorite picture with the arrow keys
up/down. With SELECT the playback will be started.
A preview of the picture will be shown by scrolling
through the file names.
OPERATION OF KODAK PICTURE CD/JPEG CD
1. REPEAT MODES
During the playback press the 1/ALL key to change
the repetition mode.
REP 1- Repeat the current picture.
REP DIR- Repeat all pictures of the current folder.
REP ALL- Repeat all pictures of the current CD.
OFF- Cancel all repeating modes.
To invoke the preview mode during the playback
press STOP.
2. SKIP TO NEXT/PREVIOUS PICTURE
Press NEXT or PREV to skip to the next or
previous picture.
If no key is pressed for a few seconds, it will be
skipped to next picture automatically
DVD
In order to return to the main menu during the
playback, press the MENU key.
TITLE: Playback of the title of a DVD.
MP3/MPEG 4 PLAYBACK
1. Place a Mp3/MPEG 4 CD into the CD tray. The
screen displays after some seconds all folders on
the CD.
NOTE: If there are titles in the root folder, the
playback of the first file starts automatically.
2. Select with the arrow keys a folder and confirm with
SELECT.
3. The files in this folder will be shown and with the
arrow keys a file can be selected. With SELECT you
can start the playback.
4. With NEXT and PREV you can select a file directly.
5. Change with REPEAT 1/ALL the playback mode:
3. ROTATE A PICTURE
With the right arrow key you can turn the picture
90° clockwise and with the left arrow key
counterclockwise.
4. MIRROR A PICTURE
Mirror the picture vertically with the up arrow key.
Mirror the picture horizontally with the down arrow
key.
5. ZOOM A PICTURE IN/OUT
By the continued pressing of ZOOM on the remote
control you can zoom out 2, 3 and 4 times and
zoom in 1/2, 1/3, 1/4 of the normal size of the
picture.
If the picture is at 1/4 of the size of the picture, a
further pressing of the ZOOM key returns to the
normal displaying size.
In order to display covered areas in the enlarged
picture, you can move with the arrow keys inside
the displayed section.
Page 31

6. TRANSITION MODE OF THE SLIDESHOW
During a slideshow you can press cyclically the
PROGRAM key, in order to select one of the
following picture transitions.
WIPE TOP: Wipe from top.
WIPE BOTTOM: Wipe from bottom.
WIPE L: Wipe from the left.
WIPE R: Wipe from the right.
DIAGONAL WIPE L TOP: Wipe from the left top
diagonal.
DIAGONAL WIPE R TOP: Wipe from the right
top diagonal.
DIAGONAL WIPE L BOTTOM: Wipe from the
left bottom diagonal.
DIAGONAL WIPE R BOTTOM: Wipe from the
right bottom diagonal.
EXTEND FROM CENTER H: Extend from the
center horizontal.
EXTEND FROM CENTER V: Extend from the
center vertical.
COMPRESS TO CENTER H: Compress to the
center horizontal.
COMPRESS TO CENTER V: Compress to the
center vertical.
WINDOW H: Horizontal jalousie effect.
WINDOW V: Vertical jalousie effect.
WIPE FROM EDGE TO CENTER: Wipe from
the edge to the center.
RANDOM: Random picture transition effect.
NONE: Picture transition effects turned off.
3. The files in memory stick can be played back like a
MP3/MPEG 4 CD.
Note: Make sure that there is no CD in the CD tray,
if you insert USB memory stick.
KARAOKE-FUNCTION WITH 2 MICROPHONES
Connect a microphone with one of the two
microphone sockets MIC1 or MIC 2.
You are now able to match the volume level of the
microphone signal with the MIC LEVEL control to the
total volume.
BASIC SETTINGS
With the basic settings you can make preferential
settings for your Player. After entering the basic
settings these are stored in your player and can be
changed at any time.
GENERAL
1. Press SETUP on the remote control.
2. Use the arrow keys for the selection of the option
to be changed and confirm with the SELECT key.
The setting page of the screen is displayed with
further options. Make changes again with the arrow
keys and confirm them with SELECT.
3. Move with the arrow keys to another setting on the
main setting page.
4. Exit the main setting page with the SETUP key on
the remote control.
SETTING OF COLOR AND BRIGHTNESS (LCD
SCREEN)
Use the ADJ button at the device to adjust the color
intensity, brightness and contrast. Press the button
once to enter the color setting mode. Press the NEXT
and PREV keys to adjust the color. Press the button
twice to enter the brightness mode and three times to
enter the contrast mode.
EXTERNAL MEMORY MEDIA OPERATION (USB)
Preparation of the player for usage of external
memory media
1. Turn on the player and rotate the function mode
switch to the DVD position. The POWER LED will
light up.
2. Insert a USB memory stick containing music, jpeg
or video files into the USB port. The USB memory
stick will be recognized and read after some
seconds. The screen shows now all existing
folders.
1. SYSTEM SETUP
SYSTEM SETUP
TV SYSTEM
SCREE
N SAVER
TV TYPE
PASSWORD
RATING
DEFAULT
EXIT SETUP
1.1 TV SYSTEM – Select the TV-mode.
Options: NTSC, PAL, PAL60, AUTO
Please select one of the options accordingly to
your TV set.
1.2 SCREEN SAVER --
If the player is not operated
for two minutes or more, a DVD Logo moves
across the screen to protect of your TV Set.
Options:
ON: The screen saver is turned on.
OFF: The screen saver is turned off.
31.
Page 32

32.
1.3 TV TYPE- Selection the TV format. Please
select this option accordingly to your TV set.
Options:
4:3PS: Pan & Scan
4:3LB: Letterbox
16:9: 16:9 Wide screen TV
1.4 PASSWORD –
Enter a password to unlock the
system.
Following steps are necessary:
1.4.1 Invoke the SYSTEM SETUP and select with
the arrow keys the option PASSWORD. Then
select with the right arrow key the input field.
1.4.2 Enter for unlocking the system the user
password “0000”. In this case select again
the input field for changing the password and
a new number with four digits. Confirm again
enter with SELECT. If the password was
changed, for unlocking the system you must
enter the new password.
1.4.3 If you have forgotten your password, you can
use the main password “8200” for unlocking
the system.
NOTE: If in the unlocked system a wrong
password was entered, the system becomes
locked.
2.2 AUDIO LANG – Select the preferred audio
language (DVD only, needs software support by the
disk).
Options: ENGLISH SPANISH PORTUGUESE ITALIAN
FRENCH GERMAN DUTCH JAPAN
2.3 SUBTITLE LANG- Select the preferred subtitle
language (DVD only, needs software support by the
disk).
Options: ENGLISH SPANISH PORTUGUESE
ITALIAN FRENCH GERMAN DUTCH OFF
2.4 MENU LANG - Select the preferred CD menu
language (DVD only, needs software support
by the disk).
Options: ENGLISH SPANISH PORTUGUESE
ITALIAN FRENCH GERMAN DUTCH JAPAN
3. AUDIO SETUP
AUDIO SET UP
AUDIO OUT
EXIT SETUP
1.5 RATING-
Adjusting the rating. If you like to
change the rating of the parental lock, please
enter first the password for unlocking.
Options: 1 KID SAFE/2 G/ 3 PG/ 4 PG 13/ 5
PG-R/ 6 R/7 NC-17/ 8 ADULT
1.6 DEFAULT -
Reset to factory settings.
Options: RESTORE
2. LANGUAGE SETUP
LANGUAGE SE TUP
OSD LANGUAGE
AUDI
O LANG
SUBTITL
E LANG
MEN
U LANG
EXI
T SETUP
2.1 OSD LANGUAGE – Adjustment of different
languages for the “On Screen Display”.
Options: ENGLISH GERMAN SPANISH FRENCH
PORTUGUESE ITALIAN
3.1 AUDIO OUT - Adjustment of the digital output
format.
SPDIF/OFF: If the digital output is not connected to an
amplifier, please select this option.
SPDIF/RAW: Used in a home theatre. It can output 5.1
channels audio.
SPDIF/PCM: Only two channels are outputted, but the
audio output takes place in higher quality.
Page 33

4. VIDEO SETUP
VIDEO SETUP
BRIGHTNESS
CONTRAST
HUE
SATURATION
EXIT SETUP
4.1 BRIGHTNESS – Setting of the brightness level of
the screen.
Options: 0/2/4/6/8/10/12
4.2 CONTRAST – Setting of the contrast level of the
screen.
Options: 0/2/4/6/8/10/12
4.3 HUE – Setting of the color intensity level of the
screen.
Options: -6/-4/-2/0/+2/+4/+6
4.4 SATURATION –
Setting of the saturation level of
the screen.
Options: 0/2/4/6/8/10/12
5. SPEAKER SETUP
SPEAKER SET UP
DOWNMIX
EXIT SETUP
5.1 DOWNMIX
Options: LT/RT -
Left/Right mix mode
STEREO – Select this setting, if there is no 5.1
channel amplifier connected to the player.
33.
Page 34

34.
RADIO OPERATION
RADIO
1. Rotate the function selector to the RADIO position.
2. Select the desired band with the band rotary switch. Set the volume to a pleasant level.
3. Use the TUNING rotary knob to locate the radio stations (Turn the rotary knob to the left or right, until you
have the best reception).
4. The built in AM antenna and the external FM telescopic antenna are depending on the direction.
• Extend the FM telescopic antenna and rotate its position until you find the best reception
• For AM reception rotate the entire until you find the best reception
5. Adjust the volume level to a pleasant listening level.
6. To turn off the radio, turn the function selector to the OFF position
NOTES:
• If the stereo signal of a single radio station is weak and you hear a lot of noise, set the band switch to the
FM (MONO) position. This often improves the reception.
• If the band switch is set to the FM ST position and a stereo broadcast is received, the FM ST indicator on
top of the player will light up.
STEREO HEADPHONE JACK
The player is equipped with a stereo headphone jack on the rear, so that you can listen to the music without
disturbing others. Plug in the headphones (not included) and adjust the volume control to a pleasant level.
NOTE: With the connection of external headphones the speakers of the player are turned off.
Page 35

TROUBLE SHOOTING
If a fault occurs, first check the points listed below before taking the unit for repair
Symptom
The device can not be turned on or
turns off suddenly.
The batteries are inserted, but the
Make sure that the AC adapter is well plugged into an AC socket.
Turn the power off and then turn it on again.
Check if the batteries are exhausted.Replace the batteries.
Check/Solution
device can not be turned on or turns
off suddenly.
The remote control does not work.
Make sure that the battery is inserted in the correct direction.
Check if the battery is exhausted. Replace the battery.
Direct the remote control directly towards the remote control sensor on the
front of the DVD player.
Remove obstacles between remote control and the remote control sensor.
No picture and sound
Make sure that the A/V cable is connected correctly.
Make sure that the disk is a DVD (regional code 1 or all), DVD-RW,
VIDEO CD or AUDIO CD.
Check if the disk is scratched or dirty.
Make sure that the labeled side of the CD is showing upwards.
The lens of the DVD player can be dirty. Contact the customer service
No picture
No sound
center for a lens cleaning.
Make sure that the TV channel is adjusted to VIDEO or AV if using a TV set.
Check if the batteries were inserted in the correct direction and the mains
cable is connected.
Make sure that the LCD is turned on.
Check the volume setting. If the volume control is set on MIN, increase the
volume level.
Check if the headphones are plugged into the headphone jack.
The speakers cannot be used together with the headphones.
Distorted video or sound
The CD is scratched or bent.
CLEANING AND CARE
Cleaning of the TFT display
• Turn the player off and wipe the display with a soft cloth.
Cleaning of the housing
• Use a soft and dry cloth. If the surfaces are extremely dirty, use a soft cloth, which is dampened lightly with a
mild washing solution.
• Do not use strong solvents, as alcohol, gasoline or solvents, since these can damage the surface of the
player.
35.
Page 36

36.
DISC CARE AND MAINTENANCE
Handling of CDs
• Touch CD’s only at the edge, in order that there will be no finger prints on the surface.
Finger prints, dirt and scratches can cause skipping and distortions.
• Do not write on the labeled CD side with ball pen or another pen.
• Do not use gasoline, solvent and liquids against static electricity.
• Do not to drop or bend discs.
• Place only one disc in the disc tray.
• Do not try to close the CD tray if the disc is not installed correctly.
Cleaning of CDs
• Only use a soft cloth for cleaning.
• Clean CDs from the center to the edge.
Storage
• After playback store CDs in their cover.
TECHNICAL DATA
Power Supply: AC 230V ~ 50 Hz
Battery operation 8x UM- 2/ Baby
(not included)
Remote control: CR2025
TFT-screen: 7“ (15.5 cm)
Band: MW (AM)
/ USW (FM)
Frequency range: AM 525 - 1615 kHz
FM 87.5 - 108 MHz
Power Consumption: 25 W
Supported TV systems: NTSC/PAL/PAL60
/AUTO
Operating temperature: +5°C to +35°C
Continuous operation: 150 minutes
Dimensions: 406x236x149.5
(L x W x H)
Weight: ca. 3 kg
Operating Humidity Range: 10 % to 75 %
Supported Discs:
1. DVD-VIDEO Disc
12 cm single-sided, single-layer
12 cm single-sided, dual-layer
12 cm double-sided, single-layer
8 cm single-sided, single-layer
8 cm single-sided, dual-layer
8 cm double-sided, single-layer
2. VIDEO CD/CD-DA/CD-R/CD-RW/MP3 -CD
12 cm Disc
8 cm Disc
Audio output signal:
1. DVD (linear audio)
(1) Frequency range: 20 Hz-20 kHz (48 kHz
sampling) & 20 Hz – 20
kHz (96 kHz sampling)
(2) S/N ratio: > 65 dB
(3) Dynamic range: 90 dB
(4) Wow and flutter: below the measurable
level
2. CD Audio:
(1) Frequency rang: 20 Hz-20 kHz
(2) S/N ratio: > 65 dB
(3) Dynamic range: 90 dB
(4) Wow and flutter: below the measurable
level
Specifications are subject to change without notice.
Page 37

GUARANTEE AND CUSTOMER SERVICE
Before distribution our appliances undergo a strict quality control. However, despite all the care, should the
product suffer damage in the production or transport phase, please contact the Elta customer service in
Germany: 01805/355460 (0.12 €/min).
Under the lawful user guarantee, the customer has, after his selection, the following guarantee: for the
purchased appliance, we extend a 24-month warranty (accompanying warranty card) beginning on the day of
purchase. In this time period, we will remedy all defects, demonstrably of material or manufacturing mistakes,
through repair or exchange. Damage resulting from unconventional usage of the appliance and mistakes
through repairs made by a third party or assembly with foreign parts, are not covered by this guarantee
Contact
Visit our homepage
http://www.elta.de
In case of technical questions:
elta Service-Center
Breitefeld 15
64839 Münster
Hotline Tel: 01805/355460 (0.12 EUR/Min)
Fax: 01805/258619 (0.12EUR/Min)
From abroad you can demand our service under:
Hotline: +49 6071/3902909
365 days per year – Monday till Sunday
service@elta.de
37.
Page 38

38.
MODEL: 6740
Radio Portable avec Lecteur DVD intégré, Ecran TFT 7’’
MESURES DE SÉCURITÉ
AVERTISSEMENT
RISQUED’ELECTROCUTION NEPAS
OUVRIRATENTION:
Un triangle avec symbole
d’éclairattire l’attention de
l’utilisateur sur la présence de
"voltage dangereux" non isolé
dans le coffrage, pouvant être
assez puissant pour
provoquerune électrocution.
PLUS D’INFORMATIONS
Prenez garde aux petites pièces et piles, ne les avalez pas. Cela pourrait être dangereux pour
votre santé et mener à l’étouffement. Prêtez l’attention la plus élevée pour garder les petits
appareils et piles hors de la portée des enfants..
Conseil important pour la protection de l’ouïe
Attention:
Nous tenons à votre ouïe autant que vous.
Par conséquent, prenez vos précautions lors de l’usage de cet appareil.
Notre recommandations: Evitez les volumes forts.
Dans le cas où des enfants utilisent l’appareil, assurez-vous que le volume n’est pas sur la
position éleve.
Attention!
Les volumes élevés peuvent irrémédiablement endommager l’ouïe des enfants.
NE JAMAIS laisser une personne ou surtout un enfant mettre des objets dans les trous, fentes ou
autres ouvertures de l’appareil. Cela pourrait entraîner la mort par décharge électrique. L’appareil
doit être ouvert uniquement par un assistant qualifié.
Veuillez utiliser l’appareil uniquement aux fins pour lesquelles il a été créé.
Cet appareil est exclusivement destiné à l’usage dans des locaux privés ou à usage commercial.
ATENTION: AFIN DE REDUIRE LES
RISQUESD’ELECTROCUTION, NE PAS
RETIRERLE COFFRAGE (AVANT OU
ARRIERE).NE CONTIENT AUCUNE
PIECE REMPLACABLE.CONFIER
TOUTEREPARATION A DU
PERSONNEL QUALIFIE.
Un triangle avec point
d’exclamation attire
l’attention de l’utilisateur sur
la présence dans le manuel
d’instructions importantes
concernant l’utilisation et
lamaintenance, et devant
être consultées.
Veuillez conserver ce mode d`emploi pour utilisation ultérieure.
Indications relatives à la protection de l’environnement
Au terme de sa durée de vie, ce produit ne doit pas être éliminé avec les ordures ménagères
mais doit être remisà un point de collecte destiné au recyclage des appareils électriques et
électroniques. Le symbole figurant sur le produit, la notice d’utilisation ou l’emballage vous
indique cela.
Les matériaux sont recyclables conformément à leur marquage. Vous apportez une large
contribution à la protection de l’environnement par le biais du recyclage, de la réutilisation
matérielle ou par les autres formes de réutilisation des appareils usagés.
Veuillez vous adresser à la municipalité pour connaître la déchetterie compétente.
Page 39

Ne gênez pas la ventilation du dispositif. Assurez-vous que rideaux, journaux, couvertures ou
meubles ne bloquent en aucun cas les fentes de ventilation de l’appareil. La ventilation doit être
assurée à tout moment! La surchauffe peut causer à l’appareil des dommages sérieux et réduire sa
performance et sa durée de vie.
La chaleur et sources de chaleur
Veuillez ne pas exposer l’appareil à la lumière directe (du soleil). Assurez-vous que l’appareil n’est
pas en contact direct avec des sources de chaleur telles qu’un chauffage ou un feu. Assurez-vous
que les fentes d’aération de l’appareil ne sont pas fermées.
Humidité et nettoyage
L’appareil n’est pas étanche! Ne plongez pas l’appareil dans l’eau. Evitez son contact avec l’eau.
De l’eau dans l’appareil pourrait sérieusement l’endommager. N’employez pas de détergents
contenant de l’alcool, de l’ammoniaque, du benzène ou des abrasifs. Ces produits pourraient
endommager votre appareil. Pour nettoyer l’appareil, utilisez un chiffon doux et humide.
Recyclage professionnel
Les piles et l’emballage n’appartiennent pas à la catégorie des ordures ménagères. Les piles
doivent être dirigées vers un centre collectant les piles usagées. Les matériaux de l’emballage sont
écologiques.
MESURES DE SÉCURITÉ
1. LISEZ CES INSTRUCTIONS - Toutes les instructions de sécurité et d’utilisation doivent êtres lues avant
de faire fonctionner l’appareil.
2. CONSERVER LES INSTRUCTIONS - Les mesures de sécurité et de fonctionnement doivent être
conservées pour références ultérieures.
3. RESPECTER TOUS LES AVERTISSEMENTS - Tous les avertissements sur l’appareil et dans le mode
d’emploi doivent être respectés.
4. SUIVRE LES INSTRUCTIONS - Toutes les instructions de fonctionnement doivent être suivies.
5. EAU ET HUMIDITE - L’appareil ne doit pas être utilisé à proximité d’eau, par exemple : une baignoire, un
lavabo, un évier, une lessiveuse, une piscine ou un sous-sol humide.
6. VENTILATION - Les ouvertures de l’appareil permettent une bonne ventilation, elles sont nécessaires
pour un bon fonctionnement de l’appareil et pour empêcher les surchauffes. L’appareil doit être placé afin
que son emplacement ou sa position n’interfère avec la bonne ventilation. Ne placez pas l’appareil sur un
lit, sofa, tapis ou une autre surface similaire qui pourrait bloquer les trous de ventilation. Le placer dans un
meuble encastré, comme une bibliothèque ou une étagère encastrée, empêchera également une bonne
circulation de l’air.
7. CHALEUR - L’appareil doit être tenu à l’écart des sources de chaleur comme les radiateurs, fours ou
autres appareils émettant de la chaleur (y compris les amplificateurs).
8. SOURCE D’ALIMENTATION - L’appareil doit être branché sur une alimentation de même type que celle
décrite dans le mode d’emploi ou comme indiqué sur l’unité.
9. PROTECTION DU CORDON D’ALIMENTATION - Les cordons d’alimentation doivent être acheminés afin
que l’on ne marche pas dessus ou qu’ils ne soient pas pincés par des éléments placés dessus ou contre
eux.
10. PERIODE DE NON UTILISATION - Pendant ces périodes de non utilisation de l’appareil, veuillez
débrancher l’appareil sur l’alimentation principale et l’antenne.
11. INSERTION D’OBJET et de LIQUIDE - Une extrême vigilance est de rigueur afin qu’aucun objet ou
liquide n’entrent dans le châssis par les ouvertures. Ne pas démonter
12. DOMMAGES NECESSITANT UNE REPARATION - L’unité doit être réparée par du personnel de
réparation qualifié lorsque:
a. Le cordon d’alimentation ou la prise d’alimentation ont été endommagé.
。
b. Un liquide a été projeté sur l’appareil ou si un objet est tombé dans l’appareil.
c. Si l’unité a été exposée à la pluie ou à l’humidité.
d. L’appareil est tombé ou l’enceinte est endommagée. N’utilisez que les commandes et les réglages comme
spécifié dans ce manuel.
e. L’appareil ne semble pas fonctionner normalement.
f. L’unité indique de grave changement dans sa performance.
39.
Page 40

40.
13. REPARATION - L’utilisateur ne doit pas tenter de réparer l’unité autrement qu’indiqué dans ce mode
d’emploi. Toutes les autres réparations doivent être effectuées par du service de réparation qualifié.
14. NETTOYAGE - Débranchez le câble d’alimentation de l’alimentation principale avant le nettoyage.
N’utilisez pas de nettoyants liquides ou de sprays, utilisez uniquement un linge humide. Suivez les
instructions de nettoyage et de maintenance de ce manuel.
15. ORAGE - Pendant les orages et les périodes de non utilisation, veuillez débrancher l’appareil sur
l’alimentation principale et l’antenne.
16. CONTRÖLE SECURITE - Après avoir fait réparé l’unité, demandez au service client d’effectuer un
contrôle sécurité.
17. SURCHARGE - Pour éviter les risques d’incendie et d’électrocution, ne surchargez pas les prises
murales et les multi prises.
18. DECHARGE ELECTROSTATIQUE - Débranchez de l’alimentation principale et retirez les piles de l’unité
si l’unité ne fonctionne pas correctement. Rebranchez ensuite.
AVERTISSEMENT
CE LECTEUR CD EST UN PRODUIT LASER DE CLASSE I CEPENDANT, CE LECTEUR CD UTILISE UN
RAYON LASER VISIBLE/INVISIBLE QUI POURRAIT ENTRAINER UNE EXPOSITION A DES RADIATIONS
DANGEREUSES . VEUILLEZ VOUS ASSUREZ DE FAIRE FONCTIONNER LE LECTEUR CORRECTE
MENT COMME INDIQUE.
L’UTILISATION DE COMMANDES OU D’AJUSTEMENTS OU DE PERFORMANCE OU DE PROCEDURES
DIFFERENTES DE CELLES QUI SONT SPECIFIEES PEUVENT ENTRAINER UNE EXPOSITION A UNE
GRAVE RADIATION.
AFIN DE REDUIRE LES RISQUES D’INCENDIE, DE CHOC ELECTRIQUE OU D’INTERFERENCE,
N’UTILISEZ QUE LES ACCESSOIRES RECOMMANDES.
INFORMATIONS COMPLEMENTAIRES
Régler l’emplacement de l’appareil
• Evitez les vibrations, les impacts ou les surfaces inclinées car cela pourrait sérieusement endommager les
parties internes.
• Ne pas placer d’objets lourds sur le lecteur.
• Ne jamais placer le lecteur sur un amplificateur ou un autre appareil qui peut devenir chaud.
-
Evitez les objets magnétiques
• Mettez le lecteur loin des objets magnétiques tels que les haut-parleurs.
Condensation :
De l’humidité peut se former sur la lentille si une des situations suivantes se produit :
• Après avoir allumer le chauffage.
• Dans une pièce qui produit de la vapeur ou une pièce très humide.
• Après avoir déplacé le lecteur d’un endroit froid à un endroit chaud.
Si de la condensation se forme, un bon fonctionnement de l’appareil ne sera pas possible ou l’appareil ne
pourra pas fonctionner correctement. Ne pas allumer et ne pas utiliser l’appareil pendant 1 heure jusqu’à ce
qu’il soit sec.
Déplacer le lecteur DVD
• Avant de déplacer le lecteur, retirez le CD qui est à l’intérieur.
Il est recommandé de retirer le CD et d’éteindre le lecteur lorsqu’il n’est pas utilisé.
Economie d’énergie
• Il est recommandé de mettre l’interrupteur de fonction sur “OFF” lorsque l’appareil est hors d’utilisation.
Si vous n’utilisez pas le lecteur pendant des périodes prolongées, veuillez le débrancher de la prise AC.
Page 41

LOCALISATION DES CONTROLES : CONNECTIONS
Cöntrôles
En façade
3
1 2
4
1. Haut-parleurs
2. REMOTE SENSOR
3. Jack MIC 1
4. Jack MIC 2
5. Port USB
6. Réglage MIC LEVEL
7. AFFICHAGE TFT
8. INTERRUPTEUR DE FONCTION
9. POIGNEE DE TRANSPORT
10. Contrôle VOLUME
11. Bouton BBS
12. Bouton ADJ
13. BOUTON PREV
14. BOUTON NEXT
15. LED POWER
16. Porte du CD
Vue du dessus
121314
15
1617181920
11
5
7
6
1
8910
21
222324
Vue arrière
26
28
25 29
27
32
30 31
17. Bouton OPEN tiroir CD
18. LED FM ST
19. Bouton FR
20. BOUTON STOP
21. BOUTON PLAY/PAUSE
22. Bouton FF
23. Contrôle TUNING
24. Interrupteur BANDE
25. Antenne télescopique
26. Prise de sortie VIDEO
27. Prises de sortie droites AUDIO
28. Prises de sortie gauches AUDIO
29. Compartiment pour piles
30. Interrupteur TFT ON/OFF
31. Prise AC
32. Prise PHONES
41.
Page 42

42.
Boutons de la télécommande et leur fonction
1. P/N: Permet de changer le système TV
2. REPEAT A-B Permet de répéter une section entre A et B
DISPL AY SETUP
P/N
1
2
3
4
5
6
7
8
9
10
11
12
13
1
A-B
4
REPE
AT
1/ALL
7
MEN
U
0
SUBTI TL
E PLAY STOP
TITLE
O
PAUSE/ STEP SLOW
AUDI
F.BWD
F.FWD PREV NEXT
E ZOOM
ANGL
SELEC
+10
MUT
E
3
2
5
6
8
9
R
CLEA
T
HPROGR AM
SEARC
14
15
3. REPEAT 1/ALL: modes de répétition
16
4. MENU : Menu principal (DVD) / PBC on/off (VCD)
5. SUBTITLE
6. PLAY
7. TITLE (DVD)
17
8. AUDIO Langue audio
9. PAUSE/STEP
10. F.BWD: retour rapide
18
11. F.FWD:avance rapide
12. ANGLE (DVD)
19
20
13. ZOOM
21
14. DISPLAY: permet d’afficher une banderole d’information
15. SETUP
22
16. MUTE
23
17. TOUCHES NUMERIQUES
24
18. CLEAR
25
19. STOP
26
20. SELECT: Sélection
21. TOUCHES FLECHE
22. SLOW: Ralenti
23. NEXT
24. PREV
25. SEARCH
26. PROGRAM: Lecture de programme
INSTALLATION ET CONNEXION
Déballage :
Retirez doucement votre lecteur DVD portable de l’emballage. Veuillez conserver l’emballage pour un usage
ultérieur. Retirez toutes les bandes adhésives.
Fixation des supports du lecteur:
Assemblez les deux parties des supports.
Page 43

Installez les deux supports dans les encoches dans la partie
inférieure du lecteur et poussez-les pour les mettre en place
jusqu’à ce que vous entendiez un claquement.
En soulevant les supports, le lecteur peut être réglé dans
une position de visualisation convenable.
Piles :
Ce système est conçu pour fonctionner sur une alimentation
principale de 230V 50Hz AC ou avec 8 piles de type “UM2”
ou “C”. Nous vous conseillons d’utiliser les piles alcaline car
elles durent plus longtemps.
Insérez les piles
1. Retirez le cache du compartiment des piles en poussant
doucement vers le bas et vers l’extérieur et insérez 8 piles
de type “UM-2” ou “C” (de préférence alcaline).
VEUILLEZ OBSERVER LA POLARITE ET INSERER LES
PILES EN RESPECTANT LES MARQUES “+” ET “-“ DANS LE COMPARTIMENT POUR PILES.
2. Replacez le couvercle en poussant sur le compartiment pour piles.
NOTE: Les piles usagées peuvent gonfler et fuir. Afin d’éviter d’endommager votre appareil, retirez les piles
lorsque l’appareil est rangée pendant de longues périodes ou si les piles sont usagées.
NOTE: L’alimentation par piles est automatique si la prise AC est retirée à la fois de la prise murale et de
l’arrière de l’appareil.
CONNEXION DE BASE
Il est recommandé de connecter le lecteur à un poste de TV à systèmes multiple.
Assurez-vous que le lecteur et d’autres équipements à connecter à l’appareil sont en mode stand-by ou off et
débranchez les cordons d’alimentation AC avant de monter une installation entre eux.
Veillez à bien lire les instructions avant de connecter d’autres appareils.
Observez le code couleur lorsque vous connectez des câbles audio et vidéo.
Remarques :
• Lorsque vous lisez un DVD, le niveau du volume de la TV peut être plus bas que lors de diffusions
télévisées. Dans ce cas, réglez le volume au niveau désiré.
• Si le lecteur DVD est connecté au poste TV par un enregistreur de cassettes vidéo, il se peut que l’image ne
soit pas lue normalement sur certains DVD. Dans ce cas, ne connectez pas le lecteur par le VCR.
• Lorsque vous connectez à un poste de TV, l’affichage TFT intégré peut s’éteindre à l’aide de l’interrupteur
TFT ON/OFF
43.
Page 44

44.
Connexion à un poste de TV
RL
Au connecteur d’entrée vidéo (jaune)
Au connecteur d’entrée audio (rouge, blanc)
Câble audio/vidéo
A une prise murale
Cordon d’alimentation AC
CONNEXION DU MICROPHONE ET DES ECOUTEURS
1. Connexion d’un microphone.
• Connectez un Microphone à une des prises MIC
2. Réglez le MIC level au niveau désiré.
3. Connectez le casque à la prise casque.
3
1 1 2
Page 45

PREPARATION DE LA TELECOMMANDE
Installation de la pile A
Insérez la pile en veillant à respecter la polarité (+) et (-)
comme indiqué à droite.
Remarques concernant la télécommande
• Utilisez une pile lithium CR2025
• La pile dure environ une année, cela dépend de la fréquence
à laquelle vous utilisez la télécommande.
• Si la télécommande ne fonctionne pas même lorsqu’elle est
utilisée à proximité du lecteur, changez la pile.
• Ne pas tenter de recharger, de faire un court-circuit, de
démonter, de chauffer ou de jeter la pile au feu.
• Ne pas laissez tomber la télécommande, ne marchez pas ou
ne provoquez pas d’impact dessus. Cela pourrait entraîner
un mauvais fonctionnement.
• Si vous n’utilisez pas la télécommande pendant une période
prolongée, retirez la pile.
Champ d’opération de la télécommande B
A
L
++
i
t
h
C
i
u
r
m
2
0
C
3
2
V
5
e
s
l
c
l
2
B
CAPTEUR DE LA TELECOMMANDE
Pointez la télécommande en direction du capteur de distance,
à pas plus de 7 mètres, et dans un angle de 60° vers la
fenêtre du capteur sur le devant du lecteur.
Remarques concernant le champ d’opération de la
télécommande :
• Ne pas diriger de lumières fortes sur le capteur.
• Le champ d’opération dépend de la luminosité de la pièce.
• Des objets se trouvant entre la télécommande et la fenêtre
du capteur bloquent la transmission.
• Ne pas utiliser la télécommande en même temps que
d’autres télécommandes pour d’autres appareils.
P/N
A-B
AT
REPE
1/ALL
MEN
U
SUBTITL
TITLE
AUDI
O
F.BWD
ANG
LE ZOOM
30
30
DISPLAY SETUP
1
2
4
5
7
8
0
+10
E PLAY STOP
T
SELEC
PAUSE/STEP SLOW
F.FWD PREV NEXT
7 m
E
MUT
3
6
9
R
CLEA
SEARC
HPROGRAM
INSTRUCTIONS D’OPERATION
INTERFACE UTILISATEUR GRAPHIQUE
Les informations et les réglages peuvent être affichés à l’écran du poste TV ou du lecteur DVD.
PREPARATION
Allumez le poste TV et sélectionnez le mode d’entrée vidéo.
45.
Page 46

46.
FONCTIONNEMENT
1. Allumez le lecteur.
2. Ouvrez le tiroir du CD.
3. Placez un CD avec le label sur le dessus sur le plateau noir comprenant 3 attaches de maintien.
4. Refermez le tiroir CD et la lecture démarrera automatiquement.
5. Lorsqu’un menu écran apparaît sur le poste de TV, sélectionnez la piste voulue à l’aides des touches flèche
ou des touches numériques et démarrez la lecture avec SELECT sur la télécommande ou avec
PLAY/PAUSE sur l’appareil.
REGLAGE DU NIVEAU DE VOLUME
Réglez le volume de l’appareil à l’aide du contrôle rotatif VOLUME, placez-le entre MIN et MAX.
ACTIVATION DE L’ INTENSIFICATION DES BASSES
Appuyez sur la touche BBS de l’appareil. Les basses seront plus fortes et amplifiées. En appuyant à nouveau
sur la touche BBS, l’intensification des basses et éteinte.
RETOUR OU AVANCE DE CHAPITRE/PISTE
DVD:
Pendant la lecture, vous pouvez sauter au chapitre suivant ou précédent à l’aide des touches NEXT ou PREV.
VCD/CD:
Pendant la lecture, vous pouvez sauter à la piste suivante ou précédente à l’aide des touches NEXT ou PREV.
AVANCE ET RETOUR RAPIDE
En appuyant sur les touches F.FWD ou F. BWD de la télécommande ou sur les boutons FF ou FR du lecteur à
plusieurs reprises, vous pouvez effectuer un balayage du CD en avant ou en arrière à vitesse X2, X4, X8, X20
ou à vitesse normale.
Pendant l’opération de balayage, le niveau du volume est abaissé.
Appuyez sur la touche PLAY pour reprendre la lecture normale.
PAUSE OU LECTURE ECRAN (CD/MP3)
Pendant la lecture, appuyez sur PAUSE/STEP de la télécommande pour mettre en pause. Continuez la lecture
normale avec PLAY.
PAUSE OU LECTURE ECRAN (VCD/DVD)
En mode pause, le lecteur va sur une écran à chaque pression sur la touche PAUSE/STEP de la télécommande. Reprenez une lecture normale avec PLAY ou en appuyant à nouveau sur PAUSE/STEP
ARRET DE LA LECTURE
Pendant la lecture, appuyez sur le bouton STOP de la télécommande ou sur le lecteur pour arrêter la lecture.
Le lecteur active sa fonction de reprise si vous appuyez une fois sur le bouton STOP. Appuyez à nouveau sur
le bouton PLAY pour démarrer la lecture à l’emplacement ou vous l’aviez arrêtée. Ouvrez le tiroir CD ou
appuyez une deuxième fois sur le bouton STOP pour effacer la fonction de reprise.
Page 47

RALENTI
VCD/DVD uniquement
Pendant la lecture, appuyez sur le bouton SLOW de
la télécommande. Le disques sera d’abord lu en
vitesse moyenne. A chaque fois que vous appuierez
sur le bouton, la vitesse de lecture diminuera (jusqu’à
1/7 de sa vitesse normale).
Continuez la lecture normale avec PLAY.
REPETER UNE FOIS/REPETER TOUT
Pendant la lecture, appuyez sur la touche REPEAT
1/ALL de la télécommande.
DVD
Un ou tous les chapitres/titres seront répétés.
VCD/CD
Une ou toutes les pistes seront répétées.
NOTE: Avec un VCD, REPEAT 1/ALL ne fonctionne
que su PBC est éteint.
RECHERCHE D’UNE SCENE
1. Pendant la lecture, appuyez sur la touche
SEARCH de la télécommande et soulignez
l’élément à lire (titre, chapitre ou partie de
chapitre)
2. Entrez le numéro ou le temps avec les touches
numériques.
3. Confirmez avec la touche SELECT et la lecture
de la scène trouvée débute.
4. Pour quitter le menu de recherche, appuyez sur
la touche SEARCH.
REPETER A-B
1. Pendant la lecture, appuyez sur la touche REPEAT
A-B pour régler le point de départ (A) de la
répétition.
2. Appuyez à nouveau sur cette touche pour régler le
point final (B). Le lecteur démarre automatique
ment la répétition de la section entre le point A et le
point B.
3. Appuyez à nouveau sur cette touche pour
reprendre la lecture normale.
LECTURE PROGRAMMEE ( JUSQU'A 16
MEMOIRE)
1. Pendant la lecture, appuyez sur PROGRAM pour
appeler le menu programme.
2. Sélectionnez l’/les emplacement(s) de la mémoire
à l’aide des touches et entrez ensuite les numéros
de titres/chapitres à l’aide des touches numéri
ques.
Note: L’insertion d’un zéro conducteur n’est pas
nécessaire. Entrez, à l’aide de la touche +10 de la
télécommande, la dizaine du numéro de
chapitre/titre/piste. Si le numéro de
chapitre/titre/piste est plus grand que 10, appuyez
d’abord sur la touche +10 et ensuite sur le chiffre.
L’insertion de numéros plus grands que le nombre
total de numéros de titres/ chapitres/pistes du CD
est inutile.
Exemple :
Pour entrer la piste 3, appuyez sur "3".
Pour entrer la piste 12, appuyez sur "+10" puis
sur "2".
Pour entrer la piste 21, appuyez deux fois
sur "+10" puis sur "1".
3. Démarrez la lecture programmés avec PLAY dans
le menu ou sur la télécommande. En appuyant à
nouveau sur le bouton PROGRAM , vous pouvez
terminez le mode de programmation.
4. Pour effacer les éléments programmés, sélection
nez les éléments et appuyez sur la touche CLEAR
de la télécommande. Pour effacer tous les
éléments, sélectionnez <DÉGA> dans le menu et
appuyez sur la touche SELECT de la télécom
mande.
5. Vous pouvez aussi terminer le mode programme en
effaçant tous les éléments du menu programme.
ZOOM (VCD/DVD)
En continuant à appuyez sur ZOOM de la télécom
mande, vous pouvez réduire de 2, 3 à 4 fois et agrandir
d’un 1/2, 1/3, 1/4 la taille normale de l’image.
Si l’image est
touche ZOOM , vous retournez à la taille d’affichage
normale.
Sur l’image agrandie, vous pouvez vous déplacer avec
les touches flèche.
INFORMATIONS A L’ECRAN
Lorsque le lecteur est allumé, appuyez en continu sur
la touche DISPLAY de la télécommande. Dans la partie
supérieure de l’écran, une banderole d’informations
s’affiche (type de CD en cours, numéro de chapitre,
temps de lecture, langue audio, type audio, langue de
sous-titrage et angles multiples, etc).
CHANGER LA LANGUE DE LA BANDE SON AUDIO
(DVD/VCD)
Vous pouvez changer la langue audio préréglée pour
mettre dans une autre langue (possible uniquement
avec les disque qui contiennent plusieurs langues
audio).
DVD
Pendant la lecture d’un DVD, appuyez sur la touche
AUDIO Vous basculerez sur la langue audio suivante
qui sera affichée dans la banderole d’informations à
l’écran.
Note: L’audio peut être lu dans 8 langues (selon les
DVD).
VCD
En appuyant sur le bouton AUDIO pendant la lecture
d’un VCD, cela change le mode de sortie audio. MONO
GAUCHE, MONO DROIT ou STEREO
NOTE: Si aucune langue audio n’est
enregistrée, cette touche n’a pas de
fonction.
¼ de sa taille, en appuyant encore sur la
-
47.
Page 48

48.
VUE ANGLES MULTIPLES (DVD UNIQUEMENT)
Pendant la lecture, appuyez sur la touche ANGLE pour
afficher le numéro des perspectives enregistrées et
sélectionner la perspective désirée de la scène.
Note: Cette fonction n’est possible qu’avec les DVD qui
comportent des perspectives multiples d’une scène.
Sélection de scènes qui ont été enregistrées depuis
différentes perspectives (limité par les angles de
caméra enregistrés du DVD).
VHANGER LA LANGUE DE SOUS-TITRAGE
(UNIQUEMENT POUR LES DVD)
Pendant la lecture d’un DVD, appuyez sur SUBTITLE.
La langue de sous-titrage affichée à l’écran se changera
à chaque fois que vous appuierez sur cette touche.
Dès que la langue de sous-titrage désirée s’affiche dans
la banderole d’informations, relâchez la touche et les
sous-titres s’affichent dans la langue sélectionnée.
Note: Cette fonction n’est possible qu’avec les DVD
quoi ont été enregistrés avec des sous-titres en
plusieurs langues.
Les sous-titres peuvent être affichés au maximum dans
32 langues (selon le disques).
LECTURE DE VCD AVEC LA FONCTION PBC
Après avoir chargé le VCD 2.0/1.0 avec PBC, l’écran
affiche le format du disque et ensuite un menu.
Sélectionnez la piste désirée avec les touches
numériques. Appuyez sur la touche appropriée du pavé
numérique de 1 à 9 pour obtenir la piste 1à 9. avec la
touche ‘0’, sélectionnez la piste 10. Si le numéro de
piste dépasse 10, appuyez d’abord sur +10 et esnuite
sur la touche numérique 1-9.
Allumez ou éteignez le PBC en appuyant sur la touche
MENU. Si le mode PBC est éteint seulement 9 touches
de pré-visualisation sont affichées.
DVD
Afin de retourner au menu principale pendant la lecture,
appuyez sur la touche MENU.
TITRE: Lecture du titre d’un DVD.
LECTURE DE MP3/MPEG 4
1. Placez un CD Mp3/MPEG 4 dans le tiroir CD.
L’écran affiche, après quelques secondes, tous les
dossiers du CD.
NOTE: S’il y a des titres dans le dossier de
démarrage, la lecture du premier fichier démarre
automatiquement.
2. Sélectionnez un dossier à l’aide des touches flèche
et confirmez avec SELECT.
3. Les fichiers du dossier seront affichés et la sélection
d’un fichier peut se faire à l’aide des touches flèche.
Avec SELECT, vous pouvez démarrer la lecture.
4. Avec NEXT et PREV vous pouvez directement
sélectionner un fichier.
5. Avec REPEAT 1/ALL , vous pouvez changer le
mode de lecture.
REPETER 1 - Permet de répéter un fichier.
REPETER LE TABLEAU– répète tous les fichiers
du dossier en cours.
TOUT REPETER – répète tous du CD en cours.
FER- Annuler tous les modes de répétition.
LECTURE D’UN CD/JPEG CD PHOTO KODAK
Après avoir inséré un CD Photo Kodak, un diaporama
démarre automatiquement.
Après le chargement, les dossiers du CD JPEG sont
affichés à l’écran. Sélectionnez le dossier désiré à l’aide
des touches flèche et confirmez avec la touche
SELECT.
Les fichiers de ce dossier seront affichés et vous
pourrez sélectionner votre photo préférée à l’aide des
touches flèche haut/bas. Avec SELECT, la lecture
démarre.
Une pré-visualisation de l’image sera affichée en
parcourant les noms de fichiers.
FONCTIONNEMENT D’UN CD/JPEG CD PHOTO
KODAK
1. MODES REPETER
Pendant la lecture, appuyez sur la touche 1/ALL
pour changer le mode de répétition.
REPETER 1- Permet de revoir une image.
REPETER LE TABLEAU– permet de revoir toutes
les images du dossier en cours.
TOUT REPETER – permet de revoir toutes les
images du CD en cours.
FER- Annuler tous les modes de répétition.
Pour appeler le mode de pré-visualisation pendant
la lecture, appuyez sur STOP.
2. SAUTER A L’IMAGE SUIVANTE/PRECEDENTE
Appuyez sur NEXT ou PREV pour sauter à l’image
suivante ou précédente.
Si vous n’appuyez sur aucune touche pendant
quelques secondes, l’appareil sautera à l’image
suivante automatiquement.
3. FAIRE PIVOTER L’IMAGE
A l’aide de la touche flèche droite, vous pouvez
tourner l’image à 90° dans le sens des aiguilles
d’une montre et dans le sens inverse des aiguilles
d’une montre avec la touche flèche gauche.
4. FAIRE UN MIROIR DE L’IMAGE
Faites un miroir verticalement à l’aide de la touche |
flèche du haut.
Faites un miroir horizontalement à l’aide de la
touche flèche du bas.
5. AGRANDIR/REDUIRE UNE IMAGE
En appuyant successivement sur la touche ZOOM
de la télécommande, vous pouvez réduire de 2, 3 à
4 fois et agrandir d’un 1/2, 1/3, 1/4 la taille normale
de l’image.
Si l’image est ¼ de sa taille, en appuyant encore
sur la touche ZOOM , vous retournez à la taille
d’affichage normale.
Afin d’afficher les zones couvertes dans l’image
agrandie, vous pouvez vous déplacer, à l’aide des
touches flèche, dans la section affichée.
Page 49

6. MODE DE TRANSITION DU DIAPORAMA
Pendant le diaporama, vous pouvez appuyer de
manière cyclique sur la touche PROGRAM afin de
sélectionner une des transitions d’image suivantes:
WIPE TOP: Essuyez depuis le haut
WIPE BOTTOM: Essuyez depuis le bas.
WIPE L: Wipe from the left.
WIPE R: Essuyez à partir de la droite.
DIAGONAL WIPE L TOP: Essuyer à partir de la
diagonale supérieure gauche.
DIAGONAL WIPE R TOP: Essuyer à partir de la
diagonale supérieure droite.
DIAGONAL WIPE L BOTTOM: Essuyer à partir
de la diagonale inférieure gauche.
DIAGONAL WIPE R BOTTOM: Essuyer à partir
de la diagonale inférieure droite.
EXTEND FROM CENTER H: Etendre depuis
l’horizontale du centre.
EXTEND FROM CENTER V: Etendre depuis la
verticale du centre.
COMPRESS TO CENTER H: Compresser
depuis l’horizontale du centre.
COMPRESS TO CENTER V: Compresser
depuis la verticale du centre.
WINDOW H: Effet jalousie horizontale.
WINDOW V: Effet jalousie verticale.
WIPE FROM EDGE TO CENTER: Essuyer du
bord vers le centre.
RANDOM: Effet de transition d’image aléatoire.
NONE: Effets de transition d’image éteints.
REGLAGE DE LA COULEUR ET DE LA LUMIN
-
OSITE (ECRAN LCD)
Utilisez le bouton ADJ de l’appareil pour régler
l’intensitéde la couleur, la luminosité et le contraste.
Appuyez une fois sur le bouton pour accéder au
mode de réglage de la couleur. Appuyez sur les
touches NEXT et PREV pour régler la couleur.
Appuyez à deux reprises sur le bouton pour accéder
au mode de luminosité et à trois reprises pour
accéder au mode contraste.
FONCTIONNEMENT D’UN MEDIA DE MEMOIRE
EXTERNE (USB)
Préparation du lecteur pour l’utilisation d’un média de
mémoire externe.
1. Allumez le lecteur et faites tourner l’interrupteur de
mode de fonction sur DVD La LED POWER
s’allumera.
2. Insérez une clé de mémoire USB contenant des
fichiers de musique, JPEG ou vidéo sur le port
USB. La clé de mémoire USB sera détectée et lue
après quelques secondes. L’écran affiche
maintenant tous les dossiers existants.
3. Les fichiers de la clé de mémoire peuvent être lus
comme un CD MP3/MPEG 4.
Note: Assurez-vous que le tiroir CD ne contient
aucun CD si vous insérez une clé de mémoire
USB.
FONCTION KARAOKE AVEC 2 MICROPHONES
Connectez un microphone sur une des deux prise
microphone MIC1 ou MIC 2.
Vous pouvez maintenant faire correspondre le niveau
de volume du signal du microphone, à l’aide du
contrôle MIC LEVEL, et le volume total.
REGLAGES DE BASE
Avec les réglages de base, vous pouvez faire des
réglages préférentiels pour votre Lecteur. Après avoir
entré les réglages de base, ils sont enregistrés sur
votre lecteur et peuvent être changés à tout moment.
GENERAL
1. Appuyez sur le bouton SETUP de la télécom
mande.
2. Utilisez les touches flèche pour sélectionner
l’option à changer et confirmez avec la touche
SELECT La page de réglages de l’écran est
affichée avec des options supplémentaires.
Effectuez à nouveau les changements à l’aide des
boutons flèche et confirmez-les avec SELECT.
3. Déplacez-vous à l’aide des touches flèche pour
aller sur un autre réglage de la page principale des
réglages.
4. Quittez la page principales des réglages à l’aide de
la touche SETUP de la télécommande.
1. REGLAGE SYSTEME
SYSTEM SETUP
TV SYSTEM
SCREE
N SAVER
TV TYPE
PASSWORD
RATING
DEFAULT
EXIT SETUP
1.1 SYSREME D’TV - Permet de sélectionner le
mode TV.
Options: NTSC, PAL, PAL60, AUTO
Veuillez sélectionner une des options en fonction
de votre poste de TV.
1.2 GARDI. L’ECR. -
Si vous n’activez pas le
lecteur pendant deux minutes ou plus, un Logo
DVD se déplace sur l’écra, pour protéger votre
poste de TV.
Options:
OUVERT : L’économiseur d’écran est allumé.
FER : L’économiseur d’écran est éteint.
49.
Page 50

50.
1.3 TYPE DE TV - Permet de sélectionner le
format de la TV. Veuillez sélectionner cette
option en fonction de votre poste de TV.
Options:
4:3PS: Pan & Scan
4:3LB: Letterbox
16:9: 16:9 TV Grand Ecran
1.4 MOT DE PASSAG - Pemet d’entrer un mot de
passe pour déverrouiller le système.
Les étapes suivantes sont nécessaires :
1.4.1 Appeler AJUSTER LE SYSTEME et
sélectionnez l’option MOT DE PASSAG avec
les touches flèche. Sélectionnez ensuite le
champ d’insertion à l’aide de la touche flèche
de droite.
1.4.2 Pour déverrouiller le système, entrez le mot
de passe utilisateur “0000”. Pour cela,
sélectionnez à nouveau le champ d’insertion
pour changer le mot de passe et entrez un
nouveau numéro à quatre chiffres. Confirmez
à nouveau avec SELECT. Si le mot de passe
a été changé, pour accéder au système, vous
devez entrer le nouveau mot de passe.
1.4.3 Si vous avez oublié votre mot de passe, vous
pouvez utiliser le mot de passe principal
“8200” pour déverrouiller le système.
NOTE: Si un mauvais mot de passe a été
utilisé pour déverrouiller le système, ce
dernier sera bloqué.
1.5 CLASSE - Permet de régler la catégorie. Si
vous souhaitez changer la catégorie du
blocage parental, veuillez d’abord entrer le mot
de passe pour déverrouiller.
Options: 1 KID SAFE/2 G/ 3 PG/ 4 PG 13/ 5
PG-R/ 6 R/7 NC-17/ 8 ADULT
1.6 DEFAUT - Réinitialiser les réglages d’usine.
Options: RETOUR
2. SELECTION DE LA LANGUE
LANGUAGE SE TUP
OSD LANGUAGE
O LANG
AUDI
E LANG
SUBTITL
MEN
U LANG
EXI
T SETUP
2.2 AUDIO LANG - Permet de sélectionner la langue
audio préférée (DVD uniquement, nécessite un
support de logiciel par le disque).
Options: ANGLAIS, ESPAGNOL, PORTUGAIS, ITALIEN,
FRANÇAIS, ALLEMAND, HOLLANDAIS, JAPONAIS
2.3 SOUSTITR LANG - Permet de sélectionner la langue
de sous-titrage préférée (DVD uniquement, nécessite
un support de logiciel par le disque).
Options: ANGLAIS, ESPAGNOL, PORTUGAIS,
ITALIEN, FRANÇAIS, ALLEMAND, HOLLAN
-
DAIS, FER
2.4 MENU LANG - Permet de sélectionner la
langue du menu CD voulue (DVD unique
ment, nécessite un support de logiciel par le
disque).
Options: ANGLAIS, ESPAGNOL, PORTUGAIS,
ITALIEN, FRANÇAIS, ALLEMAND, HOLLAN
-
DAIS, JAPONAIS
3. REGLAGE AUDIO
AUDIO SET UP
AUDIO OUT
EXIT SETUP
3.1 SORTIE AUDIO - Réglage du format de sortie
digital.
SPDIF/OFF: Si la sortie audio n’est pas connectée à un
amplificateur, veuillez sélectionner cette option.
SPDIF/RAW: Utilisé sur un home cinéma. Il peut
émettre en sortie audio canaux 5.1.
SPDIF/PCM: Seus deux canaux sont en sortie, mais la
sortie audio se fait de meilleure qualité.
2.1 OSD LANGUE - Réglage des langues
différentes pour ‘l’affichage à l’écran’.
Options: ANGLAIS, ALLEMAND, ESPAGNOL,
FRANÇAIS, PORTUGAIS, ITALIEN
Page 51

4. REGLAGE VIDEO
VIDEO SETUP
BRIGHTNESS
CONTRAST
HUE
SATURATION
EXIT SETUP
4.1 BRI - Règle le niveau de luminosité de l’écran.
Options: 0/2/4/6/8/10/12
4.2 CON - Règle le niveau de contraste de l’écran.
Options: 0/2/4/6/8/10/12
4.3 HUE - Règle le niveau d’intensité de couleur de
l’écran.
Options: -6/-4/-2/0/+2/+4/+6
4.4 SATURATION -
Règle le niveau de saturation de
l’écran.
Options: 0/2/4/6/8/10/12
5. REGLAGE DES HAUT-PARLEURS
SPEAKER SET UP
DOWNMIX
EXIT SETUP
5.1 DOWNMIX
Options: LT/RT -
Mode mix Gauche/Droit
STEREO- Sélectionnez ce réglage, s’il n’y a
pas d’amplificateur canal 5.1 connecté au
lecteur.
51.
Page 52

52.
FONCTIONNEMENT DE LA RADIO
RADIO
1. Tournez le sélecteur de fonction sur RADIO.
2. Sélectionnez la bande désirée avec l’interrupteur rotatif de bande. Réglez le volume à un niveau confort
able.
3. Utilisez le bouton rotatif TUNING pour localiser les stations radio (Tournez le bouton rotatif vers la gauche
ou la droite, jusau’à ce que vous ayez la meilleure réception).
4. L’antenne AM intégrée et l’antenne télescopique FM dépendent de la direction.
• Etirez l’antenne FM télescopique et faites tourner sa position jusqu’à ce que vous obteniez une meilleure
réception.
• Pour la réception AM, tournez en entier jusqu’à ce que vous ayez la meilleure réception.
5. Réglez le niveau de volume à un niveau d’écoute confortable.
6. Pour éteindre la radio, tournez le sélecteur de fonction sur OFF.
Remarques :
• Si le signal stéréo d’une seule station radio est faible et que vous entendez beaucoup de bruit, réglez
l’interrupteur de bande sur FM (MONO). Cela améliore souvent la réception.
• Si l’interrupteur de bande est réglé sur FM ST et qu’une diffusion stéréo est réçue, l’indicateur FM ST
au-dessus du lecteur s’allumera.
PRISE CASQUE STEREO
Le lecteur est équipé d’une prise jack stéréo à l’arrière pour que vous puissiez écouter de la musique sans
déranger d’autres personnes. Branchez les écouteurs (non fournis) et réglez le contrôle du volume à un
niveau confortable.
NOTE: Avec la connexion d’écouteurs externes, les haut-parleurs du lecteur sont éteints.
Page 53

GUIDE DE DEPANNAGE
Si une panne survient, vérifiez d’abord les points suivants avant de faire réparer l’appareil.
Problème
Il est impossible d’allumer l’appareil
ou de l’éteindre.
Les piles sont insérées mais il est
Assurez-vous que l’adaptateur AC est bien branché dans la prise AC.
Eteignez le courant et rallumez.
Vérifiez si les piles sont usagées.Changez les piles
Vérification/Solution
impossible d’allumer l’appareil ou
de l’éteindre.
La télécommande ne fonctionne pas
Assurez-vous que la pile est inséré dans la bonne direction.
Vérifiez si la pile est usagée. Remplacez la pile.
Dirigez la télécommande directement vers le capteur de la télécommande
sur le devant du lecteur DVD.
Retirez tout obstacle entre la télécommande et le capteur de la
télécommande.
Pas d’image ou de son
Assurez-vous que le câble A/V est bien connecté.
Assurez-vous que le disque est un DVD (code régional 1 ou toute zone),
DVD-RW, CD VIDEO ou CD AUDIO.
Vérifiez si le disque est rayé ou sale.
Assurez-vous que le côté avec le label du CD est sur le dessus.
La lentille du lecteur DVD est peut –être sale. Contactez le service client
Pas d’image
Pas de son
Vidéo ou son déformé(e)
NETTOYAGE ET ENTRETIEN
Nettoyage de l’écran TFT
pour nettoyer la lentille.
Assurez-vous que la chaîne TV est réglée sur VIDEO ou sur AV si vous
utilisez un poste de TV.
Vérifiez queles piles ont été insérées dans le bon sens et que le câble
principal est connecté.
Assurez-vous que le LCD est allumé.
Vérifiez le réglage du volume. Si le contrôle du volume est réglé sur MIN,
augmentez le niveau du volume.
Vérifiez si les écouteurs sont branchés dans la prise casque. Les
haut-parleurs ne peuvent pas être utilisés avec les écouteurs.
Le CD est rayé ou tordu.
• Eteignez le lecteur et essuyez l’écran à l’aide d’un chiffon doux.
Nettoyer l’enveloppe
• Utilisez un chiffon doux et sec. Si les surfaces sont extrêmement sales, utilisez un chiffon doux qui a été
légèrement mouillé à l’aide d’une solution lavante douce.
• Ne pas utiliser de solvants forts tels que de l’alcool, de l’essence ou des solvants car ils peuvent endom
mager la surface du lecteur.
53.
Page 54

54.
ENTRETIEN DU DISQUE ET MAINTENANCE
Manipulation du CD
• Ne touchez le CD que par le bord pour éviter les traces de doigts sur la surface. Les
traces de doigts, la saleté ou les rayures peuvent faire sauter le disque et entraîner
des déformations.
• Ne pas écrire sur la face du CD qui comporte le label, avec un stylo à bille ou un
autre stylo.
• Ne pas utiliser d’essence, de solvant ou de liquides contre l’électricité statique.
• Ne pas faire tomber ou plier les disques.
• Ne placez qu’un disque sur le tiroir disque.
• N’essayez pas de fermer le tiroir CD si le disque est installé correctement.
Nettoyage des CD
• Utilisez un chiffon doux et humide pour nettoyer l’appareil.
• Nettoyer le CD du centre vers l’extérieur.
Rangement
• Toujours ranger les CD dans leur boîtier après lecture.
DONNEES TECHNIQUES
Alimentation: AC 230V ~ 50 Hz
Fonctionnement de la pile 8x UM- 2/ Baby
(non fournies)
Télécommande: CR2025
Ecran TFT: 7“ (15.5 cm)
Bande: MW (AM)
/ USW (FM)
Gamme de fréquence: AM 525 - 1615 kHz
FM 87.5 - 108 MHz
Consommation d’énergie: 25 W
Supported TV systems: NTSC/PAL/PAL60
/AUTO
Température d’utilisation: +5°C à +35°C
Fonctionnement continu: 150 minutes
Dimensions: 406x236x149.5
(L x L x H)
Poids: ca. 3 kg
Gamme d’humidité pour
le fonctionnement: 10 % à 75 %
Disques supportés:
1. DDisque DVD-VIDEO
12 cm une face, une couche
12 cm une face, double couche
12 cm double face, une couche
8 cm une face, une couche
8 cm une face, double couche
8 cm double face, une couche
2. VIDEO CD/CD-DA/CD-R/CD-RW/MP3 -CD
disque 12cm
disque 8 cm
Signal Sortie Audio:
1. DVD (audio linéaire)
(1) Gamme de fréquence: 20 Hz-20 kHz (48 kHz
échantillonnage) & 20
Hz – 20 kHz (96 kHz
échantillonnage)
(2) Rapport signal/bruit: > 65 dB
(3) Gamme Dynamique: 90 dB
(4) Fluctuation de vitesse: sous le niveau
mesurable
2. CD Audio:
(1) Gamme de fréquence: 20 Hz-20 kHz
(2) Rapport signal/bruit: > 65 dB
(3) Gamme Dynamique: 90 dB
(4) Fluctuation de vitesse: sous le niveau
mesurablel
Spécifications sujettes à modifications sans avis
préalable.
Page 55

GARANTIE ET SERVICE CLIENT
Avant d’être mis sur le marché, nos produits sont soumis à des contrôles qualité stricts. Cependant, en dépit
de tous les soins apportés à nos produits, si vous constatez une défectuosité liée à la production ou au
transport, veuillez contacter le service client Elta en Allemagne: 01805/355460 (0,12 EUR/Min). Selon la loi de
garantie protégeant les consommateurs, le consommateur a, après sa sélection, la garantie suivante: le
produit est garanti 24 mois après son achat (sous présentation de la carte de garantie). Cela prend effet le
jour de l’achat de l’appareil. Durant ces 24 mois, nous effectuons les réparations qui sont liées à une
défectuosité de fabrication ou d’un composant en réparant ou en changeant si nécessaire.
Les dommages causés par un mauvais usage de l’appareil ou dûs à toute réparation non effectuée par un
service agrée, ne sont pas couverts pas cette garantie.
NOUS CONTACTER
Consultez notre site
http://www.elta.de
Pour des questions techniques:
elta Service-Center
Breitefeld 15
64839 Münster
Hotline Tél: 01805/355460 (0.12 EUR/Min)
Fax: 01805/258619 (0.12EUR/Min)
Depuis l’étranger, vous pouvez contacter notre service au:
Hotline: +49 6071/3902909
365 jours par an - du Lundi au Samedi
service@elta.de
55.
Page 56

56.
MODELL: 6740
Hordozható rádió beépített DVD-lejátszóval és 7 collos TFT képernyővel
BIZTONSÁGI ELŐÍRÁSOK
FIGYELEM
FESZÜLTSÉG ALATT!
NE NYISSA KI A BURKOLATOT!
VIGYÁZAT: AZ ÁRAMÜTÉS
A villámot tartalmazó
háromszög szimbólum arra
hívja fel a felhasználó
figyelmét, hogy a készülékben
szigetelés nélküli nagy
feszültségű alkatrészek
találhatók, amelyek áramütést
okozha
VESZÉLYÉNEK ELKERÜLÉSE
ÉRDEKÉBEN NE VEGYE LE A
KÉSZÜLÉK BURKOLATÁT.
A KÉSZÜLÉK BELSEJÉBEN NINCS
OLYAN ALKATRÉSZ, AMELYET
HÁZILAG LEHETNE KARBANTARTANI.
A KÉSZÜLÉK JAVÍTÁSÁT
A felkiáltójelet tartalmazó
háromszög azt jelzi, hogy a
felhasználásról és a
karbantartásról fontos
információkat talál a
mellékelt kézikönyvben,
melyet tanulmányozzon át.
KIEGÉSZÍTŐ INFORMÁCIÓK
Óvatosan bánjon az apró alkatrészekkel és elemekkel, és azokat ne nyelje le, mert ez komoly
sérüléseket okozhat!
Gondoskodjon arról, hogy az apró alkatrészek és elemek ne kerüljenek gyermekek kezébe.
Fontos tanácsok a halláskárosodás elkerülésére
Figyelmeztetés:
Az Ön hallásáért nemcsak Ön, de mi is aggódunk.
Éppen ezért kérjük, legyen óvatos a készülék használatánál.
Azt ajánljuk, hogy: kerülje a nagy hangerővel való hallgatást.
Ha a készüléket gyermekek használják, ügyeljünk arra, hogy ne állítsák a készüléket túl
hangosra.
Vigyázat!
A túl nagy hangerő a gyermekeknél gyógyíthatatlan károsodást okozhat.
Kérjük gondoskodjon róla, hogy a készülék burkolatának nyílásaiba SOHA senki, főképpen pedig
gyermekek, ne dughassanak bele semmit, ez ugyanis életveszélyes áramütéshez vezethet.
A készülék burkolatát csak erre megfelelően képzett szakember nyithatja fel.
A készüléket kizárólag a rendeltetésének megfelelõen használjuk.
A készülék kizárólag lakásokban és üzletekben történõ felhasználásra alkalmas.
Kérjük, őrizze meg a használati útmutatót, hogy az később is rendelkezésére álljon.
Környezetvédelmi tanácsok
Ezt a terméket az élettartama végén ne dobjuk a normál háztartási szemétbe, hanem adjuk le a
villamos és elektronikai hulladékok átvevőhelyén. A terméken található szimbólum, a használati
útmutató vagy a csomagolás felirata erre hívja fel a figyelmet.
A készülék anyagai a jelölésüknek megfelelõen újrahasznosíthatóak. Az újrahasznosítással, az
anyagok ismételt felhasználásával, illetve a használt készülékek egyéb felhasználásával sokat
tehetünk környezetünk megóvásáért.
A megfelelõ hulladék-átvevõhelyrõl a helyi önkormányzatnál érdeklõdhetünk.
Page 57

Ne akadályozza a készülék szellőzését, például függönnyel, újsággal, takaróval vagy bútorral. A
szellőzőnyílásoknak mindig szabadon kell maradnia. A túlmelegedés kárt tehet a készülékben, és
emiatt annak élettartama lerövidülhet.
Meleg és forróság
Ne tegyük ki a készüléket a közvetlen napsütés hatásának. Ügyeljünk arra, hogy a készülék ne
legyen fűtőberendezés, nyílt láng vagy egyéb hőforrás közelében. A készülék szellőzőnyílásait
mindig hagyjuk szabadon.
Nedvesség és tisztítás
Ez a készülék nem vízálló! Ne tegyük vízbe a lejátszót, és ügyeljünk arra, hogy ne is kerüljön vízzel
érintkezésbe.
A lejátszóba bejutó víz súlyos károkat okozhat. A készülék megtisztítására ne használjunk alkoholt,
ammóniát, benzint, vagy súrolószert tartalmazó tisztítóanyagot, mivel ezek károsíthatják a lejátszót.
A készülék megtisztítására enyhén megnedvesített puha törlőruhát használjunk.
Előírásos hulladék-elhelyezés
Az elemek és a csomagolóanyagok nem a háztartási szemétbe valók. Az elemeket a használt
elemek számára kijelölt gyűjtőhelyre vigyük. A csomagolóanyagok szelektív elhelyezése szintén
védi környezetünket.
SAFETY INSTRUCTIONS
1. OLVASSA EL AZ UTASÍTÁSOKAT - A készülék működtetése előtt az összes biztonsági és működtetési
utasítást olvassa el.
2. ŐRIZZE MEG AZ ÚTMUTATÓT - A biztonsági és működtetési útmutatókat tartsa meg a későbbi
használatra.
3. FIGYELMEZTETÉSEK - A terméken és a használati útmutatóban található figyelmeztetéseket tartsa be.
4. KÖVESSE AZ UTASÍTÁSOKAT - A működtetési és használati utasításokat tartsa be.
5. VÍZ ÉS NEDVESSÉG - Ne használja a terméket víz (például fürdőkád, mosdókagyló, konyhai mosogató,
mosóteknő) közelében, úszómedence mellett vagy átnedvesedett alagsorban.
6. SZELLŐZÉS - A készüléken található nyílások a megfelelő szellőzést szolgálják, a működéshez valamint
a túlmelegedés elkerülése érdekében szükségesek. A készüléket úgy kell elhelyezni, hogy a helye vagy
helyzete ne zavarja a megfelelő szellőzést. A terméket ne tegye ágyra, kanapéra, pokrócra vagy más
hasonló felületre, amely elzárhatja a szellőzőnyílásokat, ne építse be olyan helyre pl. szekrénybe vagy
tartóba amely gátolhatja a légáramlást a szellőzőnyílásokon át.
7. HŐ - A terméket a hőforrásoktól, pl. radiátoroktól, konvektoroktól, kályháktól vagy más hőt termelő
készülékektől (beleértve az erősítőket is) távol kell elhelyezni.
8. ÁRAMFORRÁS - A terméket csak a használati útmutatóban megadottal vagy a törzslapon megjelölttel
egyező feszültséget szolgáltató áramforrásról szabad üzemeltetni.
9. HÁLÓZATI CSATLAKOZÓ KÁBEL VÉDELME - A hálózati csatlakozó kábeleket úgy kell vezetni, hogy
azokra ne lépjenek rá és a rájuk vagy melléjük helyezett tárgyakba ne akadhassanak bele.
10. HA NEM HASZNÁLJÁK - Ha hosszabb ideig nem használja a készüléket, húzza ki a hálózati csatlakozót
és az antennát.
11. TÁRGYAK és FOLYADÉKOK BEJUTÁSA - Vigyázni kell, hogy a burkolat nyílásain át semmilyen tárgy ne
essen, vagy folyadék ne folyjon a készülék belsejébe. Ne szereljük széjjel.
12. JAVÍTÁST IGÉNYLŐ SÉRÜLÉSEK - A készüléket képesítéssel rendelkező szakembernek kell
megjavítania, ha:
a. A hálózati vezeték vagy a csatlakozódugasz megsérült.
b. Folyadék vagy valamilyen tárgy került a készülék belsejébe.
c. A készüléket eső vagy víz érte.
d. A készüléket leejtették vagy a burkolatot károsodás érte. Csak a kézikönyvben meghatározott
kezelőszerveket és beállításokat alkalmazza.
e. Az egység a jelek szerint nem működik rendesen.
f. A készülék teljesítményében nagymértékű változás állt be.
57.
Page 58

58.
13. SZERVIZELÉS - A felhasználó nem végezhet semmilyen olyan szervizelési műveletet a
készüléken, amely nincs leírva a használati útmutatóban. A javításokat csak képesítéssel rendelkező
szakember végezheti.
14. TISZTÍTÁS – Tisztítás előtt húzza ki a hálózati csatlakozót. Ne használjon folyékony vagy aeroszolos
tisztítószereket, csak nedves ruhát használjon. Kövesse a használati útmutatóban leírt tisztítási és
karbantartási utasításokat.
15. VILLÁMLÁS - Villámlás idején, és ha hosszabb ideig nem használja a készüléket, húzza ki a hálózati
csatlakozót és az antennát.
16. BIZTONSÁGI ELLENŐRZÉS - A szervizelést követően kérje meg a vevőszolgálatot, hogy végezzenek
biztonsági ellenőrzést a terméken.
17. TÚLTERHELÉS - A tűz és az áramütés elkerülése érdekében ne terhelje túl a fali csatlakozókat és az
egybeépített konnektor aljzatokat.
18. ELEKTROSZTATIKUS KISÜLÉS - Ha a készülék hibásan működik, húzza ki a hálózati csatlakozót és
vegye ki az elemeket. Kis idő elteltével csatlakoztassa újra.
FIGYELEM
EZ A CD-LEJÁTSZÓ I-ES OSZTÁLYÚ LÉZERT HASZNÁLÓ TERMÉK. MINDAZONÁLTAL A KÉSZÜLÉK
OLYAN LÁTHATÓ/LÁTHATATLAN LÉZERSUGARAT HASZNÁL, AMELY VESZÉLYES SUGÁRZÁST
FEJTHET KI. MINDIG ÜGYELJEN ARRA, HOGY A CD-LEJÁTSZÓT AZ ÚTMUTATÁSOK SZERINT
HASZNÁLJA.
AZ ITT LEÍRTAKTÓL ELTÉRŐ SZABÁLYOZÁSOK VAGY BEÁLLÍTÁSOK, VALAMINT ELJÁRÁSOK
ALKALMAZÁSA VESZÉLYES SUGÁRZÁST EREDMÉNYEZHET.
A TŰZ ÉS AZ ELEKTROMOS ÁRAMÜTÉS, VALAMINT A KELLEMETLEN INTERFERENCIA ELKERÜLÉSE
ÉRDEKÉBEN CSAK AZ AJÁNLOTT TARTOZÉKOKAT HASZNÁLJA.
TOVÁBBI INFORMÁCIÓK
A készülék helyének meghatározása
• Kerülje a rázkódást, az ütődést vagy az egyenetlen felületeket, mivel ezek a belső alkatrészeket súlyosan
károsíthatják.
• Ne helyezzen nehéz tárgyakat a lejátszóra.
• Tilos a lejátszót erősítőkre vagy egyéb olyan készülékekre helyezni, amelyek felforrósodhatnak.
Kerülje a mágneses tárgyakat
• Tartsa távol a készüléket az olyan mágneses tárgyaktól, mint pl. a hangszórók.
Páralecsapódás:
Nedvesség gyűlhet a lencsére a következő körülmények esetén:
• Egy fűtőtest bekapcsolása esetén.
• Gőzös, magas páratartalmú helyiségben.
• Ha a lejátszót hideg környezetből meleg hőmérsékletre viszi át.
Páralecsapódás esetén előfordulhat, hogy a készülék nem, vagy nem helyesen működik. Ne kapcsolja be és
ne használja a készüléket legalább egy óra hosszat, amíg a készülék megszárad.
A DVD-lejátszó áthelyezése
• Áthelyezés előtt távolítsa el a CD-lemezt a lejátszóból.
A CD eltávolítása és a készülék kikapcsolása akkor is ajánlott, amikor hosszabb időre nem használja azt.
Energiatakarékosság
• Ha nem használja a készüléket, ajánlott a funkciókapcsolót az “OFF” állásba kapcsolni. Ha készüléket
hosszabb ideig nem használja, a lejátszót csatlakoztassa le az elektromos hálózatról.
Page 59

SZABÁLYOZÓK/CSATLAKOZÁSOK ELHELYEZKEDÉSE
Szabályozók
1 2
1. HANGSZÓRÓK
2. REMOTE SENSOR
3. MIC 1 dugalj
4. MIC 2 dugalj
5. USB Port
6. MIC LEVEL beállítás
7. TFT-KIJELZŐ
8. FUNKCIÓKAPCSOLÓ
9. HORDOZÓFOGANTYÚ
10. VOLUME szabályozó
11. BBS gomb
12. ADJ gomb
13. PREV gomb
14. NEXT gomb
15. POWER LED
16. CD nyílás
Előlnézet
5
3
4
Felülnézet
121314
15
1617181920
11
7
6
1
8910
21
222324
Hátulnézet
26
28
25 29
27
32
30 31
17. OPEN (nyit) gomb CD tálca
18. FM ST. LED
19. FR gomb
20. STOP gomb
21. PLAY/PAUSE gomb
22. FF gomb
23. TUNING gomb
24. BAND (frekvenciasáv) kapcsoló
25. Kihúzható antenna
26. VIDEO kimeneti dugalj
27. AUDIO kimeneti dugalj (jobb)
28. AUDIO kimeneti dugalj (bal)
29. Elemtartó
30. TFT ON/OFF kapcsoló
31. AC csatlakozó
32. PHONES dugalj
59.
Page 60

60.
A távirányító gombjai és funkcióik
1. P/N: TV-rendszer váltása
2. REPEAT A-B: az A és B közötti szakasz ismétlése.
DISPL AY SETUP
P/N
1
2
3
4
5
6
7
8
9
10
11
12
13
1
A-B
4
AT
REPE
1/ALL
7
U
MEN
0
SUBTI TLE PLAY STOP
TITLE
AUDI
O
PAUSE/ STEP SLOW
F.BWD
F.FWD PREV NEXT
ANGL
E ZOOM
SELEC
+10
MUTE
3
2
5
6
8
9
CLEAR
T
SEARC
HPROGR AM
14
15
3. REPEAT 1/ALL: Az ismétlés módjai
16
4. MENU: Főmenü (DVD) / PBC (lejátszás-szabályozás)
ki/be (VCD)
5. SUBTITLE (felirat)
6. PLAY (lejátszás)
17
7. TITLE (címválasztás) (DVD)
8. AUDIO: Audiosáv nyelve
9. PAUSE/STEP (szünet/léptet)
18
10. F.BWD: gyors visszacsévélés
11. F.FWD: gyors előrecsévélés
19
20
12. ANGLE (kameraszög választás) (DVD)
21
13. ZOOM (képnagyítás/kicsinyítés)
14. DISPLAY (kijelző): információs sávot jelenít meg
22
15. SETUP (beállítások)
23
16. MUTE (elnémítás)
24
17. SZÁMJEGYEKKEL ELLÁTOTT GOMBOK
25
18. CLEAR (törlés)
26
19. STOP (leállítás)
20. SELECT: kiválaszt
21. NYILAKKAL ELLÁTOTT GOMBOK
22. SLOW: Lassított lejátszás
23. NEXT (következő)
24. PREV (előző)
25. SEARCH (keresés)
26. PROGRAM: Programozott lejátszás
ÜZEMBE HELYEZÉS ÉS CSATLAKOZTATÁS
Kicsomagolás:
Hordozható DVD-készülékét óvatosan vegye ki a csomagolásból. Tartsa meg a csomagolást a későbbi
felhasználás céljából. Távolítsa el a ragasztószalagokat.
A pozicionálók felerősítése a lejátszóra:
Állítsa össze a két pozicionáló mindkét részét.
Page 61

Helyezze a pozícionálókat a lejátszó alján található
süllyesztékbe, és addig nyomja azokat amíg kattanást
követően a helyükre ugranak.
A pozícionáló segítségével a készülék a megfelelő
nézőhelyzetbe állítható.
Elemek:
A készülék 230V-os, 50Hz-es váltóáramról, vagy 8 db UM2
vagy C típusú elemmel működik. A hosszabb lejátszási idő
érdekében alkáli elemek használatát ajánljuk.
Az elemek behelyezése:
1. Óvatosan lefelé majd kifelé nyomva távolítsa el az
elemtartó fedelét, és helyezzen be 8 db UM-2 vagy C
típusú (lehetőleg alkáli) elemet.
ÜGYELJEN A HELYES POLARITÁSRA; EZEKET „+”
ÉS „-” JELEK MUTATJÁK AZ ELEMTARTÓ MELLETT.
2. Nyomja vissza az elemtartóra a fedelet.
MEGJEGYZÉS: A használt elemek felpuffadhatnak és szivároghatnak. Ha a készüléket hosszabb időre
használaton kívül helyezi, vagy ha az elemek kimerültek távolítsa el azokat, hogy így elkerülje a lejátszó
meghibásodását.
MEGJEGYZÉS: A készülék automatikusan az elemekről kezd működni, ha a hálózati kábelt a fali aljzatból és
a készülék hátuljából is kihúzza.
ALAPCSATLAKOZTATÁS
A lejátszót lehetőleg több rendszerű tv-készülékhez csatlakoztassa.
Bizonyosodjon meg róla, hogy a lejátszó és minden csatlakoztatandó egység készenléti vagy kikapcsolt
állapotban van, továbbá a készüléket összekapcsolásuk előtt áramtalanítsa.
Más készülékek csatlakoztatása előtt olvassa el a használati útmutatót.
Audio- és videokábelek csatlakoztatása esetén ügyeljen a színkódokra.
Megjegyzések:
• DVD lejátszása esetén a tv hangerő halkabb lehet, mint tv-műsor megtekintésekor. Ekkor állítsa a hangerőt
a kívánt szintre.
• Ha a DVD-lejátszó videomagnón keresztül csatlakozik a tv-hez, egyes DVD-kről nem játszható vissza
problémamentesen a képanyag. Ebben az esetben ne a videomagnón keresztül csatlakoztassa a lejátszót.
• HA a lejátszót tv-készülékhez csatlakoztatta, a TFT-kijelzőt a TFT ON/OFF kapcsolóval kapcsolhatja ki.
61.
Page 62

62.
Csatlakoztatás tv-készülékhez
RL
A video bemeneti csatlakozóra (sárga)
Az audio bemeneti csatlakozóra (piros, fehér)
Audio-/videokábel
Hálózati aljzatba
AC tápvezeték
MIKROFON ÉS FEJHALLGATÓ CSATLAKOZTATÁSA
1. Mikrofon csatlakoztatása:
• Csatlakoztasson egy mikrofont az egyik MIC dugaljba.
2. Állítsa a MIC level-t (mikrofon hangerő) a kívánt szintre.
3. Csatlakoztasson egy fülhallgatót a fülhallgató dugaljába.
3
1 1 2
Page 63

TÁVIRÁNYÍTÓ ELŐKÉSZÍTÉSE
Elemek behelyezése A
Az elem behelyezése során ügyeljen a helyes (+) és (-)
polaritásra (a jobb oldali ábrán bemutatott módon).
Távirányítóval kapcsolatos tudnivalók
• CR2025 lítium gombelemet használjon.
• Egy elem általában egy évig használható, de ez a távirányító
használati gyakoriságától is függ.
• Ha a távirányító a lejátszó közelébe helyezve sem működik,
cserélje ki az elemet.
• Az elemeket ne töltse újra, ne zárja rövidre, ne bontsa meg,
hevítse fel, vagy dobja tűzbe.
• Ne dobálja a távirányítót, ne lépjen rá, és ne tegye ki hasonló
hatásoknak. Ez meghibásodáshoz vezethet.
• Távolítsa el az elemet, ha távirányítót hosszabb ideig nem
használja.
A
L
++
i
t
h
C
i
u
r
m
2
0
C
3
2
V
5
e
s
l
c
l
2
B
A TÁVIRÁNYÍTÓ ÉRZÉKELÕJE
A távkapcsoló hatósugara
B
A távirányítót a lejátszó elején található érzékelőtől számított 7
méteren belül és az érzékelő síkjához viszonyítva legfeljebb
60° szögben használja.
7 m
30
30
Távirányító hatósugarával kapcsolatos tudnivalók:
• Ne irányítson erős fényforrásokat az érzékelő felé.
• A hatósugár a helyiség fényességétől is függ.
• A távirányító és az érzékelő közötti tárgyak akadályozzák a
jelátvitelt.
• Ne használja a távirányító más készülékek hasonló
eszközeivel egyszerre.
DISPLAY SETUP
P/N
A-B
4
AT
REPE
1/ALL
7
MEN
U
SUBTITL
E PLAY STOP
TITLE
AUDI
O
PAUSE/STEP SLOW
F.BWD
F.FWD PREV NEXT
ANG
LE ZOOM
E
MUT
3
1
2
5
6
8
9
R
CLEA
0
+10
T
SELEC
SEARC
HPROGRAM
HASZNÁLATI UTASÍTÁS
GRAFIKUS FELHASZNÁLÓI INTERFÉSZ
IA beállításokra vonatkozó és az általános információk a tv-készülék vagy a DVD-lejátszó kijelzőjén jelenik
meg.
ELŐKÉSZÜLETEK
Kapcsolja be a televíziót, és válassza ki a videó bemeneti módot.
63.
Page 64

64.
ÜZEMELTETÉS
1. Kapcsolja be a lejátszót.
2. Nyissa ki a CD-tálcát.
3. Helyezzen egy CD-t címkés felével felfelé a fekete, három rögzítőkapoccsal rendelkező lemeztartóra.
4. Zárja vissza a CD-tálcát, a lejátszás automatikusan indul.
5. Amikor a televízió képernyőjén megjelenik a menü, a kívánt zeneszámot a nyíl vagy a szám gombokkal
tudja kiválasztani; a lejátszást a távirányító SELECT, illetve a lejátszó PLAY/PAUSE gombjának
lenyomásával indíthatja el.
HANGSZINT BEÁLLÍTÁSA
A hangerőt a készüléken található VOLUME forgógombbal tudja állítani a MIN és a MAX állás között.
MÉLYHANGKIEMELÉS BEKAPCSOLÁSA
Nyomja meg a BBS gombot a készüléken. A mély hangok teljesebben és erősebben szólnak. A mélyhang
kiemelés kikapcsolásához újra nyomja meg a BBS gombot a készüléken.
ELŐRE- VAGY VISSZALÉPTETÉS A FEJEZETEK/ZENESZÁMOK KÖZÖTT
DVD:
A lejátszás során a következő vagy az előző fejezetre a NEXT vagy a PREV gombok megnyomásával
ugorhat.
VCD/CD-lemez:
A lejátszás során a következő vagy az előző zeneszámra a NEXT vagy a PREV gombok megnyomásával
ugorhat.
GYORS ELŐRE- ÉS VISSZACSÉVÉLÉS
A távirányító F.FWD vagy F. BWD, illetve a készülék FF vagy FR gombjainak többszöri lenyomásával ×2, ×4,
×8, ×20 vagy normál sebességgel kereshet a CD-n előre vagy visszafelé haladva.
A keresési művelet során a hangerő alacsonyabb szintre kapcsol.
A normál lejátszási módhoz nyomja meg a PLAY gombot.
-
PILLANATMEGÁLLÍTÁS ÉS KÉPKOCKÁNKÉNTI LEJÁTSZÁS (CD/MP3)
A pillanatmegállításhoz nyomja meg lejátszás közben a távirányító PAUSE/STEP gombját. A normál lejátszást
a PLAY gomb lenyomásával állíthatja vissza.
PILLANATMEGÁLLÍTÁS ÉS KÉPKOCKÁNKÉNTI LEJÁTSZÁS (VCD/DVD)
A pillanatmegállításhoz nyomja meg lejátszás közben a távirányító PAUSE/STEP gombját. A normál lejátszást
a PLAY vagy a PAUSE/STEP gomb lenyomásával állíthatja vissza.
LEJÁTSZÁS MEGÁLLÍTÁSA
A megállításhoz nyomja meg lejátszás közben a távirányító STOP gombját. A lejátszó aktiválja a lejátszás
folytatása funkcióját, ha egyszer lenyomja a STOP gombot. Nyomja meg újra a PLAY gombot a lejátszást a
korábbi megállítás helyétől akarja folytatni. A lejátszás folytatása funkció kikapcsolásához nyissa ki a
CD-tálcát, vagy nyomja meg másodszor is a STOP gombot.
Page 65

LASSÍTOT LEJÁTSZÁS
Csak VCD/DVD esetén
Nyomja meg lejátszás közben a távirányító SLOW
gombját. Ekkor a lemez lejátszási sebessége a
felére csökken. E gomb minden további
megnyomásával csökken a lejátszási sebesség
(egészen a normál sebesség 1/7-ed részéig).
A normál lejátszást a PLAY gomb lenyomásával
állíthatja vissza.
ISMÉTLÉS EGYSZER/ÖSSZES ISMÉTLÉSE
Nyomja meg lejátszás közben a távirányító REPEAT
1/ALL gombját.
DVD
Egy vagy az összes fejezet/cím lejátszásra kerül.
VCD/CD esetén:
Egy vagy az összes zeneszám lejátszásra kerül.
MEGJEGYZÉS: VCD esetén a REPEAT 1/ALL
funkció csak akkor működik, ha a PBC-t
kikapcsoljuk.
KÍVÁNT JELENET KERESÉSE
1. Nyomja meg lejátszás közben a távirányító
SEARCH gombját és jelölje ki a lejátszani kívánt
tételt (cím, fejezet vagy fejezet idő).
2. Adja meg a kívánt számot vagy időt a numerikus
gombok segítségével.
3. Választását a SELECT gomb lenyomásával
véglegesítheti; elkezdődik a megtalált jelenet
lejátszása.
4. A keresés menüből való kilépéshez nyomja meg
a SEARCH gombot.
A-B ISMÉTLÉS
1. Nyomja meg lejátszás során a REPEAT A-B
gombot az ismétlés kezdő (A) pontjának
megadásához.
2. A végpont (B) megadásához újra nyomja meg ezt
a gombot. A készülék automatikusan elkezdi az A
és B pont közötti szakasz ismétlődő lejátszását.
3. A normál lejátszási módhoz nyomja meg még
egyszer ezt a gombot.
PROGRAMOZOTT LEJÁTSZÁS (LEGFELJEBB
16 MEMÓRIAHELY)
1. Nyomja meg lejátszás során a PROGRAM
gombot a program menü behívásához.
2. A nyilak segítségével válassza ki a
memóriahely(eket), majd a numerikus gombok
segítségével adja meg a kívánt cím/fejezet
számát.
Megjegyzés: Egyjegyű szám esetén nem kell
nullát elé írnia. A tizedik fejezet/cím/zeneszám
számát a távirányító +10 gombjának
megnyomásával választhatja ki. A tíz feletti
fejezet/cím/zeneszám megadásához először a
+10 gombot nyomja meg, majd vigye be a tíz
feletti, maradék számot. Ha a CD-n található
fejezetek/címek/zeneszámok teljes számánál
nagyobb számot ad meg, semmi sem fog
történni.
Példa:
A 3. zeneszámhoz nyomja meg a 3-as gombot.
A 12. zeneszámhoz nyomja meg a +10, majd a
2-es gombot.
A 21. zeneszámhoz nyomja meg a +10 gombot
kétszer, majd az 1-es gombot.
3. A programozott lejátszást a menü vagy távirányító
PLAY opciójának kiválasztásával indíthatja.
A programozási üzemmód befejezéséhez nyomja
meg újra a PROGRAM gombot.
4. A programozott tételek törléséhez válassza ki az
adott tételt, majd nyomja meg a CLEAR gombot a
távirányítón. Az összes tétel törléséhez válassza ki
a menü CLEAR opcióját, majd nyomja meg a
távirányító SELECT gombját.
5. A programozási üzemmód befejezését a program
menü összes tételének törlésével is elérheti.
ZOOM (VCD/DVD)
A távirányító ZOOM gombjának folyamatos
lenyomásával a normál képméretet 2-, 3- és 4szeresére nagyíthatja, vagy 1/2, 1/3 és 1/4 részére
csökkentheti.
Ha a képméret az eredeti 1/4 része, a ZOOM gomb
további lenyomásával a normál képmérethez tér
vissza.
A nagyított képben a nyíl gombokkal tud mozogni.
INFORMÁCIÓ A KÉPERNYŐN
HA lejátszó bekapcsolt állapotban van, nyomja meg a
távirányító DISPLAY gombját folyamatosan. A
képernyő tetején egy információs sáv (jelenleg
használt CD típusa, fejezetszám, lejátszás hossza,
audiosáv nyelve, audiosáv típusa, felirat nyelve, több
kameraszög, stb.) jelenik meg.
AZ AUDIO HANGSÁV NYELVÉNEK KIVÁLASZTÁSA (DVD/VCD)
Az előre beállított audiohangsáv-nyelv más nyelvűre
változtatható (csak a többnyelvű hangsávot
tartalmazó lemezek esetén lehetséges).
DVD
DVD-lemez lejátszása esetén nyomja meg az AUDIO
gombot. A lejátszás a következő audiohangsávnyelven folytatódik; ez az információs sávban is
megjelenik a képernyőn.
Megjegyzés: Audio hangsáv 8 nyelven
játszható le (a DVD függvényében).
65.
Page 66

66.
VCD
VCD-lemez lejátszása esetén az AUDIO gomb
lenyomásával az audio kimeneti módot választhatja ki:
MONO L (bal), MONO R (jobb) vagy STEREO.
MEGJEGYZÉS: HA nem áll rendelkezésre több
nyelvű hangsáv, akkor ez a funkció nem elérhető.
KAMERASZÖG KIVÁLASZTÁSA (CSAK DVD)
Nyomja meg a lejátszás során az ANGLE gombot, így
megjelenik a rögzített perspektívák száma, amelyből
kiválaszthatja a jelenet kívánt kameraszögét.
Megjegyzés: Csak a több kameraszöggel rendelkező
DVD-k esetén elérhető ez a funkció. Ekkor kiválaszthatja azokat a jeleneteket, amelyeket több perspektívából is rögzítettek. (a DVD-re rögzített kameraszög
függvénye).
A FEIRAT NYELVÉNEK KIVÁLASZTÁSA (CSAK
DVD)
DVD-lemez lejátszása esetén nyomja meg a
SUBTITLE gombot. A képernyőn megjelenő felirat
minden lenyomásnál megváltozik.
Ahogy kívánt felirati nyelv megjelenik az információs
sávban, engedje el a gombot és a lejátszás felirata
ezen a nyelven folytatódik.
Megjegyzés: Ez a funkció csak a többnyelvű felirattal
rendelkező DVD-k esetén elérhető.
Feliratok legfeljebb 32 nyelven játszhatók le (a lemez
függvényében).
VCD LEJÁTSZÁSA PBC HASZNÁLATÁVAL
1.0/2.0-s verziójú VCD PBC használatával történő
betöltését követően a képernyőn megjelenik a lemez
formátuma, majd egy menü.
Válassza ki a kívánt zeneszámot a numerikus gombok
segítségével. Az 1–9. szám indításához nyomja meg a
megfelelő numerikus gombot. A 0-ás gombbal
választhatja ki a 10. zeneszámot. Ha a zeneszámok
száma meghaladja a 10-et, először a +10-et, majd a
megfelelő numerikus gombot nyomja le.
A PBC funkciót a MENU gomb lenyomásával
kapcsolhatja ki vagy be. Ha a PCB funkció ki van
kapcsolva, csak 8 előnézeti képkocka látható.
DVD
A lejátszás során a főmenühöz a MENU gomb
lenyomásával térhet vissza.
CÍM: Egy DVD-n található cím lejátszása.
MP3/MPEG 4 LEJÁTSZÁSA
1. Helyezzen egy MP3/MPEG 4 fájlokat tartalmazó
CD-t a CD-tálcára. Néhány pillanat múlva a CD-n
található összes mappa megjelenik a képernyőn.
MEGJEGYZÉS: Ha a gyökérmappában címek
vannak, az első fájl lejátszása automatikusan
elindul.
2. A nyilak, majd a SELECT lenyomásával válasszon
ki egy mappát.
3. Ekkor láthatóvá válnak a mappában található fájlok,
amelyeket a nyilak segítségével választhat ki.
A lejátszást a SELECT lenyomásával indíthatja.
4. A NEXT és a PREV gombokkal közvetlenül is
kiválaszthat egy fájlt.
5. A lejátszási mód kiválasztásához nyomja le a
REPEAT 1/ALL gombot:
REP 1 – egy fájl ismétlése.
REP DIR – az adott mappa összes fájljának
ismétlése.
REP ALL – az adott CD összes fájljának ismétlése.
OFF – az ismétlési módok leállítása.
KODAK KÉP CD/JPEG CD LEJÁTSZÁSA:
Kodak kép CD behelyezését követően automatikusan
elindul a diavetítés.
JPEG CD behelyezését követően az ott található
mappák jelennek meg a képernyőn. A nyilak, majd a
SELECT lenyomásával válasszon ki egy mappát.
Ekkor megjelennek a mappában található fájlok és
máris kiválaszthatja kedvenc képét a fel/le nyilak
segítségével. A SELECT lenyomásával indíthatja a
lejátszást.
A fájlnevek közötti böngészés során a képek
előnézete jelenik meg.
KODAK KÉP CD/JPEG CD HASZNÁLATA:
1. ISMÉTLÉSI ÜZEMMÓDOK:
Nyomja meg lejátszás közben a 1/ALL gombot az
ismétlési üzemmód kiválasztásához.
REP 1 – a jelenlegi kép ismétlése.
REP DIR – az adott mappa összes képének
ismétlése.
REP ALL – az adott CD összes képének ismétlése.
OFF – az ismétlési módok leállítása.
Ha a lejátszás során vissza akar térni az előnézeti
üzemmódba, nyomja meg a STOP gombot.
2. UGRÁS A KÖVETKEZŐ/ELŐZŐ KÉPRE:
Az előző vagy a következő képre való ugráshoz
nyomja meg a NEXT, illetve a PREV gombot.
Ha néhány másodpercig nem nyom meg egy
gombot sem, automatikusan megtörténik a
következő képre ugrás.
3. KÉP ELFORGATÁSA:
A jobb nyíl gombbal a képet 90°-kal óramutató
irányába, a bal nyíl gombbal ellenkező irányba
forgathatja.
Page 67

4. KÉP TÜKRÖZÉSE:
A kép függőleges tükrözéséhez nyomja meg a
felfele nyíl gombot.
A kép vízszintes tükrözéséhez nyomja meg a lefele
nyíl gombot.
5. KÉP NAGYÍTÁSA/KICSINYÍTÉSE
A távirányító ZOOM gombjának folyamatos
lenyomásával a normál képméretet 2-, 3- és
4-szeresére nagyíthatja, vagy 1/2, 1/3 és 1/4
részére csökkentheti.
Ha a képméret az eredeti 1/4 része, a ZOOM
gomb további lenyomásával a normál képmérethez
tér vissza.
A nagyított kép nem látható részeinek
megtekintéséhez a látható részt a nyíl gombokkal
tudja mozgatni.
6. DIAVETÍTÉS ÁTMENETI MÓDJAI
Diavetítés során a PROGRAM gomb időnkénti
lenyomásával a következő átmenetek közül
választhat:
WIPE TOP: Átúsztatás felülről.
WIPE BOTTOM: Átúsztatás alulról.
WIPE L: Átúsztatás balról.
WIPE R: Átúsztatás jobbról.
DIAGONAL WIPE L TOP: Átúsztatás a bal felső
sarokból átlósan.
DIAGONAL WIPE R TOP: Átúsztatás a jobb
felső sarokból átlósan.
DIAGONAL WIPE L BOTTOM: Átúsztatás a bal
alsó sarokból átlósan.
DIAGONAL WIPE R BOTTOM: Átúsztatás a
jobb alsó sarokból átlósan.
EXTEND FROM CENTER H: Kiterjesztés a
középső vízszintesből.
EXTEND FROM CENTER V: Kiterjesztés a
középső függőlegesből.
COMPRESS TO CENTER H: Zsugorítás a
középső vízszintesbe.
COMPRESS TO CENTER V: Zsugorítás a
középső függőlegesbe.
WINDOW H: Vízszintes zsalu hatás.
WINDOW V: Függőleges zsalu hatás.
WIPE FROM EDGE TO CENTER: Átúsztatás a
szélektől a központba.
RANDOM: Véletlenszerű képátmeneti hatások.
NONE: Képátmeneti hatások kikapcsolása.
SZÍN ÉS FÉNYERŐ BEÁLLÍTÁSA (LCD KIJELZŐ):
Használja a készüléken található ADJ gombot a
színintenzitás, a fényerő és a kontraszt beállításához.
Nyomja meg egyszer a gombot a színbeállítások
üzemmód indításához. A szín állításához használja a
NEXT és a PREV gombokat. Nyomja meg kétszer a
gombot a fényerő, valamint háromszor a kontraszt
beállításainak indításához.
KÜLSŐ MEMÓRIA ESZKÖZ HASZNÁLATA (USB)
A lejátszó előkészítése külső memória eszköz
használatához:
1. Kapcsolja be a lejátszót és állítsa a
funkciókapcsolót DVD állásba. A POWER LED
kigyullad.
2. Helyezze be a zene-, jpeg- vagy videofájlokat
tartalmazó USB memóriakártyát az USB portba.
A készülék felismeri és leolvassa az USB
memóriakártyát. A képernyőn megjelenik a kártyán
található mappák listája.
3. A memóriakártyát úgy kell lejátszani mint egy
MP3/MPEG 4 CD-lemezt.
Megjegyzés: Bizonyosodjon meg róla, hogy az
USB memóriakártya behelyezésekor nincs lemez a
CD-tálcán.
KARAOKE FUNKCIÓ KÉT MIKROFONNAL
Csatlakoztasson egy mikrofont a MIC1 vagy a MIC2
mikrofonaljzatok egyikébe.
Így a MIC LEVEL szabályozó segítségével be tudja
állítani a mikrofon hangerejét a zene hangerejéhez.
ALAPVETŐ BEÁLLÍTÁSOK
Az alapvető beállításokkal saját kényelmi szempontjai
szerint állíthatja be a lejátszót. Az alapvető beállítások tárolódnak a készülékben, de bármikor
módosíthatja azokat.
ÁLTALÁNOS
1. Nyomja meg a távirányító SETUP gombját.
2. Használja a nyíl gombokat, majd a SELECT
gombot a módosítani kívánt opció kiválasztásához.
Ekkor a beállítások oldalon további opciók jelennek
meg. Változtatásokat újra a nyilak, majd a SELECT
lenyomásával tehet.
3. A nyilak segítségével választhat ki más módosítani
kívánt beállítást a beállítások főoldalán.
4. A beállítások főoldaláról a távirányító SETUP
gombjának megnyomásával léphet ki.
1. SYSTEM SETUP
SYSTEM SETUP
TV SYSTEM
SCREE
N SAVER
TV TYPE
PASSWORD
RATING
DEFAULT
EXIT SETUP
67.
Page 68

68.
1.1 TV SYSTEM– válassza ki a tv üzemmódját.
Opciók: NTSC, PAL, PAL60, AUTO
Válassza ki a tv-készülékének megfelelő
opciót.
1.2 SCREEN SAVER–
Ha készüléket legalább két
percig nem használja, tv-készüléke
védelmének érdekében egy DVD-logó jelenik
meg a képernyőn.
Opciók:
ON: a képernyővédő be van kapcsolva.
OFF: a képernyővédő ki van kapcsolva.
1.3 TV TYPE- a tv képernyőformátumának
kiválasztása. Válassza ki a tv-készülékének
megfelelő opciót.
Opciók:
4:3PS: Pan&Scan (a képet a teljes képernyőn,
változatlan arányokkal jeleníti meg és levágja
azokat a részeket, amelyek nem férnek el).
4:3LB: levélszekrény (az eredeti kép arányos
lekicsinyítése, hogy a képernyőre férjen)
16:9: 16:9 arányú széles képernyős tv
1.4 PASSWORD–
Adjon meg egy jelszót a
rendszer feloldásához.
A következőket kell tennie:
1.4.1 Nyissa meg a SYSTEM SETUP menüt és a
nyilak segítségével léptessen a PASSWORD
opcióra. A jobb nyilat ábrázoló gomb
segítségével lépjen a beviteli mezőbe.
1.4.2 A rendszer feloldásához írja be a „0000”
jelszót. Ekkor a jelszó megváltoztatásához
újra válassza ki a beviteli mezőt, és adjon
meg egy négy számjegyből álló új jelszót.
Mentse el a SELECT lenyomásával. Ha a
jelszó megváltozik, a rendszer feloldásához
már az új jelszót kell beírni.
1.4.3 Ha elfelejtette jelszavát, a rendszer
feloldásához a „8200” főjelszót használja.
MEGJEGYZÉS: Ha a feloldott rendszernek
helytelen jelszót ad meg, a rendszer lezárul.
1.5 RATING- A korhatár módosítása. A szülői
védelem által beállított korhatár
megváltoztatásához meg kell adnia a feloldási
jelszót.
Opciók: 1 KID SAFE/2 G/ 3 PG/ 4 PG 13/ 5
PG-R/ 6 R/7 NC-17/ 8 ADULT
1.6 DEFAULT-
Gyári beállítások visszaállítása.
Opciók: RESTORE
2. LANGUAGE SETUP
LANGUAGE SE TUP
OSD LANGUAGE
O LANG
AUDI
E LANG
SUBTITL
MEN
U LANG
EXI
T SETUP
2.1 OSD LANGUAGE – a képernyőn megjelenő
kijelzés (OSD) nyelvének kiválasztása.
Opciók: ENGLISH GERMAN SPANISH FRENCH
PORTUGUESE ITALIAN
2.2 AUDIO LANG– válassza ki az audio sáv
kívánt nyelvét (csak DVD, a lemez szoftveres
támogatása szükséges hozzá)
Opciók: ENGLISH SPANISH PORTUGUESE
ITALIAN FRENCH GERMAN DUTCH JAPAN
2.3 SUBTITLE LANG– válassza ki a felirat
nyelvét (csak DVD, a lemez szoftveres
támogatása szükséges hozzá)
Opciók: ENGLISH SPANISH PORTUGUESE
ITALIAN FRENCH GERMAN DUTCH OFF
2.4 MENU LANG – válassza ki a CD-menü
nyelvét (csak DVD, a lemez szoftveres
támogatása szükséges hozzá)
Opciók: ENGLISH SPANISH PORTUGUESE
ITALIAN FRENCH GERMAN DUTCH JAPAN
3. AUDIO SETUP
AUDIO SET UP
AUDIO OUT
EXIT SETUP
3.1 AUDIO OUT– a digitális kimenet formátumának
kiválasztása.
SPDIF/OFF: Akkor válassza ki ezt az opciót, ha a
digitális kimenet nem erősítőre csatlakozik.
SPDIF/RAW: Házi mozi rendszer esetén használja. 5.1
csatornás hangzás lejátszására is képes.
SPDIF/PCM: Kétcsatornás, de kiváló minőségű
hangkimeneti jel.
Page 69

4. VIDEO SETUP
VIDEO SETUP
BRIGHTNESS
CONTRAST
HUE
SATURATION
EXIT SETUP
4.1 BRIGHTNESS – A képernyő fényerejének beállítása.
Opciók: 0/2/4/6/8/10/12
4.2 CONTRAST – A képernyő kontrasztjának beállítása.
Opciók: 0/2/4/6/8/10/12
4.3 HUE – A képernyő színintenzitásának a beállítása.
Opciók: -6/-4/-2/0/+2/+4/+6
4.4 SATURATION – A képernyő színtelítettségének a
beállítása.
Opciók: 0/2/4/6/8/10/12
5. SPEAKER SETUP
SPEAKER SET UP
DOWNMIX
EXIT SETUP
5.1 DOWNMIX
Opciók: LT/RT -
Bal/jobb keverési üzemmód
STEREO - Akkor válassza ki ezt az opciót, ha a
lejátszóhoz nem csatlakoztatott 5.1 csatornás
erősítőt.
69.
Page 70

70.
RÁDIÓ HASZNÁLATA
RADIO (rádió)
1. Állítsa a funkciókapcsolót RADIO állásba.
2. Válassza ki a kívánt frekvenciasávot a sávkereső gomb segítségével. Állítsa a hangerőt kellemes szintre.
3. Rádióállomások kereséséhez a TUNING forgógombot használja (addig forgassa balra és jobbra a gombot,
amíg a legjobb vételi minőséget kapja).
4. A beépített AM és a külső FM teleszkópos antennát állítsa a megfelelő vételi irányba.
• Húzza ki az FM antennát és forgassa a legjobb vételi irányba.
• Az AM jel legjobb vételéhez az egész készüléket el kell forgatnia.
5. Állítsa a hangerőt kellemes szintre.
6. A rádió kikapcsolásához állítsa a funkciókapcsolót OFF állásba.
MEGJEGYZÉSEK:
• Ha egy állomás sztereó hangja gyenge és zajos, állítsa a frekvenciasáv kapcsolót FM (MONO) állásba.
Ez sok esetben javítja a hangminőséget.
• Ha a frekvenciasáv kapcsoló FM ST állásban van és a készülék sztereó adást vesz, akkor a tetején
felgyullad az FM ST jelzőfény.
SZTEREÓ FÜLHALLGATÓ ALJZAT
A lejátszó hátulján sztereó fülhallgató aljzat található, így mások zavarása nélkül is hallgathatja a készüléket.
Dugja be a fülhallgatót (nem készülék-tartozék), és állítsa a hangerőt a kívánt szintre.
MEGJEGYZÉS: Ha fülhallgatót csatlakoztat a készülékhez, a hangszórók kikapcsolódnak.
Page 71

HIBAKERESÉS
Hiba esetén a készülék javíttatása előtt mindig először haladjon végig az alábbi listán.
Hiba
A készüléket nem lehet bekapcsolni,
svagy hirtelen kikapcsol.
Az elemeket behelyezte, de a
Győződjön meg róla, hogy a hálózati adapter megfelelően csatlakozik a
hálózati dugaljban.
Kapcsolja a készüléket ki, majd újra be.
Ellenőrizze, hogy az elemek nem merültek-e ki.Cserélje ki az elemeket.
Ellenőrzés/Megoldás
készüléket nem lehet bekapcsolni,
vagy hirtelen kikapcsol.
A távirányító nem működik.
Győződjön meg róla, hogy az elemet megfelelő polaritással helyezte be.
Ellenőrizze, hogy az elem nem merült-e ki. Cserélje ki az elemet.
Irányítsa a távirányítót közvetlenül a DVD lejátszó előlapján található
távirányító érzékelőre.
Távolítsa el a távirányító és az érzékelő között található akadályokat.
Nincs kép és hang.
Győződjön meg róla, hogy az A/V kábelt megfelelően csatlakoztatta.
Ellenőrizze, hogy DVD (1-es vagy minden régiókód), DVD-RW, VIDEO CD
vagy AUDIO CD lemezt helyezett be.
Ellenőrizze, hogy az lemez karcos vagy piszkos-e.
Győződjön meg róla, hogy az CD címkés oldala néz felfelé.
Nincs kép
Nincs hang
A DVD lejátszó optikája is elkoszolódhatott. Vegye fel a kapcsolatot a
vevőszolgálati központunkkal az optika tisztítása céljából.
Ha tv-készüléket használ, ellenőrizze, hogy a TV csatorna VIDEO vagy AV
üzemmódban van-e.
Ellenőrizze, hogy az elemeket helyesen helyezte be, vagy a hálózati kábel
megfelelően csatlakozik.
Győződjön meg róla, hogy az LCD-kijelzőt bekapcsolta.
Ellenőrizze a hangerő beállításokat. Ha a hangerőszabályozó MIN állásban
van, növelje a hangerőt.
Torzított kép és hang
TISZTÍTÁS ÉS KARBANTARTÁS
Ellenőrizze, hogy a fülhallgatókat bedugta a fülhallgató aljzatokba.
Fülhallgató használata esetén a hangszórók elnémulnak.
A lemez összekarcolódott vagy meghajlott.
A TFT-kijelző tisztítása
Kapcsolja ki a lejátszót, és puha ruhával törölje tisztára a képernyőt.
A borítás tisztítása
Használjon puha és száraz ruhát. Amennyiben a borítás rendkívül piszkos, használjon enyhén mosószeres
oldatban benedvesített puha rongyot.
Ne használjon erős oldó hatású anyagokat, mint pl. az alkohol, a benzin vagy az oldószerek, mivel ezek
károsíthatják a lejátszó felületét.
71.
Page 72

72.
LEMEZEK ÁPOLÁSA ÉS KARBANTARTÁSA
CD-k kezelése
• A lemezeket csak élüknél fogja meg, így nem hagy ujjlenyomatot a felületén.
Az ujjlenyomatok, a piszok és a karcolódások a lejátszás akadozását és torzítását
okozhatja.
• Ne írjon golyós- vagy hasonló tollal a lemez címkés oldalára.
• Ne használjon benzint, oldószereket vagy folyadékokat az elektrosztatikusság ellen.
• Ne ejtse el vagy hajlítsa meg a lemezt.
• A lemeztálcára egyszerre csak egy lemezt helyezzen.
• Csak akkor zárja be a CD-tálcát, ha a lemezt helyesen behelyezte.
CD-k tisztítása
• A tisztításhoz használjon puha anyagot.
• A CD-ket a középponttól a szélek felé haladva tisztítsa.
Tárolás
• Lejátszás után a lemezt helyezze vissza tartójába.
MŰSZAKI ADATOK
Áramellátás: AC 230V ~ 50 Hz
Elemes üzemeltetés: 8 × UM-2 / Bébi
(nem tartozék)
Távirányító: CR2025
TFT-kijelző: 7“ (15,5 cm)
Frekvenciasáv: MW (AM)
/ USW (FM)
Frekvenciatartomány: AM 525–1615 kHz
FM 87,5–108 MHz
Energiafogyasztás: 25 W
Támogatott TV-rendszerek: NTSC/PAL
/PAL60/AUTO
Üzemi hőmérséklet: +5°C és +35°C között
Folyamatos üzemidő: 150 perc
Méretek: 406×236×149.5
(hossz × szélesség
× magasság)
Tömeg: kb. 3 kg
Üzemi páratartalom: 10% és 75% között
Támogatott lemezek:
1. DVD-VIDEO lemezek:
12 cm-es, egyoldalas, egyrétegű
12 cm-es, egyoldalas, kétrétegű
12 cm-es, kétoldalas, egyrétegű
8 cm-es, egyoldalas, egyrétegű
8 cm-es, egyoldalas, kétrétegű
8 cm-es, kétoldalas, egyrétegű
2. VIDEO CD/CD-DA/CD-R/CD-RW/MP3 -CD
12 cm-es lemez
8 cm-es lemez
Audio kimeneti jel:
1. DVD (lineáris audio)
(1) Frekvenciatartomány: 20 Hz–20 kHz (48 kHz
mintavétel) és
20 Hz–20 kHz (96 kHz
mintavétel)
(2) Jel-zaj arány: > 65 dB
(3) Dinamikus tényező: 90 dB
(4) Frekvenciaingadozás: mérhető érték alatt
2. CD Audio:
(1) Frekvenciatartomány: 20 Hz–20 kHz
(2) Jel-zaj arány: > 65 dB
(3) Dinamikus tényező: 90 dB
(4) Frekvenciaingadozás: mérhető érték alatt
A műszaki előírások változtatásának jogát külön
értesítés nélkül fenntartjuk.
Page 73

GARANCIA ÉS VEVŐSZOLGÁLAT
A kiszállítás előtt készülékeinket szigorú minőségellenőrzésnek vetjük alá. Ha azonban minden
óvintézkedés ellenére a termék megsérült a gyártási vagy szállítási fázis során, lépjen kapcsolatba az
Elta vevőszolgálatával Németországban: 01805/355460 (0,12 EUR/perc).
A jogszerű garancia keretein belül a vevőt a következő jogok illetik meg: a vásárolt készülékre a vásárlás
napjától számítva kiterjesztett, 24 hónapos garanciát vállalunk (garancialevél mellékelve). Ezen időtartam alatt
javítással vagy cserével megjavítunk minden olyan hibát, amely igazolhatóan anyaghiba vagy gyártási hiba
következtében lépett fel. A készülék nem megfelelő használatából, harmadik fél által végzett nem szakszerű
javításból vagy más gyártótól származó alkatrész beszereléséből származó sérülésekre és
károsodásra a garancia nem vonatkozik.
KAPCSOLAT
Látogasson el honlapunkra
http://www.elta.de
Műszaki kérdésekkel kapcsolatban:
elta Service-Center
Breitefeld 15
64839 Münster
Technikai forródrót: 01805/355460 (0,12 EUR/perc)
Fax: 01805/258619 (0,12 EUR/perc)
Vevőszolgálatunkat külföldről a következő számon érheti el:
Forródrót: +49 6071/3902909
Évi 365 napon – Hétfőtől vasárnapig
service@elta.de
73.
Page 74

74.
MODELLLO: 6740
Radio portatile con lettore DVD integrato e schermo TFT da 7”
ISTRUZIONI DI SICUREZZA
AVVERTIMENTO:
Il triangolo con inscritto il
simbolo di un lampo attira
l’attenzione dell’utente su
“voltaggio pericoloso” senza
isolamento all’interno
dell‘involucro, che potrebbe
essere sufficientemente alto
da costituire rischio di scosse
RISCHIO DI SCOSSE ELETTRICHE
RISCHIO DI SCOSSE ELETTRICHE,
NON RIMUOVERE LA COPERTURA
(O IL FONDO). ALL ’INTERNO NON VI è
ALCUNA COMPONENTE CHE POSSA
NON APRIRE
ATTENZIONE: PER RIDURRE IL
ESSERE RIPARATA DALL
’UTENTE. PER LE RIPARAZIONI,
RIVOLGERSI A PERSONALE
QUALIFICATO.
INFORMAZIONI AGGIUNTIVE
Prestate attenzione ai pezzettini e alle batterie, non inghiottiteli. Potrebbe essere nocivo alla
vostra salute ecausare soffocamento. Prestate la massima attenzione a tenere i piccoli dispositivi
e le batterie lontani dalla portata dei bambini.
Importante suggerimento riguardo alla protezione dell’udito
Attenzione:
Avete a cuore il vostro udito, così come noi.
Pertanto, fate attenzione quando usate questo apparecchio.
La nostra raccomandazione è di: Evitare un volume eccessivo.
Dovesse l’apparecchio essere usato da bambini, assicuratevi che esso non sia regolato su un
volume eccessivo.
Attenzione!
Un volume eccessivo potrebbe causare danni irreversibili all’udito dei vostri bambini.
Il triangolo con inscritto il
punto esclamativo attira
l’attenzione dell’utente su
importanti istruzioni relative
all’uso e alla
MAI lasciare che nessuno, ed in particolar modo bambini, metta alcun oggetto sopra i buchi,
scappatoie o alter aperture sul dispositivo. Ciò potrebbe causare la morte da scossa elettrica. Il
dispositivo deve essere aperto solo da un assistente qualificato.
Usate l'apparecchio solo per il proposito per cui è stato disegnato.
L'apparecchio è destinato unicamente all'utilizzo in ambienti domestici e di lavoro.
Conservare accuratamente le istruzioni per l’uso per futuro riferimento.
Avvertenze per la tutela dell’ambiente
Una volta inutilizzabile il prodotto non deve essere smaltito con i rifiuti domestici ma portato
presso un punto di raccolta per il riciclo di apparecchiature elettriche. Ciò è indicato dal simbolo
presente sul prodotto, sulle istruzioni per l’uso o sulla confezione.
I materiali riciclabili sono riutilizzabili a seconda delle loro caratteristiche. Con il riutilizzo, con il
riciclaggio dimateriale o altri tipi di riciclaggio di apparecchi vecchi fornirete un importante
contributo alla tutela ambientale. Informatevi presso l’amministrazione comunale sui punti di
smaltimento competenti.
Page 75

Non ostacolate la ventilazione del dispositivo. Assicuratevi che né tende, giornali, coperte o mobili
blocchino le scappatoie della ventilazione dell’apparato. La ventilazione dev’essere costantemente
assicurata! Un eventuale surriscaldamento potrebbe causare seri danni al dispositivo e ridurre sia le
prestazioni che la durata del funzionamento.
Riscaldamento e calore
Non esponete l’apparecchio a luce del sole diretta. Assicuratevi che l’apparecchio non sia soggetto
a fonti di calore dirette come stufe o fiamme. Assicuratevi che le vie di ventilazione dell’apparecchio
non siano coperte.
Umidità e pulizia
L’apparecchio non è subacqueo! Non immergete il lettore nell’acqua. Non lasciate che il lettore
venga a contatto con acqua. Dell’acqua che dovesse incidentalmente cadere sul lettore potrebbe
causare seri danni. Non usate detergenti che contengano alcool, ammoniaca, benzene o abrasivi in
quanto questi potrebbero danneggiare il lettore. Per pulire, usate un panno soffice e umido.
Riciclaggio professionale
Le batterie e l’imballaggio non fanno parte della vostra spazzatura casalinga. Le batterie devono
essere passate ad un centro di raccolta per batterie usate. Disporre separatamente dei materiali
d’imballaggio è un aiuto alla conservazione dell’ambiente.
ISTRUZIONI DI SICUREZZA
1. LEGGERE LE ISTRUZIONI - Leggere attentamente le istruzioni di sicurezza e d’uso prima di
adoperare l’apparecchio.
2. CONSERVARE LE ISTRUZIONI - Le istruzioni di sicurezza e d’uso dovrebbero essere conservate per
riferimento futuro.
3. RISPETTARE LE AVVERTENZE - Rispettare tutte le avvertenze contenute nel manuale d’uso
dell’apparecchio.
4. SEGUIRE LE ISTRUZIONI - Seguire accuratamente tutte le istruzioni d’uso.
5. ACQUA ED UMIDITÀ - L’apparecchio non deve essere collocato vicino all’acqua, ad es. nei pressi di
vasche da bagno, lavabi, lavelli, vasche per il bucato, piscine o in seminterrati umidi.
6. VENTILAZIONE – Le aperture sull’apparecchio servono per la ventilazione e sono necessarie per il
funzionamento e la prevenzione del surriscaldamento. Non collocare l’apparecchio in ubicazioni
che ne prevengano la corretta ventilazione. Non collocare su letti, divani, tappeti o altre superfici
simili sulle quali le aperture potrebbero essere ostruite, in spazi chiusi quali librerie ed armadi, dove
il flusso di aria nelle aperture di ventilazione possa essere impedito.
7. CALORE - L’apparecchio non deve essere collocato vicino a fonti di calore, quali radiatori, stufe od
altri elettrodomestici (amplificatori inclusi) che producono calore.
8. ALIMENTAZIONE - L’apparecchio dovrebbe essere connesso solo a fonti di alimentazioni del tipo
descritto nel manuale d’uso o indicato sull’apparecchio stesso.
9. SALVAGUARDIA DEL CAVO DI ALIMENTAZIONE - Assicurarsi che i cavi di alimentazione non siano
a rischio di essere calpestati o schiacciati da oggetti posti al di sopra o a ridosso di essi.
10. IN CASO DI NON UTILIZZO – Durante lunghi periodi di non utilizzo, scollegare i cavi di alimentazi
one ed antenna.
11. INGRESSO DI OGGETTI O LIQUIDI – Assicurarsi che oggetti o liquidi non penetrino
nell’apparecchio attraverso le aperture.Non smontare.
12. GUASTO CHE RICHIEDE ASSISTENZA - L'apparecchio dovrà ricevere assistenza da personale
qualificato se:
a. il cavo di alimentazione o la spina sono danneggiati;
b. oggetti o liquidi sono penetrati all’interno dell’involucro dell’apparecchio;
c. l’apparecchio è stato esposto a pioggia od umidità;
d. L’apparecchio è caduto e l’interno è danneggiato. Utilizzare solo controlli e accessori specificati nel
manuale.
e. L’unità non sembra funzionare normalmente.
f. l’apparecchio dimostra un serio calo nelle prestazioni.
75.
Page 76

76.
13. ASSISTENZA – L’utente non è autorizzato a riparare l’apparecchio oltre i limiti descritti nel manuale
d’istruzioni per l’utente. Per ogni altra riparazione rivolgersi a personale di assistenza qualificato.
14. PULIZIA – Scollegare il cavo di alimentazione prima di pulire. Non utilizzare detergenti liquidi o spray,
ma un semplice panno umido. Seguire le istruzioni per la cura e manutenzione contenute nel presente
manuale.
15. ILLUMINAZIONE – Durante temporali e lunghi periodi di non utilizzo, scollegare il cavo di
alimentazione e l’antenna.
16. CONTROLLO DI SICUREZZA – Dopo aver ricevuto assistenza, fare richiesta presso il servizio clienti
per un controllo di sicurezza.
17. SOVRACCARICO – Per evitare incendi e scosse elettriche non sovraccaricare le prese elettriche e le
prese multiple.
18. SCARICA ELETTROSTATICA – Scollegare dall’alimentazione e rimuovere le batterie se l’unità non
funziona a dovere. Riconnettere dopo breve tempo.
ATTENZIONE
IL LETTORE CD È UN PRODOTTO LASER DI CLASSE I. QUESTO LETTORE CD UTILIZZA UN RAGGIO
LASER /VISIBILEINVISIBILE CHE POTREBBE CAUSARE ESPOSIZIONE A RADIAZIONI PERICOLOSE.
UTILIZZARE IL LETTORE CD CORRETTAMENT COME DESCRITTO.
UN UTILIZZO DEI COMANDI O REGOLAZIONI O UN’ESECUZIONE DI PROCEDURE DIVERSE DA
QUELLE SPECIFICAT NEL PRESENTE MANUALE POTREBBERO CAUSARE ESPOSIZIONE A
RADIAZIONI PERICOLOSE.
PER RIDURRE IL RISCHIO DI FUCO O SHOCK ELETTRICO ED EVITARE INTERFERENZE UTILIZZARE
SOLO ACCERROSI CONSIGLIATI.
INFORMAZIONI AGGIUNTIVE
Posizionamento del dispositivo
• Evitare vibrazioni, colpi o superfici inclinate in quanto le parti interne potrebbero danneggiarsi seriamente.
• Non poggiare oggetti sul lettore.
• Non poggiare il lettore su amplificatori o altri dispositivi, che potrebbero riscaldarsi.
Evitare oggetti magnetici
• Tenere oggetti magnetici come altoparlanti, ad una certa distanza dal lettore.
Condensa:
Potrebbe concentrarsi umidità sulla lente se viene provocata una delle seguenti situazioni:
• Accensione di riscaldamento.
• In ambienti molto umidi
• Spostando il lettore da un ambiente freddo ad uno caldo.
Se si forma condensa, non si il funzionamento corretto dell’unità. Non accendere e non utilizzare il dispositivo
per 1 ora, finché non completamente asciutto.
Spostamento del lettore DVD
• Prima di spostare il lettore, togliere il CD dall’interno.
Si consiglia di rimuovere il CD e spegnere il lettore se non in uso.
Risparmio energetico
• Si consiglia di spostare l'interruttore di funzione su “OFF” se non in uso.
Se il lettore non viene usato per lungo tempo, tirare la spina dalla presa AC.
Page 77

POSIZIONE DEI COMANDI /CONNESSIONI
Comandi
Visione frontale
3
1 2
4
1. ALTOPARLANTI
2. REMOTE SENSOR
3. Presa MIC 1
4. Presa MIC 2
5. Porta USB
6. Regolazione MIC LEVEL
7. DISPLAY TFT
8. INTERRUTTORE DI FUNZIONE
9. IMPUGNATURA
10. Controllo VOLUME
11. Pulsante BBS
12. Pulsante ADJ
13. Pulsante PREV
14. Pulsante NEXT
15. LED POWER
16. Porta CD
Visione superiore
121314
15
1617181920
11
5
7
6
1
8910
21
222324
Visione posteriore
26
28
25 29
27
32
30 31
17. Pulsante APRI vassoio CD
18. LED FM ST.
19. Pulsante FR
20. Pulsante STOP
21. Pulsante PLAY/PAUSE
22. Pulsante FF
23. Comando TUNING
24. Interruttore di BANDA
25. Antenna telescopica
26. Prese uscita VIDEO
27. Prese uscita destra AUDIO
28. Prese uscita sinistra AUDIO
29. Alloggiamento delle batterie
30. Interruttore TFT ON/OFF
31. Presa AC
32. Presa PHONES
77.
Page 78

78.
Pulsanti sul telecomando e funzioni relative
1. P/N: caricamento del sistema TV
2. REPEAT A-B: Ripetere una sezione tra A e B.
DISPL AY SETUP
P/N
1
2
3
4
5
6
7
8
9
10
11
12
13
1
A-B
4
AT
REPE
1/ALL
7
U
MEN
0
SUBTI TLE PLAY STOP
TITLE
AUDI
O
PAUSE/ STEP SLOW
F.BWD
F.FWD PREV NEXT
ANGL
E ZOOM
SELEC
+10
MUTE
3
2
5
6
8
9
CLEAR
T
SEARC
HPROGR AM
14
15
3. REPEAT 1/ALL: Ripeti modalità
16
4. MENU: Menu principale (DVD) / PBC on/off (VCD)
5. SUBTITLE
6. PLAY
7. TITLE (DVD)
17
8. AUDIO: Lingua audio
9. PAUSE/STEP
10. F.BWD: riavvolgimento rapido
18
11. F.FWD:avanzamento rapido
12. ANGLE (DVD)
19
20
13. ZOOM
21
14. DISPLAY: Visualizzazione di una barra di informazioni
15. SETUP
22
16. MUTE
23
17. TASTI NUMERICI
24
18. CLEAR
25
19. STOP
26
20. SELECT: Selezione
21. TASTI A FRECCIA
22. SLOW: Lento
23. NEXT
24. PREV
25. SEARCH
26. PROGRAM: Programmare la riproduzione
INSTALLAZIONE E CONNESSIONE
Nella confezione:
Estrarre dalla confezione il lettore DVD portatile. Conservare la confezione per utilizzo futuro. Rimuovere
tutte le strisce adesive.
Supporti del lettore:
Montare le due parti dei supporti.
Page 79

Installare i due supporti nelle fessure in basso del lettore e
spingerli nella giusta posizione, finché non scattano.
Sollevando i supporti il lettore può essere regolato nella
migliore posizione desiderata.
Batterie:
Il sistema funziona con alimentazione 230V 50Hz AC o 8
batterie tipo “UM2” o “C”. Si consiglia l’utilizzo di batterie
alcaline per periodo di utilizzo lunghi.
Inserimento delle batterie
1. Rimuovere il coperchio dello scomparto batterie
spingendolo leggermente verso il basso e inserire 8
batterie tipo “UM-2” o “C” (preferibilmente alcaline).
FAR ATTENZIONE ALLA GIUSTA POLARITA’ SEGNATA
CON “+” E “-“ ALL’INTERNO DELLO SCOMPARTO
BATTERIE.
2. Montare nuovamente il coperchio premendo sullo scomparto.
NOTA: Batterie vecchie potrebbero perdere liquidi. Per evitare di danneggiare il dispositivo, rimuovere le
batterie se l’unità non viene utilizzata per lunghi periodi o se le batterie sono esaurite.
NOTA: L’utilizzo di batterie sarà automaticamente attivato se si rimuove la spina AC dalla presa di corrente.
CONNESSIONI DI BASE
Si consiglia di collegare il lettore ad un set TV.
Assicurarsi che il lettore e altri dispositivi da collegare all’unità siano in modalità di standby o spenti e
scollegare il cavo AC prima di collegarli.
Leggere le istruzioni prima di collegare altri dispositivi.
Rispettare il codice dei colori durante la connessione dei cavi audio e video.
Note:
• Durante la riproduzione DVD il volume della TV potrebbe essere basso rispetto alla trasmissione TV. In tal
caso regolare il controllo del volume al livello desiderato.
• Se il lettore DVD è connesso al set TV tramite registratore di cassette, l’immagine non potrebbe essere
riprodotta normalmente per alcuni DVD. In tal caso non collegare il lettore via VCR.
• Se si college ad una set TV, il display TFT incorporato potrebbe essere spento con l’interruttore TFT
ON/OFF.
79.
Page 80

80.
Collegamento con un set TV
RL
Al connettore input video (giallo)
Al connettore input audio (rosso, bianco)
Cavo audio/video
A una presa di rete
Cavo di rete AC
CONNECTION OF MICROPHONE AND HEADPHONES
1. Connection of a microphone.
• Connect a Microphone to one of the MIC jacks.
2. Adjust the MIC level to the desired level.
3. Connect a headphone to the phone jack.
3
1 1 2
Page 81

PREPARAZIONE DEL TELECOMANDO
Installazione della batteria A
Inserire la batteria rispettando la corretta polarità (+) e (-)
come mostrato sulla destra.
Note relative al telecomando
• Utilizzare una batteria cellula al litio CR2025.
• La batteria generalmente dura un anno; dipende sulla
frequenza di utilizzo del telecomando.
• Se il telecomando non funziona anche quando utilizzato
vicino il lettore sostituire le batterie con batterie nuove.
• Non ricaricare, cortocircuitare, smontare, riscaldare o gettare
le batterie nel fuoco.
• Non far cadere il telecomando. Potrebbe non funzionare
correttamente.
• Se il telecomando non viene utilizzato per lungo tempo
rimuovere le batterie.
Campo di funzionamento del telecomando B
Puntare il telecomando da non più di 7 m dal sensore e in un
angolo di 60° verso il sensore sul lettore.
Note relative al funzionamento del telecomando:
• Non puntare lampade luminose verso il sensore.
• La gamma di funzionamento dipende dalla luminosità della
stanza.
• Oggetti tra il telecomando e il sensore potrebbero bloccare la
trasmissione.
• Non usare il telecomando insieme ad altri telecomandi di altri
dispositivi.
A
L
++
i
t
h
C
i
u
r
m
2
0
C
3
2
V
5
e
s
l
c
l
2
B
SENSORE DEL TELECOMANDO
7 m
30
30
DISPLAY SETUP
E
MUT
P/N
3
1
2
A-B
4
5
6
AT
REPE
1/ALL
7
8
9
MEN
U
R
CLEA
0
+10
SUBTITL
E PLAY STOP
TITLE
T
SELEC
AUDI
O
PAUSE/STEP SLOW
F.BWD
F.FWD PREV NEXT
ANG
SEARC
LE ZOOM
HPROGRAM
ISTRUZIONI D’USO
INTERFACCIA GRAFICA
Le informazioni e le impostazioni sono visualizzate sullo schermo del set TV o lettore DVD.
PREPARAZIONE
Accendere il set TV e selezionare la modalità di input video.
81.
Page 82

82.
FUNZIONAMENTO
1. Accendere il lettore.
2. Aprire il vassoio CD.
3. Posizionare un CD con l’etichetta rivolta verso l’alto sull’unità nera con i 3 morsetti ferma cd.
4. Chiudere il vassoio CD e la riproduzione comincia automaticamente.
5. Se uno schermo menu compare sul set TV, selezionare la traccia desiderata con i tasti freccia o i tasti
numerici e avviare la riproduzione con SELECT sul telecomando o con PLAY/PAUSE sul dispositivo.
REGOLAZIONE DEL LIVELLO DEL VOLUME
Regolare il volume del dispositivo con la manopola VOLUME tra MIN e MAX.
ATTIVAZIONE DELL’INTENSIFICAZIONE DEL BASSO
Premere il tasto BBS sul dispositivo. Il basso viene fuori in modo più forte. Premendo nuovamente il tasto BBS
si disattiva l’intensificazione del basso.
CAPITOLO/TRACCIA AVANTI O INDIETRO
DVD:
Durante la riproduzione è possibile passare al capitolo successivo o precedente con i tasti NEXT o PREV.
VCD/CD:
Durante la riproduzione è possibile passare alla traccia successiva o precedente con i tasti NEXT o PREV.
AVANZAMENTO O RIAVVOLGIMENTO RAPIDO
Premendo I tasti F.FWD o F. BWD sul telecomando o i pulsanti FF o FR sul lettore diverse volte, è possibile
scannerizzare il CD avanti o indietro a X2, X4, X8, X20 o velocità normale.
Durante il funzionamento il livello del volume è più basso.
Premere il tasto PLAY per riprendere la riproduzione normale.
PAUSA O RIPRODUZIONE FRAME (CD/MP3)
Durante la riproduzione, premere PAUSE/STEP sul telecomando per interrompere la riproduzione. Continuare
la riproduzione normale con PLAY.
PAUSA O RIPRODUZIONE FRAME (VCD/DVD)
In modalità pausa il lettore avanza di una frame ogni volta che si preme il tasto PAUSE/STEP sul telecomando.
Continuare la riproduzione normale con PLAY o premere di nuovo PAUSE/STEP.
INTERROMPERE LA RIPRODUZIONE
Durante la riproduzione premere il tasto STOP sul telecomando o sul lettore per interrompere la riproduzione.
Il lettore attiva la funzione di ripristino se viene premuto una volta STOP. Premere di nuovo il tasto PLAY per
avviare la riproduzione da dove era stata interrotta. Aprire il vassoio CD o premere il pulsante STOP una
seconda volta per annullare la funzione di ripristino.
Page 83

LENTO
VCD/DVD only
Solo VCD/DVD
Durante la riproduzione premere il tasto SLOW sul
telecomando. All’inizio il disco sarà riprodotto a
metà velocità. Ogni volta anche si premerà il
pulsante si reduce la velocità la velocità di
riproduzione (fino a 1/7 della velocità normale).
Continuare la riproduzione normale con PLAY.
RIPETI UNA VOLTA/RIPETI TUTTI
Durante la riproduzione premere il pulsante
REPEAT 1/ALL sul telecomando.
DVD
Uno o tutti i capitoli/tracce saranno ripetuti.
VCD/CD
Uno o tutte le tracce saranno ripetute.
titolo/traccia sul CD è inutile.
Esempio:
Per inserire la traccia 3, premere “3”.
Per inserire la traccia 12, premere “+10” e poi “2”.
Per inserire la traccia 21, premere due volte “+10”
e poi “1”.
3. Avviare la riproduzione programmata con PLAY dal
menu o dal telecomando. Premendo di nuovo
PROGRAM è possibile completare la modalità di
programmazione.
4. Per cancellare le voci programmate, selezionare le
voci e poi premere il tasto CLEAR sul telecomando.
Per cancellare tutte le voci, selezionare <PULIRE>
nel menu e poi premere il tasto SELECT sul
telecomando.
5. E’ possibile anche terminare la modalità di
programmazione cancellando tutte le voci nel menu
di programmazione.
NOTA: Con VCD REPEAT 1/ALL funziona solo se il
PBC è disattivato.
RICERCA DI UNA PARTE PREFERITA
1. Durante la riproduzione premere il tasto SEARCH
sul telecomando e evidenziare la voce da
riprodurre (titolo, capitolo o parte di capitolo).
2. Inserire il numero desiderato o tempo con i tasti
numerici.
3. Confermare con il tasto SELECT e la riproduzione
comincia al punto desiderato.
4. Per uscire dal menu di ricerca premere il tasto
SEARCH.
RIPETI A-B
1. Durante la riproduzione premere il tasto REPEAT
A-B per fissare il punto di inizio (A) per la
ripetizione.
2. Premere nuovamente il tasto per fissare il punto
di fine (B). Il lettore si avvia automaticamente per
ripetere la sezione tra i punti A e B.
3. Premere il tasto di nuovo per riprendere la
riproduzione normale.
RIPRODUZIONE PROGRAMMATA (FINO A 16
POSTAZIONI MEMORIA)
1. Durante la riproduzione premere PROGRAM per
accedere al menu di programmazione.
2. Selezionare le postazioni di memoria con i tasti
freccia e poi accedere i numeri desiderati di
titoli/capitoli con i tasti numerici.
Nota: L’inserimento dello zero non è necessario.
Inserire con il tasto +10 del telecomando il
decimo numero del capitolo/titolo/traccia. Se il
capitolo/titolo/numero è maggiore di 10, premere
il tasto +10 e poi la cifra. L’inserimento di numeri
maggiori del numero totale di numeri di
ZOOM (VCD/DVD)
Continuando a premere ZOOM sul telecomando è
possibile ingrandire 2, 3 e 4 volte e rimpicciolire di 1/2,
1/3, 1/4 della normale dimensione un’immagine.
Se l’immagine è a 1/4 della sua dimensione,
premendo nuovamente il tasto ZOOM si ritorna alla
dimensione normale.
Nell’immagine ingrandita è possibile muoversi con i
tasti freccia.
INFORMAZIONI ON SCREEN DISLPAY
Se il display è acceso, premere di continuo il tasto
DISPLAY sul telecomando. Sulla parte superiore dello
schermo viene visualizzata una barra delle
informazioni (tipo attuale di CD, numero del titolo,
numero del capitolo, durata, lingua audio, tipo di
audio, lingua sottotitoli e multi angolazione, ecc..).
MODIFICARE LA LINGUA DELLA TRACCIA AUDIO
(DVD/VCD)
E’ possibile modificare la lingua iniziale audio (è
possibile solo con dischi che contengono diverse
lingue audio).
DVD
Durante la riproduzione di un DVD premere il tasto
AUDIO. La lingua audio successive sarà applicata e
sarà visualizzata nella barra delle informazioni sullo
schermo.
Nota: L’audio può essere riprodotto in 8 lingue
(a seconda del DVD).
VCD
Premere il pulsante AUDIO durante la riproduzione di
un VCD per cambiare la modalità output audio:
MONO SINISTRO, MONO DESTRO o STEREO.
83.
Page 84

84.
NOTA: Se non viene registrata alcuna lingua audio
questo tasto non ha alcuna funzione.
VISUALIZZAZIONE A ANGOLAZIONE MULTIPLA
(SOLO DVD)
Durante la riproduzione premere il tasto ANGLE per
visualizzare il numero delle prospettive registrate e
selezionare la prospettiva della scena desiderata.
Nota: Solo con una multi prospettiva DVD di una
scena è possibile applicare tale funzione. Selezione di
scene, registrate da diverse prospettive (limitate dagli
angoli memorizzati DVD).
CAMBIAMENTO DELLA LINGUA DEI SOTTOTITOLI
(SOLO DVD)
Durante la riproduzione di un DVD premere
SUBTITLE. La lingua dei sottotitoli mostrata sullo
schermo cambia premendo il tasto.
Appena la lingua dei sottotitoli desiderata è visualizzata sulla barra delle informazioni rilasciare il tasto e i
sottotitoli sono visualizzati in quella lingua.
Nota: Questa funzione funziona solo con DVD che
sono registrati con i sottotitoli in diverse lingue.
I sottotitoli possono essere visualizzati in Massimo 32
lingue (a seconda del disco).
3. I file nella cartella sono visualizzati e con i tasti
freccia è possibile selezionare un file. Con SELECT
è possible selezionare la riproduzione.
4. Con NEXT e PREV è possibile selezionare
direttamente un file.
5. Cambiare con REPEAT 1/ALL la modalità di
riproduzione:
RIPETERE 1 – Ripetere un file.
RIPETER DIR – Ripetere tutti i file nella cartella.
RIPETERE TUTTO – Ripetere tutti i file del
presente CD.
DISATTIVO – Annullare la modalità di ripetizione.
RIPRODUZIONE DI IMMAGINI KODAK CD/JPEG CD
Dopo aver inserito un CD d’immagini Kodak cominciano ad essere visualizzate le slide.
Dopo aver caricato le cartelle del CD JPEG, compaiono
sullo schermo. Con i tasti freccia selezionare la
cartella desiderata e confermare con il tasto SELECT.
I file della cartella sono visualizzati ed è possibile
selezionare l’immagine preferita con i tasti freccia
su/giù. Con SELECT si avvia la riproduzione.
Una panoramica delle immagini comincia scorrendo
tra i nomi dei file.
RIPRODUZIONE DI VCD CON FUNZIONE PBC
Dopo aver caricato un VCD 2.0/1.0 con PBC lo
schermo visualizza il formato del disco e dopo un menu.
Selezionare la traccia desiderata con i tasti numerici:
Premere per la traccia da 1 a 9 il tasto specifico del
blocco numerico 1 – 9. Con il tasto “0” selezionare la
traccia 10. Se il numero della traccia supera 10,
premere prima il tasto +10 e poi il tasto numerico 1 – 9.
Attivare o disattivare il PBC con il tasto MENU. Se la
modalità PBC è disattivata sono visualizzate solo 9
immagini.
DVD
Per ritornare al menu principale durante la riproduzione, premere il tasto MENU.
TITOLO
: Riproduzione del titolo di un DVD.
RIPRODUZIONE DI MP3/MPEG 4
1. Posizionare un CD Mp3/MPEG 4 nel vassoio CD.
Lo schermo visualizza dopo alcuni secondi tutte le
cartelle sul CD.
NOTA: Se sono presenti titoli nella cartella base, la
riproduzione comincia automaticamente dal primo
file.
2. Con i tasti freccia selezionare una cartella e
confermare con il tasto SELECT.
FUNZIONAMENTO DI IMMAGINI KODAK CD/JPEG
CD
1. MODALITA’ RIPETI
Durante la riproduzione premere il tasto 1/ALL per
passare alla modalità ripeti.
RIPETI 1- Ripeti l’immagine attuale.
RIPETI DIR- Ripeti tutte le immagini della cartella.
RIPETI TUTTO- Ripeti tutte le immagini del CD.
DISATTIVA- Disattiva la modalità ripeti.
Per interrompere la modalità di panoramica durante
la riproduzione premere STOP.
2. PASSARE ALL’IMMAGINE
SUCCESSIVA/PRECEDENTE
Premere NEXT o PREV per passare all’immagine
precedente o successiva.
Se non si preme nessun tasto per alcuni secondi, si
passa automaticamente all’immagine successiva.
3. RUOTARE UN’IMMAGINE
Con il tasto freccia destro è possibile ruotare
l’immagine di 90° e con il tasto freccia sinistro in
senso contrario.
4. RIFLETTERE UN’IMMAGINE
Riflettere l’immagine verticalmente con il tasto
freccia su.
Riflettere l’immagine orizzontalmente con il tasto
freccia giù.
Page 85

5. INGRANDIRE/RIMPICCIOLIRE UN’IMMAGINE
CON LO ZOOM
Continuando a premere ZOOM sul telecomando è
possibile ingrandire 2, 3 e 4 volte e rimpicciolire di
1/2, 1/3, 1/4 della normale dimensione
un’immagine.
Se l’immagine è a 1/4 della sua dimensione,
premendo nuovamente il tasto ZOOM si ritorna alla
dimensione normale.
Per visualizzare le aree coperte nelle immagini
ingrandite, spostare con i tasti freccia la sezione
visualizzata.
6. MODALITA’ DI PASSAGGIO DELLE SLIDE
Durante la visualizzazione di diapositive premere il
tasto PROGRAM, per selezionare una delle
seguenti immagini di trasmissione.
WIPE TOP: Asciuga sopra.
WIPE BOTTOM: Asciuga giù.
WIPE L: Asciuga da sinistra.
WIPE R: Asciuga da destra.
DIAGONAL WIPE L TOP: Asciuga dalla
diagonale superiore di sinistra.
DIAGONAL WIPE R TOP: Asciuga dalla
diagonale superiore di destra.
DIAGONAL WIPE L BOTTOM: Asciuga dalla
diagonale inferiore di sinistra.
DIAGONAL WIPE R BOTTOM: Asciuga dalla
diagonale inferiore di destra.
EXTEND FROM CENTER H: Estendi dal centro
orizzontalmente.
EXTEND FROM CENTER V: Estendi dal centro
orizzontalmente.
COMPRESS TO CENTER H: Estendi dal centro
verticalmente.
COMPRESS TO CENTER V: Comprimi dal
centro verticalmente.
WINDOW H: Effetto jalousie orizzontale.
WINDOW V: Effetto jalousie verticale.
WIPE FROM EDGE TO CENTER: Asciuga
dall’orlo al centro.
RANDOM: Effetto di transizione casuale
dell’immagine.
NONE: Effetto di transizione casuale
dell’immagine disattivato.
IMPOSTARE IL COLORE E LA LUMINOSITA’
(SCHERMO LCD)
Utilizzare il pulsante ADJ del dispositivo per regolare
l’intensità del colore, la luminosità e il contrasto.
Premere una volt ail pulsante per accedere alla
modalità colore. Premere i tasti NEXT e PREV per
regolare il colore. Premere il pulsante due volte per la
modalità di luminosità e tre volte per accedere alla
modalità di contrasto.
FUNZIONAMENTO CON MEDIA DI MEMORIA
ESTERNA (USB)
Preparazione del lettore per utilizzo di media
memoria esterno
1. Accendere il lettore e ruotare l’interruttore di
funzione in posizione DVD. Il LED POWER si
accende.
2. Inserire una memoria USB contenente musica, file
jpeg o video nella porta USB. La memoria USB
sarà riconosciuta e letta dopo alcuni secondi. Lo
schermo visualizza tutte le cartelle esistenti.
3. I file nella memoria possono essere riprodotti come
un CD MP3/MPEG 4.
Nota: Assicurarsi che non vi sia CD nel vassoio
CD, se si inserisce una memoria USB.
FUNZIONE KARAOKE CON 2 MICROFONI
Collegare un microfono con una delle due prese
microfono MIC1 o MIC 2.
Ora è possibile regolare il livello del volume con il
controllo MIC LEVEL al volume totale.
IMPOSTAZIONI DI BASE
Con le impostazioni di base è possibile effettuare
impostazioni preferenziali per il lettore. Dopo aver
inserito le impostazioni di base, queste vengono
memorizzate e possono essere cambiate in ogni
momento.
GENERALE
1. Premere il SETUP sul telecomando.
2. Utilizzare I tasti freccia per la selezione
dell’opzione da cambiare e confermare con il tasto
SELECT. La pagina d’impostazione è visualizzata
sullo schermo con alter opzioni. Effettuare i
cambiamenti con i tasti freccia e confermare con il
tasto SELECT.
3. Spostarsi con i tasti freccia ad un’altra impostazi
one della pagina d’impostazione principale.
4. Uscire dalla pagina principale con il tasto SETUP
del telecomando.
1. SETUP SISTEMA
SYSTEM SETUP
SCREE
N SAVER
TV TYPE
PASSWORD
RATING
DEFAULT
EXIT SETUP
85.
Page 86

86.
1.1 SISTEMA TV – Selezionare la modalità TV.
Opzioni: NTSC, PAL, PAL60, AUTO
Selezionare una delle opzioni secondo il set TV.
1.2 PROTT -- Se il lettore non è in funzionamento
per due minuti o più, un logo DVD si muove
sullo schermo per proteggerlo.
Opzioni:
ACCENDERE: il proteggi schermo è attivo.
INATTIVO: il proteggi schermo è inattivo.
1.3 TASSO VISUALE- Selezione del formato TV.
Selezionare l’opzione secondo il set TV.
Opzioni:
4:3PS: Pan & Scan
4:3LB: Letterbox
16:9: 16:9 ampio schermo TV
1.4 PASSWORD –
Inserire una password per
sbloccare il sistema.
Sono necessarie le seguenti fasi:
1.4.1 Accedere a SETUP SISTEMA e selezionare
con i tasti freccia l’opzione PASSWORD. Poi
selezionare con i tasti freccia il campo
d’inserimento.
1.4.2 Per sbloccare il sistema inserire la password
“0000”. In tal caso selezionare nuovamente la
password e inserire un nuovo numero di
quattro cifre. Confermare con SELECT. Se la
password viene modificata, per sbloccare il
sistema è necessario inserire una nuova
password.
1.4.3 Se si dimentica la password, è possibile
utilizzare la password “8200” per sbloccare il
sistema.
NOTA: Se nel sistema sbloccato viene
inserita una password errata, il sistema si
blocca.
1.5 RAPPORTO-
Regolazione del rapporto. Se si
desidera cambiare il rapporto del blocco
parentale, inserire prima la password per
sbloccare.
Opzioni: 1 KID SAFE/2 G/ 3 PG/ 4 PG 13/ 5
PG-R/ 6 R/7 NC-17/ 8 ADULT
1.6 DI FABBRICA-
Ripristinare le impostazioni di
fabbrica.
Opzioni: RIPRENDERE
2. SETUP LINGUA
LANGUAGE SE TUP
OSD LANGUAGE
O LANG
AUDI
E LANG
SUBTITL
MEN
U LANG
EXIT SETUP
2.1 LINGUA OSD –
Regolazione delle diverse
lingue per “On Screen Display”.
Opzioni: INGLESE TEDESCO SPAGNOLO
FRANCESE PORTOGHESE ITALIANO
2.2 LINGUA AUDIO –
Selezionare la lingua audio
preferita (solo DVD, necessita il supporto di
software con disco).
Opzioni: INGLESE SPAGNOLO PORTOGHESE
ITALIANO FRANCESE TEDESCO OLANDESE
GIAPPONESE
2.3 LINGUA SOTTOTIT-
Selezionare la lingua dei
sottotitoli preferita (solo DVD, necessita il supporto
di software con disco).
Opzioni: INGLESE SPAGNOLO PORTOGHESE
ITALIANO FRANCESE TEDESCO OLANDESE
INATTIVO
2.4 LINGUA MENU -
Selezionare la lingua preferita del
menu CD (solo DVD, necessita il supporto di
software con disco).
Opzioni: INGLESE SPAGNOLO PORTOGHESE
ITALIANO FRANCESE TEDESCO OLANDESE
GIAPPONESE
3. SETUP AUDIO
AUDIO SET UP
AUDIO OUT
EXIT SETUP
3.1 SETUP AUDIO -
Regolazione del formato per
l’uscita digitale.
ANALOG: Se l’uscita digitale non è connessa
all’amplificatore, selezionare questa opzione.
Page 87

SPDIF/RAW: Utilizzato a casa. Può emettere canali
audio 5.1.
SPDIF/PCM: Solo due canali, ma l’uscita audio avviene
a qualità alta.
4. SETUP VIDEO
VIDEO SETUP
BRIGHTNESS
CONTRAST
HUE
SATURATION
EXIT SETUP
4.1 BRI – Impostare la luminosità dello schermo.
Opzioni: 0/2/4/6/8/10/12
4.2 CON – Impostare il contrasto dello schermo.
Opzioni: 0/2/4/6/8/10/12
4.3 HUE – Impostare l’intensità del colore dello schermo.
Opzioni: -6/-4/-2/0/+2/+4/+6
4.4 SATURATION –
Impostare il livello di saturazione
dello schermo.
Opzioni: 0/2/4/6/8/10/12
5. SETUP ALTOP.
SPEAKER SET UP
DOWNMIX
EXIT SETUP
5.1 DOWNMIX
Opzion: LT/RT -
Modalità mixata sinistra/destra
STEREO – Selezionare questa impostazione, se
c’è un amplificatore a 5.1 canali collegato con il
lettore.
87.
Page 88

88.
FUNZIONAMENTO RADIO
RADIO
1. Ruotare il selettore di funzione su RADIO.
2. Selezionare la banda desiderata con l’interruttore della banda. Impostare il volume al livello desiderato.
3. Utilizzare la manopola TUNING per posizionare le stazioni radio (girare la manopola a destra o sinistra
finché non si ha la migliore ricezione).
4. L’antenna AM incorporate e l’antenna telescopica esterna FM dipendono dalla direzione.
• Estendere l’antenna FM e ruotarla nella migliore posizione di ricezione.
• Per l’antenna AM ruotare l’unità finché non si ha la migliore ricezione.
5. Regolare il livello del volume ad un livello piacevole di ascolto.
6. Per spegnere la radio posizionare il commutatore di funzione su OFF.
NOTE:
• Se il segnale stereo è debole e c’è molto rumore, impostare la banda su FM (MONO). Questo migliora
spesso la ricezione.
• Se l’interruttore di banda è su FM ST e si riceve una trasmissione stereo, l’indicatore FM ST si illumina.
JACK CUFFIE STEREO
Il lettore è dotato di jack cuffie stereo sul retro in modo da poter ascoltare musica senza disturbare gli altri.
Inserire la presa cuffie (non inclusa) e regolare il volume ad un livello piacevole.
NOTA: Con la connessione delle cuffie esterne gli altoparlanti del lettore sono disattivi.
Page 89

RISOLUZIONE DI GUASTI
Se si verifica un guasto, controllare i punti di seguito elencati prima di portare a riparare l’unità.
Problema
Il dispositivo non si accende e si
spegne all’improvviso.
Le batterie sono inserite, ma il
Assicurarsi che l’adattatore AC sia ben inserito nella presa AC.l
Spegnere l’unità e poi riaccenderla.
Controllare se le batterie sono esaurite. Sostituire le batterie esaurite.
Controllo/Soluzione
dispositivo non si accende e si
spegne all’improvviso.
Il telecomando non funziona.
Assicurarsi che le batteria siano inserite correttamente.
Controllare lo stato della batteria Sostituire le batterie esaurite.
Puntare il telecomando direttamente verso il sensore del
telecomando sulla lato frontale del DVD.
Rimuovere ostacoli tra il telecomando e il sensore.
Nessuna immagine e audio
Assicurarsi che il cavo A/V sia collegato correttamente.
Assicurasi che il disco sia un DVD (codice regionale 1 o tutti),
DVD-RW, VIDEO CD o AUDIO CD.
Controllare se il disco è graffiato.
Assicurarsi che il CD sia rivolto con l’etichetta verso l’alto.
La lente del lettore DVD potrebbe essere sporca. Contattare il
Nessuna immagine
Nessun suono
centro assistenza per pulire la lente.
Assicurarsi che il canale TV sia regolato su VIDEO o AV se si utilizza un set TV.
Controllare se le batterie siano inserite correttamente e il cavo
di rete è collegato.
Assicurarsi che l’LCD sia acceso.
Controllare l’impostazione del volume. Se il controllo del volume sia
impostato su MIN, aumentare il livello del volume.
Controllare che le cuffie siano inserite nel jack cuffie. Gli altoparlanti non
possono essere usati insieme alle cuffie.
Video o audio distorto
Il CD è graffiato o piegato.
PULIZIA E MANUTENZIONE
Pulire il display TFT
Spegnere il lettore e pulire il display con un panno morbido.
Pulire l’alloggiamento
• Usare un panno asciutto e morbido. Se la superficie è molto sporca utilizzare un panno morbido.
• Non utilizzare solventi, come alcool, benzina o solventi, in quanto si rischia di danneggiare il lettore.
89.
Page 90

90.
CURA E MANUTENZIONE DEL DISCO
Maneggiare CD
• Toccare solo l’orlo del CD in modo da non lasciare impronte.
Le impronte, sporco o graffi potrebbero causare distorsioni.
• Non scrivere sull’etichetta del CD.
• Non utilizzare benzina, solvente o altri liquidi.
• Non far cadere o piegare i dischi.
• Poggiare solo un disco sul vassoio.
• Non cercare di chiudere il vassoio se il disco non è installato correttamente.
Pulire CD
• Utilizzare solo un panno morbido umido.
• Pulire i CD dall’interno verso l’esterno.
Archiviazione
• Conservare sempre i CD nella propria custodia.
DATI TECNICI
Alimentazione: AC 230V ~ 50 Hz
Funzionamento della
batteria: 8x UM- 2/ Baby
(non inclusa)
Telecomando: CR2025
Schermo TFT: 7“ (15.5 cm)
Banda: MW (AM) / USW (FM)
Frequenza: AM 525 - 1615 kHz
FM 87.5 - 108 MHz
Consumo di energia: 25 W
Sistemi supportati dalla TV: NTSC/PAL/PAL
60/AUTO
Temperatura di esercizio : Da +5°C a +35°C
Funzionamento continuo: 150 minuti
Dimensioni: 406x236x149.5
(L x A x A)
Peso: ca. 3 kg
Umidità durante esercizio: Da 10 % a 75 %
Dischi supportati:
1. Disco DVD-VIDEO
12 cm a singola faccia, strato singolo
12 cm a singola faccia, strato doppio
12 cm a singola doppia, strato singolo
8 cm a singola faccia, strato singolo
8 cm a singola faccia, strato doppio
8 cm a singola doppia, strato singolo
2. VIDEO CD/CD-DA/CD-R/CD-RW/MP3 -CD
Disco 12 cm
Disco 8 cm
Periferica di output audio:
1. DVD (audio lineare)
(1) Risposta in frequenza: 20 Hz-20 kHz
(campionamento 48
kHz) & 20 Hz – 20 kHz
(campionamento 96
kHz)
(2) Rapporto S/N: > 65 dB
(3) Rapporto dinamico: 90 dB
(4) Wow e battito: al di sotto del livello
misurabile
2. CD Audio:
(1) Frequenza: 20 Hz-20 kHz
(2) Rapporto S/N: > 65 dB
(3) Rapporto dinamico: 90 dB
(4) Wow e battito: al di sotto del livello
misurabile
Le specifiche del prodotto sono soggette a modifica
senza preavviso.
Page 91

GARANZIA E SERVIZIO CLIENTI
Prima della distribuzione, i nostri apparecchi sono sottoposti ad un rigido controllo della qualità. Tuttavia,
nonostante tutta la nostra attenzione, se il prodotto dovesse essere danneggiato durante la fase di
produzione o trasporto, Vi preghiamo di contattare il servizio clienti ELTA in Germania, al numero
01805/355460 (0,12 EUR/min).
Secondo la garanzia per l’utente prevista dalla legge, il cliente gode, in seguito alla propria selezione, della
seguente garanzia: per il prodotto acquistato, estendiamo una garanzia di 24 mesi (scheda di garanzia di
accompagnamento) a decorrere dalla data di acquisto. Durante detto periodo, porremo rimedio – mediante
riparazione o sostituzione – a tutti i difetti che dipendano, in modo dimostrabile, da errori nei materiali o del
processo produttivo. I danni risultanti dall’uso improprio dell’apparecchio ed gli errori dovuti ad interventi
effettuati da terze parti, nonché l’assemblaggio di componenti non originali, non sono coperti dalla presente
garanzia.
CONTATTI
Visitate il nostro sito internet:
http://www.elta.de
In caso di problemi tecnici:
Elta Service-Center
Breitefeld 15
64839 Münster
Hotline: 01805/355460 (0,12 EUR/min)
Fax: 01805/258619 (0,12 EUR/Min)
Dall’estero, è possibile richiedere la nostra assistenza chiamando il seguente numero:
Hotline: +49 6071/3902909
365 giorni all’anno – dal lunedì alla domenica
service@elta.de
91.
Page 92

92.
MODELO: 6740
Radio portátil con reproductor DVD y pantalla TFT de 7” integrados
INSTRUCCIONES DE SEGURIDAD
ADVERTENCIA:
RIESGO DE DESCARGA
ELÉCTRICA
Un triángulo con un símbolo de
rayo con punta dentro de un
triángulo tiene el propósito de
alertar al usuario de la
presencia de voltaje “peligroso”
no aislado dentro de la caja
que puede ser de suficiente
magnitud para constituir un
riesgo de descarga eléctrica a
los seres humanos.
INFORMACIÓN ADICIONAL
Vigile que nadie se trague las piezas pequeñas ni las pilas del aparato, puesto que es
potencialmente muy dañino para la salud y puede provocar asfixia. Preste mucha atención
especialmente en el caso de los niños.
Aviso importante respecto a la protección de sus oídos
Cuidado:
Su capacidad auditiva nos preocupa tanto como a usted.
Por lo tanto, tenga precaución cuando use el aparato.
Le recomendamos que evite escuchar música a niveles altos de volumen.
En caso de que el aparato sea usado por niños, asegúrese que no la usen a un volumen muy
alto.
¡Peligro!
Niveles de volumen altos pueden causar daños irreparables a los oídos de los niños.
No permita NUNCA que nadie, en especial niños, ponga objetos dentro de los huecos, ranuras u
otras aberturas del aparato. Existe riesgo de sufrir descargas eléctricas que pueden causar la
muerte. El aparato solo debe ser abierto por un operario calificado.
Use el aparato únicamente para los propósitos que fue diseñado.
El aparato está concebido exclusivamente para ser usado en viviendas y áreas de negocio.
ADVERTENCIA: PARA PREVENIR
EL RIESGO DE SUFRIR UNA
DESCARGA ELÉCTRICA,
NO QUITE LA CUBIERTA. NO HAY
PIEZAS A LAS QUE PUEDA DAR
SERVICIO DENTRO. REFIERA
TODO EL SERVICIO A PERSONAL.
Este signo de exclamación
dentro de un triángulo tiene
el propósito de alertar al
usuario de la existencia de
importantes instrucciones de
operación y mantenimiento
(servicio) en este manual.
Le recomendamos que conserve las instrucciones de uso para un eventual uso posterior.
Indicaciones sobre el medio ambiente
No deseche este producto en la basura doméstica una vez que se haya cumplido su vida útil,
deposítelo en un punto de recogida de aparatos eléctricos y electrónicos. El símbolo que se
encuentra en el producto, el manual de usuario o el embalaje, hacen referencia a este punto.
El plástico es reutilizable según esté indicado. Con la reutilización de productos de plástico u otra
clase de reciclaje de aparatos viejos, está contribuyendo de forma importante a la conservación
del medio ambiente.
Infórmese en su administración local sobre la entidad de eliminación de residuos competente.
Page 93

No impida la ventilación del aparato. Asegúrese, que cortinas, periódicos, manteles o muebles no
estén bloqueando las ranuras de ventilación del aparato. ¡Se debe asegurar una ventilación
correcta todo el tiempo! El sobrecalentamiento puede causar serios daños en el interior del aparato,
provocando problemas de funcionamiento y acortando el tiempo de vida útil del producto.
Calor
No exponga el aparato a la luz solar directa. Asegúrese que el aparato no esta expuesto directamente a Fuentes de calor como calefactores o fuego. Asegúrese que las ranuras de ventilación del
aparato no esté n cubiertas.
Humedad y limpieza
Este aparato no es impermeable! No sumerja el aparato en el agua. No permite que el aparato
entre en contacto con el agua. La entrada de agua en el aparato causa serios problemas y daños.
No use agentes limpiadores que contengan alcohol, amoniacos, benceno o abrasivos. Éstos
pueden dañar al aparato. Para la limpieza use un paño suave y húmedo.
Reciclaje profesional
No deseche las pilas ni el material de embalaje con la basura doméstica. Las pilas deben ser
recogidas por el personal del centro recolector de baterías usadas. Desechar separadamente los
materiales de embalaje es de gran ayuda para el medio ambiente.
INSTRUCCIONES DE SEGURIDAD
1. LEA LAS INSTRUCCIONES - Lea atentamente las instrucciones de seguridad y funcionamiento antes de
usar el aparato.
2. GUARDE LAS INSTRUCCIONES - Guarde estas instrucciones de seguridad y funcionamiento para un
uso futuro.
3. ADVERTENCIAS - Siga todas las advertencias en este aparato y en el manual de instrucciones.
4. SIGA LAS INSTRUCCIONES - Siga todas las instrucciones de seguridad de este manual.
5. AGUA Y HUMEDAD - El aparato no debe usarse cerca del agua, como cerca de una bañera, lavabo,
fregadero de cocina, lavadero, piscina o en un sótano húmedo.
6. VENTILACIÓN - las aperturas del dispositivo sirven para la ventilación del aparato, son necesarias para
el funcionamiento y prevención de sobrecalentamiento. El aparato tiene que estar colocado de forma que
su posición no interfiera con su propia ventilación. No coloque el aparato en camas, sofás, alfombras o
superficie similar que puede obstruir las aperturas de ventilación, en una instalación incorporada, tales
como una estantería o armario que impida el flujo de aire a través de las aperturas de ventilación.
7. CALOR - No coloque este aparato cerca de Fuentes de calor tales como radiadores, estufas u otros
aparatos (incluido amplificadores) que producen calor.
8. FUENTE ELÉCTRICA - Este aparato debe conectarse a la toma de corriente del tipo descrito en las
instrucciones de funcionamiento o escrito en el aparato.
9. PROTECCIÓN DEL CABLE DE ALIMENTACIÓN - el cable de alimentación tiene que ser guiado con el
fin de no andar sobre él o pinchado con artículos colocados en él o contra él.
10. DEJAR DE USAR - Durante largos periodos de tiempo sin usar el aparato, por favor, desconéctelo de la
toma de corriente y desconecte la antena también.
11. OBJETO Y ENTRADA DE LÍQUIDO - debe tener cuidado que ningún objeto o líquido caiga en el aparato
o sea vertido en las aperturas del aparato. No desmontar.
12. DAÑOS QUE REQUIEREN REVISIÓN - Esta unidad deber ser revisada por personal cualificado cuando:
a. El cable de alimentación o enchufe ha sido dañado.
b. Los objetos han sufrido una caída o cualquier líquido ha sido vertido en el aparato.
c. Este aparato ha sido expuesto a la lluvia o humedad.
d. El aparato ha caído, o el chasis se ha dañado. Use solamente los controles y ajuste especificados en el
manual.
e. La unidad no parece funcionar con normalidad.
f. El aparato no funciona correctamente.
93.
Page 94

94.
13. FUNCIONAMIENTO - El usuario no debe usar el aparato para otros fines que no estén descritos en este
manual de instrucciones. Cualquier tipo de revisión debe hacerse por el personal cualificado.
14. LIMPIEZA - Desconecte el aparato de la toma de corriente antes de limpiarlo. No use líquido o
limpiadores en forma de pulverizador, use sólo un paño húmedo. Siga las instrucciones de cuidado y
mantenimiento de este manual.
15. RELÁMPAGOS - Durante relámpagos y largos periodos de no haber usado el aparato desconecte el
aparato de la toma de corriente y la antena.
16. COMPROBACIÓN DE SEGURIDAD - Después de vender el aparato pida al servicio de clientes de
hacer una comprobación de seguridad.
17. SOBRECARGA - Para evitar incendios y descargas eléctricas no sobrecargue su toma de corriente y su
receptáculos convenientes.
18. DESCARGA ELECTROESTÁTICA - Desconecte de la toma de tierra y retire las baterías si el aparato no
funciona bien. Vuelva a conectar después un periodo corto de tiempo.
ADVERTENCIA
ESTE REPRODUCTOR DE CD ES UN PRODUCTO LASER DE CLASE I. SIN EMBAGO, UTILIZA UN RAYO
LASER VISIBLE/INVISIBLE, QUE PUEDE CAUSAR EXPOSICIÓN A RADIACIÓN PELIGROSA.
ASEGURESE DE QUE EL REPRODUCTOR DE CD OPERA CORRECTAMENTE COMO SE MUESTRA EN
LAS INSTRUCCIONES.
El USO DE LOS CONTROLES, AJUSTES O PRESTACIONES DE PROCEDIMIENTOS DIFERENTES A LOS
QUE AQUÍ SE ESPECIFICAN PUEDE DAR COMO RESULTADO EXPOSICION A RADIACIÓN PELIGROSA.
PARA REDUCIR EL RIESGO DE FUEGO O DE DESCARGA ELÉCTRICA Y DE INTERFERENCIAS
MOLESTAS USE SOLO LOS ACCESORIOS RECOMENDADOS.
INFORMACIÓN ADICIONAL
Ubicación del aparato
• Evite las vibraciones, impactos o superficies inclinadas ya que las partes interiores podrían verse
seriamente dañadas.
• No coloque objetos pesados sobre el reproductor.
• Nunca coloque el reproductor sobre amplificadores u otros aparatos que puedan estar calientes.
Evite objetos magnéticos
• Mantenga los objetos magnéticos como altavoces a distancia del reproductor.
Condensación:
La humedad se puede concentrar en las lentes si alguna de las siguientes condiciones se produce:
• Después de conectar un calentador
• En una habitación con vapor o muy húmeda.
• Después de mover el reproductor de un entorno frío a un entorno cálido.
Si la condensación ocurre, el funcionamiento correcto podría no ser posible o la unidad podría no funcionar
correctamente. No lo encienda y no lo use durante una hora aproximadamente, hasta que el reproductor esté
seco.
Como mover el reproductor de DVD
• Antes de moverlo quite el CD del reproductor.
Se recomienda quitar el CD y apagar el reproductor durante los periodos en que no se use.
Ahorro de energía
• Se recomienda, si no se utiliza el reproductor, girar el interruptor de función a la posición “OFF”. Si el
reproductor no se va a utilizar durante un periodo largo de tiempo, el reproductor debería desenchufarse de
la toma de CA.
Page 95

UBICACIÓN DE LOS CONTROLES / CONEXIONES
Controles
Vista frontal
1 2
3
1. ALTAVOCES
2. SENSOR REMOTO
3. Jack MIC 1
4. Jack MIC 2
5. Puerto USB
6. Ajuste de MIC LEVEL
7. PANTALLA TFT
8. INTERRUPTOR DE FUNCIÓN
9. ASA PARA TRANSPORTE
10. Control de VOLUMEN
11. Botón BBS
12. Botón ADJ
13. Botón PREV
14. Botón NEXT
15. LED POWER
16. Tapa del CD
Vista superior
121314
15
1617181920
11
5
7
6
4
1
8910
21
222324
visión trasera
26
28
25 29
27
32
30 31
17. Botón de APERTURA de la tapa del CD
18. LED FM ST.
19. Botón FR
20. Botón STOP
21. Botón PLAY/PAUSE
22. Botón FF
23. Control de TUNING
24. Interruptor de BAND (banda)
25. Antena telescópica
26. Jacks de salida de VIDEO
27. Jacks derechos de salida de AUDIO
28. Jacks izquierdos de salida de AUDIO
29. Compartimiento de la batería
30. Interruptor TFT ON/OFF
31. Jack AC
32. Jack PHONES
95.
Page 96

96.
Botones del control remoto y sus funciones
1. P/N: Cambia el sistema de TV
2. REPEAT A-B: Repite una sección entre A y B.
DISPL AY SETUP
P/N
1
2
3
4
5
6
7
8
9
10
11
12
13
1
A-B
4
AT
REPE
1/ALL
7
U
MEN
0
SUBTI TLE PLAY STOP
TITLE
AUDI
O
PAUSE/ STEP SLOW
F.BWD
F.FWD PREV NEXT
ANGL
E ZOOM
SELEC
+10
MUTE
3
2
5
6
8
9
CLEAR
T
SEARC
HPROGR AM
14
15
3. REPEAT 1/ALL: Modos de repetición
16
4. MENU: Menú principal (DVD) / On/off del PCB (VCD).
5. SUBTITLE
6. PLAY
7. TITLE (DVD)
17
8. AUDIO: Idioma del sonido
9. PAUSE/STEP
10. F.BWD: Retroceso rápido
18
11. F.FWD: Avance rápido
12. ANGLE (DVD)
19
20
13. ZOOM
21
14. DISPLAY: Muestra una ventana de información
15. SETUP
22
16. MUTE
23
17. TECLAS NUMÉRICAS
24
18. CLEAR
25
19. STOP
26
20. SELECT: Selección
21. TECLAS DE FLECHA
22. SLOW: Cámara lenta
23. NEXT
24. PREV
25. SEARCH
26. PROGRAM: Reproducción de programa.
INSTALACIÓN Y CONEXIÓN
Desembalado:
Saque cuidadosamente su reproductor de DVD portátil del embalaje. Guarde el embalaje para usos
posteriores. Quite todas las cintas adhesivas.
Acoplamiento de los ajustadores del reproductor:
Monte las dos partes de ambos soportes.
Page 97

Instale los dos ajustadores dentro de las ranuras que hay en
la parte trasera del reproductor y empújelos en sus
posiciones, hasta que oiga un chasquido.
Al elevar los ajustadores, el reproductor tiene que afianzarse
en una posición adecuada para la visualización.
Baterías:
El sistema esta diseñado para funcionar con corriente alterna
de 230V y 50Hz como suministro de corriente principal o con
8 baterías tipo “UM2” o “C”. Recomendamos el uso de
baterías alcalinas para un funcionamiento más largo.
Cómo colocar las baterías
1. Quite la tapa del compartimiento de las baterías
cuidadosamente empujando hacia abajo y hacia fuera e
introduzca las 8 baterías tipo “UM-2” o “C”
(preferiblemente alcalinas).
OBSERVE LAS POLARIDADES CORRECTAS QUE
ESTÁN MARCADAS CON “+” Y “-” A UN LADO DEL COMPARTIMIENTO DE BATERÍAS
2. Coloque otra vez la tapa presionando hacia el compartimiento de baterías.
NOTA: Las baterías viejas pueden hincharse y gotear. Para evitar daños en su aparato, quite las baterías
cuando la unidad se almacene durante largos periodos de tiempo o si las baterías están gastadas.
NOTA: La utilización con baterías se encenderá automáticamente si el cable de CA se quita de la toma de
pared y de la parte trasera del aparat
CONEXIONES BÁSICAS
Se recomienda conectar el reproductor a un aparato de TV multisistema.
Asegúrese que el reproductor y el equipo al que va a conectarse la unidad estén en modo suspendido o
apagado y desconectado del cable de corriente alterna antes de conectarlos entre ellos.
Lea las instrucciones antes de conectar otro equipo.
Fíjese en los códigos de color cuando conecte los cables de video y de sonido.
Notas:
• Durante la reproducción de música del DVD, el volumen de la TV tiene que ser menor que el volumen de la
TV durante sus emisiones. En este caso ajuste el volumen al nivel deseado.
• Si el reproductor de DVD esta conectado al aparato de TV vía un grabador de vídeo casete, la imagen
puede que no se grave correctamente sobre algunos DVD. En ese caso no conecte el reproductor vía el
reproductor de vídeo.
• Cuando conecte el aparato a un TV, la pantalla TFT incorporada puede apagarse con el interruptor TFT
ON/OFF.
97.
Page 98

98.
Conexión a un aparato de TV
RL
Al conector de entrada de video (amarillo)
Al conector de entrada de sonido (rojo, blanco)
Cable de sonido/vídeo
A un enchufe
Cable de corriente alterna
CONEXIÓN DE MICRÓFONO Y DE AURICULARES
1. Cómo conectar un micrófono.
• Conecte un micrófono a uno de los jacks de MIC.
2. Ajustar el MIC level al nivel deseado
3. Conectar los auriculares al jack de auriculares.
3
1 1 2
Page 99

PREPARACIÓN DEL CONTROL REMOTO
Instalación de la batería A
Introduzca la batería mirando detenidamente la polaridad
correcta (+) y (-) como se ilustra en el lado derecho.
Notas sobre el control remoto
• Use una pila de botón de litio CR2025.
• La batería funcionará aproximadamente durante un año, esto
depende de cuan a menudo utilice la unidad de control
remoto.
• Si la unidad de control remoto deja de funcionar, incluso si la
utiliza cerca del reproductor, cambie la batería.
• No intente recargar, cortocircuitar, desmontar, calentar ni tirar
la batería al fuego.
• No deje caer, pise ni de cualquier otro golpe al control
remoto. Esto puede provocar un mal funcionamiento.
• Si no va a utilizar la unidad del control remoto durante mucho
tiempo, quite la batería.
Rango de funcionamiento del control remoto B
A
L
++
i
t
h
C
i
u
r
m
2
0
C
3
2
V
5
e
s
l
c
l
2
B
SENSOR DEL CONTROL REMOTO
Dirija la unidad de control remoto desde no más de 7 m desde
el sensor del control remoto y dentro de un ángulo de
aproximadamente 60º hacia la ventana del sensor en el panel
7 m
30
30
frontal del reproductor.
DISPLAY SETUP
E
Notas sobre el rango de operación del control remoto:
• No dirija lámparas brillantes en la dirección del sensor.
• El rango de operación depende de la luminosidad de la
habitación.
• Los objetos entre el control remoto y la ventana del sensor
bloquean la transmisión.
• No utilice el control remoto al mismo tiempo que otros
controles remotos de otros aparatos.
P/N
A-B
4
AT
REPE
1/ALL
7
MEN
U
SUBTITL
E PLAY STOP
TITLE
AUDI
O
PAUSE/STEP SLOW
F.BWD
F.FWD PREV NEXT
ANG
LE ZOOM
MUT
3
1
2
5
6
8
9
R
CLEA
0
+10
T
SELEC
SEARC
HPROGRAM
INSTRUCCIONES DE FUNCIONAMIENTO
INTERFAZ GRÁFICA DE USUARIO
La información y los ajustes se pueden visualizar en la pantalla del aparato de TV o del reproductor de DVD.
PREPARACIÓN
Encienda su aparato de TV y seleccione el modo de entrada de vídeo.
99.
Page 100

100.
FUNCIONAMIENTO
1. Encienda el reproductor.
2. Abra la tapa del CD.
3. Coloque un CD con el lado etiquetado hacia arriba en la placa negra de soporte con los 3 clips de
retención.
4. Cierre la tapa del CD otra vez y la reproducción empezará automáticamente.
5. Cuando aparezca la pantalla de menú en el aparato de TV, seleccione la pista deseada con las teclas de
flecha o con las teclas numéricas y empiece la reproducción con SELECT en el control remoto o con
PLAY/PAUSE en el aparato.
AJUSTE DEL NIVEL DE VOLUMEN
Ajuste el volumen del aparato con el control rotatorio de volumen VOLUME entre MIN y MAX.
ACTIVACIÓN DE LA INTESIFICACIÓN DE BAJOS
Presione la tecla BBS del aparato. Los bajos suenan mas plenos y más fuertemente. Presionando de nuevo
la tecla BBS desconecta la intensificación de bajos.
AVANCE O RETROCESO DE CAPITULOS/PISTAS
DVD:
Durante la reproducción usted puede saltarse los capítulos siguientes o previos con las teclas NEXT o PREV.
VCD/CD:
Durante la reproducción usted puede saltarse las pistas siguientes o previas con las teclas NEXT o PREV.
AVANCE Y RETROCESO RÁPIDO
Presionando las teclas de F.FWD o F. BWD en el control remoto o los botones FF o FR en el reproductor
varias veces usted puede explorar el CD hacia delante o hacia atrás a X2, X4, X8, X20 o a la velocidad
normal.
Durante la operación de exploración el nivel de volumen se reduce.
Presione la tecla PLAY para reanudar la reproducción normal.
PAUSA O REPRODUCCIÓN DE CUADROS (CD/MP3)
Durante la reproducción, presione PAUSE/STEP en el control remoto para hacer una pausa. Presione PLAY
para continuar con la reproducción normal.
PAUSA O MJC REPRODUCCIÓN DE CUADROS (VCD/DVD)
En el modo de pausa el reproductor pasa un marco con cada tecla PAUSE/STEP presionada en el control
remoto. Continúe con la reproducción normal con PLAY o presionando PAUSE/STEP otra vez.
PARAR LA REPRODUCCIÓN
Durante la reproducción presione el botón STOP en el control remoto o en el reproductor para parar la
reproducción. El reproductor activa su función reanudar si se presiona otra vez STOP. Presione el botón PLAY
otra vez para empezar la reproducción en el lugar en el se había parado anteriormente. Abra la tapa del CD o
presione le botón STOP una segunda vez para anular la función reanudar.
 Loading...