

Page 1
00-4518 Cover 12/1/06 5:38 PM Page 1
6698RB
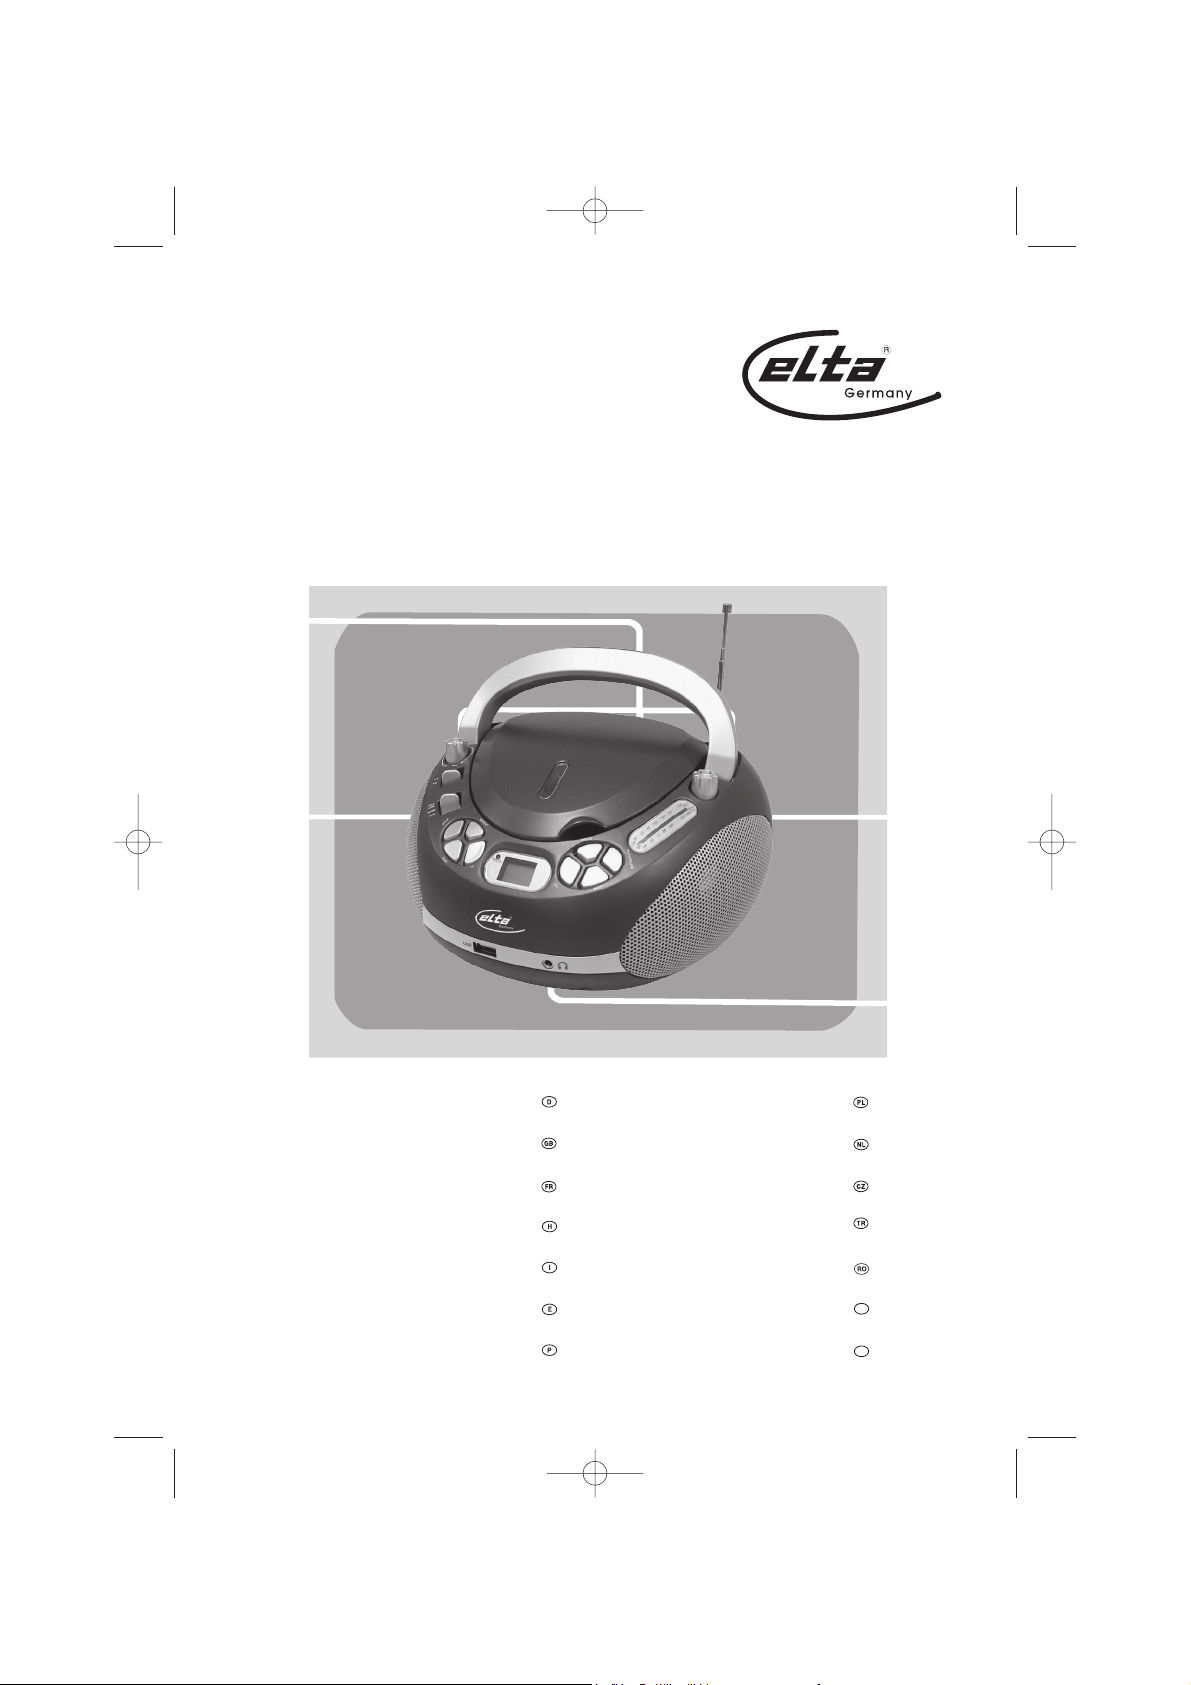
Design Radio mit CD/MP3/WMA-
Player und USB-Anschluss
Design Radio with CD/ MP3/WMA
Player and USB Port
Radio design avec lecteur
CD/MP3/WMA et port USB
Formatervezett rádió CD/ MP3/WMA
lejátszóval és USB porttal
Radio con lettore
CD/MP3/WMA e porta USB
Radio de diseño con reproductor
CD/ MP3/ WMA y puerto USB
Rádio de Design com Leitor de
CD/MP3/WMA e Porta USB
Nowoczesne radio z odtwarzaczem
CD/MP3/WMA oraz portem USB
Design Radio met CD/MP3/WMA-
Speler en USB Poort
Designové rádio s přehrávačem disků
CD/MP3/WMA a portem USB
CD/ MP3/WMA çalarlı USB portlu
Şık tasarımlı Radyo
Radio Design, cu CD/MP3/WMA
Player şi port USB
Радио със CD/MP-3/WMA плеър,
вход за USB и оригинален дизайн
Радиоприемник «Design» с CD/ MP3
/WMA-плеером и USB портом
BG
RU
Page 2

2.
MODELL: 6698RB
Design Radio mit CD/MP3/WMA-Player und USB-Anschluss
SICHERHEITSHINWEISE
VORSICHT
STROMSCHLAGGEFAHR
NICHT ÖFFNEN
VORSICHT: ZUR VERMEIDUNG VON
STROMSCHLAG GERÄTEGEHÄUSE
Der Blitz im gleichseitigen
Dreieck weist auf gefährliche
Hochspannung im Gerät hin,
die zu Stromschlag führen
kann.
NICHT ÖFFNEN. ES BEFINDEN SICH
KEINE VOM VERBRAUCHER
WARTBAREN TEILE IM INNERN DES
GERÄTS. REPARATUR UND
WARTUNG NUR DURCH
FACHPERSONAL.
WEITERE INFORMATIONEN
Achtung bei Kleinteilen und Batterien, bitte nicht Verschlucken, dies kann zu ernsthaften
Schädigungen oder Ersticken führen. Achten Sie insbesondere bei Kindern darauf, dass
Kleinteile und Batterien außerhalb deren Reichweite sind.
Wichtige Hinweise zum Gehörschutz
Vorsicht:
Ihr Gehör liegt Ihnen und auch uns am Herzen.
Deshalb seien Sie bitte vorsichtig beim Gebrauch dieses Gerätes.
Wir empfehlen: Vermeiden Sie hohe Lautstärken.
Sollte das Gerät von Kindern verwendet werden, achten Sie darauf, dass das Gerät nicht zu laut
eingestellt wird.
Achtung!
Zu hohe Lautstärken können bei Kindern irreparable Schäden hervorrufen.
Das Ausrufungszeichen
imgleichseitiges Dreieck
weist auf wichtige
Bedienungs- und
Wartungsanleitungen hin.
Lassen Sie NIEMALS Personen, und insbesondere keine Kinder, Gegenstände in Löcher,
Schächte oder andere Öffnungen des Gehäuses stecken; dies könnte zu einem tödlichen
elektrischen Schlag führen. Das Gerätegehäuse, darf nur von ausgebildetem Fachpersonal
geöffnet werden.
Bitte verwenden Sie das Gerät nur seiner vorhergesehenen Bestimmung entsprechend. Das
Gerät ist ausschließlich für den Einsatz in Wohn- und Geschäftsbereichen bestimmt.
Bitte bewahren Sie die Bedienungsanleitung auch für eine spätere Verwendung sorgfältig auf.
Hinweise zum Umweltschutz
Dieses Produkt darf am Ende seiner Lebensdauer nicht über den normalen Haushaltsabfall
entsorgt werden, sondern muss an einem Sammelpunkt für das Recycling von elektrischen und
elektronischen Geräten abgegeben werden. Das Symbol auf dem Produkt, der Gebrauchsanlei
tung oder der Verpackung weist darauf hin.
Die Werkstoffe sind gemäß ihrer Kennzeichnung wiederverwertbar. Mit der Wiederverwendung,
der stofflichen Verwertung oder anderen Formen der Verwertung von Altgeräten leisten Sie einen
wichtigen Beitrag zum Schutze unserer Umwelt.
Bitte erfragen Sie bei der Gemeindeverwaltung die zuständige Entsorgungsstelle.
Page 3
Behindern Sie nicht die Belüftung des Gerätes, wie etwa mit Vorhängen, Zeitungen, Decken oder
mit Möbelstücken, die Belüftungsschlitze müssen immer frei sein. Überhitzung kann Schäden
verursachen und die Lebensdauer des Gerätes verkürzen.
Hitze und Wärme
Setzen Sie das Gerät nicht direkter Sonnenstrahlung aus. Achten Sie darauf, dass das Gerät
keinen direkten Wärmequellen wie Heizung oder offenem Feuer ausgesetzt ist. Achten Sie darauf,
dass die Lüftungsschlitze des Gerätes nicht verdeckt sind.
Feuchtigkeit und Reinigung
Dieses Produkt ist nicht wasserfest! Tauchen Sie den Player nicht in Wasser ein und lassen ihn
auch nicht mit Wasser in Berührung kommen. In den Player eindringendes Wasser kann ernsthafte
Schäden verursachen.
Verwenden Sie keine Reinigungsmittel, die Alkohol, Ammoniak, Benzen oder Schleifmittel
enthalten, da diese den Player beschädigen können. Verwenden Sie zum Reinigen ein weiches,
feuchtes Tuch.
Batterien fachgerecht entsorgen
Batterien gehören nicht in den Hausmüll. Die Batterien müssen bei einer Sammelstelle für
Altbatterien abgegeben werden. Werfen Sie Batterien niemals in Feuer.
WICHTIGE SICHERHEITSHINWEISE
1. ALLE ANWEISUNGEN LESEN - Vor Betrieb des Geräts sollten Sie alle Sicherheits- und
Bedienungsanleitungen lesen.
2. ANWEISUNGEN AUFBEWAHREN - Die Sicherheits- und Bedienungsanleitungen sollten für zukünftigen
Bezug aufbewahrt werden.
3. WARNUNGEN BEACHTEN - Die Warnungen auf dem Gerät und in der Bedienungsanleitung sollten
beachtet werden.
4. ANWEISUNGEN BEFOLGEN - Alle Bedienungs- und Verwendungsanweisungen sollten befolgt werden.
5. WASSER UND FEUCHTIGKEIT - Dieses Gerät nicht in der Nähe von Wasser verwenden, z.B. in der
Nähe einer Badewanne, eines Waschbeckens, einer Küchenspüle, eines Waschzubers, in einem nassen
Keller, in der Nähe eines Schwimmbeckens usw.
6. BELÜFTUNG - Schlitze und Öffnungen im Gehäuse dienen der Ventilation. Sie sind für zuverlässigen
Betrieb des Gerätes und Schutz vor Überhitzung erforderlich und dürfen nicht blockiert oder abgedeckt
werden. Die Öffnungen sollten niemals dadurch blockiert werden, dass das Gerät auf ein Bett, ein Sofa,
einen Teppich oder eine ähnliche Oberfläche gestellt wird. Das Gerät sollte nur dann in Einbauinstallierung
wie in einem Bücherschrank oder einem Regal verwendet werden, wenn angemessene Ventilation
vorgesehen ist bzw. die Anweisungen des Herstellers befolgt worden sind.
7. WÄRME - Das Gerät sollte fern von Wärmequellen wie Radiatoren, Heizkörpern, Öfen und anderen
wärmeerzeugenden Geräten (einschließlich Verstärkern) aufgestellt werden.
8. STROMVERSORGUNG - Dieses Gerät sollte nur mit der auf dem Typenschild angegebenen
Stromversorgungsart betrieben werden. Wenn Sie nicht sicher sind, was für eine Stromversorgung Sie
haben, so wenden Sie sich bitte an Ihren Fachhändler oder Ihr Elektrizitätswerk. Beziehen Sie sich für
Batteriebetrieb oder andere Stromquellen bitte auf die Bedienungsanleitung.
9. NETZKABELSCHUTZ - Netzkabel sollten so verlegt werden, dass möglichst nicht darauf getreten wird
und dass sie nicht eingeklemmt werden, mit besonderer Beachtung der Kabel an Steckern,
Verlängerungskabeln und dem Austritt des Kabels aus dem Gerät.
10. NICHTBENUTZUNG – Ziehen Sie bei längerer Nichtbenutzung Netzstecker und Antennenkabel ab.
11. EINDRINGEN VON FREMDKÖRPERN UND FLÜSSIGKEITEN -
durch die Öffnungen in das Gerät schieben, da diese unter hoher Spannung stehende Teile berühren oder
kurzschließen können, wodurch es zu Feuer oder Stromschlag kommen kann. Niemals Flüssigkeiten
irgendwelcher Art auf dem Gerät verschütten.
12. BESCHÄDIGUNG, DIE EINE WARTUNG ERFORDERT -
sich an einen autorisierten Kundendienst, wenn:
Niemals Objekte irgendwelcher Art
Ziehen Sie stets den Netzstecker und wenden
3.
Page 4
4.
a. das Netzkabel oder der Stecker beschädigt ist;
b. Flüssigkeit oder Fremdkörper in das Gerät eingedrungen sind;
c. das Gerät Regen oder Feuchtigkeit ausgesetzt war;
d. das Gerät nicht wie gewöhnlich funktioniert. Stellen Sie nur jene Steuerungen ein, die in der
Bedienungsanleitung beschrieben sind;
e. das Gerät fallen gelassen oder beschädigt wurde;
f. das Gerät Leistungskraft verloren hat.
13. WARTUNG – Versuchen Sie nicht, das Gerät selbst zu warten, da Sie sich durch Öffnen bzw. Entfernen
von Abdeckungen hohen Spannungen und sonstigen Gefahren aussetzen können. Wenden Sie sich mit
Wartung und Reparaturen stets an einen autorisierten Kundendienst.
14. REINIGUNG – Ziehen Sie vor dem Reinigen den Netzstecker. Benutzen Sie keine flüssigen oder
Sprühreiniger, sondern nur ein feuchtes Tuch. Folgen Sie den Reinigungshinweisen in der
Bedienungsanleitung.
15. GEWITTER – Ziehen Sie während eines Gewitters und bei längerer Nichtbenutzung Netzstecker und
Antennenkabel als zusätzlichen Schutz gegen Überspannung ab.
16. SICHERHEITSÜBERPRÜFUNG – Verlangen Sie nach einer Wartung stets eine Sicherheitsüberprüfung
durch den Kundendienst.
17. ÜBERLASTUNG – Überlasten Sie Steckdosen und Verlängerungskabel nicht, das kann zu Feuer und
Stromschlag führen.
18. ELEKTROSTATISCHE ENTLADUNG – Wenn ein Fehler angezeigt wird oder eine Fehlfunktion besteht,
das Netzkabel rausziehen und alle Batterien entfernen. Danach das Netzkabel wieder anschließen.
ACHTUNG
DIESER CD-PLAYER IST EIN KLASSE 1 LASERPRODUKT UND BENUTZT SICHTBARE/UNSICHTBARE
LASERSTRAHLEN, DIE ZU GEFÄHRLICHER STRAHLENBELASTUNG FÜHREN KÖNNEN. BITTE
BETREIBEN SIE DEN CD-PLAYER ENTSPRECHEND DER BEDIENUNGSANLEITUNG.
UNSICHTBARE LASERSTRAHLUNG TRITT AUS, WENN DER DECKEL GEÖFFNET UND WENN DIE
SICHERHEITSVERRIEGELUNG ÜBERBRÜCKT IST. NICHT DEM STRAHL AUSSETZEN!
LASERLINSE NICHT BERÜHREN
STEUERUNGEN ODER EINSTELLUNGEN ANDERS ALS IN DIESER BEDIENUNGSANLEITUNG
BESCHRIEBEN KÖNNEN ZUR FREISETZUNG GEFÄHRLICHER STRAHLUNG FÜHREN.
ZUR VERMEIDUNG VON FEUER, STROMSCHLAG UND STÖRUNGEN NUR EMPFOHLENES ZUBEHÖR
VERWENDEN UND GERÄT WEDER REGEN NOCH FEUCHTIGKEIT AUSSETZEN.
Einstellen einer sicheren Lautstärke
• Beim ständigen Hören lauter Musik gewöhnt sich Ihr Gehör daran und lässt die Lautstärke geringer
erscheinen.
• Was normal erscheint, kann schon lange zu laut und gesundheitsschädlich sein.
• Stellen Sie zu Ihrer eigenen Sicherheit die Lautstärke niedrig ein.
• Erhöhen Sie die Lautstärke langsam.
• Die Hörschäden können weitreichend und nicht heilbar sein.
• Wenden Sie sich bei Hörproblemen bitte unverzüglich an Ihren Hausarzt.
Weitere Hinweise zum Gerät
• Bei längerer Benutzung erwärmt sich das Gerät, das ist völlig normal.
• Schließen Sie immer die CD-Klappe, damit das CD-Laufwerk staubfrei bleibt. Zum Reinigen wischen Sie
das Fach des CD-Laufwerks mit einem weichen, trocknen Tuch aus.
• Die mechanischen Teile des Geräts enthalten selbstschmierende Lager und dürfen nicht geölt oder
geschmiert werden.
• Nehmen Sie das Gerät nur in einem gemäßigten Klima in Betrieb.
• Nicht für Kinder unter drei Jahren geeignet.
Page 5

Kondensation
Beim Umsetzen des Geräts von einer kalten in eine warme Umgebung kann es zu Kondensationsbildung
kommen. In diesem Fall sind Fehlfunktionen nicht auszuschließen.
Schalten Sie das Gerät ein, benutzen es jedoch für etwa 1 Stunde nicht, bis es ausgetrocknet ist.
Schützen Sie das Gerät vor Regen und Feuchtigkeit, Sand, Staub und extremer Hitze (beispielsweise im
Sommer im geparkten Fahrzeug) und vor direkter Sonneneinstrahlung.
Umsetzen des Geräts
• Entfernen Sie vor einem Transport des Geräts die CD.
• Es empfiehlt sich auch bei Nichtbenutzung des Geräts die CD zu entfernen und das Gerät auszuschalten.
Aufstellort des Gerätes
• Vermeiden Sie Vibrationen, Stöße oder geneigte Oberflächen, hierdurch können Komponenten erheblich
beschädigt werden.
• Keine schweren Gegenstände auf das Gerät stellen.
• Das Gerät niemals auf Verstärker oder andere Geräte stellen, die heiß werden können.
Auspacken:
• Nehmen Sie das Gerät vorsichtig aus der Verpackung und entfernen Sie alle Verpackungsmaterialen.
• Heben Sie die Verpackung zur weiteren Verwendung auf, falls Sie das Gerät zum Kundendienst einschicken
müssen.
• Falls Sie die Verpackung entsorgen wollen, halten Sie sich bitte an die Entsorgungsvorschriften.
• Entfernen Sie vorsichtig die Schutzkarte im CD-Laufwerk.
Spannungsversorgung
Wenn möglich benutzen Sie die Netzspannungsversorgung, um die Batterielebensdauer zu erhöhen. Ziehen
Sie den Netzstecker vor dem Einsetzen der Batterien.
Batterien (nicht mitgeliefert)
Öffnen Sie das Batteriefach und setzen 6 Batterien Typ LR-14, UM-2 oder C (vorzugsweise Alkali-Batterien)
ein. Bitte beachten Sie die richtige Polarität, die mit + und - Symbolen im Batteriefach angezeigt wird.
Wollen Sie das Gerät mit Batterien betreiben, so muss der kleine Neztstecker auf der Geräterückseite
herausgezogen werden.
Beim Anschluss an dieser Buchse wird automatisch auf Netzbetrieb umgestellt.
Hinweise zu den Batterien
- Folgen Sie den Sicherheits- und Benutzungshinweisen des Batterieherstellers.
- Bewahren Sie Batterien kindersicher und sicher vor Haustieren auf.
- Werfen Sie Batterien nicht ins Feuer. Setzen Sie Batterien weder Hitze noch Feuer aus.
- Entsorgung von Batterien: Entsorgen Sie erschöpfte Batterien entsprechend der örtlichen Gesetze und
Verordnungen. Für weitere Informationen setzen Sie sich bitte mit Ihrer Entsorgungsbehörde in Verbindung.
- Vermischen Sie nicht alte mit neuen Batterien.
- Vermischen Sie keine unterschiedlichen Batterietypen: z.B. Alkali mit Zink-Kohle. Verwenden Sie nur
Batterien gleichen Typs.
- Entfernen Sie die Batterien, wenn das Gerät längere Zeit nicht benutzt wird.
Netzbetrieb
- Schließen Sie das Netzkabel an einer AC230V~50Hz Steckdose an.
- Dieses Gerät darf nur mit der auf dem Typenschild angegebenen Stromversorgungsart betrieben werden.
- Stecken Sie den kleineren Stecker des Netzkabels in die AC~ Buchse auf der Rückseite des Geräts.
Vergewissern Sie sich, dass der Stecker vollständig eingesteckt wurde.
5.
Page 6
6.
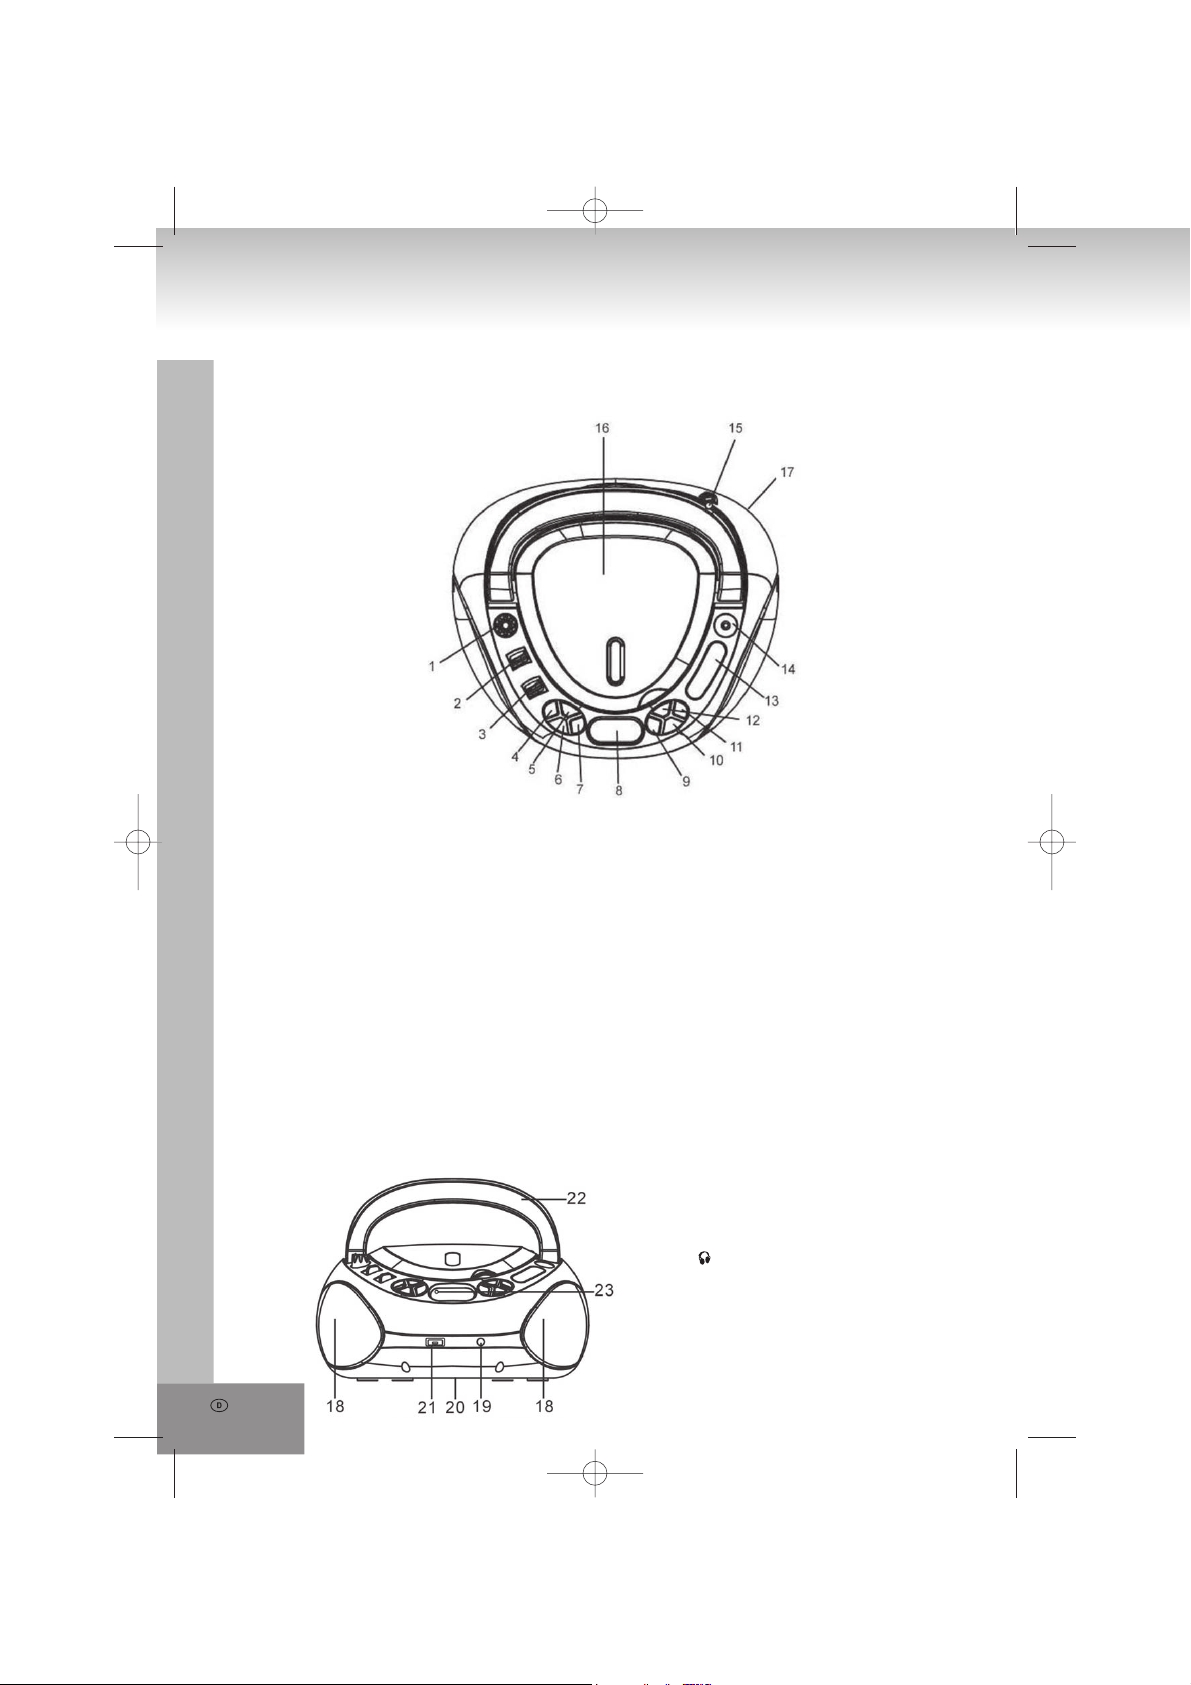
Tastenbelegung und Funktionen
Draufsicht
1. VOLUME MIN/MAX Lautstärke
2. Bandumschalter AM/FM
Umschalten des Radios zwischen UKW und
Mittelwelle
3. Funktionsumschalter MP3/USB/RADIO/OFF
Umschalten zwischen Audio-CD/MP3-CD,
USB, Radiobetrieb und Ausschalten des
Geräts
4. STOP
Wiedergabe beenden
5. REPEAT
Umschalten der Wiederholungsmodi
6. SKIP Zurück zum vorherigen Track und schneller
Rücklauf
7. -10
Rücksprung um 10 Tracks/Dateien
Vorderansicht
8. LCD Display
9. +10
Vorwärtssprung um 10 Tracks/Dateien
10. SKIP+
Weiter zum nächsten Track und schneller
Vorlauf
11. PLAY/PAUSE
Wiedergabe und Pause
12. PROGRAM
Programmierung der Reihenfolge der
Wiedergabe
13. Radio Frequenzanzeige
14. TUNING Senderwahl
15. Teleskopantenne
16. Klappe CD-Laufwerk
17. AC~ Buchse Netzanschluss
(Geräterückseite)
18. Lautsprecher
19. Kopfhörerbuchse
20. Batteriefach (Geräteunterseite)
21. USB Port
22. Handgriff
23. POWER Kontrollanzeige
Page 7

Allgemeine Bedienungshinweise
Ein- und Ausschalten
Um unnötigen Energieverbrauch zu vermeiden, stellen Sie stets den Funktionsumschalter bei Nichtbenut
zung auf OFF. Bei eingeschaltetem Gerät leuchtet die POWER Kontrollanzeige rot.
1. Wählen Sie die Betriebsart mit dem Funktionsumschalter aus: RADIO, MP3/USB oder OFF.
2. Mit VOLUME MIN/MAX stellen Sie die Lautstärke ein.
3. Stellen Sie den Funktionsumschalter zum Ausschalten des Geräts auf OFF.
Vorn auf dem Gerät finden Sie die Kopfhörerbuchse für privaten Musikgenuss (Kopfhörer nicht
mitgeliefert). Schließen Sie Kopfhörer mit einem 3,5 mm Klinkenstecker an. Beim Anschluss der Kopfhörer
schalten sich die Lautsprecher des Geräts automatisch stumm.
-
Radio
Tipps für besseren Empfang
UKW (FM): Ziehen Sie die Teleskopantenne voll aus. Wenn das Empfangssignal zu stark ist (z.B. in der
Nähe eines Senders), verkürzen Sie die Länge der Teleskopantenne.
Mittelwelle (AM): Die MW-Antenne ist eingebaut, bei schwachem Empfang richten Sie das Gerät bitte neu
aus.
Radioempfang
1. Stellen Sie den Funktionsumschalter auf RADIO.
2. Wählen Sie mit dem Bandwahlschalter den Frequenzbereich aus: FM (UKW) oder AM (Mittelwelle).
3. Stellen Sie mit dem TUNING Drehknopf den gewünschten Sender ein.
4. Mit VOLUME MIN/MAX stellen Sie die Lautstärke ein.
5. Zum Ausschalten des Geräts schieben Sie den Funktionsumschalter wieder auf OFF.
Audio-CD und MP3-CD Wiedergabe
Der CD-Player kann nur Audio-CD’s und MP3-CD’s abspielen. Versuchen Sie nicht, Daten-CD’s oder
VCD/DVD Discs abzuspielen.
1. Schieben Sie den Funktionsumschalter auf MP3/USB. Das Display zeigt für kurze
Zeit „- - -“ an, danach 000.
2. Öffnen Sie das CD-Laufwerk manuell mit der Griffmulde, OP wird angezeigt.
3. Legen Sie eine Disc mit dem Aufdruck nach oben ein und schließen die Klappe des CD-Laufwerks wieder
manuell. Zunächst wird wiederum „- - -“ angezeigt, danach die Gesamtzahl der Tracks auf der Disc sowie
CD. Danach schaltet die Anzeige zu 001 und CD um und die Wiedergabe beginnt automatisch. Die
jeweilge Tracknummer wird im Display angezeigt.
4. Sollte die Wiedergabe nicht automatisch beginnen (discabhängig), so drücken Sie bitte PLAY/PAUSE und
starten die Wiedergabe des ersten Tracks manuell.
5. Mit PLAY/PAUSE unterbrechen Sie die Wiedergabe vorübergehend (Pause), mit erneutem Tastendruck
setzen Sie die Wiedergabe von gleicher Stelle aus fort. Während der Pause blinkt ► im Display.
6. Mit STOP beenden Sie die Wiedergabe, im Display wird wieder die Gesamtzahl der Tracks angezeigt.
Hinweise:
Die Disc-Wiedergabe wird auch beendet, wenn:
a. die Klappe des CD-Laufwerks geöffnet wird;
b. der Funktionsumschalter auf RADIO oder OFF geschoben wird;
c. alle Tracks der Disc abgespielt wurden.
Auswahl eines bestimmten Tracks
Während der Wiedergabe können Sie mit SKIP-, SKIP+, -10 oder +10 zum vorherigen oder nächsten Track
oder jeweils 10 Tracks vorwärts oder zurück springen.
1. Wählen Sie den Track im Wiedergabe-, Stopp- oder Pausemodus mit SKIP-, SKIP+, -10 oder +10 und
starten die Wiedergabe mit PLAY/PAUSE.
2. Mit einem kurzen Tastendruck auf SKIP+ springen Sie zum nächsten Track oder drücken mehrmals auf
die Taste, bis die gewünschte Tracknummer im Display angezeigt wird. Drücken Sie die SKIP+ Taste
während der Wiedergabe des letzten Tracks, so spingen Sie zum ersten Track der Disc.
7.
Page 8
8.
3. Um einen oder mehrere Tracks zurückzuspringen, drücken Sie ein- oder mehrmals auf SKIP-. Drücken
Sie die SKIP- Taste während der Wiedergabe des ersten Tracks, so spingen Sie zum letzten Track der
Disc.
4. Mit einem kurzen Tastendruck auf +10 springen Sie zehn Tracks weiter. Verbleiben weniger als 10 Tracks
auf der Disc, so springen Sie zum letzten Track. Drücken Sie die +10 Taste während des letzten Tracks,
so spingen Sie zum ersten Track der Disc.
5. Mit einem kurzen Tastendruck auf -10 springen Sie zehn Tracks zurück. Sind Sie innerhalb der ersten 10
Tracks auf der Disc, so springen Sie zum ersten Track. Drücken Sie die -10 Taste während des ersten
Tracks, so spingen Sie zum letzten Track der Disc.
Schneller Vor- und Rücklauf
Halten Sie SKIP+ oder SKIP- zum schnellen Vorlauf oder Rücklauf durch den Track gedrückt, hierbei wird
die Lautstärke automatisch etwas herunter geregelt.
Programmwiedergabe
Sie können bis zu 20 Tracks in beliebiger Reihenfolge programmieren. Ein Track kann auch mehr als einmal
programmiert werden.
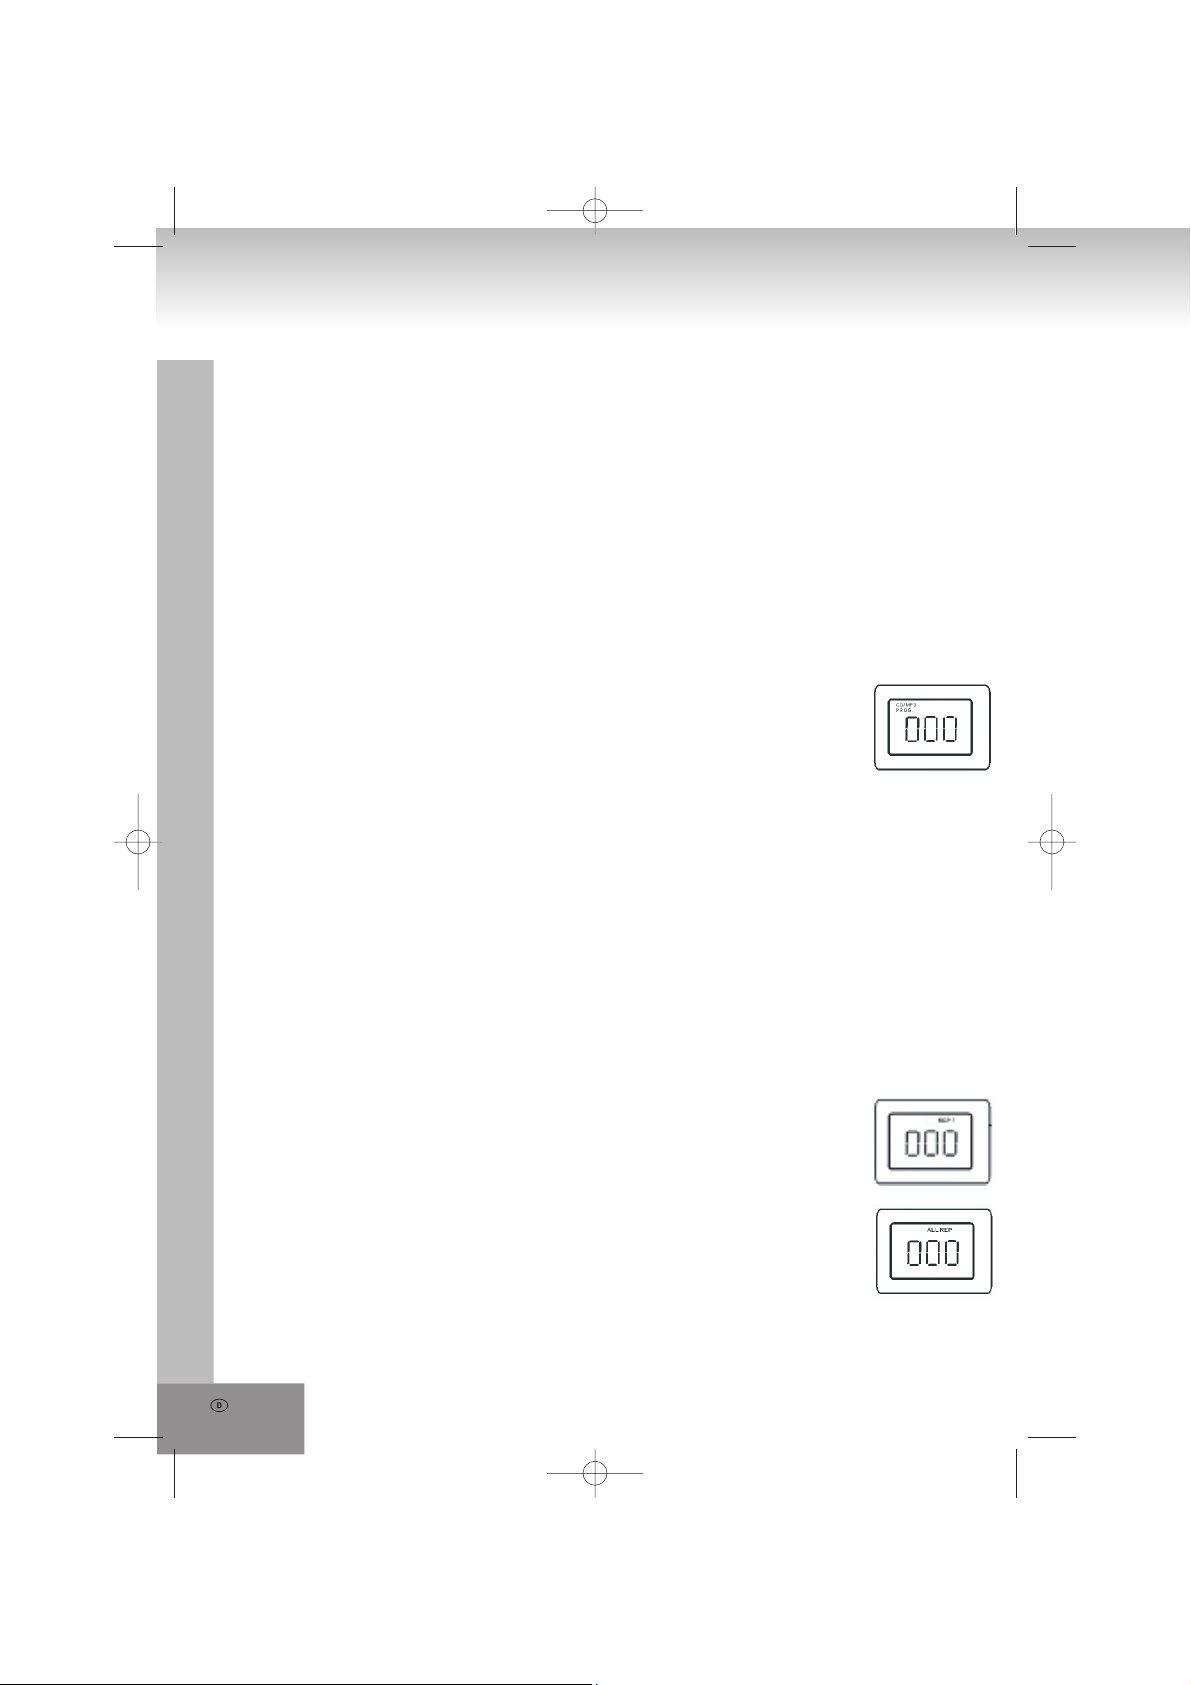
1. Drücken Sie vor dem Beginn der Programmierung immer auf STOP und dann auf
PROGRAM. Im Display wird neben CD auch 000 und PROG angezeigt.
2. Wählen Sie den gewünschten Track mit SKIP+, SKIP-, +10 oder -10 aus.
3. Speichern Sie den Track mit einem Tastendruck auf PROGRAM. Im Display wird nun
neben CD und PROG auch P01 angezeigt. Wählen Sie nun den nächsten Track aus.
4. Wiederholen Sie die Schritte 2 und 3 zum Speichern weiterer Tracks, bis zu einer Höchstzahl von 20
Tracks.
5. Starten Sie die Wiedergabe der programmierten Tracks mit PLAY/PAUSE. Während der
Programmwiedergabe werden die Tracknummer, CD und PROG angezeigt.
6. In der Programmwiedergabe steht Ihnen ebenfalls die Wiederholungsfuktion für das gesamte Programm
zur Verfügung. Sehen Sie Einzelheiten bitte unter Wiederholung
Löschen der Programmierung
Die Programmierung kann folgendermaßen gelöscht werden:
1. Öffnen Sie die Klappe des CD-Laufwerks.
2. Schieben Sie den Funktionsumschalters auf RADIO oder OFF.
3. Drücken Sie STOP.
Punkt 4.
Wiederholung
Ihnen stehen mehrere Wiederholungsmodi zur Verfügung, die mit REPEAT aufgerufen und umgeschaltet
werden.
1. Zur ständigen Wiederholung des aktuellen Tracks drücken Sie während der
Wiedergabe einmal REPEAT. Im Display wird neben der Tracknummer und CD
ebenfalls REP 1 angezeigt.
2. Zur ständigen Wiederholung der gesamten Disc in der aufgezeichneten Reihenfolge
drücken Sie während der Wiedergabe zweimal REPEAT. Im Display wird neben der
Tracknummer und CD ebenfalls ALL REP angezeigt.
3. Zur Rückkehr zur Normalwiedergabe drücken Sie erneut REPEAT, im Display werden
nur noch Tracknummer und CD angezeigt.
4. Die Wiederholung kann auch für die Programmwiedergabe angewandt werden.
Drücken Sie während der Programmwiedergabe einmal REPEAT zur Wiederholung
des gesamten Programms. Im Display wird zusätzlich zur Tracknummer und PROG
auch noch ALL REP angezeigt.
Page 9

MP3 Wiedergabe von USB-Gerät
Schließen Sie Ihr USB-Gerät (USB Stick, MP3-Player usw.) am USB Port vorn an dem Gerät an. Befindet
sich eine Disc im Laufwerk, so muss diese entfernt werden. Mit STOP schalten Sie zwischen Disc- und
USB-Modus um.
1. Im Display wird nun für einen Moment USB angezeigt, danach während des Lesens „- - -“ und dann die
Anzahl der Dateien. Die Wiedergabe beginnt automatisch.
2. Sollte die Wiedergabe nicht automatisch beginnen, so drücken Sie bitte PLAY/PAUSE und starten die
Wiedergabe der ersten Datei manuell.
3. Mit PLAY/PAUSE unterbrechen Sie die Wiedergabe vorübergehend (Pause), mit erneutem Tastendruck
setzen Sie die Wiedergabe von gleicher Stelle aus fort. Während der Pause blinkt die Dateinummer im
Display.
4. Mit STOP beenden Sie die Wiedergabe, im Display wird wieder die Gesamtzahl der Dateien angezeigt.
Hinweise:
Die USB Wiedergabe wird auch beendet, wenn:
a. die Klappe des CD-Laufwerks geöffnet wird;
b. der Funktionsumschalter auf RADIO oder OFF geschoben wird;
c. alle Dateien des USB-Geräts abgespielt wurden.
Auswahl einer bestimmten Datei
Während der Wiedergabe können Sie mit SKIP-, SKIP+, -10 oder +10 zur vorherigen oder nächsten Datei
oder jeweils 10 Dateien vorwärts oder zurück springen.
1. Wählen Sie die Datei im Wiedergabe-, Stopp- oder Pausemodus mit SKIP-, SKIP+, -10 oder +10 und
starten die Wiedergabe mit PLAY/PAUSE.
2. Mit einem kurzen Tastendruck auf SKIP+ springen Sie zur nächsten Datei oder drücken mehrmals auf die
Taste, bis die gewünschte Dateinummer im Display angezeigt wird. Drücken Sie die SKIP+ Taste während
der Wiedergabe der letzten Datei, so spingen Sie zur ersten Datei auf dem USB-Gerät.
3. Um einen oder mehrere Tracks zurückzuspringen, drücken Sie ein- oder mehrmals auf SKIP-. Drücken
Sie die SKIP- Taste während der Wiedergabe der ersten Datei, so spingen Sie zur letzten Datei auf dem
USB-Gerät.
4. Mit einem kurzen Tastendruck auf +10 springen Sie zehn Dateien weiter. Verbleiben weniger als 10
Dateien auf dem USB-Gerät, so springen Sie zur letzten Datei. Drücken Sie die +10 Taste während der
letzten Datei, so spingen Sie zur ersten Datei auf dem USB-Gerät.
5. Mit einem kurzen Tastendruck auf -10 springen Sie zehn Dateien zurück. Sind Sie innerhalb der ersten 10
Dateien auf dem USB-Gerät, so springen Sie zur ersten Datei. Drücken Sie die -10 Taste während der
ersten Datei, so spingen Sie zur Datei auf dem USB-Gerät.
Schneller Vor- und Rücklauf
In der USB-Wiedergabe haben Sie keinen schnellen Vorlauf oder Rücklauf.
Programmwiedergabe
Sie können bis zu 20 Dateien in beliebiger Reihenfolge programmieren. Eine Datei kann auch
mehr als einmal programmiert werden.
1. Drücken Sie vor dem Beginn der Programmierung immer auf STOP und dann auf PROGRAM. Im Display
wird 000 und PROG angezeigt.
2. Wählen Sie die gewünschte Datei mit SKIP+, SKIP-, +10 oder -10 aus.
3. Speichern Sie die Datei mit einem Tastendruck auf PROGRAM. Im Display werden nun PROG und P01
angezeigt. Wählen Sie nun den nächsten Track aus.
4. Wiederholen Sie die Schritte 2 und 3 zum Speichern weiterer Dateien, bis zu einer Höchstzahl von 20
Dateien.
5. Starten Sie die Wiedergabe der programmierten Dateien mit PLAY/PAUSE. Während der
Programmwiedergabe werden die Dateinummer und PROG angezeigt.
6. In der Programmwiedergabe steht Ihnen ebenfalls die Wiederholungsfuktion für das gesamte Programm
zur Verfügung. Sehen Sie Einzelheiten bitte unter Wiederholung
Punkt 4.
9.
Page 10

10.
Löschen der Programmierung
Die Programmierung kann folgendermaßen gelöscht werden:
1. Öffnen Sie die Klappe des CD-Laufwerks.
2. Schieben Sie den Funktionsumschalters auf RADIO oder OFF.
3. Drücken Sie STOP.
Wiederholung
Ihnen stehen mehrere Wiederholungsmodi zur Verfügung, die mit REPEAT aufgerufen und umgeschaltet
werden.
1. Zur ständigen Wiederholung der aktuellen Datei drücken Sie während der Wiedergabe einmal REPEAT.
Im Display wird neben der Dateinummer ebenfalls REP 1 angezeigt.
2. Zur ständigen Wiederholung aller Dateien auf dem USB-Gerät in der aufgezeichneten Reihenfolge
drücken Sie während der Wiedergabe zweimal REPEAT. Im Display wird neben der Tracknummer
ebenfalls ALL REP angezeigt.
3. Zur Rückkehr zur Normalwiedergabe drücken Sie erneut REPEAT, im Display wird nur noch die
Dateinummer angezeigt.
4. Die Wiederholung kann auch für die Programmwiedergabe angewandt werden. Drücken Sie während der
Programmwiedergabe einmal REPEAT zur Wiederholung des gesamten Programms. Im Display wird
zusätzlich zur Dateinummer und PROG auch noch ALL REP angezeigt.
Behandlung und Pflege von Discs
Behandlung von CD’s
* Entnehmen Sie die CD aus dem Cover.
* Berühren Sie die Oberflächen nicht.
* Bringen Sie keine Aufkleber oder Beschriftungen auf CD’s an.
* Biegen Sie CD’s nicht.
VON INNEN NACH AUSSEN
RICHTIG FALSCH
Aufbewahrung
* Bewahren Sie CD’s in ihrem Cover auf.
* Setzen Sie CD’s nicht direkter Sonneneinstrahlung, hohen Temperaturen, Feuchtigkeit oder Staub aus.
Reinigen von CD’s
* Reinigen Sie CD’s mit einem weichen Tuch.
* Reinigen Sie CD’s von innen nach außen.
Page 11
Störungserkennung
Sollte sich mit dem System ein Problem ergeben, dann überprüfen Sie zunächst mit dieser Liste, bevor Sie
sich an den Kundendienst wenden.
WARNUNG: Öffnen Sie keinesfalls das Gerät, sondern wenden sich mit Reparaturen oder Wartun
gen stets an einen autorisierten Kundendienst.
-
PROBLEM MÖGLICHE URSACHE LÖSUNGSVORSCHLAG
ALLGEMEIN
Kein Ton
Lautstärke ist zu gering
eingestellt.
Batterien sind erschöpft.
Batterien sind nicht richtig
eingesetzt.
Regeln Sie die Lautstärke.
Setzen Sie neue Batterien ein.
Achten Sie auf die Polarität.
Schließen Sie das Netzkabel
korrekt an.
Netzkabel ist nicht
angeschlossen.
RADIO
Schlechter Empfang
CD/MP3
CD springt
Schwaches
SignalStörungen durch
andere Elektrogeräte
(Fernseher, Videorekorder,
Computer usw.).
CD/MP3 beschädigt oder
verschmutzt.
Das Gerät wurde angestoßen.
Antenne ausrichten:
UKW: Teleskopantenne.
MW: Gerät ausrichten.
Halten Sie Abstand zu anderen
Elektrogeräten.
Ersetzen oder reinigen Sie die
Disc.
Halten Sie das Gerät im
Wiedergabemodus ruhig oder
stellen es ab.
Anzeige: - - - Keine CD eingelegt.
Die CD ist verschmutzt oder
beschädigt.
Die Laserlinse ist beschlagen.
Die CD-R/RW ist leer oder
nicht abgeschlossen.
Legen Sie eine CD, CD-R oder
CD-RW ein.
Ersetzen oder reinigen Sie die
CD.
(Siehe „Behandlung von CD’s“)
Warten bis die Laserlinse
wieder trocken ist.
Schließen Sie die CD-R/RW ab.
Technische Spezifikationen
Allgemein
Spannungsversorgung: AC 230V~50Hz
DC 9V (6 Batterien Typ LR14 / UM-2 / C, 1.5V)
(Batterien nicht mitgeliefert)
Leistungsaufnahme: 13 Watt
Frequenzbereich: AM (MW) 525 – 1615kHz
FM (UKW) 87.5 – 108MHz
Audio
Lautsprecherimpedanz: 8 Ohm
Abmessungen: ca. 239 x 205 x 121 mm
Gewicht: ca. 1,4 kg
Änderungen ohne vorherige Ankündigung vorbehalten.
11.
Page 12

12.
MODEL: 6698RB
Design Radio with CD/ MP3/WMA Player and USB Port
SAFETY INSTRUCTIONS
WARNING
RISK OF ELECTRIC SHOCK
DO NOT OPEN
CAUTION: TO REDUCE THE RISK
OF ELECTRIC SHOCK. DO NOT
A triangle with a lightning
symbol draws the user's
attention to "dangerous
voltage" without insulation in
the cabinet which may be
high enough to entail a risk of
electric shock.
REMOVE COVER (OR BACK).
THERE ARE NO USER
SERVICEABLE PART INSIDE.
REFER SERVICING TO
QUALIFIED SERVICE
PERSONNEL.
FURTHER INFORMATION
Beware of small pieces and batteries, do not swallow them. It may be hazardous to your health
and lead into suffocation. Please, Make sure to keep small devices and batteries out of the reach
of children.
Important advice regarding hearing protection
Caution:
You care for your hearing, and so do we.
Therefore, use caution while using this appliance.
Our recommendation: Avoid high volumes.
Children should be supervised while using headphones; make sure that the appliance is not set to
high volume.
Caution!
High volumes may cause irreparable damage to children’s ears.
A triangle with an
exclamation mark draws the
user's attention to important
instructions for use and
maintenance in the
accompanying manual,
which should be studied.
NEVER let allow anyone, especially children, to put objects into the holes, slots or openings on
this devise. This may lead into death due to electric shock. The device must only be opened by a
qualified assistant.
Only use the appliance for its intended purpose.
This device may only be used in housings and business premises.
Please keep this instruction manual for further reference.
Instructions on environment protection
Do not dispose of this product in the usual household garbage at the end of its life cycle; hand it
over at a collection point for the recycling of electrical and electronic appliances. The symbol on
the product, the instructions for use or the packing will inform about the methods for disposal.
The materials are recyclable as mentioned in its marking. By recycling, material recycling or other
forms of reutilization of old appliances, you are making an important contribution to protect our
environment.
Please inquire at the community administration for the authorized disposal location.
Page 13

Do not obstruct the ventilation of the device. Make sure, that no curtains, newspapers, furniture or
any other type of object are blocking the ventilation system of the apparatus. The ventilation system
must be clear of objects at all times! Overheating may lead into serious damage of the device and
reduce its performance and lifespan.
Heat and warmth
Do not expose the appliance to direct sunlight. Make sure that the appliance is not subject to direct
heat sources such as heaters or open fire. Make sure that the ventilation slots of the appliance are
not covered.
Moisture and cleaning
This appliance is not waterproof! Do not immerse player in water. Do not allow player to come in
contact with water. If water gets inside the player it may cause serious damage. Do not use cleaning
agents that contain alcohol, ammoniac, benzene or abrasives as these could damage the player.
For cleaning, use a soft, moistened cloth.
Professional recycling
Batteries and packaging should not be disposed of in the trash. Batteries must be handed over to a
collection centre for used batteries. Separating disposable packaging materials is ecologically
friendly.
SAFETY INSTRUCTIONS
1. READ INSTRUCTIONS - All the safety and operating instructions should be read before the unit is
operated.
2. RETAIN INSTRUCTIONS - The safety and operating instruction should be retained for future reference.
3. HEED WARNINGS - All warnings on the unit and in the operating instructions should be adhered to.
4. FOLLOW INSTRUCTIONS - All operating instructions should be followed.
5. WATER AND MOISTURE - The appliance should not be used near water, for example, near a bathtub,
washbowl, kitchen sink, laundry tub, swimming pool or in a wet basement.
6. VENTILATION – Openings in the device serve its proper ventilation, are necessary for the operation and
prevent overheating. The unit should be situated so that its location or position does not interfere with its
proper ventilation. Do not place on bed, sofa, rug or similar surface that may block the ventilation
openings, in a built-in installation, such as a bookcase or cabinet that may impede the flow of air through
the ventilation openings.
7. HEAT - The unit should be situated away from heat sources such as radiators, stoves, or other appliances
(including amplifiers) that produce heat.
8. POWER SOURCE - The unit should be connected to power supply only of the type described in the
operating instructions or as marked on the unit.
9. POWER CORD PROTECTION - Power supply cords should be routed so that they are not likely to be
walked on or pinched by items placed upon or against them.
10. NON-USE – During longer periods of non-use please disconnect from mains power supply and antenna.
11. OBJECT and LIQUID ENTRY - Care should be taken so that objects do not fall and liquids are not spilled
into the enclosure through openings.
12. DAMAGE REQUIRING SERVICE - The unit should be serviced by qualified service personnel when:
a. The power-supply cord or plug has been damaged.
b. Objects have fallen into, or liquid has been spilled into the unit enclosure.
c. The unit has been exposed to rain or moisture.
d. The appliance has been dropped, or the enclosure damaged. Only use controls and adjustments as
specified in the manual.
e. The unit does not appear to operate normally.
f. The device displays serious changes in its performance
13. SERVICING - The user should not attempt to service the unit beyond that described in the user operating
instructions. All other servicing should be referred to qualified service personnel.
13.
Page 14

14.
14. CLEANING – Disconnect from mains power supply before cleaning. Do not use liquid or spray
cleaners, only use a damp cloth. Follow the care and maintenance instructions in this manual.
15. LIGHTNING – During lightning and longer periods of non-use please disconnect from mains power supply
and antenna.
16. SAFETY CHECK – After servicing the unit ask the customer service for a safety check.
17. OVERLOAD – To avoid fire and electric shock do not overload wall outlets and convenience receptacles.
18. ELECTROSTATIC DISCHARGE – Disconnect from mains power supply and remove batteries if unit
malfunctions. Reconnect after a short time.
CAUTION
THIS CD PLAYER IS A CLASS I LASER PRODUCT. HOWEVER, THIS CD PLAYER USES A
VISIBLE/INVISIBLE LASER BEAM, WHICH COULD CAUSE HAZARDOUS RADIATION EXPOSURE. BE
SURE TO OPERATE THE CD PLAYER CORRECTLY AS INSTRUCTED.
INVISIBLE LASER RADIATION WHEN COVER IS OPEN OR THE SECURITY INTERLOCK DEFEATED.
DO NOT EXPOSE TO BEAM!
DO NOT TOUCH THE LASER LENS.
USE OF CONTROLS OR ADJUSTMENTS OR PERFORMANCE OF PROCEDURES OTHER THAN
THOSE SPECIFIED HEREIN MAY RESULT IN HAZARDOUS RADIATION EXPOSURE.
TO REDUCE THE RISK OF FIRE OR ELECTRIC SHOCK AND ANNOYING INTERFERENCE USE ONLY
THE RECOMMENDED ACCESSORIES.
Setting a safe volume level
• If you continually listen to loud music, your hearing gradually adapts to it and gives you the impression that
the volume is lower.
• What seems normal to you can actually be damaging.
• To protect yourself from this, set the volume to a low level.
• Increase the volume slowly, until you can hear clearly and without problems.
• Damage to your hearing can be extensive and cannot be reversed.
• If you notice a hearing problem, please consult a doctor.
Further information
• If the device will be used for long periods of time, it will become warm. This is absolutely normal.
• Always close the CD-door to keep the CD drive free from dust. When cleaning, wipe the CD drive
compartment with a soft, dry cloth.
• The mechanic parts of the unit contain self-lubricating bearings. Do not oil or lubricate!
• Operate the unit under moderate climate conditions only.
• Not suitable for children under three years.
Condensation
Condensation may occur when moving the device from a cold to a warm environment. If there is moisture
inside the player, it may not operate properly.
Please turn on the power supply and wait about one hour for the moisture to evaporate.
Protect the device from rain and moisture, sand, dust and extreme heat (e.g. in a parked vehicle in summer)
and from direct sunlight.
Moving of the device
• Remove the CD before moving the device.
• It is suggested to remove the CD and to turn off the device for periods of non use.
Page 15
Setting up location of the device
• Avoid vibrations, impact or tilted surfaces as the internal parts may be seriously damaged.
• Do not place heavy objects on the player.
• Never place the player on amplifiers or other devices, which can become hot.
Unpacking:
• Take out carefully the device from the packing and remove all packing materials.
• Keep the packing for further use, if the device must be returned to the customer service.
• If you want to dispose the packing material, adhere to the disposal regulations.
• Carefully remove the laser lens protection from the CD drive.
Power Supply
Whenever possible, connect the unit to the mains power supply to conserve battery lifetime. Disconnect the
mains plug before inserting the batteries.
Battery Operation (Batteries Not Included)
Open the battery compartment and insert 6 batteries type LR-14, UM-2 or C (preferably Alkaline). Please
observe correct polarities which are marked with “+” and “-“ in the battery compartment.
For battery operation disconnect the small mains plug at the rear of the unit.
When connecting the mains cord the unit is automatically set to mains operation.
Battery Safety Precautions:
- Always follow the safety and use precautions of the battery manufacturer.
- Keep batteries away from children and pets.
- Never throw batteries into the fire. Do not expose batteries to fire or other heat sources.
- Battery disposal: exhausted batteries must be properly disposed of and recycled in compliance with all
applicable laws. For detailed information contact your local municipality’s waste authority.
- Do not mix new and exhausted batteries.
- Do not mix different battery types, such as Alkaline and zinc/carbon. Only use batteries of the same type.
- Remove the batteries when the device will not be used for extended periods of time to prevent damage due
to rusted or corroded batteries.
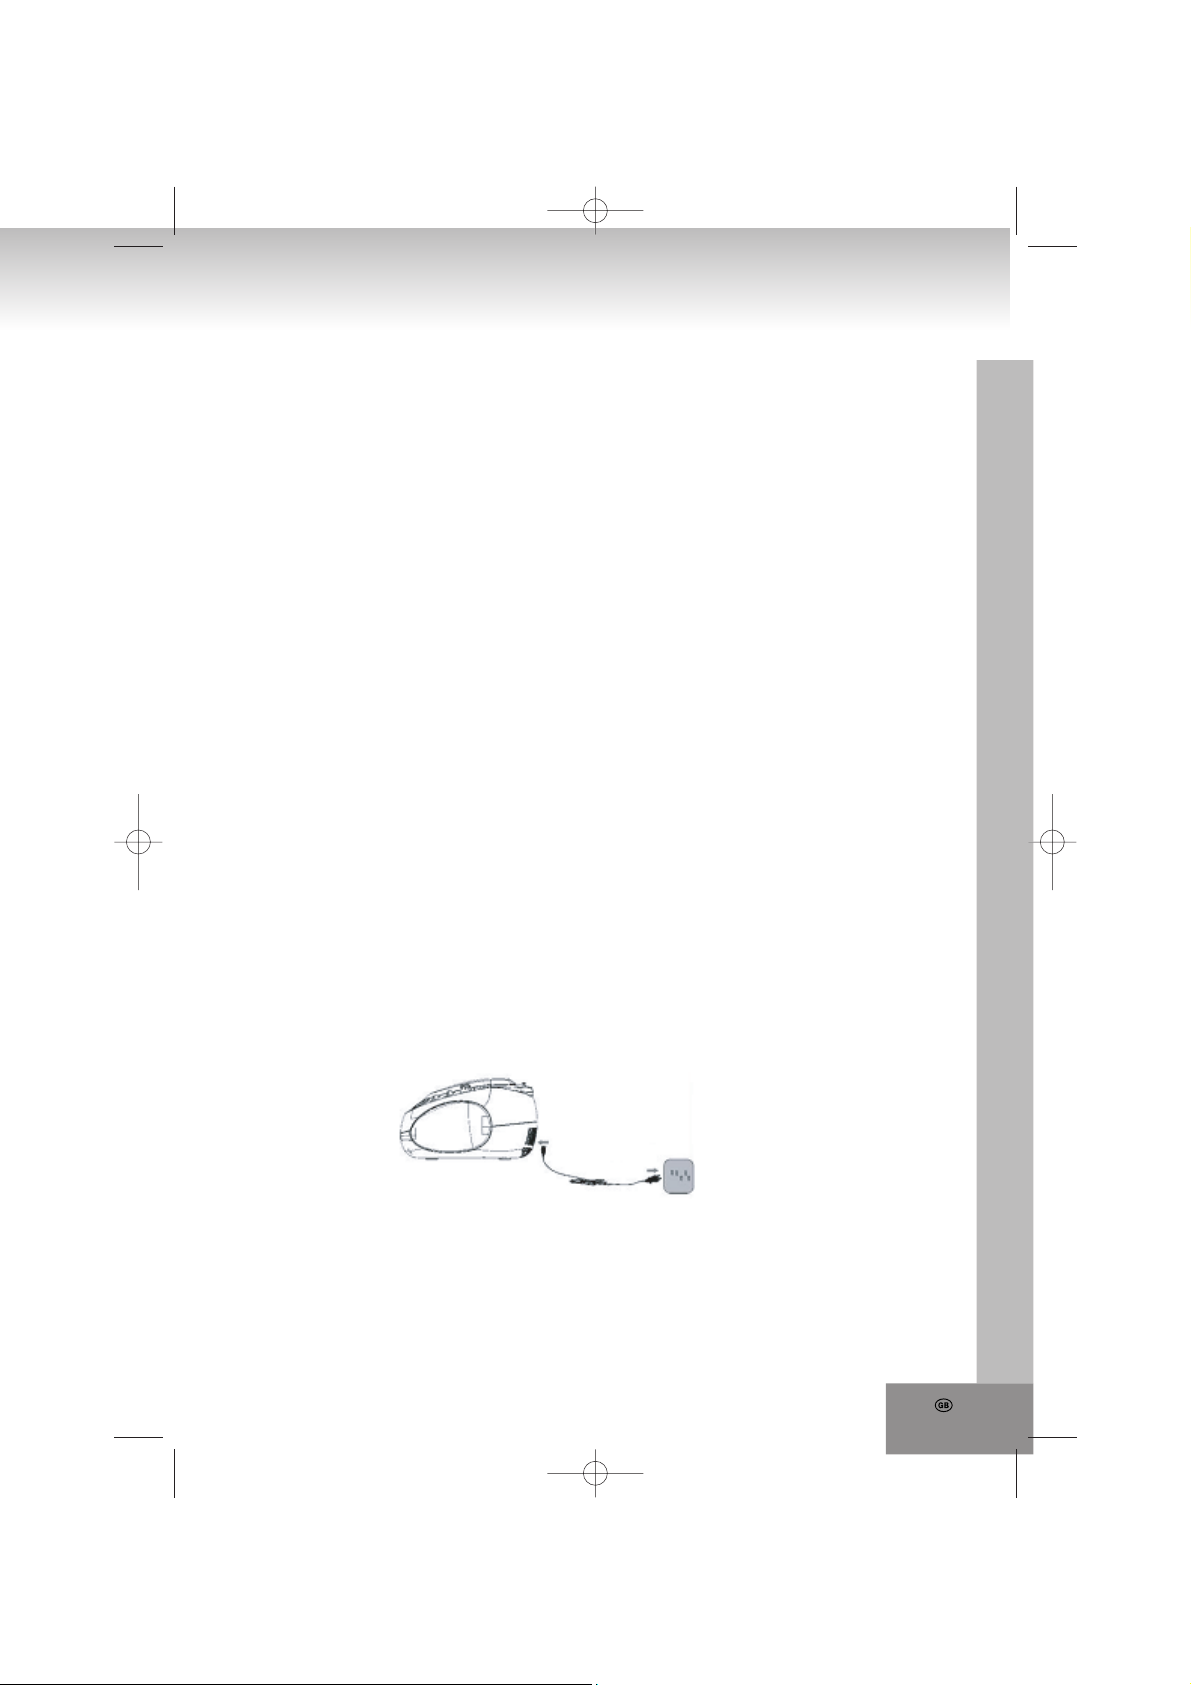
Mains Operation
- Connect the mains power cable to an AC 230V~50Hz wall outlet.
- Operate the unit only with power supply that corresponds with the specifications on the type label.
- Insert the smaller plug of the power cord into the AC~ jack at the rear. Make sure the plug is completely
inserted.
15.
Page 16
16.
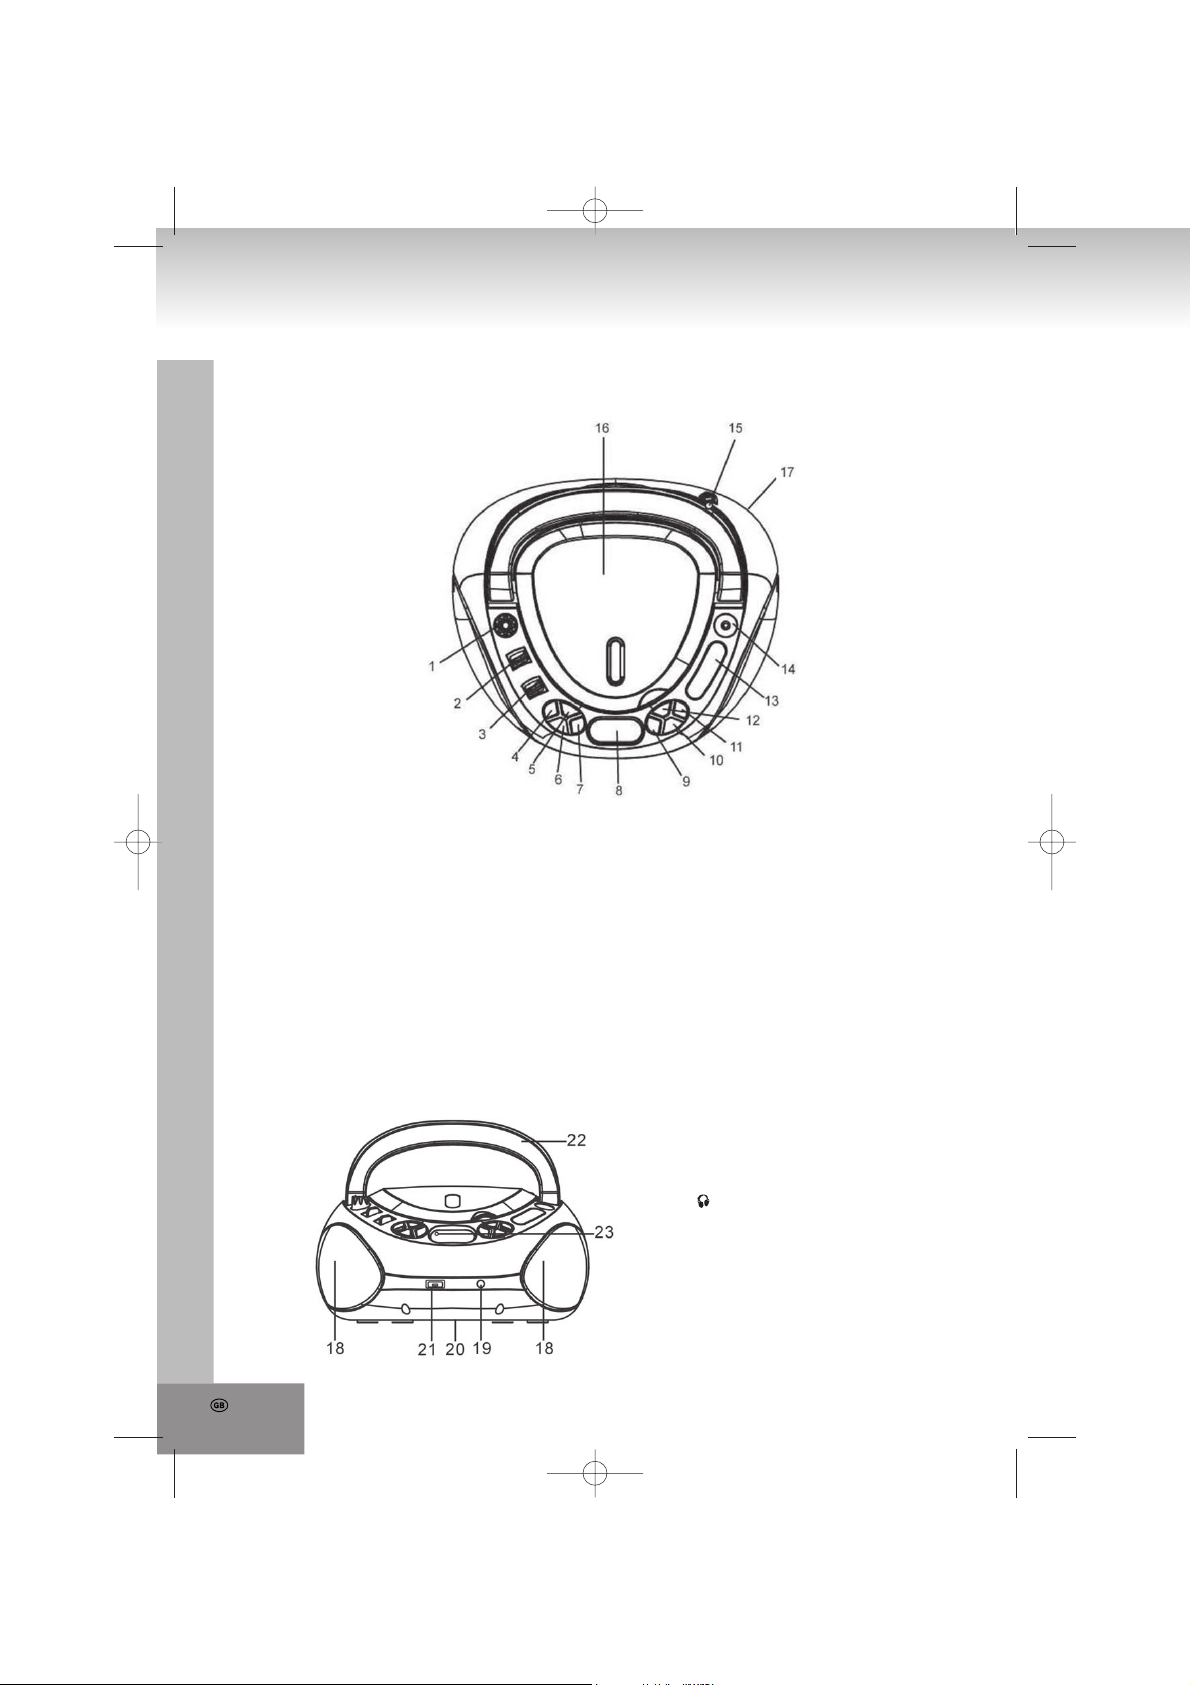
Location Of Controls
Top View
1. VOLUME MIN/MAX
2. Band selector AM/FM
Select radio reception between FM and AM
3. Function selector MP3/USB/RADIO/OFF
Select between Audio CD/MP3 CD, USB and
radio modes and turn the unit off
4. STOP
5. REPEAT
Select repeat modes
6. SKIP Skip to previous track and rewind
7. -10
Skip 10 tracks/files back
Front View
8. LCD display
9. +10
Skip 10 tracks/files forward
10. SKIP+
Skip to next track and fast forward
11. PLAY/PAUSE
12. PROGRAM
Track sequence
13. Dial scale
14. TUNING control
15. Telescopic antenna
16. Door CD drive
17. AC~ mains power jack
(rear of the unit)
18. Speakers
19. Earphone jack
20. Battery compartment (bottom of the unit)
21. USB port
22. Handle
23. POWER indicator
Page 17

Basic Operation
On/Off
To avoid unnecessary power consumption, please set function selector to OFF position when the unit is not in
use. In ON mode the POWER indicator turns red.
1. Select the desired mode with the function selector: RADIO, MP3/USB or OFF.
2. Set the desired volume with VOLUME MIN/MAX.
3. Set the function selector to OFF position to turn off the unit.
On the front of the unit you have an earphones jack for private listening (earphones not supplied). Connect
the earphones with a 3.5mm stereo jack. Upon connection the speakers are automatically muted.
Radio
Recommendations for better reception
FM: Fully extend the telescopic antenna. If the reception signal is too strong (e.g. near a station), shorten
the telescopic antenna.
AM: The unit has a built-in AM antenna; change the position of the unit if reception is poor.
Radio Operation
1. Set the function selector to RADIO position.
2. Select the desired frequency band with the band selector: FM or AM.
3. Tune into your favorite radio station with TUNING control.
4. Set the desired volume with VOLUME MIN/MAX.
5. Set the function selector to OFF position to turn off the unit.
Audio CD and MP3 CD Playback
The CD player can only read Audio CDs and MP3 CDs. Do not attempt to play Data CD or VCD/DVD discs.
1. Set the function selector to MP3/USB position. The display shows “- - -“ for a short moment, afterwards it
shows 000.
2. Open the CD compartment manually with the recessed grip; OP is displayed.
3. Insert a disc with the label up and close the CD compartment again manually. At first
“- - -“ is displayed, afterwards the total number of tracks and CD. The display changes
to 001 and CD. And playback starts automatically. The corresponding track number is displayed.
4. In case playback does not start (depending on the disc), please press PLAY/PAUSE to start playback of
the first track manually.
5. Press PLAY/PAUSE to pause playback; press again to continue playback. In pause mode ► flashes.
6. Press STOP to stop playback; the display again shows the total number of tracks.
Notes:
CD playback is also stopped when:
a. opening the CD compartment;
b. sliding the function selector to RADIO or OFF positions;
c. all tracks on the CD have besen played.
Skip Mode
In playback mode press SKIP-, SKIP+, -10 or +10 to skip to the previous or next track or 10 tracks forward or
back.
1. Select the track in playback, stop or pause modes with SKIP-, SKIP+, -10 or +10 and start playback by
pressing PLAY/PAUSE.
2. Press SKIP+ repeatedly to skip to the next track(s), until the desired track number is displayed. Press
SKIP+ during playback of the last track to skip to the first track of the disc.
3. Press SKIP- repeatedly to skip to the previous track(s). Press SKIP- during playback of the first track to
skip to the last track of the disc.
4. Briefly press +10 to skip ten tracks forward. If less than 10 tracks are left on the disc you skip to the last
track. Press +10 during playback of the last track to skip to the first track of the disc.
5. Briefly press -10 to skip ten tracks back. If you are within the first 10 tracks of the disc you skip to the first
track. Press -10 during playback of the first track to skip to the last track of the disc.
17.
Page 18
18.
Fast Forward and Rewind
Press and hold SKIP+ or SKIP- to access fast forward or rewind functions through the track to search for a
certain position. The volume is decreased.
Program Playback
Up to 20 tracks can be programmed in your desired sequence; any track can be programmed more than
once.
1. Before programming, please press STOP and PROGRAM. The display shows
also 000 and PROG besides CD .
2. Select the first desired track with SKIP+, SKIP-, +10 or -10.
3. Save the track with PROGRAM. The display shows besides CD and PROG also
P01. Now select the next track.
4. Repeat steps 2 and 3 to program further tracks, the maximum number of tracks is 20.
5. Press PLAY/PAUSE to start playback of the tracks in your desired sequence. In program mode the track
number, CD and PROG are displayed.
6. In program mode the repeat function for the complete program is available, see details under Repeat
Modes point 4.
Delete Program
Follow these steps to delete the program:
1. Open the CD compartment.
2. Set the function selector to RADIO or OFF positions.
3. Press STOP.
Repeat Modes
Several repeat modes are available on the unit; press REPEAT to access and select.
1. Press REPEAT once to repeat the current track. The display shows REP 1
besides track number and CD.
2. Press REPEAT twice to repeat the disc in its original sequence. The display
shows ALL REP besides track number and CD.
3. Press REPEAT again to return to normal playback mode. The display shows again
track number and CD.
4. You may also use the repeat function during program playback. In program mode
press REPEAT once to repeat the complete program. The display shows besides
the track number and PROG also ALL REP.
MP3 Playback from USB Device
Connect your USB device (USB stick, MP3 player, etc.) to the USB port on the front. Remove the disc from
the drive. Press STOP to toggle between disc and USB modes.
1. The display shows briefly USB, during reading “- - -“ and the number of files is displayed. Playback starts
automatically.
2. In case playback does not start automatically, please press PLAY/PAUSE to start playback of the first file
manually.
3. Press PLAY/PAUSE to pause playback; press again to continue playback. In pause mode the file number
flashes.
4. Press STOP to stop playback; the display shows again the total number of files.
Notes:
USB playback is also stopped when:
a. Opening the CD compartment;
b. Sliding the function selector to RADIO or OFF positions;
c. All files on the USB device have been played.
Page 19

Skip Mode
In playback mode press SKIP-, SKIP+, -10 or +10 to skip to the previous or next file or 10 files forward or
back.
1. Select the file in playback, stop or pause modes with SKIP-, SKIP+, -10 or +10 and start playback by
pressing PLAY/PAUSE.
2. Press SKIP+ repeatedly to skip to the next file(s), until the desired file number is displayed. Press SKIP+
during playback of the last file to skip to the first file of the USB device.
3. Press SKIP- repeatedly to skip to the previous file(s). Press SKIP- during playback of the first file to skip to
the last file of the USB device.
4. Briefly press +10 to skip ten files forward. If less than 10 files are left on the USB device you skip to the
last file. Press +10 during playback of the last file to skip to the first file of the USB device.
5. Briefly press -10 to skip ten files back. If you are within the first 10 files of the USB device you skip to the
first file. Press -10 during playback of the first file to skip to the last file of the USB device.
Fast Forward and Rewind
In USB playback, no fast-forward or rewind function is available.
Program Playback
Up to 20 files can be programmed in your desired sequence; any file can be programmed more than once.
1. Before programming, please press STOP and PROGRAM. The display shows besides CD also 000 and
PROG.
2. Select the desired file with SKIP+, SKIP-, +10 or -10.
3. Save the file with PROGRAM. The display shows PROG and P01. Now select the next file.
4. Repeat steps 2 and 3 to save further files, the maximum number of files is 20.
5. Press PLAY/PAUSE to start playback of the files in your desired sequence. In program mode the file
number and PROG are displayed.
6. In program mode the repeat function for the complete program is available, see details unter Repeat
Modes point 4.
Delete Program
Follow these steps to delete the program:
1. Open the CD compartment.
2. Set the function selector to RADIO or OFF positions.
3. Press STOP.
Repeat Modes
Several repeat modes are available on the unit; press REPEAT to access and select.
1. Press REPEAT once to repeat the current file. The display shows REP 1 besides the file number.
2. Press REPEAT twice to repeat the all files on the USB device. The display shows ALL REP besides the file
number.
3. Press REPEAT again to return to normal playback mode. The display shows again the file number.
4. You may also use the repeat function during program playback. In program mode press REPEAT once to
repeat the complete program. The display shows besides the file number and PROG also ALL REP.
19.
Page 20

20.
Handling And Cleaning Of Discs
HANDLING OF CD´s
* Remove the CD from its cover.
* Do not touch on the surfaces.
* Do not attach stickers on CD´s and do not write on them.
* Do not bend CD´s.
FROM THE CENTRE TO THE EDGE
CORRECT INCORRECT
Storage
* Always store CD´s in their cover.
* Do not subject to direct sunlight, high temperatures, humidity or dust.
Cleaning CD’s
* Clean CD´s with a soft cloth.
* Clean CD´s from the centre to the edge.
Page 21

TROUBLESHOOTING
If you experience any problem with this system, review the list below before you contact the customer
service.
WARNING: Never open the device. Always refer service or maintenance to authorized customer
service personnel.
SYMPTOM POSSIBLE CAUSE SOLUTION
GENERAL
No sound
Volume is set too low.
Batteries exhausted.
Batteries inserted incorrectly.
Mains cable not connected.
Adjust the volume.
Change the batteries.
Observe polarity.
Connect mains cable correctly.
RADIO
Poor reception
Weak signal.
Interferences by other
appliances (TV sets, VCRs,
computers, etc.).
Adjust antenna:
FM: Telescopic antenna.
AM: adjust unit.
Keep distance to other
appliances.
CD/MP3
CD skips
CD/MP3 dirty or damaged.
The unit was jolted.
Replace or clean the disc.
Keep the unit steady during
operation or put it down.
Display: - - - No CD inserted.
CD is dirty or damaged.
Condensation in laser lens.
CD-R/RW is empty or not
finalized.
Insert a CD, CD-R or CD-RW.
Replace or clean the CD.
Wait until the laser lens is
completely dry (approx. 1 hour).
Finalize the CD-R/RW.
SPECIFICATIONS
General
Power Supply: AC 230V~50Hz
DC 9V (6 batteries type LR14 / UM-2 / C, 1.5V)
(batteries not supplied)
Power Consumption: 13 Watt
Frequency range: AM 525 – 1615kHz
FM 87.5 – 108MHz
Audio
Speaker impedance: 8 Ohm
Dimensions: approx 239 x 205 x 121 mm
Weight: approx 1,4 kg
Subject to change without prior notice.
21.
Page 22
22.
MODELE: 6698RB
Radio design avec lecteur CD/MP3/WMA et port USB
MESURES DE SECURITE
AVERTISSEMENT
RISQUE D’ELECTROCUTION
NE PAS OUVRIR
ATENTION: AFIN DE REDUIRE LES
Un triangle avec symbole
d’éclairattire l’attention de
l’utilisateur sur la présence de
"voltage dangereux" non isolé
dans le coffrage, pouvant être
assez puissant pour
provoquerune électrocution.
RISQUES D’ELECTROCUTION, NE
PAS RETIRER LE COFFRAGE
(AVANT OU ARRIERE). NE
CONTIENT AUCUNE PIECE
REMPLACABLE. CONFIER TOUTE
REPARATION A DU PERSONNEL
QUALIFIE.
PLUS D’INFORMATIONS
Prenez garde aux petites pièces et piles, ne les avalez pas. Cela pourrait être dangereux pour
votre santé et mener à l’étouffement. Prêtez l’attention la plus élevée pour garder les petits
appareils et piles hors de la portée des enfants.
Conseil important pour la protection de l’ouïe
Attention:
Nous tenons à votre ouïe autant que vous.
Par conséquent, prenez vos précautions lors de l’usage de cet appareil.
Notre recommandations: Evitez les volumes forts.
Dans le cas où des enfants utilisent l’appareil, assurez-vous que le volume n’est pas sur la
position éleve.
Attention!
Les volumes élevés peuvent irrémédiablement endommager l’ouïe des enfants.
Un triangle avec point
d’exclamation attire
l’attention de l’utilisateur sur
la présence dans le manuel
d’instructions importantes
concernant l’utilisation et la
maintenance, et devant être
consultées.
NE JAMAIS laisser une personne ou surtout un enfant mettre des objets dans les trous, fentes ou
autres ouvertures de l’appareil. Cela pourrait entraîner la mort par décharge électrique. L’appareil
doit être ouvert uniquement par un assistant qualifié.
Veuillez utiliser l’appareil uniquement aux fins pour lesquelles il a été créé.
Cet appareil est exclusivement destiné à l’usage dans des locaux privés ou à usage commercial.
Veuillez conserver ce mode d`emploi pour utilisation ultérieure.
Indications relatives à la protection de l’environnement
Au terme de sa durée de vie, ce produit ne doit pas être éliminé avec les ordures ménagères
mais doit être remisà un point de collecte destiné au recyclage des appareils électriques et
électroniques. Le symbole figurant sur le produit, la notice d’utilisation ou l’emballage vous
indique cela.
Les matériaux sont recyclables conformément à leur marquage. Vous apportez une large
contribution à la protection de l’environnement par le biais du recyclage, de la réutilisation
matérielle ou par les autres formes de réutilisation des appareils usagés.
Veuillez vous adresser à la municipalité pour connaître la déchetterie compétente.
Page 23

Ne gênez pas la ventilation du dispositif. Assurez-vous que rideaux, journaux, couvertures ou
meubles ne bloquent en aucun cas les fentes de ventilation de l’appareil. La ventilation doit être
assurée à tout moment! La surchauffe peut causer à l’appareil des dommages sérieux et réduire sa
performance et sa durée de vie.
La chaleur et sources de chaleur
Veuillez ne pas exposer l’appareil à la lumière directe (du soleil). Assurez-vous que l’appareil n’est
pas en contact direct avec des sources de chaleur telles qu’un chauffage ou un feu. Assurez-vous
que les fentes d’aération de l’appareil ne sont pas fermées.
Humidité et nettoyage
L’appareil n’est pas étanche! Ne plongez pas l’appareil dans l’eau. Evitez son contact avec l’eau.
De l’eau dans l’appareil pourrait sérieusement l’endommager. N’employez pas de détergents
contenant de l’alcool, de l’ammoniaque, du benzène ou des abrasifs. Ces produits pourraient
endommager votre appareil. Pour nettoyer l’appareil, utilisez un chiffon doux et humide.
Recyclage professionnel
Les piles et l’emballage n’appartiennent pas à la catégorie des ordures ménagères. Les piles
doivent être dirigées vers un centre collectant les piles usagées. Les matériaux de l’emballage sont
écologiques.
MESURES DE SÉCURITÉ
1. LISEZ CES INSTRUCTIONS - Toutes les instructions de sécurité et d’utilisation doivent êtres lues avant
de faire fonctionner l’appareil.
2. CONSERVER LES INSTRUCTIONS – Les mesures de sécurité et de fonctionnement doivent être
conservées pour références ultérieures.
3. RESPECTER TOUS LES AVERTISSEMENTS – Tous les avertissements sur l’appareil et dans le mode
d’emploi doivent être respectés.
4. SUIVRE LES INSTRUCTIONS – Toutes les instructions de fonctionnement doivent être suivies.
5. EAU ET HUMIDITE - L’appareil ne doit pas être utilisé à proximité d’eau, par exemple : une baignoire, un
lavabo, un évier, une lessiveuse, une piscine ou un sous-sol humide.
6. VENTILATION- Les ouvertures de l’appareil permettent une bonne ventilation, elles sont nécessaires pour
un bon fonctionnement de l’appareil et pour empêcher les surchauffes. L’appareil doit être placé afin que
son emplacement ou sa position n’interfère avec la bonne ventilation. Ne placez pas l’appareil sur un lit,
sofa, tapis ou une autre surface similaire qui pourrait bloquer les trous de ventilation. Le placer dans un
meuble encastré, comme une bibliothèque ou une étagère encastrée, empêchera également une bonne
circulation de l’air.
7. CHALEUR – L’appareil doit être tenu à l’écart des sources de chaleur comme les radiateurs, fours ou
autres appareils émettant de la chaleur (y compris les amplificateurs).
8. SOURCE D’ALIMENTATION - L’appareil doit être branché sur une alimentation de même type que celle
décrite dans le mode d’emploi ou comme indiqué sur l’unité.
9. PROTECTION DU CORDON D’ALIMENTATION – Les cordons d’alimentation doivent être acheminés
afin que l’on ne marche pas dessus ou qu’ils ne soient pas pincés par des éléments placés dessus ou
contre eux.Toujours tenir la prise lorsque vous débranchez l’appareil de la prise murale et ne débranhchez
pas avec le câble d’alimentation, ne jamais tirer sur le câble.
10. PERIODE DE NON UTILISATION - Pendant ces périodes de non utilisation de l’appareil, veuillez
débrancher l’appareil sur l’alimentation principale et l’antenne.
11. INSERTION D’OBJET et de LIQUIDE – Une extrême vigilance est de rigueur afin qu’aucun objet ou
liquide n’entrent dans le châssis par les ouvertures.
12. DOMMAGES NECESSITANT UNE REPARATION – L’unité doit être réparée par du personnel de
réparation qualifié lorsque:
a. Le cordon d’alimentation ou la prise d’alimentation ont été endommagé.
b. Un liquide a été projeté sur l’appareil ou si un objet est tombé dans l’appareil.
c. Si l’unité a été exposée à la pluie ou à l’humidité,
d. L’appareil est tombé ou l’enceinte est endommagée. N’utilisez que les commandes et les
réglages comme spécifié dans ce manuel.
23.
Page 24

24.
e. L’appareil ne semble pas fonctionner normalement.
f. L’unité indique de grave changement dans sa performance.
13. REPARATION – L’utilisateur ne doit pas tenter de réparer l’unité autrement qu’indiqué dans ce mode
d’emploi. Toutes les autres réparations doivent être effectuées par du service de réparation qualifié.
14. NETTOYAGE – Débranchez le câble d’alimentation de l’alimentation principale avant le nettoyage.
N’utilisez pas de nettoyants liquides ou de sprays, utilisez uniquement un linge humide. Suivez les
instructions de nettoyage et de maintenance de ce manuel.
15. ORAGE – Pendant les orages et les périodes de non utilisation, veuillez débrancher l’appareil sur
l’alimentation principale et l’antenne.
16. CONTRÖLE SECURITE – Après avoir fait réparé l’unité, demandez au service client d’effectuer un
contrôle sécurité.
17. SURCHARGE – Pour éviter les risques d’incendie et d’électrocution, ne surchargez pas les prises
murales et les multi prises.
18. DECHARGE ELECTROSTATIQUE – Débranchez de l’alimentation principale et retirez les piles de
l’unité si l’unité ne fonctionne pas correctement. Rebranchez ensuite.
AVERTISSEMENT:
CE LECTEUR CD EST UN PRODUIT LASER DE CLASSE I CEPENDANT, CE LECTEUR CD UTILISE UN
RAYON LASER VISIBLE/INVISIBLE QUI POURRAIT ENTRAINER UNE EXPOSITION A DES RADIATIONS
DANGEREUSES . VEUILLEZ VOUS ASSUREZ DE FAIRE FONCTIONNER LE LECTEUR CORRECTE
MENT COMME INDIQUE.
RADIATION LASER INVISIBLE LORSQUE LE COUVERCLE EST OUVERT OU QUE LE VERROUILLAGE
DE SECURITE EST DETRUIT NE PAS EXPOSER AUX FAISCEAUX LUMINEUX !
NE PAS TOUCHER LA LENTILLE DU LASER
L’UTILISATION DE COMMANDES OU D’AJUSTEMENTS OU DE PERFORMANCE OU DE PROCEDURES
DIFFERENTES DE CELLES QUI SONT SPECIFIEES PEUVENT ENTRAINER UNE EXPOSITION A UNE
GRAVE RADIATION.
AFIN DE REDUIRE LES RISQUES D’INCENDIE, DE CHOC ELECTRIQUE OU D’INTERFERENCE,
N’UTILISEZ QUE LES ACCESSOIRES RECOMMANDES.
Régler un niveau sonore sûr
• Si vous écoutez de la musique à un fort niveau sonore, votre audition s’habitue en vous donnant
l’impression que le volume baisse.
• Ce qui vous semble un niveau sonore normal est en fait très néfaste pour votre audition.
• Pour vous protéger, réglez le niveau sonore à un faible niveau.
• Augmentez le volume graduellement jusqu’à ce que vous entendiez clairement et sans difficultés
• Endommager votre audition est extensif et irréversible.
• Si vous constatez un problème d’audition, veuillez consulter votre médecin.
Information Complementaires
• Si l’appareil va est utilisé pendant de longues périodes de temps, il devient chaud. Cela est entièrment
normal.
• Toujours fermer la porte du CD afin que la poussière n’entre pas dans le lecteur CD. Lorsque vous
nettoyez, essuyez le compartiment du lecteur CD avec un chiffon doux et sec.
• Les parties mécaniques contiennent des roulements qui s’auto-lubrifient. Ne pas huiler ou lubrifier!
• N’utilser l’appareil que dans des conditions de climat tempéré.
• Ne convient pas aux enfants de moins de trois ans.
Condensation
De la condensation peut se former lorsque vous déplacer l’appareil d’un endroit froid vers un endroit chaud.
S’il y a de l’humidité dans le lecteur, il se peut que cela l’empêche de fonctionner correctement.
Veuillez allumer l’alimentation et attendez environ une heure que l’humidité s’évapore.
-
Page 25
Protéger l’appareil de la pluie et de l’humidité, du sable, de la poussière et de la chaleur excessive (ex : dans
un véhicule en stationnement en été)
Déplacer l'appareil
• Retirez le CD avant de déplacer l’appareil.
• Il est suggéré de retirer le CD et d’éteindre le lecteur pendant les périodes de non-utilisation.
Régler l’emplacement de l’appareil
• Evitez les vibrations, les surfaces qui provoqueraient des impacts ou des surfaces inclinées car les parties
internes pourraient être sérieusement endommagées.
• Ne pas placer d’objets lourds sur le lecteur.
• Ne jamais placer le lecteur sur des amplificateurs ou sur d’autres appareils qui peuvent devenir chauds.
Déballage :
• Retirez soigneusement l’appareil de son emballage et ôtez tous les matériaux d’emballage.
• Veuillez conserver l’emballage pour une utilisation ultérieure, si vous devez retourner l’appareil au service
clientèle.
• Si vous souhaitez jeter l’emballage, veuillez vous conformer aux réglementations concernant les déchets.
• Veuillez retirer soigneusement la protection de la lentille laser du lecteur CD.Veuillez retirer soigneusement
la protection de la lentille laser du lecteur CD.
Alimentation
Lorsque cela est possible, connectez l’appareil à l’alimentation secteur pour préserver la durée de vie de la
batterie. Débranchez la prise secteur avant d’insérer les piles.
Fonctionnement avec piles (piles non fournies)
Ouvrez le compartiment de piles et insérez 6 piles de type LR-14, UM-2 ou C (de préférence Alcaline). Veuillez
observer les bonnes polarités qui sont indiquées par ‘+’ et ‘-‘ dans le compartiment de piles.
Pour le fonctionnement avec piles, débranchez la prise secteur située à l’arrière de l’appareil.
Lorsque vous connectez le cordon secteur, l’appareil se met automatiquement sur le fonctionnement secteur.
Précautions de sécurité de la pile :
- Veuillez toujours suivre les précautions de sécurtié du fabricant de piles.
- Veuillez mettre les piles à l’abri des enfants et des animaux domestiques.
- Ne jamais jeter les piles au feu. Ne pas exposer le piles au feu ou à d’autres sources de chaleur.
- Destruction de piles: les piles usagées doivent être jetées de manière appropriée et recyclées en conformité
avec les lois en vigueur. Pour des informations détaillées, contactez l’autorité de votre municipalité en charge
des déchets.
- Ne mélangez pas les piles usagées et les piles neuves.
- Ne mélangez pas les types de piles différents, comme par exemple Alcaline et zinc/carbone. N’utilisez que
des piles de même type.
- Retirez les piles lorsque l’appareil ne sert pas pendant des périodes prolongées et ce afin d’éviter
d’endommager l’appareil avec des piles rouillées ou corrodées.
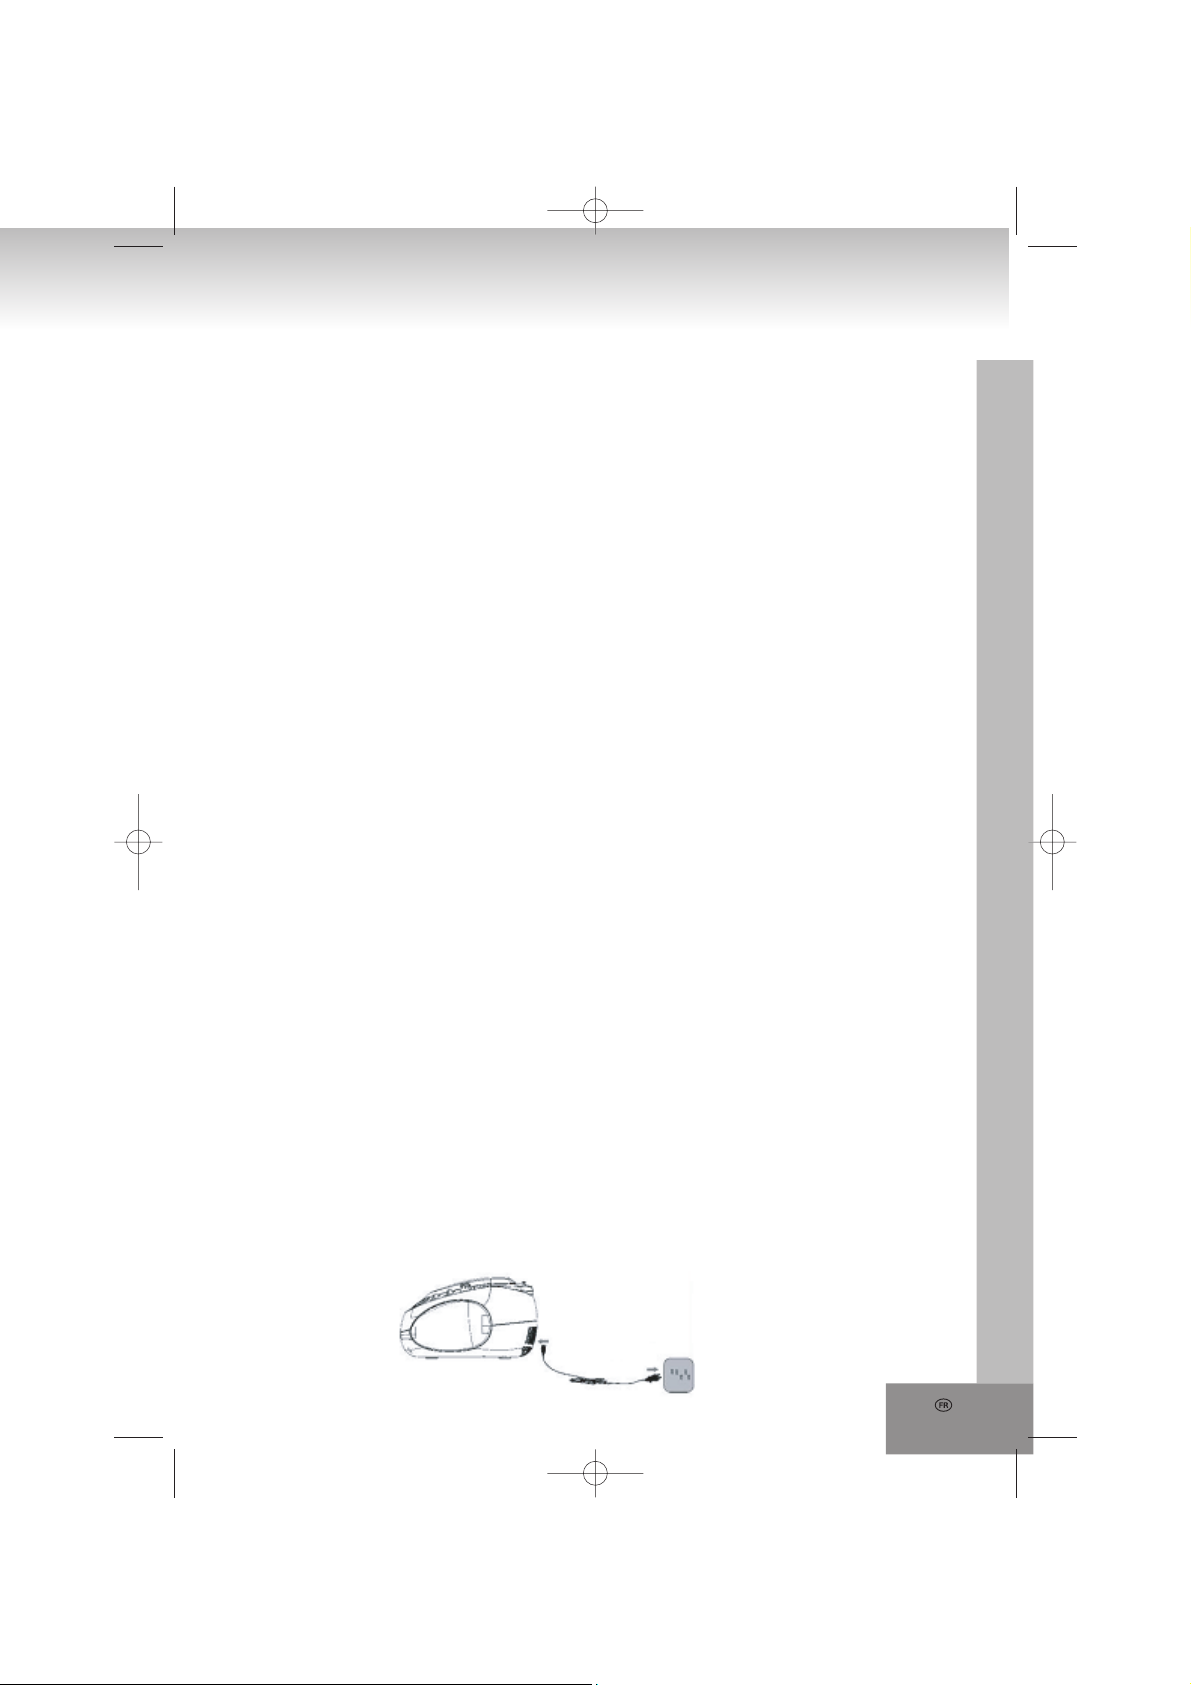
Fonctionnement sur secteur
- Connectez le câble d’alimentation secteur à une prise murale AC 230V~50Hz.
- Faites fonctionner l’appareil uniquement avec l’alimentation qui correspond aux spécifications sur l’étiquette
indiquant le type.
- Insérez la plus petite prise du cordon électrique dans la prise AC~ située à l’arrière. Assurez-vous que la
prise soit complètement insérée.
25.
Page 26

26.
Emplacement des contrôles
Vue du dessus
1. VOLUME MIN/MAX
2. Sélecteur de bandes AM/FM
Pour sélectionner la réception radio entre FM
ou AM
3. Sélecteur de fonction MP3/USB/RADIO/OFF
Permet de sélectionner parmi CD audio/CD
MP3, modes USB et radio et d’éteindre l’unité
4. STOP
5. REPEAT
Permet de sélectionner les modes de répétition
6. SKIP Permet de faire un saut à la piste précédente
et de faire un retour
7. -10
Permet de faire un saut en arrière de 10
pistes/fichiers
Façade
8. Affichage LCD
9. +10
Permet de faire un saut en avant de 10
pistes/fichiers
10. SKIP+
Permet de faire un saut à la piste suivante
et de faire une avance rapide
11. PLAY/PAUSE
12. PROGRAM
Séquence de la piste
13. Échelle du cadran
14. Contrôle TUNING
15. Antenne télescopique
16. Porte lecteur CD
17. Prise courant secteur AC~
(arrière de l’appareil)
18. Haut-parleurs
19. Prise casque
20. Compartiment de piles (bas de l’appareil)
21. Port USB
22. Poignée
23. Indicateur POWER
Page 27
Fonctionnement de base
On/Off (allumer/éteindre)
Afin d’éviter une consommation de courant inutile, veuillez placer le sélecteur de fonction en position OFF
lorsque l’appareil ne sert pas. En mode ON, l’indicateur POWER s’allume en rouge.
1. Sélectionnez le mode désiré à l’aide du sélecteur de fonction : RADIO, MP3/USB ou OFF.
2. Réglez le volume désiré à l’aide de VOLUME MIN/MAX.
3. Réglez le sélecteur de fonction sur OFF pour éteindre l’appareil.
Sur le devant de l’appareil, vous avez une prise écouteurs pour une écoute privée (écouteurs non fournis).
Connectez les écouteurs avec une prise stéréo 3,5mm. A la connexion des écouteurs, les haut-parleurs sont
automatiquement mis en son muet.
Radio
Recommandations pour une meilleure réception
FM: Étirez complètement l’antenne télescopique. Si le signal de réception est trop fort (ex: proche d’une
station), abaissez l’antenne télescopique.
AM: L’appareil comporte une antenne AM intégrée, changez la position de l’appareil si la réception est
mauvaise.
Fonctionnement radio
1. Réglez le sélecteur de fonction sur RADIO.
2. Sélectionnez la bande de fréquence désirée à l’aide du sélecteur de bandes. FM ou AM.
3. Syntonisez votre station de radio préférée à l’aide du contrôle TUNING.
4. Réglez le volume désiré à l’aide de VOLUME MIN/MAX.
5. Réglez le sélecteur de fonction sur OFF pour éteindre l’appareil.
Lecture de CD audio et de CD MP3
Le lecteur CD ne peut lire que des CD audio et des CD MP3. N’essayez pas de lire des CD de données ou
des disques VCD/DVD.
1. Réglez le sélecteur de fonction sur MP3/USB. L’affichage indique “- - -“ pendant un
court instant. Ensuite, il indique 000.
2. Ouvrez le compartiment CD manuellement à l’aide de l’emprise, OP s’affiche.
3. Insérez le disque avec l’étiquette sur le dessus et refermez le compartiment CD
manuellement. “- - -“ s’affiche d’abord et ensuite le nombre total de pistes ainsi que CD apparaissent.
L’affichage se change en 001 et CD. Et la lecture démarre automatiquement. Le numéro de piste
correspondant s’affiche.
4. Au cas où la lecture ne démarrerait pas (en fonction du disque), veuillez appuyer sur PLAY/PAUSE pour
démarrer la lecture de la première piste manuellement.
5. Appuyez sur PLAY/PAUSE pour mettre la lecture en pause, appuyez à nouveau pour reprendre la lecture.
En mode pause, ► clignote.
6. Appuyez sur STOP pour arrêter la lecture, l’affichage indique à nouveau le nombre total de pistes.
Remarques:
Le lecture du CD s’arrête aussi lorsque :
a. vous ouvrez le compartiment CD ;
b. vous faites glisser le sélecteur de fonction sur RADIO ou OFF;
c. toutes les pistes du CD ont été lues.
Mode Saut
En mode lecture, appuyez sur SKIP-, SKIP+, -10 ou +10 pour faire un saut à la piste précédente ou suivante
ou pour faire un saut de 10 pistes en avant ou en arrière.
1. Sélectionnez la piste en lecture, les modes arrêt ou pause à l’aide de SKIP-, SKIP+, -10 ou +10 et
démarrez la lecture en appuyant sur PLAY/PAUSE.
2. Appuyez successivement sur SKIP+ pour faire un saut à la piste/aux pistes suivante(s) jusqu'à ce que le
numéro de piste s’affiche. Appuyez sur SKIP+ pendant la lecture de la dernière piste pour faire un saut à la
première piste du disque.
27.
Page 28

28.
3. Appuyez successivement sur SKIP- pour faire un saut à la piste/aux pistes précédente (s). Appuyez sur
SKIP- pendant la lecture de la première piste pour faire un saut à la dernière piste du disque.
4. Appuyez légèrement sur +10 pour faire un saut en avant de +10 pistes. S’il reste moins de 10 pistes sur
le disque, vous ferez un saut à la dernière piste. Appuyez sur +10 pendant la lecture de la dernière piste
pour faire un saut à la première piste du disque.
5. Appuyez légèrement sur -10 pour faire un saut en arrière de dix pistes. Si vous êtes sur les 10 premières
pistes du disque, vous ferez un saut à la première piste. Appuyez sur -10 pendant la lecture de la
première piste pour faire un saut à la dernière piste du disque.
Avance et Retour rapides
Appuyez et maintenez SKIP+ ou SKIP- pour accéder aux fonctions d’avance et de retour rapide de la piste
pour rechercher un certain point. Le volume est diminué.
Lecture de programme
Vous pouvez programmer jusqu’à 20 pistes dans une séquence de votre choix, vous pouvez programmer
une piste plus d’une fois.
1. Avant de programmer, veuillez appuyer sur STOP et PROGRAM. L’écran affiche
aussi 000 et PROG à côté de CD
2. Sélectionnez la première piste désirée avec SKIP+, SKIP-, +10 ou -10.
3. Sauvegardez la piste à l’aide de PROGRAM. CD et PROG ainsi que P01 sont affichés.
Sélectionnez maintenant la piste suivante.
4. Répétez les étapes 2 et 3 pour programmer d’autres pistes, le nombre maximum de pistes est 20.
5. Appuyez sur PLAY/PAUSE pour démarrer la lecture des pistes dans la séquence désirée. En mode
programme, le numéro de piste, CD et PROG sont affichés.
6. En mode programme, la fonction répétition du programme complet est disponible, voir les détails dans
Modes Répéter point 4.
Effacer le programme
Suivez ces étapes pour effacer le programme :
1. Ouvrez le compartiment CD.
2. Réglez le sélecteur de fonction sur RADIO ou OFF.
3. Appuyez sur STOP.
Modes répéter
Il y a plusieurs modes de répétition disponibles sur l’appareil ; appuyez sur REPEAT pour y accéder et les
sélectionner.
1. Appuyez sur REPEAT une fois pour répéter la piste en cours. L’affichage indique
REP 1 à côté du numéro de piste et CD.
2. Appuyez sur REPEAT deux fois pour répéter le disque dans sa séquence d’origine.
L’affichage indique ALL REP à côté du numéro de piste et CD.
3. Appuyez à nouveau sur REPEAT pour retourner en mode de lecture normale.
L’affichage indique à nouveau le numéro de piste et CD...
4. Vous pouvez aussi utiliser la fonction répéter pendant la lecture du programme.
En mode programme, appuyez une fois sur REPEAT pour répéter le programme
complet. PROG ainsi que ALL REP s’affichent à côté du numéro de piste.
Lecture de MP3 à partir d’un appareil USB.
Connectez votre appareil USB (clé USB, lecteur MP3, etc.) au port USB en façade. Retirez le disque du
lecteur. Appuyez sur STOP pour basculer entre les modes USB et disque.
1. L’affichage indique brièvement USB. Pendant la lecture, “- - -“ ainsi que le numéro des fichiers sont
affichés. La lecture démarre automatiquement.
2. Au cas où la lecture ne démarrerait pas automatiquement, appuyez sur PLAY/PAUSE pour démarrer la
lecture de la première piste manuellement.
Page 29
3. Appuyez sur PLAY/PAUSE pour mettre la lecture en pause, appuyez à nouveau pour reprendre la lecture.
En mode pause, le numéro de fichier clignote.
4. Appuyez sur STOP pour arrêter la lecture, l’affichage indique à nouveau le nombre total de fichiers.
Remarques:
Le lecture USB est aussi interrompue lorsque :
a. Vous ouvrez le compartiment CD,
b. Vous faites glisser le sélecteur de fonction sur RADIO ou OFF.
c. Tous les fichiers de l’appareil USB ont été lus.
Mode Saut
En mode lecture, appuyez sur SKIP-, SKIP+, -10 ou +10 pour faire un saut à la piste précédente ou suivante
ou pour faire un saut de 10 pistes en avant ou en arrière.
1. Sélectionnez le fichier en mode lecture, arrêt ou pause à l’aide de SKIP-, SKIP+, -10 ou +10 et démarrez
la lecture en appuyant sur PLAY/PAUSE.
2. Appuyez successivement sur SKIP+ pour faire un saut au(s) fichier(s) suivant(s) jusqu'à ce que le numéro
de fichier s’affiche. Appuyez sur SKIP+ pendant la lecture du dernier fichier pour faire un saut au premier
fichier de l’appareil USB.
3. Appuyez successivement sur SKIP- pour faire un saut au(x) fichier(s) précédent(s). Appuyez sur SKIP pendant la lecture du premier fichier pour faire un saut au dernier fichier de l’appareil USB.
4. Appuyez légèrement sur +10 pour faire un saut en avant de dix fichiers. S’il reste moins de 10 fichiers sur
l’appareil USB, vous ferez un saut au dernier fichier. Appuyez sur +10 pendant la lecture du dernier fichier
pour faire un saut au premier fichier de l’appareil USB.
5. Appuyez légèrement sur -10 pour faire un saut en arrière de dix fichiers. Si vous êtes sur les 10 premiers
fichiers de l’appareil USB, vous ferez un saut au premier fichier. Appuyez sur -10 pendant la lecture du
premier fichier pour faire un saut au dernier fichier de l’appareil USB.
Avance et retour rapide
En lecture USB, la fonction avance rapide ou retour rapide n’est pas disponible.
Lecture de programme
Vous pouvez programmer jusqu’à 20 fichiers dans une séquence désirée ; un fichier peut être programmé
plus d’une fois.
1. Avant de programmer, veuillez appuyer sur STOP et PROGRAM. CD et 000 ainsi que PROG sont
affichés.
2. Sélectionnez le fichier désiré à l’aide de SKIP+, SKIP-, +10 ou -10.
3. Sauvegardez le fichier à l’aide de PROGRAM. PROG ainsi que P01 sont affichés. Sélectionnez
maintenant le fichier suivant.
4. Répétez les étapes 2 et 3 pour sauvegarder d’autres fichiers, le nombre maximum de fichiers est 20.
5. Appuyez sur PLAY/PAUSE pour démarrer la lecture des fichiers dans la séquence désirée. En mode
programme, le numéro de fichier et PROG sont affichés.
6. En mode programme, la fonction répétition du programme complet est disponible, voir les détails dans
Modes Répéter point 4.
Effacer le programme
Suivez ces étapes pour effacer le programme :
1. Ouvrez le compartiment CD
2. Réglez le sélecteur de fonction sur RADIO ou OFF.
3. Appuyez sur STOP.
Modes de répétition
Plusieurs modes de répétition sont disponibles sur l’appareil, appuyez sur REPEAT pour y accéder et pour
les sélectionner.
1. Appuyez une fois sur REPEAT pour répéter le fichier en cours. L’écran indique REP 1 à côté du numéro
de fichier.
29.
Page 30

30.
2. Appuyez deux fois sur REPEAT pour répéter tous les fichiers de l’appareil USB. L’écran indique ALL REP
à côté du numéro de fichier.
3. Appuyez à nouveau sur REPEAT pour retourner au mode de lecture normale. L’écran indique à nouveau
le numéro de fichier.
4. Vous pouvez aussi utiliser la fonction répéter pendant la lecture du programme. En mode programme,
appuyez une fois sur REPEAT pour répéter le programme complet. PROG ainsi que ALL REP s’affichent
à côté du numéro de piste.
MAINTENANCE ET ENTRETIEN DES DISQUES
Manipulation du CD
* Retirez le CD de son boîtier.
* Ne pas toucher les surfaces.
* Ne pas apposer d’autocollants sur le CD et ne pas écrire dessus.
* Ne pas plier le CD.
VON INNEN NACH AUSSEN
CORRECT INCORRECT
Stockage
* Toujours ranger les CD dans leur boîtier
* Ne pas exposer à la lumière directe du soleil, à des températures élevées, à l’humidité ou à la poussière.
Nettoyer le CD
* Nettoyer le CD à l’aide d’un chiffon doux.
* Nettoyer le CD du centre vers l’extérieur.
Page 31

GUIDE DE DEPANNAGE
Si vous rencontrez des problèmes avec cet appareil, veuillez d’abord consulter la liste ci-dessous avant de
contacter le service client.
AVERTISSEMENT : Ne jamais ouvrir l’appareil. Veuillez toujours faire réparer ou entretenir l’appareil
par un personnel de réparation agréé.
PROBLEME CAUSE POSSIBLE SOLUTION
GENERAL
Pas de son
Volume réglé à un niveau
trop bas.
Les piles sont usagées.
Les piles sont mal insérées.
Le câble secteur n’est pas
Réglez le volume.
Changez les piles.
Respectez la polarité.
Connectez correctement le
câble secteur.
connecté.
RADIO
Mauvaise réception
CD/MP3
Le CD saute
Signal faible.
Des interférences causées
par d’autres appareils
(postes de TV, VCR,
ordinateurs, etc.)
Le CD/MP3 est sale ou
endommagé.
L’appareil a été secoué.
Réglez l’antenne.
FM: Antenne télescopique.
AM: Réglez l'appareil.
Mettez à distance des autres
appareils électriques.
Remplacez ou nettoyez le
disque.
Veillez à garder l’appareil stable
lors de son utilisation ou
posez-le.
Affichage: - - - Pas de CD inséré.
Le CD est sale ou
endommagé.
Condensation sur la lentille
laser.
CD-R/RW est vide ou non
finalisé.
Insérez un CD, CD-R ou
CD-RW.
Remplacez ou nettoyez le CD.
Attendez que la lentille laser
soit complètement sèche
(environ 1 heure).
Finalisez le CD-R/RW
SPECIFICATIONS
Générales
Alimentatio : AC 230V~50Hz
DC 9V (6 piles de type LR14 / UM-2 / C, 1.5V)
(piles non fournies)
Consommation d’énergie: 13 Watt
Gamme de fréquence: AM 525 – 1615kHz
FM 87.5 – 108MHz
Audio
Impédance des haut-parleurs: 8 Ohm
Dimensions: environ 239 x 205 x 121 mm
Poids: environ 1,4 kg
Peut être sujet à modifications sans avis préalable.
31.
Page 32

32.
MODELL: 6698RB
Formatervezett rádió CD/ MP3/WMA lejátszóval és USB porttal
BIZTONSÁGI ELŐÍRÁSOK
FIGYELEM
FESZÜLTSÉG ALATT! NE
NYISSA KI A BURKOLATOT!
VIGYÁZAT: AZ ÁRAMÜTÉS
A villámot tartalmazó
háromszög szimbólum arra
hívja fel a felhasználó
figyelmét, hogy a
készülékben szigetelés
nélküli nagy feszültségű
alkatrészek találhatók,
amelyek áramütést okozha.
VESZÉLYÉNEK ELKERÜLÉSE
ÉRDEKÉBEN NE VEGYE LE A
KÉSZÜLÉK BURKOLATÁT. A
KÉSZÜLÉK BELSEJÉBEN NINCS
OLYAN ALKATRÉSZ, AMELYET
HÁZILAG LEHETNE
KARBANTARTANI. A KÉSZÜLÉK
JAVÍTÁSÁT.
KIEGÉSZÍTŐ INFORMÁCIÓK
Óvatosan bánjon az apró alkatrészekkel és elemekkel, és azokat ne nyelje le, mert ez komoly
sérüléseket okozhat! Gondoskodjon arról, hogy az apró alkatrészek és elemek ne kerüljenek
gyermekek kezébe.
Fontos tanácsok a halláskárosodás elkerülésére
Figyelmeztetés:
Az Ön hallásáért nemcsak Ön, de mi is aggódunk.
Éppen ezért kérjük, legyen óvatos a készülék használatánál.
Azt ajánljuk, hogy: kerülje a nagy hangerővel való hallgatást.
Ha a készüléket gyermekek használják, ügyeljünk arra, hogy ne állítsák a készüléket túl
hangosra.
Vigyázat!
A túl nagy hangerő a gyermekeknél gyógyíthatatlan károsodást okozhat.
A felkiáltójelet tartalmazó
háromszög azt jelzi, hogy a
felhasználásról és a
karbantartásról fontos
információkat talál a
mellékelt kézikönyvben,
melyet tanulmányozzon át.
Kérjük gondoskodjon róla, hogy a készülék burkolatának nyílásaiba SOHA senki, főképpen pedig
gyermekek, ne dughassanak bele semmit, ez ugyanis életveszélyes áramütéshez vezethet. A
készülék burkolatát csak erre megfelelően képzett szakember nyithatja fel.
A készüléket kizárólag a rendeltetésének megfelelõen használjuk.
A készülék kizárólag lakásokban és üzletekben történõ felhasználásra alkalmas.
Kérjük, őrizze meg a használati útmutatót, hogy az később is rendelkezésére álljon.
Környezetvédelmi tanácsok
Ezt a terméket az élettartama végén ne dobjuk a normál háztartási szemétbe, hanem adjuk le a
villamos és elektronikai hulladékok átvevőhelyén. A terméken található szimbólum, a használati
útmutató vagy a csomagolás felirata erre hívja fel a figyelmet.
A készülék anyagai a jelölésüknek megfelelõen újrahasznosíthatóak. Az újrahasznosítással, az
anyagok ismételt felhasználásával, illetve a használt készülékek egyéb felhasználásával sokat
tehetünk környezetünk megóvásáért.
A megfelelõ hulladék-átvevõhelyrõl a helyi önkormányzatnál érdeklõdhetünk.
Page 33

Ne akadályozza a készülék szellőzését, például függönnyel, újsággal, takaróval vagy bútorral. A
szellőzőnyílásoknak mindig szabadon kell maradnia. A túlmelegedés kárt tehet a készülékben, és
emiatt annak élettartama lerövidülhet.
Meleg és forróság
Ne tegyük ki a készüléket a közvetlen napsütés hatásának. Ügyeljünk arra, hogy a készülék ne
legyen fűtőberendezés, nyílt láng vagy egyéb hőforrás közelében. A készülék szellőzőnyílásait
mindig hagyjuk szabadon.
Nedvesség és tisztítás
Ez a készülék nem vízálló! Ne tegyük vízbe a lejátszót, és ügyeljünk arra, hogy ne is kerüljön vízzel
érintkezésbe. A lejátszóba bejutó víz súlyos károkat okozhat. A készülék megtisztítására ne
használjunk alkoholt, ammóniát, benzint, vagy súrolószert tartalmazó tisztítóanyagot, mivel ezek
károsíthatják a lejátszót. A készülék megtisztítására enyhén megnedvesített puha törlőruhát
használjunk.
Előírásos hulladék-elhelyezés
Az elemek és a csomagolóanyagok nem a háztartási szemétbe valók. Az elemeket a használt
elemek számára kijelölt gyűjtőhelyre vigyük. A csomagolóanyagok szelektív elhelyezése szintén
védi környezetünket.
BIZTONSÁGI ELŐÍRÁSOK
1. OLVASSA EL AZ UTASÍTÁSOKAT - A készülék működtetése előtt az összes biztonsági és működtetési
utasítást olvassa el.
2. ŐRIZZE MEG AZ ÚTMUTATÓT - A biztonsági és működtetési útmutatókat tartsa meg a későbbi
használatra.
3. FIGYELMEZTETÉSEK - A terméken és a használati útmutatóban található figyelmeztetéseket tartsa be.
4. KÖVESSE AZ UTASÍTÁSOKAT - A működtetési és használati utasításokat tartsa be.
5. VÍZ ÉS NEDVESSÉG - Ne használja a terméket víz (például fürdőkád, mosdókagyló, konyhai mosogató,
mosóteknő) közelében, úszómedence mellett vagy átnedvesedett alagsorban.
6. SZELLŐZÉS - A készüléken található nyílások a megfelelő szellőzést szolgálják, a működéshez valamint
a túlmelegedés elkerülése érdekében szükségesek. A készüléket úgy kell elhelyezni, hogy a helye vagy
helyzete ne zavarja a megfelelő szellőzést. A terméket ne tegye ágyra, kanapéra, pokrócra vagy más
hasonló felületre, amely elzárhatja a szellőzőnyílásokat, ne építse be olyan helyre pl. szekrénybe vagy
tartóba amely gátolhatja a légáramlást a szellőzőnyílásokon át.
7. HŐ - A terméket a hőforrásoktól, pl. radiátoroktól, konvektoroktól, kályháktól vagy más hőt termelő
készülékektől (beleértve az erősítőket is) távol kell elhelyezni.
8. ÁRAMFORRÁS - A terméket csak a használati útmutatóban megadottal vagy a törzslapon megjelölttel
egyező feszültséget szolgáltató áramforrásról szabad üzemeltetni.
9. HÁLÓZATI CSATLAKOZÓ KÁBEL VÉDELME - A hálózati csatlakozó kábeleket úgy kell vezetni, hogy
azokra ne lépjenek rá és a rájuk vagy melléjük helyezett tárgyakba ne akadhassanak bele.
10. HA NEM HASZNÁLJÁK - Ha hosszabb ideig nem használja a készüléket, húzza ki a hálózati csatlakozót
és az antennát.
11. TÁRGYAK és FOLYADÉKOK BEJUTÁSA - Vigyázni kell, hogy a burkolat nyílásain át semmilyen tárgy ne
essen, vagy folyadék ne folyjon a készülék belsejébe.
12. JAVÍTÁST IGÉNYLŐ SÉRÜLÉSEK - A készüléket képesítéssel rendelkező szakembernek kell megjavíta
nia, ha:
a. A hálózati vezeték vagy a csatlakozódugasz megsérült.
b. Folyadék vagy valamilyen tárgy került a készülék belsejébe.
c. A készüléket eső vagy víz érte.
d. A készüléket leejtették vagy a burkolatot károsodás érte. Csak a kézikönyvben meghatározott
kezelőszerveket és beállításokat alkalmazza.
e. Az egység a jelek szerint nem működik rendesen.
f. A készülék teljesítményében nagymértékű változás állt be.
33.
Page 34

34.
13. SZERVIZELÉS - A felhasználó nem végezhet semmilyen olyan szervizelési műveletet a készüléken,
amely nincs leírva a használati útmutatóban. A javításokat csak képesítéssel rendelkező szakember
végezheti.
14. TISZTÍTÁS – Tisztítás előtt húzza ki a hálózati csatlakozót. Ne használjon folyékony vagy aeroszolos
tisztítószereket, csak nedves ruhát használjon. Kövesse a használati útmutatóban leírt tisztítási és
karbantartási utasításokat.
15. VILLÁMLÁS - Villámlás idején, és ha hosszabb ideig nem használja a készüléket, húzza ki a hálózati
csatlakozót és az antennát.
16. BIZTONSÁGI ELLENŐRZÉS - A szervizelést követően kérje meg a vevőszolgálatot, hogy végezzenek
biztonsági ellenőrzést a terméken.
17. TÚLTERHELÉS - A tűz és az áramütés elkerülése érdekében ne terhelje túl a fali csatlakozókat és az
egybeépített konnektor aljzatokat.
18. ELEKTROSZTATIKUS KISÜLÉS - Ha a készülék hibásan működik, húzza ki a hálózati csatlakozót és
vegye ki az elemeket. Kis idő elteltével csatlakoztassa újra.
FIGYELEM
EZ A CD-LEJÁTSZÓ I-ES OSZTÁLYÚ LÉZERT HASZNÁLÓ TERMÉK. MINDAZONÁLTAL A KÉSZÜLÉK
OLYAN LÁTHATÓ/LÁTHATATLAN LÉZERSUGARAT HASZNÁL, AMELY VESZÉLYES SUGÁRZÁST
FEJTHET KI. MINDIG ÜGYELJEN ARRA, HOGY A CD-LEJÁTSZÓT AZ ÚTMUTATÁSOK SZERINT
HASZNÁLJA.
LÁTHATATLAN LÉZERSUGÁRZÁS A BURKOLAT FELNYITÁSAKOR VAGY A BIZTONSÁGI RETESZ
KIIKTATÁSAKOR. NE TEGYE KI MAGÁT A SUGÁRZÁSNAK!
NE ÉRJEN A LÉZER LENCSÉJÉHEZ.
AZ ITT LEÍRTAKTÓL ELTÉRŐ SZABÁLYOZÁSOK VAGY BEÁLLÍTÁSOK, VALAMINT ELJÁRÁSOK
ALKALMAZÁSA VESZÉLYES SUGÁRZÁST EREDMÉNYEZHET.
A TŰZ ÉS AZ ELEKTROMOS ÁRAMÜTÉS, VALAMINT A KELLEMETLEN INTERFERENCIA ELKERÜLÉSE
ÉRDEKÉBEN CSAK AZ AJÁNLOTT TARTOZÉKOKAT HASZNÁLJA.
BIZTONSÁGOS HANGERŐ SZINT BEÁLLÍTÁSA
• Ha Ön folyamatosan hangos zenét hallgat, a hallása fokozatosan ehhez alkalmazkodik és azt a benyomást
kelti, hogy a hangerő alacsonyabb szintű.
• Ami Önnek normálisnak tűnik, valójában káros lehet.
• Védekezésül ez ellen állítsa a hangerőt alacsony szintre.
• Növelje a hangerőt lassan, amíg tisztán nem hall problémák nélkül.
• A halláskárosodás nagy fokúvá válhat és nem fordítható vissza.
• Ha hallás problémát tapasztal, kérjük, forduljon orvoshoz.
TOVÁBBI INFORMÁCIÓK
• Hosszú ideig történő használat esetén a készülék felmelegedhet. Ez teljesen normális jelenség.
• A CD-meghajtó ajtaját mindig tartsa zárva, hogy védje a meghajtót a portól. Tisztításkor puha száraz
ruhával törölje át a CD-meghajtót.
• A készülék mechanikus részei önzsírozó csapágyakat tartalmaznak. Ne olajozza vagy zsírozza a
csapágyakat!
• A készüléket csak mérsékelt időjárási körülmények között használja.
• Kizárólag három évnél idősebb gyermekek számára.
Páralecsapódás
Páralecsapódás jöhet létre, amikor a készüléket hidegről meleg környezetbe viszik. Ha nedvesség található
a lejátszóban, akkor lehetséges, hogy nem fog megfelelően működni.
Kérjük, kapcsolja ki a tápellátást, és várjon nagyjából egy órát, hogy a nedvesség felszáradhasson.
Page 35

Védje a készüléket az esőtől, a nedvességtől, homoktól, portól és a nagy hőtől (pl. leállított autóban nyáron),
és óvja a közvetlen napfénytől.
A készülék áthelyezése
• A készülék áthelyezése előtt távolítsa el a CD-lemezt a lejátszóból.
• A CD eltávolítása és a készülék kikapcsolása akkor is ajánlott, amikor hosszabb időre nem használja azt.
A készülék elhelyezése
• Kerülje az instabil, rázkódó vagy billegő felületeket, mert ezek súlyosan károsíthatják a készülék belső
alkatrészeit.
• Ne tegyen nehéz tárgyakat a lejátszóra.
• Ne tegye a lejátszót erősítőre vagy más olyan berendezésre, amely felmelegedhet.
Kicsomagolás:
• A készüléket óvatosan vegye ki a csomagolásból és távolítsa el a csomagolóanyagokat.
• Tartsa meg a szükséges csomagolóanyagokat arra az esetre, ha a készüléket vissza kellene küldenie a
vevőszolgálatnak.
• Amennyiben nem kívánja megtartani a csomagolást, kérjük, tartsa be a hulladékgyűjtési szabályozásokat.
• Óvatosan távolítsa el a lézeroptika védőrétegét a CD-meghajtóról.
Áramellátás
Az elemek élettartamának növelése érdekében amikor csak lehetséges, a hálózati áramforráshoz csatlakoz
tassa a készüléket. Az elemek behelyezése előtt húzza ki a készüléket a csatlakozóból.
Üzemelés elemről (az elemeket külön kell megvásárolni)
Nyissa ki az elemtartót és helyezzen be 6 db LR-14, UM-2 vagy C típusú (lehetőleg alkáli) elemet. Ügyeljen a
helyes polaritásra, amit “+” és “-“ jel mutat az elemtartóban.
Elemes üzemelés esetén húzza ki a készülék hátoldalán található hálózati csatlakozót.
A hálózati kábel csatlakoztatásakor a készülék automatikusan hálózati üzemre kapcsol.
Biztonsági előírások az elemekkel kapcsolatban:
- Mindig tartsa be az elem gyártójának biztonsági és használati utasításait.
- Tartsa távol az elemeket a gyermekektől és a háziállatoktól.
- Ne dobja tűzbe az elemeket, ne tegye ki az elemeket hő vagy nyílt láng hatásának.
- Hulladékkezelés: a kimerült elemeket a vonatkozó előírások figyelembevételével kell kezelni és
újrahasznosítani. Részletes információért forduljon a helyi önkormányzat hulladékgazdálkodási ügyekben
illetékes munkatársaihoz.
- Ne használjon vegyesen régi és új elemeket.
- Ne használjon vegyesen különböző típusú (pl. alkáli és cink-karbon) elemeket. Csak azonos típusú és
méretű elemeket használjon.
- Ha a készüléket hosszabb ideig nem használja, távolítsa el az elemeket.
-
Üzemelés hálózatról
- Csatlakoztassa a hálózati kábelt egy 230 V ~ 50 Hz-es váltóáramú fali aljzathoz.
- A készüléket csak a típuslapon feltüntetettel megegyező áramforrással üzemeltesse.
- Dugja a hálózati kábel kisebbik csatlakozóját a készülék hátoldalán található AC~ aljzatba. Ellenőrizze, hogy
a csatlakozót teljesen bedugta-e az aljzatba.
35.
Page 36

36.
A kezelőszervek elhelyezése
Felülnézet
1. VOLUME MIN/MAX
2. AM/FM sávválasztó
A rádió vételi sávjának kiválasztása FM és AM
közül
3. MP3/USB/RADIO/OFF funkcióválasztó
Váltás az Audio CD/MP3 CD, USB és rádió
módok között, valamint a készülék
kikapcsolása
4. STOP
5. REPEAT
Ismétlési módok kiválasztása
6. SKIP Továbblépés az előző műsorszámra és
visszatekerés
7. -10
Továbblépés visszafelé 10
műsorszámmal/fájllal
Elölnézet
8. LCD kijelző
9. +10
Továbblépés előrefelé 10
műsorszámmal/fájllal
10. SKIP+
Továbblépés a következő műsorszámra és
előretekerés
11. PLAY/PAUSE
12. PROGRAM
Műsorszámok sorrendjének
programozása
13. Állomáskereső skála
14. TUNING szabályozógomb
15. Teleszkópantenna
16. CD meghajtó ajtaja
17. AC~ tápkábel csatlakozója
(a készülék hátoldalán)
18. Hangszórók
19. Fülhallgató csatlakozó
20. Elemtartó (a készülék alján)
21. USB port
22. Fogantyú
23. POWER jelzőlámpa
Page 37

Alapfunkciók
Be/kikapcsolás
A felesleges áramfogyasztás elkerülése érdekében mindig állítsa a funkcióválasztót az OFF pozícióba, ha
nem használja a készüléket. Bekapcsolt (ON) módban a POWER indikátor pirosan világít.
1. Válassza ki a funkcióválasztóval a kívánt módot: RADIO, MP3/USB vagy OFF.
2. Állítsa be a kívánt hangerőszintet a VOLUME MIN/MAX szabályozóval.
3. A készülék kikapcsolásához állítsa a funkcióválasztót az OFF pozícióba.
A készülék előlapján egy fejhallgató-csatlakozó található a privát zenehallgatáshoz (a fejhallgató nem
tartozék). A fejhallgatót 3,5 mm-es sztereó jack-dugóval csatlakoztathatja. Ebben az esetben a hangszórók
automatikusan elnémulnak.
Rádió
Javaslatok a jobb vétel érdekében
FM: Teljesen húzza ki a teleszkópos antennát. Ha a vételi jel nagyon erős (pl. az adó közelében), akkor
kissé tolja vissza az antennát.
AM: A készülék beépített AM-antennával rendelkezik; rossz vétel esetén változtassa meg a készülék
elhelyezkedését.
A rádió használata
1. Állítsa a funkcióválasztót a RADIO pozícióba.
2. Válassza ki a kívánt frekvenciát (FM vagy AM) a frekvenciaválasztóval.
3. A TUNING szabályozóval keresse meg kedvenc állomását.
4. Állítsa be a kívánt hangerőszintet a VOLUME MIN/MAX szabályozóval.
5. A készülék kikapcsolásához állítsa a funkcióválasztót az OFF pozícióba.
Audio CD és MP3 CD lejátszása
A CD-lejátszó csak Audio CD-ket és MP3 CD-ket tud lejátszani. Ne próbáljon Data CD-ket vagy VCD/DVD
lemezeket lejátszani.
1. Állítsa a funkcióválasztót az MP3/USB állásba. A kijelzőn rövid időre megjelenik az
“- - -“ felirat, majd a 000.
2. Nyissa ki a CD-lejátszó ajtaját kézzel, a bemélyedő fogantyú segítségével; az OP
felirat jelenik meg a kijelzőn.
3. Helyezzen be egy lemezt borítójával felfelé és kézzel zárja be a CD-lejátszó ajtaját. A kijelzőn először a
“- - -“ felirat jelenik meg, majd a műsorszámok teljes száma és a CD felirat. A kijelző a 001 és CD
feliratokra vált. A lejátszás automatikusan elindul. Megjelenik a megfelelő műsorszám sorszáma.
4. Amennyiben a lejátszás nem indul el (a lemeztől függően), nyomja meg a PLAY/PAUSE gombot az első
dal lejátszásának kézi elindításához.
5. A lejátszás megállításához nyomja meg a PLAY/PAUSE gombot; a folytatáshoz nyomja meg ismét ezt a
gombot. Pillanat-állj módban a ► jel villog.
6. A lejátszás befejezéséhez nyomja meg a STOP gombot; a kijelzőn ismét a lemezen található dalok száma
jelenik meg.
Megjegyzés:
A CD lejátszása akkor is megáll, ha:
a. felnyitja a CD-fedelet;
b. a funkcióválasztót a RADIO vagy az OFF pozícióba állítja;
c. a készülék már lejátszotta a CD-n levő összes dalt.
Skip mód
Lejátszás módban nyomja le a SKIP-, SKIP+, -10 vagy +10 gombot az előző vagy következő műsorszámra,
vagy a 10 műsorszámmal vissza illetve előre való továbblépéshez.
1. A playback (lejátszás), stop (állj) vagy pause (pillanat-állj) módok valamelyikében a SKIP-, SKIP+, -10 vagy
+10 gombokkal válassza ki a lejátszani kívánt dalt, majd a PLAY/PAUSE gombbal indítsa el a lejátszást.
2. Nyomja meg a SKIP+ gombot többször egymás után a következő műsorszám(ok)hoz való továbblépéshez
addig, amíg a kívánt műsorszám sorszáma nem lesz látható. Nyomja le a SKIP+ gombot az utolsó
műsorszám lejátszásakor a lemezen található első műsorszámhoz való továbblépéshez.
37.
Page 38

38.
3. Nyomja le a SKIP- gombot többször az előző műsorszám (ok) hoz való továbblépéshez. Nyomja le a
SKIP- gombot az első műsorszám lejátszásakor a lemezen található utolsó műsorszámhoz való
továbblépéshez.
4. Röviden nyomja le a +10 gombot 10 műsorszámmal való előrelépéshez. Ha kevesebb, mint 10
műsorszám van a lemezen, akkor a készülék a legutolsó fájlhoz lép. Nyomja le a +10 gombot az utolsó
műsorszám lejátszásakor a lemezen található első műsorszámhoz való továbblépéshez.
5. Röviden nyomja le a -10 gombot 10 műsorszámmal való visszalépéshez. A lemezen található első 10
műsorszám valamelyikének lejátszása esetén a készülék az első műsorszámhoz lép. Nyomja le a -10
gombot az első műsorszám lejátszásakor a lemezen található utolsó műsorszámhoz való továbblé
péshez.
Gyors előre- és visszatekercselés
Nyomja meg és tartsa lenyomva a SKIP+ vagy a SKIP- gombot a dalon belüli gyors előre-, illetve visszatekercselési funkció eléréséhez, egy adott pozíció megtalálásához. A hangerő ilyenkor csökken.
Programozott lejátszás
Akár 20 dal kívánt sorrendben történő lejátszása is beprogramozható; a dalok többször is szerepelhetnek a
programsorrendben.
1. A programozás előtt nyomja le a STOP és a PROGRAM gombot. A kijelzőn a CD
felirat mellett megjelenik a 000 és a PROG felirat.
2. A SKIP+, SKIP-, +10 vagy -10 gombbal válassza ki a beprogramozni kívánt első dalt.
3. Mentse el a műsorszámot a PROGRAM gomb lenyomásával. A kijelzőn a CD felirat
mellett megjelenik a PROG és a P01 felirat. Most válassza ki a következő
műsorszámot.
4. A további dalok beprogramozásához ismételje meg a 2-3. lépést; legfeljebb 20 dalt programozhat be.
5. Nyomja le a PLAY/PAUSE gombot a műsorszámok lejátszásának elindításához a kijelölt sorrendben.
Programozott módban a műsorszám sorszáma, a CD és a PROG felirat látható a kijelzőn.
6. Programozott módban az ismétlés funkció a teljes programra vonatkozik, a részletekről tájékozódjon az
Ismétlési módok rész 4. pontjából.
Program törléseS
A programot a következő lépésekkel törölheti:
1. Nyissa fel a CD-fedelet.
2. Állítsa a funkcióválasztót a RADIO vagy az OFF pozícióba.
3. Nyomja meg a STOP gombot.
Ismétlési módok
A készülék számos ismétlési módot kínál; ezek eléréséhez és kiválasztásához nyomja meg a REPEAT
gombot.
1. Nyomja meg egyszer a REPEAT gombot az éppen játszott dal megismétléséhez.
A kijelző a dal sorszáma mellett a REP 1 feliratot és a CD jelet mutatja.
2. Nyomja meg kétszer a REPEAT gombot a lemez teljes, a dalok eredeti sorrendjében
történő megismétléséhez. A kijelző a dal sorszáma mellett az ALL REP feliratot és a
CD jelet mutatja.
3. Nyomja meg ismét a REPEAT gombot a normál lejátszáshoz való visszatéréshez.
A kijelző ismét a dal sorszámát és a CD jelet mutatja.
4. Az ismétlés funkció a programozott lejátszás során is használható. Programozott
módban nyomja le egyszer a REPEAT gombot a teljes program megismétléséhez.
A kijelzőn megjelenik a PROG és az ALL REP felirat, a műsorszám sorszáma mellett.
Page 39

MP3 lejátszás USB eszközről
Csatlakoztassa az USB eszközt (USB memória, MP3 lejátszó, stb.) a készülék elején található USB porthoz.
Vegye ki a lemezt a meghajtóból. Nyomja le a STOP gombot a váltáshoz a lemez és USB módok között.
1. A kijelzőn rövid időre megjelenik az USB felirat, beolvasáskor a “- - -“ felirat és a fájlok száma látható.
A lejátszás automatikusan elindul.
2. Abban az esetben, ha a lejátszás nem indulna el automatikusan, nyomja le a PLAY/PAUSE gombot az
első fájl lejátszásának kézzel való elindításához.
3. Nyomja le a PLAY/PAUSE gombot a lejátszás szüneteltetéséhez; nyomja le ismét a lejátszás
folytatásához. Szünet módban a fájlok száma villog.
4. Nyomja le a STOP gombot a lejátszás megállításához; a kijelzőn újra a fájlok száma látható.
Megjegyzések:
Az USB lejátszása akkor is megáll, ha:
a. Kinyitják a CD-lejátszót;
b. A funkcióválasztót a RADIO vagy OFF állásba csúsztatják;
c. Az USB eszközön található minden műsorszám lejátszásra került.
Továbblépés mód
Lejátszás módban nyomja le a SKIP-, SKIP+, -10 vagy +10 gombot az előző vagy következő fájlra, vagy a 10
fájllal vissza illetve előre való továbblépéshez.
1. Válassza ki a fájlt a lejátszás, megállítás vagy szüneteltetés módokban a SKIP-, SKIP+, -10 vagy +10
gombbal és indítsa el a lejátszást a PLAY/PAUSE gomb lenyomásával.
2. Nyomja meg a SKIP+ gombot többször egymás után a következő fájl(ok)hoz való továbblépéshez addig,
amíg a kívánt fájl sorszáma nem lesz látható. Nyomja le a SKIP+ gombot az utolsó fájl lejátszásakor az
USB eszközön található első fájlhoz való továbblépéshez.
3. Nyomja le a SKIP- gombot többször az előző fájl(ok)ra való továbblépéshez. Nyomja le a SKIP- gombot az
első fájl lejátszásakor az USB eszközön található utolsó fájlhoz való továbblépéshez.
4. Röviden nyomja le a +10 gombot 10 fájllal való előrelépéshez. Ha kevesebb, mint 10 fájl van az USB
eszközön, akkor a készülék a legutolsó fájlhoz lép. Nyomja le a +10 gombot az utolsó fájl lejátszásakor az
USB eszközön található első fájlhoz való továbblépéshez.
5. Röviden nyomja le a -10 gombot 10 fájllal való visszalépéshez. Az USB eszközön található első 10 fájl
valamelyikének lejátszása esetén a készülék az első fájlhoz lép. Nyomja le a -10 gombot az első fájl
lejátszásakor az USB eszközön található utolsó fájlhoz való továbblépéshez.
Gyors előretekerés és visszatekerés
USB lejátszásakor a gyors előretekerés és visszatekerés funkciók nem használhatók
Programozott lejátszás
Legfeljebb 20 fájl programozható a kívánt sorrendben; az egyes fájlok többször is beprogramozhatók.
1. A programozás előtt nyomja le a STOP és a PROGRAM gombot. A kijelzőn a CD felirat mellett megjelenik
a 000 és a PROG. felirat.
2. Válassza ki a kívánt fájlt a SKIP+, SKIP-, +10 vagy -10 gombokkal.
3. Mentse el a fájlt a PROGRAM gomb lenyomásával. A kijelzőn megjelenik a PROG és a P01 felirat. Most
válassza ki a következő fájlt.
4. Ismételje meg a 2. és 3. lépéseket a további fájlok elmentéséhez, a fájlok maximális száma 20 lehet.
5. Nyomja le a PLAY/PAUSE gombot a fájlok lejátszásának elindításához a kijelölt sorrendben. Programozott
módban a fájl sorszáma és a PROG felirat látható a kijelzőn.
6. Programozott módban az ismétlés funkció a teljes programra vonatkozik, a részletekről tájékozódjon az
Ismétlési módok rész 4. pontjából.
Program törlése
A program törléséhez kövesse ezeket a lépéseket:
1. Nyissa ki a CD-lejátszót.
2. Állítsa a funkcióválasztót a RADIO vagy OFF állásba.
3. Nyomja le a STOP gombot.
39.
Page 40

40.
Ismétlési módok
A készülék többféle ismétlési módra képes; nyomja le a REPEAT gombot az ezekhez való hozzáféréshez és
kiválasztáshoz.
1. Nyomja le a REPEAT gombot egyszer az aktuális fájl megismétléséhez. A kijelzőn megjelenik a REP 1
felirat a fájl sorszáma mellett.
2. Nyomja le a REPEAT gombot kétszer az USB eszközön található összes fájl megismétléséhez. A kijelzőn
megjelenik az ALL REP felirat a fájl sorszáma mellett.
3. Nyomja le a REPEAT gombot ismét a normál lejátszási módba való visszatéréshez. A kijelzőn ismét a fájl
sorszáma jelenik meg.
4. Az ismétlés funkció a programozott lejátszás során is használható. Programozott módban nyomja le
egyszer a REPEAT gombot a teljes program megismétléséhez. A kijelzőn megjelenik a PROG és az ALL
REP felirat, a fájl sorszáma mellett.
A lemezek kezelése és tisztítása
A CD-K KEZELÉSE
* Vegye ki a CD-t a tokból.
* Ne érjen a felületéhez.
* Ne ragasszon öntapadó címkéket a CD-khez és ne írjon azokra.
* Ne hajlítsa meg a CD-ket.
A KÖZÉPTŐL A SZÉLE FELÉ
HELYES HELYTELEN
Tárolás
* A CD-ket mindig a tokban tárolja.
* Ne tegye ki közvetlen napsugárzásnak, magas hőmérsékletnek, nedvességnek vagy pornak.
A CD-k tisztítása
* A CD-ket puha törlőruhával tisztítsa.
* A CD-ket a középponttól kifelé haladva tisztítsa.
Page 41

HIBAELHÁRÍTÁS
Ha bármilyen problémát tapasztal a készülék használata során, előbb nézze át az alábbi listát mielőtt
kapcsolatba lép a vevőszolgálattal.
FIGYELMEZTETÉS: Soha ne nyissa fel a készüléket. A szervizelést és a karbantartást mindig bízza a
hivatalos vevőszolgálat szakembereire.
TÜNET LEHETSÉGES OK MEGOLDÁS
ÁLTALÁNOS
Nincs hang
A hangerőt túl halkra állította.
Az elemek kimerültek.
Az elemek nem megfelelően
vannak behelyezve.
Nincs csatlakoztatva a
Állítsa be a hangerőt.
Cserélje ki az elemeket.
Ügyeljen a polaritásra.
Csatlakoztassa a hálózati
kábelt.
shálózati kábel.
RADIO
Gyenge vétel
CD/MP3
A CD ugrik
Túl gyenge a jel.
Interferencia más
készülékekkel
(TV-készülékek,
videomagnók, számítógépek
stb.)
A CD/MP3 szennyezett vagy
sérült.A készüléket meglökték.
Állítsa be az antennát:
FM: teleszkópos antenna.
AM: módosítsa a készülék
elhelyezését.
Ne tegyen közel a készülékhez
más elektromos eszközöket.
Cserélje ki vagy tiszítsa meg a
lemezt.
Tartsa szilárdan a készüléket
működés közben, vagy tegye le.
Kijelzés: - - - Nincs CD behelyezve.
A CD szennyezett vagy
sérült.
Páralecsapódás a lézerfejen.
A CD-R/RW lemez üres vagy
nincs lezárva.
Helyezzen be egy CD, CD-R
vagy CD-RW lemezt.
Cserélje ki vagy tiszítsa meg a
lemezt.
Várjon, amíg a lézerfej teljesen
megszárad (kb. 1 óra).
Zárja le a CD-R/RW lemezt.
MŰSZAKI ADATOK
Általános tudnivalók
Áramellátás: 230 V~50 Hz váltóáram
9V egyenáram (6 db LR14 / UM-2 / C típusú, 1,5 V-os elem)
(az elemeket külön kell megvásárolni)
Energiafogyasztás: 13 Watt
Frekvenciatartomány: AM 525 – 1615 kHz
FM 87,5 – 108 MHz
Audio
Hangszóró impedancia: 8 Ohm
Méretek: kb. 239 x 205 x 121
Súly: kb. 1,4 kg
Előzetes bejelentés nélkül változhatnak.
mm
41.
Page 42

42.
MODELLO: 6698RB
Radio con lettore CD/ MP3/WMA e porta USB
ISTRUZIONI DI SICUREZZA
AVVERTIMENTO
RISCHIO DI SCOSSE
sELETTRICHE NON APRIRE
ATTENZIONE: PER RIDURRE IL
Il triangolo con inscritto il
simbolo di un lampo attira
l’attenzione dell’utente su
“voltaggio pericoloso” senza
isolamento all’interno
dell‘involucro, che potrebbe
essere sufficientemente alto
da costituire rischio di scosse.
RISCHIO DI SCOSSE ELETTRICHE,
NON RIMUOVERE LA COPERTURA
(O IL FONDO). ALL’INTERNO NON VI
è ALCUNA COMPONENTE CHE
POSSA ESSERE RIPARATA
DALL’UTENTE. PER LE RIPARAZ-
IONI, RIVOLGERSI A PERSONALE
QUALIFICATO.
NFORMAZIONI AGGIUNTIVE
Prestate attenzione ai pezzettini e alle batterie, non inghiottiteli. Potrebbe essere nocivo alla
vostra salute ecausare soffocamento. Prestate la massima attenzione a tenere i piccoli dispositivi
e le batterie lontani dalla portata dei bambini.
Importante suggerimento riguardo alla protezione dell’udito
Attenzione:
Avete a cuore il vostro udito, così come noi.
Pertanto, fate attenzione quando usate questo apparecchio.
La nostra raccomandazione è di: Evitare un volume eccessivo.
Dovesse l’apparecchio essere usato da bambini, assicuratevi che esso non sia regolato su un
volume eccessivo.
Attenzione!
Un volume eccessivo potrebbe causare danni irreversibili all’udito dei vostri bambini.
Il triangolo con inscritto il
punto esclamativo attira
l’attenzione dell’utente su
importanti istruzioni relative
all’uso e alla.
MAI lasciare che nessuno, ed in particolar modo bambini, metta alcun oggetto sopra i buchi,
scappatoie o alter aperture sul dispositivo. Ciò potrebbe causare la morte da scossa elettrica. Il
dispositivo deve essere aperto solo da un assistente qualificato.
Usate l'apparecchio solo per il proposito per cui è stato disegnato.
L'apparecchio è destinato unicamente all'utilizzo in ambienti domestici e di lavoro.
Conservare accuratamente le istruzioni per l’uso per futuro riferimento.
Avvertenze per la tutela dell’ambiente
Una volta inutilizzabile il prodotto non deve essere smaltito con i rifiuti domestici ma portato
presso un punto di raccolta per il riciclo di apparecchiature elettriche. Ciò è indicato dal simbolo
presente sul prodotto, sulle istruzioni per l’uso o sulla confezione.
I materiali riciclabili sono riutilizzabili a seconda delle loro caratteristiche. Con il riutilizzo, con il
riciclaggio dimateriale o altri tipi di riciclaggio di apparecchi vecchi fornirete un importante
contributo alla tutela ambientale. Informatevi presso l’amministrazione comunale sui punti di
smaltimento competenti.
Page 43

Non ostacolate la ventilazione del dispositivo. Assicuratevi che né tende, giornali, coperte o mobili
blocchino le scappatoie della ventilazione dell’apparato. La ventilazione dev’essere costantemente
assicurata Un eventuale surriscaldamento potrebbe causare seri danni al dispositivo e ridurre sia le
prestazioni che la durata del funzionamento.
Riscaldamento e calore
Non esponete l’apparecchio a luce del sole diretta. Assicuratevi che l’apparecchio non sia soggetto
a fonti di calore dirette come stufe o fiamme. Assicuratevi che le vie di ventilazione dell’apparecchio
non siano coperte.
Umidità e pulizia
L’apparecchio non è subacqueo Non immergete il lettore nell’acqua. Non lasciate che il lettore
venga a contatto con acqua. Dell’acqua che dovesse incidentalmente cadere sul lettore potrebbe
causare seri danni. Non usate detergenti che contengano alcool, ammoniaca, benzene o abrasivi in
quanto questi potrebbero danneggiare il lettore. Per pulire, usate un panno soffice e umido.
Riciclaggio professionale
Le batterie e l’imballaggio non fanno parte della vostra spazzatura casalinga. Le batterie devono
essere passate ad un centro di raccolta per batterie usate. Disporre separatamente dei materiali
d’imballaggio è un aiuto alla conservazione dell’ambiente.
ISTRUZIONI DI SICUREZZA
1. LEGGERE LE ISTRUZIONI - Leggere attentamente le istruzioni di sicurezza e d’uso prima di adoperare
l’apparecchio.
2. CONSERVARE LE ISTRUZIONI - Le istruzioni di sicurezza e d’uso dovrebbero essere conservate per
riferimento futuro.
3. RISPETTARE LE AVVERTENZE - Rispettare tutte le avvertenze contenute nel manuale d’uso
dell’apparecchio.
4. SEGUIRE LE ISTRUZIONI - Seguire accuratamente tutte le istruzioni d’uso.
5. ACQUA ED UMIDITÀ - L’apparecchio non deve essere collocato vicino all’acqua, ad es. nei pressi di
vasche da bagno, lavabi, lavelli, vasche per il bucato, piscine o in seminterrati umidi.
6. VENTILAZIONE – Le aperture sull’apparecchio servono per la ventilazione e sono necessarie per il
funzionamento e la prevenzione del surriscaldamento. Non collocare l’apparecchio in ubicazioni che ne
prevengano la corretta ventilazione. Non collocare su letti, divani, tappeti o altre superfici simili sulle quali
le aperture potrebbero essere ostruite, in spazi chiusi quali librerie ed armadi, dove il flusso di aria nelle
aperture di ventilazione possa essere impedito.
7. CALORE - L’apparecchio non deve essere collocato vicino a fonti di calore, quali radiatori, stufe od altri
elettrodomestici (amplificatori inclusi) che producono calore.
8. ALIMENTAZIONE - L’apparecchio dovrebbe essere connesso solo a fonti di alimentazioni del tipo
descritto nel manuale d’uso o indicato sull’apparecchio stesso.
9. SALVAGUARDIA DEL CAVO DI ALIMENTAZIONE - Assicurarsi che i cavi di alimentazione non siano a
rischio di essere calpestati o schiacciati da oggetti posti al di sopra o a ridosso di essi.
10. IN CASO DI NON UTILIZZO – Durante lunghi periodi di non utilizzo, scollegare i cavi di alimentazione ed
antenna.
11. INGRESSO DI OGGETTI O LIQUIDI – Assicurarsi che oggetti o liquidi non penetrino nell’apparecchio
attraverso le aperture.
12. GUASTO CHE RICHIEDE ASSISTENZA - L'apparecchio dovrà ricevere assistenza da personale
qualificato se:
a. il cavo di alimentazione o la spina sono danneggiati;
b. oggetti o liquidi sono penetrati all’interno dell’involucro dell’apparecchio;
c. l’apparecchio è stato esposto a pioggia od umidità;
d. L’apparecchio è caduto e l’interno è danneggiato. Utilizzare solo controlli e accessori specificati nel
manuale.
e. L’unità non sembra funzionare normalmente.
f. l’apparecchio dimostra un serio calo nelle prestazioni.
43.
Page 44

44.
13. ASSISTENZA – L’utente non è autorizzato a riparare l’apparecchio oltre i limiti descritti nel manuale
d’istruzioni per l’utente. Per ogni altra riparazione rivolgersi a personale di assistenza qualificato.
14. PULIZIA – Scollegare il cavo di alimentazione prima di pulire. Non utilizzare detergenti liquidi o spray, ma
un semplice panno umido. Seguire le istruzioni per la cura e manutenzione contenute nel presente
manuale.
15. ILLUMINAZIONE – Durante temporali e lunghi periodi di non utilizzo, scollegare il cavo di alimentazione
e l’antenna.
16. CONTROLLO DI SICUREZZA – Dopo aver ricevuto assistenza, fare richiesta presso il servizio clienti per
un controllo di sicurezza.
17. SOVRACCARICO – Per evitare incendi e scosse elettriche non sovraccaricare le prese elettriche e le
prese multiple.
18. SCARICA ELETTROSTATICA – Scollegare dall’alimentazione e rimuovere le batterie se l’unità non
funziona a dovere. Riconnettere dopo breve tempo.
ATTENZIONE
IL LETTORE CD È UN PRODOTTO LASER DI CLASSE I. QUESTO LETTORE CD UTILIZZA UN RAGGIO
LASER /VISIBILEINVISIBILE CHE POTREBBE CAUSARE ESPOSIZIONE A RADIAZIONI PERICOLOSE.
UTILIZZARE IL LETTORE CD CORRETTAMENT COME DESCRITTO.
RADIAZIONE LASER INVISIBILE QUANDO LA COPERTURA È APERTA O IL DISPOSITIVO DI BLOCCO È
DISATTIVATO. NON ESPORSI AL RAGGIO!
NON TOCCARE LA LENTE LASER.
UN UTILIZZO DEI COMANDI O REGOLAZIONI O UN’ESECUZIONE DI PROCEDURE DIVERSE DA
QUELLE SPECIFICAT NEL PRESENTE MANUALE POTREBBERO CAUSARE ESPOSIZIONE A
RADIAZIONI PERICOLOSE.
PER RIDURRE IL RISCHIO DI FUCO O SHOCK ELETTRICO ED EVITARE INTERFERENZE UTILIZZARE
SOLO ACCERROSI CONSIGLIATI.
Regolazione sicura del livello del volume
• Se si ascolta sempre musica alta, il vostro udito si adatta gradualmente e avrete l’impressione che il volume
sia basso.
• Quello che può sembrare normale può essere dannoso.
• Per proteggervi da ciò, regolare il volume ad un livello basso.
• Alzare il volume lentamente fino a sentire chiaramente e senza problemi.
• Danni all'udito possono essere gravi e irreversibili.
• Se si nota un problema all’udito consultare un medico.
Ulteriori informazioni
• Se utilizzato per un tempo prolungato, il dispositivo si riscalda. Si tratta di un fenomeno normale.
• Tenere sempre chiuso lo sportello del CD in modo che all'interno non si accumuli polvere. Durante la
pulizia, passare lo scomparto del CD con un panno morbido asciutto.
• I componenti meccanici dell'apparecchio contengono cuscinetti auto-lubrificanti. Non oliare né lubrificare!
• Utilizzare l'apparecchio sono in condizioni climatiche moderate.
• Non adatto a bambini di età inferiore ai tre anni.
Condensa
Si può creare della condensa spostando l’apparecchio da un ambiente freddo ad uno tiepido. Se c’è
condensa all’interno dello stereo, potrebbe non funzionare in modo corretto.
Si prega di collegarlo alla corrente e di attendere circa un’ora per fare evaporare la condensa.
Proteggere l’apparecchio dalla pioggia e dall’umidità, dalla sabbia, dalla polvere e da calore eccessivo (ad
esempio nel veicolo parcheggiato al sole in estate) e dai raggi solari diretti.
Page 45

Spostamento del dispositivo
• Rimuovere il CD prima di spostare il dispositivo.
• Si consiglia di rimuovere il CD e spegnere il dispositivo se non in uso.
Posizionamento del dispositivo
• Evitare vibrazioni, urti e superfici inclinate, per evitare seri danni ai componenti interni.
• Non porre oggetti pesanti sul lettore.
• Non porre mai il lettore sopra amplificatori o altri dispositivi che possano riscaldarsi.
Rimozione dell’imballaggio:
• Estrarre il dispositivo dalla confezione e rimuovere tutto il materiale d’imballaggio.
• Conservare la confezione per un eventuale uso futuro, se il dispositivo deve essere consegnato per
assistenza.
• Se si desidera smaltire il materiale d’imballaggio, rispettare le norme vigenti.
• Rimuovere la protezione della lente dall’unità CD.
Alimentazione
Ogni qualvolta sia possibile, collegare l'apparecchio all'impianto elettrico per preservare la batteria. Scollegarsi
dall'impianto elettrico prima di inserire le batterie.
Funzionamento a batteria (Batterie non fornite)
Aprire il vano batterie ed inserire 6 batterie di tipo LR-14, UM-2 o C (preferibilmente alcaline). Rispettare la
polarità riportata all'interno del vano batterie con i simboli “+” e “-“.
Per utilizzare l'apparecchio alimentandolo a batterie, prima disconnettere la piccola presa di alimentazione sul
retro.
Quando viene collegato il cavo di alimentazione, l'apparecchio passa automaticamente all'alimentazione da
impianto.
Precauzioni relative alla sicurezza delle batterie:
- Seguire sempre le istruzioni relativa alla sicurezza e all'uso fornite dal produttore delle batterie.
- Tenere le batterie fuori dalla portata di bambini e animali domestici.
- Non gettare mai le batterie nel fuoco. Non esporre le batterie a fiamme e altre sorgenti di calore.
- Smaltimento delle batterie: le batterie esaurite devono essere smaltite correttamente e riciclate ai sensi delle
disposizioni vigenti. Per informazioni dettagliate in proposito, contattare l'autorità locale competente.
- Non utilizzare contemporaneamente batterie nuove ed usate.
- Non utilizzare contemporaneamente batterie di diverso tipo, come ad esempio alcaline e zinco/carbonio.
Utilizzare esclusivamente batterie dello stesso tipo.
- Se si prevede di non utilizzare il dispositivo per un periodo di tempo prolungato, rimuovere le batterie per
prevenire danni dovuti alla loro ossidazione o corrosione.
Funzionamento da impianto
- Collegare il cavo di alimentazione ad una presa a muro AC 230V~50Hz.
- Utilizzare l'apparecchio solo su impianti che corrispondano alle specifiche riportate nell'etichetta.
- Inserire la spina più piccola del cavo di alimentazione nel jack AC~ sul retro dell'apparecchio. Assicurarsi che
la spina sia completamente inserita.
45.
Page 46

46.
Posizione dei comandi
Vista dall'alto
1. VOLUME MIN/MAX
2. Selettore di banda AM/FM
Seleziona ricezione radio tra FM e AM
3. Selettore di funzione MP3/USB/RADIO/OFF
Seleziona tra Audio CD/MP3 CD, USB e
modalità radio e spegne l’unità
4. STOP
5. REPEAT
Selezione modalità ripeti
6. SKIP Passa alla traccia precedente e riavvolgimento
rapido
7. -10
Passa a 10 tracce/file indietro
Vista Retro
8. Display LCD
9. +10
Passa a 10 tracce/file avanti
10. SKIP+
Passa alla traccia successiva e
avanzamento rapido
11. PLAY/PAUSE
12. PROGRAM
Sequenza tracce
13. Scala di selezione
14. TUNING controllo
15. Antenna telescopica
16. Porta unità CD drive
17. AC~ jack principale
(sul retro dell’unità)
18. Altoparlanti
19. jack cuffie
20. Scomparto batterie (in basso all’unità)
21. Porta USB
22. Impugnatura
23. Indicatore POWER
Page 47

Funzionamento elementare
Accensione/Spegnimento
Per evitare un inutile consumo di energia, posizionare il selettore di funzione su OFF quando l'apparecchio
non è in funzione. Quando impostato su ON, la spia POWER diventa rossa.
1. Selezionare la modalità desiderata mediante il selettore di funzione: RADIO, MP3/USB o OFF.
2. Impostare il volume desiderato mediante VOLUME MIN/MAX.
3. Posizionare il selettore di funzione su OFF per spegnere l'apparecchio.
Sulla parte anteriore dell'apparecchio si trova il jack cuffie che permette l'ascolto in privato (cuffie non
fornite). Collegare le cuffie dotate di jack stereo da 3,5 mm. Al momento del collegamento, l'audio degli
altoparlanti viene automaticamente disattivato.
Radio
Consigli per una migliore ricezione
FM: Estendere completamente l'antenna telescopica. Se il segnale in ricezione è troppo forte (ad esempio
in prossimità di una stazione), accorciare l'antenna telescopica.
AM: L'apparecchio è dotato di un'antenna AM incorporata; cambiare la posizione dell'apparecchio in caso
di bassa qualità della ricezione.
Funzionamento della Radio
1. Posizionare il selettore di funzione su RADIO.
2. Selezionare la banda di frequenza desiderata mediante il selettore di banda: FM o AM.
3. Sintonizzarsi sulla stazione radio preferita mediante il controllo TUNING.
4. Impostare il volume desiderato mediante VOLUME MIN/MAX.
5. Posizionare il selettore di funzione su OFF per spegnere l'apparecchio.
Riproduzione CD audio e CD MP3
Il lettore CD può riprodurre solo CD audio e CD mp3. Non cercare si riprodurre CD dati o dischi VCD/DVD.
1. Impostare il selettore di funzione sulla posizione MP3/USB. Sul display compare “- - -“
per un breve tempo, poi mostra 000.
2. aprire lo scomparto CD manualmente; viene visualizzato OP.
3. Inserire un disco con l’etichetta rivolta verso l’alto e chiudere lo scomparto CD
manualmente. All’inizio compara “- - -“, dopo il numero totale delle tracce e CD. Il display passa da 001 e
CD. E la riproduzione riprende automaticamente. Il numero della traccia corrispondente viene visualizzato.
4. Se la riproduzione non si avvia (a seconda del disco), premere PLAY/PAUSE per avviare manualmente la
riproduzione della prima traccia.
5. Premere PLAY/PAUSE per sospendere la riproduzione; premere nuovamente per riprendere la
riproduzione. Quando si è in pausa, ► lampeggia.
6. Premere STOP per interrompere la riproduzione; sul display compare nuovamente il numero totale delle
tracce.
Note:
La riproduzione del CD viene interrotta anche quando:
a. si apre il vano CD;
b. si posiziona il selettore di funzione su RADIO o OFF;
c. tutte le tracce sul CD sono state riprodotte.
Modalità Skip
In modalità di riproduzione premere SKIP-, SKIP+, -10 o +10 per passare alla traccia precedente o alla
traccia successive o 10 tracce avanti o indietro.
1. Selezionare la traccia in riproduzione, in stop o pausa mediante SKIP- SKIP+, -10 o +10 e avviare la
riproduzione premendo PLAY/PAUSE.
2. Premere SKIP+ ripetutamente alla traccia successiva, finché non compare il numero della traccia
desiderato. Premere SKIP+ durante la riproduzione dell’ultima traccia per passare alla prima traccia del
disco.
3. Premere SKIP- ripetutamente per passare alla traccia precedente. Premere SKIP+ durante la
riproduzione della prima traccia per passare all’ultima traccia del disco.
47.
Page 48

48.
4. Premere brevemente +10 per passare dieci tracce avanti. Se è rimasto un numero di tracce inferiore a 10
sul disco si passa all’ultima traccia. Premere +10 durante la riproduzione dell’ultima traccia per passare
alla prima traccia del disco.
5. Premere brevemente -10 per passare dieci tracce indietro. Se si è entro le prime 10 tracce del disco si
passa alla prima traccia. Premere -10 durante la riproduzione della prima traccia per passare all’ultima
traccia del disco.
Avanzamento veloce e riavvolgimento
Tenere premuti SKIP+ o SKIP- per accedere alle funzioni di avanzamento e riavvolgimento veloce lungo una
traccia per individuare una determinata posizione. Il volume viene diminuito.
Riproduzione programma
Si possono programmare nell'ordine desiderato fino a 20 tracce. Una traccia può essere inserita più volte.
1. Prima della programmazione, premere STOP e PROGRAM. Il display mostra 000 e PROG oltre CD.
2. Selezionare la prima traccia desiderata mediante SKIP+, SKIP-, +10 o -10.
3. Salvare la traccia con PROGRAM. Il display mostra CD e PROG oltre P01.
Ora selezionare la traccia successive.
4. Ripetere i punti 2 e 3 per programmare altre tracce, il numero massimo è 20.
5. Premere PLAY/PAUSE per avviare la riproduzione delle tracce nella sequenza
desiderata. In modalità programma il numero della traccia, CD e PROG sono visualizzati.
6. In modalità programma è disponibile la funzione ripeti per l’intero programma, vedere i dettagli al
paragrafo Modalità Ripeti punto 4.
Cancellazione del programma
Per cancellare il programma seguire le seguenti istruzioni:
1. Aprire il vano CD.
2. Posizionare il selettore di funzione RADIO o OFF.
3. Premere STOP.
Modalità di ripetizione
Sull'apparecchio sono disponibili diverse modalità di riproduzione; premere REPEAT per accedervi e
selezionarle.
1. Premere una volta REPEAT per ripetere la traccia corrente. Sul display compare
REP 1 accanto al numero di traccia e CD.
2. Premere due volte REPEAT per ripetere il disco nella sequenza originale. Sul display
compare ALL REP accanto al numero di traccia e CD.
3. Premere nuovamente REPEAT per ripristinare la normale riproduzione. Sul display
compaiono di nuovo il numero di traccia e CD.
4. E’ anche possibile utilizzare la funzione ripeti durante la ripetizione del programma.
In modalità programma premere REPEAT una volta per ripetere il programma
completo. Il display mostra oltre al numero della traccia anche PROG e ALL REP.
Riproduzione di MP3 da dispositivo USB
Connettere il dispositivo USB (penna USB, lettore MP3, ecc.) alla porta USB sul lato frontale. Rimuovere il
disco dall’unità. Premere STOP per spostarsi tra le modalità disco e USB.
1. Il display mostra USB, durante la lettura “- - -“ e il numero dei file viene visualizzato. La riproduzione avrà
inizio automaticamente.
2. In caso la riproduzione non si avvia automaticamente premere PLAY/PAUSE per avviare manualmente la
riproduzione del primo file.
3. Premere PLAY/PAUSE per interrompere la riproduzione; premere nuovamente per continuare. in modalità
pausa il numero del file lampeggia.
4. Premere STOP per interrompere la riproduzione; il display mostra di nuovo il numero totale dei file.
Page 49

Note:
La riproduzione del dispositivo USB viene anche interrotta:
a. Aprire lo scomparto CD;
b. spostando il selettore su RADIO o TAPE;
c. Tutte le tracce del dispositivo USB sono state riprodotte.
Modalità Skip
In modalità di riproduzione premere SKIP-, SKIP+, -10 o +10 per passare alla traccia precedente o alla
traccia successive o 10 tracce avanti o indietro.
1. Selezionar il file in modalità riproduzione, stop o pausa con SKIP-, SKIP+, -10 o +10 e avviare la
riproduzione premendo PLAY/PAUSE.
2. Premere SKIP+ ripetutamente alla traccia successiva, finché non compare il numero della traccia
desiderato. Premere SKIP+ durante la riproduzione dell’ultima traccia per passare alla prima traccia del
dispositivo USB.
3. Premere SKIP- ripetutamente per passare alla traccia precedente. Premere SKIP- durante la riproduzione
della prima traccia per passare all’ultima traccia del dispositivo USB.
4. Premere brevemente +10 per passare dieci tracce avanti. Se è rimasto un numero di tracce inferiore a 10
sul dispositivo USB si passa all’ultima traccia. Premere +10 durante la riproduzione dell’ultima traccia per
passare alla prima traccia del dispositivo USB.
5. Premere brevemente -10 per passare dieci tracce indietro. Se si è entro le prime 10 tracce del dispositivo
USB si passa alla prima traccia. Premere -10 durante la riproduzione della prima traccia per passare
all’ultima traccia del dispositivo USB.
Riavvolgimento e Avanzamento Rapido
In riproduzione USB non è disponibile la funzione di riavvolgimento o avanzamento rapido.
Programmazione della riproduzione
E’ possibile programmare fino a 20 tracce nella sequenza desiderata; ogni traccia può essere programmata
più di una volta.
1. Prima della programmazione, premere STOP e PROGRAM. Il display mostra 000 e PROG oltre CD.
2. Selezionare il file desiderato con SKIP+, SKIP-, +10 o -10.
3. Salvare la traccia con PROGRAM. Il display mostra PROG e P01. Ora selezionare la traccia successiva.
4. Ripetere le fasi 2 e 3 per salvare altri file, il numero Massimo di file è 20.
5. Premere PLAY/PAUSE per avviare la riproduzione delle tracce nella sequenza desiderata. In modalità
programma il numero della traccia e PROG sono visualizzati.
6. In modalità programma è disponibile la funzione ripeti per l’intero programma, vedere i dettagli al
paragrafo Modalità Ripeti punto 4.
Annullare un programma
Seguire le seguenti fasi per cancellare il programma:
1. Aprire lo scomparto CD.
2. Ruotare il selettore funzione su RADIO o TAPE.
3. Premere STOP.
Modalità Ripeti
Sono disponibili diverse modalità ripeti; premere REPEAT per accedere e selezionare.
1. Premere una volta REPEAT per ripetere il file corrente Il display mostra REP 1 oltre al numero del file.
2. Premere REPEAT due volte per ripetere tutti I file del dispositivo USB. Il display mostra ALL REP oltre al
numero del file.
3. Premere di nuovo REPEAT per tornare alla riproduzione normale. Il display mostra nuovamente il numero
del file.
4. E’ anche possibile utilizzare la funzione ripeti durante la ripetizione del programma. In modalità
programma premere REPEAT una volta per ripetere il programma completo. Il display mostra oltre al
numero della traccia anche PROG e ALL REP.
49.
Page 50

50.
Maneggiare e pulire dischi
TRATTAMENTO DEI CD
* Togliere il CD dalla custodia.
* Non toccare le superfici.
* Non applicare adesivi e non scrivere sui dischi.
* Non piegare i CD.
DAL CENTRO VERSO IL BORDO
CORRETTO SCORRETTO
Stoccaggio
* Riporre sempre i CD nella loro custodia.
* Evitare che i dischi siano esposti alla luce solare diretta, a temperature elevate, umidità e polvere..
Pulizia dei CD
* Pulire i CD con un panno morbido.
* Pulire i CD dal centro verso il bordo.)
Page 51

PROBLEMI E SOLUZIONI
Se si verifica un problema, prima di contattare l'assistenza clienti, verificare l'elenco di seguito.
ATTENZIONE: Non aprire mai il dispositivo. Per le riparazioni e la manutenzione rivolgersi sempre al
personale del servizio di assistenza autorizzato.
SINTOMO POSSIBILE CAUSA SOLUZIONE
GENERALE
Nessun suono
Volume troppo basso.
Batterie esaurite.
Batterie inserite in modo
scorretto.
Cavo di alimentazione
Regolare il volume.
Sostituire le batterie.
Rispettare la polarità.
Collegare correttamente il cavo
di alimentazione.
scollegat
RADIO
Ricezione scarsa
Segnale debole.
Interferenze di altri dispositivi
(TV, VCR, computer, ecc.).
Regolare l’antenna:
FM: Antenna telescopica.
AM: Regolare l’unità.
Tenere una certa distanza da
altri dispositivi.
CD/MP3
Il CD salta
CD/MP3 sporco o
danneggiato.
L’unità è stata mossa.
Display: - - - Nessun CD inserito.
Il CD è sporco o danneggiato.
Condensa sulla lente del laser.
CD-R/RW è vuoto o non
finalizzato.
Sostituire o pulire il disco.
Tenere l’unità ferma durante il
funzionamento.
Inserire un CD, CD-R o CD-RW.
Sostituire o pulire il CD.
Attendere che la lente del laser
sia completamente asciutta
(ca. 1 ora).
Finalizzare il CD-R/RW.
SPECIFICHE TECNICHE
Generali
Alimentazione: AC 230V~50Hz
DC 9V (6 batterie di tipo LR14 / UM-2 / C, da 1,5V)
(batterie non fornite)
Consumo: 13 Watt
Gamma di frequenza: AM 525 – 1615kHz
FM 87,5 – 108MHz
Audio
Impedenza altoparlanti: 8 Ohm
Dimensioni: circa x 239 x 205 x 121
Peso: circx 1,4 kg
mm
Soggetto a modifica senza preavviso.
51.
Page 52

52.
MODELO: 6698RB
Radio de diseño con reproductor CD/ MP3/ WMA y puerto USB
INSTRUCCIONES DE SEGURIDAD
ADVERTENCIA RIESGO DE
DESCARGA ELÉCTRICA
Un triángulo con un símbolo de
rayo con punta dentro de un
triángulo tiene el propósito de
alertar al usuario de la
presencia de voltaje “peligroso”
no aislado dentro de la caja
que puede ser de suficiente
magnitud para constituir un
riesgo de descarga eléctrica a
los seres humanos.
ADVERTENCIA: PARA PREVENIR EL
RIESGO DE SUFRIR UNA
DESCARGA ELÉCTRICA, NO QUITE
LA CUBIERTA.. NO HAY PIEZAS A
LAS QUE PUEDA DAR SERVICIO
DENTRO. REFIERA TODO EL
SERVICIO A PERSONAL
CUALIFICADO.
INFORMACIÓN ADICIONAL
Vigile que nadie se trague las piezas pequeñas ni las pilas del aparato, puesto que es potencialmente muy dañino para la salud y puede provocar asfixia. Preste mucha atención especialmente
en el caso de los niños.
Aviso importante respecto a la protección de sus oídos
Cuidado:
Su capacidad auditiva nos preocupa tanto como a usted.
Por lo tanto, tenga precaución cuando use el aparato.
Le recomendamos que evite escuchar música a niveles altos de volumen.
En caso de que el aparato sea usado por niños, asegúrese que no la usen a un volumen muy
alto.
¡Peligro!
Niveles de volumen altos pueden causar daños irreparables a los oídos de los niños.
Este signo de exclamación
dentro de un triángulo tiene
el propósito de alertar al
usuario de la existencia de
importantes instrucciones de
operación y mantenimiento
(servicio) en este manual.
No permita NUNCA que nadie, en especial niños, ponga objetos dentro de los huecos, ranuras u
otras aberturas del aparato. Existe riesgo de sufrir descargas eléctricas que pueden causar la
muerte. El aparato solo debe ser abierto por un operario calificado.
Use el aparato únicamente para los propósitos que fue diseñado.
El aparato está concebido exclusivamente para ser usado en viviendas y áreas de negocio.
Le recomendamos que conserve las instrucciones de uso para un eventual uso posterior.
Indicaciones sobre el medio ambiente
No deseche este producto en la basura doméstica una vez que se haya cumplido su vida útil,
deposítelo en un punto de recogida de aparatos eléctricos y electrónicos. El símbolo que se
encuentra en el producto, el manual de usuario o el embalaje, hacen referencia a este punto.
El plástico es reutilizable según esté indicado. Con la reutilización de productos de plástico u otra
clase de reciclaje de aparatos viejos, está contribuyendo de forma importante a la conservación
del medio ambiente.
Infórmese en su administración local sobre la entidad de eliminación de residuos competente.
Page 53

No impida la ventilación del aparato. Asegúrese, que cortinas, periódicos, manteles o muebles no
estén bloqueando las ranuras de ventilación del aparato. ¡Se debe asegurar una ventilación
correcta todo el tiempo! El sobrecalentamiento puede causar serios daños en el interior del aparato,
provocando problemas de funcionamiento y acortando el tiempo de vida útil del producto.
Calor
No exponga el aparato a la luz solar directa. Asegúrese que el aparato no esta expuesto directamente a Fuentes de calor como calefactores o fuego. Asegúrese que las ranuras de ventilación del
aparato no esté n cubiertas.
Humedad y limpieza
Este aparato no es impermeable! No sumerja el aparato en el agua. No permite que el aparato
entre en contacto con el agua. La entrada de agua en el aparato causa serios problemas y daños.
No use agentes limpiadores que contengan alcohol, amoniacos, benceno o abrasivos. Éstos
pueden dañar al aparato. Para la limpieza use un paño suave y húmedo.
Reciclaje profesional
No deseche las pilas ni el material de embalaje con la basura doméstica. Las pilas deben ser
recogidas por el personal del centro recolector de baterías usadas. Desechar separadamente los
materiales de embalaje es de gran ayuda para el medio ambiente.
INSTRUCCIONES DE SEGURIDAD
1. LEA LAS INSTRUCCIONES – Lea atentamente las instrucciones de seguridad y funcionamiento antes de
usar el aparato.
2. GUARDE LAS INSTRUCCIONES – Guarde estas instrucciones de seguridad y funcionamiento para un
uso futuro.
3. ADVERTENCIAS –Siga todas las advertencias en este aparato y en el manual de instrucciones.
4. SIGA LAS INSTRUCCIONES – Siga todas las instrucciones de seguridad de este manual.
5. AGUA Y HUMEDAD – El aparato no debe usarse cerca del agua, como cerca de una bañera, lavabo,
fregadero de cocina, lavadero, piscina o en un sótano húmedo.
6. VENTILACIÓN – las aperturas del dispositivo sirven para la ventilación del aparato, son necesarias para
el funcionamiento y prevención de sobrecalentamiento. El aparato tiene que estar colocado de forma que
su posición no interfiera con su propia ventilación. No coloque el aparato en camas, sofás, alfombras o
superficie similar que puede obstruir las aperturas de ventilación, en una instalación incorporada, tales
como una estantería o armario que impida el flujo de aire a través de las aperturas de ventilación.
7. CALOR – No coloque este aparato cerca de Fuentes de calor tales como radiadores, estufas u otros
aparatos (incluido amplificadores) que producen calor.
8. FUENTE ELÉCTRICA – Este aparato debe conectarse a la toma de corriente del tipo descrito en las
instrucciones de funcionamiento o escrito en el aparato.
9. PROTECCIÓN DEL CABLE DE ALIMENTACIÓN – el cable de alimentación tiene que ser guiado con el
fin de no andar sobre él o pinchado con artículos colocados en él o contra él.
10. DEJAR DE USAR – Durante largos periodos de tiempo sin usar el aparato, por favor, desconéctelo de la
toma de corriente y desconecte la antena también.
11. OBJETO Y ENTRADA DE LÍQUIDO – debe tener cuidado que ningún objeto o líquido caiga en el aparato
o sea vertido en las aperturas del aparato.
12. DAÑOS QUE REQUIEREN REVISIÓN – Esta unidad deber ser revisada por personal cualificado cuando:
a. El cable de alimentación o enchufe ha sido dañado.
b. Los objetos han sufrido una caída o cualquier líquido ha sido vertido en el aparato.
c. Este aparato ha sido expuesto a la lluvia o humedad.
d. El aparato ha caído, o el chasis se ha dañado. Use solamente los controles y ajuste especificados en el
manual.
e. La unidad no parece funcionar con normalidad.
f. El aparato no funciona correctamente.
53.
Page 54

54.
13. FUNCIONAMIENTO – El usuario no debe usar el aparato para otros fines que no estén descritos en este
manual de instrucciones. Cualquier tipo de revisión debe hacerse por el personal cualificado.
14. LIMPIEZA – Desconecte el aparato de la toma de corriente antes de limpiarlo. No use líquido o
limpiadores en forma de pulverizador, use sólo un paño húmedo. Siga las instrucciones de cuidado y
mantenimiento de este manual.
15. RELÁMPAGOS – Durante relámpagos y largos periodos de no haber usado el aparato desconecte el
aparato de la toma de corriente y la antena.
16. COMPROBACIÓN DE SEGURIDAD – Después de vender el aparato pida al servicio de clientes de
hacer una comprobación de seguridad.
17. SOBRECARGA – Para evitar incendios y descargas eléctricas no sobrecargue su toma de corriente y su
receptáculos convenientes.
18. DESCARGA ELECTROESTÁTICA- Desconecte de la toma de tierra y retire las baterías si el aparato no
funciona bien. Vuelva a conectar después un periodo corto de tiempo.
ADVERTENCIA
ESTE REPRODUCTOR DE CD ES UN PRODUCTO LASER DE CLASE I. SIN EMBAGO, UTILIZA UN
RAYO LASER VISIBLE/INVISIBLE, QUE PUEDE CAUSAR EXPOSICIÓN A RADIACIÓN PELIGROSA.
ASEGURESE DE QUE EL REPRODUCTOR DE CD OPERA CORRECTAMENTE COMO SE MUESTRA EN
LAS INSTRUCCIONES.
SE PUEDE PRODUCIR UNA RADIACIÓN DE LÁSER INVISIBLE AL ABRIR LA COBERTURA O EL
BLOQUEO DE SEGURIDAD FALLA. NO SE EXPONGA A LOS RAYOS.
NO TOQUE LA LENTE DEL LÁSER.
El USO DE LOS CONTROLES, AJUSTES O PRESTACIONES DE PROCEDIMIENTOS DIFERENTES A
LOS QUE AQUÍ SE ESPECIFICAN PUEDE DAR COMO RESULTADO EXPOSICION A RADIACIÓN
PELIGROSA.
PARA REDUCIR EL RIESGO DE FUEGO O DE DESCARGA ELÉCTRICA Y DE INTERFERENCIAS
MOLESTAS USE SOLO LOS ACCESORIOS RECOMENDADOS.
Establecer un nivel de volumen seguro
• Si escucha continuadamente a música alta, su oído se adaptará gradualmente al mismo y le dará la
impresión de que el volumen está bajo.
• Lo que le parezca normal puede ser, de hecho, dañino.
• Para protegerse, ponga el volumen a un nivel bajo.
• Aumente lentamente el volumen, hasta que escuche con claridad y sin problemas.
• Los daños a su oído pueden ser extensos e irreversibles.
• Si observa problemas de audición, consulte a un médico.
Información adicional
• Si utiliza el aparato durante un periodo de tiempo prolongado, se calentará. Esto es absolutamente normal.
• Cierre siempre la tapa del CD para evitar que entre polvo en el reproductor. Cuando limpie la unidad,
seque el compartimiento del reproductor de CD con un paño suave y seco.
• Las piezas mecánicas de la unidad contienen cojinetes de engranaje automático. ¡No eche aceite ni
lubrique!
• Maneje la unidad solamente bajo ciertas condiciones climáticas.
• No es apropiado para niños menores de tres años.
Condensación
Puede producirse condensación cuando mueva el dispositivo de un entorno frío a uno cálido. Si hay
humedad en el reproductor, éste puede no funcionar correctamente.
Encienda el aparato y espere aproximadamente una hora para que la humedad se evapore.
Page 55

Proteja el dispositivo de la lluvia y la humedad, arena, polvo y calor extremo (p. ej., en un vehículo aparcado
en verano) y de la luz del sol directa.
Mover el dispositivo
• Quite el CD antes de mover el dispositivo.
• Se aconseja quitar el CD y apagar el dispositivo durante los periodos en los que no lo vaya a utilizar.
Dónde colocar el dispositivo
• Evite vibraciones, impactos o superficies inclinadas
• No coloque objetos extraños sobre el reproductor.
• Nunca coloque el reproductor sobre amplificadores u otros dispositivos, puede calentarse.
Desempaquetar:
• Saque cuidadosamente el dispositivo del paquete y quite todos los materiales empaquetados.
• Guarde la caja para futuras utilizaciones, como el caso de que tenga que devolver el dispositivo al centro de
atención al cliente.
• Si quiere desechar el material de empaquetado, tenga en cuenta los reglamentos sobre eliminación de
residuos.
• Quite con cuidado la protección del lente láser del reproductor de CD.
Suministro de corriente
Siempre que sea posible, conecte la unidad a la toma de corriente para preservar la vida útil de la batería.
Desconecte el enchufe de la toma de corriente antes de colocar las baterías.
Funcionamiento con baterías (baterías no incluidas)
Abra el compartimiento de las baterías y coloque 6 baterías tipo LR-14, UM-2 o C (preferentemente Alcalinas).
Tenga en cuenta la polaridad correcta marcada con “+” y“-“ dentro del compartimiento de las baterías.
Para funcionar con baterías, desconecte el enchufe pequeño en la parte trasera de la unidad.
Cuando se conecta el cable de alimentación la unidad se configura automáticamente para funcionamiento con
suministro de corriente.
Precauciones de seguridad de la batería:
- Siga siempre las instrucciones de seguridad y uso del fabricante de las baterías.
- Mantenga las baterías lejos del alcance de niños y animales.
- No tire las baterías al fuego. Nunca exponga las baterías al fuego ni otras fuentes de calor.
- Eliminación de las baterías: las baterías gastadas deben desecharse apropiadamente y reciclarse según las
leyes correspondientes. Para mayor información póngase en contacto con la entidad de eliminación de
residuos competente en su localidad.
- No mezcle baterías gastadas con baterías nuevas.
- No mezcle diferentes tipos de baterías tales como alcalinas y zinc/carbono. Use sólo baterías del mismo tipo.
- Si no utilizará el dispositivo durante largos periodos de tiempo, quite las baterías para prevenir daños por
baterías oxidadas o corroídas.
Funcionamiento con suministro de corriente
- Conecte el cable de suministro de energía a una toma de corriente CA 230V~50Hz.
- Opere la unidad sólo con el suministro de corriente que se corresponda con las especificaciones de la
etiqueta del tipo de dispositivo.
- Coloque el enchufe más pequeño del cable de alimentación en la toma de CA en la parte trasera. Asegúrese
de que el enchufe esté completamente introducido.
55.
Page 56

56.
Ubicación de los controles
Parte superior
1. VOLUME MIN/MAX
2. Selector de banda de frecuencia AM/FM
Seleccionar el tipo de recepción de radio entre
AM y FM
3. Selector de modo MP3/USB/RADIO/OFF
Seleccionar entre modo audio/CD MP3, USB y
radio y apagar la unidad.
4. STOP
5. REPEAT
Seleccionar modos de repetición
6. SKIP Saltar a la pista anterior y y retroceder.
7. -10
Saltar 10 pistas/archivos hacia atrás.
Parte frontal
8. Pantalla LCD
9. +10
Saltar 10 pistas/archivos hacia adelante
10. SKIP+
Saltar a la pista siguiente y avance rápido
11. PLAY/PAUSE
12. PROGRAM
Secuencia de pistas
13. Escala del dial
14. Control TUNING
15. Antena telescópica
16. Tapa de la unidad de CD
17. Toma de corriente AC~
(parte trasera de la unidad)
18. Altavoces
19. Toma para auriculares
20. Compartimiento para la batería
(en la parte inferior de la unidad)
21. Puerto USB
22. Asa
23. Indicador POWER
Page 57

Funcionamiento Básico
Encendido/Apagado
Para evitar el consumo de energía innecesario, coloque el selector de función en la posición OFF cuando la
unidad no esté en uso. En el modo ON el indicador POWER se enciende de color rojo.
1. Seleccione el modo deseado con el selector de modo: RADIO, MP3/USB u OFF.
2. Elija el volumen deseado con el botón VOLUME MIN/MAX.
3. Coloque el selector de modo en la posición OFF para apagar la unidad.
En la parte frontal de la unidad hay una toma para auriculares para escuchar de modo privado
(auriculares no incluidos). Conecte los auriculares con una toma estéreo de 3,5 mm. Al conectar auriculares
los altavoces se silencian automáticamente.
Radio
Sugerencias para una mejor recepción
FM: Extienda por completo la antena telescópica. Si la señal de recepción es demasiado fuerte
(por ejemplo, si está cerca de una emisora), acorte la antena telescópica.
AM: La unidad posee una antena de AM integrada, cambie la ubicación de la unidad si la recepción es mala.
Funcionamiento de la Radio
1. Coloque el selector de modo en la posición RADIO.
2. Elija la frecuencia deseada con el selector de banda: FM o AM.
3. Sintonice su emisora de radio favorita con el control TUNING.
4. Elija el volumen deseado con el botón VOLUME MIN/MAX.
5. Coloque el selector de modo en la posición OFF para apagar la unidad.
Reproducción de CD de Audio y CD MP3
El reproductor de CD sólo puede leer CD de Audio y CD MP3. No intente reproducir CD de datos o discos
VCD/DVD.
1. Coloque el selector de modo en la posición MP3/USB. La pantalla mostrará “- -“ durante
unos segundos, luego mostrará 000.
2. Abra el compartimiento de CD manualmente utilizando la pestaña hundida; aparecerá OP.
3. Coloque un CD con la etiqueta hacia arriba y cierre el compartimiento de CD otra vez
manualmente. En un principio aparecerá “- - -“, y luego el número total de pistas y CD. La pantalla
cambiará a 001 y CD. ►. Y la reproducción comenzará automáticamente. Se muestra el correspondiente
número de pista.
4. En caso de que la reproducción no comience (según el disco), presione PLAY/PAUSE para iniciar
manualmente la reproducción de la primera pista.
5. Presione PLAY/PAUSE para hacer una pausa en la reproducción; presione nuevamente para continuar
con la reproducción. Cuando está en modo pausa ► parpadea.
6. Presione STOP para detener la reproducción; la pantalla mostrará nuevamente el número total de pistas.
Notas:
La reproducción de un CD también se detiene cuando:
a. se abre el compartimiento de CD;
b. se desliza el selector de modo a las posiciones RADIO u OFF;
c. todas las pistas del CD se han reproducido.
Modo de salto
Cuando la unidad esté en modo reproducción, presione SKIP-, SKIP+, -10 o +10 para saltar a la pista
anterior o a la siguiente o 10 pistas hacia delante o atrás.
1. Seleccione la pista en modo reproducción, detener o pausa con SKIP- o SKIP+,-10 o +10 y comience la
reproducción presionando PLAY/PAUSE.
2. Presione SKIP+ repetidamente para saltar a la(s) pista(s) siguiente(s), hasta que muestre el número de
pista deseado. Presione SKIP+ durante la reproducción de la última pista para saltar a la primera pista del
disco.
3. Presione SKIP- repetidamente para saltar a la(s) pista(s) anterior(es). Presione SKIP- durante
la reproducción de la primera pista para saltar a la última pista del disco.
57.
Page 58

58.
4. Presione brevemente +10 para saltar diez pistas hacia delante. Si quedan menos de 10 pistas en el disco
saltará a la última pista. Presione +10 durante la reproducción de la última pista para saltar a la primera
pista del disco.
5. Presione brevemente -10 para saltar diez pistas hacia atrás. Si está dentro de las primeras 10 pistas del
disco saltará a la primera pista. Presione -10 durante la reproducción de la primera pista para saltar a la
última pista del disco.
Avance rápido y rebobinado
Presione y sostenga SKIP+ o SKIP- para acceder a las funciones de avance rápido o rebobinado dentro de
la pista para ubicar una posición. El volumen disminuye.
Reproducción programada
Se pueden programar hasta 20 pistas en el orden que usted desee; cualquier pista puede programarse más
de una vez.
1. Antes de programar, presione STOP y PROGRAM. La pantalla mostrará también
000 y PROG al lado de CD.
2. Seleccione la primera pista deseada con SKIP+ o SKIP-. +10 o -10.
3. Guarde la pista con PROGRAM. La pantalla mostrará al lado de CD y PROG
también P01. Ahora seleccione la próxima pista.
4. Repita los pasos 2 y 3 para programar más pistas, la cantidad máxima de pistas es 20.
5. Presione PLAY/PAUSE para iniciar la reproducción de las pistas en la secuencia elegida. Cuando está en
modo programa se muestra el número de pista, CD y PROG.
6. Cuando está en modo programa la función repetir el programa completo está disponible, consulte la
sección Modos de Repetición, punto 4, para más detalles.
Borrado de un programa
Siga estos pasos para borrar un programa:
1. Abra el compartimiento de CD.
2. Coloque el selector de modo en las posiciones RADIO u OFF.
3. Presione STOP.
Modos de repetición
Hay varios modos de repetición disponibles en la unidad; presione REPEAT para acceder y seleccionar.
1. Presione REPEAT una vez para repetir la pista actual. La pantalla muestra REP 1
al lado del número de pista y CD.
2. Presione REPEAT dos veces para repetir el disco en su secuencia original.
La pantalla muestra ALL REP al lado del número de pista y CD.
3. Presione REPEAT nuevamente para volver al modo normal de reproducción.
La pantalla muestra nuevamente el número de pista y CD.
4. También puede utilizar la función de repetición durante la reproducción. En el modo
programa presioe REPEAT una vez para repetir el programa completo. La pantalla
muestra además el número de pista y PROG y también ALL REP.
Reproducción de MP3 desde un Dispositivo USB
Conecte su dispositivo USB (tarjeta USB, reproductor MP3, etc.) al puerto USB en la parte frontal de la
unidad. Quite el disco de la unidad. Presione STOP para alternar entre modos disco y USB.
1. La pantalla mostrará brevemente USB, durante la lectura se muestra “- - -“ y el número de archivos. La
reproducción comienza automáticamente.
2. En caso de que la reproducción no comience automáticamente, presione PLAY/PAUSE para iniciar
manualmente la reproducción del primer archivo.
3. Presione PLAY/PAUSE para hacer una pausa en la reproducción; presione nuevamente para continuar
con la reproducción. Cuando está en modo pausa el número de archivo parpadea.
Page 59

4. Presione STOP para detener la reproducción; la pantalla mostrará nuevamente el número total de
archivos.
Notas:
La reproducción de USB también se detiene cuando:
a. se abre el compartimiento de CD;
b. se desliza el selector de modo a las posiciones RADIO o OFF;
c. todos los archivos del dispositivo USB se han reproducido.
Modo de salto
Cuando la unidad esté en modo reproducción, presione SKIP-, SKIP+, -10 o +10 para saltar al archivo
anterior o al siguiente o 10 archivos hacia delante o atrás.
1. Seleccione el archivo en modo reproducción, detener o pausa con SKIP-, SKIP+, -10 o +10 y comience la
reproducción presionando PLAY/PAUSE.
2. Presione SKIP+ repetidamente para saltar a el/los archivo(s) siguiente(s), hasta que muestre el número
de archivo deseado. Presione SKIP+ durante la reproducción del último archivo para saltar al primer
archivo del dispositivo USB.
3. Presione SKIP- repetidamente para saltar a el/los archivo(s) anterior(es). Presione SKIP- durante la
reproducción del primer archivo para saltar al último archivo del dispositivo USB.
4. Presione brevemente +10 para saltar diez archivos hacia delante. Si quedan menos de 10 archivos en el
dispositivo USB saltará al último archivo. Presione +10 durante la reproducción del último archivo para
saltar al primer archivo del dispositivo USB.
5. Presione brevemente -10 para saltar diez archivos hacia atrás. Si está dentro de los 10 primeros archivos
del dispositivo USB saltará al primer archivo. Presione -10 durante la reproducción del primer archivo para
saltar al último archivo del dispositivo USB.
Avance rápido y rebobinado
Durante la reproducción de USB, no hay funciones de avance rápido ni rebobinado disponibles.
Reproducción programada
Se pueden programar hasta 20 archivos en el orden que usted desee; cualquier archivo puede programarse
más de una vez.
1. Antes de programar, presione STOP y PROGRAM. La pantalla mostrará al lado de CD también 000 y
PROG.
2. Seleccione el archivo deseado con SKIP+, SKIP-, +10 o -10.
3. Guarde el archivo con PROGRAM. La pantalla mostrará PROG y P01. Ahora seleccione el próximo
archivo.
4. Repita los pasos 2 y 3 para guardar más archivos, la cantidad máxima de archivos es 20.
5. Presione PLAY/PAUSE para iniciar la reproducción de los archivos en la secuencia elegida. Cuando está
en modo programa se muestra el número de archivo y PROG.
6. Cuando está en modo programa la función repetir el programa completo está disponible, consulte la
sección Modos de Repetición, punto 4.
Borrado de un programa
Siga estos pasos para borrar un programa:
1. Abra el compartimiento de CD.
2. Coloque el selector de modo en las posiciones RADIO u OFF.
3. Presione STOP.
Modos de repetición
Hay varios modos de repetición disponibles en la unidad; presione REPEAT para acceder y seleccionar.
1. Presione REPEAT una vez para repetir el archivo actual. La pantalla muestra REP 1 al lado del número de
archivo.
2. Presione REPEAT dos veces para repetir todos los archivos del dispositivo USB. La pantalla muestra ALL
REP al lado del número de archivo.
59.
Page 60

60.
3. Presione REPEAT nuevamente para volver al modo normal de reproducción. La pantalla muestra
nuevamente el número de archivo.
4. También se puede usar la función repetir durante la reproducción de un programa. En modo programa,
presione REPEAT una vez para repetir el programa completo. La pantalla muestra al lado del número de
archivo y PROG también ALL REP.
Manejo y limpieza de los discos
MANEJO DE LOS CD´s
* Quite la cobertura del CD.
* No toque las superficies.
* No pegue pegatinas sobre la superficie de los CD´s y no escriba sobre estos.
* No doble los CD´s.
DESDE EL CENTRO A LOS EXTREMOS
CORRECTO INCORRECTO
Almacenamiento
* Guarde siempre los CD´s en su cobertura.
* No exponga los CD´s a los rayos directos solares, altas temperaturas, humedad o suciedad.
Limpieza de los CD’s
* Limpie los CD´s con una gamuza suave.
* Limpie los CD´s desde el centro a los extremos.
Page 61

GUÍA SOLUCIONADOR DE PROBLEMAS
Si experiencia algún problema con este sistema, revise la lista proporcionada antes de contactar con el
servicio al cliente.
ADVERTENCIA: nunca abra la unidad. Acuda siempre a un servicio técnico cualificado o a un
servicio al cliente autorizado.
SÍNTOMA POSIBLE CAUSA SOLUCIÓN
GENERAL
No hay sonido
El volumen está muy bajo.
Las pilas están gastadas.
Las pilas están insertadas
incorrectamente.
El cable de alimentación no
Ajuste el volumen.
Cambie las pilas.
Observe la polaridad.
Conecte correctamente el cable
de alimentación.
está conectado
RADIO
Recepción pobre
Señal débil.
Interferencias por otros
electrodomésticos
(Televisores, VCRs,
ordenadores, etc.).
CD/MP3
El CD salta
El CD/MP3 está sucio o
averiado.
La unidad ha recibido un
golpe.
Pantalla: - - - No se ha insertado ningún
CD.
El CD está sucio o averiado.
Condensación en el lente del
láser.
CD-R/RW está vacío o no se
Ajuste la antena:
FM: antena telescópica.
AM: ajuste la unidad.
Mantenga la distancia de otros
electrodomésticos.
Limpie o reemplace el disco.
Mantenga la unidad firme
durante el funcionamiento o
deposítela.
Inserte un CD, CD-R o CD-RW.
Limpie o reemplace el CD.
Espere hasta que la lente del
láser esté completamente seca
(aproximadamente 1 hora).
Finalice el CD-R/RW.
finalizó.
ESPECIFICACIONES
General
Suministro de corriente: CA 230V~50Hz
CD 9V (6 baterías tipo LR14 / UM-2 / C, 1.5V)
(no incluidas)
Consumo de energía: 13 vatios
Rango de frecuencia: AM 525 – 1615kHz
FM 87.5 – 108MHz
Audio
Resistencia de altavoz: 8 Ohm
Dimensions: aprox. 239 x 205 x 121
Peso: aprox.1,4 kg
Sujeto a cambios sin previo aviso.
mm
61.
Page 62

62.
MODELO: 6698RB
Rádio de Design com Leitor de CD/MP3/WMA e Porta USB
INSTRUCÇÕES DE SEGURANÇA
AVISO
RISCO DE CHOQUE
ELÉCTRICO NÃO ABRIR
CUIDADO: PARA REDUZIR O RISCO
DE CHOQUE ELÉCTRICO, NÃO
RETIRE A COBERTURA (OU O
Um triângulo com um símbolo
de raio alerta o utilizador para
"tensão perigosa" sem
isolamento do revestimento,
a qual pode ser suficiente
para constituir risco de
choque eléctrico.
REVESTIMENTO POSTERIOR). NO
INTERIOR, NÃO EXISTEM
COMPONENTES PASSÍVEIS DE
REPARAÇÃO PELO UTILIZADOR.
PARA FINS DE ASSISTÊNCIA,
CONSULTE UM TÉCNICO
QUALIFICADO
AIS INFORMAÇÕES
Acautelar-se dos pequenos pedaços e pilhas, não engolir estes pedaços ou pilhas. Estes
objectos podem ser perigosos para a sua saúde e provocar o sufocamento. Prestar atenção e
manter pequenos dispositivos e pilhas fora de alcance das crianças.
Importantes avisos para a protecção dos ouvidos
Cuidado:
A sua audição é tão preciosa para si como para nós.
Portanto, por favor tenha cuidado com este equipamento.
Recomendamos: Evite volumes de som elevados.
Se o equipamento for utilizado por crianças, certifique-se que o volume do aparelho não está
demasiado elevado.
Atenção!
Volumes demasiado elevados podem provocar danos irreparáveis à audição das crianças.
Um triângulo com um ponto
de exclamação alerta o
utilizador para a existência
de instruções importantes de
uso e manutenção no
manual incluído. O utilizador
deve ler estas instruções.
Nunca deixe a pessoa especialmente as crianças colocar os objectos dentro de buracos,
ranhuras ou outras
aberturas. Estes procedimentos podem causar a morte através de choque eléctrico. O dispositivo
deve ser aberto somente e na presença do pessoal qualificado.
Por favor utilize o equipamento apenas de acordo com o regulamento descrito acima. O aparelho
foi concebido exclusivamente para ser utilizado no sector das actividades e habitação.
Por favor, guarde cuidadosamente as instruções de utilização para uma futura utilização.
Conselhos para protecção do ambiente
Este produto, no fim do seu período de vida útil, não deve ser depositado no lixo doméstico
normal. Deverá ser, pelo contrário, depositado num ponto de recolha para reciclagem de
aparelhos eléctricos e electrónicos. O símbolo no produto, as instruções de utilização e a
embalagem chamam a atenção para esse facto.
As matérias-primas são reutilizáveis de acordo com as suas características. Com a reutilização,
a utilização material ou outras formas de utilização de aparelhos velhos fazem com que dê um
contributo valioso para a protecção do nosso ambiente.
Por favor, informe-se junto das autoridades locais sobre os centros de recolha competentes.
Page 63

Não impedir a ventilação dos dispositivos. Tenha a certeza que as curtinhas, os jornais, panos de
cobrir os mobiliários não impedir a ventilação das aberturas de aparelhos. A ventilação deve
manter-se a qualquer momento. Aquecer-se demais pode provocar sério dano no dispositivo e
reduzir o seu desempenho por toda a vida.
Calor
Não expor o aparelho directamente à luz solar. Tenha atenção para não expor o aparelho a fontes
de calor como aquecedores ou fontes de chama descoberta. Tenha atenção para que as fendas de
arejamento do aparelho não estejam cobertas.
Humidade e Limpeza
Este produto não é resistente à água. Não submergir o aparelho em água nem deixar que este
entre em contacto comágua. Se penetrarágua no aparelho pode provocar sérios danos. Não utilizar
agentes de limpeza que contenhamálcool, amoníaco, benzol ou abrasivos, pois estes podem
danificar o aparelho. Utilize um pano macio e húmido para a limpeza.
Reciclagem Profissional
Pilhas e materiais de embalagem não pertencem ao lixo doméstico. As pilhas devem ser colocadas
num ponto de recolha para pilhas usadas. A separação dos materiais de embalagem preserva o
ambiente.
INSTRUÇÕES DE SEGURANÇA
1. LER AS INSTRUÇÕES – Toda a segurança e as instruções de funcionamento devem ser lidas antes da
unidade ser operada.
2. MANTER AS INSTRUÇÕES – A segurança e a instrução de funcionamento devem ser mantidas para
referência futura.
3. ATENÇÃO AOS AVISOS – Todos os avisos na unidade e nas instruções de funcionamento devem ser
seguidos.
4. SEGUIR AS INSTRUÇÕES – Todas as instruções de funcionamento devem ser seguidas.
5. ÁGUA E LÍQUIDOS – O aparelho não deve ser usado perto de água, por exemplo, perto de uma
banheira, pia para lavagem, lava-loiças, piscina ou num ambiente húmido.
6. VENTILAÇÃO – As aberturas do aparelho servem para a sua própria ventilação, são necessárias para o
seu funcionamento e evitam um sobre aquecimento. Coloque o aparelho num local que não interfira com
uma ventilação adequada. Não o coloque em cima de camas, sofás, tapetes ou superficies semelhantes
que possam tapar as aberturas de ventilação, ou em estruturas fechadas, tais como estantes ou armários
que impeçam o fluxo de ar.
7. CALOR - o equipamento deve estar afastado de fontes de calor, tais como radiadores, saídas de ar
quente, fogões ou outros aparelhos (incluindo amplificadores de som) que produzam calor.
8. FONTE DE ALIMENTAÇÃO - O aparelho só funciona com o tipo de alimentação indicado na etiqueta.
9. PROTECÇÃO DO CABO DE ALIMENTAÇÃO - cabos de alimentação devem ser colocados de tal forma
que não possam ser pisados ou apertados pelos objectos colocados em cima deles ou contra eles.
10. PERÍODOS DE NÃO UTILIZAÇÃO – Desligue o aparelho da tomada quando não o utilizar durante um
longo período de tempo.
11. ENTRADA DE OBJECTOS E LÍQUIDOS - Deve tomar cuidado para que não entrem objectos ou salpicos
para dentro do aparelho.
12. DANOS QUE REQUEREM ASSISTÊNCIA TÉCNICA – A unidade deve ser reparada por pessoal da
assistência técnica qualificada quando:
a. A fonte de alimentação ou plugue foi danificado
b. Objectos cairam dentro, ou líquido foi derrubado dentro da unidade.
c. A unidade foi exposta à chuva e humidade.
d. O aparelho tenha caído no chão ou esteja danificado. Use apenas os controlos e ajustes especificados
no manual.
e. O aparelho não parece funcionar normalmente.
f. A unidade exibe sérias mudanças no seu desempenho.
63.
Page 64

64.
13. ASSISTÊNCIA TÉCNICA - O utilizador não deve tentar reparar o aparelho para além do descrito no
manual. Todas as reparações devem ser realizadas por pessoal técnico qualificado.
14. LIMPEZA – Desligue o aparelho da tomada antes de o limpar. Não utilize panos molhados ou aerosóis.
Utilize um pano húmido.
15. RELÂMPAGOS – Durante trovoadas e períodos mais longos de não utilização, desligue da corrente
eléctrica e a antena.
16. VERIFICAÇÃO DE SEGURANÇA – Após um serviço de assistência técnica peça para ser realizado
uma verificação de segurança.
17. SOBRECARGA – Para evitar fogo e choque eléctrico não sobrecarregue as tomadas e receptáculos.
18. DESCARGAS ELECTROESTÁTICAS – Desconecte das fontes de alimentação e remova as pilhas se
a unidade funciona mal. Reconece depois de um período pequeno de tempo.
CUIDADO
ESTE LEITOR DE CDs É UM PRODUTO LASER CLASSE I. NO ENTANTO, ESTE LEITOR DE CDs
UTILIZA UM FEIXE DE LASER VISÍVEL/INVISÍVEL QUE PODE PROVOCAR EXPOSIÇÕES A RADIAÇÃO
PERIGOSA. CERTIFIQUE-SE DE QUE UTILIZA O LEITOR DE CDs CORRECTAMENTE, DE ACORDO
COM AS INSTRUÇÕES.
RADIAÇÃO LASER INVISÍVEL COM A COBERTURA ABERTA OU O BLOQUEIO DE SEGURANÇA
DESACTIVADO. EVITE A EXPOSIÇÃO AO FEIXE!
NÃO TOQUE NA LENTE DE LASER.
A UTILIZAÇÃO DE CONTROLOS OU AJUSTES OU A EXECUÇÃO DE PROCEDIMENTOS DIFERENTES
DOS ESPECIFICADOS NO PRESENTE MANUAL PODERÁ RESULTAR NA EXPOSIÇÃO A RADIAÇÃO
PERIGOSA.
PARA REDUZIR O RISCO DE INCÊNDIO OU CHOQUE ELÉCTRICO E INTERFERÊNCIA NOCIVA,
UTILIZE APENAS OS ACESSÓRIOS RECOMENDADOS.
Estabelecer um nível de volume seguro
• Se ouvir continuamente música num volume elevado, a sua audição irá adaptar-se gradualmente e irá ter a
impressão que o volume está baixo.
• O que poderá parecer-lhe normal pode, na realidade, ser prejudicial.
• Para o proteger deste factor, coloque o volume num nível baixo.
• Aumente lentamente o volume até poder ouvir de forma nítida e sem problemas.
• Os danos à sua audição podem ser extensos e poderão não ser reversíveis.
• Caso note algum problema de audição, consulte um médico.
INFORMAÇÕES ADICIONAIS
• O dispositivo aquece após a utilização prolongada do mesmo. Esta situação é normal.
• Feche sempre a porta de CDs de modo a manter a unidade de CDs isenta de pó. Ao limpar, passe um
pano macio e seco no compartimento da unidade de CDs.
• Os componentes mecânicos da unidade contêm rolamentos auto-lubrificantes. Não lubrifique estes
rolamentos!
• Utilize a unidade apenas em condições climatéricas moderadas.
• Não adequado a crianças com menos de três anos.
Condensação
Ao deslocar o aparelho de um ambiente frio para um ambiente quente, poderá ocorrer condensação. Se
existir humidade no interior do aparelho, este poderá não funcionar correctamente.
Para evaporar a humidade, ligue a fonte de alimentação e aguarde cerca de uma hora.
Proteja o aparelho da chuva e da humidade, areia, pó e calor intenso (por exemplo, num veículo estacionado ao sol), bem como da luz solar directa.
Page 65

Mover o aparelho
• Remova o CD antes de mover o aparelho.
• Sugere-se que remova o CD e desligue o aparelho durante os períodos em que não utiliza.
Configurar a localização do dispositivo
• Evite superfícies inclinadas ou sujeitas a vibrações e impactos, na medida em que os componentes internos
podem sofrer danos graves.
• Não coloque objectos pesados sobre o leitor.
• Nunca coloque o Leitor sobre amplificadores ou outros dispositivos que possam aquecer.
Desempacotar:
• Retire cuidadosamente o aparelho da embalagem e remova todos os materiais de embalamento.
• Guarde a embalagem para o caso de ser necessário devolver o aparelho ao serviço de clientes.
• Caso queira descartar o material de embalamento, tenha em atenção os regulamentos em vigor.
• Remova cuidadosamente a protecção da lente lazer do compartimento de CD.
Fonte de Alimentação
Sempre que possível, ligue a unidade à corrente eléctrica para conservar o tempo de vida útil das pilhas.
Desligue a ficha da corrente eléctrica antes de inserir as pilhas.
Funcionamento das Pilhas (Pilhas Não Incluídas)
Abra o compartimento das pilhas e insira as 6 pilhas tipo LR-14, UM-2 ou C (de preferência alcalinas). Veja as
polaridades correctas cujas marcas são “+” e “-“ no compartimento das pilhas.
Para o funcionamento das pilhas desligue as fichas pequenas da corrente eléctrica na parte traseira da
unidade.
Quando ligar os cabos à corrente eléctrica a unidade é automaticamente definida para começar a funcionar.
Precauções de Segurança das Pilhas:
- Siga sempre as precauções de segurança e de utilização recomendadas pelo fabricante das pilhas.
- Mantenha as pilhas afastadas do alcance das crianças e animais de estimação.
- Nunca deite as pilhas no fogo. Não exponha as pilhas ao fogo ou a outras fontes de calor.
- Tratamento das pilhas: as pilhas gastas devem ser tratadas e recicladas adequadamente, de acordo com as
leis aplicáveis. Para informações detalhadas, contacte a autoridade de recolha de lixo do seu município local.
- Não misture pilhas novas com pilhas gastas.
- Não misture pilhas de diferentes tipos, tais como as alcalinas com as de zinco/carbono. Utilize apenas pilhas
do mesmo tipo.
- Retire as pilhas quando o aparelho não estiver a ser utilizado durante períodos de tempo muito longos, de
forma a evitar danos produzidos pela ferrugem ou corrosão das pilhas.
Ligação à Corrente Eléctrica
- Ligue o cabo de alimentação à corrente eléctrica numa tomada de parede CA 230V~50Hz.
- Ligue a unidade apenas a uma fonte de alimentação que corresponda às especificações indicadas na
etiqueta.
- Insira a ficha mais pequena do cabo de alimentação na tomada AC~na parte traseira do aparelho.
Assegure-se de que a ficha está totalmente inserida.
65.
Page 66

66.
Localização dos Controlos
Vista Superior
1. VOLUME MIN/MAX
2. Selector de banda AM, FM
Seleccionar a recepção de rádio entre FM e
AM
3. Selector de função MP3/USB/RADIO/OFF
Seleccionar entre os modos CD de Áudio/CD
de MP3, USB e rádio e desligar a unidade
4. STOP
5. REPEAT
Seleccionar modos de repetição
6. SKIP Passar para a faixa anterior e rebobinar
7. -10
Retroceder 10 faixas/ficheiros
Vista Frontal
8. Visor LCD
9. +10
Avançar 10 faixas/ficheiros
10. SKIP +
Passar para a faixa seguinte e avançar
rapidamente
11. PLAY/PAUSE
12. PROGRAM
Sequência de faixas
13. Escala de sintonização
14. Controlo TUNING
15. Antena telescópica
16. Porta da unidade de CD
17. Ficha de alimentação AC ~
(parte posterior da unidade)
18. Colunas
19. Ficha de auscultadores
20. Compartimento de pilhas (parte inferior
da unidade)
21. Porta USB
22. Pega
23. Indicador POWER
Page 67

Funcionamento Básico
Ligar/Desligar
Para evitar o consumo de energia desnecessário, defina o selector de funções para a posição OFF quando a
unidade não estiver a ser utilizada. No modo ON o indicador POWER muda para vermelho.
1. Seleccione o modo que deseja através do selector de funções: RADIO, MP3/USB ou OFF.
2. Defina o volume que deseja através de VOLUME MIN/MAX.
3. Defina o selector de funções para a posição OFF para desligar a unidade.
Na parte frontal da unidade encontra uma tomada para auriculares para audição em privado (auriculares
não fornecidos). Ligue os auriculares a uma tomada estéreo de 3.5mm. Quando os auriculares são ligados,
os altifalantes ficam automaticamente sem som.
Rádio
Recomendações para uma melhor recepção
FM: Estique totalmente a antena. Se o sinal de recepção é muito forte (ou seja, está perto de uma
estação), recolha um pouco a antena telescópica.
AM: A unidade tem uma antena AM incorporada; mude a posição da unidade se o sinal de recepção for
fraco.
Funcionamento do Rádio
1. Defina o selector de funções para a posição RADIO.
2. Seleccione a banda de frequência que deseja através das frequências: FM ou AM.
3. Sintonize a sua estação de rádio preferida através do controlo TUNING.
4. Defina o volume que deseja através de VOLUME MIN/MAX.
5. Defina o selector de funções para a posição OFF para desligar a unidade
Reprodução de CDs de Áudio e CDs de MP3
O leitor de CDs apenas pode reproduzir CDs de Áudio e CDs de MP3. Não tente reproduzir CDs de Dados
ou discos VCD/DVDs.
1. Coloque o selector de função na posição MP3/USB. O visor apresenta a indicação “- - -“
durante breves instantes e, e seguida, apresenta 000.
2. Abra manualmente o compartimento de CDs com a pega com reentrência; é apresentada
a indicação OP.
3. Introduza um disco com a etiqueta voltada para cima e volte a fechar manualmente o compartimento de
CDs. Começa por ser apresentada a indicação “- - -“ e, em seguida, o número total de faixas e a indicação
CD. O visor muda para 001 e CD. A reprodução tem início automaticamente. É apresentado o número da
faixa correspondente.
4. No caso da reprodução não ser iniciada (dependendo do disco), prima PLAY/PAUSE para iniciar a
reprodução da primeira faixa manualmente.
5. Prima PLAY/PAUSE para fazer uma pausa na reprodução; volte a premir para continuar a reprodução.
No modo pausa, pisca ►.
6. Prima STOP para parar a reprodução; o visor volta a mostrar o número total de faixas.
Notas:
A reprodução do CD também pára quando:
a. o compartimento do CD é aberto;
b. o selector de funções é mudado para as posições RADIO ou OFF;
c. todas as faixas do CD foram reproduzidas.
Modo Saltar
Em modo de reprodução, prima SKIP-, SKIP+, -10 ou +10 para passar para a faixa anterior ou seguinte ou
para avançar ou retroceder 10 faixas.
1. Seleccione a faixa nos modos reprodução, parar ou pausa através de SKIP-, SKIP+, -10 ou +10 e comece
a reprodução premindo PLAY/PAUSE.
2. Prima repetidamente SKIP+ para avançar para a(s) faixa(s) seguinte(s), até ser apresentado o número da
faixa pretendida. Prima SKIP+ durante a reprodução da última faixa para passar para a primeira faixa do
disco.
67.
Page 68

68.
3. Prima repetidamente SKIP- para retroceder para a (s) faixa (s) anterior (es). Prima SKIP- durante a
reprodução da última faixa para passar para a última faixa do disco.
4. Prima brevemente +10 para avançar dez faixas. Se restarem menos de 10 faixas no disco, passa para a
última faixa. Prima +10 durante a reprodução da última faixa para passar para a primeira faixa do disco.
5. Prima brevemente -10 para retroceder dez faixas. Se se encontrar nas primeiras 10 faixas do disco,
passa para a primeira faixa. Prima -10 durante a reprodução da primeira faixa para passar para a última
faixa do disco.
Avançar e Retroceder
Prima e mantenha premido SKIP+ ou SKIP- para aceder às funções para avançar ou retroceder ao longo
da faixa para procurar por uma certa posição. O volume diminui.
Programar Reprodução
Até 20 faixas podem ser programadas na sequência que deseja; qualquer faixa pode ser programada mais
que uma vez.
1. Antes de programar, prima STOP e PROGRAM. O visor apresenta igualmente 000 e
PROG, para além de CD .
2. Seleccione a primeira faixa que deseja através de SKIP+, SKIP-, +10 ou -10.
3. Guarde a faixa premindo PROGRAM. O visor apresenta CD e PROG, bem como
para além de P01. Seleccione agora a faixa seguinte.
4. Repita os passos 2 e 3 para programar mais faixas, o número máximo de faixas é 20.
5. Prima PLAY/PAUSE para iniciar a reprodução das faixas na sequência pretendida. Em modo de
programa, são apresentados o número da faixa e as indicações CD e PROG.
6. Em modo de programa, está disponível a função de repetição para todo o program. Para mais
informações, consulte a secção Modos de repetição, ponto 4.
Programar Apagar
Siga os passos para apagar o programa:
1. Abra o compartimento do CD.
2. Defina o selector de funções para as posições RADIO ou OFF.
3. Prima STOP.
Modos Repetição
Estão disponíveis vários modos de repetição na unidade; prima REPEAT para aceder e
seleccionar.
1. Prima REPEAT uma vez para repetir a faixa actual. O visor mostra REP 1 além do
número da faixa e CD
2. Prima REPEAT duas vezes para repetir o disco na sua sequência original. O visor
mostra ALL REP além do número da faixa e CD
3. Volte a premir REPEAT para regressar ao modo de reprodução normal. O visor
volta a mostrar o número da faixa e CD
4. Pode utilizar igualmente a função de repetição durante a reprodução de programa.
Em modo de programa, prima uma vez REPEAT para repetir todo o programa.
O visor apresenta, para além do número da faixa e de PROG, a indicação ALL REP.
Reprodução de MP3 a partir de Dispositivo USB
Ligue o dispositivo USB (caneta USB, leitor de MP3, etc.) à porta USB frontal. Retire o disco da unidade.
Prima STOP para alternar entre os modos de disco e USB.
1. Visor apresenta, durante breves instantes,a indicação USB e, durante a leitura, é apresentada a
indicação “- - -“ e o número de ficheiros. A reprodução tem início automaticamente.
2. O a reprodução não seja iniciada automaticamente, prima PLAY/PAUSE para iniciar manualmente a
reprodução do primeiro ficheiro.
Page 69

3. Prima PLAY/PAUSE para iniciar a reprodução; prima novamente para continuar a reprodução. Em modo
do pausa, o número do ficheiro fica intermitente.
4. Prima STOP para iniciar a reprodução; o visor apresenta novamente o número total de ficheiros.
Notas:
A reprodução USB pára igualmente sempre que:
a. Abrir o compartimento de CDs;
b. Colocar o selector de função na posição RADIO ou OFF;
c. Todas as faixas do dispositivo USB tiverem sido reproduzidas.
Modo Avançar/Retroceder
Em modo de reprodução, prima SKIP-, SKIP+, -10 ou +10 para passar para o ficheiro anterior ou seguinte
ou para avançar ou retroceder 10 ficheiros.
1. Seleccione a faixa em modo de reprodução, paragem ou pausa com SKIP-, SKIP+, -10 ou +10 inicie a
reprodução premindo o botão PLAY/PAUSE.
2. Prima repetidamente SKIP+ para passar para o (s) ficheiro (s) seguinte (s), até ser apresentado o número
do ficheiros pretendido. Prima SKIP+ durante a reprodução do último ficheiro para passar para o primeiro
ficheiro do dispositivo USB.
3. Prima repetidamente SKIP- para passar para o (s) ficheiro (s) anterior (es). Prima SKIP- durante a
reprodução do primeiro ficheiro para passar para o último ficheiro do dispositivo USB.
4. Prima brevemente +10 para avançar dez ficheiros. Se restarem menos de 10 ficheiros no dispositivo USB,
passa para o último ficheiro. Prima +10 durante a reprodução do último ficheiro para passar para o
primeiro ficheiro do dispositivo USB.
5. Prima brevemente -10 para retroceder dez ficheiros. Se se encontrar nos primeiros 10 ficheiros do
dispositivo USB, passa para o primeiro ficheiro. Prima -10 durante a reprodução do primeiro ficheiro para
passar para o último ficheiro do dispositivo USB.
Avanço e Retrocesso Rápido
Na reprodução USB, não está disponível a função de avanço ou retrocesso rápido.
Programar a Reprodução
É possível programar até 20 ficheiros numa sequência pretendida. É possível programar várias vezes o
mesmo ficheiro.
1. Antes de programar, prima STOP e PROGRAM. O visor apresenta igualmente CD e 000, para além de
PROG.
2. Seleccione o ficheiro pretendido com SKIP+, SKIP-, +10 ou -10.
3. Guarde o ficheiro premindo PROGRAM. O visor apresenta as indicações PROG e P01. Seleccione agora
o ficheiro seguinte.
4. Repita os passos 2 e 3 para guardar outros ficheiros. Pode programar um máximo de 20 ficheiros.
5. Prima PLAY/PAUSE para iniciar a reprodução dos ficheiros na sequência pretendida. Em modo de
programa, são apresentados o número do ficheiro e a indicação PROG.
6. Em modo de programa, está disponível a função de repetição para todo o program. Para mais
informações, consulte a secção Modos de repetição, ponto 4.
Eliminar o Programa
Para eliminar o programa, execute os seguintes passos:
1. Abra o compartimento de CDs.
2. Coloque o selector de função na posição RADIO ou OFF.
3. Prima STOP.
Modos de Repetição
Na unidade, estão disponíveis vários modos de repetição. Prima REPEAT para aceder e seleccionar.
1. Prima REPEAT uma vez para repetir o ficheiro actual. O visor apresenta a indicação REP 1 e o número do
ficheiro.
2. Prima REPEAT duas vezes para repetir todos os ficheiros do dispositivo. O visor apresenta a
indicação ALL REP e o número do ficheiro.
69.
Page 70

70.
3. Prima novamente o botão REPEAT para voltar ao modo de reprodução normal. O visor apresenta
novamente o número do ficheiro.
4. Pode utilizar igualmente a função de repetição durante a reprodução de programa. Em modo de
programa, prima uma vez REPEAT para repetir todo o programa. O visor apresenta, para além do número
do ficheiro e de PROG, a indicação ALL REP.
Manuseamento e Limpeza de Discos
MANUSEAMENTO DE CDs
* Retire o CD da caixa.
* Não toque nas superfícies.
* Não cole etiquetas nem escreva nos CDs.
* Não sobre os CDs.
DO CENTRO PARA A EXTREMIDADE
CORRECTO INCORRECTO
Armazenamento
* Guarde sempre os CDs na respectiva caixa.
* Não exponha os CDs a luz solar directa, temperaturas elevadas, humidade ou pó.
Limpar CDs
* Limpe os CDs com um pano macio.
* Limpe os CDs do centro para a extremidade.
Page 71

RESOLUÇÃO DE PROBLEMAS
Se ocorrer algum problema com este sistema, consulte a lista seguinte antes de contactar o serviço de
clientes.
AVISO: Nunca abra o dispositivo. Solicite sempre assistência ou manutenção a pessoal qualificado
e autorizado.
Sintoma Causa possível Solução
GERAIS
Sem som
O volume está muito baixo.
As pilhas estão gastas.
As pilhas foram inseridas
incorrectamente.
Os cabos de alimentação
Ajuste o volume.
Mude as pilhas.
Veja a polaridade.
Ligue os cabos de alimentação
correctamente.
Snão estão ligados.
RÁDIO
Recepção insuficiente
CD/MP3
O CD salta
Sinal fraco.
Interferências provocadas
por outros aparelhos
(televisores, gravadores de
vídeo, computadores, etc.).
CD/MP3 sujo ou danificado.
A unidade sofreu um impacto.
Ajuste a antena:
FM: antena telescópica.
AM: ajuste a unidade.
Mantenha a unidade afastada
de outros aparelhos.
Substitua ou limpe o disco.
Mantenha a unidade estável
durante a operação ou pouse-a.
Visor: - - - Nenhum CD introduzido.
O CD está sujo ou danificado.
Condensação na lente de
laser.
O CD-R/RW está vazio ou
não foi finalizado.
Introduza um CD, CD-R ou
CD-RW.
Substitua ou limpe o CD.
Aguarde até a lente de laser
estar completamente seca
(cerca de 1 hora).
Finalize o CD-R/RW.
ESPECIFICAÇÕES
Gerais
Fonte de alimentação: AC 230V~50Hz
DC 9V (6 pilhas tipo LR14 / UM-2 / C, 1.5V)
(pilhas não fornecidas)
Consumo de energia: 13 Watts
Alcance de frequência: AM 525 – 1615kHz
FM 87.5 – 108MHz
Áudio
Impedância dos altifalantes: 8 Ohm
Dimensões: aprox. 239 x 205 x 121
Peso: aprox. 1,4 kg
mm
Sujeito a alteração sem aviso prévio.
71.
Page 72

72.
MODEL: 6698RB
Nowoczesne radio z odtwarzaczem CD/ MP3/WMA oraz portem USB
ŚRODKI OSTROŻNOŚCI
OSTRZEZENIE
RYZYKO PORAŻENIA
PRĄDEM NIE OTWIERAJ
OSTRZEŻENIE: ABY UNIKNĄĆ
Trójkąt z symbolem pioruna
to znak odnoszący się do
“niebezpiecznego napięcia”,
braku izolacji, co może
przyczynić się do ryzyka
porażenia prądem.
RYZYKA PORAŻENIA PRĄDEM, NIE
ŚCIĄGAJ OBUDOWY RADIA.
KONIECZNE JEST, ABY WSZELKIE
NAPRAWY ODBYWAŁY SIĘ W
AUTORYZOWANYM SERWISIE.
Trójkąt z wykrzyknikiem to
znak odnoszący się do
ważnych instrukcji
użytkowania oraz
konserwacji. Znak pojawia
się w podręczniku
użytkownika.
DALSZE INFORAMCJE
Zwróć uwagę na małe części urządzenia oraz baterie. Nie połykaj ich; może to spowodować
poważne zagrożenie w tym uduszenie. Zwróć szczególną uwagę na dzieci. Trzymaj małe części
urządzenia z dala od dzieci.
Informacje dotyczące ochrony słuchu
Uwaga:
Twoje zdrowie jest ważne zarówno dla ciebie jak i dla nas.
Zachowaj więc wszelkie środki ostrożności korzystając z tego urządzenia.
Unikaj wysokiego poziomu głośności.
Jeżeli urządzenie jest obsługiwane przez dzieci, nie pozwól na odtwarzanie muzyki zbyt głośno.
Uwaga!
Zbyt wysoki poziom głośności może prowadzić do uszkodzenia słuchu twoich dzieci.
Nie pozwalaj komukolwiek, zwłaszcza dzieciom, wkładać niczego do otworów, otworów wentyl
acyjnych lub dziur; może to doprowadzić do porażenia prądem. Obudowa urządzenia może być
zdjęta wyłącznie przez swykwalifikowanych specjalistów. Korzystaj z urządzenia wyłącznie w
celach, do których zostało przeznaczone.
Urządzenie jest przeznaczone do użytku wewnętrznego.
Zachowaj instrukcję obsługi do przyszłego wglądu.
Ochrona środowiska
To urządzenie nie może być traktowane jak zwykłe odpady. Przekaż urządzenie do specjalnych
miejsc skupu I utylizacji urządzeń elektrycznych. Na urządzeniu lub opakowaniu znajduje się
symbol, który informuje o sposobie pozbycia się urządzenia. Wszystkie materiały mogą podlegać
utylizacji. Możesz znacznie przysłużyć się do ochrony środowiska utylizując urządzenie w
odpowiedni sposób. Zapytaj odpowiednie władze o miejsce utylizacji urządzeń elektrycznych.
Upewnij się, że otwory wentylacyjne nie są zasłonięte przez firanki, zasłon, gazety itp.
Page 73

Otwory wentylacyjne zawsze muszą być odsłonięte. Przegrzanie urządzenia może powodować
uszkodzenie lub skrócić jego żywotność.
Ciepło
Nie wystawiaj urządzenia na działanie promieni słonecznych. Upewnij się, że urządzenie nie jest
wystawione na działanie ęródeł ciepła, takich jak grzejniki czy ogień. Upewnij się, że otwory
wentylacyjne urządzenia nie są zasłonięte.
Wilgoć oraz czyszczenie
To urządzenie nie jest odporne na wilgoć. Trzymaj urządzenie z dala od wody oraz wilgoci.
Woda może spowodować poważne uszkodzenia. Do czyszczenia nie używaj środków
zawierających alkohol, amoniak, benzen oraz środków żrących. Mogą uszkodzić urządzenie. Czyść
urządzenie miękką, wilgotną szmatką.
Pozbywanie się baterii
Baterie nie mogą być traktowane jak zwykłe śmieci. Przekaż baterie do oznaczonego punktu
składowania baterii. Nie wrzucaj baterii do ognia.
ŚRODKI OSTROŻNOŚCI
1. PRZECZYTAJ INSTRUKCJE - Należy przeczytać wszystkie instrukcje dotyczące bezpieczeństwa i
obsługi przed uruchomieniem urządzenia.
2. ZACHOWAJ INSTRUKCJE - Instrukcje dotyczące bezpieczeństwa i obsługi należy zachować do
wykorzystania w przyszłości.
3. WEŹ POD UWAGĘ OSTRZEŻENIA - Należy przestrzegać wszystkich ostrzeżeń opisanych na urządzeniu
i w instrukcji obsługi.
4. POSTĘPUJ ZGODNIE Z INSTRUKCJAMI - Należy postępować zgodnie ze wszystkimi instrukcjami.
5. WODA I WILGOĆ – Nie należy korzystać z urządzenia w pobliżu wody, na przykład, obok wanny,
umywalki, zlewozmywaka, miednicy, na terenie basenu lub w wilgotnej piwnicy.
6. WENTYLACJA – Otwory w urządzeniu służą prawidłowej wentylacji, są konieczne do bezusterkowego
działania urządzenia i zapobiegają przegrzaniu. Urządzenie należy umieścić w takim miejscu lub pozycji,
aby prawidłowa wentylacja nie była utrudniona. Nie wolno go stawiać bezpośrednio na łóżku, kanapie,
dywanie lub żadnej innej tego typu powierzchni, ponieważ otwory wentylacyjne mogą zostać zakryte.
Umieszczenie urządzenia w zamkniętej przestrzeni, takiej jak szafka czy regał, może utrudniać przepływ
powietrza przez otwory wentylacyjne.
7. ŹRÓDŁA CIEPŁA - Urządzenie należy umieszczać z dala od źródeł ciepła, takich jak grzejniki, kuchenki,
lub innego tego typu sprzętu (włącznie ze wzmacniaczami), który wydziela ciepło.
8. ZASILANIE - Urządzenie należy podłączyć tylko do takiego źródła zasilania, jakie zostało opisane w
instrukcji obsługi lub oznaczone na obudowie.
9. ZABEZPIECZENIE PRZEWODU ZASILAJĄCEGO - Przewody zasilające należy poprowadzić w taki
sposób, aby nie znajdowały się one w przejściu, ani nie przyciskały ich pobliskie przedmioty.
10. OKRES NIEUŻYTKOWANIA - Podczas dłuższego okresu nieużytkowania urządzenia, należy odłączyć je
od sieci zasilającej i anteny.
11. CIAŁO OBCE LUB PŁYN W URZĄDZENIU - Należy zachować wszelką ostrożność, aby do urządzenia
nie dostały się przez otwory w obudowie żadne ciała obce, ani płyny.
12. USTERKA WYMAGAJĄCA NAPRAWY - Urządzenie należy skierować do wykwalifikowanego personelu
serwisowego, kiedy:
a. Przewód zasilający lub wtyczka zostały uszkodzone.
b. Do środka dostały się ciała obce lub płyny.
c. Zostało wystawione na działanie deszczu.
d. Urządzenie spadło lub posiada uszkodzoną obudowę. Korzystaj z kontrolek i dokonuj regulacji w
sposób opisany w podręczniku.
e. Urządzenie wydaje się funkcjonować nieprawidłowo.
f. Działanie urządzenia znacznie różni się od normalnego.
73.
Page 74

74.
13. NAPRAWA - Użytkownik nie powinien podejmować prób naprawy urządzenia, za wyjątkiem sugestii
opisanych w instrukcji. Wszelkie naprawy techniczne powinny być skierowane do wykwalifikowanego
personelu serwisowego.
14. CZYSZCZENIE – Urządzenie należy odłączyć od sieci zasilającej przed przystąpieniem do czyszczenia.
Nie wolno stosować preparatów czyszczących w płynie ani aerozolu - przecierać tylko za pomocą
wilgotnej szmatki. Stosować się do instrukcji dotyczących czyszczenia i konserwacji zawartych w
niniejszej instrukcji.
15. WYŁADOWANIA ATMOSFERYCZNE - Podczas wyładowań atmosferycznych i dłuższego okresu
nieużytkowania urządzenia, należy odłączyć je od sieci zasilającej i anteny.
16. KONTROLA BEZPIECZEŃSTWA - Po dokonaniu przeglądu lub naprawy, serwisant powinien
przeprowadzić kontrolę sprawności.
17. PRZECIĄŻENIE - Aby uniknąć pożaru lub porażenia prądem, nie wolno przeciążać gniazd wtykowych
ściennych, ani przedłużaczy.
18. WYŁADOWANIE ELEKTROSTATYCZNE – Urządzenie należy odłączyć od sieci zasilającej i wyjąć z
niego baterie, jeżeli występuje wadliwe jego działanie. Po chwili podłączyć ponownie do sieci zasilającej.
UWAGA
NINIEJSZY ODTWARZACZ CD JEST PRODUKTEM LASEROWYM KLASY I. JEDNAKŻE KORZYSTA ON
Z WIDZIALNEJ/NIEWIDZIALNEJ WIĄZKI LASERA, KTÓRA MOŻE STWORZYĆ RYZYKO SZKODLIWYCH
ODDZIAŁYWAŃ. ODTWARZACZ NALEŻY OBSŁUGIWAĆ ZGODNIE Z INSTRUKCJAMI.
PROMIENIOWANIE NIEWIDZIALNEGO LASERA, przy OTWARTEJ POKRYWIE LUB OBEJŚCIU
BLOKADY ZABEZPIECZAJĄCEJ. NIE NARAŻAĆ SIĘ NA DZIAŁANIE PROMIENIA!
NIE DOTYKAĆ SOCZEWKI LASERA.
OBSŁUGA LUB REGULACJA URZĄDZENIA, A TAKŻE POSTĘPOWANIE W SPOSÓB NIEZGODNY Z
ZAWARTYMI INSTRUKCJAMI MOŻE NARAZIĆ UŻYTKOWNIKA NA SZKODLIWE ODDZIAŁYWANIE.
ABY ZMNIEJSZYĆ RYZYKO POŻARU LUB PORAŻENIA ELEKTRYCZNEGO I DOKUCZLIWYCH
ZAKŁÓCEŃ, NALEŻY KORZYSTAĆ TYLKO Z ZALECANYCH AKCESORIÓW.
USTAWIENIE BEZPIECZNEGO POZIOMU GŁOŚNOŚCI
• Słuch stopniowo przyzwyczaja się do ciągłego słuchania głośnej muzyki i pojawia się wrażenie, że poziom
głośności jest niższy niż w rzeczywistości.
• To co się wydaje normalne w rzeczywistości może być szkodliwe.
• Głośność powinna być ustawiona na niższym poziomie ze względów bezpieczeństwa.
• Powoli zwiększaj głośność, aż usłyszysz wyraźnie i bez problemów.
• Uszkodzenie słuchu może być poważne i nieodwracalne.
• W razie problemów ze słuchem, skonsultuj się z lekarzem.
DALSZE INFORMACJE
• Jeśli urządzenie używane jest przez dłuższy okres czasu, nagrzewa się. Jest to całkowicie normalne
zjawisko.
• Zawsze zamykaj drzwiczki CD, aby napęd CD nie był zakurzony. Podczas czyszczenia należy wytrzeć
napęd CD miękką, suchą szmatką.
• Mechaniczne części urządzenia zawierają łożyska samosmarujące. Nie wolno ich nawilżać ani natłuszczać!
• Urządzenie może być używane wyłącznie w klimacie umiarkowanym.
• Nieodpowiednie dla dzieci poniżej trzech lat.
Kondensacja
W przypadku przenoszenia urządzenia z zimnego do ciepłego otoczenia może wystąpić zjawisko
kondensacji. Jeśli wewnątrz odtwarzacza znajduje się wilgoć, może ono nie działać prawidłowo.
Należy włączyć zasilanie i odczekać około godziny do momentu wyparowania wilgoci.
Page 75

Urządzenie należy chronić przed działaniem deszczu i wilgoci, piasku, kurzu, zewnętrznych źródeł ciepła (np.
w zaparkowanym samochodzie w lecie), a także bezpośredniego światła słonecznego.
Przenoszenie urządzenia
• Wyjmij płytę CD przed przeniesieniem urządzenia
• Zalecane jest wyjęcie płyty CD i wyłączenie odtwarzacza, jeśli nie korzystamy z urządzenia.
Ustalanie lokalizacji dla urządzenia
• Należy unikać wibracji, uderzeń lub powierzchni pochyłych, ponieważ wewnętrzne części urządzenia mogą
ulec uszkodzeniom.
• Nie wolno umieszczać ciężkich przedmiotów na odtwarzaczu.
• Nigdy nie umieszczaj odtwarzacza na wzmacniaczach ani innych urządzeniach, które mogą być gorące.
Wypakowanie:
• Wyjmij ostrożnie urządzenie i usuń wszystkie materiały opakowania.
• Zatrzymaj opakowanie do dalszego użycia, jeśli urządzenie ma być zwrócone do centrum serwisowego.
• Jeśli chcesz pozbyć się materiału opakunkowego, należy postępować zgodnie z odpowiednimi przepisami.
• Ostrożnie wyjmij zabezpieczenie głowicy laserowej z napędu CD.
Zasilanie
Jeśli tylko jest to możliwe, podłącz urządzenie do zasilania sieciowego, aby przedłużyć żywotność baterii.
Wyjmij wtyczkę z gniazda przed włożeniem baterii.
Zasilanie bateryjne (brak baterii w zestawie)
Otwórz komorę baterii i włóż 6 baterii typu LR-14, UM-2 lub C (zalecane baterie alkaliczne). Uwzględnij oba
bieguny, zaznaczone za pomocą “+” oraz “-“ wewnątrz komory baterii.
Odłącz niewielką wtyczkę zasilania w tylnej części urządzenia, jeśli chcesz, aby urządzenie było zasilane
bateryjnie.
Podczas podłączania przewodu zasilania, urządzenie automatycznie przechodzi w tryb zasilania sieciowego.
Baterie- środki ostrożności:
- Zawsze postępuj zgodnie z instrukcjami użytkowania oraz bezpieczeństwa zalecanymi przez producenta
baterii.
- Przechowuj baterie z dala od dzieci oraz zwierząt.
- Nigdy nie wrzucaj baterii do ognia. Nie wystawiaj baterii na działanie ognia ani źródeł ciepła.
- Wyrzucanie baterii: zużyte baterie należy wyrzucać lub utylizować zgodnie z odpowiednimi przepisami.
Skontaktuj się z lokalnym przedstawicielem władz miejskich w celu uzyskania szczegółowej informacji.
- Nie mieszaj nowych baterii z wyczerpanymi.
- Nie mieszaj baterii różnych typów, takich jak alkaliczne oraz cynkowe/węglowe. Zawsze korzystaj z baterii
tego samego typu.
- Wyjmij baterie, jeśli nie korzystasz z urządzenia przez dłuższy okres czasu, aby zapobiec uszkodzeniom z
powodu zardzewiałych lub skorodowanych baterii.
Zasilanie sieciowe
- Podłącz kabel zasilania sieciowego do gniazda ściennego AC 230V~50Hz.
- Urządzenie może być zasilane z sieci wyłącznie, gdy wartości odpowiadają specyfikacjom podanym na
plakietce urządzenia.
- Włóż mniejszą wtyczkę kabla zasilania do gniazdka typu jack AC~ w tylnej części urządzenia. Sprawdź, czy
wtyczka jest włożona do końca.
75.
Page 76

76.
Rozmieszczenie kontrolek
Widok z góry
1. Regulator VOLUME MIN/MAX
2. Selektor pasma AM/FM
Wybór pasma radiowego między FM a AM
3. Selektor funkcji MP3/USB/RADIO/OFF
Wybór między trybami Audio CD/MP3 CD,
USB oraz radiowym i wyłączanie urządzenia
4. STOP
5. REPEAT
Wybór trybów powtarzania
6. PRZEJDŹ Przejście do poprzedniego utworu i przewijanie
7. -10
Przejście 10 utworów/ plików do tyłu
Widok z przodu
8. Wyświetlacz LCD
9. +10
Przejście 10 utworów/ plików do przodu
10. SKIP+
Przejdź do następnego utworu i
przewijanie do przodu
11. PLAY/PAUSE
12. PROGRAM
Kolejność utworów
13. Skala
14. TUNING dostrajanie
15. Antena teleskopowa
16. Drzwiczki napędu CD
17. AC~ gniazdko sieci zasilania
(w tylnej części urządzenia)
18. Głośniki
19. Gniazdko słuchawek
20. Komora baterii (dolna część urządzenia)
21. Port USB
22. Uchwyt
23. Wskaźnik POWER
Page 77

Podstawowe działanie
Włączanie/Wyłączanie
Aby uniknąć niepotrzebnego zużycia mocy, ustaw selektor funkcji w pozycji OFF, jeśli urządzenie nie jest
użytkowane. Przy włączonym urządzeniu wskaźnik POWER zapala się na czerwono.
1. Wybierz tryb za pomocą selektora funkcji : RADIO, MP3/USB lub OFF.
2. Ustaw głośność za pomocą VOLUME MIN/MAX.
3. Ustaw selektor funkcji w pozycji OFF, aby wyłączyć urządzenie.
W przedniej części urządzenia znajduje się gniazdko słuchawek w celu słuchania w prywatności (brak
słuchawek w zestawie). Podłącz słuchawki za pomocą gniazdka stereo 3.5mm. Po dokonaniu połączeń,
głośniki wyciszają się automatycznie.
Radio
Zalecenia w celu poprawy jakości odbioru:
FM: Całkowicie rozwiń antenę teleskopową. Jeśli sygnał odbioru jest zbyt silny (np. w pobliżu stacji), należy
skrócić antenę.
AM: Urządzenie posiada wbudowana antenę AM; zmień położenie urządzenia, jeśli odbiór jest słaby.
Działanie radia
1. Ustaw selektor funkcji w pozycji RADIO.
2. Wybierz częstotliwość za pomocą selektora pasma: FM lub AM.
3. Dostosuj swoją ulubioną stację radiową za pomocą kontrolki TUNING .
4. Ustaw głośność za pomocą VOLUME MIN/MAX.
5. Ustaw selektor funkcji w pozycji OFF, aby wyłączyć urządzenie.
Odtwarzanie płyty audio CD lub MP3 CD
Odtwarzacz CD odczytuje wyłącznie płyty Cd audio oraz MP3. Nie należy odtwarzać Cd z danymi lub płyt
typu VCD/DVD.
1. Ustaw selektor funkcji w pozycji MP3/USB . Ekran pokazuje “- - -“przez moment, a
następnie wyświetla się 000.
2. Otwórz komorę CD ręcznie za pomocą uchwytu; na ekranie wyświetla się OP.
3. Włóż płytę naklejką do góry i ponownie ręcznie zamknij kieszeń CD. Na początku
wyświetla się “- - -“ , a następnie całkowita liczba utworów oraz CD. Na wyświetlaczu następuje zmiana na
001 oraz CD. Odtwarzanie rozpoczyna się automatycznie. Wyświetla się odpowiedni numer utworu.
4. Jeśli odtwarzanie nie rozpocznie się (zależnie od płyty), naciśnij PLAY/PAUSE aby ręcznie rozpocząć
odtwarzanie pierwszego utworu.
5. Naciśnij PLAY/PAUSE aby przerwać na moment odtwarzanie; naciśnij ponownie, aby powrócić. W trybie
pauzy miga ►.
6. Naciśnij STOP aby zatrzymać odtwarzanie; wyświetlacz ponownie pokaże całkowitą liczbę utworów.
Uwagi:
Odtwarzanie CD jest również zatrzymane kiedy:
a. kieszeń CD zostaje otwarta;
b. selektor funkcji ustawiony jest w pozycji RADIO lub OFF ;
c. zostaną odtworzone wszystkie utwory na CD.
Tryb przechodzenia
W trybie odtwarzania naciśnij SKIP-, SKIP+, -10 lub +10, aby przejść do poprzedniego lub następnego
utworu lub 10 utworów do przodu albo do tyłu.
1. Wybierz utwór w trybie odtwarzania, pauzy lub zatrzymania za pomocą SKIP-, SKIP+, -10 lub +10 i
rozpocznij odtwarzanie, naciskając PLAY/PAUSE.
2. Naciśnij SKIP+ kilkakrotnie, aby przejść do następnych utworów, aż wyświetli się numer wybranego
utworu. Naciśnij SKIP+ podczas odtwarzania ostatniego utworu, aby przejść do pierwszego utworu na
płycie.
3. Naciśnij SKIP- kilkakrotnie, aby przejść przez poprzednie utwory. Naciśnij SKIP- podczas odtwarzania
pierwszego utworu, aby przejść do ostatniego utworu na płycie.
77.
Page 78

78.
4. Naciśnij szybko +10 aby przejść 10 utworów do przodu. Jeśli na płycie jest poniżej 10 utworów, następuje
przejście do ostatniego utworu. Naciśnij +10 podczas odtwarzania ostatniego utworu, aby przejść do
pierwszego utworu na płycie.
5. Naciśnij szybko -10, aby przejść 10 utworów do tyłu. Pomiędzy 10 utworami na płycie następuje przejście
do pierwszego utworu. Naciśnij -10 podczas odtwarzania pierwszego utworu, aby przejść do ostatniego
utworu na płycie.
Przewijanie do przodu i do tyłu
Naciśnij i przytrzymaj SKIP+ lub SKIP- aby wybrać funkcje przewijania do przodu lub do tyłu poprzez utwór
w celu wyszukania wybranej pozycji. Poziom głośności jest niższy.
Programowanie i odtwarzanie
Można zaprogramować do 20 utworów w wybranej kolejności; każdy utwór może być zaprogramowany
więcej niż raz.
1. Przed zaprogramowaniem, naciśnij STOP oraz PROGRAM. Ekran pokazuje również
000, PROG oraz CD .
2. Wybierz pierwszy utwór za pomocą SKIP+, SKIP-, +10 lub -10.
3. Zapisz utwór za pomocą PROGRAM. Ekran pokazuje również CD oraz PROG poza
P01. Teraz wybierz następny utwór.
4. Powtórz etapy 2 oraz 3, aby zaprogramować następne utwory, maksymalna liczba utworów wynosi 20.
5. Naciśnij PLAY/PAUSE, aby rozpocząć odtwarzanie utworów w wybranej kolejności. W trybie
programowania wyświetlają się numer utworu, CD oraz PROG .
6. W trybie programowania dostępna jest funkcja powtarzania całego programu, patrz szczegóły Tryby
powtarzania punkt 4.
Kasuj programowanie
W celu wykasowania zaprogramowanych utworów należy postąpić wg podanych poniżej instrukcji:
1. Otwórz kieszeń CD.
2. Ustaw selektor funkcji w pozycji RADIO lub OFF.
3. Naciśnij STOP.
Tryby powtarzania
W urządzeniu dostępne są różne tryby powtarzania; naciśnij REPEAT w celu dostępu i wyboru.
1. Naciśnij REPEAT raz, aby powtórzyć bieżący utwór. Ekran pokazuje REP 1, numer
utworu, jak również CD.
2. Naciśnij REPEAT dwa razy, aby powtórzyć płytę w oryginalnej kolejności. Ekran
pokazuje ALL REP numer utworu, jak również CD.
3. Naciśnij REPEAT ponownie, aby powrócić do normalnego trybu odtwarzania. Ekran
ponownie pokazuje numer utworu oraz CD.
4. Funkcja powtarzania może być również użyta w trybie programowania. W trybie
powtarzania naciśnij REPEAT raz, aby powtórzyć cały program. Na wyświetlaczu
pojawia się numer utworu, PROG oraz ALL REP.
Odtwarzanie MP3 z urządzenia USB
Podłącz urządzenie USB (typu USB stick, odtwarzacz MP3, itp.) do portu USB w przedniej części. Wyjmij
płytę z napędu. Naciśnij STOP, aby przełączyć między płytą a trybami USB.
1. Na ekranie pojawia się natychmiast USB, podczas odczytu “- - -“ oraz liczba wyświetlonych plików.
Odtwarzanie zaczyna się automatycznie.
2. Jeśli odtwarzanie nie rozpocznie się automatycznie, naciśnij PLAY/PAUSE, aby ręcznie rozpocząć
odtwarzanie pierwszego utworu.
3. Naciśnij PLAY/PAUSE, aby przerwać na moment odtwarzanie; naciśnij ponownie, aby powrócić. W trybie
pauzy miga numer pliku.
4. Naciśnij STOP, aby zatrzymać odtwarzanie; wyświetlacz ponownie pokaże całkowitą liczbę plików.
Page 79

Uwagi:
Odtwarzanie USB jest również zatrzymane kiedy:
a. Kieszeń CD zostaje otwarta;
b. Selektor funkcji ustawiony jest w pozycji RADIO lub OFF ;
c. Zostaną odtworzone wszystkie utwory na urządzeniu USB.
Tryb przechodzenia
W trybie odtwarzania naciśnij SKIP-, SKIP+, -10 lub +10, aby przejść do poprzedniego lub następnego pliku
lub 10 plików do przodu lub do tyłu.
1. Wybierz plik w trybie odtwarzania, pauzy lub zatrzymania za pomocą SKIP-, SKIP+, -10 lub +10 i
rozpocznij odtwarzanie, naciskając PLAY/PAUSE.
2. Naciśnij SKIP+ kilkakrotnie, aby przejść do następnych plików, aż wyświetli się numer wybranego pliku.
Naciśnij SKIP+ podczas odtwarzania ostatniego pliku, aby przejść do pierwszego pliku na urządzeniu
USB.
3. Naciśnij SKIP- kilkakrotnie, aby przejść przez poprzednie pliki. Naciśnij SKIP- podczas odtwarzania
pierwszego pliku, aby przejść do ostatniego pliku na urządzeniu USB.
4. Naciśnij szybko +10 aby przejść dziesięć plików do przodu. Jeśli na urządzeniu USB jest poniżej 10 plików
następuje przejście do ostatniego pliku. Naciśnij +10 podczas odtwarzania ostatniego pliku, aby przejść do
pierwszego pliku na urządzeniu USB.
5. Naciśnij szybko -10 aby przejść 10 plików do tyłu. Pomiędzy 10 plikami na urządzeniu USB następuje
przejście do pierwszego pliku. Naciśnij -10 podczas odtwarzania pierwszego pliku, aby przejść do
ostatniego pliku na urządzeniu USB.
Przewijanie do przodu i do tyłu
W odtwarzaniu USB niedostępna jest funkcja przewijania do przodu oraz do tyłu.
Programowanie i odtwarzanie
Można zaprogramować do 20 plików w wybranej kolejności; każdy plik może być zaprogramowany więcej niż
raz.
1. Przed zaprogramowaniem, naciśnij STOP oraz PROGRAM. Wyświetlacz pokazuje również CD oraz 000 i
PROG.
2. Wybierz plik za pomocą SKIP+, SKIP-, +10 lub -10.
3. Zapisz plik za pomocą PROGRAM. Wyświetlacz pokazuje PROG oraz P01. Teraz wybierz następny plik
4. Powtórz etapy 2 oraz 3, aby zapisać następne pliki; maksymalna liczba plików wynosi 20.
5. Naciśnij PLAY/PAUSE, aby rozpocząć odtwarzanie plików w wybranej kolejności. W trybie programowania
wyświetlają się: numer pliku oraz PROG .
6. W trybie programowania dostępna jest funkcja powtarzania całego programu, patrz szczegóły Tryby
powtarzania punkt 4.
Kasuj programowanie
W celu wykasowania programu należy postąpić wg podanych poniżej instrukcji:
1. Otwórz kieszeń CD.
2. Ustaw selektor funkcji w pozycji RADIO lub OFF.
3. Naciśnij STOP.
Tryby powtarzania
W urządzeniu dostępne są różne tryby powtarzania; naciśnij REPEAT w celu dostępu i wyboru.
1. Naciśnij REPEAT raz, aby powtórzyć bieżący plik. Wyświetlacz pokazuje REP 1 oraz numer pliku.
2. Naciśnij REPEAT dwa razy, aby powtórzyć wszystkie pliki na urządzeniu USB. Wyświetlacz pokazuje ALL
REP oraz numer pliku.
3. Naciśnij REPEAT ponownie, aby powrócić do normalnego trybu odtwarzania. Na wyświetlaczu ponownie
pojawia się numer pliku.
4. Funkcja powtarzania może być również użyta w trybie programowania. W trybie powtarzania naciśnij
REPEAT raz, aby powtórzyć cały program. Na wyświetlaczu pojawia się numer pliku, PROG
oraz ALL REP.
79.
Page 80

80.
Posługiwanie się płytami oraz ich czyszczenie
OBCHODZENIE SIĘ Z PŁYTAMI CD
* Wyjmij płytę z pudełka.
* Nie dotykaj jej powierzchni.
* Nie przytwierdzaj na płytach naklejek, ani nie pisz po nich.
* Nie zginaj płyt CD.
OD CZĘŚCI CENTRALNEJ DO KRAWĘDZI
PRAWIDŁOWO NIEPRAWIDŁOWO
Przechowywanie
* Zawsze przechowuj płyty CD w swoich pudełkach.
* Nie wystawiać na bezpośrednie działanie promieni słonecznych, wysokich temperatur, wilgotności czy
kurzu.
Czyszczenie płyt CD
* Do czyszczenia używaj tylko miękkiej szmatki.
* Płytę przecieraj ruchem od środka na zewnątrz.
Page 81

ROZWIĄZYWANIE PROBLEMÓW
Jeżeli odtwarzacz wydaje się nie działać prawidłowo, należy najpierw sprawdzić poniższą listę przed
skontaktowaniem się z autoryzowanym centrum napraw.
OSTRZEŻENIE: Nigdy nie otwierać obudowy urządzenia. Wszelkie naprawy techniczne lub konserwacja powinny być skierowane do wykwalifikowanego personelu serwisowego.
PROBLEM MOŻLIWA PRZYCZYNA ROZWIĄZANIE
OGÓLNE
Brak dźwięku
Zbyt niski poziom głośności.
Wyczerpane baterie.
Baterie włożone
nieprawidłowo.
Niepodłączony kabel
Dostosuj głośność.
Wymień baterie.
Sprawdź bieguny.
Podłącz kabel zasilania w
prawidłowy sposób.
zasilania.
RADIO
Słaby odbiór
Słaby sygnał.
Zakłócenia pochodzące od
innych urządzeń (TV, VCR,
skomputer, itp.).
Dostosuj antenę:
FM: Antena teleskopowa.
AM: dostosuj urządzenie.
Zachowaj odpowiednią
odległość od innych urządzeń
elektrycznych.
CD/MP3
CD przeskakuje
CD/MP3 brudna lub
uszkodzona płyta.
Urządzenie było narażone na
Wymień lub wyczyść płytę.
Należy utrzymać urządzenie w
stabilnej pozycji lub je odstawić.
wstrząsy.
Wyświetlacz: - - - Brak CD w kieszeni.
Brudna lub uszkodzona płyta.
Kondensacja w głowicy
laserowej.
CD-R/RW jest pusty lub nie
jest sfinalizowany.
Włóż płytę CD, CD-R lub
CD-RW.
Wymień lub wyczyść płytę CD.
Poczekaj na całkowite
osuszenie głowicy laserowej
(około 1 godziny).
Sfinalizuj CD-R/RW.
DANE TECHNICZNE
Ogólne
Zasilanie: AC 230V~50Hz
DC 9V (6 baterii typu LR14 / UM-2 / C, 1.5V)
(baterie nie są dołączone do zestawu)
Pobór mocy: 13 Watt
Częstotliwość: AM 525 – 1615kHz
FM 87.5 – 108MHz
Audio
Impedancja głośnika 8 Ohm
Wymiary: ok. 239 x 205 x 121
Waga: ok. 1,4 kg
Dane techniczne mogą ulec zmianie bez uprzedniego zawiadomienia.
mm
81.
Page 82

82.
MODEL: 6698RB
Design Radio met CD/MP3/WMA-Speler en USB Poort
VELIGHEIDSMAATREGELEN
WAARSCHUWING
RISICO VOOR EEN
ELEKTRISCHE SCHOK
PAS OP: OM HET RISICO VAN EEN
ELEKTRISCHE SCHOK TE
Een driehoek met een
bliksemschicht wil de
aandacht van de gebruiker
vestigen op “gevaarlijke
voltage”, zonder isolatie,
binnenin het apparaat die
hoog genoeg kan zijn om een
elektrische schok te
veroorzaken.
VERMINDEREN, DE BEHUIZING (OF
ACHTERKANT) NIET VERWIJ
DEREN. ER ZIJN GEEN
ONDERDELEN DIE DOOR DE
GEBRUIKER ONDERHOUDEN
MOETEN WORDEN. LAAT
ONDERHOUD OVER AAN
GEKWALIFICEERD ONDERHOUD
SPERSONEEL.
BIJKOMENDE INFORMATIE
Let op bij kleine onderdelen en batterijen, niet doorslikken, dit kan tot ernstige schade of
verstikking leiden. Let er in het bijzonder bij kinderen op dat kleine onderdelen en batterijen buiten
hun bereik zijn.
Belangrijk advies omtrent het gehoor
Opgelet:
U geeft om uw gehoor, wij doen dat ook.
Wees daarom voorzichtig tijdens het gebruik van dit apparaat.
Onze aanbeveling: Vermijd hard geluid.
In het geval het apparaat door kinderen wordt gebruikt, zorg ervoor dat het volume niet te hard
staat.
Opgelet!
Hard geluid kan onherstelbare schade aan het gehoor van een kind veroorzaken.
Een driehoek met een
-
uitroepteken wil de aandacht
van de gebruiker vestigen op
belangrijke instructies voor
gebruik en onderhoud in de
bijgeleverde gebruiksaanwijzing, die zorgvuldig moeten
-
worden gelezen.
Laat NOOIT personen, in het bijzonder kinderen, voorwerpen in de gaten, schachten of andere
openingen van de behuizing steken; dit kan een dodelijke elektrische schok tot gevolg hebben.
De behuizing van het apparaat mag slechts door daartoe gekwalificeerde vaklui geopend worden.
Gebruik het apparaat alleen voor het doel waarvoor het is bestemd.
Het apparaat is uitsluitend bedoeld voor gebruik in huishoudelijke en zakelijke omgevingen.
Gelieve deze gebruiksaanwijzing zorgvuldig te bewaren voor later gebruik.
Aanwijzingen inzake de milieubescherming
Dit product mag aan het einde van zijn levensduur niet samen met het normale huishoudelijke
afval verwijderd worden, maar moet afgegeven worden op een verzamelpunt voor de recycling
van elektrische en elektronische apparatuur. Het symbool op het product, in de gebruiksaanwijz
ing of op de verpakking maakt u daarop attent.
De werkstoffen zijn volgens hun kenmerking herbruikbaar. Met het hergebruik, de stoffelijke
verwerking of andere vormen van recycling van oude apparaten levert u een belangrijke bijdrage
tot de bescherming van ons milieu.
Gelieve bij het gemeentebestuur informatie te vragen over het bevoegde verzamelpunt.
Page 83

Verhinder nooit de ventilatie van het apparaat door middel van gordijnen, kranten, dekens of
meubelstukken. De ventilatiegaten moeten altijd vrij zijn. Oververhitting kan schade veroorzaken en
de levensduur van het apparaat verkorten.
Hitte en warmte
Stel het apparaat niet bloot aan direct zonlicht. Zorg ervoor dat het apparaat niet wordt blootgesteld
aan directe hittebronnen zoals verwarmingen en open vuur. Zorg ervoor dat de ventilatiegaten niet
zijn bedekt.
Vocht en reiniging
Dit product is niet waterdicht! Doop de speler niet in water. Voorkom dat de speler met water in
contact komt. Water in het apparaat kan tot ernstige beschadiging leiden. Gebruik geen
schoonmaakmiddelen die alcohol, ammoniak, benzeen of schuurmiddel bevatten aangezien deze
middelen de speler kunnen beschadigen. Om te reinigen, gebruik een zachte, vochtige doek.
Professionele recycling
Batterijen en verpakking horen niet thuis in het huisafval. De batterijen moeten worden ingeleverd
bij een verzamelpunt voor gebruikte batterijen. Verpakkingsmateriaal gescheiden deponeren is
goed voor het milieu.
VELIGHEIDSMAATREGELEN
1. LEES DE GEBRUIKSAANWIJZING – Alle veiligheids- en bedieningsaanwijzingen dienen gelezen te
worden voordat het apparaat gebruikt wordt.
2. BEWAAR DE GEBRUIKSAANWIJZING – De veiligheids en bedieningsaanwijzingen dienen bewaard te
worden voor toekomstig gebruik.
3. NEEM WAARSCHUWINGEN IN ACHT – Alle waarschuwing op het apparaat en handleiding dienen in
acht genomen te worden.
4. VOLG DE GEBRUIKSAANWIJZINGEN OP – Alle bedienings- en gebruiksaanwijzingen dienen opgevolgd
te worden.
5. WATER EN VOCHT – Gebruik het apparaat niet in de buurt van water, bijvoorbeeld bij een badkuip,
wasbak, keukenaanrecht, wasteil, zwembad of in een vochtige kelder.
6. VENTILATIE – De openingen in het apparaat zorgen er voor dat het apparaat goed geventileerd wordt, ze
zijn nodig voor het goed functioneren en het voorkomen van oververhitting. Het apparaat dient zodanig
geplaatst te worden op een locatie dat een goede ventilatie niet door gehinderd wordt. Zet het niet op een
bed, sofa tapijt of een soortgelijk oppervlak dat de ventilatiegleuven kan blokkeren of in een ingebouwde
installatie zoals een boekenkast of kastje dat de luchtstroom door de ventilatiegleuven kan verhinderen.
7. HITTE - Het apparaat dient niet in de nabijheid van hittebronnen zoals radiatoren, warmte roosters,
kachels of andere apparaten (waaronder versterkers) die hitte produceren, te staan.
8. ENERGIEBRONNEN – Dit product dient alleen gebruik te maken van het type energiebron aangegeven
op het markeringslabel.
9. STROOMSNOER BESCHERMING – Stroomsnoeren dienen zo gelegd te worden dat er niet makkelijk
overheen gelopen kan worden of ingedrukt worden door voorwerpen die bovenop of tegen ze geplaatst
worden.
10. PERIODEN VAN ONBRUIK – Haal de stekkers uit het stopcontact en maak de stekker van de antenne
los als het apparaat voor langere tijd niet gebruikt gaat worden.
11. VOORWERPEN EN VLOEISTOFFEN – Let er op dat er geen vreemde voorwerpen en vloeistoffen
gemorst worden in de openingen van het apparaat.
12. SCHADEONDERHOUD – Haal de stekker uit het stopcontact en breng het naar gekwalificeerd
onderhoudspersoneel in de volgende gevallen:
a. Als het stroomsnoer beschadigd is;
b. Als er vloeistof gemorst is of er voorwerpen in het apparaat gevallen zijn;
c. Als het apparaat blootgesteld is aan regen of water;
d. Het apparaat is gevallen of de behuizing is beschadigd. Gebruik de bedieningselementen alleen zoals
aangegeven in de gebruiksaanwijzing.
e. Het apparaat lijkt niet normaal te functioneren.
f. Als het apparaat een duidelijke verandering in functioneren vertoont;
83.
Page 84

84.
13. ONDERHOUD – Behalve dan wat er aangegeven staat in de handleiding, dient de gebruiker niet zelf te
proberen het apparaat te repareren. Alle reparaties dienen uitgevoerd te worden door
onderhoudspersoneel.
14. HET SCHOONMAKEN – Haal de stekker uit het stopcontact vóór het schoonmaken. Gebruik geen
vloeibare schoonmaakmiddelen of aërosolmiddelen. Gebruik een vochtige doek voor het schoonmaken.
Volg de verzorging en onderhoud instructies in de handleiding.
15. BLIKSEM – voor extra bescherming voor dit product tijdens onweer, haalt u de stekker uit het stopcontact
en ontkoppel de antenne of het kabelsysteem.
16. VEILIGHEIDSCONTROLE – Na het afronden van onderhoud of reparaties aan dit apparaat, vraag de
onderhoudsmonteur om veiligheidscontroles uit te voeren.
17. OVERBELASTING – Overbelast stopcontacten, verlengsnoer of geïntegreerde stekkerdozen omdat dit
kan resulteren in brand of een elektrische schok.
18. ELECTROSTATISCHE ONTLADING – Ontkoppel van het voedingsnet en verwijder de batterijen
wanneer het toestel niet goed functioneert. Sluit het opnieuw aan na verloop van tijd.
OPGELET
DEZE CD-SPELER IS EEN KLASSE I LASER PRODUCT. ECHTER DEZE CD-SPELER GEBRUIKT EEN
ZICHTBARE/ONZICHTBARE LASERSTRAAL WELKE VOOR BLOOTSTELING AAN GEVAARLIJK
STRALING KAN ZORGEN ALS DEZE VRIJKOMT. ZORG ER VOOR OM DE CD TE BEDIENEN ZOALS
AANGEGEVEN.
ONZICHTBARE LASERSTRALING KOMT VRIJ WANNEER DE BEHUIZING GEOPEND WORDT OF ALS
DE INTERNE BEVEILIGING UITGESCHAKELD WORDT. VOORKOM BLOOTSTELLING AAN DE STRAAL!
RAAK DE LASERLENS NIET AAN.
VERKEERT GEBRUIK VAN DE BESTURING, AANPASSINGEN, PRESTATIES OF PROCEDURES KAN
RESULTEREN IN EEN GEVAARLIJKE BLOOTSTELLING AAN STRALING.
OM HET RISICO VAN BRAND OF ELECTROCUTIE EN STORENDE INTERFERENTE TE VERMINDEREN
DIENT U ALLEEN DE AANBEVOLEN ACCESSOIRES TE GEBRUIKEN.
Een veilig geluidsniveau instellen
• Wanneer u constant naar luide muziek luistert past uw gehoor zich geleidelijk aan het hoge geluidsniveau
aan. Daardoor lijkt het volume lager te zijn dan het werkelijk is.
• Wat voor u een normaal geluidsniveau lijkt te zijn, kan in feite uw gehoor beschadigen.
• Zet het volume laag om uzelf hiertegen te beschermen.
• Draai dan langzaam het volume hoger, totdat u de muziek duidelijk en zonder problemen kunt horen.
• Gehoorbeschadiging kan ernstig zijn en is onomkeerbaar.
• Raadpleeg uw dokter wanneer u een gehoorprobleem opmerkt.
Overige Informatie
• Als het apparaat voor langere tijd gebruikt wordt, dan wordt het warm. Dat is normaal.
• Sluit altijd de CD-lade om de CD-drive stofvrij te houden. Veeg, tijdens het schoonmaken het CD-drive
compartiment schoon met een zachte droge doek.
• De mechanische onderdelen van het apparaat bevatten zelfsmerende lagers. Niet invetten of insmeren.
• Gebruik het apparaat alleen onder gematigde klimaat condities.
• Niet geschikt voor kinderen onder de drie jaar.
Condensatie
Condensatie kan plaatsvinden als het apparaat van een koude naar een warme omgeving verplaatst wordt.
Als er vocht in de speler zit, dan zal het apparaat misschien niet goed functioneren.
Doe de stekker in het stopcontact en wacht ongeveer een uur om het vocht te laten verdampen.
Page 85

Bescherm het apparaat tegen regen en vocht, zand, stof en extreme hitte (bijvoorbeeld in een in de zon
geparkeerde auto) en tegen direct zonlicht.
Het apparaat verplaatsen
• Verwijder de CD voordat u het apparaat verplaatst.
• U wordt aangeraden de CD te verwijderen en het apparaat uit te schakelen wanneer u het apparaat lange
tijd niet gebruikt.
Het gereedmaken van de plaats waar het apparaat neergezet gaat worden.
• Vermijdt vibraties, botsingen of niet rechte oppervlakken omdat anders de interne onderdelen ernstig
beschadigd kunnen raken.
• Zet geen zware voorwerpen op de speler.
• Zet de speler nooit op versterkers of andere apparaten die warm kunnen worden.
Uitpakken:
• Haal het apparaat voorzichtig uit de verpakking en verwijder alle verpakkingsmateriaal.
• Bewaar het verpakkingsmateriaal, zodat u het weer kunt gebruiken als het apparaat teruggestuurd moet
worden naar de klantenservice.
• Houdt u aan de regelgeving voor het wegwerpen van verpakkingsmateriaal als u het materiaal wilt
weggooien.
• Verwijder voorzichtig de laserlensbescherming van het CD-compartement.
Voeding
Sluit het apparaat zo vaak mogelijk aan op het stopcontact om de levensduur van de batterijen te verlengen.
Haal de stekker uit het stopcontact voordat u de batterijen plaatst.
Batterijvoeding (Batterijen Niet Meegeleverd)
Open de batterijhouder en plaats 6 type LR-14, UM-2 of C batterijen (bij voorkeur Alkaline). Let a.u.b. op de
juiste polariteiten, welke met “+” en “-“ in de batterijhouder gemarkeerd zijn.
Haal de kleine netwerkstekker uit de achterkant van het apparaat om de batterijen als voeding te gebruiken.
Wanneer u de voedingskabel aansluit, schakelt het apparaat automatisch over op netwerkvoeding.
Voorzorgsmaatregelen Voor Batterijgebruik:
- Volg altijd de voorzorgsmaatregelen van de batterijfabrikant betreffende veiligheid en gebruik.
- Houd batterijen uit de buurt van kinderen en huisdieren.
- Werp batterijen nooit in vuur. Stel batterijen niet bloot aan vuur of andere hittebronnen.
- Verwijderen van batterijen: Uitgeputte batterijen dienen op correcte manier afgedankt en hergebruikt worden
conform alle wetten daarop van toepassing. Voor meer informatie, neem contact op met uw lokale autoriteiten
i.v.m. afvalverwerking.
- Combineer geen nieuwe en uitgeputte batterijen.
- Combineer geen verschillende batterijtypes, zoals Alkaline en zink/koolstof. Gebruik uitsluitend batterijen van
hetzelfde type.
- Haal de batterijen uit het apparaat wanneer u van plan bent de speler gedurende lange tijd niet te gebruiken
om beschadiging wegens roest of corrosie van de batterijen te voorkomen.
Netwerkvoeding
- Sluit de voedingskabel aan op een AC 230V~50Hz stopcontact.
- Gebruik het apparaat uitsluitend met een voeding die overeenkomt met de specificaties op het typelabel.
- Steek de kleinere stekker van de voedingskabel in de AC~ ingang op de achterkant. Zorg ervoor de stekker
er volledig in te duwen.
85.
Page 86

86.
Locatie Van De Bedieningen
Bovenaanzicht
1. VOLUME MIN/MAX
2. Frequentiebandkiezer AM/FM
Selecteer de radio ontvangst tussen FM en
AM.
3. MP3/USB/RADIO/OFF-functiekiezer.
Selecteer tussen Audio, CD/MP3-CD, USB en
radiomodi en het uitschakelen van het
apparaat.
4. STOP
5. REPEAT
Selecteer de herhaalmodi
6. SKIP Naar de vorige track en terugspoelen
7. -10
Ga 10 tracks/bestanden terug
Vooraanzicht
8. LCD-display
9. +10
Ga 10 tracks/bestanden vooruit
10. SKIP +
Ga naar de volgende track en snel
vooruitspoelen
11. PLAY / PAUSE
12. PROGRAM
Track volgorde
13. Wijzerplaat
14. TUNING-knop
15. Telescoopantenne
16. CD-drive klep
17. AC-stroomnetwerkaansluiting
(Aan de achterzijde van het apparaat).
18. Luidsprekers
19. Koptelefoonaansluiting
20. Batterijcompartiment (onderzijde van het
apparaat)
21. USB-poort
22. Handgreep
23. POWER-indicator
Page 87

Basisbediening
Aan/Uit
Wanneer het apparaat niet in gebruik is, zet de functiekeuzeschakelaar a.u.b. op stand OFF om onnodig
stroomverbruik te voorkomen. In stand ON (AAN) zal de POWER indicator rood oplichten.
1. Selecteer de gewenste modus met de functieschakelaar: RADIO, MP3/USB of OFF.
2. Pas het volume naar wens aan met VOLUME MIN/MAX.
3. Zet de functiekeuzeschakelaar op stand OFF om het apparaat uit te schakelen.
Op de voorkant van het apparaat zit een hoofdtelefooningang om privé te luisteren (hoofdtelefoon niet
meegeleverd). Sluit de hoofdtelefoon aan met een 3,5mm stereo jack. Zodra u deze aansluit, worden de
luidsprekers automatisch uitgeschakeld.
Radio
Aanbevelingen voor betere ontvangst
FM: Trek de telescopische antenne volledig uit. Mocht het ontvangstsignaal te sterk zijn (bijv. in de buurt
van een radiostation), verkort dan de telescopische antenne.
AM: Het apparaat is voorzien van een ingebouwde AM antenne. Verplaats het gehele apparaat in geval van
zwakke ontvangst.
Radiobediening
1. Stel de functiekeuzeschakelaar in op stand RADIO.
2. Selecteer de gewenste frequentieband met de bandkeuzeschakelaar: FM of AM.
3. Stem af op uw favoriete radiostation met de TUNING regeling.
4. Pas het volume naar wens aan met VOLUME MIN/MAX.
5. Stel de functiekeuzeschakelaar in op stand OFF om het apparaat uit te schakelen.
Het afspelen van audio-CD’s en MP3-CD’s
De CD-speler kan alleen audio-CD’s en MP3-CD’s afspelen. Probeer geen Data-CD of VCD/DVD-disks af te
spelen.
1. Zet de functiekiezer op de MP3/USB-stand. Het display toont voor een kort ogenblik
“- - - “ en daarna 000.
2. Open het CD-compartiment handmatig d.m.v. de uitgeholde greep, OP verschijnt op
het LCD-display.
3. Doe er een disk in met het label naar boven toe gericht er in en sluit het CD-compartiment weer
handmatig. Eerst verschijnt “- - -“ en daarna het totale aantal tracks en CD. Het display verandert in 001
en CD. En het afspelen begint automatisch. Het overeenkomende tracknummer wordt weergegeven.
4. Mocht het afspelen niet starten (afhankelijk van de disk), druk dan a.u.b. op PLAY/PAUSE om het afspelen
van de eerste track handmatig te beginnen.
5. Druk op PLAY/PAUSE om het afspelen te pauzeren, druk nogmaals om het afspelen te hervatten. In
pauzemodus zal ► knipperen.
6. Druk op STOP om het afspelen te stoppen; de display vertoont het totale aantal tracks weer.
Opmerkingen:
Het afspelen van een CD wordt tevens gestopt wanneer:
a. de CD-houder wordt geopend;
b. de functiekeuzeschakelaar naar stand RADIO of OFF wordt verschoven;
c. alle tracks van de CD zijn afgespeeld.
Overslaanmodus
Druk in de afspeelmodus op SKIP-, SKIP+, -10 of +10 om naar de vorige, volgende of 10 tracks terug of
vooruit te gaan.
1. Selecteer de track in afspeel -, stop –of pauzemodus met SKIP-, SKIP+, -10 of +10 en start het afspelen
door PLAY/PAUSE in te drukken.
2. Druk herhaaldelijk op SKIP+ om naar de volgende track(s) te gaan totdat het gewenste track nummer
weergegeven wordt. Druk op SKIP+ tijdesn het afspelen van de laatste track om naar de eerste track van
de disk te gaan.
87.
Page 88

88.
3. Druk herhaaldelijk op SKIP - om naar de vorige track(s) te gaan. Druk op SKIP- tijdesn het afspelen van
de eerste track om naar de laatste track van de disk te gaan.
4. Druk kort op +10 om tien tracks vooruit te gaan. Als er minder dan 10 tracks over zijn op de disk dan gaat
u naar de laatste track. Druk op +10 tijdens het afspelen van de laatste track om naar de eerste track van
de disk te gaan.
5. Druk kort op -10 om tien tracks terug te gaan. Wanneer u zich in de eerste 10 tracks van de disk bevindt
dan gaat u naar de eerste track. Druk op -10 tijdens het afspelen van de eerste track om naar de laatste
track van de disk te gaan.
Vooruit –en Terugspoelen
Houd SKIP+ of SKIP- ingedrukt om de vooruit –en terugspoelfuncties te gebruiken en naar een bepaalde
positie binnen de track te zoeken. Het volume wordt hierdoor verlaagd.
Geprogrammeerd afspelen
Maximaal 20 tracks kunnen in een door u gekozen volgorde geprogrammeerd worden, u kunt elke gewenste
track meer dan eens programmeren.
1. Voordat u gaat programmeren moet u eerst op STOP en PROGRAM drukken.
Het display toont ook 000 en PROG naast CD. .
2. Selecteer de eerste gewenste track met SKIP+, SKIP-, +10 of -10.
3. Sla de track op met PROGRAM. Het display toont naast CD en PROG ook P01.
Selecteer nu de volgende track.
4. Herhaal stappen 2 en 3 om meerdere tracks te programmeren, het maximale aantal tracks is 20.
5. Druk op PLAY/PAUSE om het afspelen van de tracks in de door u gewenste volgorde te beginnen. In de
programmamodus worden het tracknummer, CD en PROG getoond.
6. In de programmamodus is de herhaalfunctie voor het volledige programma beschikbaar, zie voor meer
informatie Herhaalmodi punt 4.
De Programmering Wissen
Volg onderstaande stappen om de programmering te wissen:
1. Open de CD-houder.
2. Stel de functiekeuzeschakelaar in op stand RADIO of OFF.
3. Druk op STOP.
Herhaalmodi
Verscheidene herhaalmodi worden door het apparaat beschikbaar gesteld; druk op REPEAT om deze te
gebruiken en selecteren.
1. Druk eenmaal op REPEAT om de huidige track te herhalen. De display vertoont
REP 1 naast het tracknummer en CD.
2. Druk tweemaal op REPEAT om de gehele disk in de originele volgorde ervan te
herhalen. De display vertoont ALL REP naast het tracknummer en CD.
3. Druk wederom op REPEAT om terug te keren naar normale afspeelmodus.
De display vertoont het tracknummer weer en CD.
4. U kunt ook de herhaalfunctie gebruiken tijdens het afspelen van het programma.
Druk in de programmamodus één keer op REPEAT om het volledige programma te
herhalen. Het display toont naast het tracknummer en PROG ook ALL REP.
Het afspelen van MP3-bestanden
Sluit uw USB-apparaat (USB-stick, MP3-speler enz.) aan op de USB-poort aan de voorzijde. Haal de disk
uit de drive. Druk op STOP om te schakelen tussen de disk en USB-modi.
1. Het display geeft kort USB weer, tijdens het lezen “- - - “ en daarna wordt het aantal bestanden getoond.
Het afspelen begint automatisch.
2. Wanneer het afspelen niet automatisch begint, druk dan op PLAY/PAUSE om het afspelen van het eerste
bestand handmatig te beginnen.
Page 89

3. Druk op PLAY/PAUSE om het afspelen te pauzeren, druk er nogmaals op om het afspelen te continueren.
In de pauzemodus knippert het bestandnummer.
4. Druk op de STOP om het afspelen te stoppen, het display toont weer de totale hoeveelheid bestanden.
Opmerkingen:
Het afspelen d.m.v. de USB wordt ook gestopt wanneer:
a. het CD-compartiment geopend wordt;
b. het schuiven van de functiekiezer naar de RADIO of OFF-standen;
c. alle bestanden op het USB-apparaat afgespeeld zijn.
Skipmodus
Druk in de afspeelmodus op SKIP-, SKIP+, -10 of +10 om naar de vorige, volgende of 10 bestanden terug of
vooruit te gaan.
1. Select het bestand in de stop- of pauzemodi met SKIP- SKIP+, -10 of +10 en begin het afspelen door op
PLAY/PAUSE te drukken.
2. Druk herhaaldelijk op SKIP+ om naar het (de) volgende bestand(en) te gaan totdat het gewenste
bestandsnummer weergegeven wordt. Druk op SKIP+ tijdens het afspelen van het laatste bestand om
naar het eerste bestand op het USB-apparaat te gaan.
3. Druk herhaaldelijk op SKIP- om naar het (de) vorige bestand(en) te gaan. Druk op SKIP- tijdens het
afspelen van het eerste bestand om naar het laatste bestand op het USB-apparaat te gaan.
4. Druk kort op +10 om tien bestanden vooruit te gaan. Als er minder dan 10 bestanden over zijn op het
USB-apparaat dan gaat u naar het laatste bestand. Druk op +10 tijdens het afspelen van het laatste
bestand om naar het eerste bestand op het USB-apparaat te gaan.
5. Druk kort op -10 om tien bestanden terug te gaan. Wanneer u zich in de eerste 10 bestanden van het
USB-apparaat bevindt dan gaat u naar het eerste bestand. Druk op -10 tijdens het afspelen van het eerste
bestand om naar het laatste bestand op het USB-apparaat te gaan.
Snel vooruit- achteruitspoelen.
In de USB-afspeelmodus is er geen snel vooruit of achteruitspoelfunctie beschikbaar.
Een programma afspelen
Tot 20 bestanden kunnen geprogrammeerd worden in de door u gewenste volgorde, elk bestand kan meer
dan één keer geprogrammeerd worden.
1. Voordat u gaat programmeren moet u eerst op STOP en PROGRAM drukken. Het display toont ook 000
en PROG naast CD.
2. Selecteer het gewenste bestand met SKIP+, SKIP-, +10 of -10.
3. Sla het bestand om met PROGRAM Het display toont PROG en P01. Selecteer nu het volgende bestand.
4. Herhaal de stappen 2 en 3 om meer bestanden op te slaan, het maximal aantal bestanden is 20.
5. Druk op PLAY/PAUSE om het afspelen van de bestanden in de door u gewenste volgorde te beginnen. In
de programmamodus worden het bestandsnummer, en PROG getoond.
6. In de programmamodus is de herhaalfunctie voor het volledige programma beschikbaar, zie voor meer
informatie Herhaalmodi punt 4.
Programma wissen
Voer de volgende procedure uit om het programma te wissen:
1. Open het CD-compartiment.
2. Zet de functiekiezer op de RADIO of OFF-standen.
3. Druk op STOP.
Herhaalmodi
Er zijn verschillende herhaalmodi beschikbaar op het apparaat, druk op REPEAT om er naar toe te gaan en
ze te selecteren.
1. Druk éénmaal op REPEAT om het huidige bestand te herhalen. Het display toont naast het
bestandsnummer ook REP 1.
2. Druk tweemaal op REPEAT om alle bestanden op het USB-apparaat te herhalen. Het display
toont naast het bestandsnummer ook ALL REP.
89.
Page 90

90.
3. Druk nogmaals op REPEAT om terug te gaan naar normaal afspelen. Het displa toont weer het
bestandsnummer.
4. U kunt ook de herhaalfunctie gebruiken tijdens het afspelen van het programma. Druk in de
programmamodus één keer op REPEAT om het volledige programma te herhalen. Het display toont naast
het bestandsnummer en PROG ook ALL REP.
Het behandelen en schoonmaken van disks.
OMGAAN MET CD´s
* Haal de CD uit het doosje.
* Raak de oppervlakken niet aan.
* Plak geen stickers op de CD’s en schrijf er niet op.
* Buig CD’s niet.
VANUIT HET MIDDEN NAAR DE RAND TOE
CORRECT INCORRECT
Bewaren
* Bewaar CD’s altijd in de doosjes.
* Stel de CD's niet bloot aan direct zonlicht, hoge temperaturen, vocht of stof.
Reinigen van CD’s
* Reinig CD’s met een zachte doek.
* Veeg vanuit het midden naar de rand over de CD’s.
Page 91

PROBLEEMOPLOSSING
Wanneer u problemen met dit apparaat ondervindt, raadpleeg dan eerst onderstaande lijst voordat u
contact opneemt met de klantenservice.
WAARSCHUWING: Open het apparaat nooit. Laat onderhoud of reparatie altijd over aan gekwali
ficeerd onderhoudspersoneel.
Probleem Mogelijke oorzaak Oplossing
ALGEMEEN
Geen geluid.
Volume te laag ingesteld.
Batterijen uitgeput.
Batterijen verkeerd geplaatst.
Voedingskabel niet
aangesloten.
Pas het volume aan.
Vervang de batterijen.
Controleer de polariteit.
Sluiot de voedingskabel juist
aan.
-
RADIO
Slechte ontvangst.
Zwak signaal
Interferenties van andere
apparaten (TV, videorecorder,
computers enz.).
Pas de antenne aan:
FM: Telescopische antenne.
AM: pas het apparaat aan.
Houd afstand van andere
apparaten.
CD/MP3
CD slaat over
De CD/MP3-disk is vuil of
beschadigd.
Het apparaat kreeg een
schok.
Display: - - - Er zit geen CD in.
De CD is vuil of beschadigd.
Condensatie op de laserlens.
De CD-R/RW is leeg of niet
voltooid.
Maak de disk schoon of
vervang het.
Houd het apparaat stevig vast
tijdens gebruik of zet het neer.
Doe ere en CD, CD-R of
CD-RW in.
Vervang de CD of maak deze
schoon.
Wacht totdat de laserlens
helemaal droog is (ongeveer 1
uur).
Voltooi de CD-R/RW.
SPECIFICATIES
Algemeen
Voeding: AC 230V~50Hz
DC 9V (6 batterijen type LR14 / UM-2 / C, 1,5V)
(batterijen niet meegeleverd)
Stroomverbruik: 13 Watt
Frequentiebereik: AM 525 – 1615kHz
FM 87.5 – 108MHz
Audio
Luidspreker impedantie: 8 Ohm
Afmetingen: ongeveer 239 x 205 x 121
Gewicht: ongeveer 1,4 kg
Specificaties kunnen veranderd worden zonder voorafgaande kennisgeving.
mm
91.
Page 92

92.
MODEL: 6698RB
Designové rádio s přehrávačem disků CD/MP3/WMA a portem USB
BEZPEÈNOSTNÍ POKYNY
VAROVÁNÍ
NEBEZPEČÍ ZÁSAHU
ELEKTRICKÝM
PROUDEMNEOTEVÍRAT
UPOZORNĚNÍ: KE SNÍŽENÍ RIZIKA
Trojúhelník se symbolem
blesku upozorňuje uživatele
na neizolované „nebezpečné
napětí“ uvnitř přístroje, které
je dostatečně vysoké, aby
mohlo znamenat nebezpečí
zásahu elektrickým proudem.
ZÁSAHU ELEKTRICKÝM PROUDEM
NEODSTRAŇUJTE KRYT (NEBO
ZADNÍ ČÁST) UVNITŘ NEJSOU
ŽÁDNÉ UŽIVATELEM VYMĚNITELNÉ
SOUČÁSTKY S OPRAVOU SE
OBRAŤTE NA KVALIFIKOVANÉHO
TECHNIKA.
Trojúhelník se symbolem
vykřičníku upozorňuje
uživatele na důležité
instrukce k používání a
údržbě spolu s návodem,
který je třeba prostudovat.
DOPLŇUJÍCÍ INFORMACE
Pozor na malé díly a baterie. Spolknutí těchto předmětů může vést k vážnému zranění, nebo
udušení. Hlavně dbejte na to, aby malé díly a baterie nebyly v dosahu dětí.
Důležitá rada týkající se ochrany sluchu
Upozornění
Máme starost o váš sluch tak jako vy.
Proto používejte tento spotřebič s rozvahou.
Naše doporučeni: Nepoužívejte vysoké hlasitosti.
V případě, že je spotřebič používán dětmi, přesvědčte se, že není hlasitost příliš vysoká.
Upozornění!
Vysoká hlasitost může způsobit nenapravitelnou ztrátu dětského sluchu.
Nenechte NIKDY osoby, zvláště děti, strkat předměty do dírek, zdířek, nebo jiných otvorů na
přístroji. Může to vést ke smrtelnému zranění elektrickým proudem. Pouzdro přístroje smí otevřít
jedině odborník.
Použijte spotřebič pouze k účelu k jakému je určen.
Přístroj je určen výhradně pro použití v obytných a obchodních oblastech.
Prosíme, uschovejte si pečlivě tento návod k obsluze pro pozdější upotřebení.
Upozornění k ochraně životního prostředí
Tento výrobek se nesmí po ukončení své životnosti likvidovat s normálním domovním odpadem,
ale musí být odevzdán na sběrném místě pro recyklaci elektrických a elektronických přístrojů.
Symbol na výrobku, návodu k použití či obalu na to upozorňuje.
Materiály jsou recyklovatelné podle svých označení. Recyklací, využitím materiálů nebo jinou
formou zužitkování starých přístrojů důležitým způsobem přispíváte k ochraně našeho životního
prostředí.
Zeptejte se prosím obecní správy na příslušné likvidační místo.
Page 93

Neblokujte větrání přístroje tím, že jej např. přikryjete látkou, novinami, nebo jiným kusem nábytku.
Otvory pro větrání musí zůstat vždy volné. Přehřátí může způsobit poškození a zkrátit životnost
přístroje.
Teplo a horko
Nevystavujte spotřebič přímému slunečnímu záření. Přesvědčte se, že spotřebič není vystaven
přímému zdroji tepla jako jsou topná tělesa nebo přímý plamen. Přesvědčte se, že ventilační
štěrbiny u spotřebiče nejsou zakryty.
Vlhkost a čištění
Tento spotřebič není vodotěsný! Neponořte spotřebič do vody. Nenechte spotřebič přijít do kontaktu
s vodou. Voda vniknoucí do spotřebiče může tento spotřebič vážně poškodit. K čistění nepoužívejte
čistící prostředky, které obsahují alkohol, čpavek, benzín nebo hrubé předměty protože by poškodily
spotřebič. Jako čisticí prostředek použijte navlhčený jemný kus látky.
Sběr odpadu
Baterie a obalový materiál nepatří do domácího odpadu. Baterie musí být vráceny do speciální
sběrny pro použité baterie. Oddělení obalového materiálu je z ekologického a ekonomického
hlediska výhodné.
BEZPEČNOSTNÍ POKYNY
1. ČTĚTE POKYNY – před započetím manipulování se zařízením je nutné pročíst veškeré bezpečnostní
pokyny a návod k použití.
2. UCHOVEJTE POKYNY – návod k použití a bezpečnostní pokyny musí být uchovány pro další použití.
3. VĚNUJTE POZORNOST VAROVÁNÍM – musí být dodržována veškerá varování a návod k použití.
4. DODRŽUJTE POKYNY – veškeré provozní pokyny musí být dodržovány.
5. VODA A VLHKOST - zařízení se nesmí používat v blízkosti vody, např. poblíž vany, umyvadla, dřezu,
prádelní kádě, ve vlhkém sklepení či v blízkosti plaveckého bazénu.
6. VĚTRÁNÍ – otvory v zařízení slouží pro správné odvětrání a jsou nezbytné pro provoz a zabraňují
přehřátí. Zařízení by mělo být umístěné tak, aby díky svému umístění či poloze nebylo zabráněno
správné ventilaci. Nepokládejte na postel, pohovku, koberec či podobné plochy, které mohou ucpat
ventilační otvory. Nevkládejte do knihoven či vestavěných skříní, které mohou zabraňovat proudění
vzduchu ventilačními otvory.
7. TEPLO – zařízení by mělo být umístěno v dostatečné vzdálenosti od tepelných zdrojů, jako jsou radiátory,
kamna či jiná zařízení (včetně zesilovačů), které produkují teplo.
8. ZDROJ ENERGIE – zařízení musí být zapojeno do takového typu síťového napájení, jenž je uvedeno v
provozních pokynech nebo označeno na zařízení.
9. OCHRANA PŘÍVODNÍHO KABELU – přívodní kabely by měly být vedeny tak, aby se na ně nešlapalo,
aby nebyly stlačovány předměty nad nebo vedle nich.
10. NEPOUŽÍVÁNÍ – pokud se zařízení delší dobu nepoužívá, odpojte jej prosím od sítě a antény.
11. VNIKNUTÍ PŘEDMĚTU či KAPALINY – je nutné dávat pozor, aby žádné předměty a jakékoli jiné kapaliny
nevnikly skrze otvory do zařízení.
12. POŠKOZENÍ VYŽADUJÍCÍ SERVIS – zařízení musí opravit kvalifikovaný servisní technik v následujících
případech:
a. přívodní kabel či zástrčka je poškozená.
b. do zařízení vnikly předměty či natekla kapalina.
c. zařízení bylo vystaveno na dešti či ve vodě.
d. Zařízení spadlo na zem nebo je poškozený kryt. Používejte pouze ovládací a regulační prvky dle pokynů
v příručce.
e. Zdá se, že přístroj nepracuje normálně.
f. zařízení prokazuje patrnou změnu ve svém výkonu.
13. SERVIS – uživatel nesmí provádět údržbu jiným způsobem, než který je uveden v návodu k použití.
Veškeré opravy musí provádět kvalifikovaný servisní technik.
14. ČIŠTĚNÍ – před čištěním vypojte zařízení z el. sítě. Nepoužívejte tekuté čističe, používejte
pouze vlhký hadřík. Dodržujte instrukce pro údržbu a péči, uvedené v této příručce.
93.
Page 94

94.
15. BOUŘKA – zařízení vypojte ze sítě a od antény při bouřce a pokud se zařízení delší dobu nepoužívá.
16. BEZPEČNOSTNÍ KONTROLA – pro provedení opravy požádejte zákaznický servis o provedení
bezpečnostní kontroly.
17. PŘETÍŽENÍ – aby nedošlo ke vzniku požáru či úrazu elektrickým proudem, nepřetěžujte el. zásuvky a
zabudované zdířky.
18. ELEKTROSTATICKÝ VÝBOJ – zařízení vypojte z el. zásuvky a vyjměte baterie v případě poruchy na
zařízení. Po krátké době opět připojte.
UPOZORNĚNÍ
TENTO CD PŘEHRÁVAČ SPADÁ DO LASEROVÝCH VÝROBKŮ TŘÍDY I. V TOMTO CD PŘEHRÁVAČI SE
POUŽÍVÁ VIDITELNÝ / NEVIDITELNÝ LASEROVÝ PAPRSEK, VYSTAVENÍ JEHO ZÁŘENÍ MŮŽE BÝT
NEBEZPEČNÉ. POUŽÍVEJTE CD PŘEHRÁVAČ POUZE DLE POKYNŮ.
NEVIDITELNÉ LASEROVÉ ZÁŘENÍ PŘI OTEVŘENÉM KRYTU ČI PŘERUŠENÍ BEZPEČNOSTNÍ
POJISTKY. NEVYSTAVUJTE SE PAPRSKU!
NEDOTÝKEJTE SE LASEROVÝCH ČOČEK.
JINÉ POUŽITÍ A ÚPRAVY OVLÁDÁNÍ, NASTAVENÍ, VÝKONU, ČI POSTUPŮ NEŽ JAKÉ JSOU POPSÁNY
V TÉTO PŘÍRUČCE MŮŽE BÝT PŘÍČINOU VYSTAVENÍ SE NEBEZPEČNÉ RADIACI.
PRO SNÍŽENÍ NEBEZPEČÍ POŽÁRU NEBO ÚRAZU ELEKTRICKÝM PROUDEM A TAKÉ RUŠENÍ
POUŽÍVEJTE POUZE DOPORUČENÉ PŘÍSLUŠENSTVÍ.
Nastavení bezpečné úrovně hlasitosti
• Jestliže nepřetržitě posloucháte hlasitou hudbu, Váš sluch se tomuto postupně přizpůsobuje, a to dělá
dojem, že hlasitost je nižší.
• To, co se Vám zdá normální, může dokonce škodit.
• Abyste se před tímto ochránili, nastavte hlasitost na nízkou úroveň.
• Pomalu zvyšte hlasitost, dokud neuslyšíte jasně a bez problémů.
• Poškození Vašeho sluchu může být značné a nemusí se dát vrátit zpět.
• Jestliže zaznamenáte poruchu sluchu, navštivte, prosím, doktora.
DALŠÍ INFORMACE
• Jestliže budete používat zařízení po dlouhou dobu, zařízení se zahřeje. Je to absolutně normální.
• Vždy zavírejte kryt jednotky CD, abyste udržovali pohon CD jednotky bez prachu. Při čištění otřete jednotku
CD pohonu měkkým suchým hadrem.
• Mechanické části jednotky obsahují samomazná ložiska. Neolejujte je ani nemažte!
• Jednotku provozujte pouze v mírných klimatickým podmínkách.
• Není vhodné pro děti mladší 3 let.
Kondenzace
Ke kondenzací může dojít při přenesení zařízení z chladného do teplejšího prostředí. Pokud se uvnitř
přístroje nashromáždí vlhkost, může dojít poruše.
Zapněte prosím napájení a vyčkejte asi jednu hodinu, dokud nedojde k odpaření vlhkosti.
Chraňte svůj přístroj před deštěm a vlhkostí, pískem, prachem a extrémním horkem (například v létě v
zaparkovaném vozidle) a přímým sluncem.
Přestěhování přístroje
• Před přemísťováním přístroje vyjměte disk CD.
• Během doby, kdy se přístroj nepoužívá, se doporučuje vyjmout CD a vypnout přehrávač.
Page 95

Umístění přístroje
• Nevystavujte přístroj otřesům, úderům nebo neukládejte jej na nakloněné plochy, jelikož by se mohly vážně
poškodit vnitřní části.
• Nepokládejte na přehrávač těžké předměty.
• Nikdy nepokládejte přístroj na zesilovače nebo jiné přístroje, které se mohou zahřívat.
Rozbalení:
• Opatrně vyjměte přístroj z obalu a odstraňte veškerý balící materiál.
• Balení zachovejte pro případ, že bude nutné vrátit přístroj na zákaznický servis.
• Jestliže chcete balící materiál zlikvidovat, dodržujte předpisy určené pro nakládání s odpadem.
• Z CD jednotky opatrně vyjměte ochranu laserové čočky.
Přívod elektrické energie
Kdykoli je to možné, připojte přístroj k přívodu elektrické energie ze sítě, abyste šetřili baterie. Před vložením
baterií odpojte přívod elektrické energie od sítě.
Provoz s bateriemi (baterie nejsou součástí dodávky)
Otevřete oddělení pro baterie a vložte 6 baterií typu LR-14, UM-2 nebo C (přednostně alkalické). Prosím
zachovejte správnou polaritu, která je vyznačena symboly “+” a “-“ v oddělení pro baterie.
Při provozu s bateriemi odpojte malou zástrčku přívodu elektrické energie na zadní straně přístroje.
Když připojíte přívodní šňůru k elektrické síti, přístroj se automaticky přepne na napájení ze sítě.
Bezpečnostní opatření týkající se baterií:
- Vždy dodržujte bezpečnostní opatření a návod k obsluze vydané výrobcem baterií.
- Udržujte baterie mimo dosah dětí a domácích zvířat.
- Nikdy nevhazujte baterie do ohně. Nevystavujte baterie ohni nebo dalším zdrojům tepla.
- Likvidace baterií: vybité baterie musí být správně zlikvidovány nebo recyklovány ve shodě s platnými
právními předpisy. Detailní informace naleznete v příslušném oddělení likvidace odpadu u místní
samosprávy.
- Nemíchejte spolu nové a vybité baterie.
- Nemíchejte různé typy baterií, jako jsou alkalické a zinkovo/uhlíkové. Používejte baterie stejného typu.
- Odstraňte baterie ze zařízení, když jej nepoužíváte delší dobu, abyste předešli poškození způsobenému
korozí nebo vytečením baterií.
Provoz při připojení do elektrické sítě
- Připojte zástrčku přívodní šňůry do elektrické zásuvky na zdi ST 230V~50Hz.
- Provozujte přístroj pouze při napájecím napětí, které koresponduje se specifikacemi na typovém štítku.
- Vložte menší zástrčku přiváděcí šňůry do konektoru AC~ (ST) na zadní straně přístroje. Ujistěte se, že je
zástrčka vložena kompletně.
95.
Page 96

96.
Umístění ovládacích prvků
Horní pohled
1. VOLUME MIN/MAX (hlasitost min/max)
2. Volič pásma AM/FM
Zvolte příjem rádia mezi FM a AM
3. Přepínač funkcí MP3/USB/RADIO/OFF
Zvolte mezi režimy Audio CD/MP3 CD, USB a
rádio a vypněte přístroj.
4. STOP (zastavit)
5. REPEAT (opakovat)
Zvolte režimy opakování
6. SKIP Přejít na předchozí stopu a přetáčet
7. -10
Přeskočit 10 stop/souborů zpět
8. LCD displej
Přední pohled
9. +10
Přeskočit 10 stop/souborů dopředu
10. PŘEJÍT+
Přejít na další stopu a přetáčet rychle
vpřed
11. Tlačítko PLAY / PAUSE
12. PROGRAM
Pořadí stop
13. Stupnice ladění
14. Ladění TUNING
15. Výsuvná anténa
16. Dvířka jednotky CD
17. Zdířka pro síťové napájení AC ~
(zadní strana přístroje)
18. Reproduktory
19. Zdířka na sluchátka
20. Přihrádka na baterie (spodní strana
přístroje)
21. Port USB
22. Držadlo
23. Kontrolka napájení POWER
Page 97

ZÁKLADNÍ OPERACE
Zapnout/vypnout
Abyste předešli zbytečné spotřebě elektrické energie, prosím nastavte ovladač funkce do polohy OFF, když
přístroj nepoužíváte. V režimu ON (ZAP) se indikátor POWER rozsvítí červeně.
1. Vyberte požadovaný režim přepínačem funkce: RADIO, MP3/USB nebo OFF.
2. Nastavte požadovanou hlasitost ovladačemhlasitosti VOLUME MIN/MAX.
3. Abyste přístroj vypnuli, nastavte přepínač funkce do polohy OFF.
Na přední straně přístroje máte konektor sluchátek označený pro privátní poslech (sluchátka nejsou
součástí dodávky). Sluchátka připojte pomocí 3,5mm stereo konektoru. Při připojení sluchátek se reproduk
tory automaticky ztlumí.
RÁDIO
Doporučení pro zlepšení příjmu:
FM (VKV): Vytáhněte naplno teleskopickou anténu. Jestliže je signál příliš silný (např. v blízkosti stanice),
zasuňte teleskopickou anténu.
AM (SV): Přístroj má vestavěnou AM-anténu; změňte polohu přístroje, je-li signál příliš slabý.
Činnost rádia
1. Nastavte přepínač funkce do polohy RADIO .
2. Vyberte požadované frekvenční pásmo přepínačem vlnových rozsahů. FM (VKV) nebo AM (SV).
3. Nalaďte vaši oblíbenou radiostanici pomocí ovladače TUNING.
4. Nastavte požadovanou hlasitost ovladačem VOLUME MIN/MAX.
5. Abyste přístroj vypnuli, nastavte přepínač funkce do polohy OFF.
Přehrávání disků Audio CD a MP3 CD
Přehrávač disků CD je schopen číst pouze disky audio CD a MP3. Nepokoušejte se přehrávat datová CD či
disky VCD/DVD.
1. Nastavte funkční přepínač do polohy MP3/USB . Na displeji se nakrátko zobrazí nápis
“- - -“ a poté 000.
2. Manuálně otevřete přihrádku pro disk CD za zahloubené držadlo, přičemž se na displeji
zobrazí nápis OP.
3. Vložte disk potiskem nahoru a opět manuálně uzavřete přihrádku pro disky CD. Nejdříve se zobrazí nápis
“- - -“ a poté celkový počet stop a CD. Displej se změní na 001 a CD. Přehrávání se spustí automaticky.
Zobrazí se odpovídající číslo stopy.
4. V případě, že přehrávání nezačne (v závislosti na typu disku), prosím stiskněte tlačítko PLAY/PAUSE,
abyste začali přehrávat první stopu ručně.
5. Stiskněte PLAY/PAUSE, abyste přerušili přehrávání v pauze; stiskněte je znovu, abyste pokračovali v
přehrávání. V režimu přerušení přehrávání Pause (pauza) bliká ►.
6. Stiskněte STOP, abyste zastavili přehrávání; na displeji se znovu ukáže celkový počet stop.
Poznámky:
Přehrávání CD se také zastaví, když:
a. otevřete zásobník s CD;
b. posunete přepínač funkce do polohy RADIO nebo OFF;
c. na CD se přehrály již všechny stopy.
-
Režim Přeskočit (SKIP)
V režimu přehrávání stlačte tlačítka SKIP-, SKIP+, -10 či +10 pro přejití na předchozí či následující stopu či
10 stop vpřed či vzad.
1. Vyberte stopu v režimu přehrávání, zastavení nebo v pauze pomocí tlačítek SKIP-, SKIP+, -10 nebo +10 a
začněte přehrávat tuto stopu stisknutím PLAY/PAUSE.
2. Opakovaně stlačte tlačítko SKIP + a přejděte na další stopu (stopy), dokud se nezobrazí požadované číslo
souboru. Během přehrávání poslední stopy stlačte tlačítko SKIP+ a přejděte na první stopu na disku.
3. Opakovaně stlačte tlačítko SKIP - pro přejití na předchozí stopu (stopy). Během přehrávání první stopy
stlačte tlačítko SKIP- a přejděte na poslední stopu na disku.
4. Pro přeskočení deseti stop směrem vpřed, krátce stlačte tlačítko +10. Jestliže se na disku
nachází méně než 10 stop, přejdete na poslední stopu. Během přehrávání poslední stopy
97.
Page 98

98.
stlačte tlačítko +10 a přejděte na první stopu na disku.
5. Pro přeskočení deseti stop směrem vzad, krátce stlačte tlačítko -10. Jste-li mezi 10 prvními stopami na
disku, přejdete na první stopu. Během přehrávání první stopy stlačte tlačítko -10 a přejděte na poslední
stopu na disku.
Rychlý pohyb vpřed a rychlý pohyb zpět
Stiskněte a podržte SKIP+ nebo SKIP-, abyste se rychle pohybovali vpřed nebo zpět mezi stopami při
vyhledávání určité polohy. Hlasitost se zeslabí.
Programování přehrávání
Při výběru vámi požadovaného pořadí stop lze naprogramovat až 20 stop; jakákoli stopa může být naprogramována více jak jedenkrát.
1. Než začnete programovat, stlačte prosím tlačítko STOP a PROGRAM. Na displeji se
zobrazí také kromě nápisu CD, nápis 000 a PROG. .
2. Vyberte první požadovanou stopu pomocí tlačítek SKIP+, SKIP-, +10 nebo -10.
3. Stopu uložte pomocí tlačítka PROGRAM. Na displeji se zobrazí kromě nápisu CD a
PROG, také nápis P01. Nyní zvolte další stopu.
4. Opakujte kroky 2 a 3, abyste naprogramovali další stopy, maximální počet stop je 20.
5. Stlačením tlačítka PLAY/PAUSE se spustí přehrávání stop ve vámi zvoleném pořadí. V režimu
programování se zobrazí číslo stopy, nápis CD a PROG.
6. V režimu programování je dostupná funkce opakování pro kompletní program – viz. podrobnosti v části
Režimy opakování, bod č. 4.
Vymazání programu
Následujte tyto kroky, abyste vymazali program:
1. Otevřete zásobník s CD.
2. Nastavte přepínač funkce do polohy RADIO nebo OFF .
3. Stiskněte STOP.
Režimy opakování
Přístroj má k dispozici několik režimů opakování; stiskněte REPEAT, abyste vstoupili a
vybrali režim.
1. Stiskněte jedenkrát REPEAT, abyste zopakovali aktuální stopu. Na displeji se zobrazí
REP 1 za číslem stopy a CD.
2. Stiskněte dvakrát REPEAT, abyste zopakovali disk v původním pořadí nahrávky.
Na displeji se zobrazí ALL REP za číslem stopy a CD.
3. Stiskněte znovu REPEAT, abyste se vrátili do normálního režimu přehrávání. Na
displeji se zobrazí znovu číslo stopy a CD.
4. Je také možné použít funkci opakování během přehrávání programu. V režimu
programování stlačte jednou tlačítko REPEAT pro opakování celého programu.
Na displeji se zobrazí číslo stopy, nápis PROG a ALL REP.
Přehrávání MP3 ze zařízení USB
Připojte zařízení USB (klíč USB, přehrávač MP3 atd.) do portu USB v přední části. Vyjměte disk z jednotky.
Stiskněte tlačítko STOP pro přepnutí mezi diskem a režimy USB.
1. Na displeji se nakrátko zobrazí nápis USB, během čtení se zobrazí nápis “- - -“ a počet souborů.
Přehrávání se spustí automaticky.
2. Jestliže se přehrávání nespustí automaticky, stlačte prosím tlačítko PLAY/PAUSE pro manuální spuštění
přehrávání prvního souboru.
3. Jestliže chcete přehrávání pozastavit, stlačte tlačítko PLAY/PAUSE . Pro opětovné spuštění přehrávání
tlačítko stlačte znovu. V režimu pozastavení bliká číslo souboru.
4. Pro zastavení přehrávání stlačte tlačítko STOP a na displeji se opět zobrazí celkový počet souborů.
Page 99

Poznámky:
Přehrávání USB se také zastaví, pokud:
a. se otevře přihrádka pro disky CD;
b. se přepne přepínač funkcí do polohy RADIO či OFF;
c. se přehrají všechny soubory na zařízení USB.
Režim „přejít“
V režimu přehrávání stlačte tlačítka SKIP-, SKIP+, -10 či +10 pro přejití na předchozí či následující soubor či
10 souborů vpřed či vzad.
1. Pomocí tlačítek SKIP-, SKIP+, -10 či +10 zvolte soubor v režimu přehrávání, v režimu stop či pozastavení
a spusťte přehrávání tlačítkem PLAY/PAUSE.
2. Opakovaně stlačte tlačítko SKIP + a přejděte na další soubor (soubory), dokud se nezobrazí požadované
číslo souboru. Během přehrávání posledního souboru stlačte tlačítko SKIP+ a přejděte na první soubor na
zařízení USB.
3. Opakovaně stlačte tlačítko SKIP - pro přejití na předchozí soubor (soubory). Během přehrávání prvního
souboru stlačte tlačítko SKIP- a přejděte na poslední soubor na zařízení USB.
4. Pro přeskočení deseti souborů směrem vpřed, krátce stlačte tlačítko +10. Jestliže se na zařízení USB
nachází méně než 10 souborů, přejdete na poslední soubor. Během přehrávání posledního souboru
stlačte tlačítko +10 a přejděte na první soubor na zařízení USB.
5. Pro přeskočení deseti souborů směrem vzad, krátce stlačte tlačítko -10. Jste-li mezi 10 prvními soubory na
disku, přejdete na první soubor. Během přehrávání prvního souboru stlačte tlačítko -10 a přejděte na
poslední soubor na zařízení USB.
Rychle vpřed a převíjení
Při přehrávání USB nejsou k dispozici žádné funkce rychle vpřed a převíjení.
Programové přehrávání
Lze naprogramovat až 20 souborů v požadovaném pořadí a libovolný soubor je možné naprogramovat
častěji.
1. Než začnete programovat, stlačte prosím tlačítko STOP a PROGRAM. Na displeji se zobrazí také kromě
nápisu CD, také nápis 000 a PROG.
2. Pomocí tlačítek SKIP+, SKIP-, +10 či -10 zvolte požadovaný soubor.
3. Soubor uložte pomocí tlačítka PROGRAM. Na displeji se zobrazí PROG a P01. Nyní zvolte další soubor.
4. Opakujte kroky 2 a3 pro uložení dalších souborů, přičemž maximální počet souborů je 20.
5. Stlačením tlačítka PLAY/PAUSE se spustí přehrávání souborů ve vámi zvoleném pořadí. V režimu
programování se zobrazí číslo souboru a nápis PROG.
6. V režimu programování je dostupná funkce opakování pro kompletní program – viz. podrobnosti v části
Režimy opakování, bod č. 4.
Vymazání programu
Program vymažete dle následujících kroků:
1. Otevřete přihrádku CD.
2. Přepněte přepínač funkcí do polohy RADIO či OFF.
3. Stlačte tlačítko STOP.
Režimy opakování
Přístroj nabízí několik režimů přehrávání. Pro přístup a zvolení režimu stlačte tlačítko REPEAT.
1. Chcete-li opakovat aktuální soubor, stlačte jednou tlačítko REPEAT. Na displeji se zobrazí číslo souboru a
nápis REP 1.
2. Chcete-li opakovat všechny soubory na zařízení USB, dvakrát stlačte tlačítko REPEAT. Na displeji se
zobrazí číslo souboru a nápis ALL REP.
3. Jestliže se chcete vrátit na normální režim přehrávání, opět stlačte tlačítko REPEAT. Na displeji se opět
zobrazí číslo souboru.
4. Je také možné použít funkci opakování během přehrávání programu. V režimu programování
stlačte jednou tlačítko REPEAT pro opakování celého programu. Na displeji se zobrazí číslo
souboru, nápis PROG a ALL REP.
99.
Page 100

100.
Manipulace s disky a čištění
MANIPULACE S DISKY CD
* Vyjměte disk CD z krytu.
* Nedotýkejte se ploch.
* Nelepte na disky CD nálepky a nepište na ně.
* Disky CD neohýbejte.
OD STŘEDU KE KRAJI
SPRÁVNĚ NESPRÁVNĚ
Skladování
* Disky CD vždy ukládejte do svých obalů.
* Nevystavujte disky přímému slunci, vysokým teplotám, vlhkosti či prachu.
Čištění disků CD
* Disky CD čistěte měkkým hadříkem.
* Disky CD čistěte od středu k okraji.
 Loading...