

Page 1
Quick Start
Page 2
THE
GLASSES FOR TRUE DEPTH OF VISION
You've already made your purchase decision, so it's too late now—you're already convinced that you bought
the right product. It doesn't matter who convinced you, they were right!
We can only attempt to describe the ELSA 3D REVELATOR experience on paper. Instead, we'd like to concen-
trate on giving you effective guidelines to help you install and set up the glasses correctly as quickly as possible. Everything else can be found in the online help. The hardware installation is straightforward. You
should devote a bit of attention to setting the software up correctly, however.
In some individuals, flash effects may trigger epileptic seizures or sensory disturbances. Please consult your physician before using the 3DREVELATOR in the event that you've experienced similar problems in the past. Should you experience queasiness, involuntary muscle contractions or cramps
while using the glasses, take them off immediately.
E
SSENTIAL HARDWARE AND SOFTWAR E
An ELSA ERAZO R II, an ELSA ERAZOR III, an ELSA VICTORY II or an ELSA WINNER II and other graphics
cards
✶
with the TNT or TNT2 chip from NVIDIA.
A monitor capable of refresh rates of at least 100 – 140Hz.
Any 3D game that uses Direct3D and delivers valid Z data—nearly all current games are suitable.
Windows 95 or Windows 98 with DirectX from Version 6.0!
✶
Also tested are the Diamomd Viper V550, Viper 770 Ultra and Creative Labs Graphics Blaster TNT, TNT2 Ultra. Problem-free functionality with other graphics boards cannot be guaranteed. This driver is based on the latest NVIDIA ULTRA
DETONATOR drivers and includes all the latest NVIDIA utilities. This replaces the manufacturer's own supplied drivers
and utilities. Special functions such as TV out may no longer be available!
C
ONNECTIONS TO THE COMPUTER
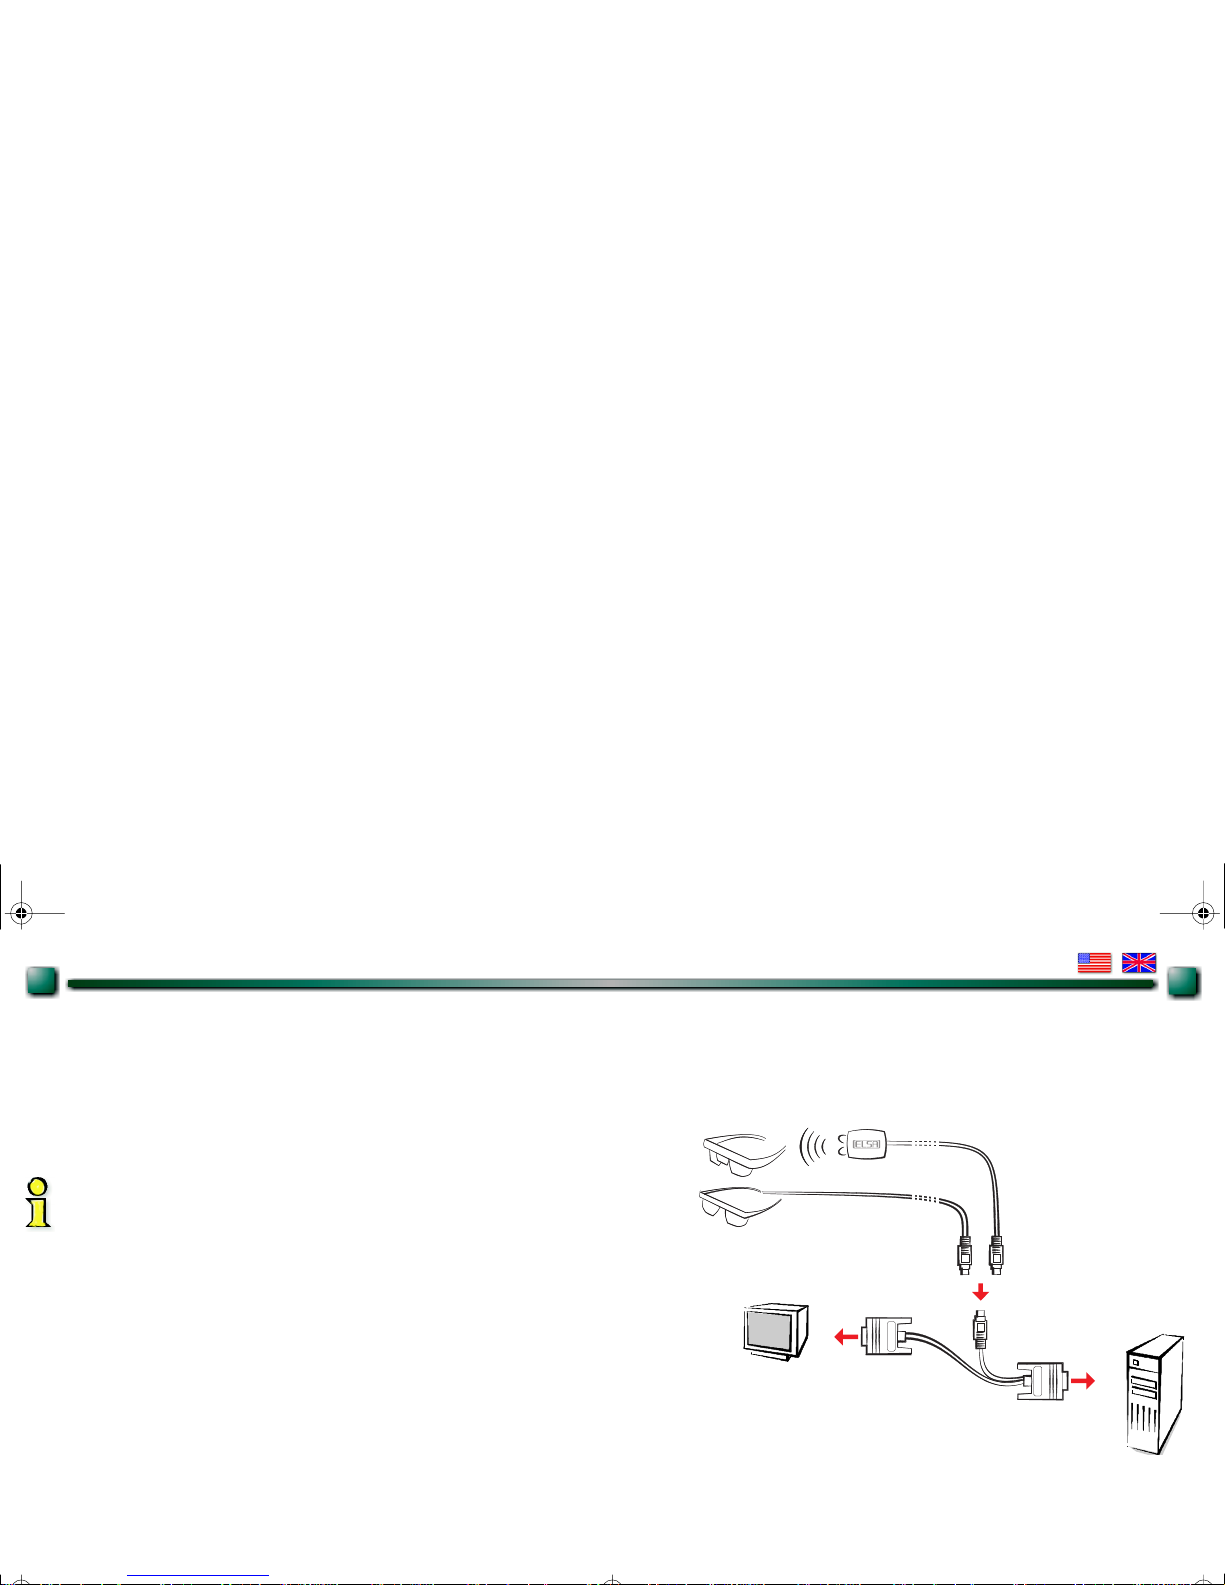
A connection adapter for the ELSA 3D REVELATOR glasses and monitor is included, as well as a CD containing
the ELSA 3D REVELATOR software. For the infrared version, connect the plug of the transmitter module to
the socket on the adapter; plug the cable version directly into the adapter.
Infrared versionCable version
Connection layout for the 3D REVELATOR
1
2
21626.fm Seite 1 Die nstag, 10. August 1999 11:03 11
Page 3
C
ONNECTIONS TO THE SYSTEM
In addition to the hardware requirements described above, ensure that the drivers for your graphics board and
the 3D REVELATOR are installed.
Insert the included CD in your CD-ROM drive. If the ELSA setup does not start automatically, run SETUP in the
root folder of the CD. The rest almost takes care of itself—the ELSA setup will guide you through the installation step by step.
F
OUR STEPS FOR FAST RESULTS
Now that the glasses are connected and the drivers are installed, we bet that you're already dying of impatience. Here—in a nutshell—is how to continue:
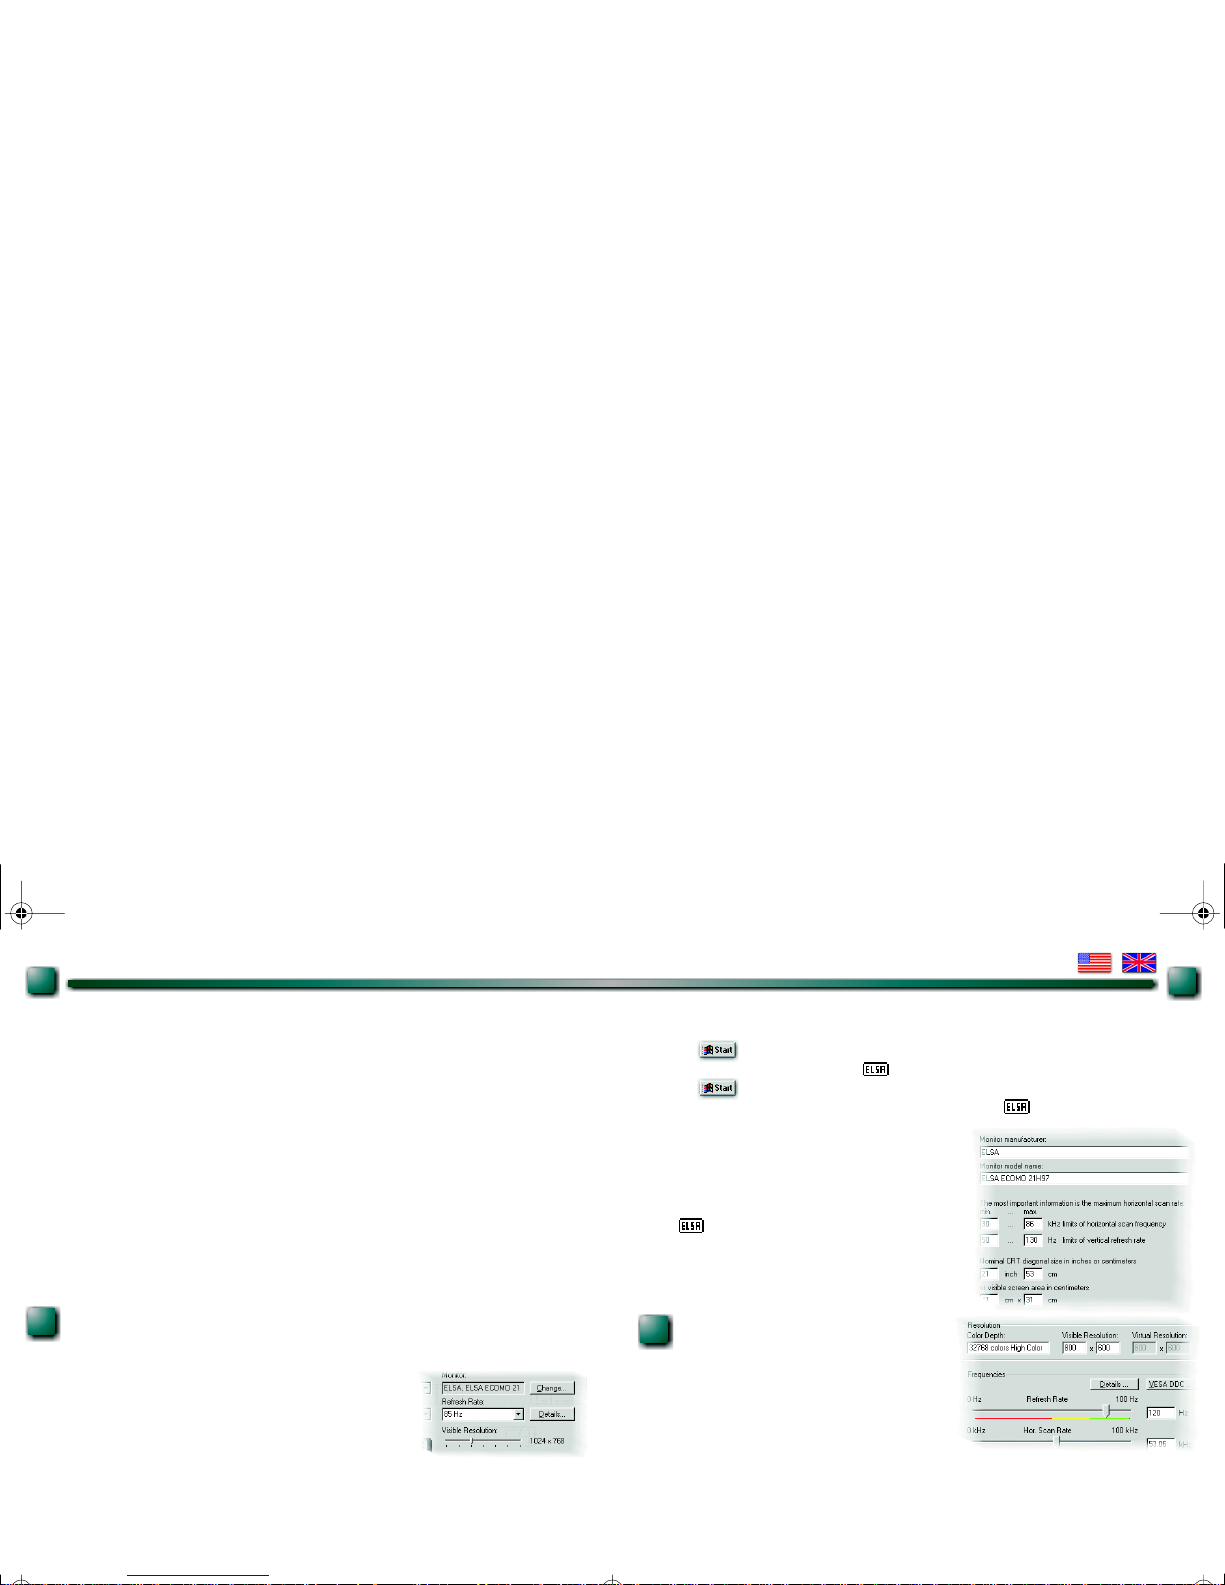
If you are using an ELSA graphics card, you must select your monitor model in the Windows Display Properties
and increase the refresh rate. If your monitor is not listed in the Windows database, you should request the
monitor manufacturer to provide the installation file (INF file) for your monitor.
Is your monitor known?
This step is only required if your monitor isn't registered under Windows! If you are using an ELSA
graphics board, then the driver software helps you to enter the monitor information.
Windows needs to "know" your monitor before it can set
a high refresh rate. All common manufacturers and monitor types are already contained in the Windows data-
base. Here's how to check whether your monitor is registered under Windows:
WIN95:
Settings Control Panel Display Settings
WIN98:
Settings Control Panel Display Settings Advanced... Settings
If your monitor hasn't been specified and isn't listed in
the Windows database, your monitor handbook and the
ELSA graphics driver will help you to make the entries
yourself. Be sure to enter the monitor specifications correctly, otherwise you may damage your monitor!
In the ' Settings' dialog box, click
Change...
, and
enter the horizontal and vertical values, as well as the
diagonal size of your monitor, as stated in the monitor
manual.
Increasing the refresh rate
Go to the settings of the graphics board and select a resolution that permits a refresh rate of at least
100Hz (or better 120Hz). It's possible to enter the resolution into the dialog box directly—e.g. 800x600—and use
the slider to check the maximum refresh rate your monitor
1
2
3
4
21626.fm Seite 2 Die nstag, 10. August 1999 11:03 11
Page 4
is capable of displaying. Perform this step for every resolution that you would like to use later with Direct3D.
Windows will retain these settings.
WIN95:
Settings Control Panel Display Settings Details
WIN98:
Settings Control Panel Display Settings Advanced... Settings Details
Enabling the stereo driver
Next, activate the stereo driver. You can then
enable and disable the driver with the '–' hotkey on the
numeric keypad.
WIN9x:
Settings Control Panel Display Stereo
Game start!
Put on the glasses! Go for it!
Some games must first be switched to Direct3D. You can check this in the Options of the game.
S
EEING CORRECTLY
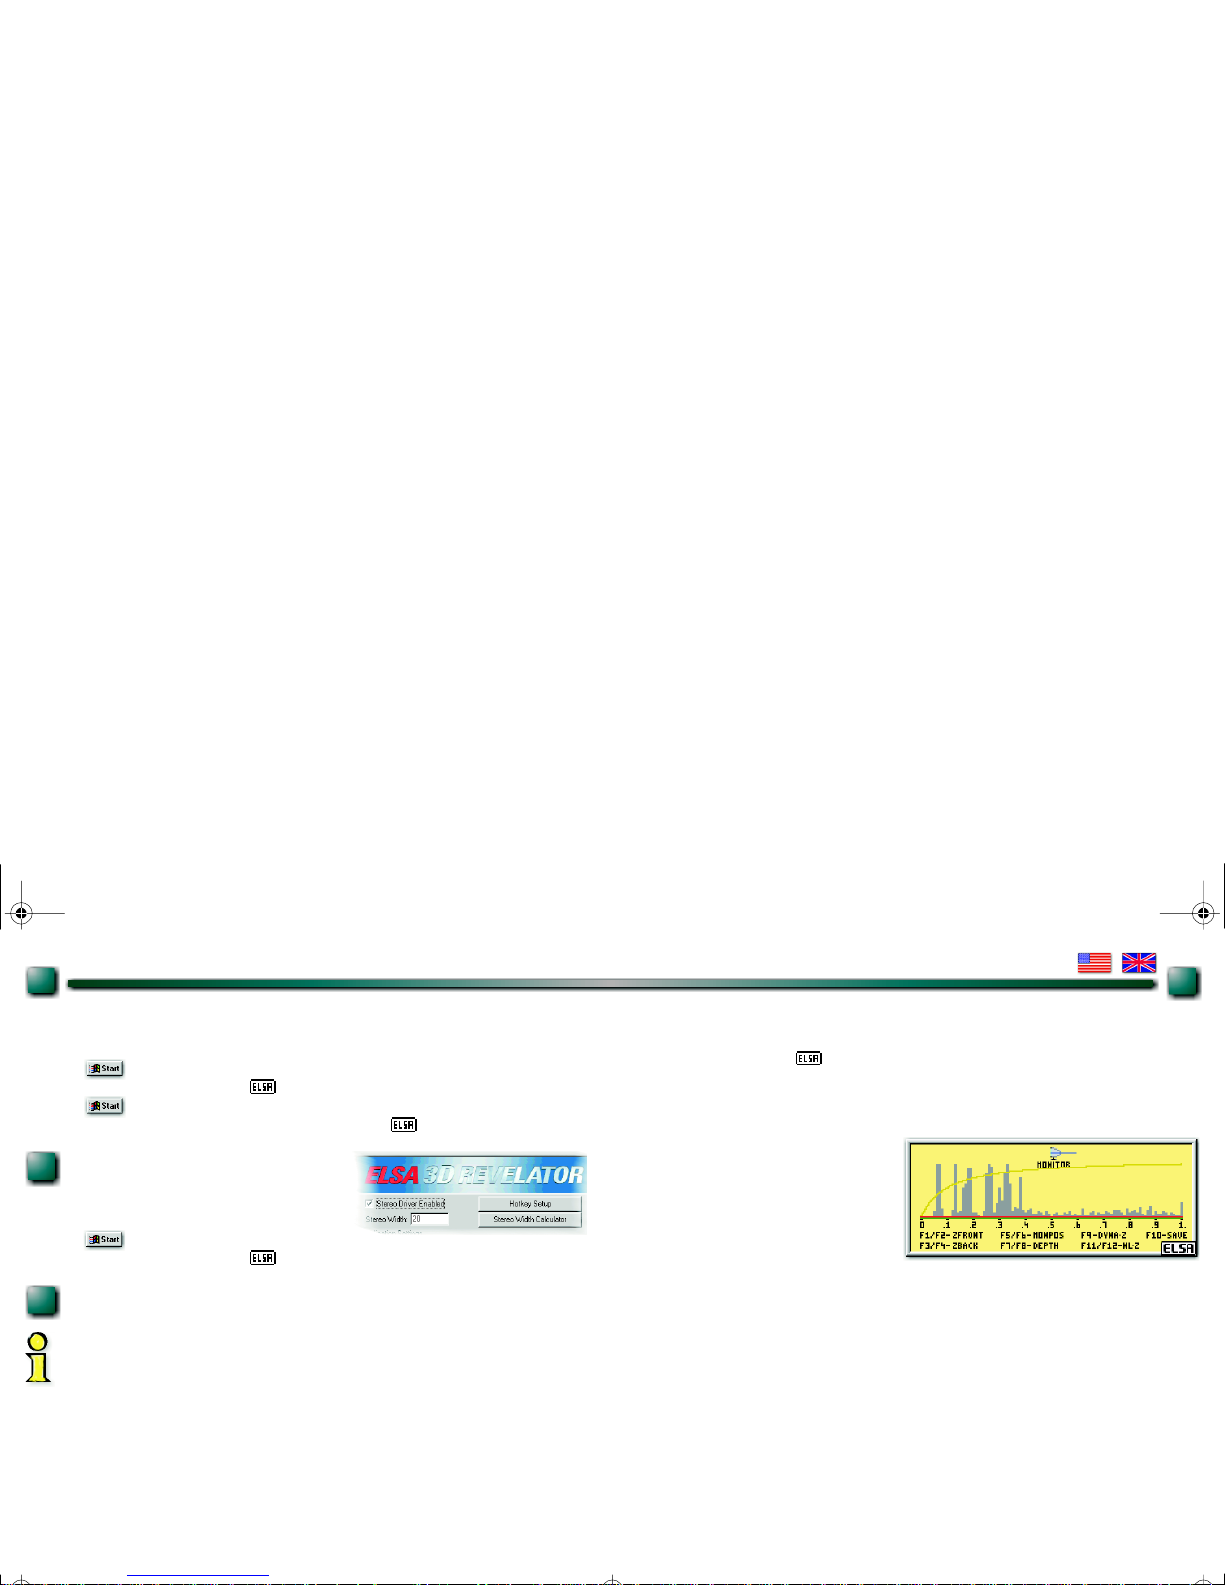
The Windows help file under ' Stereo' covers the possible settings in detail, so let's concentrate on the
in-game control panel. As soon as you've activated the stereo effect and started a game, you can call up the
in-game control panel with the * key on the numeric keypad.
Note: The function keys of the game are disabled as long as the in-game control panel is active.
As a general rule, don't hesitate to experiment with the settings! Check the values in the stereo-width calculator and adapt them as required. Manipulate the values using the function keys in the control panel and
observe the effects.
3
4
!
Reduce the minimum Z value
/
Reduce the stereo width
"
Increase the minimum Z value
(
Increase the stereo width
§
Reduce the maximum Z value
)
Enable and disable Dyna-Z
TM
$
Increase the maximum Z value
=
Save the current settings for the game
%
Move scene out from the monitor
?
Reduce nonlinear Z-mapping factor
&
Move scene in towards the monitor
J
Increase nonlinear Z-mapping factor
The control pan el histogram illustrates the distri -
bution of Z values in the scene. The relative pos i-
tion of the monitor and viewing plane are also
symbolized.
5
6
21626.fm Seite 3 Die nstag, 10. August 1999 11:03 11
Page 5
THE 3D REVELATOR S
UITE
After the installation you will find a new symbol in the task bar of Windows. Behind this symbol there is the
3D REVELATOR Suite, which you can open with one mouse-click. All the important functions are deposited
here centrally and can be easily adjusted.
With the driver switch function of the 3D REVELATOR Suite you can switch between the original
drivers and tools for the installed graphics card, and the 3D REVELATOR drivers. After switching
Windows must be started again.
FOR
CORDLESS USERS ONLY
:
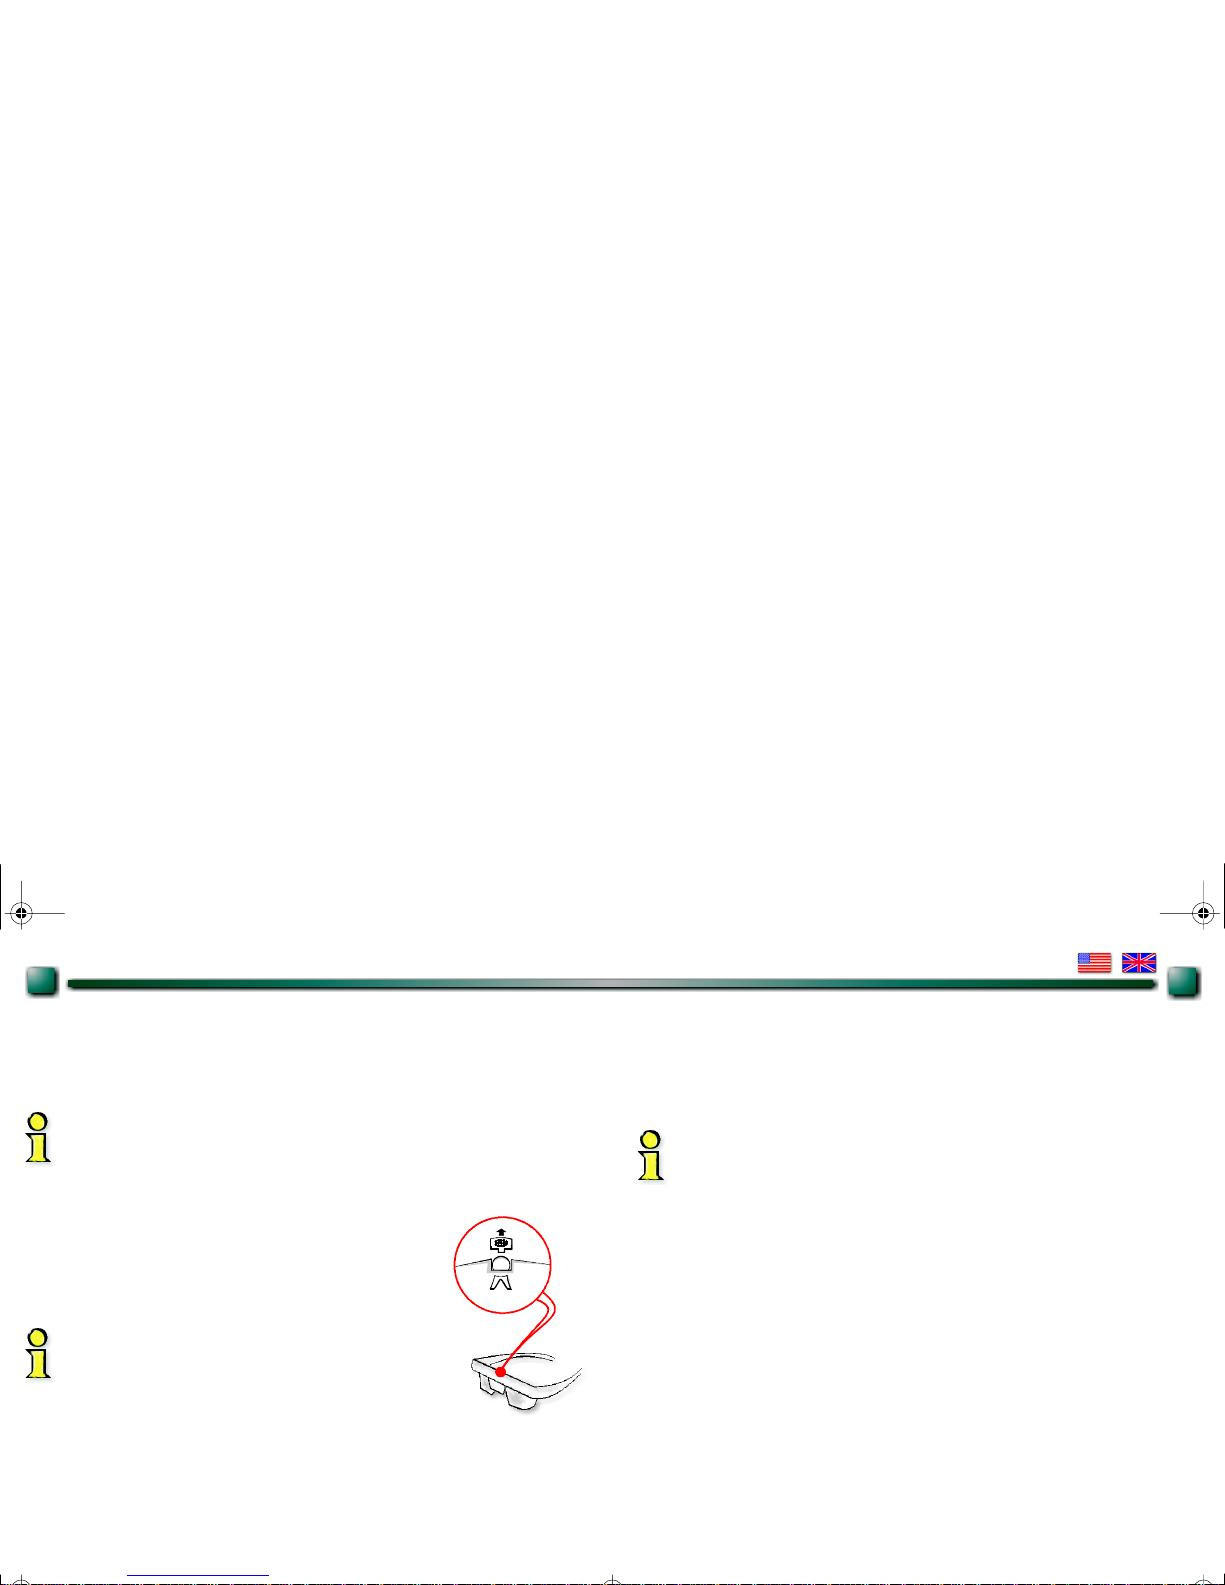
Just above the nose pads of the infrared model, you'll find a cover plate for the
battery compartment of the 3D RE VELATOR. Two CR2032 batteries will be
required if you ever need to replace them. Please note that when inserting that
the plus pole of the battery must point to the cover plate.
Remember: be sure to dispose of the old batteries correctly. Batteries do not
belong in your regular household trash.
When taking the infrared version of the 3D REVELATOR off briefly or
setting it aside for longer periods of time, don't forget to fold up at
least the right-hand earpiece. The on/off switch of the glasses is lin-
ked to the hinge mechanism. The glasses are ready to receive in their
open state and are thus drawing power from the batteries.
O
PERATING NOTICE
You think everything should be working by now, but you are having problems? The causes arise mostly from
the system environment or even from certain input devices. For example, connect the glasses before starting
the operating system and make sure that the power-saving mode for your monitor is switched off. Also make
sure that the vertical synchronization (V-sync) for your graphics board is activated.
With the infrared version of the 3D REVELATOR, interference can be created by the special wave
characteristic of fluorescent tubes and the Infrared transfer can be disturbed. In such case you
should alter the lighting environment.
You can find responses to most questions in the FAQs on the 3D REVELATOR CD. Just start the Setup program, click on the button
Support
and choose
FAQs
.
Or visit ELSA on the Internet at www.elsa.com. Our Support pages has an area where frequently asked questions (FAQs) are coverd in detail and many useful tips can be found.
HOW TO
CONTACT
ELSA
Support-Hotline +44-171294 0114
Internet www.3drevelator.com/support
7
8
21626.fm Seite 4 Die nstag, 10. August 1999 11:03 11
 Loading...