

Page 1
INTRODUCTION ELRO PRO OUTDOOR SOLAR SIREN AP55SR11B:
The PRO Outdoor Solar Siren AP55SR11B is designed for use with the ELRO 10-ZONE PRO ALARM
SYSTEM AP5500.
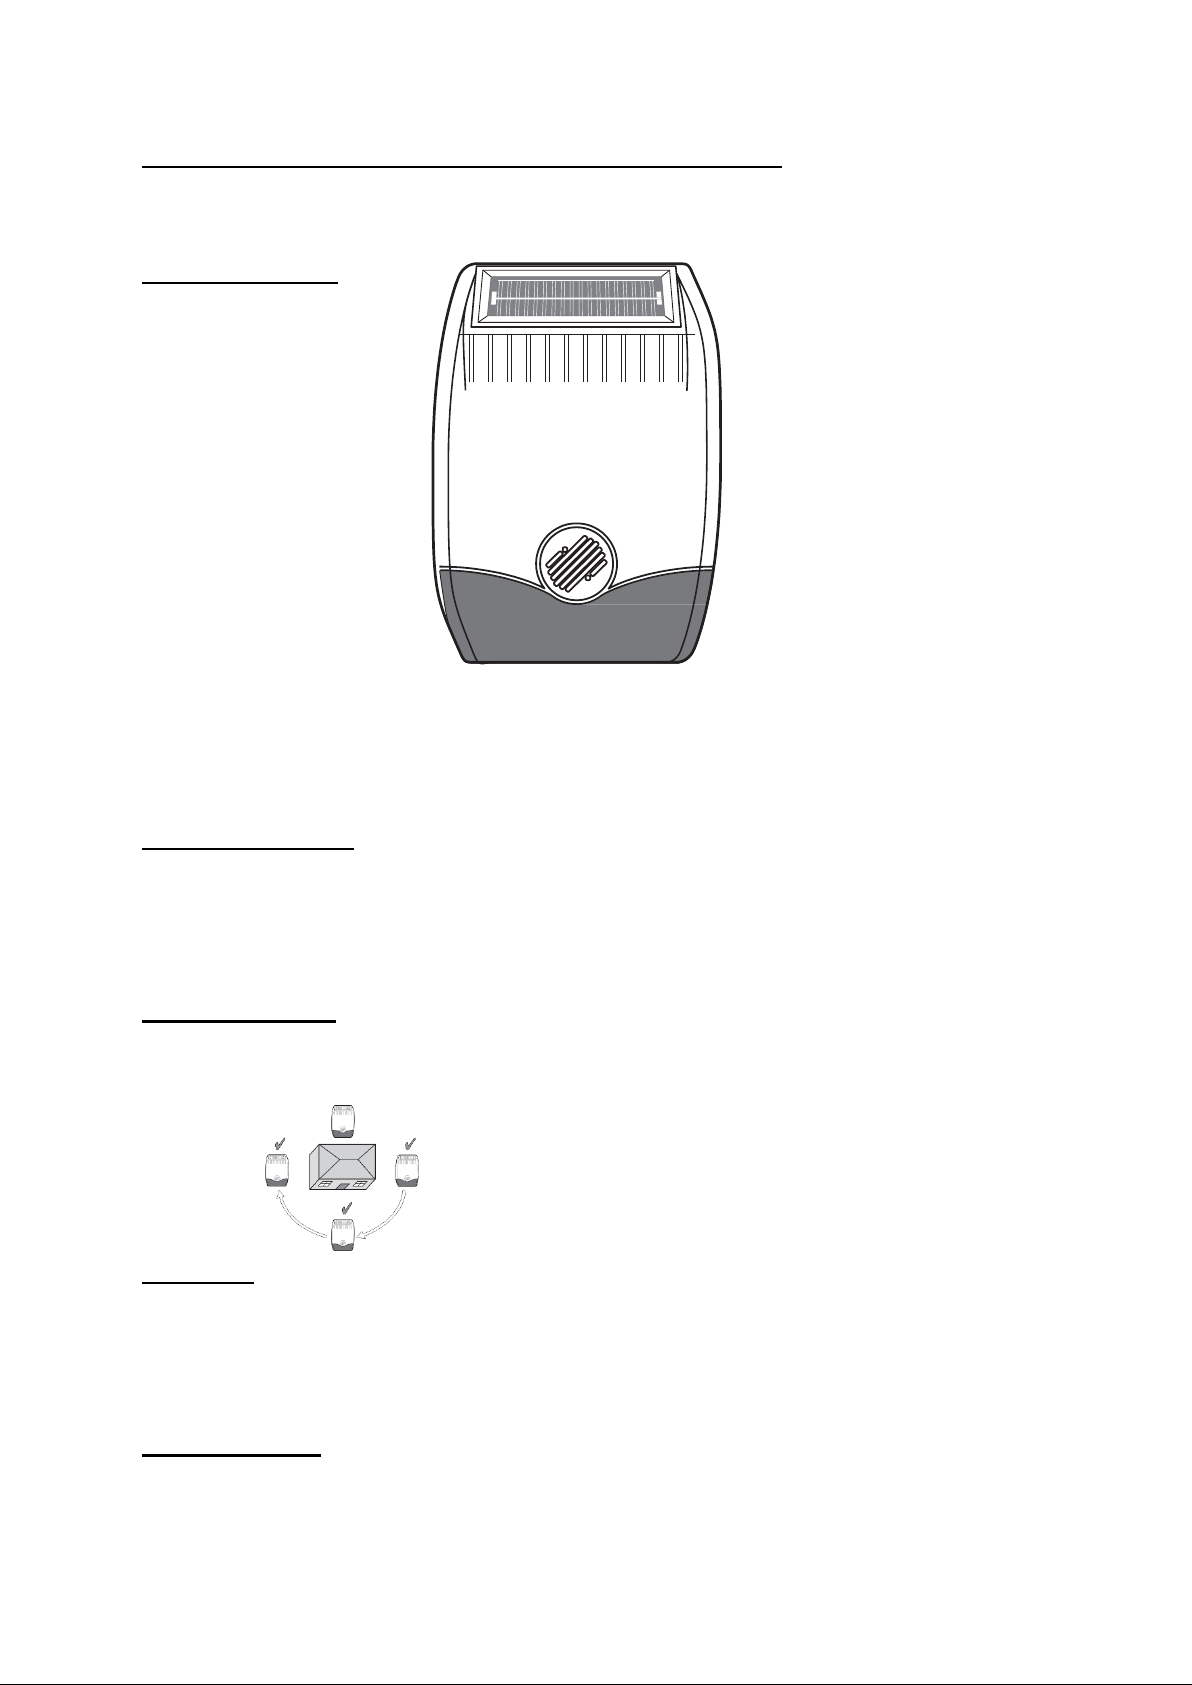
Outdoor Solar Siren:
The Siren, Strobe Lights and Solar Panel are all
housing. This
components inside are specially
housing provides full protection against adverse weather conditions. All electronic
treated to ensure long, reliable, trouble free operation and an
integral tamper switch gives maximum security
encapsulated within a tough polycarbonate
protection to the unit.
Rechargeable Battery:
The Solar Siren is powered by a high capacity rechargeable battery. A Solar Panel mounted on the top
of the housing
energy is required to
& Strobe
charges the battery during daylight hours. During darkness, only a small amount of
maintain the Solar Siren unit.
unit to provide the initial power to the system.
An Alkaline 9V PP3 battery is supplied in the Siren
Best place to install:
The Siren & Strobe unit should be fitted to the outside of the building in a position that is clearly
visible and at a
height which is relatively inaccessible to an intruder. Avoid shadow from trees
X nort h Test if the location where you want to mount the siren is in
We st East reach of the Alarm Panel !
South
Installation:
Remove the fixing screw from the base of the housing and carefully hinge off the front cover.
Use the rear back-plate as a template to mark the position of the four fixing holes on the external
wall. Drill four 6mm holes and insert the plastic wall plugs. Mount
screws provided
the back-plate using the four
Siren House Code:
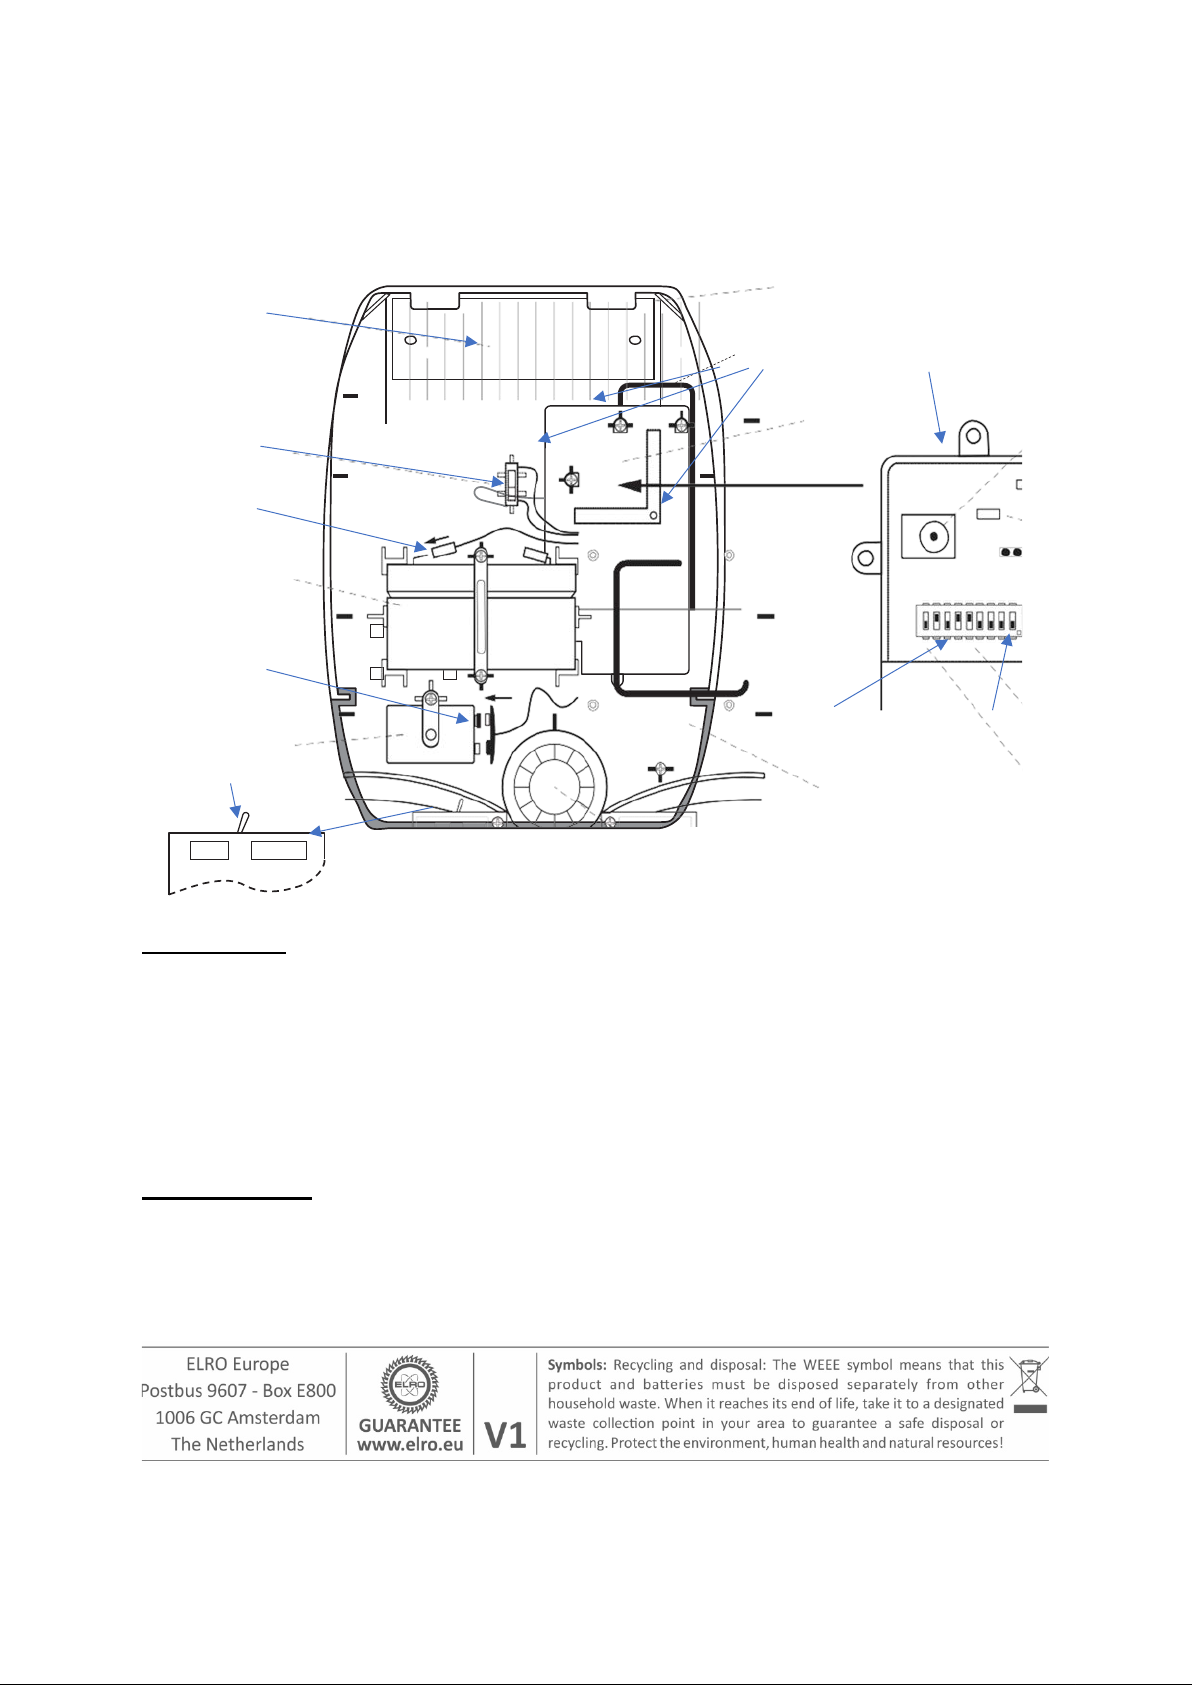
Under the DIP switch cover you will find a series of miniature dip switches. When the Siren is
viewed as shown above
the dip switches are ‘upside down’. Set the dip switches 1-8 to your
house code. And set DIP 9 on OFF for 1 minute and ON for 3 minutes alarm duration! Connect the
9V PP3 initial power-up
to the charging leads red to red (+)
battery to the clip-on connectors. Connect the rechargeable battery
and black to black (–). Fit the siren and strobe cover to the
Page 2
back plate and secure using the fixing screw. The strobe lamp will flash to confirm that the
tamper switch has been closed. The installation of your Siren & Strobe
is now complete.
Solar panel
3 screws from DIP swit ch cover
Tamper switch
Battery connection
Initial Power Up
Battery 9 Volt
House Code Alarm duration
DIP 1-8 DIP 9
Unit / Siren
Service Mode:
Press and hold the bottom button on the Remote Control. The Siren will produce two short
beeps/LED flashes and
followed immediately by two short
then after approximately 6 seconds a single long beep/LED flash
beeps/LED flashes to indicate that it has switched into
Service Mode. Now you can open the siren for service. At least once a year, preferably in the
autumn, the solar panel on the top of the siren housing should be cleaned
This operation will ensure that the
solar panel receives all of the available light.
using a soft, damp cloth.
Operating Mode:
Press and hold the middle button on the Remote Control. After approximately 6 seconds the
Siren will produce a
operating mode.
single long beep/LED flash to indicate that it has switched into normal
For more information about the ELRO 10-ZONE PR O AL ARM S YST EM AP 550 0 visi t www. elr o . eu
 Loading...