

ELRO Pro Alarm System AP5500 Quick Start Manual
ELRO 10 Zone Pro Alarm
System
with Voice a nd Digit al
Dialer
AP5500
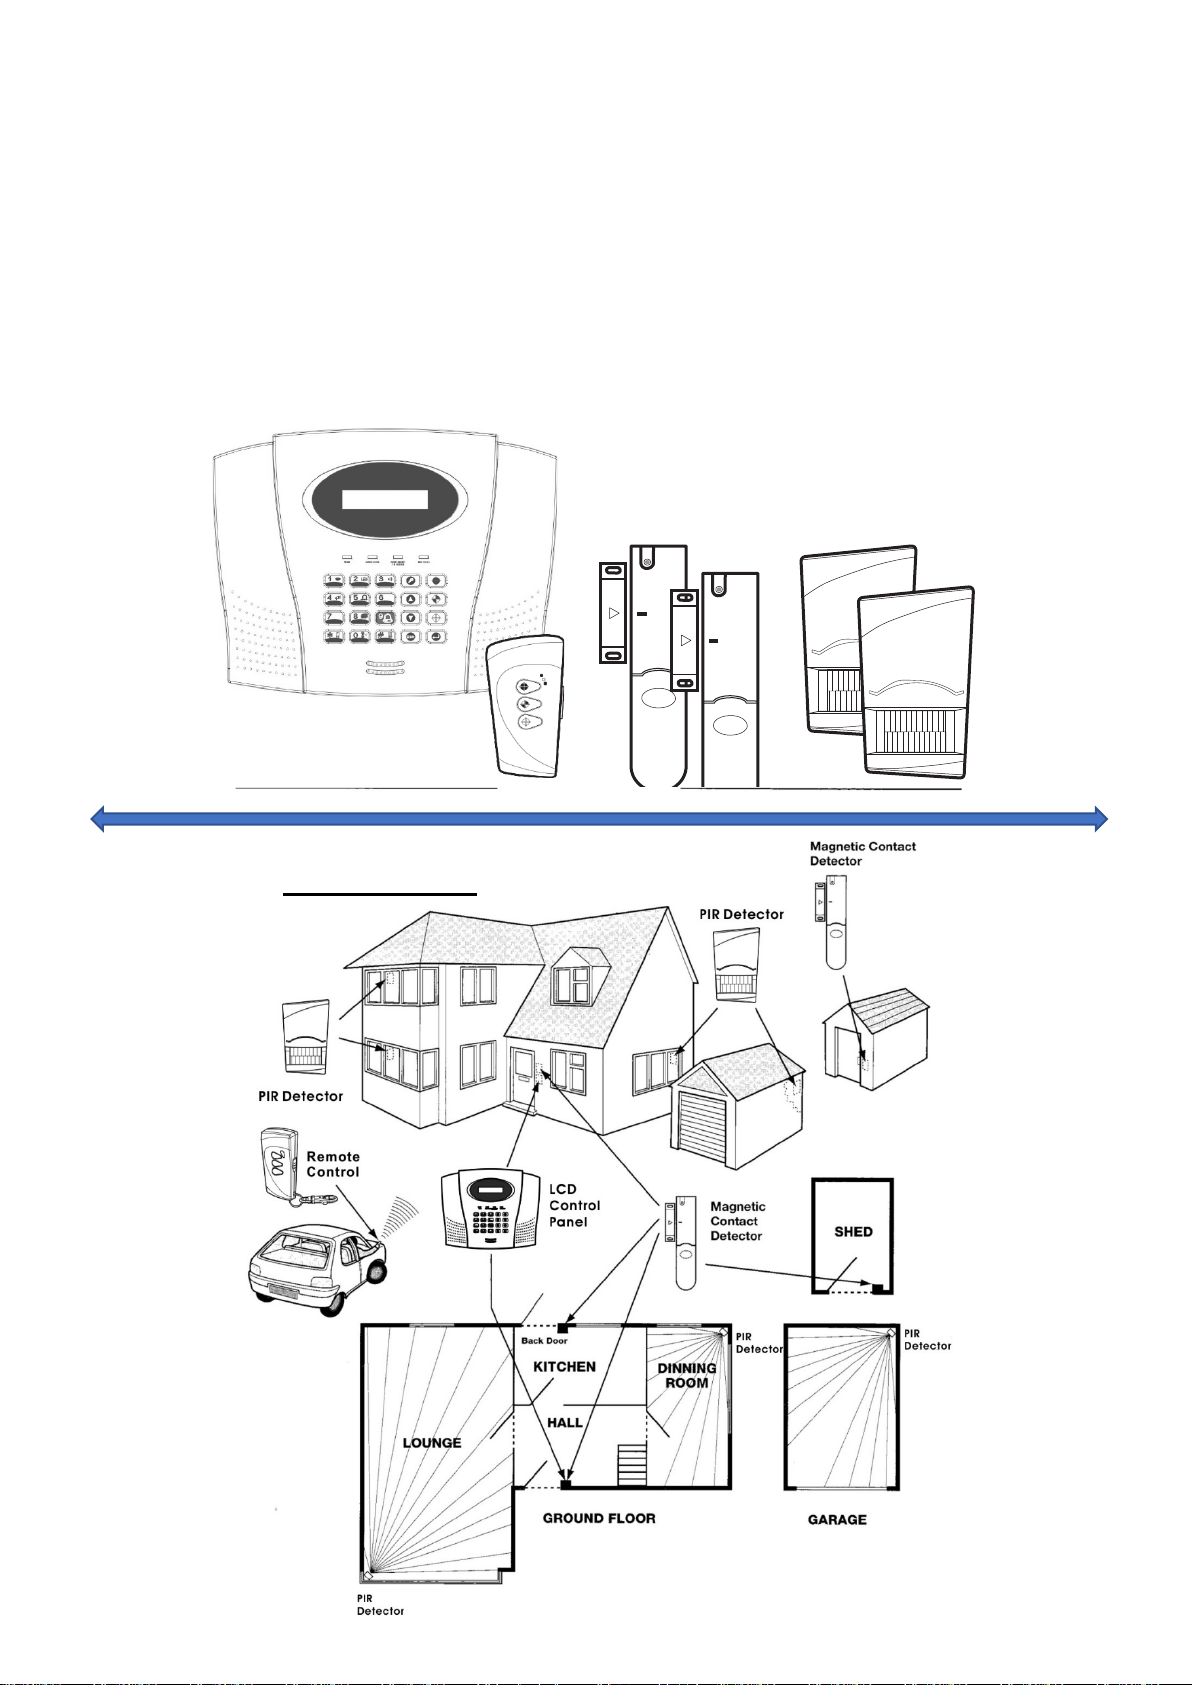
Position - planning
Congratulations with your new ELRO PRO Alarm System AP5500, a secure and independently
D: Door/window contact F: Alarm Panel
working Alarm System!
This Short manual will help you through insta ll ati on and Set-Up of your System effectively. If you have
further questions, ideas or recommendations, visit www.elro.eu
and the possibility to leave us with your honest feedback on our products.
for a detailed manual, an FAQ section
MULTIPLE USERS
The system allows up to 6 Users and one Master User. Each user will have a different Password.
Agree about the different Passwords:
Master:______User1:______User2:______User3:______User4:______User5:_______User6:______
How to start?:
Overview your home as a burglar! Which entrances do you think he will take? What is your main
entrance? Do you want to switch your alarm on and off with a remote, use the Alarm Panel, or use an
external Keypad (not included). What do you need to prevent and how? Do you want to switch on the
alarm only when you are away from home, or also when you are a sleep?
A: Door/window contact B: PIR motion sensor C: PIR motion sensor E: Remote Control
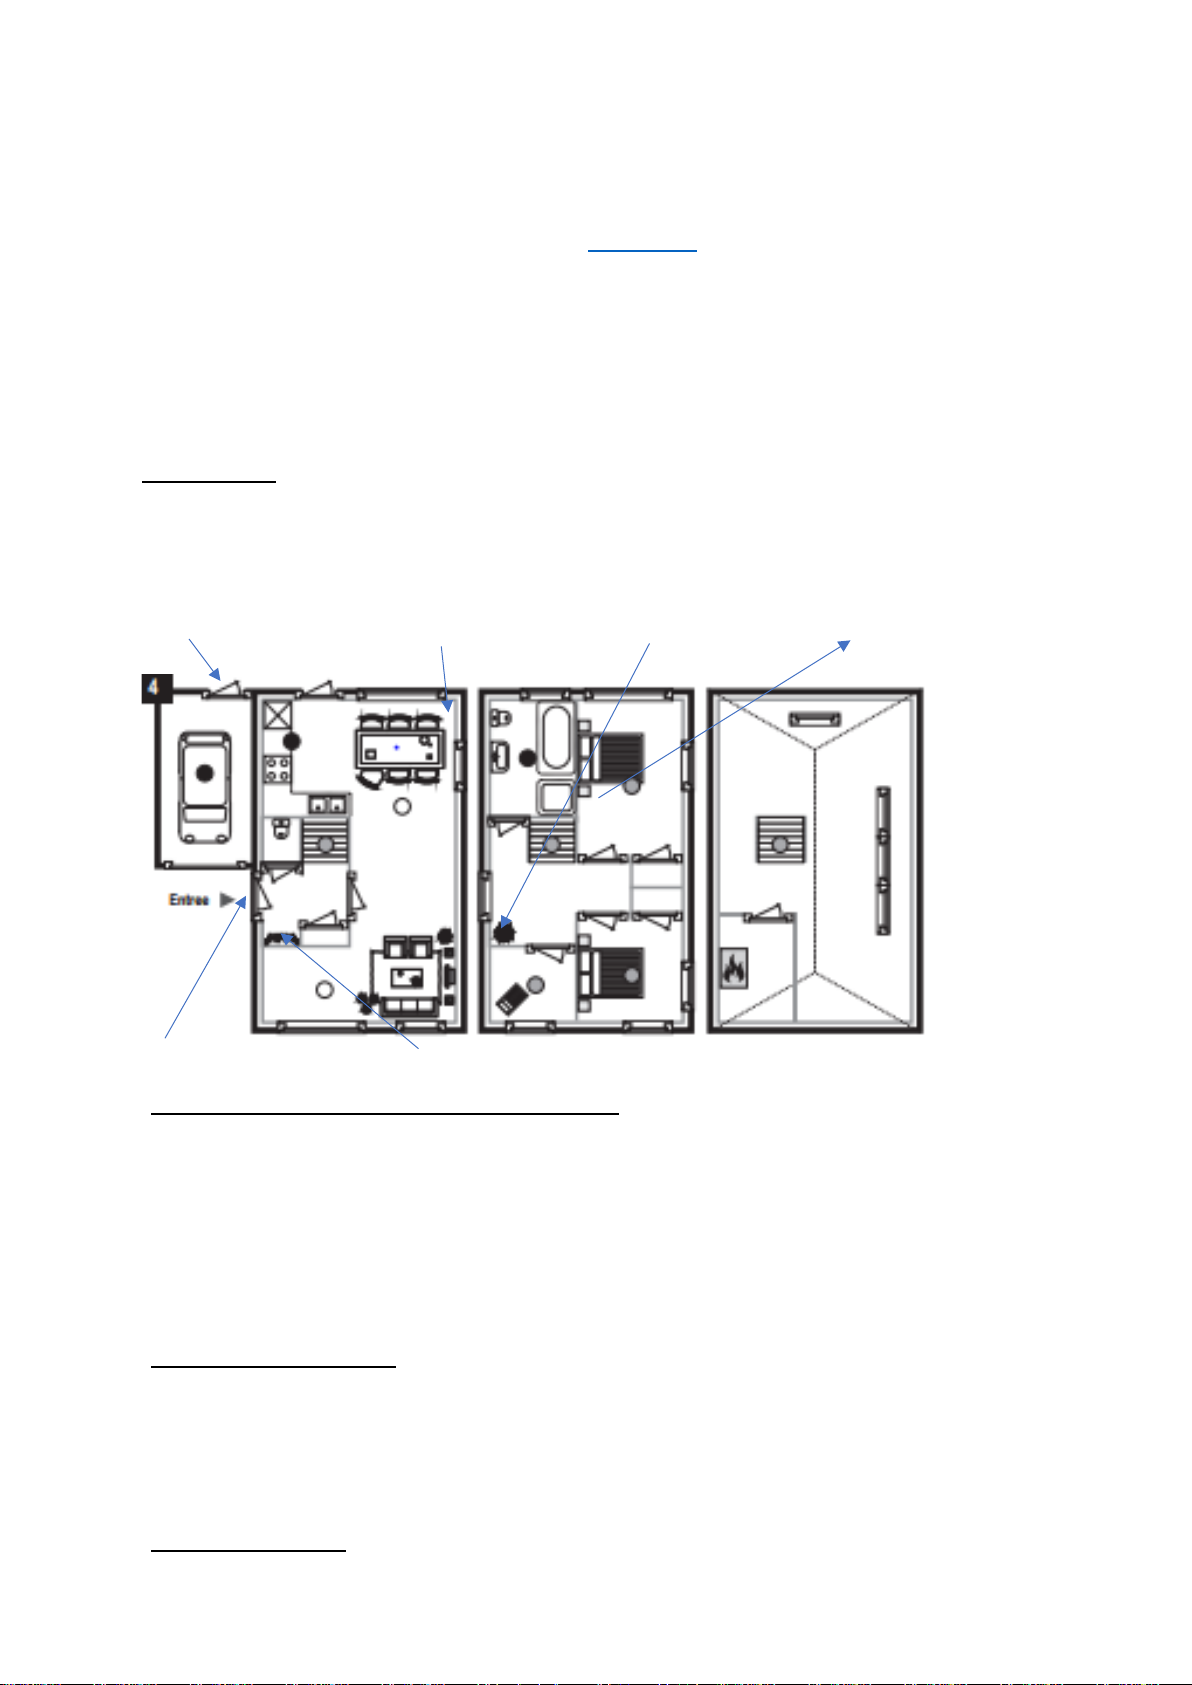
Divide the house in Alarm parts according figure:
It is possible to put the Alarm system in Partial armed (2 different parts) and full armed.
For example when we are at home we only Arm the Garage PARM1, but not the rest. If we are a sleep, we
only arm the Garage and down floors PARM2, but not the rest. If we are away from home Full armed.
We also can give a sensor being defined as an sensor with Exit/Entry Delay. For example; If we leave
home, and we want to switch on the alarm on the panel, we give the door/window magnet E: the Exit/Entr y
delay status. All other sensors can have the immediate status. Your system can be divided in groups or
zones. When there is an alarm you can see which Zone gave alarm. The zone number also will be selected
on the sensor. All sensor in the same zone will have the same PARM and Exit/Entry delay statuses.
You can divide up to 6 zones. If you have not more than 6 zones you can give each sensor its own zone
number.
Draw a map of your home, mark the places to be secured, and make an overview on the last page like:
A: Door/window contact : Zone number: 01 PARM1:On PARM2: On Exit/Entry Delay: Off
B: PIR Motion Sensor : Zone number: 02 PARM1:Off PARM2: On Exit/Entry Delay: Off
C: PIR Motion Sensor : Zone number: 03 PARM1:Off PARM2: Off Exit/Entry Delay: Off
D: Door/window contact : Zone number: 04 PARM1:Off PARM2: On Exit/Entry Delay: On
E: Remote Control : advise to take this with you when you go to bed. Easy to control the alarm, and in
reach in case of panic!
F: Alarm Panel : can be installed hidden, for example behind the hood in the hall.
Telephone numbers: Consider which numbers must be called in case of alarm: fill in the numbers on the
overview on the last page.
 Loading...