

ELRO DWH series Installation And Operation Instruction Manual
DWH SERIES
VIDEO SECURITY SYSTEM
Installation and Operation Instruction Manual
This manual should be retained in a safe place for future reference

CONTENTS
SYSTEM INTRODUCTION
04
04
04
05
05
07
08
08
08
09
09
10
11
11
11
12
13
13
15
15
16
16
18
18
18
18
19
19
19
20
21
21
21
22
23
KIT CONTENTS
QUICK START GUIDE
SETUP THE CAMERA
SETUP THE TOUCH CREEN MONITOR / RECEIVER
SYETEM OPERATION
REMOTE ACCESS
SETTING THE CAMERA CHANNEL
PAIRING THE CAMERA TO RECEIVER
CAMERA INSTALLATION
LIVE SCREEN DISPLAY
ZOOM FEATURE
RECORDING LIVE VIDEO
PLAYING BACK RECORDED VIDEO
CAMERA SETUP SCREEN
CAMERA PAIRING
CAMERA ACTIVATION
BRIGHTNESS
RECORDER SETUP SCREEN
MOTION DETECTION
SCHEDULE RECORD
CLEAR A SCHEDULE RECORD
NETWORK SETUP SCREEN
INTERNET SETUP
SECURITY CODE SETUP
NETWORK INFORMATION
SYSTEM MENU
SYSTEM OPERATION
GETTING TO KNOW THE RECEIVER AND CAMERA
INSTALLATION
READ BEFORE START
REQUIREMENT FOR REMOTE VIEW
PLANNING YOUR LAYOUT
SAFETY INSTALLATION TIPS
IMPORTANT NOTES

2
CONTENTS
SYSTEM INTRODUCTION
03
03
05
05
07
08
08
08
09
09
09
11
12
12
12
13
14
16
16
16
17
17
18
18
19
19
20
20
20
21
21
22
22
23
24
KIT CONTENTS
QUICK START GUIDE
SETUP THE CAMERA
SETUP THE TOUCH CREEN MONITOR / RECEIVER
SYETEM OPERATION
REMOTE ACCESS
SYSTEM REQUIREMENT
SETTING THE CAMERA CHANNEL
PAIRING THE CAMERA TO RECEIVER
CAMERA INSTALLATION
LIVE SCREEN DISPLAY
ZOOM FEATURE
RECORDING LIVE VIDEO
PLAYING BACK RECORDED VIDEO
CAMERA SETUP SCREEN
CAMERA SETUP
CAMERA ACTIVATION
BRIGHTNESS
RECORDER SETUP SCREEN
MOTION DETECTION
SCHEDULE RECORD
CLEAR A SCHEDULE RECORD
NETWORK SETUP SCREEN
INTERNET SETUP
SECURITY CODE SETUP
NETWORK INFORMATION
SYSTEM MENU
SYSTEM OPERATION
UNDERSTANDING THE VIDEO VIEWING SPEED
GETTING TO KNOW THE RECEIVER AND CAMERA
INSTALLATION
PLANNING YOUR LAYOUT
SAFETY INSTALLATION TIPS
IMPORTANT NOTES TO READ BEFORE START
REMOTE ACCESS32
MAINTAINING THE SYSTEM
UPGRADING YOUR FIRMWARE
TROUBLE SHOOTING
SYSTEM CONFIGURATION
PRODUCT SPECIFICATION
RECORDING TIME FOR MEMORY CARD
BATTERY USED IN THE RECEIVER
DECLARATION
DISPOSAL & RECYCLING
ALARM SETUP SCREEN
PERIOD
MELODY
SYSTEM SETUP SCREEN
POWER SAVING
SCREEN AUTO LOCK
TIME
CLOCK ALARM
TIME SETTING
TIMER
FORMAT STORAGE
SYSTEM UPGRADE
LANGUAGE
QUICK TIPS
OVERVIEW
DOWNLOADING APPS
ANDROID
iPHONE/iPAD
CONNECTING TO THE INTERNET
23
24
24
25
25
26
26
27
27
28
28
29
29
30
30
30
30
30
32
34
35
35
36
37
38
38
39
39
39
2
IMPORTANT NOTICE
Please Read Before You Start
This equipment has been tested and found to comply with limits for a Class B digital device, pursuant to
Part 15 of the FCC rules and ETSI (EN) 300 328. These limits are designed to provide reasonable
protection against harmful interference in residential installations. This equipment generates, uses, and
can radiate radio frequency energy, and if not installed and used in accordance with the instructions,
may cause harmful interference to radio communications.
However, there is no guarantee that interference will not occur in a particular installation. If this
equipment does cause interference to radio or television equipment reception, which can be determined
by turning the equipment off and on, the user is encouraged to try to correct the interference by one or
more of the following measures:
- Reorient or relocate the receiving antenna.
- Move the equipment away from the receiver.
- Plug the equipment into an outlet on a circuit different from that to which the receiver is connected.
- Consult the dealer or an experienced radio/television technician for additional suggestions.
If the camera system no longer functions or can no longer be repaired, it must be disposed of according
to the valid statutory regulations. Disposal of spent batteries/accumulators:
You are required by law (Battery Ordinance) to return all spent batteries and accumulators. Disposing of
spent batteries/accumulators with common household waste is prohibited! Batteries/accumulators that
contain hazardous substances are marked with the symbols on the side. These symbols indicate that it
is prohibited to dispose of these batteries/accumulators in the household waste.
The abbreviations for the respective heavy metals are Cd = cadmium, Hg = mercury, Pb = lead. You can
return spent batteries/accumulators that can no longer be charged to the designated collection points in
your community, outlets or wherever batteries or accumulators are sold. Following these instructions will
allow you to fulfill the legal requirements and contribute to the protection of our environment!
You are cautioned that any change or modifications to the equipment not expressly approved by the
party responsible for compliance could void your authority to operate such equipment.
FCC/CE WARNING
Disposal

System “Device ID” and “Password” are provided on a label
applied at the back of the LCD Monitor (behind the pull out stand).
The “Device ID” and “Password” are needed for remote viewing.
For security purpose, it is recommenced for user to copy the
“Device ID” and “Password” information to the user manual,
following by removing the label containing the “Device ID” and
“Password” information.
Please store this manual in a safe place to protect the device ID
and password information for future reference.
Always use discretion when installing CCTV surveillance
equipment especially when there is perceived policy. Enquire
regarding local regulations applicable to the lawful installation of
video recording/surveillance. Third party consent may be
required.
REQUIREMENTS FOR REMOTE VIEW
Supported Device
iPhone, iPad1, iPad2, New iPad and iPod Touch
Android devices (phone/ tablet PC)
Note:
Not suitable for Windows7 or Blackberry Smartphones.
Recommended minimum internet upload speed
512Kbps upload speed (or bandwidth) to achieve up to an average of
2FPS viewing speed. Average viewing speed will depend on other
restrictions by your ISP (internet service providers).
4

5
PLANNING YOUR LAYOUT
SAFETY AND INSTALLATION TIPS
LCD Touch Screen Monitor
keep away from heat sources and high temperature places
Avoid direct sunlight
Avoid humid places
Avoid vibration
Install in a ventilated environment
The supplied SD card can be replaced with up to a 32GB SD card if
required
Installation Notes
Always follow manufacturers advice when using power tools, steps,
ladders, etc and wear protective equipment (e.g, safety goggles and
gloves) when drilling holes, etc.
When using ladders ensure they are positioned on a firm stable surface at
an angle and suitably secured. Check for hidden electricity wires or water
pipes before drilling any holes. If in doubt use a cable/pipe locator.
It is recommended to avoid exposing the camera to extreme weather
conditions (e.g, under a gutter which is prone to water leaks). After drilling
any holes through an external wall for a cable, ensure the hole is sealed
up using a suitable sealant to prevent drafts.
To prevent a fire or electrical shock hazard, do not attempt to open the
housing while the camera is exposed to rain water or wet conditions. Do
not expose any wiring connections to weathering. If terminating any wiring
connections outdoors then use a suitable weathering box to insulate the
connections.
There are no user serviceable parts inside. Refer servicing to qualified
service personnel.
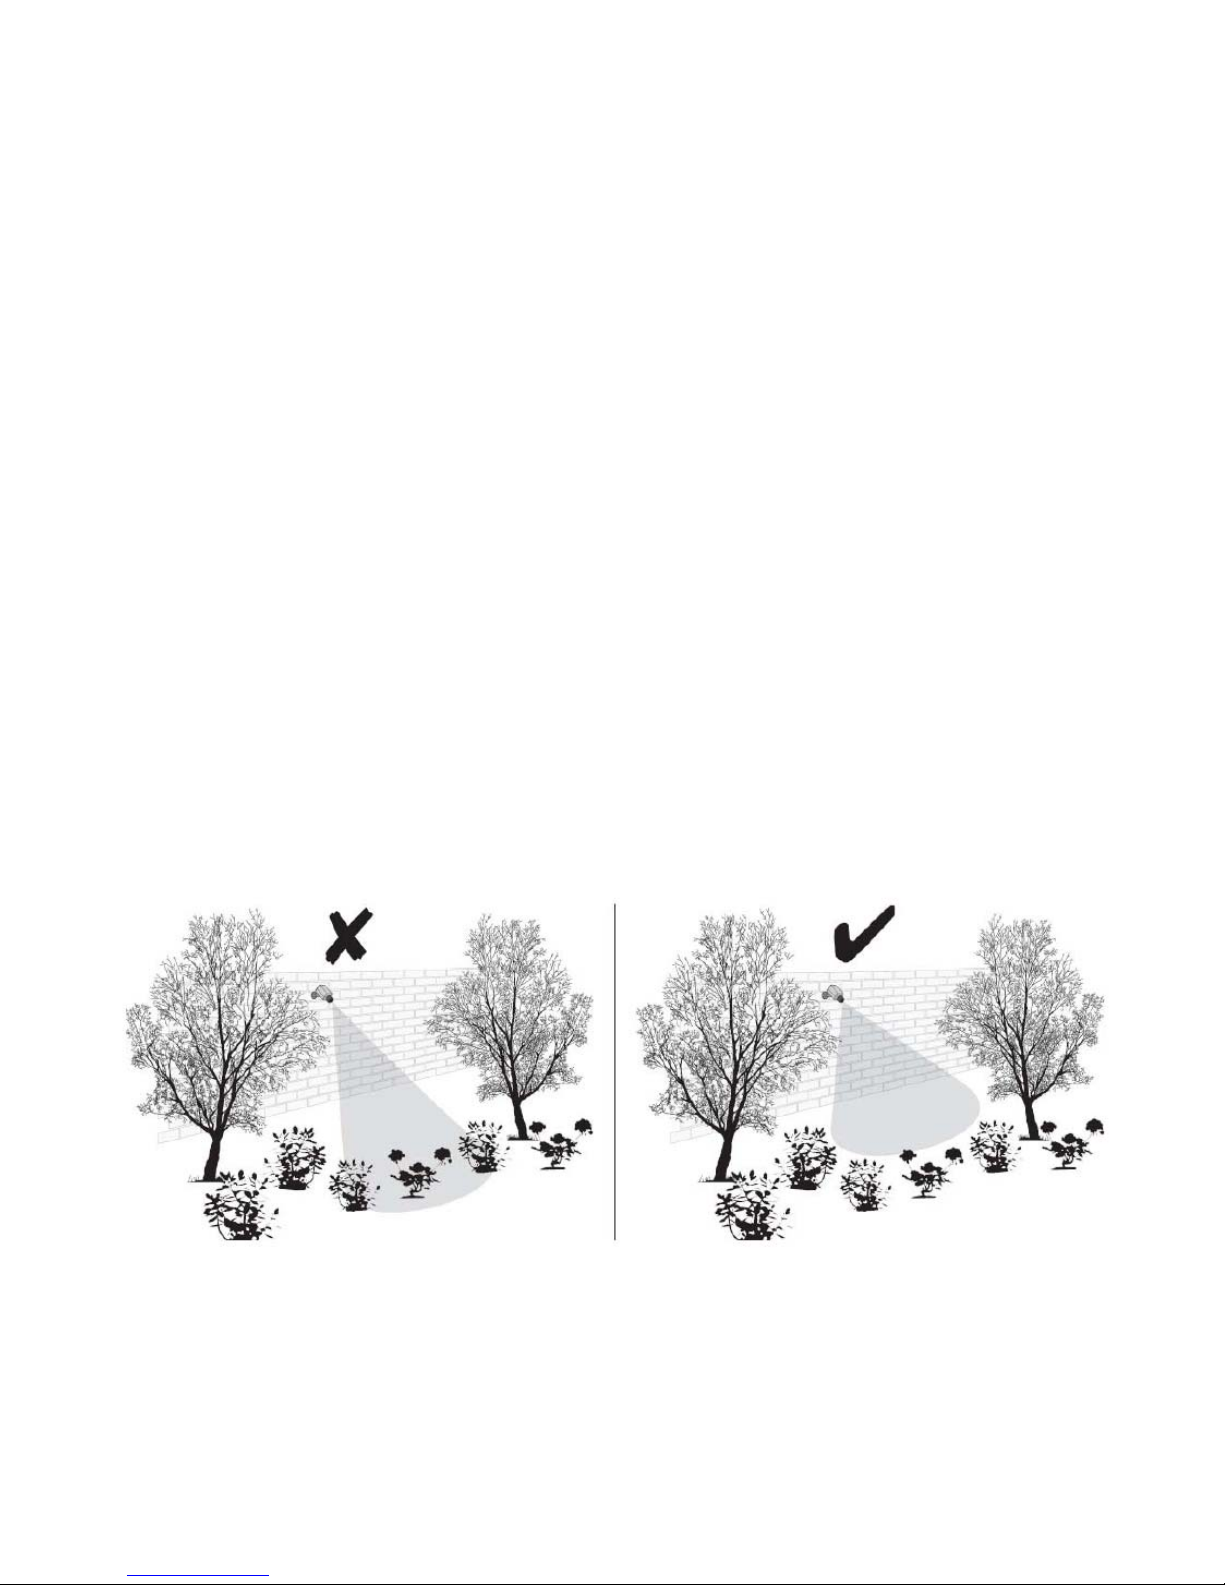
Camera Installation
Avoid positioning the camera so that it is facing directly at the sun as
this will impair the picture quality viewed.
Avoid pointing the camera lens directly through clear glass as the night
vision LEDs will cause a blurred image at night.
Avoid pointing the camera directly at any bushes, tree branches or
moving objects that might naturally move due to winds. This is also
because if you need to use the motion detection feature in the PC
software to record movement the software might record unnecessarily.
6
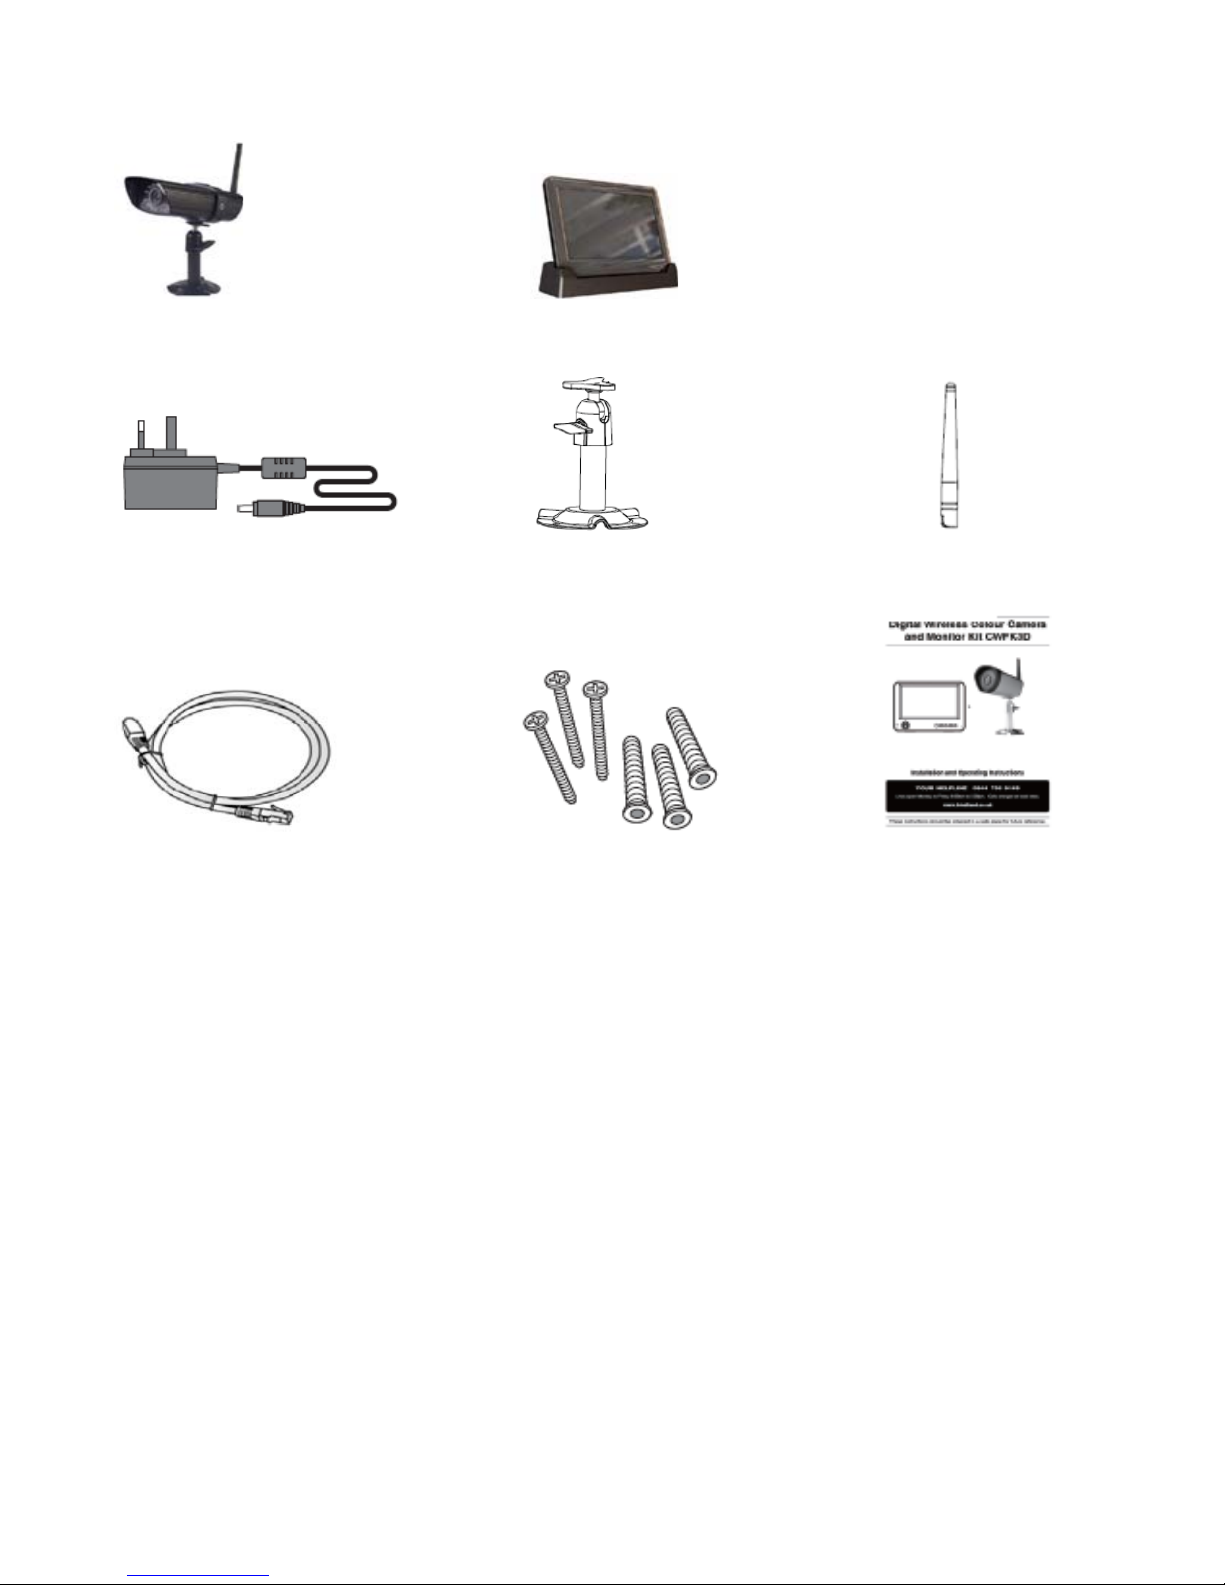
KIT CONTENTS
1 x Camera 1 x Touch Screen LCD Monitor w/Cradle
2 x 5V/1A Power Adaptor 1 x Camera Stand 1 x Antenna
1 x Internet Cable 1 x Fixings Pack 1 x Instruction Manual
7
QUICK START GUIDE
For further details on the installation of the camera bracket and fixings
please refer to page12.
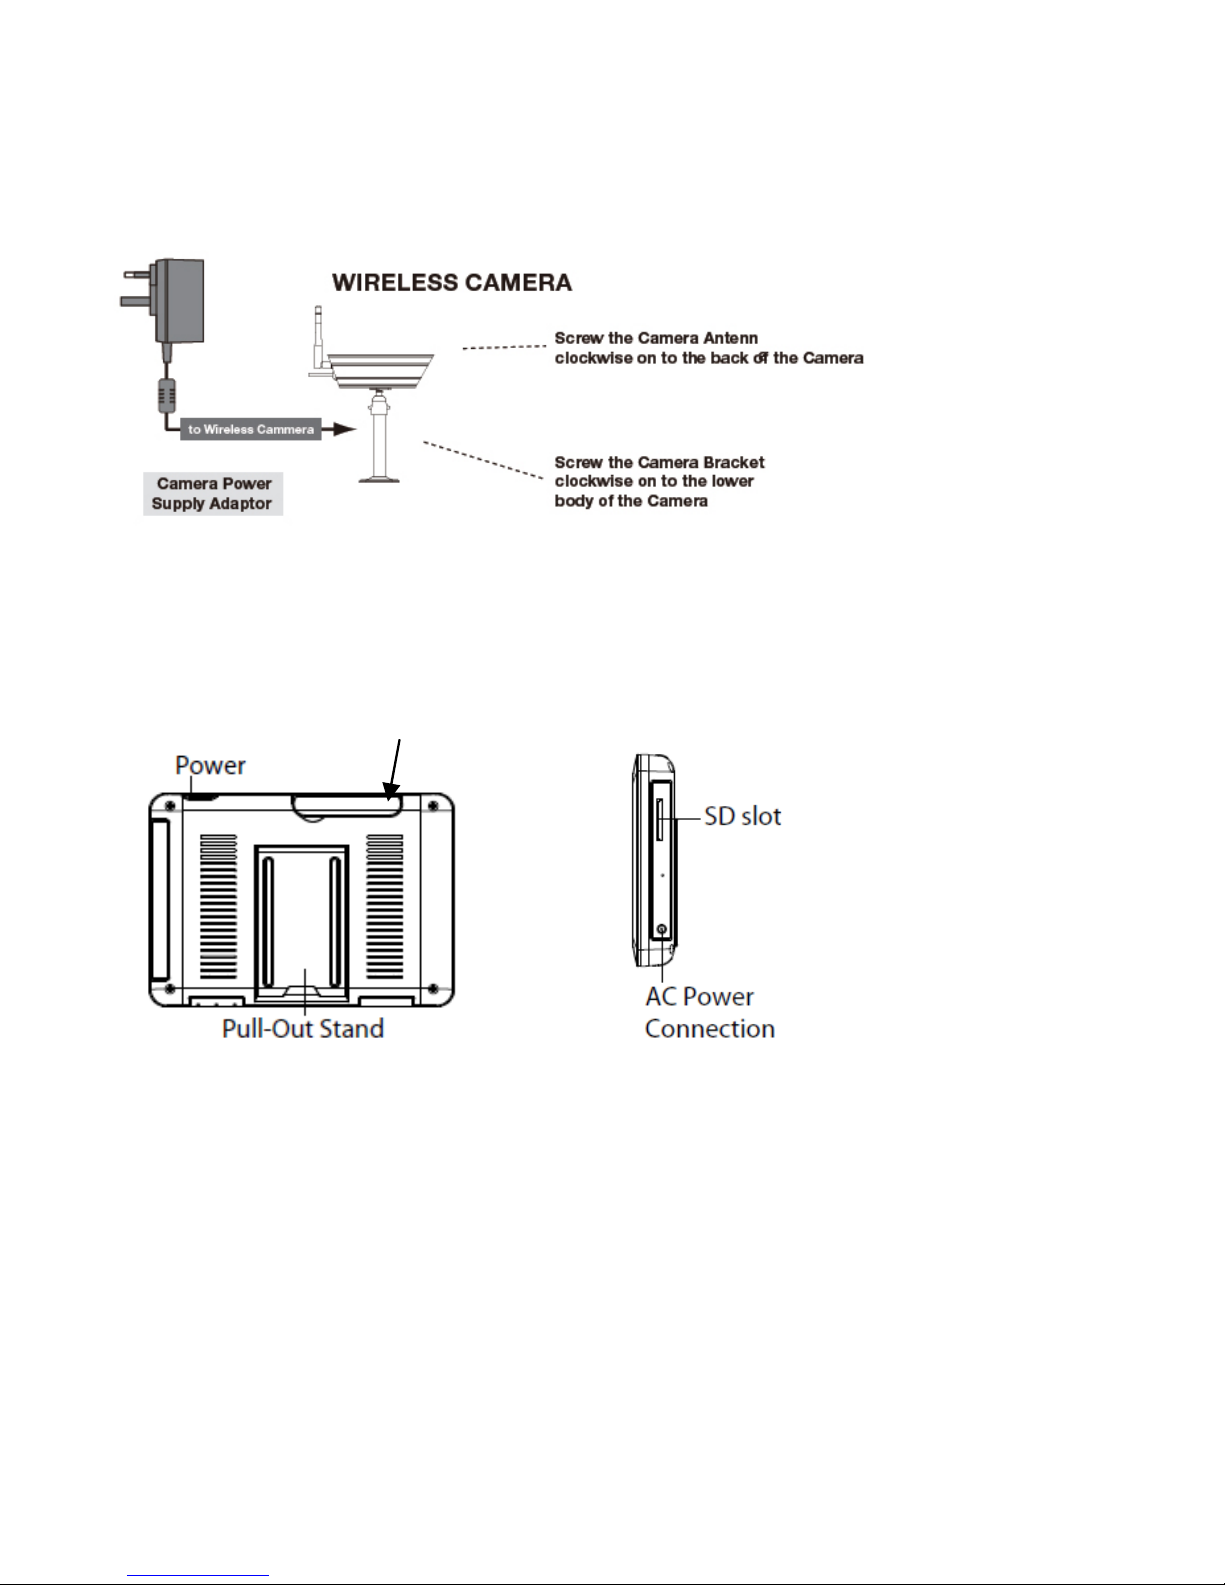
Set Up the Camera
Set Up the Touch Screen Monitor
1. Flip out the stand, extend the antenna, connect AC/DC adapter to the
input on the side of the monitor.
Antenna
2. Press and hold the POWER button on the top of the monitor for 3 - 4
seconds to power it up.
3. The receive
r displays Welcome screen for a few seconds and then
transitions to the LIVE view.
4. Place the SD card into the SD card slot located on the side of the
monitor.
Note:
The screen remains dark until the cameras is powered up.
8

9
The 7" touch screen monitor is fitted with a rechargeable battery and can
operate for up to 4 hours on battery power once fully charged. The
monitor can be carried around anywhere within operating range of the
cameras, but should be used in a dry environment as it is not
weatherproof.
System Operation
Refer page18, for Camera, System and Recording Settings.
Remote Access
Can be done via iPhone, iPad1, iPad2, New iPad / Android d
evice
connected to 3G/Wifi internet.
For an Android device
Please read page32 of this instruction manual
For iPhone, iPad1, iPad2, New iPad
Please read page34 of this instruction manual
NEED HELP
Note:
The monitor must be placed on the docking cradle to allow remote
viewing.
If removed from the cradle then the camera(s) can only be viewed on the
7” touch screen monitor.
customer helpline y to Friday 9.00am to 5.00pm o 5.00p
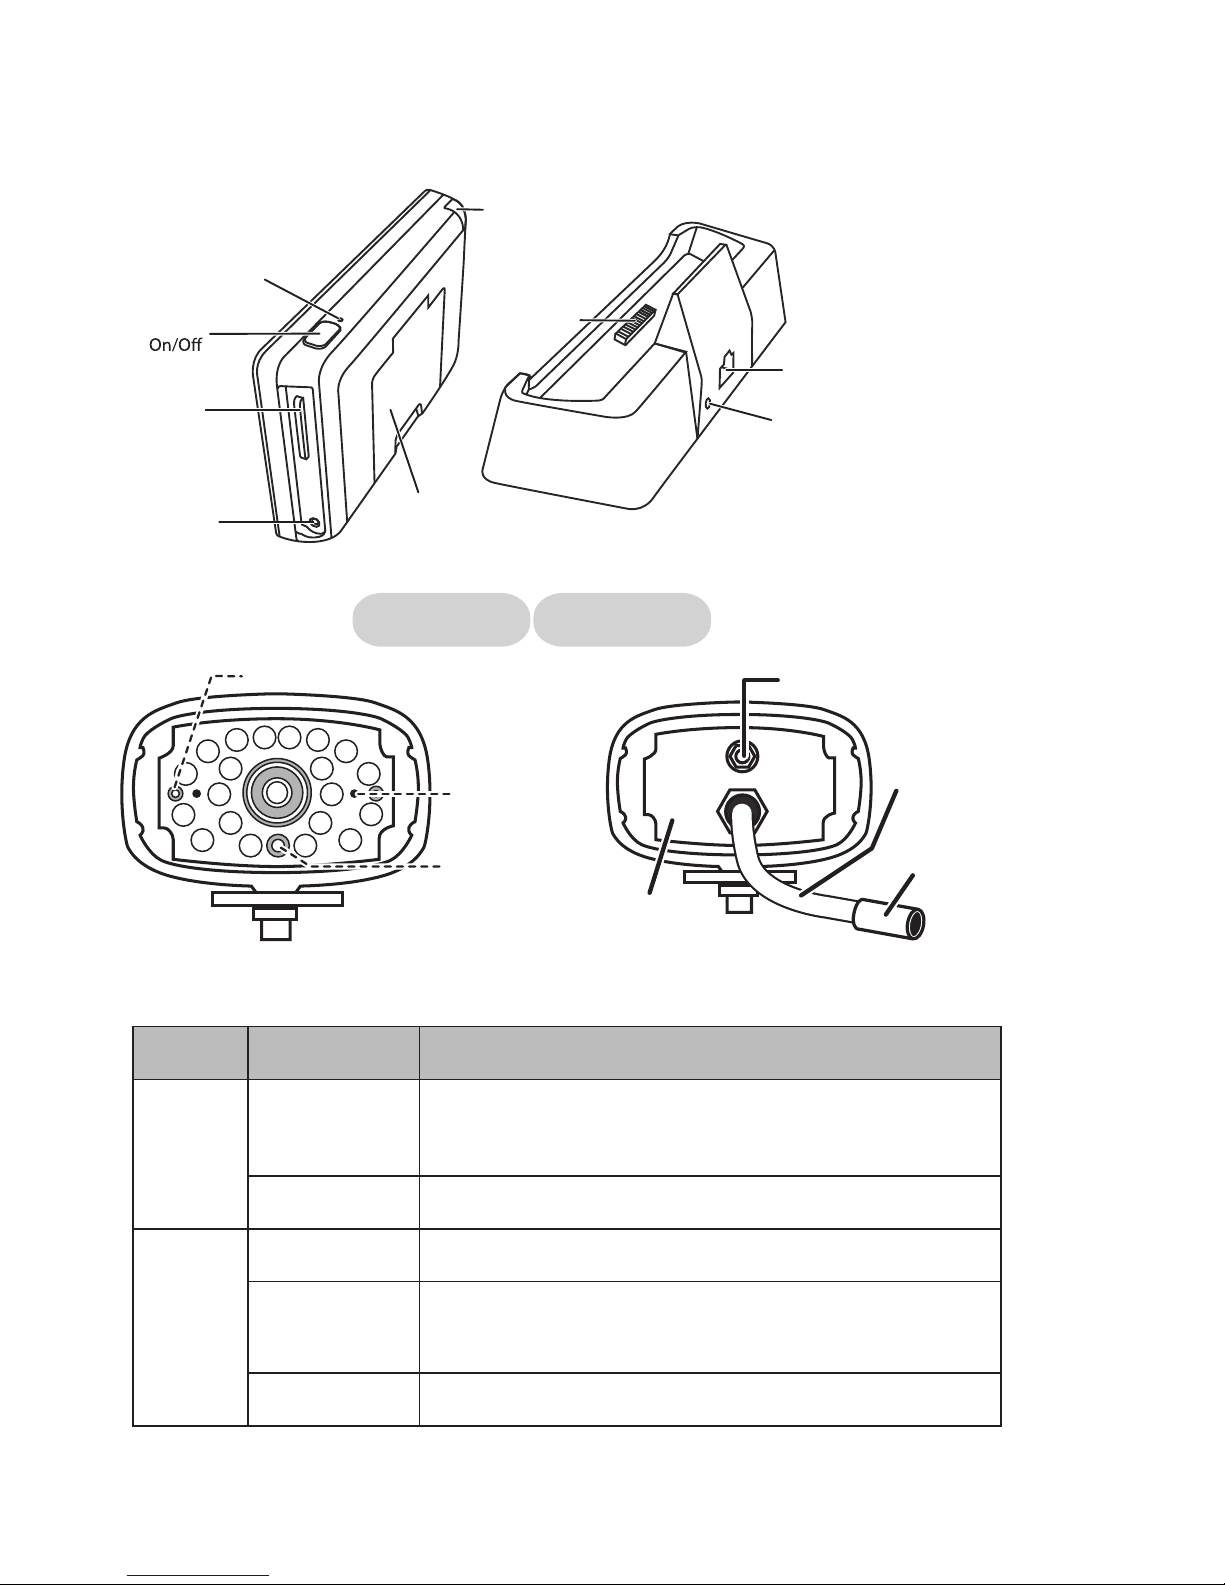
Light State What it means
Power
status
On
(Red)
The camera is on.
Off The camera is off.
Flashing The camera is in pairing mode.
Link
status
On
(Green)
The camera is connected to the receiver.
Off The camera is in standby.
WHAT THE LIGHTS MEAN
10
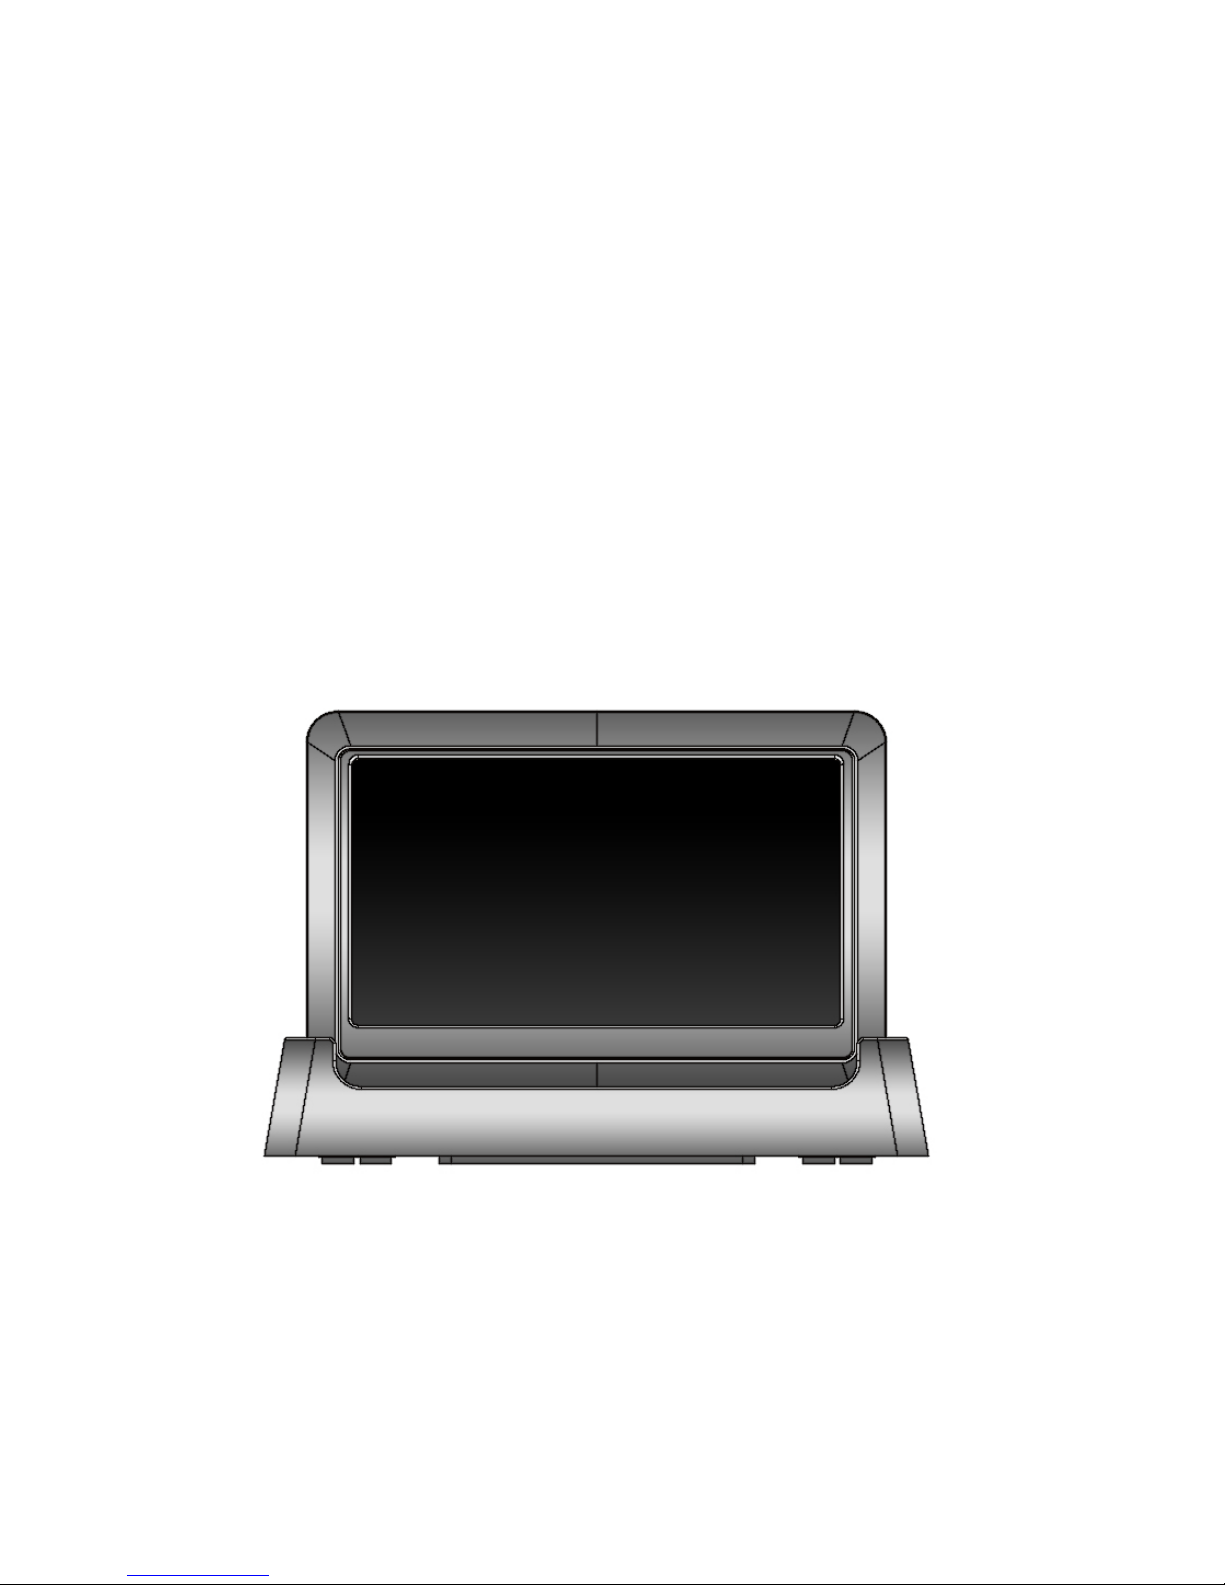
Receiver
Power Dock
Data Cable
Connection
AC Power
Connection
Power
SD slot
AC Power
Connection
Receiver
(back/side)
Cradle
Pull-Out
Stand
Reset
Antenna
Front view
Camera
Back view
Power status
Link status
Light sensor
Antenna
connector
Power
pigtail
Power/Pair
button
Microphone
 Loading...