

ELPRO TZM443 User Manual
TZM443 4x4 HIGH RES. & AUDIO MATRIX
ELPRO Video Labs s.r.l.
Via della Praia, 4/A 10090 Ferriera di Buttigliera Alta (TO) ITALY
Tel.+39 0119348778 – Fax +39 0119348779
1
TZM443-M 26/10/2005
• Variable time “through blank” switching
• Keypad programmable preview output
• Customizable default configuration
• 4 presets recallable from keypad, 8 from RS232
• RGBHV only, AUDIO only, AFV
• RS232, RS485 control, IR
• Infrared remote control (optional)

INSTALLATION AND USE OF THE TZM443
INDEX:
1.0 Overview
2.0 Power supply
3.0 Settings
4.0 Installation
5.0 Local control
6.0 Infrared remote control
7.0 Control from computer via RS232
8.0 Control from computer via RS485
9.0 Technical data
10.0 Notes
Please read this manual carefully when installing the TZM443 unit.
The manufacturer will not be responsible for any damage caused by the use, although
correct, of its products.
The information and features of the product may change without prior notice.
TZM443 4x4 HIGH RES. & AUDIO MATRIX
ELPRO Video Labs s.r.l.
Via della Praia, 4/A 10090 Ferriera di Buttigliera Alta (TO) ITALY
Tel.+39 0119348778 – Fax +39 0119348779
2
1.0 OVERVIEW
Thank you for purchasing this product.
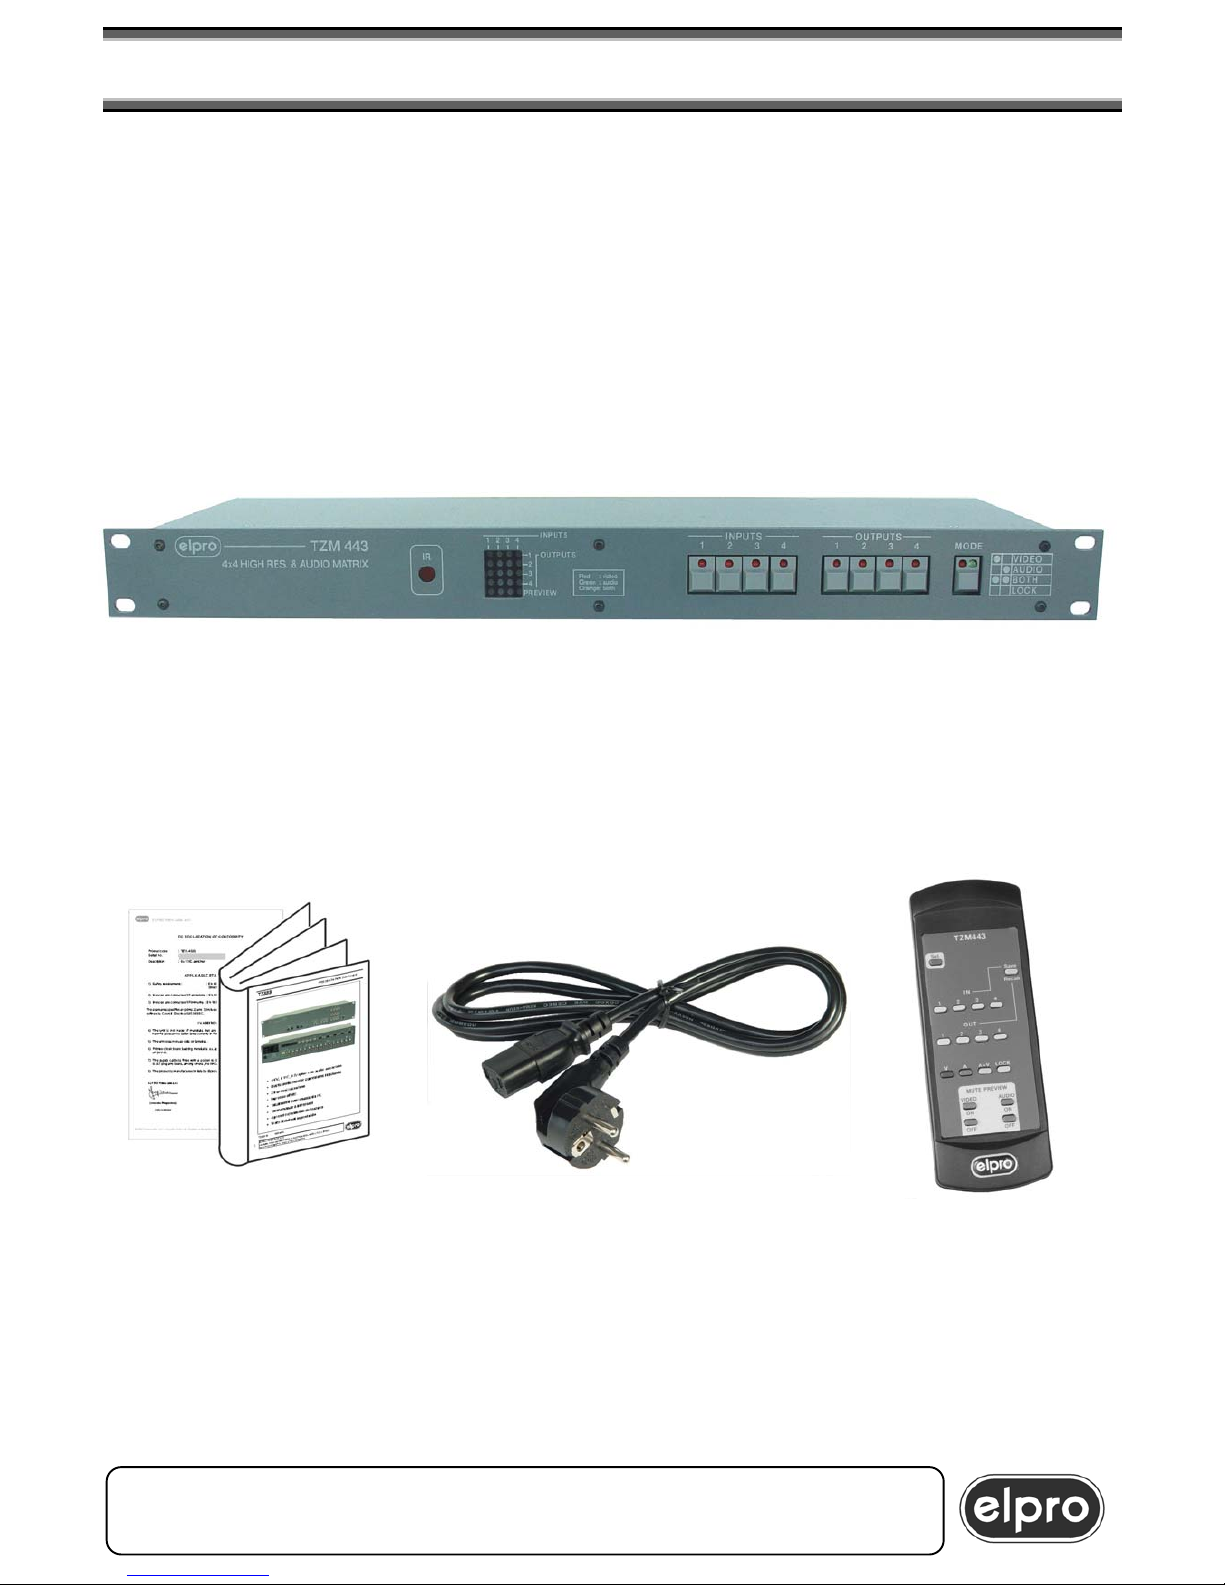
Carefully check the contents of the package. It contains:
TZM443 4x4 HIGH RES. & AUDIO MATRIX
ELPRO Video Labs s.r.l.
Via della Praia, 4/A 10090 Ferriera di Buttigliera Alta (TO) ITALY
Tel.+39 0119348778 – Fax +39 0119348779
3
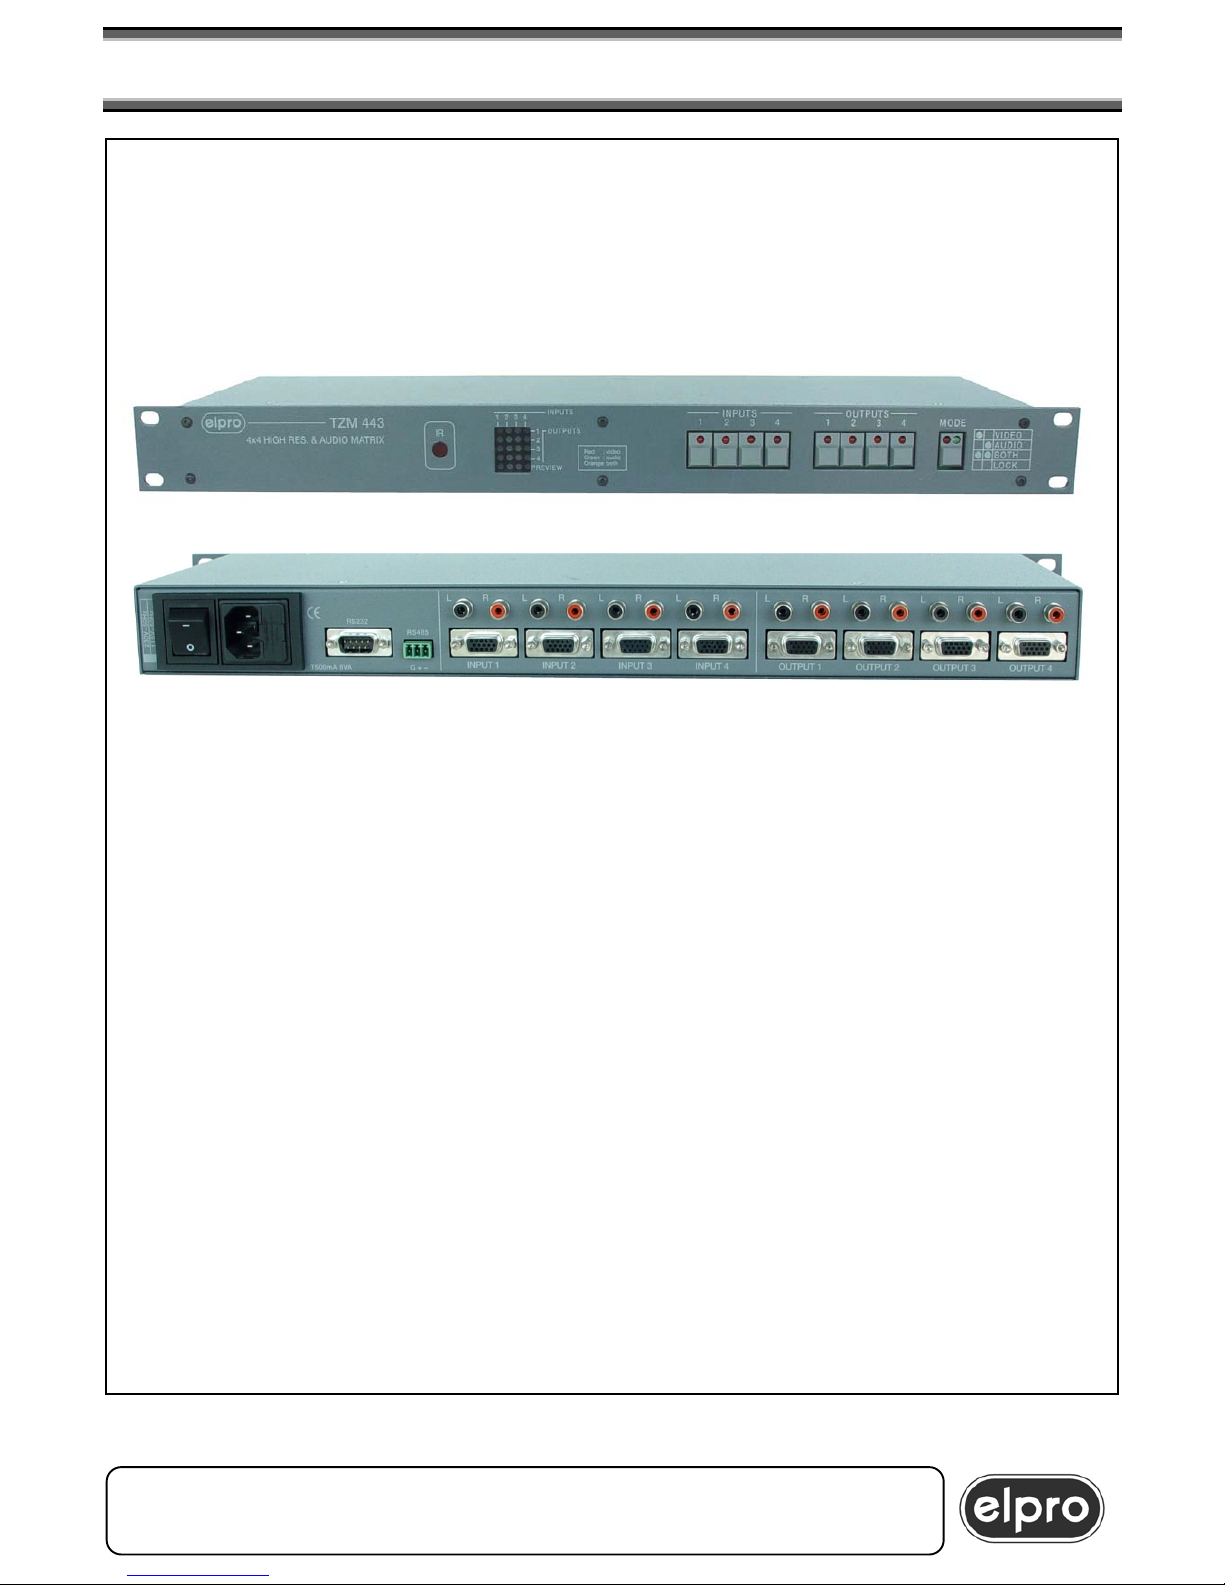
The TZM443 unit is a 4x4 matrix for RGBHV high resolution signals with
associated stereo audio signal.
It can be controlled with the integrated keyboard, from the computer with an
RS232 or RS485 serial interface and with an infrared remote control.
8 configurations can be saved and recalled, 3 of which directly from the keypad.
These are very useful in small presentation environments as well as in teaching
programs.
− The TZM443 unit
− The main cable − This manual
−
The CE declaration
- The IR remote control
(optional IR-TZM443)
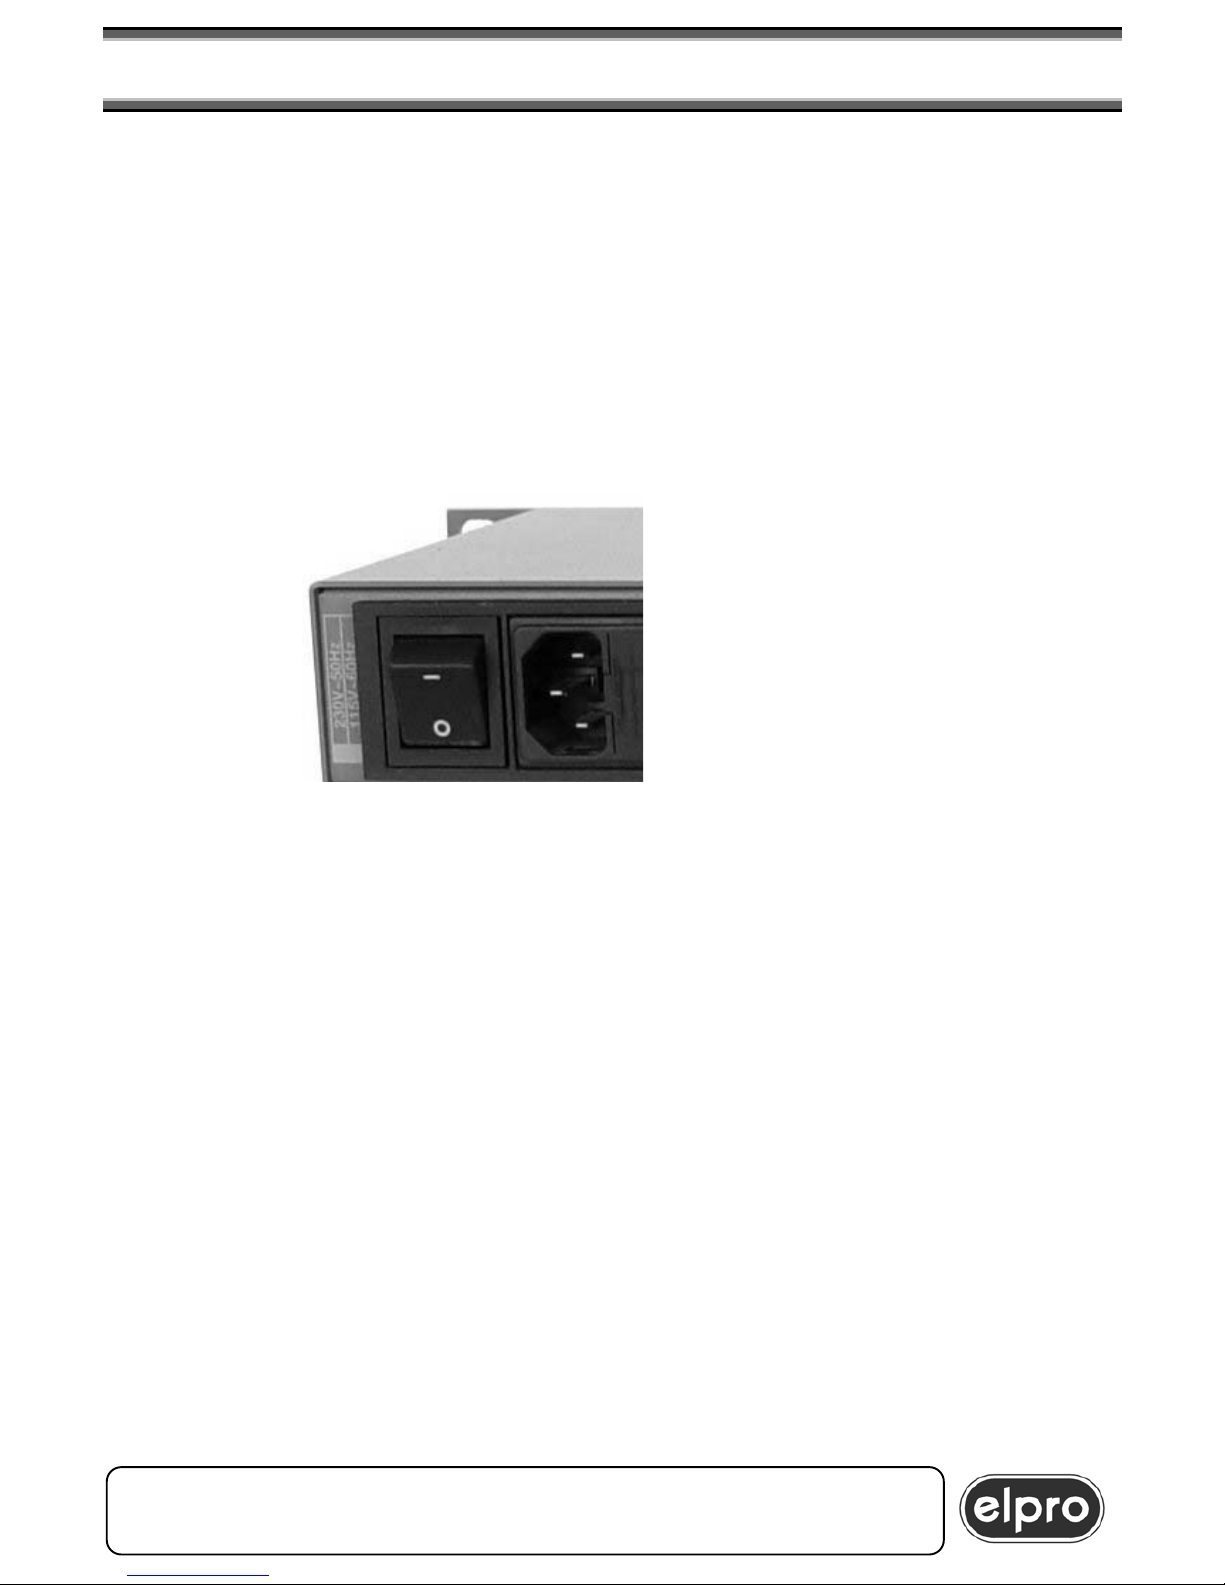
2.0 POWER SUPPLY
The TZM443 must be powered at 230 Vac 50Hz (115Vac 60Hz on request) with the
supplied power cable. The socket of the main cable must be connected to the panel plug
placed on the left hand side of the rear panel.
The panel plug has a fuse carrier for 5X20 fuses.
In case of fuse failure, replace it with an equivalent one, as specified at the back of the
unit (T 500mA).
CAUTION
All operations must be carried out by highly skilled personnel
who must be informed on risks concerning electric shock.
In some nations it is necessary to change the plug in order to adapt it according to the
local standard types. The code for the identification of the wires is as follows:
-Brown PHASE (Marked by the letter L, it could be red)
-Blue NEUTRAL (Marked by the letter N, it could be black)
-Yellow/Green GROUND (Marked by the letter E, it could be green)
CAUTION
Grounding is compulsory
TZM443 4x4 HIGH RES. & AUDIO MATRIX
ELPRO Video Labs s.r.l.
Via della Praia, 4/A 10090 Ferriera di Buttigliera Alta (TO) ITALY
Tel.+39 0119348778 – Fax +39 0119348779
4
3.0 SETTINGS
The unit does not have internal setups.
CAUTION
All maintenance operations must be carried out by highly skilled personnel
who must be informed on risks concerning electric shock.
Do not open the cover of the unit without previously removing the main cable.
4.0 INSTALLATION
a) Make sure that all units to be installed are switched off.
b) Connect the sources and graphic destinations according to the silk-screen printings on
the rear panel.
c) Connect the sources and audio destinations according to the silk-screen printings on
the rear panel.
d) Power up the equipment.
The unit will set up according to the factory setup so by the inputs and outputs
connected with the same number or according to the customized default configuration,
or according to the last preset recalled from the keypad or computer.
CAUTION
To store and enable a configuration to the
next switch-ons (customized default configuration),
press the MODE button for 2 seconds.
Two LEDS will flash after storing the information.
Subsequent recalls of one of the presets from the keypad or computer will change the
default configuration, thereby corresponding to the last recalled preset.
5.0 LOCAL CONTROL
5.1 Signal switching
The 4 graphic and audio outputs of the unit, as well as the graphic and audio preview
output, can be controlled through the console on the front panel.
The “MODE” button is used for changing the operation mode:
-Only audio (green LED on)
-Only video (red LED on)
-AFV (both LEDS on)
-Lock (both LEDS off, keypad locked).
TZM443 4x4 HIGH RES. & AUDIO MATRIX
ELPRO Video Labs s.r.l.
Via della Praia, 4/A 10090 Ferriera di Buttigliera Alta (TO) ITALY
Tel.+39 0119348778 – Fax +39 0119348779
5
Switching is carried out by following the INPUTS - OUTPUTS sequence.
Operationally:
The 4 buttons with a built-in LED, called "INPUTS", are used for selecting a source.
When a source is selected, it is immediately switched to the PREVIEW output.
The 4 "OUTPUT" buttons are used for switching the previously selected input to the
required output.
If MODE AFV (Audio Follows Video) is enabled, the video and audio input signals are
switched to the preview output and subsequently to the required output; if "only video" is
enabled, the switching applies only to the video.
This also applies to "only audio”.
The status of the machine, including the preview, is shown on the LED matrix, which is
installed on the unit front panel. The color of the LED indicates the type of signal on the
output:
-green indicates audio
-red indicates video
-orange indicates audio and video
(AFV, namely Audio Follows Video).
5.1.1 Switching time setup from keypad:
The TZM443 features the “through blank” switching mode. The switching time is user-
adjustable to permit the perfect matching with the destination device.
This important feature prevents annoying effects coming from LCDs when switching a
signal to their input.
Since every LCD has its own response time, the user can change the through blank
duration from 0.3 to 2 seconds to achieve optimal switching.
There are four settable times:
0.3 sec.; 0.5 sec.; 1 sec. and 2 sec.
In order to display and setup the through blank
switching time with the keypad, the MODE button
must be in LOCK position.
By doing so, the setup time will be displayed on
the LEDs of the keys associated with inputs 1, 2,
3, and 4 with the following meaning:
To set up a new switching time, it is necessary to hold down the required key for 2
seconds according to the time required.
The default value is 500 msec.
TZM443 4x4 HIGH RES. & AUDIO MATRIX
IN key LED
(In LOCK MODE)
Switching time
IN 1 300 msec
IN 2 500 msec
IN 3 1 sec.
IN 4 2 sec.
ELPRO Video Labs s.r.l.
Via della Praia, 4/A 10090 Ferriera di Buttigliera Alta (TO) ITALY
Tel.+39 0119348778 – Fax +39 0119348779
6
 Loading...