

ELPRO SDZ16 Installation And Use Manual
SDZ16 16x16 SD & AUDIO MATRIX
• Automatic rate selection from 143 to 360Mbit/sec
• External switching reference
• Switching line selectable
• Command by keypad, RS232 or LAN
• 16 recallable presets
• Balanced audio combined
SDZ16 – M 05/03/2007
ELPRO Video Labs s.r.l.
Strada della Pronda, 45/B 10142 TORINO – ITALY
Tel.+39 0117701583 – Fax +39 011703751
1

SDZ16 16x16 SD & AUDIO MATRIX
INSTALLATION AND USE OF SDZ16
INDEX
1.0 Overview
2.0 Power supply
3.0 Settings
4.0 Installation
5.0 Local control
6.0 Computer control via RS232
7.0 LAN control
8.0 Firmware upgrade
9.0 Technical data
10.0 Notes
When installing the SDZ16 unit, please read this handbook carefully.
The manufacturer shall not be held responsible for any damage or injury
caused by use, even correct, of its products.
The data and characteristics of the product may be modified without prior
notice.
ELPRO Video Labs s.r.l.
Strada della Pronda, 45/B 10142 TORINO – ITALY
Tel.+39 0117701583 – Fax +39 011703751
2
SDZ16 16x16 SD & AUDIO MATRIX
1.0 OVERVIEW
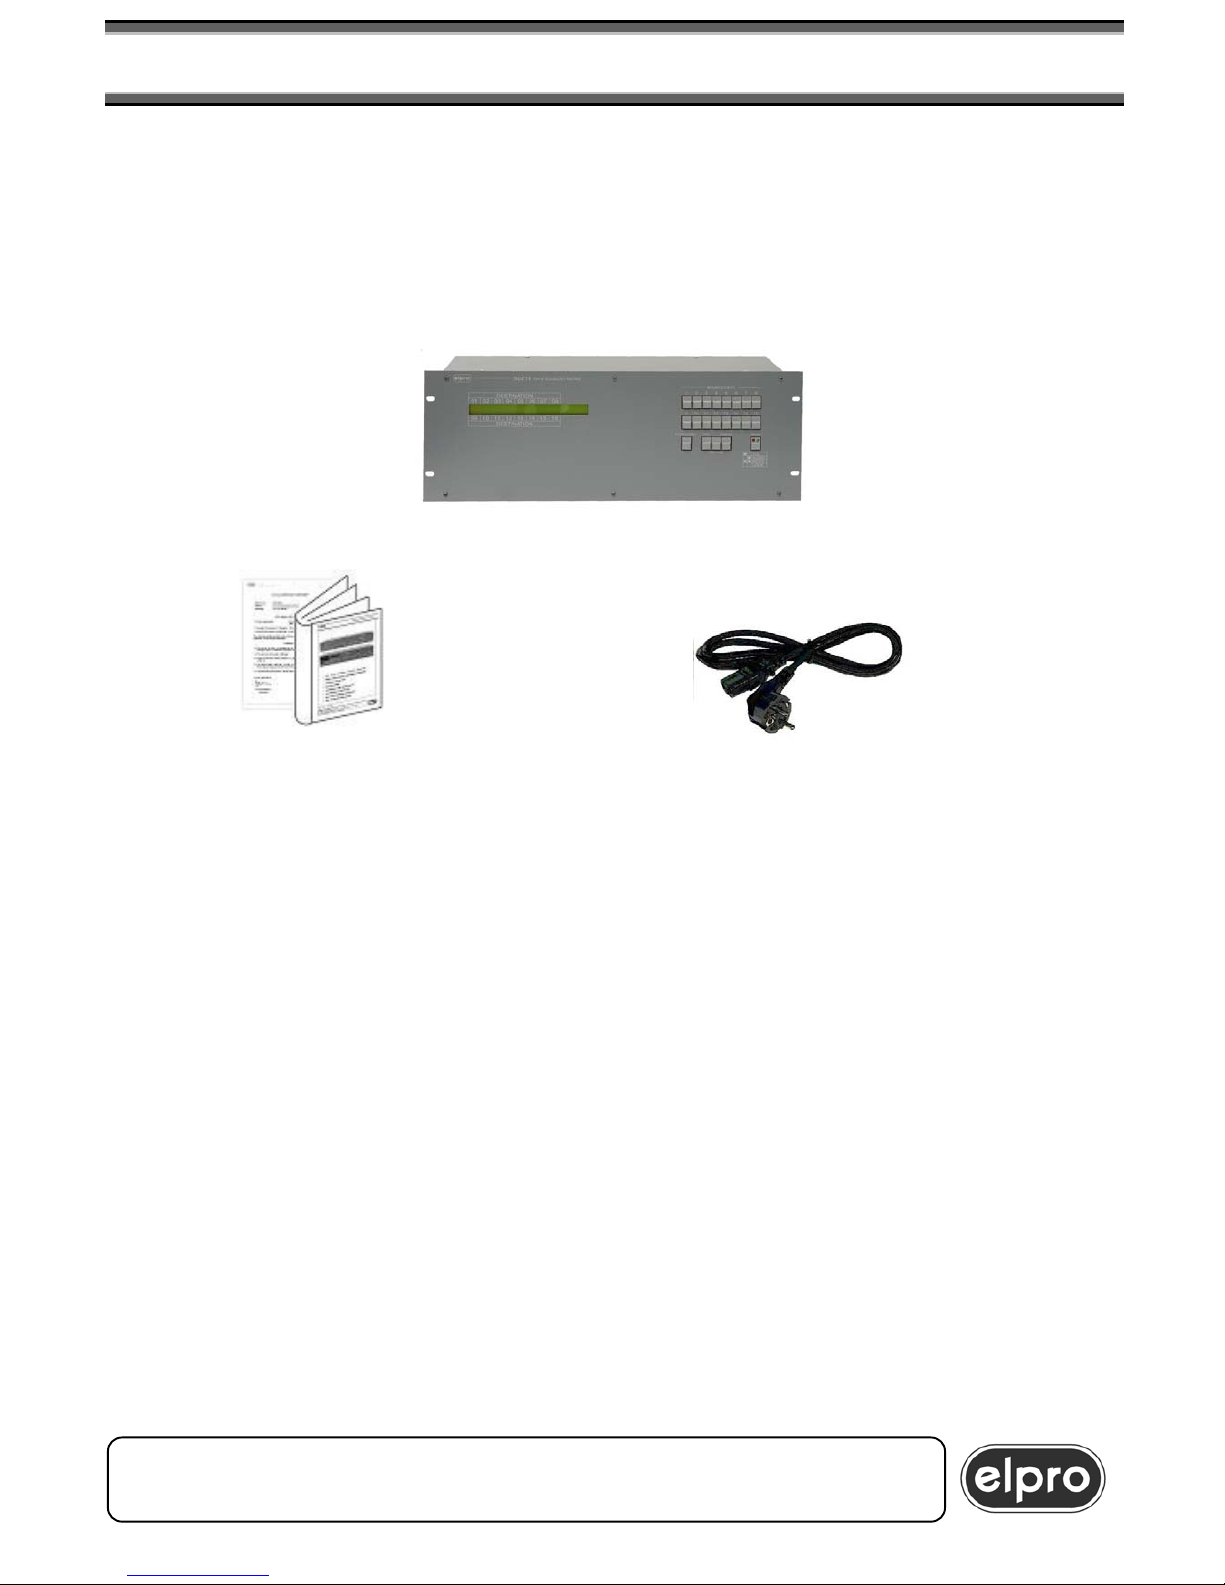
Thank you for buying this product. Check the contents of the packaging
carefully. It contains:
the SDZ16
the present manual
and the CE certificate the mains cable
.
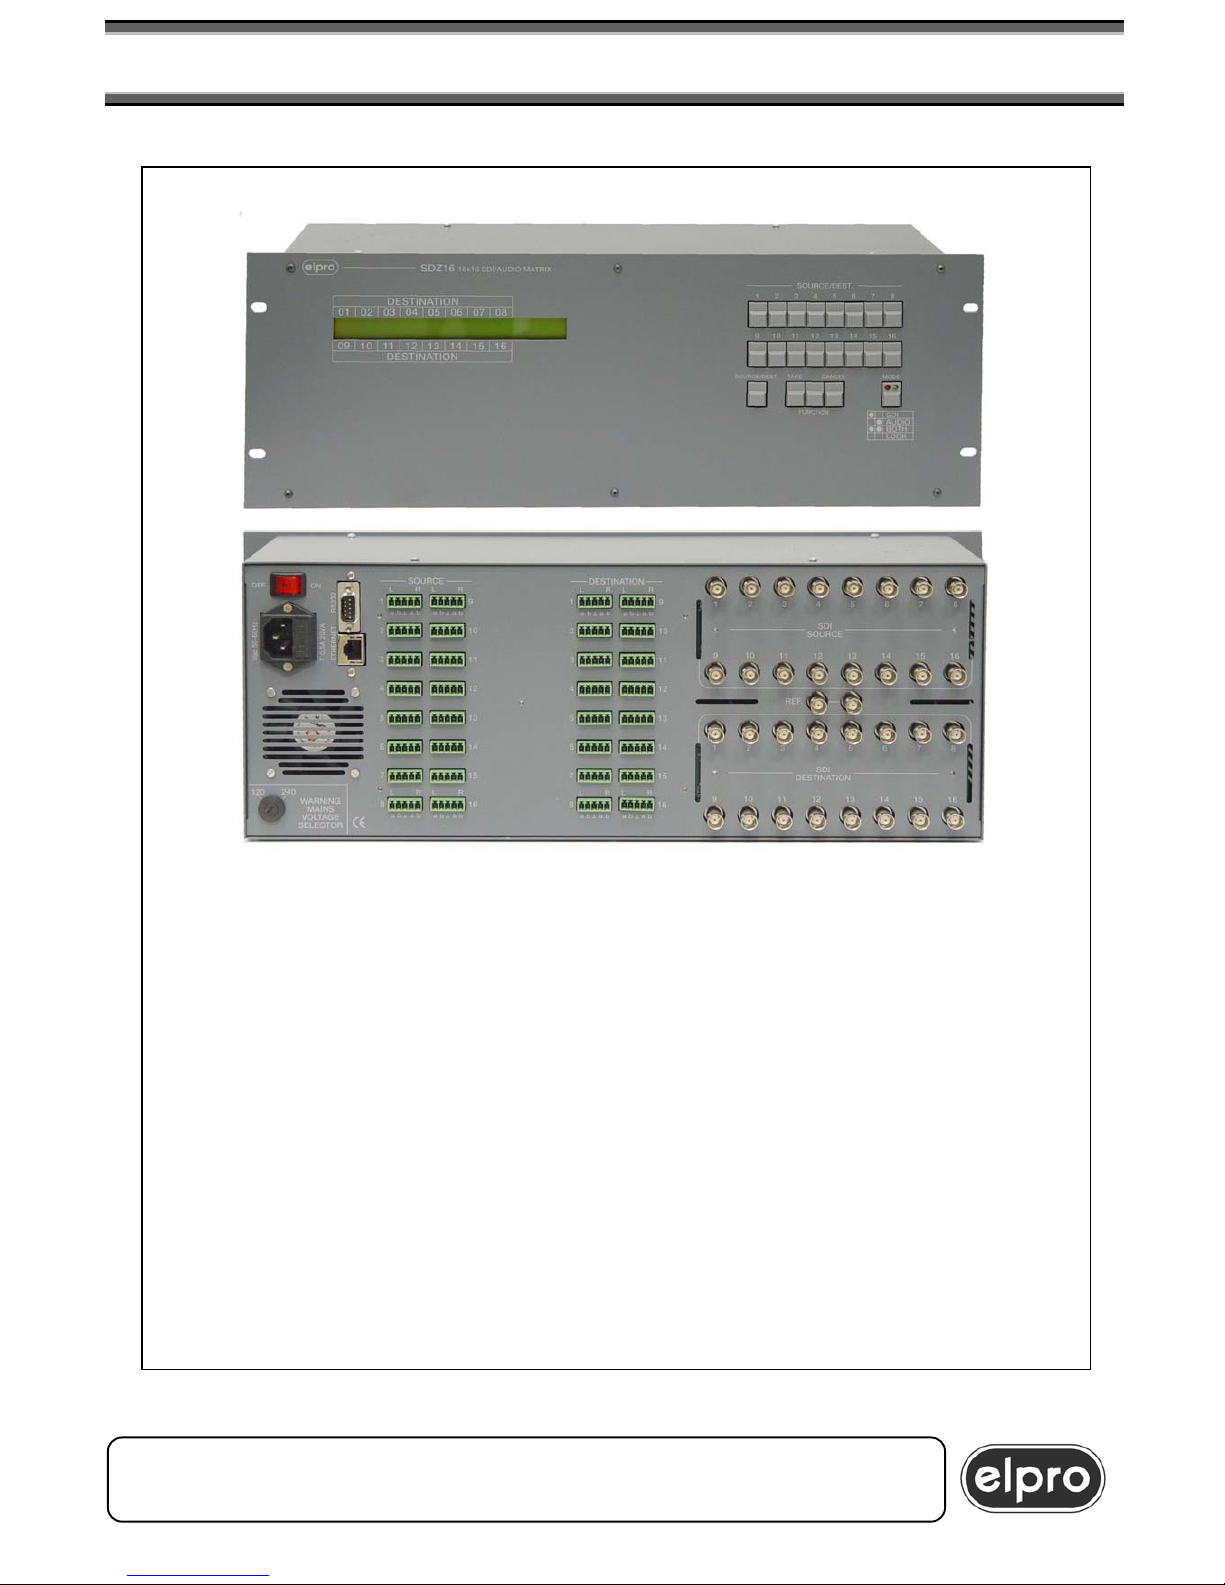
SDZ16 is a SD 16x16 digital matrix with associated analog audio.
The analog audio’s presence does not exclude the possibility of using SD
signal’s digital audio (embedded audio).
The user has the possibility to save and recall 16 configurations, via keypad
and RS232.
SDZ16 performs a synchronous switching with an analog external reference
(genlock) with the possibility to select the switching line (2nd÷15th). (see
paragraph 5.2 and 6.11).
ELPRO Video Labs s.r.l.
Strada della Pronda, 45/B 10142 TORINO – ITALY
Tel.+39 0117701583 – Fax +39 011703751
3
SDZ16 16x16 SD & AUDIO MATRIX
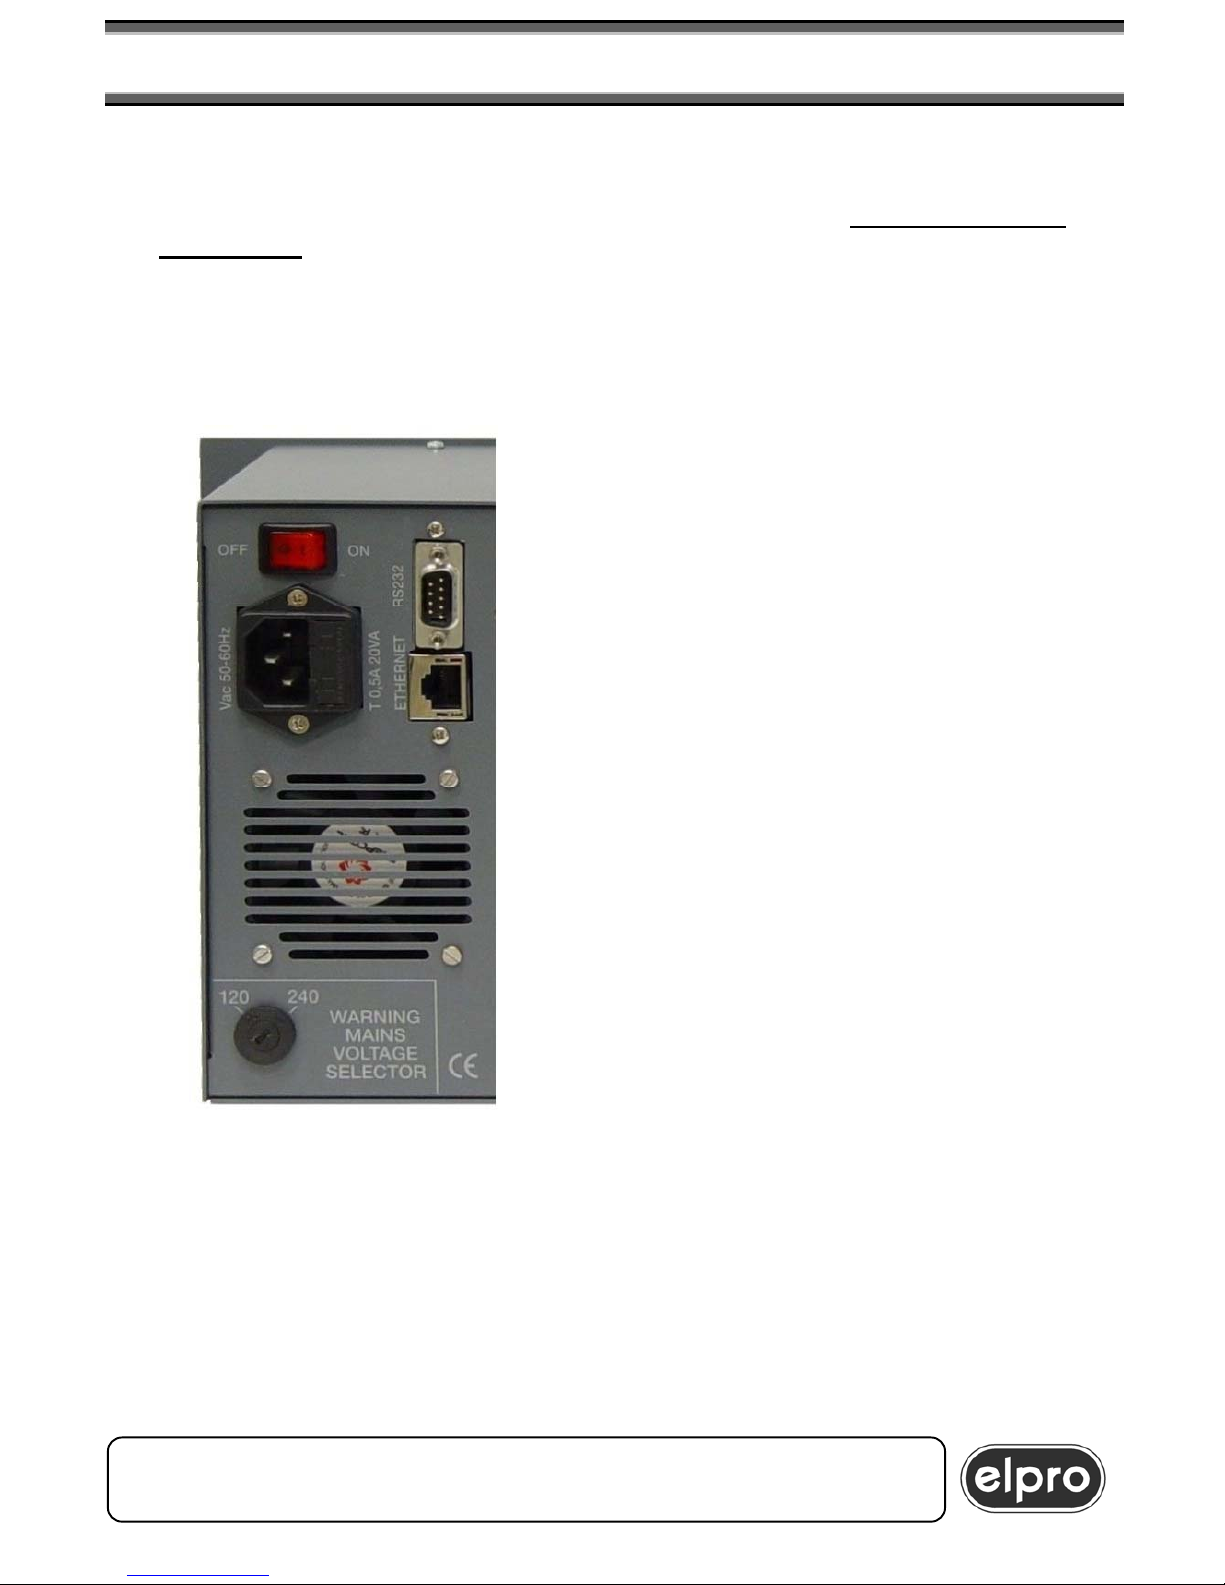
2 .0 POWER SUPPLY
Before switching on the unit, make sure that the
MAIN VOLTAGE
SELECTOR corresponds to the supply voltage in your country. It is possible
to choose between 120Vac and 240Vac.
The panel plug is complete with fuse-holder for 5X20 fuses.
If the fuse blows, replace with a fuse with the same rating as specified on
the back of the unit. (T 0,5A).
WARNING
All operations must be carried out by
qualified personnel only who must be
informed of the risks of electric shock
Do not remove the cover without
unplugging the mains cable.
In european countries, SDZ16 requires a
230 Vac 50 Hz power suppling through the
mains cable.
The socket of the cable must be inserted in
the related panel plug on the left at the back
of the unit.
In some countries, the power plug must be
adapted to local standards. The wires are
identified according to the following coding:
- Brown PHASE (Identified with the
letter L, may be red)
- Blue NEUTRAL (Identified with the
letter N, may be black)
- Yellow/Green GROUND (Identified with
the letter E, may be green)
WARNING
A ground connector is mandatory
MAIN VOLTAGE SELECTOR is factory set on 240Vac.
ELPRO Video Labs s.r.l.
Strada della Pronda, 45/B 10142 TORINO – ITALY
Tel.+39 0117701583 – Fax +39 011703751
4

SDZ16 16x16 SD & AUDIO MATRIX
3.0 SETTINGS
SDZ16 doesn’t dispone of any internal settings by the user.
Some of the functional settings are setable via keypad (see paragraph 5.2)
4.0 INSTALLATION
a) Make sure that all the units to be installed are off.
b) Connect the SD sources and destinations according to the screen-printed
instructions on the rear panel.
SD is usually a 270 Mbit/sec signal (4:2:2 component) as required by ITU-R-
601 normatives, or rather SMPTE 259M. However SDZ16 is able to treat also
143 Mbit/sec (4fsc NTSC), 177 Mbit/sec (4 fsc PAL) and 360 Mbit/sec (4:2:2
widescreen) signals.
WARNING
The Video inputs are 75 Ω terminated.
It is not possible a loop in input.
c) Connect the external analog reference input (usually a Black Burst) to the
BNC nominated REF.
If not used, close the loop with a 75Ω termination.
WARNING
-The presence of the REF is indicated by the letter L in the right corner of the
bottom row of the display.
-SDZ16 performs syncronous video input switchings to the reference signal,
as its field interval.
Horizontal switching line is selectable from 2nd to 15th. The advisable line is
the 6th. (see paragraph 5.2 and 6.11).
The switching takes places physically at the half of the line, between 25µsec.
and 35µsec.
If the external reference
is not connected, the SD signals switch takes place
anyway, but in a casual mode.
d) Connect the audio sources and destinations according to the screen-
printed instructions on the rear panel.
ELPRO Video Labs s.r.l.
Strada della Pronda, 45/B 10142 TORINO – ITALY
Tel.+39 0117701583 – Fax +39 011703751
5
SDZ16 16x16 SD & AUDIO MATRIX
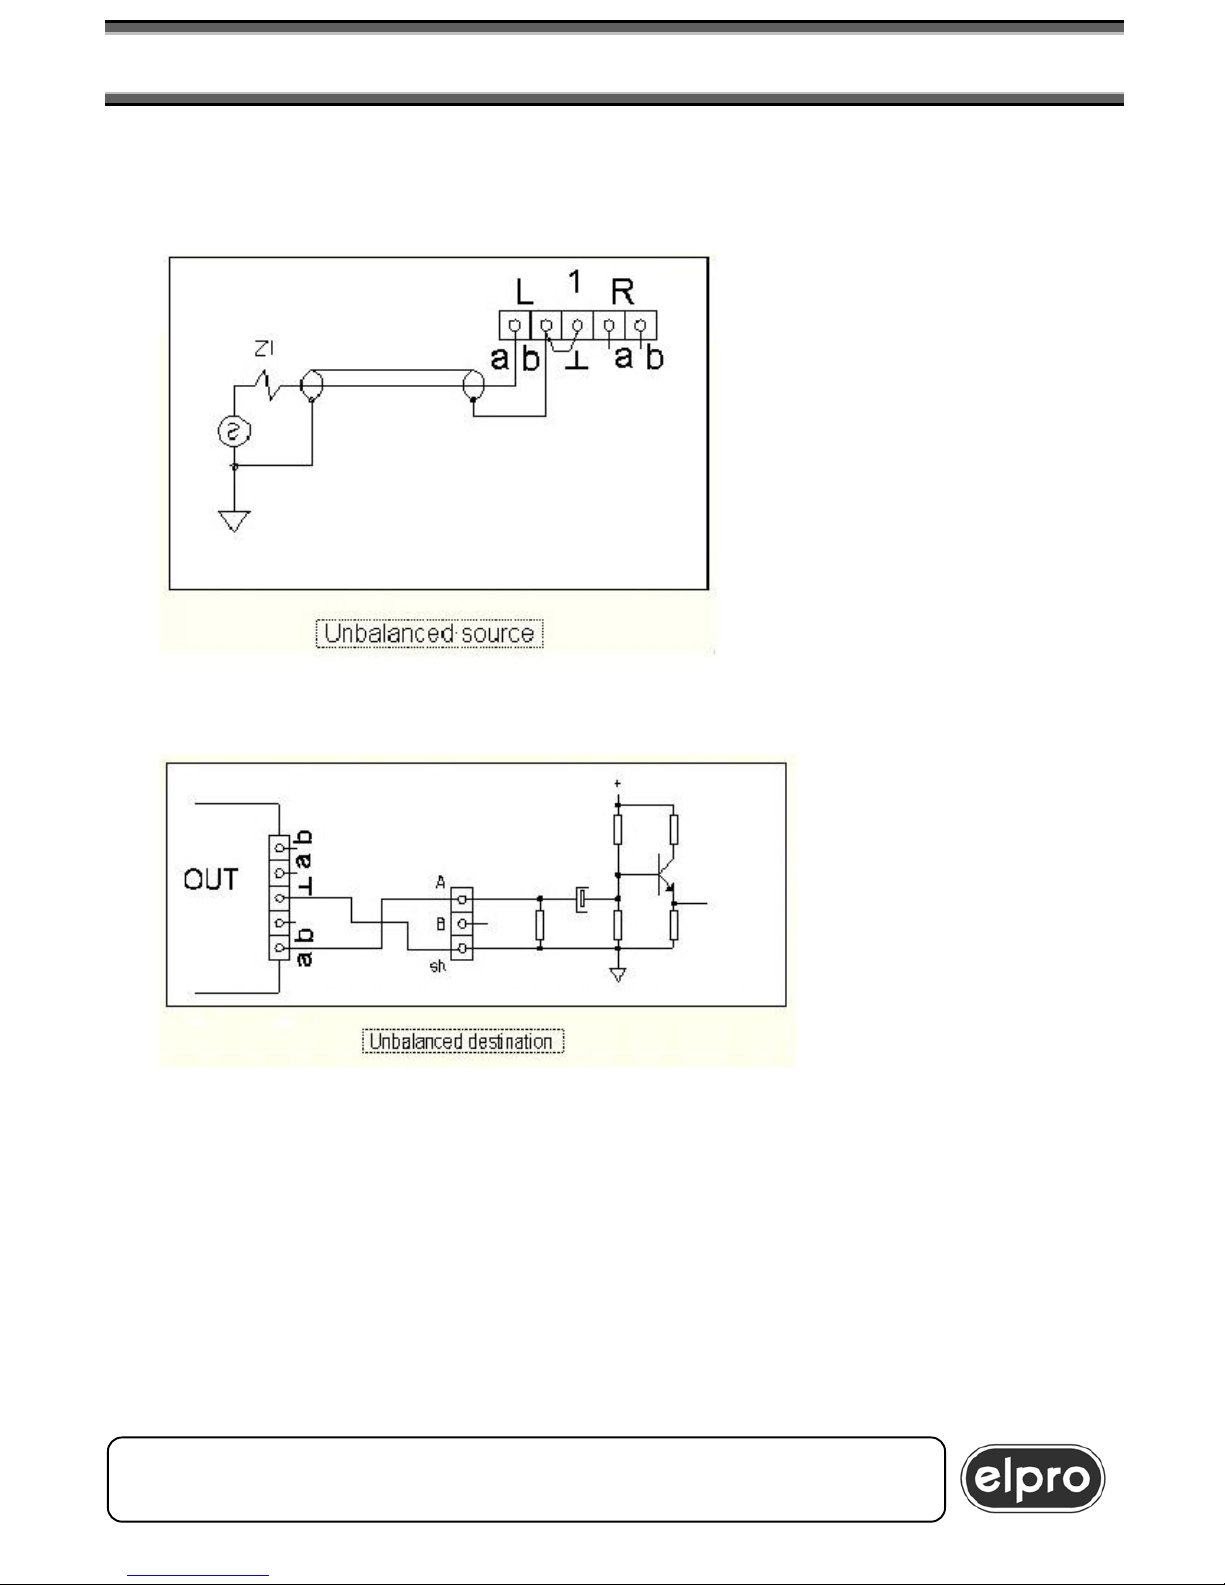
Audio inputs and outputs are balanced. If the source to connect at the input
has an unbalanced output, place the hot signal at the a input of the SDZ16,
connect the signal’s mass and the b input to the GND.
Connect the balanced audio
inputs and outputs to active
speakers or to a stereo
amplifier.
WARNING
If the speakers or the
amplif ier have an
unbalanced input,
use the “a” outputs and
the GND leaving free the
"b" output
In this case half of the
output level will be lost.
WARNING:
SDZ16 saves
internally its own
configuration, as
benefit for a following
switch on, 15
seconds after the last
modified setting. For
this reason any
command sent less
than 15 seconds
before switching off
. will not be saved.
e)Supply power to the devices. The unit will predispose itself:
e1) as factory configuration connecting inputs and outputs having the same
number (Input 1 to output 1, input 2 to output 2 etc...). This is the case of the
units first switching on.
e2) as last configuration, current during the switching off. This is the regular
case.
ELPRO Video Labs s.r.l.
Strada della Pronda, 45/B 10142 TORINO – ITALY
Tel.+39 0117701583 – Fax +39 011703751
6

SDZ16 16x16 SD & AUDIO MATRIX
e3) as last default configuration (see paragraph 5.2 and 6.10).
Once activated, the Default configuration status will be maintained for all the
successive switch ons independently of the active state before switching off.
If inactivated, at switch on SDZ16 will maintain the status had at the previous
switch off.
At switch on, Active Default Configuration is mark ed by the “ Default Status”
message that appeares for a few seconds on the right side of the display.
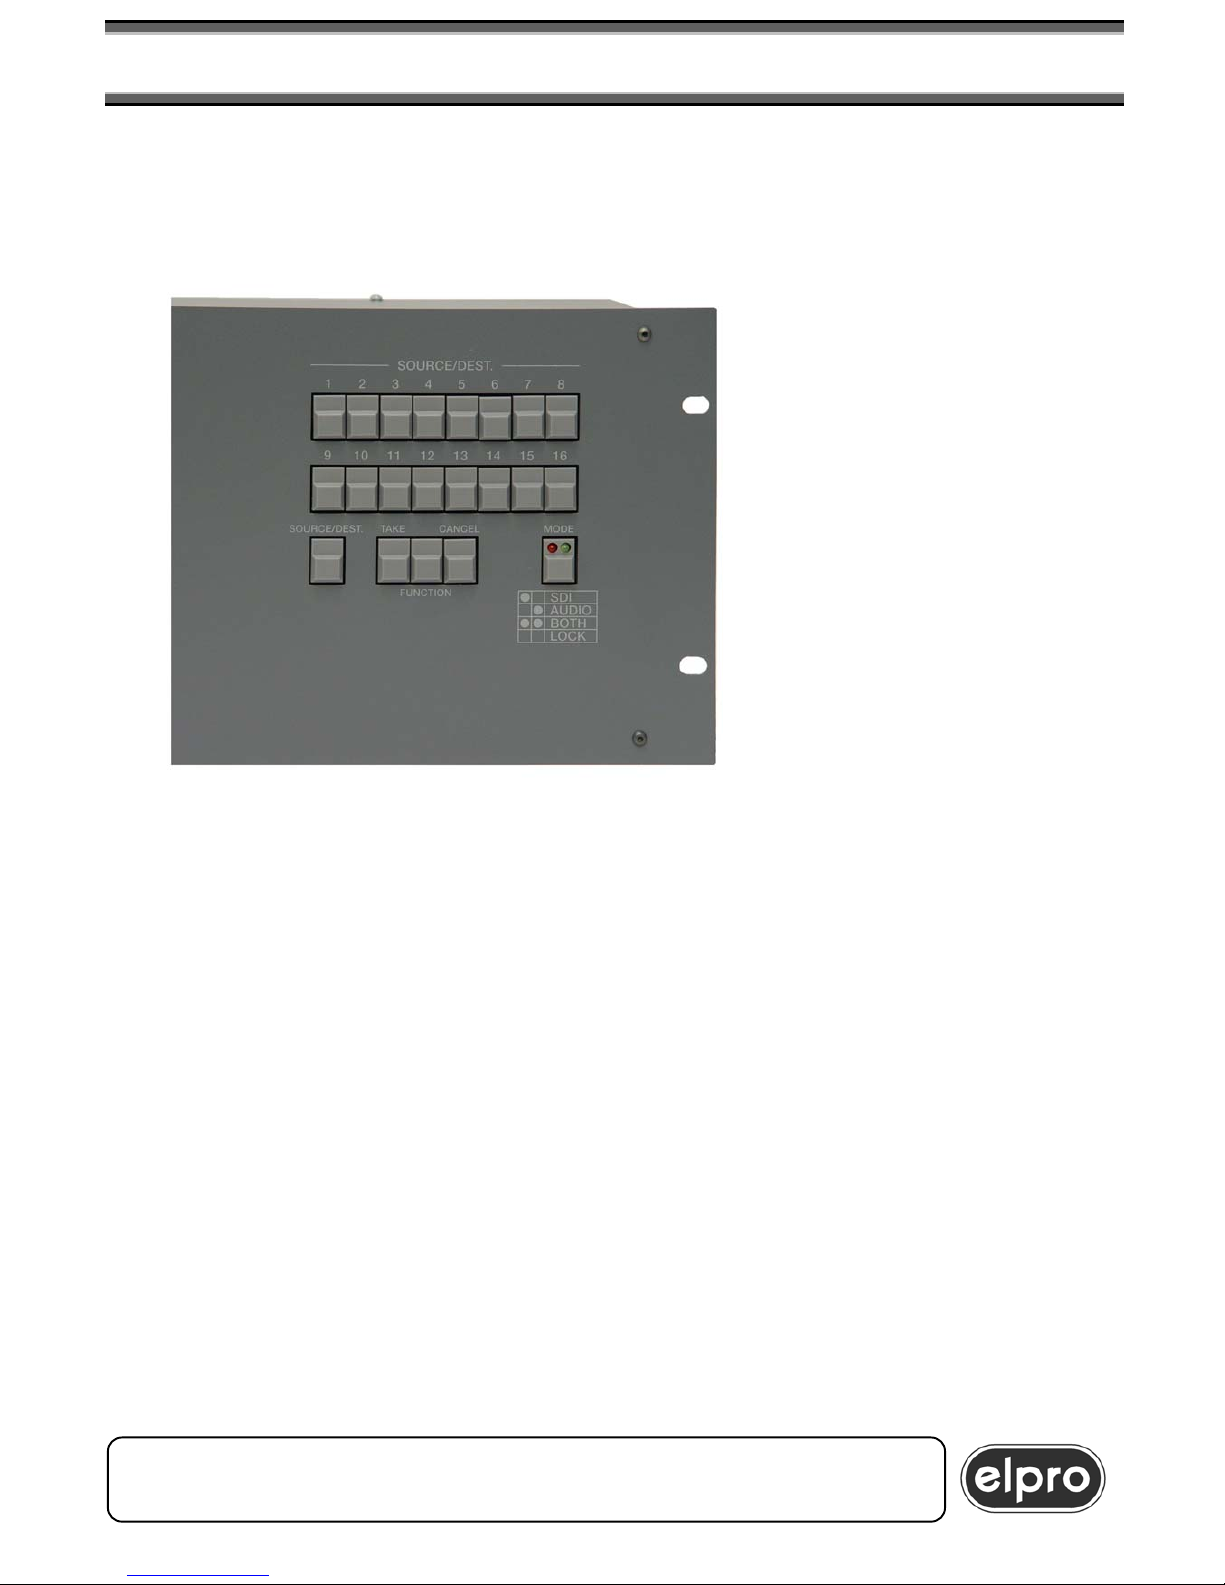
5.0 LOCAL CONTROL
"MODE" button is used to select the functioning modality:
- Only Analogic Audio Switching ( AUDIO) (green led on)
- Only Video Switching ( SDI) (red led on)
- SD Video+Audio Switching ( BOTH) (both leds on)
- LOCK, blocked keyboard ( LOOK) (both leds off)
TAKE, FUNCTION e CANCEL buttons are used for the matrix settings and to
activate a switching command (TAKE).
Matrix status is revealed on a LCD 40x2 display. On the display are indicated
the sources switched on the 16 destinations numberated from 1 to 16, directly
incripted on the front.
Alternatively are indicated the video sources (Xpoint Video), or audio sources
(Xpoint Audio) based on the setting selected using the MODE button.
WARNING
If 16th output is used as PREVIEW output an * (asterisk ) mark es the
corresponding source on the display. (see paragraph 5.2 and 6.8)
The right side of the display (8 charaters) is used for the interactivity with the
user that works on the console.
WARNING
"Warning RPM fan" appearing on the right side of the display instead of the
usual “Xpoint Video” or “Xpoint Audio” message announces a cooler fan fault
so please contact Elpro assistance service.
ELPRO Video Labs s.r.l.
Strada della Pronda, 45/B 10142 TORINO – ITALY
Tel.+39 0117701583 – Fax +39 011703751
7
SDZ16 16x16 SD & AUDIO MATRIX
5.1 SWITCHING OF THE SIGNALS
The video and audio outputs of the unit can be controlled using the console
on the front panel.
a) Press the SOURCE /
DEST button to proceed
with the source selection.
On the right of the first
) If the function mode is
Press one of the 16
WARNING
It’s possible to select more than one sources consecutively. This is extremly
) Press INPUT / OUTPUT BUTTON to abilitate the destination source.
) Press one of the 16 INPUT / OUTPUT buttons to select the destination.
WARNING
It’s possible to select more than one destinations consecutively without any
Press the TAKE to effectuate the switch that will be confirmed by the
display line will appear :
AV or A or V in base of
the function mode and S
b
not the one desired,
press MODE button until
the relative writing will
appear on the display
c)
INPUT / OUTPUT
buttons to select the source. The selection will be visualized on the display.
helpful when PREVIEW is set on the 16th output to monitorize the sources
without any switching. (see paragraph 5.2 and 6.8)
d
On the right side of the second display line will appear a D character :
e
The selection will be visualized on the display.
switching. The switch will be decided pressing the TAKE button.
f)
visualization on the display.
ELPRO Video Labs s.r.l.
Strada della Pronda, 45/B 10142 TORINO – ITALY
Tel.+39 0117701583 – Fax +39 011703751
8
 Loading...