

Page 1
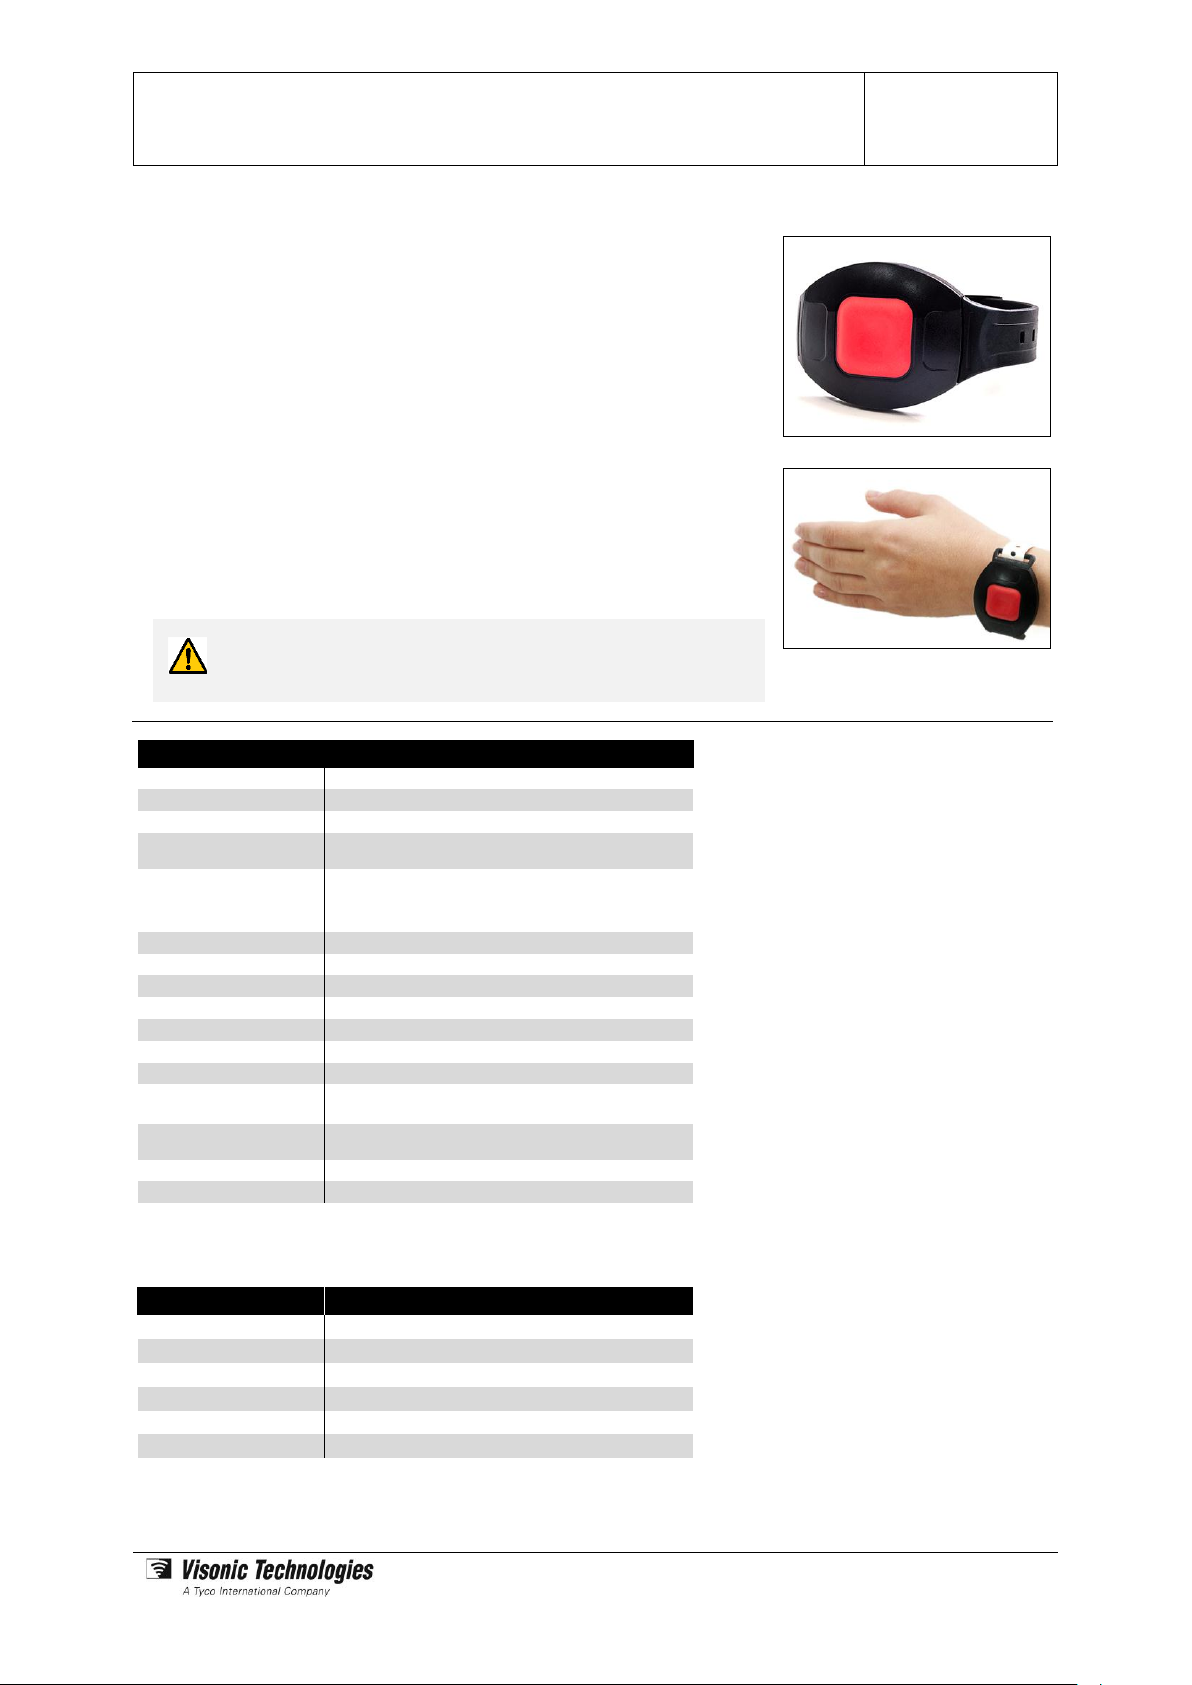
Elpas Personal Safety Bracelet
P/Ns: 5-WTD40100-0, 5-WTD40101-0, 5-WTD41100-0 and 5-WTD41101-0
User Guide
www.elpas.com
Page 1 of 3
V2/Sept 2012
The Personal Safety Bracelet is a wrist worn Active RFID Tag that provides aroundthe-clock monitoring of medical patients and assisted living care residents who
require added safety.
The bracelet bundles triple-tech Real-Time Location System (RTLS) technologies to
deliver precise real-time positioning data so that a host RTLS safety application or an
integrated physical security platform can track the whereabouts of the individual
anywhere within the facility.
The bracelet features a large duress call button designed especially for senior
citizens. Pressing the button causes the tag to transmit positioning data that identifies
the person requiring assistance and the precise building location of the involving
medical or safety incident for speedier and more effective response efforts.
The bracelet also enables immediate near-exit location awareness for administering
patient/staff escort procedures and for preventing unauthorized transfers into or out of
protected building areas.
It is important that you understand, and follow the instructions in this document.
Should you have any questions, please contact your Elpas support representative
before proceeding with the installation, operation or maintenance of these products.
Product Specifications
Transmission Rates in LF Zones
Moving Bracelet
LF Response Time: Onboard LF receiver
polls every 0.6 sec to check if the bracelet is
in a LF zone.
Transmission Rate: Bursts of 6 IR/RF
supervision transmissions (each
transmission about 2ms in duration), 400ms
apart. If the bracelet stays in a LF zone, then
repeated at 2 seconds intervals.
Transmitted Message Type: IR/RF Data
Message includes ID code of LF Exciter.
Motion bit, M=1.
Motionless Bracelet
LF Response Time: Onboard LF receiver
polls every 15 seconds to check if the badge
is in a LF zone.
Transmission Rate: 6 IR/RF supervision
transmissions (each transmission about 2ms
in duration), 0.4 seconds apart: If the bracelet
stays in a LF zone, then repeated at 15
second intervals.
Transmitted Message Type: IR/RF Data
Message includes ID code of LF Exciter.
Motion bit, M=0
Signaling Technologies
RF (433MHz) IR (800nm) LF (125KHz)
RF (Motion/Stationary)
Supervision messages every 10 seconds / 60 seconds
IR (Motion/Stationary)
Supervision messages every 10 seconds / 60 seconds
RF Under LF
6 IR/RF transmissions (each @ 2ms in duration), 0.5secs apart;
every 2 secs after 10 mins returns to 10 secs when in motion
Supervised Events
Button Press/Release
Motion/Stationary
Low Battery
3 RF/IR transmissions (each @2ms in duration), 400ms apart
Power Source
3.0V/560mAH lithium battery, CR 2450
Battery Life
12-36 months depending upon usage
LED Indicator
Low Battery, Button Press, LF Field
Badge ID
Factory-Programmed ID
Housing
IP65, Nylon Plastic
Weight
35 grams (1.23 ounces)
Dimensions (H x W x D)
46.9 x 41.0 x18.9mm (1.84 x 1.61 x 0.74 inches)
Operating Environment
Temp: 0°C to 50° (0°F to 122°F)
Humidity: 100% non-condensing
Management Software
Eiris 4.6 (or higher)/Eiris Configurator 4.8 (or higher)
ELC Programmer V2.0
Standards
IC, FCC & CE compliant
Warranty
1 year limited warranty (excluding battery)
Product offerings and specifications are subject to change without notice.
Not all products include all features.
Compatible Accessories
Part Number
Description
5-PBA90003
3.0V/560mAH lithium battery, CR 2450 (20 pcs)
5-WTD09001
Standard Wristband (set of 5)
5-WTD09003
Hospital Band Adapters (set of 5)
*5-PB063011
Disposable Clincher Wristband (set of 50)
*5-WTA90007
Reusable Medical Grade Wristband with Lock Pin (5 pcs)
5-500130
Lock Pin Removal Magnet
Introduction
*Requires Hospital Band Adapters for use with Bracelet P/Ns 5-WTD40000-0 & 5-WTD41000-0.
Page 2
Elpas High-Risk Security Bracelet – User Guide
www.elpas.com
Page 2 of 3
V2/Sept 2012
Initial Activation
The bracelet is shipped from the factory in Sleep Mode
to conserve battery power during shipping.
To activate the bracelet from sleep mode both of the
following described methods can be used:
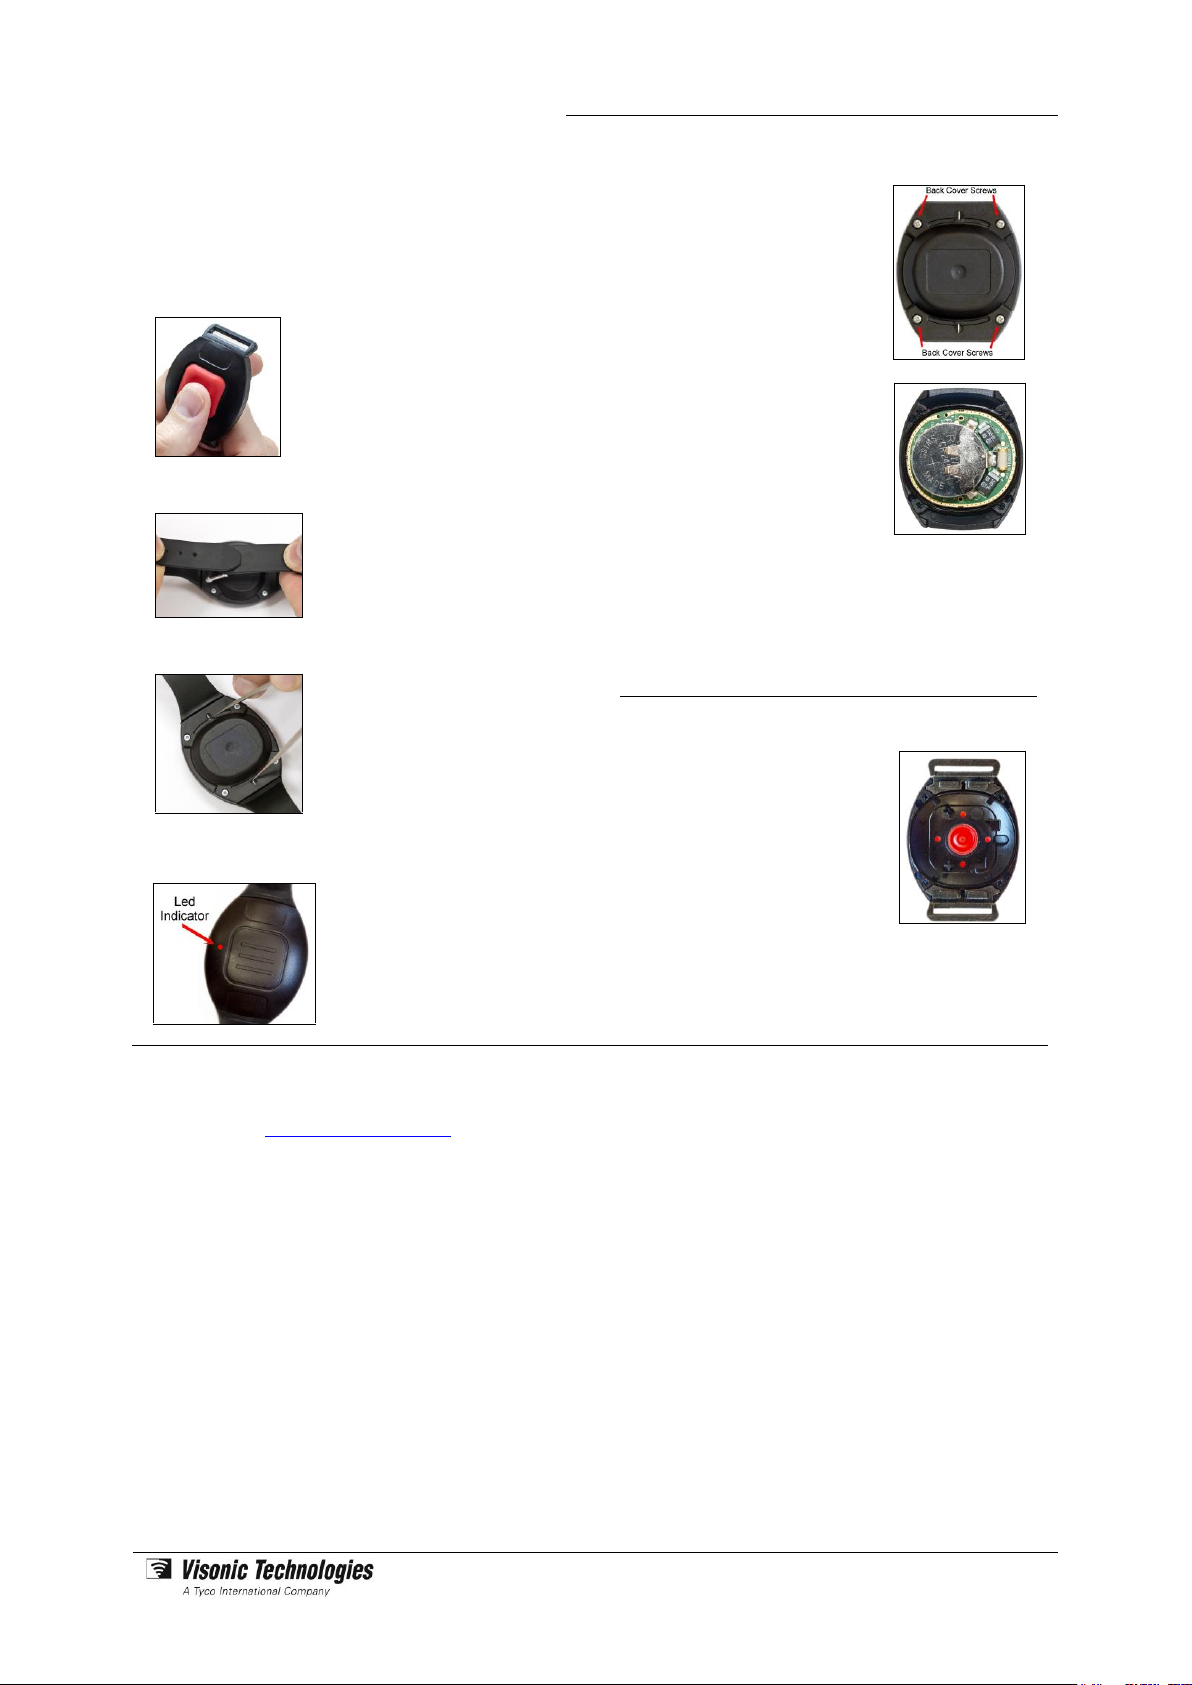
Button Press
Orient the tag front-cover
side up. Next press & hold
down the call button for at
least 5 seconds.
Tamper Band Method
Touch the two ends of the
tamper wrist band together.
Pin Shorting
Place the bracelet back
cover side up. Using the tips
of a metal tweezers, touch
the two metal contacts
simultaneously
If the wake-up process is successful the LED Indicator
on the front of the bracelet will illuminate for 3 seconds.
Battery Replacement
Change the bracelet’s status in the
host RTLS application to ‘Inactive’.
Place the bracelet back cover side
up. Then Unscrew the 4 screws and
remove the back cover.
Slide the battery out from under
the battery holder. Dispose of
used battery in accordance with
local regulations.
Replace the battery ensuring that
the positive (+) side of the battery
faces up.
Close the back cover such that the screw holes are
correctly aligned. Tighten the 4 screws snugly into place.
Do not over-tighten as this may strip the case threads.
Change the bracelet’s status in the host RTLS application
back to ‘Active’.
Attaching the Hospital Band Adapters
Place the bracelet back cover side
up. Then Unscrew the 4 screws and
remove the back cover.
Position the bracelet front cover side
down. Next insert the two hospital
band adapters into the grooved slots
which are located on either side of
the front cover.
Close the back cover such that the screw holes are
correctly aligned. Tighten the 4 screws snugly into place.
Do not over-tighten as this may strip the case threads
Option 1 – Using Dispatch Disinfectant Spray
1. Lightly wet a disposable towel with Dispatch spray
2. Do not saturate the towel
3. Wipe the outer surfaces of the sensor
4. Next wipe the sensor with a dry disposable towel
5. Allow the sensor to air dry
6. Return the clean sensor to inventory or usage
7. Dispose of used towels per facility policies
Option 2 – Using Dispatch Disinfectant Towels
1. Open a new Dispatch pre-moistened towel
2. Wipe the outer surfaces of the sensor
3. Next wipe the sensor with a dry disposable towel
4. Allow the sensor to air dry
5. Return the clean sensor to inventory or usage
6. Dispose of used towels per facility policies
Cleaning & Disinfection Procedures
Use an appropriate antibacterial disinfectant such as Dispatch® Hospital Cleaner Disinfectant with Bleach from Caltech
Industries, Inc (http://www.caltechind.com) to clean the High-Risk Security Bracelet.
Since ‘Cleaning Procedures’ may vary according to facility guidelines, thus the procedures given below are for illustrative
purposes only:
Page 3

Elpas High-Risk Security Bracelet – User Guide
Page 3 of 3
V2/Sept 2012
W.E.E.E. Product Recycling Declaration
For information regarding the recycling of this product you must contact the company from which you orignially purchased it.
If you are discarding this product and not returning it for repair then you must ensure that it is returned as identified by your supplier.
This product is not to be thrown away with everyday waste - Directive 2002/96/EC Waste Electrical and Electronic Equipment.
This device complies with Part 15 of the FCC Rules and RSS210 of Industry and Science Canada. Operation is subject to
the following two conditions: (1) This device may not cause
harmful interference, and (2) this device must accept any
interference received, i ncl uding interference that may cause
undesired operation.
This device complies with Industry Canada license-exempt
RSS standard(s). Operation is subject to the following two
conditions: (1) thi s device may not cause interference, and (2)
this device must accept any interference, including
interference that may cause undesired operation of the device.
Le présent appareil est conforme aux CNR d'Industrie Canada
applicables aux appareils radio exempts de licence.
L'exploita tion est autorisée aux deux conditions suivantes : (1)
l'appareil ne doit pas produire de brouillage, et (2) l'utilisateur
de l'appareil doit accepter t out brouillage radioélectrique subi,
même si le brouillage est susceptible d'en compromettre l e
fonctionnement.
Wa rning!
Visonic Technologies is not responsible f or any radio or TV
interference caused by unauthorized modifications to this
eq ui pm e nt . Suc h m od if ic at ion s c ou l d vo id th e us er ’s au th o ri ty
to operate the equipment.
Standards Compliance
Product Warranty
Vi sonic T
ec hn ol og ies Ltd . ( VT o r t he C om pan y) , an d it s af fi li at es, wa rr an ts i ts pr od uc ts (h er ei na ft er ref er re d to as "th e P ro du ct ”) to be f ree of de fects in
ma teria ls and workmanship under nor mal op erating c ond ition s and use f or a period of on e year fro m t he d at e of s hi pm en t by V T. T he Co mp an y’ s
ob ligat ion s sh all be limited within the war ranty period, at its opt ion, to repair o r to rep lace the defective Product or any defec tive compo nent or
pa rt th ereof. T o exercise this warra nty , t he product mu st be re tur ned to the man ufa cture r fre ight pre paid and insured.
Th is war ranty does not apply to repa irs or replacem ent ca used by imprope r in stallation, Pr oduct misuse, f ailur e to follo w ins tal latio n or op erating
in structio ns, alterati on, abu se, accid ent , ta mpering, repa ir by anyone other than VT, exter nal cau ses, and failu re t o perform re quire d preve nti ve
ma inten ance. Thi s warran ty also d oes not a pply t o any pro ducts , access ories, o r attach ments used in c onjun ction wit h the Pro d uct, in cluding
ba tteries, whic h s hall be cov ered solely by their own warrant ies, if any. VT shall no t be lia ble for any dama ge or loss whatsoev er, whether d irectly,
in directly, inciden tally, co nsequent ial ly o r othe rwise , re sulting f rom a ma lfunction of the Produ ct d ue to prod ucts, accessorie s, o r at tachment s of
ot hers, in cluding batte rie s, us ed in co njunction wit h the Product.
VT MAKES NO EXPRESS WARRA NTIES E XCEPT THOSE STA TED IN THIS STATE MENT. V T DISCL AIMS ALL OTHER W ARR ANTIE S, EXPRE SS
OR IMPLIED, INCLUDING W ITHOU T LIMI TAT ION IMPLIED WAR RANTIES O F ME RCHANTAB ILITY AND FITNESS FOR A P ARTICULA R PURP OSE.
VT ’S SO LE R ES PO NS IB IL IT Y FOR W AR RA NT Y CL AI MS IS L IMI TE D TO R EP AI R OR T O RE PL AC E AS SE T FO RT H IN TH IS S TA TEM EN T.
VT sh all ha ve no liability f or any de ath , personal injury, p roperty damage , or other lo ss whethe r direct, ind ire ct, i ncidenta l, con sequential, o r
ot herwise, based on a claim that th e P roduct fa iled to fun ction . H owever, if VT is held l iable , w hether d irectly or ind ire ctl y, for any loss or damage
ar ising under this l imite d w arr anty o r o the rwise, re gardless of cause or origin, VT' s maxi mum li ability sha ll be limite d to the p urcha se pri ce of t he
Pr oduct , which shall be fixed a s l iquid ate d damages and not as a pen alt y, an d s hall be th e c omplete and exclusive liability o f VT.
VT sha ll no t, u nde r any circumst ances whatso eve r, be li able for any ina ccu racy, error of j udgme nt, def ault, o r ne gligence of VT , it s employe es,
of ficers, age nts, or any o ther party , or of the p urcha ser o r use r, arising from any assistance o r commun ication of any kind r eg ard ing the
co nfigurat ion, design, installat ion, o r c reation of s ecurity syste m i nvo lving the Prod uct, that bein g the res ponsibil ity of t he purchaser or user. f VT
is u na bl e to m ak e su ch r ep ai r or r ep la ce men t, V T’ s en ti re l ia bi li ty s ha ll b e li mi te d to t he co st of a reason able subs tit ute product. VT shall not be
re sponsible for any dis mantling , installat ion, reinstal latio n, purch asi ng, s hip ping, insuran ce, or a ny simil ar charges.
VT s hal l have no liability f or any damage s, inclu ding witho ut lim itation, a ny direct , indire ct, incide nta l, special, or co nsequent ial d amage s,
ex penses, costs , profits, lost sav ings o r earni ngs, or other d amage s arising o ut of the use of t he Product o r the removal, in stalla tion,
re installa tion, repair or replace ment o f the P roduc t or any re lated event s. In t he eve nt tha t t her e is any l iability ag ain st VT, such l iability sh all be
li mited to the pur chase pr ice o f the Produ ct which a mount sh all be f ixed as liquidat ed damages.
Th e purchase r and u ser unders tand that this Product may b e compro mised or cir cum vente d by intentio nal a cts; that the Pro duct will not in all
ca ses preve nt d eath, person al injury , prope rty damag e, o r other lo ss re sul ting from burglary, ro bbe ry, fire o r ot her cau ses; and th at t he P roduct
wi ll not in all cases pro vide adequa te warni ng or protecti on. The purch ase r and u ser also und erstand tha t a properly in sta lled and mainta ined
al arm may reduc e th e risk of events s uch as b urglary, rob bery, and fir e without warning, but it is not ins urance or a guara nt ee that su ch e ven ts
wi ll no t o ccur or that the re will be no de ath, personal in jury, propert y damage , o r oth er lo ss as a result o f s uch e vents.
By p urchasin g the P roduc t, the p urchaser a nd user sha ll def end, indem nify and h old VT, i ts off icers, directors, aff iliates, s ubs idiaries, agents,
se rvant s, emp loyees, and autho rized represen tatives h armle ss fro m a nd aga inst a ny and all c lai ms, s uits, cos ts, d amages, and jud gment s
in curre d, claimed, or sustained whether for death, personal injury , prope rty damage, o r otherwise, because o f or i n any way rel ated to the
co nfigurat ion, desig n, insta llation, o r creat ion of a security sys tem inv olv ing the Produc t, an d the use , sale, distributio n, a nd in stallation of the
Pr od uct , in cl ud in g pa ym en t of a ny a nd a ll a tt or ne y’ s fe es , c os ts , and e xp en se s i ncur red a s a resu lt of an y such e vents.
Th e pu rchaser o r us er s hould f ollow the Pro duct insta lla tion an d op eration instructions and test th e Pr oduct and the ent ire s y stem at least onc e
ea ch week. Fo r va rious rea sons, includ ing but no t limited to cha nge s in environm ental con ditions, ele ctric , e lec tronic, o r e lectroma gnetic
di sruptions, and tamper ing, th e Product may not perform as expec ted. The purc haser and use r ar e advised to take a ll n ecessary pre cautions for
th e protection and safety of persons an d p ropert y.
Th is state ment provid es certa in legal right s. Other rights may va ry by state or co untry . U nder certain circum stances, so me stat es or countrie s may
no t allow exclus ion or limitation of incident al or conseque ntial damag es or implied warran ties, so the above exc lus ions may not apply unde r t hose
ci rcumstances a nd in th ose stat es or co untries.
VT reserves the right to modify t his statement at any time, in its sole discretion wi thout notice to any purch aser or user. H owever, this
statement shall not be modifi ed or varied except by VT in writing, and V T does not authorize any si ngle indi vidual to act on its behalf to
modify or vary thi s statement . An y questi ons about this stat ement sh ould be directed to VT. 3/0
 Loading...