

Elo TouchSystems ET 1525C Series, ET 1726C Series, ET 1526C Series, ET 1725C Series User Manual

ELO Entuitive Touchmonitor
User Guide
For 15" and 17" CRT iTouch and AccuTouch Series
Touchmonitors
Revision A
ET 1725C/1726C SeriesET 1525C/1526C Series

Elo Entuitive Touchmonitor
User Guide
For 15" and 17" CRT iTouch and AccuTouch
Series Touchmonitors
ETXX25C/26C-4XWE-3 Series Models
ETXX25C/26C-7XWE-1 Series Models
Revision A
P/N 008553
Elo TouchSystems, Inc.
1-800-ELOTOUCH
www.elotouch.com


iii
Copyright © 2002 Elo TouchSystems Inc. All Rights Reserved.
No part of this p ubl icatio n may be r eprod uced, tra nsmi tted, tra nscri bed, sto red in a r etrieval syst em,
or trans lated into any language or computer language, in any form or by any mean s , including, but not
limited to, electronic, magnetic, optical, chemical, manual, or otherwise without prior written
permis sion of Elo TouchSystems.
Disclaimer
The informat ion in this do cument is sub ject to change w ithout notic e. Elo TouchSystems ma kes no
representations or warranties with respect to the contents hereof, and specifically disclaims any
implied warr anties o f merchan tabilit y or fitness for a parti cular pur pose. El o TouchSystems res erves
the right to revise this publication and to make changes from time to time in the content hereof
without obli ga t ion of Elo Touch S ys tems to no tify any pe r s o n of such revi s io ns or chan ges.
Trademark Acknowledgments
iTouch, IntelliTouch, SecureTouch, AccuTouch, Entuitive, and MonitorMouse are trademarks of Elo
TouchSystems, Inc.
Other product names mentioned herein may be trademarks or registered trademarks of their
respective companies. Elo TouchSystems claims no interest in trademarks other than its own.

iv

v
Chapter 1
Introduction 1
Precautions . . . . . . . . . . . . . . . . . . . . 1
About the Product . . . . . . . . . . . . . . . . . 1
Chapter 2
Installation and Setup 3
Unpacking Your Touchmonitor. . . . . . . . . . . 3
Installing the Base . . . . . . . . . . . . . . . 4
Uninstalling the Base. . . . . . . . . . . . . . 5
Selecting a Suitable Location . . . . . . . . . 5
Connecting Your Touchmonitor . . . . . . . . . . 6
Installing the Driver Software . . . . . . . . . . . 9
Installing the Serial Touch Driver for Windows
XP, Windows 2000, Me, 95/98 and NT 4.0 . 10
Install ing the Touch Driver for MS-DOS and
Windows 3.1 . . . . . . . . . . . . . . . 11
Chapter 3
Operation 13
About Touchmonitor Adjustments . . . . . . . . 13
Touchmonitor Controls . . . . . . . . . . . . . 14
Using the On Screen Disp lay (OSD). . . . . 14
OSD Adjustments . . . . . . . . . . . . . . 15
Chapter 4
Troubleshooting 19
Appendix A
Touch Technology 21
Touchscreens: An Overview. . . . . . . . . . . 21
iTouch Touchscr eens . . . . . . . . . . . . . . 22
Appendix B
Touchmonitor Safety 23
Appendix C
Tec hnic al Spec ifi cati ons 25
Touchmonitor Specifications . . . . . . . . . . 25
Signal PINOUT for 15" and 17" Monit ors . . 28
Power Consump tion. . . . . . . . . . . . . . . 29
Preset Timing Table . . . . . . . . . . . . . . . 30
Regulatory Information 31
Warranty 33
Index 35
Table of Contents

vi

1-1
C HAPTER
1
C
HAPTER
1
I
NTRODUCTION
Congratulations on your purchase of an Elo TouchSystems Entuitive
touchmonitor. Your new high-resolution touchmonitor combines the reliable
performance of Elo’s touch technology with the latest advan ces in CRT display
design. This combination of features creates a natural flow of information
between a user and the touchmonitor.
Precautions
Follow all warnings, precautions and maintenance as recommended in this
user’s manual to maximize the life of your unit. See Appendix B for more
information on touchmonitor safety.
Abou t the Pr oduct
Your CRT touchmonitor is a color display with the following features:
• 14-inch viewable image 0.28mm dot pitch CDT for 15" and 15.9-inch
viewable image 0.27mm dot pitch CDT for 17".
• Supports a wide range of screen refresh r ates with flicker-free picture quality.
• Plug and Play functionality automatically adjusts the monitor to its optimum
performance.
• VESA DPMS (Display Power Management Signaling).
• VESA DDC1/2B compatibility.
• Patented touch technology from Elo TouchSystems.
• RS-232 or USB touch interface.

1-2 Elo Entuitive Touchmonitor User Guide

2-3
C HAPTER
2
C
HAPTER
2
I
NSTALLATION AND
S
ETUP
This chapter discusse s how to install your CRT touchmonito r and how to install
Elo TouchSystems driver software.
Unpac king Your Touchmon itor
Check that the following 8 items are present and in good condition:
Base
USA power cable
Serial cabl e
VGA cable
European p o wer cab l e
USB cable
OR
CD (with e-manual)
and Quick Installation
Guide
2-4 Elo Entuitive Touchmonitor User Guide
Installing the Base
• Carefully turn the touchmonitor upside-down.
• Place the base again st the bottom of the monitor so tha t the base faste ners are
aligned with appropriate slots.
• Push the base towards the front of the monitor until you hear a “click” and
the latch locks into position.
• Carefully turn the touchmonitor right-side up.

2-5
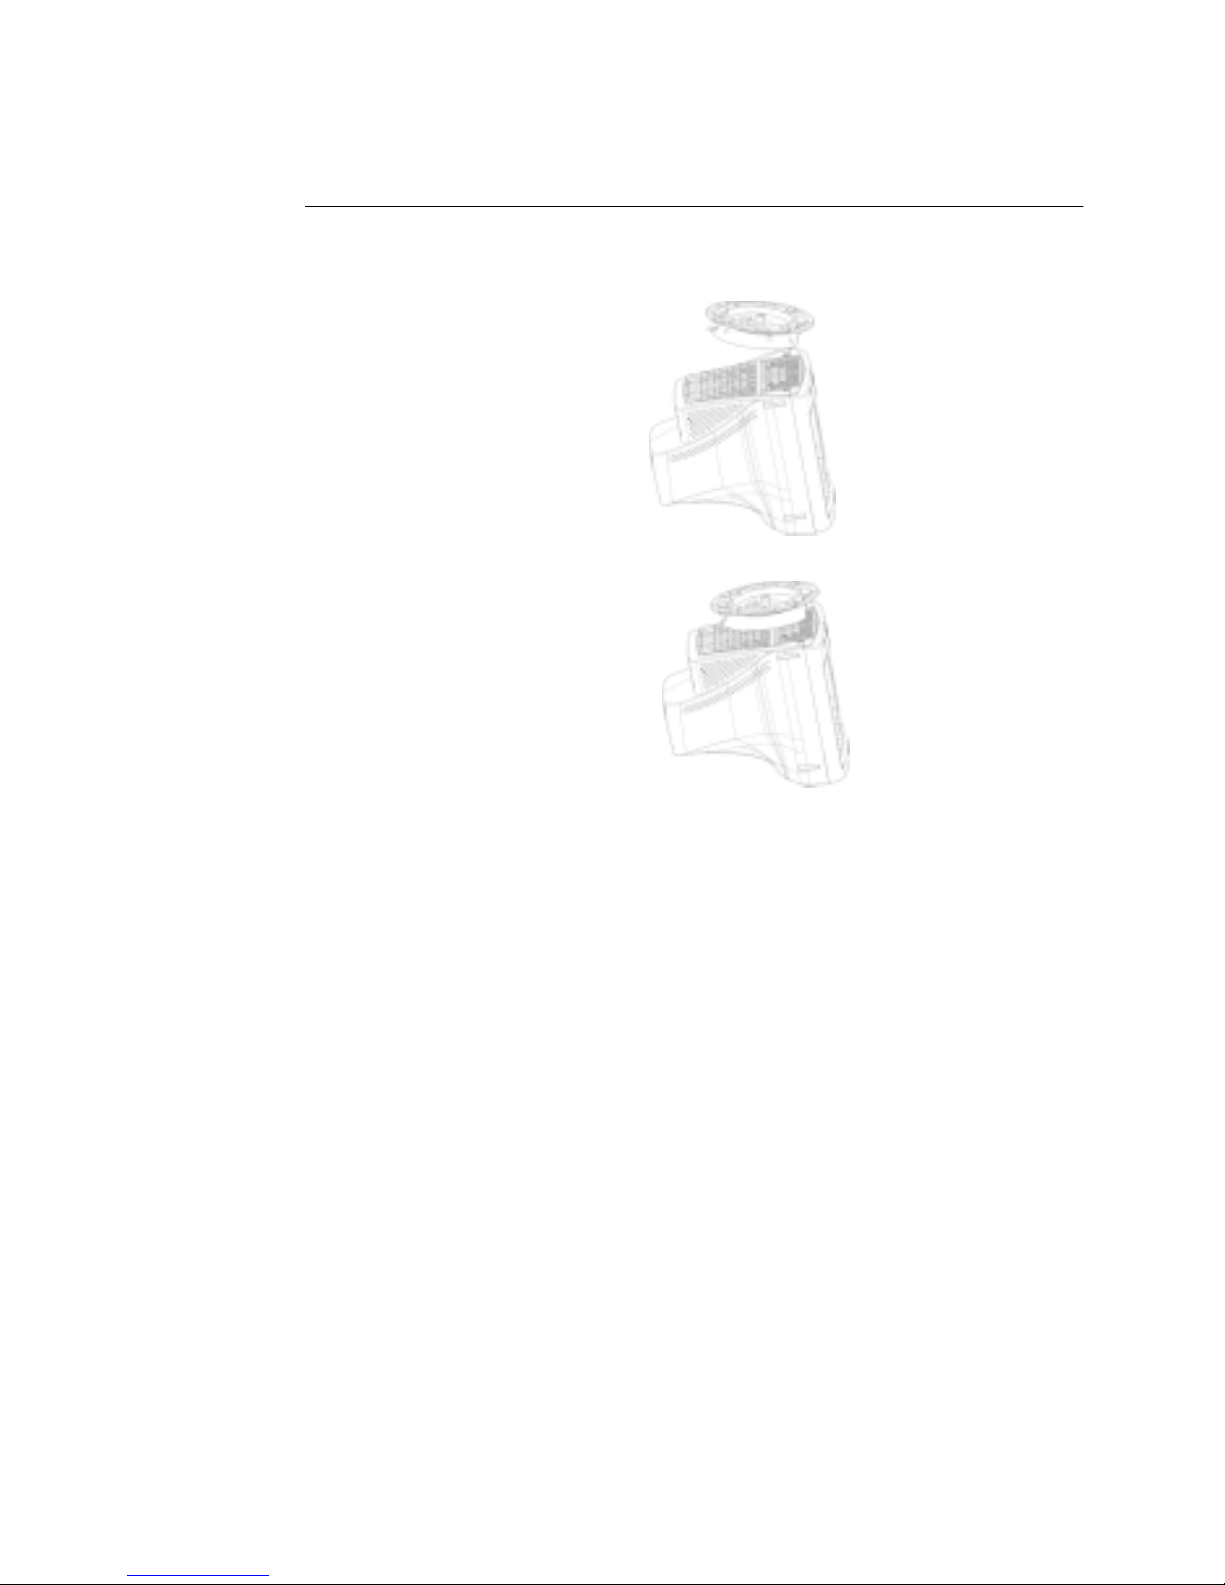
Uninstalling the Base
• Carefully turn the touchmonitor upside-down.
• Gently press the clip wit h one hand while pulling the base towards the rear of
the cabinet with the other hand.
• Carefully turn the touchmonitor right-side up.
Sele cting a S uitable Locatio n
• Place the monitor at least 12 inches from other electrical or heat -emitting
equipment and allow at least 4 inches on each side for ventilation.
• Place the monitor in a position where no light shines or is reflected directly
on the scre e n .
• To reduce eye strain, avoid installing the display unit against a bright
background such as a window.
• Position the monitor so the top of the screen is no higher than eye level.
• Position the monitor directly in front of you at a comfortable reading
distance.

2-6 Elo Entuitive Touchmonitor User Guide
Conn ecting Your Touchmon itor
I
MPORTANT
:
Before conn ecting the cables to your touchmonitor and computer, be sure that the
computer and touchmonitor are turned off.
1 Connect the video cable to the video connector on your c omputer. Secure the
cable to your computer by turning the screws on the conn ector in a clockwis e
direction.

2-7
2 Connect the power cable to the AC connector on your touchmonitor. To
protect your equipment against risk of damage from electrica l surges in the
power line, plug the touchm onitor’s power cord into a surge protector, and
then connect the surge protector to a grounded (three-pronged) AC elect rical
outlet.
3 Connect the touchscreen cable. Determine if you have RS-232 or USB.
Connect one end to the appropriate port on the back of your PC. Connect the
other end of the cable to the touchscreen connector on your touchmonitor.
The touchscreen cable connectors should fit snugly into the connectors on
your touchmonitor and PC.

2-8 Elo Entuitive Touchmonitor User Guide
4 Power on your monitor using the Soft power swit ch and check tha t the power
LED is on, then power on your PC. I f not, repeat steps 2, 3, and 4, or refer to
Chapter 4, Troubleshooting.
5 After a brief pause the picture should appear. If necessary, a djust the front
panel controls according to your personal preferen ce (see Chapter 3).
6 Insert the Elo TouchTools CD-ROM in your computer’s CD-RO M driv e to
install the appropriate touchscreen driver software. Follow the directions
starting on the next page to install the driver software.
Soft Power Switch
Power LED
 Loading...