

Elo TouchSystems Entuitive ET1545C Series, Entuitive ET1745C Series User Manual

Elo Entuitive Touchmonitor
User Guide
For 15” and 17” CRT Rear Mount
Touchmonitors
Version 1.0
DOC# SW500127
P/N 008527
ET1545C Series Models
ET1745C Series Models
Elo TouchSystems, Inc.
1-800-ELOTOUCH
www.elotouch.com


Copyright © 2000 Elo TouchSystems Inc. All Rights Reserved.
No part of this p ublicati on may be repro duced, t ransmitte d, transcri bed, store d in a retriev al system, o r
translated into any language or computer language, in any form or by any means, including, but not limited to, electronic, magnetic, optical, chemical, manual, or otherwise without prior written permission of
Elo TouchSystems.
Disclaimer
The information in th is docume nt is subje ct to cha nge wit hout notic e. Elo TouchSystems makes no rep resentat ions or warranties with respect to the contents hereof, an d specifically di sclaims any impli ed
warranties of merchant ability or fi tness for a pa rticul ar purpose . Elo TouchSystems reserves the right t o
revise this publication and to make changes from time to time in the content hereof without obligation of
Elo TouchSystems to notify any person of such revisions or changes.
T rademark Acknowledgments
IntelliTouch, SecureTouch, AccuTouch, Entuitive, and MonitorMouse are t rade mark s of E lo TouchSystems, Inc .
Other product na mes mentione d herein ma y be trad emarks or r egistered tra demarks o f their resp ective
companies. Elo TouchSystems claims no interest in trademarks other than its own.
Elo Entuitive Touchmonitor CRT Desktop User Guide - iii

iv-Elo Entuitive Touchmonitor CRT Desktop User Guide

Contents
Chapter 1. Introduction ........................................................................1
Precautions................................................................................................1
About the Product.....................................................................................1
Chapter 2. Installation and Setup ........................................................3
Unpacking Your Touchmonitor................................................................3
Getting Started..........................................................................................4
Selecting a Suitable Location...............................................................4
Mounting Your Touchmonitor..................................................................5
Horizontal Mount.................................................................................5
Vertical Mount.....................................................................................6
Bottom Mount......................................................................................6
Connecting Your Touchmonitor...............................................................7
Installing the Driver Software...................................................................11
Installing the Serial Touch Driver for Windows 2000, 95/98 and
NT 4.0 ..................................................................................................11
Installing the USB Touch Driver for Windows 2000 and
Windows 98 .........................................................................................12
Chapter 3. Operation.............................................................................15
About Touchmonitor Adjustments ...........................................................15
Touchmonitor Controls.............................................................................16
Using the On Screen Display (OSD) ...................................................17
OSD Adjustments ................................................................................18
Chapter 4. Troubleshooting..................................................................21
Monitor Warning Messages.................................................................23
Appendix A. Touch Technology...........................................................25
Touchscreens: An Overview.....................................................................25
IntelliTouch Touchscreens........................................................................25
AccuTouch Touchscreens.........................................................................26
Appendix B. Touchmonitor Safety.......................................................27
Care and Handling of Your Touchmonitor...............................................28
Elo Entuitive Touchmonitor CRT Rear Mount User Guide - v

Contents
Appendix C. Technical Specifications..................................................29
Touchmonitor Specifications...................................................................30
IntelliTouch Touchmonitor Specifications ..............................................32
AccuTouch Touchmonitor Specifications ...............................................34
Signal PINOUT for 15” and 17” Monitors..........................................36
Power Consumption..................................................................................37
Preset Timing Table..................................................................................38
15” and 17” CRT Rear Mount Touchmonitor Dimensions .....................38
Regulatory Information ............................................................................39
Warranty ................................................................................................41
Index ........................................................................................................ 43
vi - Elo Entuitive Touchmonitor CRT Rear Mount User Guide

Chapter 1
Introduction
Congratulations on your purchase of an El o TouchSystems Entuitive
touchmonitor. Your new high-resolution touchmon itor combines the
reliable performance of Elo’s touch technology w ith the lat est advan ces
in CRT display design. This combination of features creates a natural
flow of information between a user and the touchmonitor.
Precautions
Precautions
Follow all warnings, precautions and maintenance as recommended in
this user’s manual to maximize the life of you r un it. See Appen dix B fo r
more information on touchmonitor safety.
About the Product
Your CRT touchmonitor is a color display with the following f eatures:
❑ 13.8-inch viewable image microprocessor-based display for
15-inch monitor and 15.7-inch viewable image microprocessor-based display for 17-inch mon itor.
❑ Supports a wide range of screen refresh rates with flicker-free
picture quality.
❑ Plug and Play functionality automatically adjusts the monitor
to its optimum performance.
❑ VESA DPMS (Display Power Management Signaling).
❑ VESA DDC1/2B compatibility.
❑ Patented touch technology fro m Elo TouchSys te ms.
❑ RS-232 or Universal Serial Bus (USB) touch interface.
Elo Entuitive Touchmonitor CRT Rear Mount Us er Guide - 1

Chapter 1 : Introduction
2 - Elo Entuitive Touchmonitor CRT Rear Mount User Guide
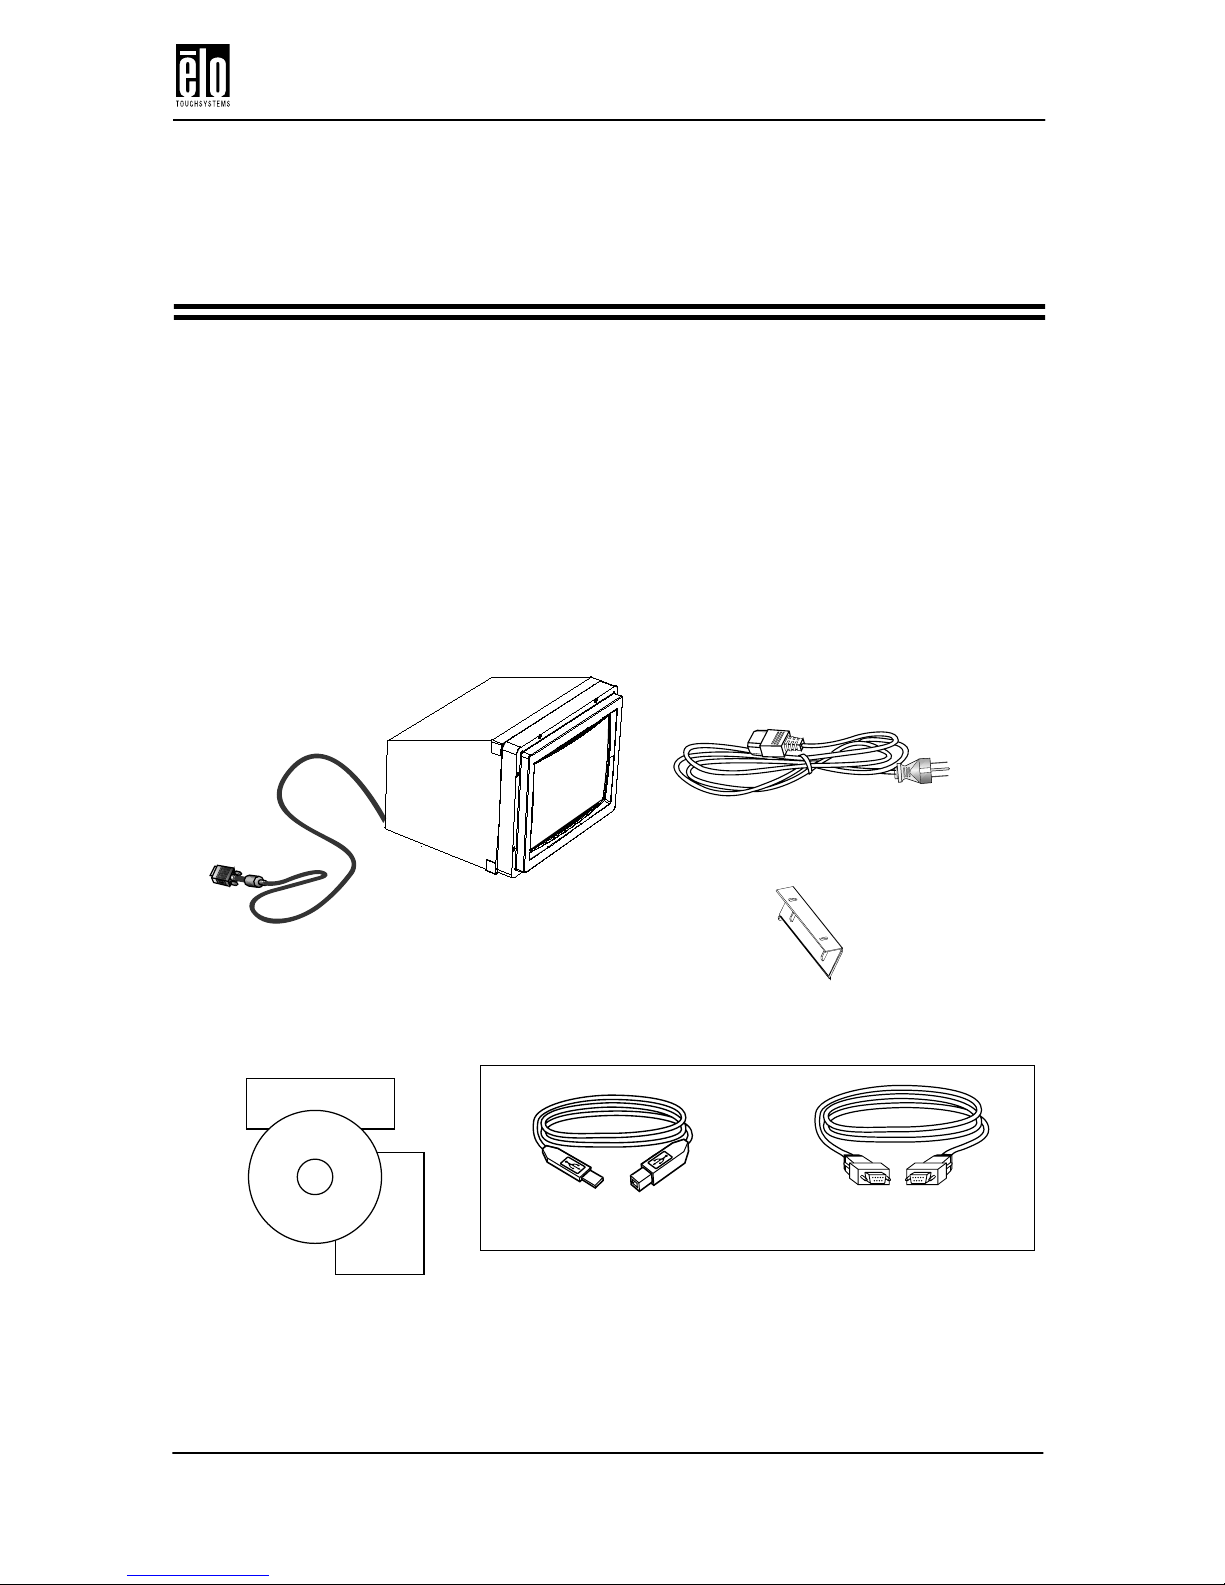
Unpacking Your Touchmonitor
Elo QuickStart
User
Guide
CD
Software
Chapter 2
Installation and Setup
This chapter discusses how to install your CRT touchmonitor and how
to install Elo TouchSystems driver software.
Unpacking You r Touchmonitor
Check that the following 7 items are present and in good condition:
CR T Rear Moun t monitor
with tethered video cable
USB touchscreen cable
User’s Guide, Quick Start Guide,
and TouchTools CD-ROM
Monitor power cable
Mounting L-brackets (2)
OR
Serial touchscreen cable
Elo Entuitive Touchmonitor CRT Rear Mount User Guide - 3

Chapter 2 : Installation and Setup
Getting Started
Selecting a Suitable Location
❑ Place the monitor at least 12 inches from other electrical or
heat-emitting equipm ent and allow at least 4 inches on each
side for ventilation.
❑ Place the monitor in a position where no light shines or is
reflected directly on the screen.
❑ To reduce eye strain, avoid installing the monitor unit against a
bright background such as a window.
❑ Position the monitor so the top of th e screen is no higher than
eye level.
❑ Position the monitor directly in front of you at a comfortable
reading distance.
4 - Elo Entuitive Touchmonitor CRT Rear Mount User Guide
Mounting Your Touchmonitor
Mounting Your Touchmonitor
Your Elo touchmonitor is designed to be mounted in a variety of ways.
The mounting brackets enable yo u to moun t your tou chmonitor h orizontally or vertically. You can also use the keyholes on the bottom of the
monitor for slide-in-place mounting. See Appendix C for dimension
drawings of all mounting options.
Note: You will need a Phillips screwdriver to attach the L-brackets.
Your touchmonitor comes with two L-brackets (and four screws) that
attach to both sides of the touchmonitor.
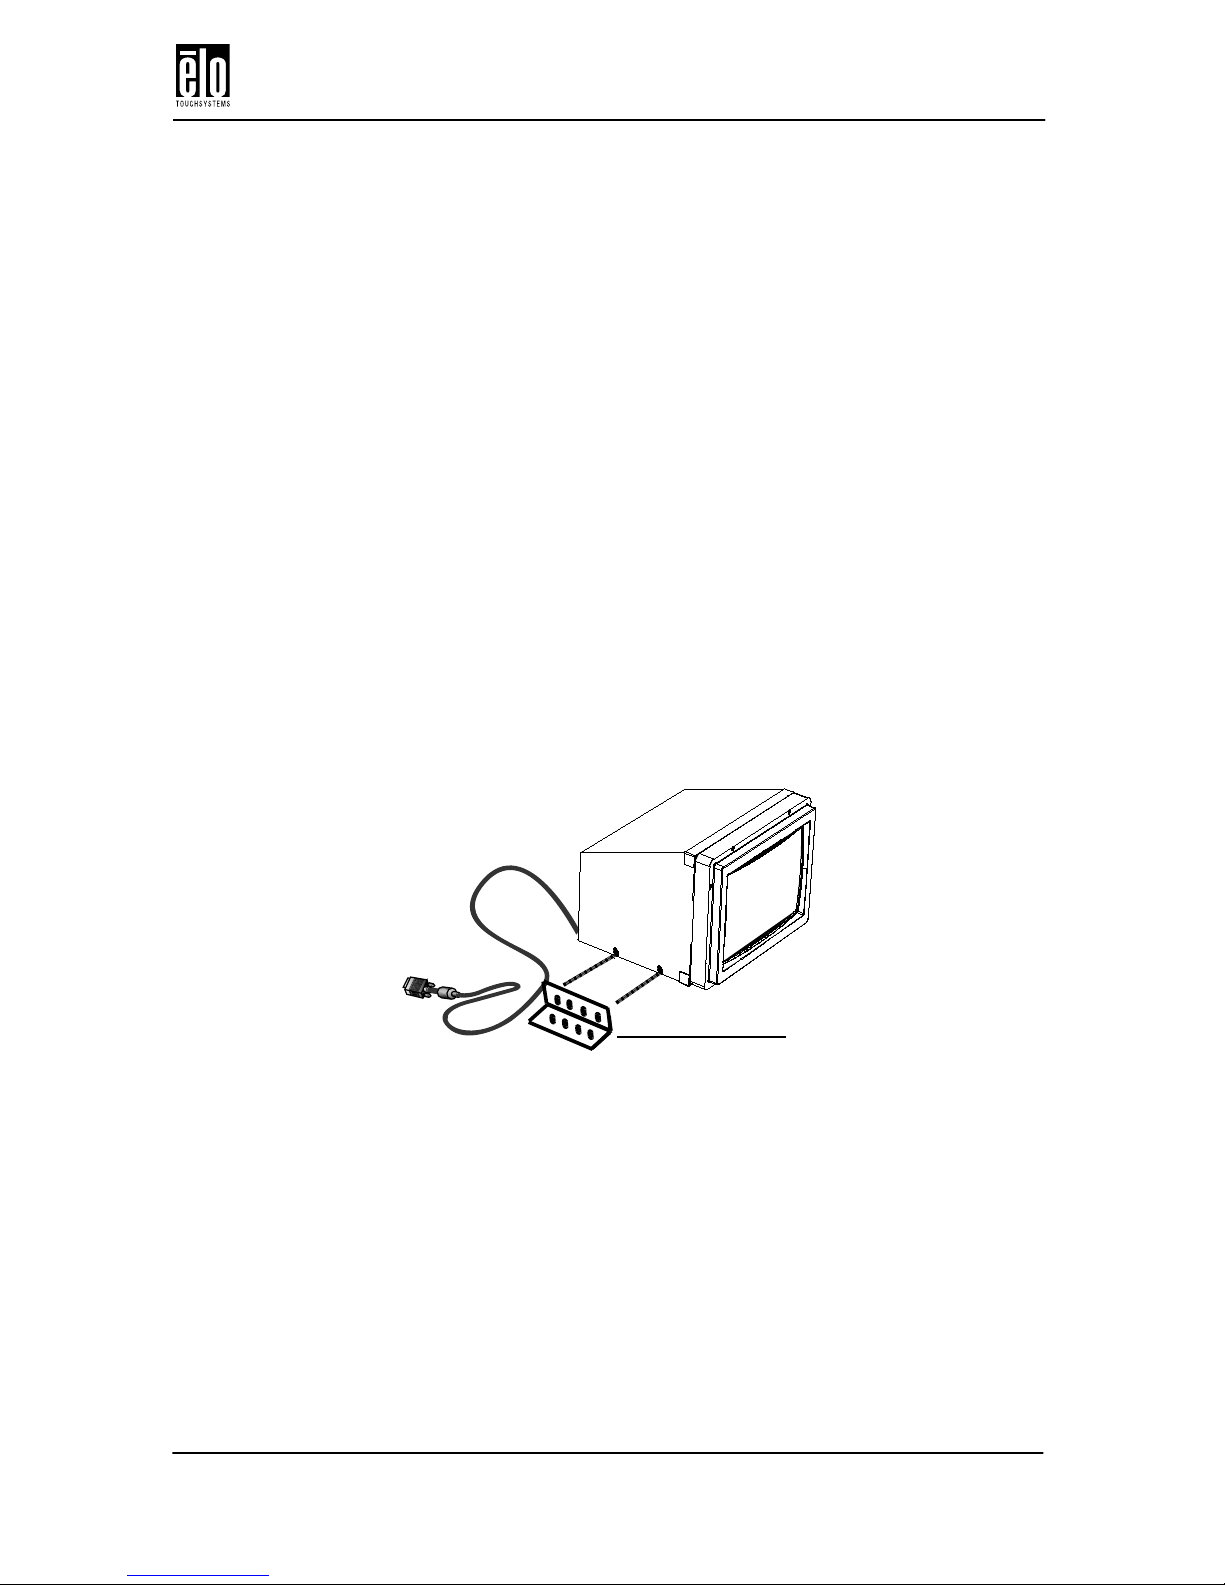
Horizontal Mount
To mount the brackets horizontally to your touchmonitor:
1. Locate the two holes on each side of the touchmonitor toward
the bottom. Match up the two holes of one bracket to the holes
on one side of your mon itor.
L-bracket
2. Place two screws in the holes and with the screwdriver, screw
them in to secure the bracket.
3. Repeat steps 1 and 2 to attach the other L-bracket to the other
side of the touchmonitor.
Elo Entuitive Touchmonitor CRT Rear Mount User Guide - 5

Chapter 2 : Installation and Setup
Vertical Mount
To mount the brackets vertically to your touchmon itor:
1. Locate the two holes on each side of your touchmonitor. Match
up the two holes of one bracket to the holes on one side of your
touchmonitor.
L-bracket
2. Place two screws in the holes and with the screwdriver, screw
them in to secure the bracket.
3. Repeat steps 1 and 2 to attach the other L-bracket to the other
side of the touchmonitor.
Bottom Mount
You can also mount your touchmonitor by using the keyholes on t he
bottom of the monitor. These keyholes provide easy slide on mounting.
You can also bolt your touchmonitor to a tabletop or other flat surface.
Please refer to Appendix C for locati on and dimens ion of the m ounting
holes.
6 - Elo Entuitive Touchmonitor CRT Rear Mount User Guide
Connecting Your Touchmonitor
Connecting Your Touchmonitor
Your touchmonitor comes with one of the following touchscreen connector cables: Serial (RS-232) or USB cable (for Windows 98 and Windows 2000 systems only) .
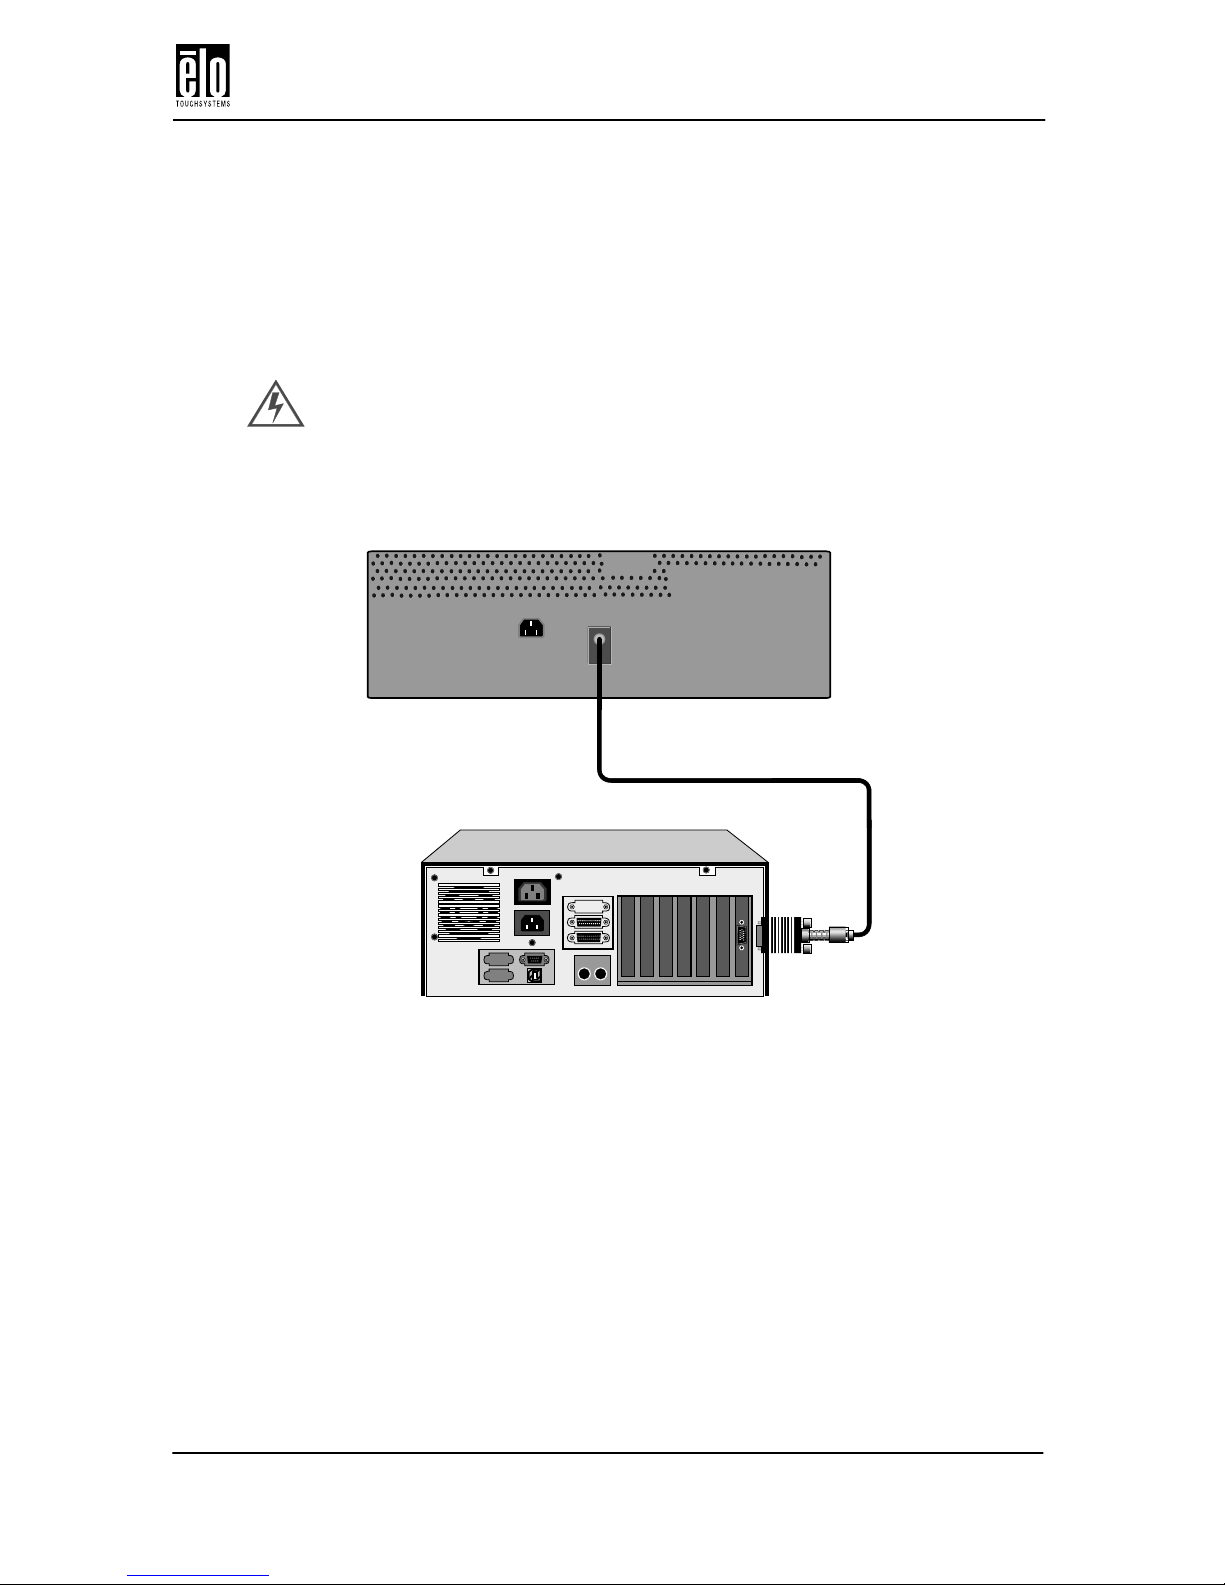
IMPORTANT: Before connecting the cables to your touchmonitor
and PC, be sure that the computer and touchmon itor are tu rned off.
1. Connect the video cable to the video connector on your PC.
Secure the cable to your PC by turning the screws on the connector.
Tethered video cable
Elo Entuitive Touchmonitor CRT Rear Mount User Guide - 7

Chapter 2 : Installation and Setup
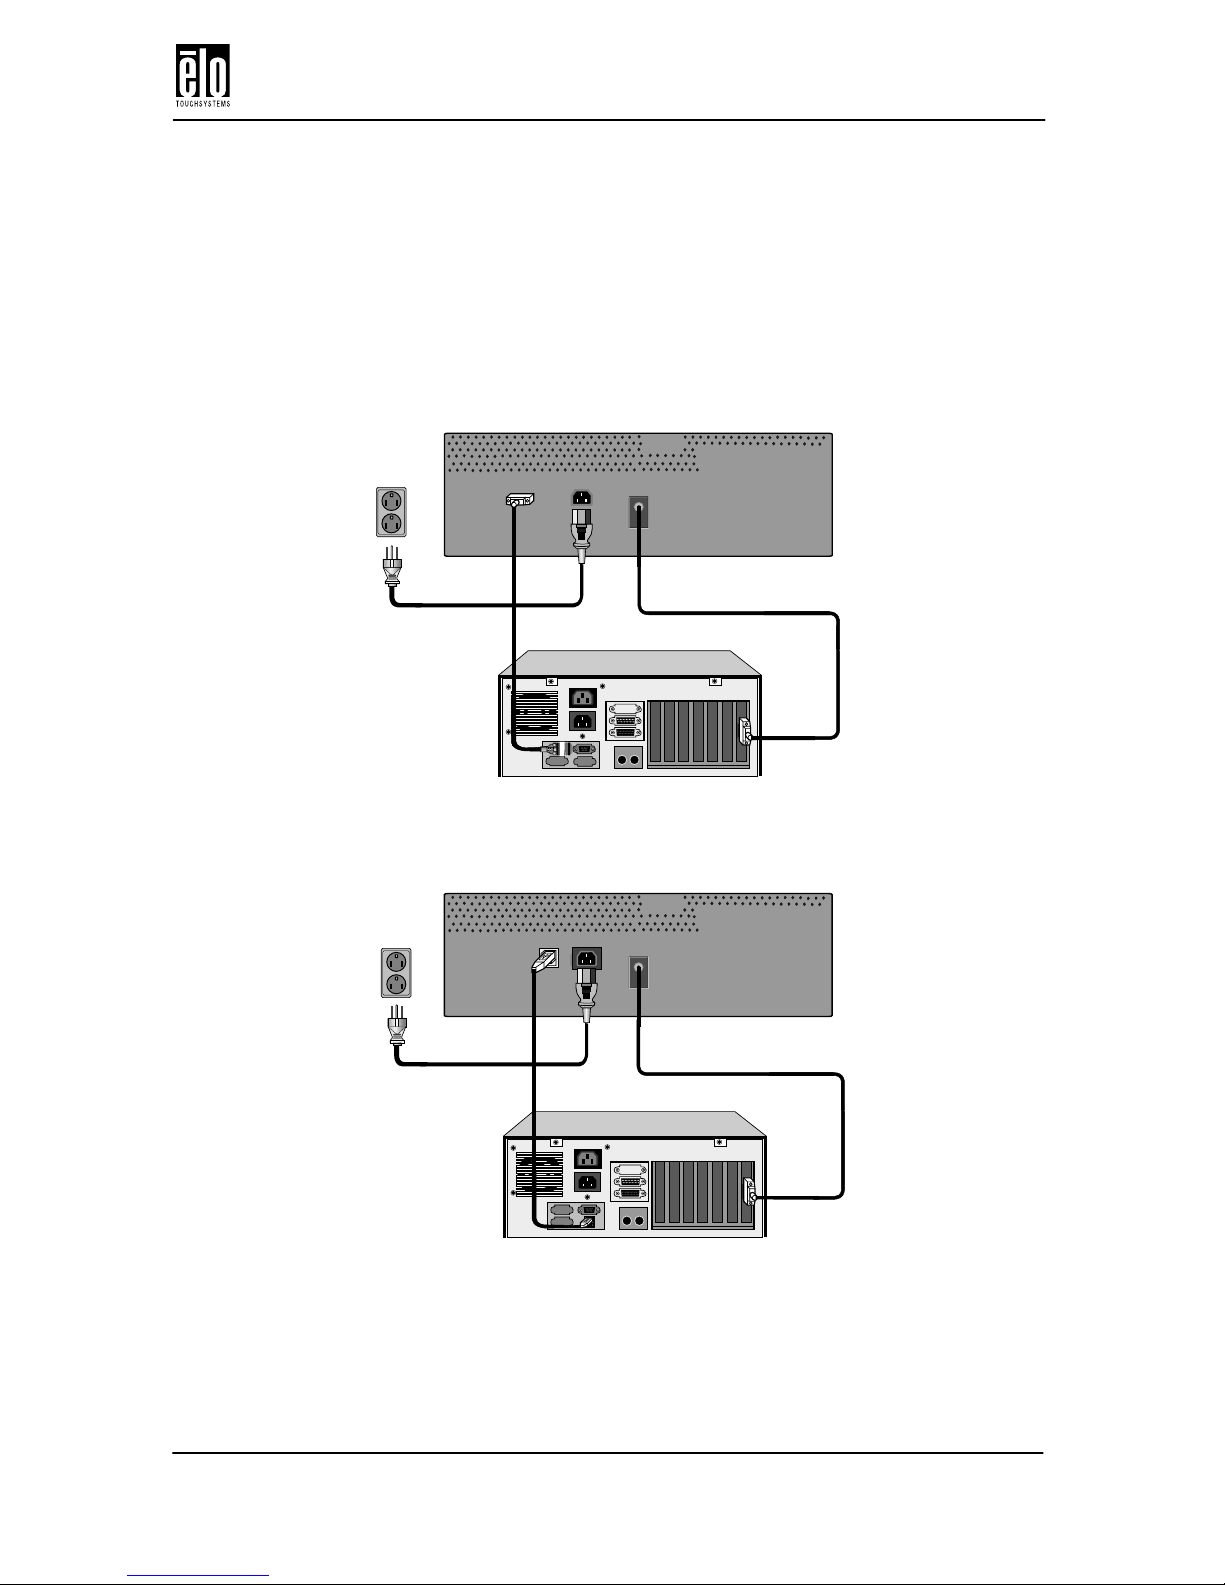
2. Connect the power cable to the AC connector on your touch-
monitor. To protect your e quipmen t against risk of damage from
electrical surges in the power line, plug the touchmonitor’s
power cord into a surge protector, and then connect the surge
protector to a grounded (three-pronged) AC electrical outlet.
Power cable
Tethered video cable
8 - Elo Entuitive Touchmonitor CRT Rear Mount User Guide
Connecting Your Touchmonitor
3. Connect the touchscreen cable. Determine if you have RS-232
or USB. Connect one end to the appropriate port on the back of
your PC. Connect the other end of the cable to the touchscreen
connector on your touchmonitor. Secure the serial cable to your
touchmonitor and PC by turning the screws on the connector.
The USB cable connectors should fit snugly into the connectors
on your PC and touchmonitor.
Power cable
Power cable
Serial touchscreen cable
OR
USB
touchscreen cable
Tethered video cable
Tethered video cable
Elo Entuitive Touchmonitor CRT Rear Mount User Guide - 9
 Loading...