

Elo TouchSystems Entuitive ET1724L-7SWB-1-NL, ET1724L-8SWB-1-NL, Entuitive ET1724L-8SWB-1-NL User Manual

Elo Entuitive Touchmonitor
User Guide
17" LCD Desktop Touchmonitor
1724L Series
Revision A
P/N 008561
Elo TouchSystems, Inc.
1-800-ELOTOUCH
www.elotouch.com


Copyright © 2002 Elo Tou chSystem s Inc. All Rights Reserved.
No part of this p ubl icatio n may be reprod uced, tra nsmi tted, tra nscri bed, sto red in a retrieval syst em,
or tr ans lated into any la nguage or computer language, in any form or by any means, including, but no t
limited to, electronic, magnetic, optical, chemical, manual, or otherwise without prior written
permi s s ion of Elo TouchSystems .
Disclaimer
The inform ation in this do cument is sub ject to change w ithout notic e. Elo TouchSystems ma kes no
representations or warranties with respect to the contents hereof, and specifically disclaims any
implied warr anties o f merchan tabilit y or fitnes s for a parti cular pu rpose. El o TouchSystems re serves
the right to revise this publication and to make changes from time to time in the content hereof
with ou t ob ligat io n of Elo Touch S ys tems to no t ify an y pe rs on of such revisi o ns or ch anges .
Trademark Acknowledgments
IntelliTouch, SecureTouch, AccuTouch, Entuitive, and MonitorMouse are trademarks of Elo
TouchSystems, Inc.
Other product names mentioned herein may be trademarks or registered trademarks of their
respective companies. Elo TouchSystems claims no interest in trademarks other than its own.
iii

iv

Table of Contents
Chapter 1
Introduction 1
Product Description . . . . . . . . . . . . . . . . 1
Precautions . . . . . . . . . . . . . . . . . . . . 1
About the Product . . . . . . . . . . . . . . . . . 1
Chapter 2
Installation and Setup 3
Unpacking Your T ouchmonitor. . . . . . . . . . . 3
Rear View . . . . . . . . . . . . . . . . . . . 4
Connecti ng Your Touchmonitor . . . . . . . . . . 5
Video Cabl e Connection . . . . . . . . . . . . 5
Touchscreen Cable Connection . . . . . . . . 6
Power Cable Connection . . . . . . . . . . . . 7
Video Input Pin Assignment. . . . . . . . . . . . 8
Installing the Driver Software . . . . . . . . . . . 9
Installing the Serial Touch Driver for Windows
XP, Windows 2000, Me, 95/98 and NT 4.0 . 10
Installing the Serial Touch Driver for MS-DOS
and Windows 3.1 . . . . . . . . . . . . . . 11
Chapter 3
Operation 13
Touchmonitor Controls . . . . . . . . . . . . . 14
Setting the Refresh Rate. . . . . . . . . . . 14
Adjustments . . . . . . . . . . . . . . . . . 15
Screen Adjustments. . . . . . . . . . . . . . . 16
Direct A cc e s s B u tto n s . . . . . . . . . . . . 1 6
Auto Adjust . . . . . . . . . . . . . . . . 16
OSD Lock/Unlock . . . . . . . . . . . . . . 17
Power Lock/Unlock. . . . . . . . . . . . . . 17
OSD and P ower Lock/ U nlock . . . . . . . . 18
OSD Adjustments . . . . . . . . . . . . . . . . 19
BRIGHTNESS . . . . . . . . . . . . . . 19
CONTRAST. . . . . . . . . . . . . . . . 19
COLOR CONTROL . . . . . . . . . . . . 19
YUV COLOR . . . . . . . . . . . . . . . 19
HUE . . . . . . . . . . . . . . . . . . . . . 19
FLESH TONE . . . . . . . . . . . . . . . . 19
MISCELLANEOUS . . . . . . . . . . . . 19
RECALL . . . . . . . . . . . . . . . . . . . 19
OSD TIMER. . . . . . . . . . . . . . . . . 19
OSD POSITION. . . . . . . . . . . . . . . 19
AUTO ADJUST . . . . . . . . . . . . . . 20
LANGUAGE. . . . . . . . . . . . . . . . 20
H/VPOSITION . . . . . . . . . . . . . . 20
H-POSITION. . . . . . . . . . . . . . . . . 20
V-POSITION. . . . . . . . . . . . . . . . . 20
CLOCK PHASE . . . . . . . . . . . . . 20
PHASE . . . . . . . . . . . . . . . . . . . 20
CLOCK . . . . . . . . . . . . . . . . . . . 20
Chapter 4
Troubleshooting Tips 21
Appendix A
Native Resol utio n 23
Appendix B
Touchmonitor Safety 25
Care and Handling of Your Touchmonitor. . . . 27
Appendix C
Technical Specifications 29
Preset Timing Table. . . . . . . . . . . . . . . 29
VESA Mounting. . . . . . . . . . . . . . . . . 30
Touchmonitor Specifications. . . . . . . . . 31
AccuTouch Touchscreen Specifications . . . 32
Inte lliTouch Touch s cr e e n S pec if ic a tio n s . . . 33
17" LCD Desktop Touchmonitor (ET1 724L-XSWB-
1) Dimensions . . . . . . . . . . . . . . . . . 34
Regulatory Information 37
Index 41
v

vi

Pr od uct D e scrip tion
Congratulations on your purchase of an Elo TouchSystems Entuitive LCD
desktop touchmon itor. Your new high-resolution industrial touchmonit or
combines the relia ble performance of Elo’s touch technology with the latest
advances in LCD display design. This combination of features creates a natural
flow of information be tween you and your touchmonitor.
C HAPTER
1
C
HAPTER
1
I
NTRODUCTION
Precautions
Follow all warnings, precautions and maintenance as recommended in this
user’s manual to maximi ze the life of your unit. See Appendix B for more
information on touc hmonitor safety.
Abou t the Pr od uct
Your LCD desktop touchmonitor is a 17" TFT color display with the following
features:
• Direct analog RGB input
• 17.0" diagonal screen size
• 1280 x 1024 resolution
• DOS/ VGA/ SVGA/ XVGA/ SXGA/ EGA/ CGA/ Mac compatible
• Frequency H-sync: 30-80k Hz; V-sync: 50-85kHz
(up to 75khz @ 1280 x 1024)
1-1

•Plug & Play
• High quality full sc reen re-scaling
• VESA DDC 1/2B data communication
• VESA DPMS power saving
• Supports VESA Flat Panel Monitor Physical Mounting Interface
• Worldwide agenc y approva ls that i nclude UL, CUL, TÜV- Bauar t, FCC, CE,
C-Tick, VCCI
• IntelliTouch or AccuTouch Technology
For full Product Spec ifications refer to Appendix C.
1-2 Elo Entuitive Touchmonitor User Guide
C
HAPTER
2
I
NSTALLATION AND
This chapter disc usses how to setup your LCD desktop touchmonitor and how
to install Elo TouchS ystems driver software.
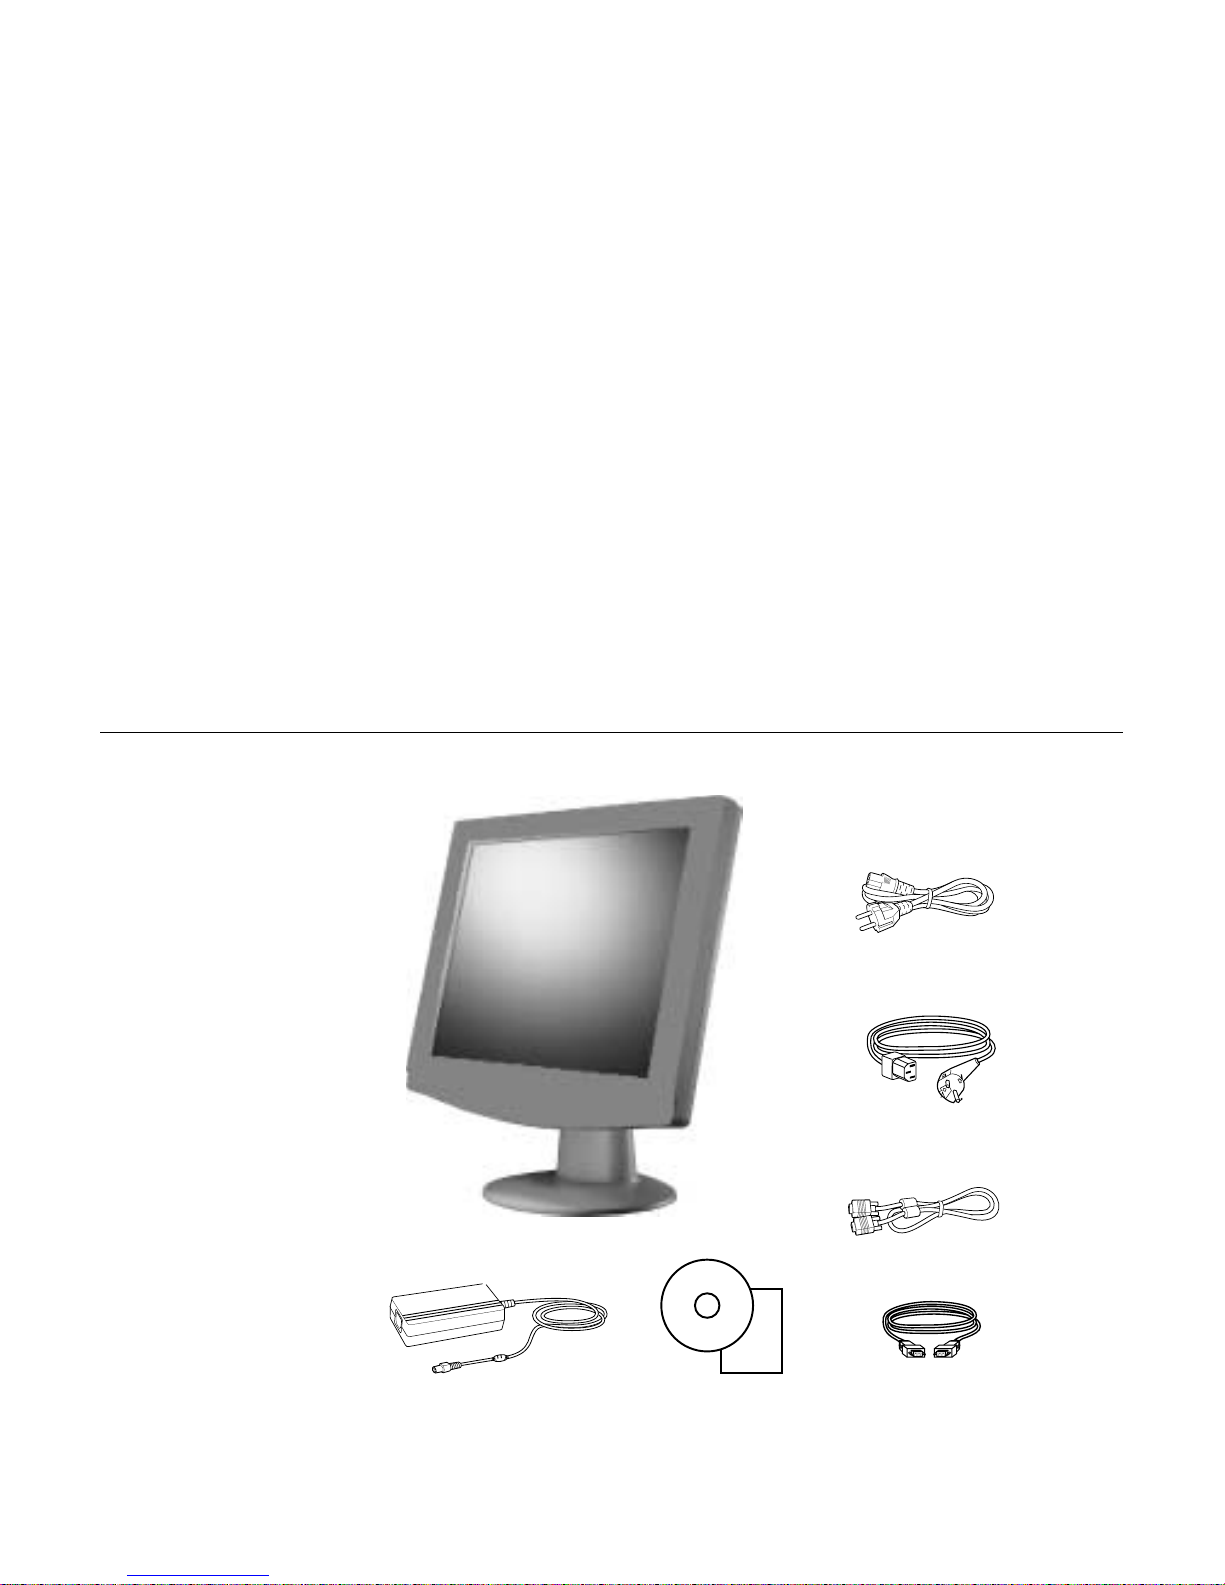
Unpac king Your Touc hmon itor
C HAPTER
2
S
ETUP
AC/DC Power adapter
CD and Quick
Installation Guide
US power cord
European power cord
Video cable
Serial touchscreen
cable
2-3
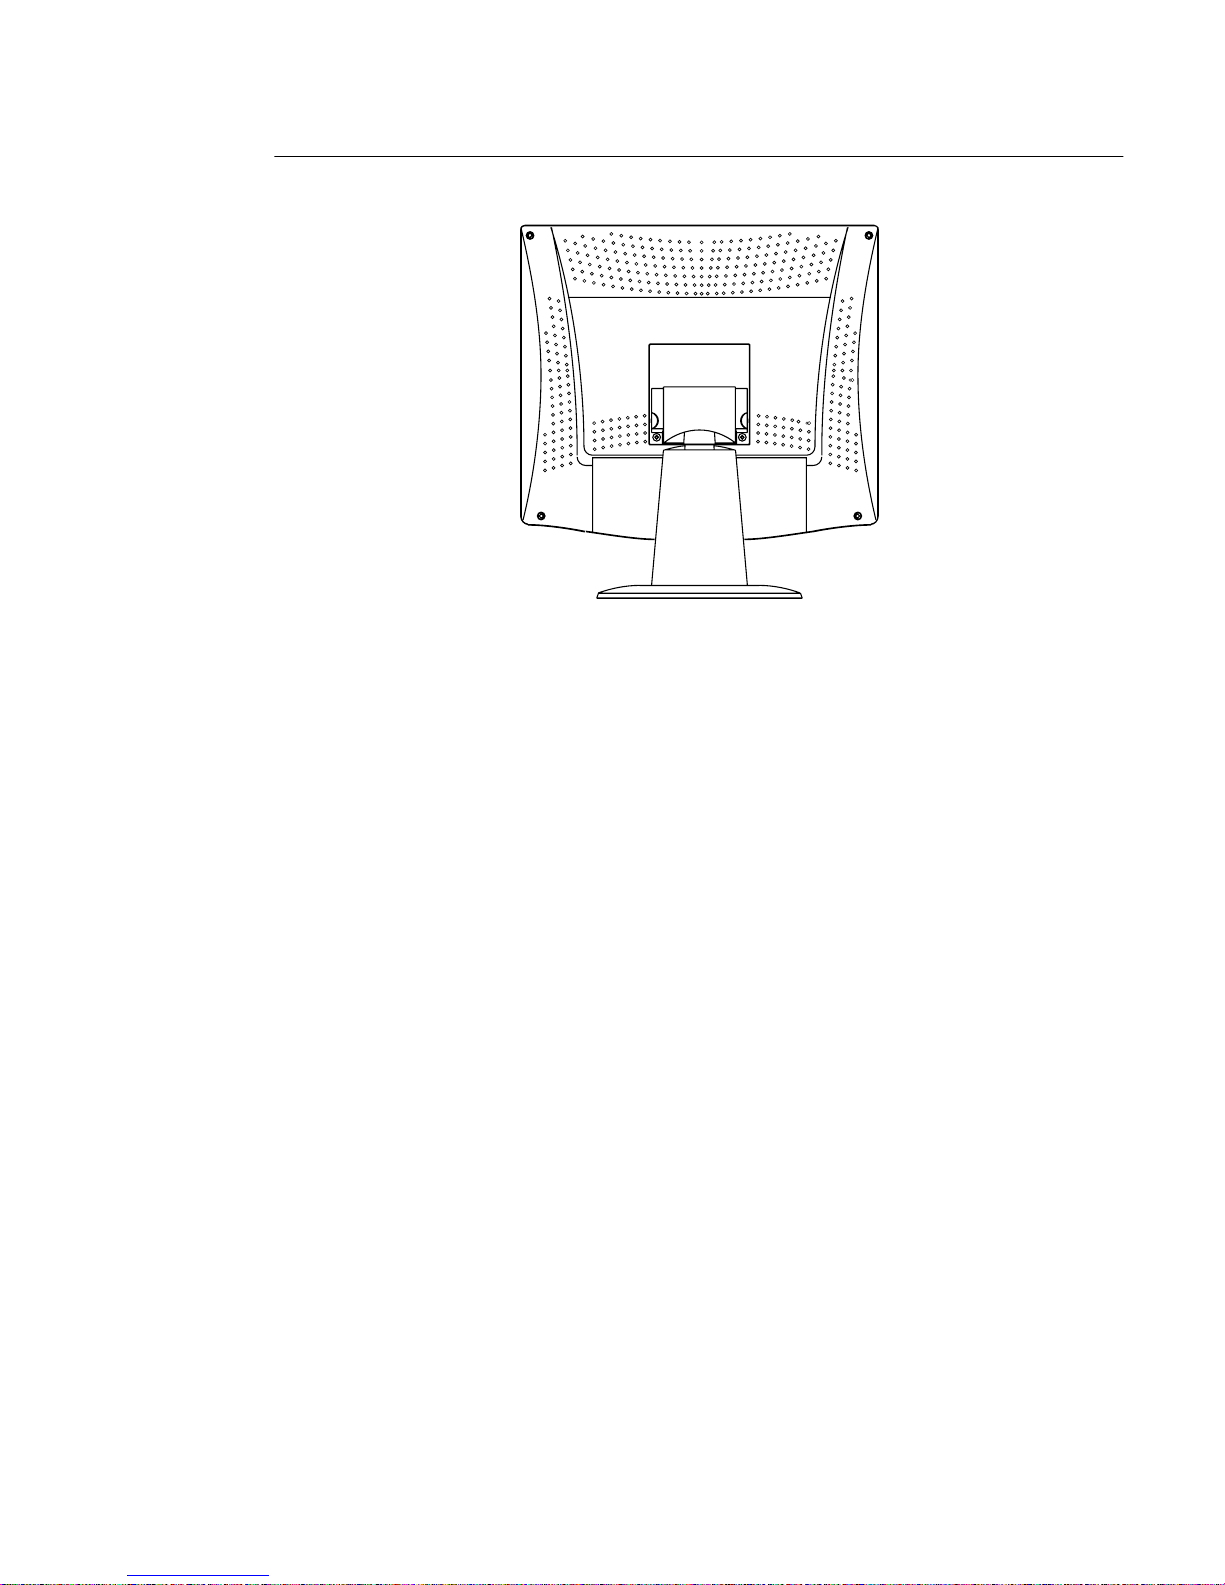
Rear View
2-4 Elo Entuitive Touchmonitor User Guide
Conn ecting Your Touchmon itor
Before connecting the cables to your touchm onitor and computer, be sure that the
touchmoni tor and computer are off.
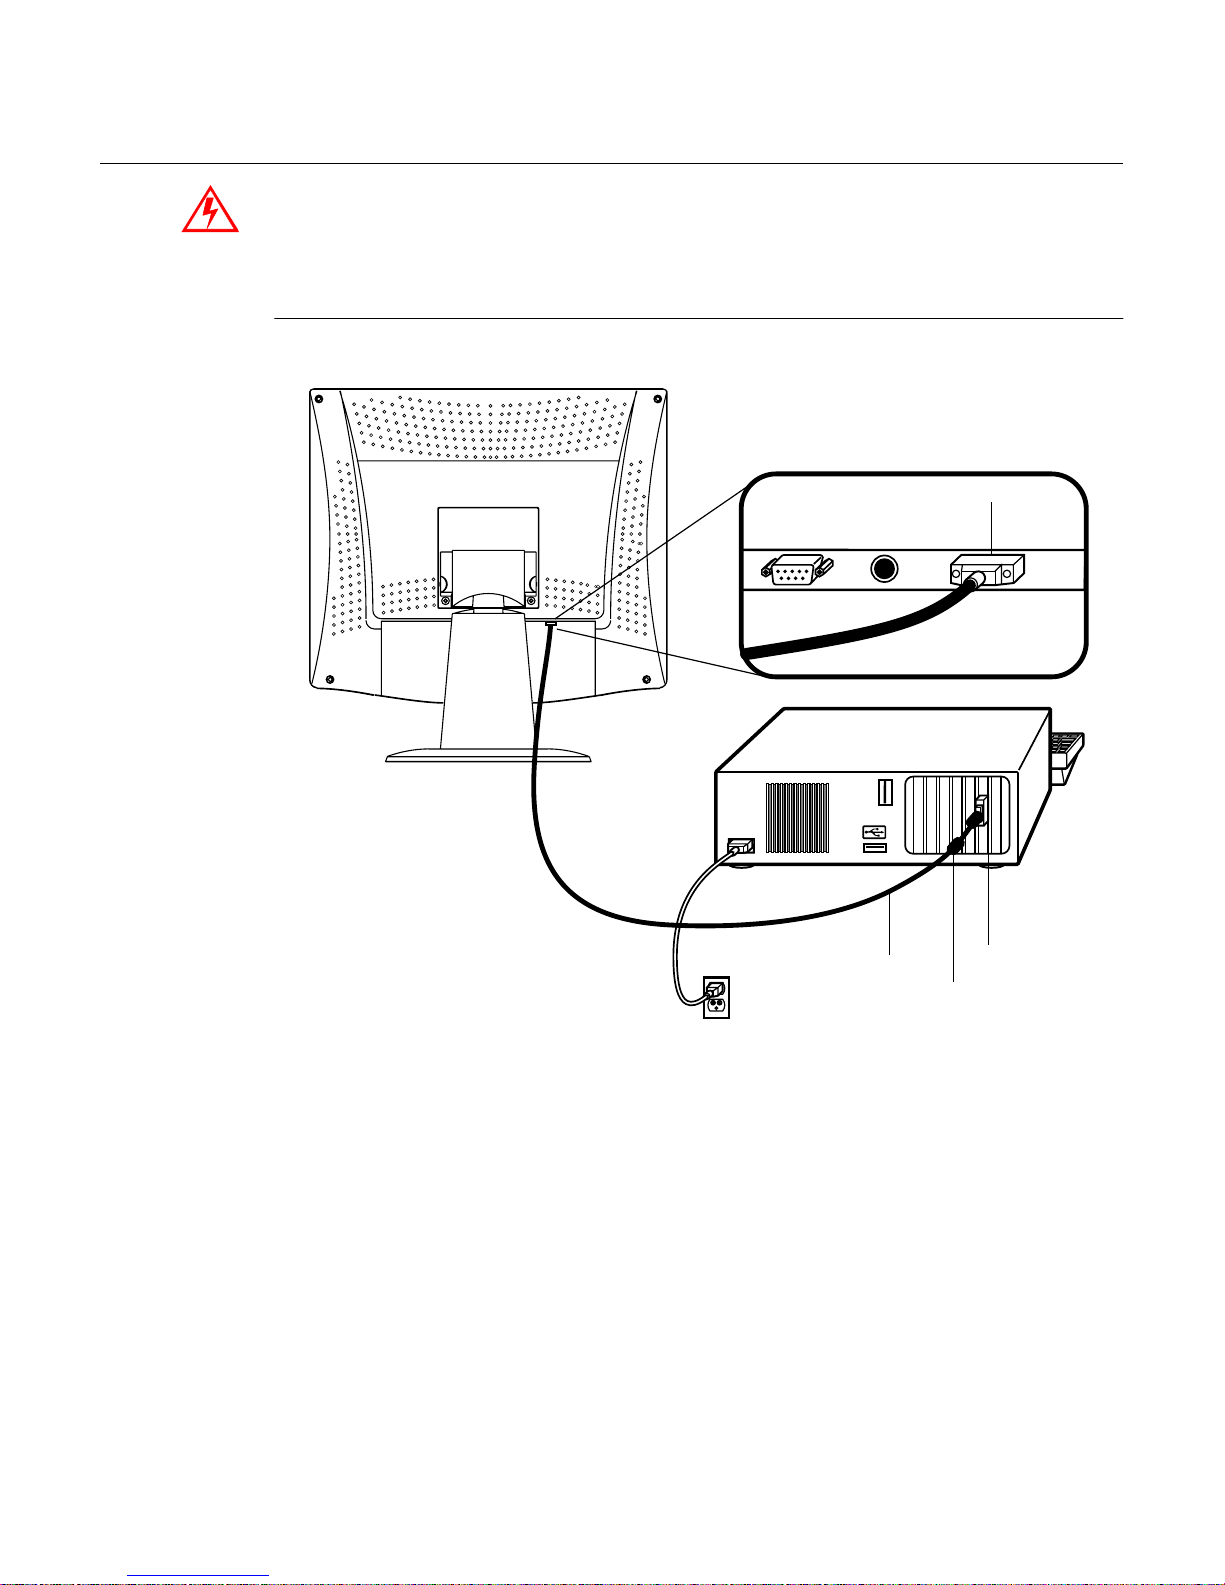
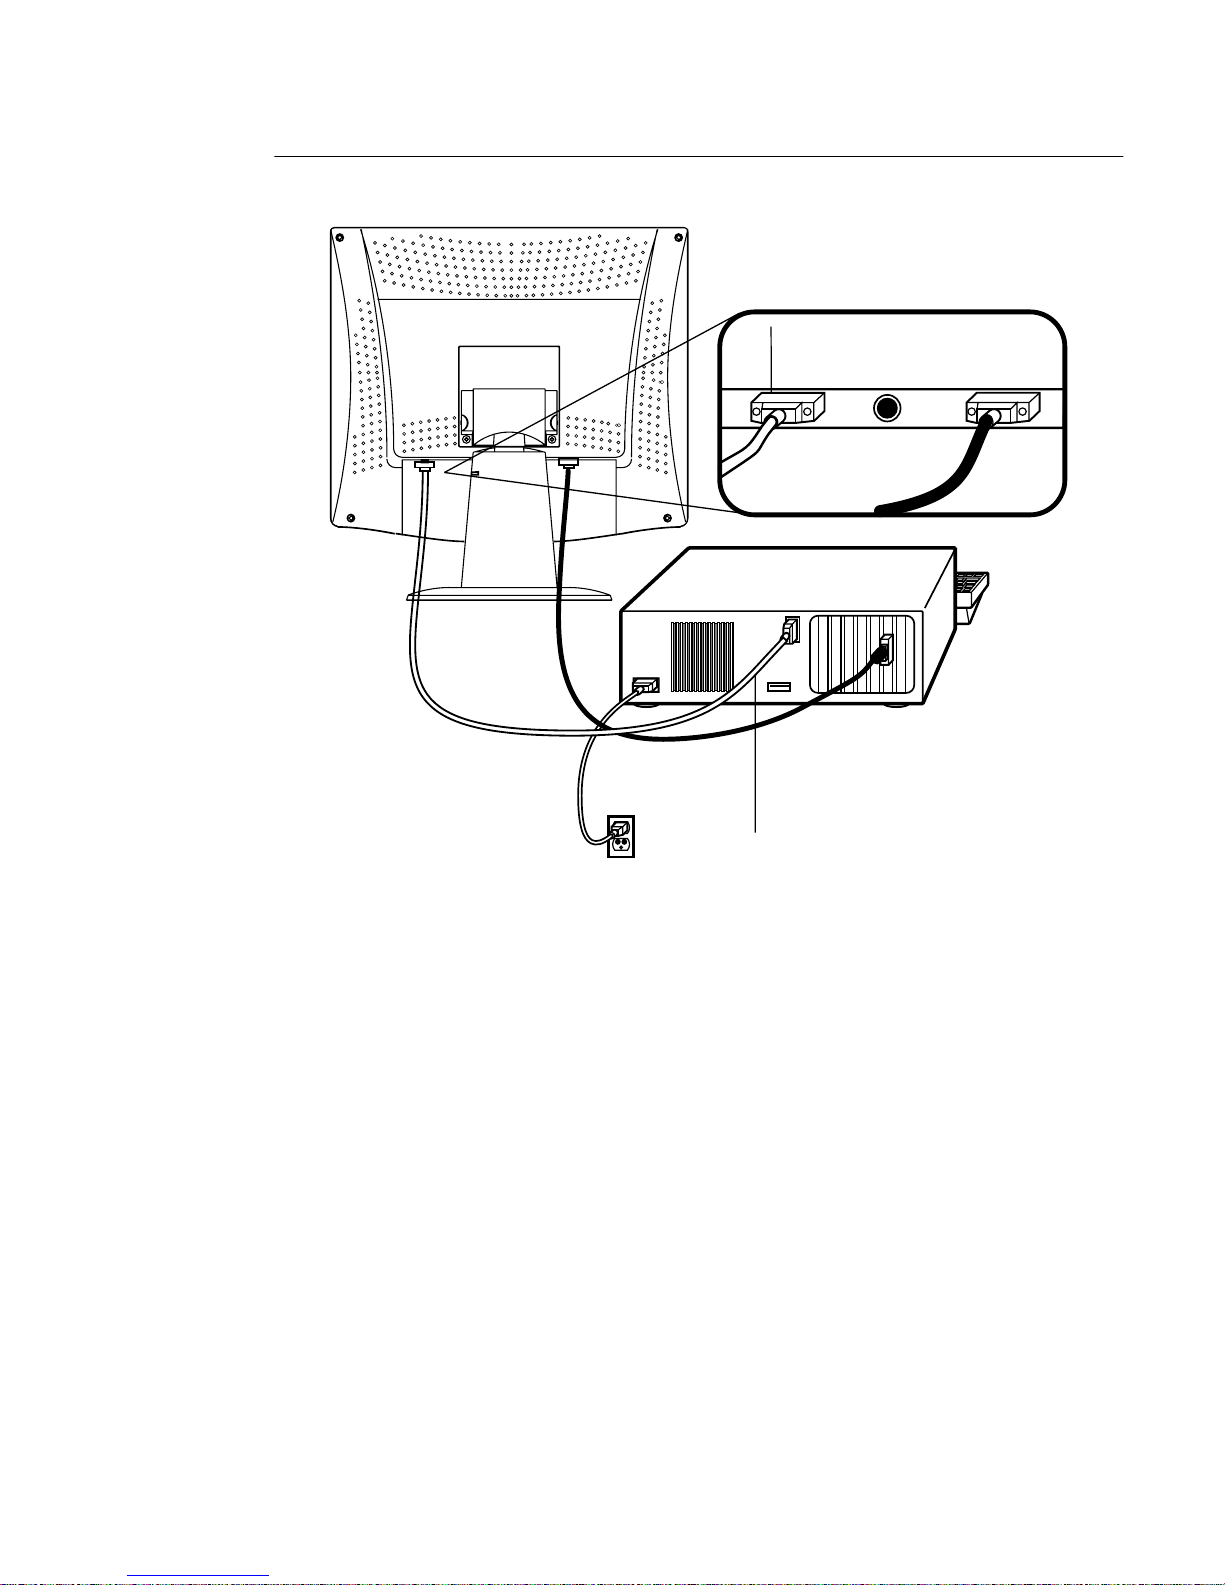
Vid e o C able Conne ct ion
Connections on underside
Female 15-pin
video
D-SUB
Video
cable
Ferrite bead
Video
port
1 Set the touchmonit or on a solid horizontal surface, such as a table or desk.
2 Connect the female end of the video cable connector to the back of the LCD
monitor, and connect the other end to the back of the computer.
3 Secure the c able to yo ur touchmonitor and comput er by tighteni ng th e screws
on the connector cloc kwise.
2-5
Touchscreen Cable Connection
Connections on underside
Female 9-pin serial
touchscreen
connector
Serial
touchscreen
cable
1 Connect the female end of the 9-pin touchscreen RS-232 cable to the serial
port on the back of your computer.
2 Connect the m ale end of th e cable to t he serial t ouc hscreen c onnector o n your
touchmonitor.
3 Secure the c able to yo ur touchmonitor and comput er by tighteni ng th e screws
on the connector cloc kwise.
2-6 Elo Entuitive Touchmonitor User Guide
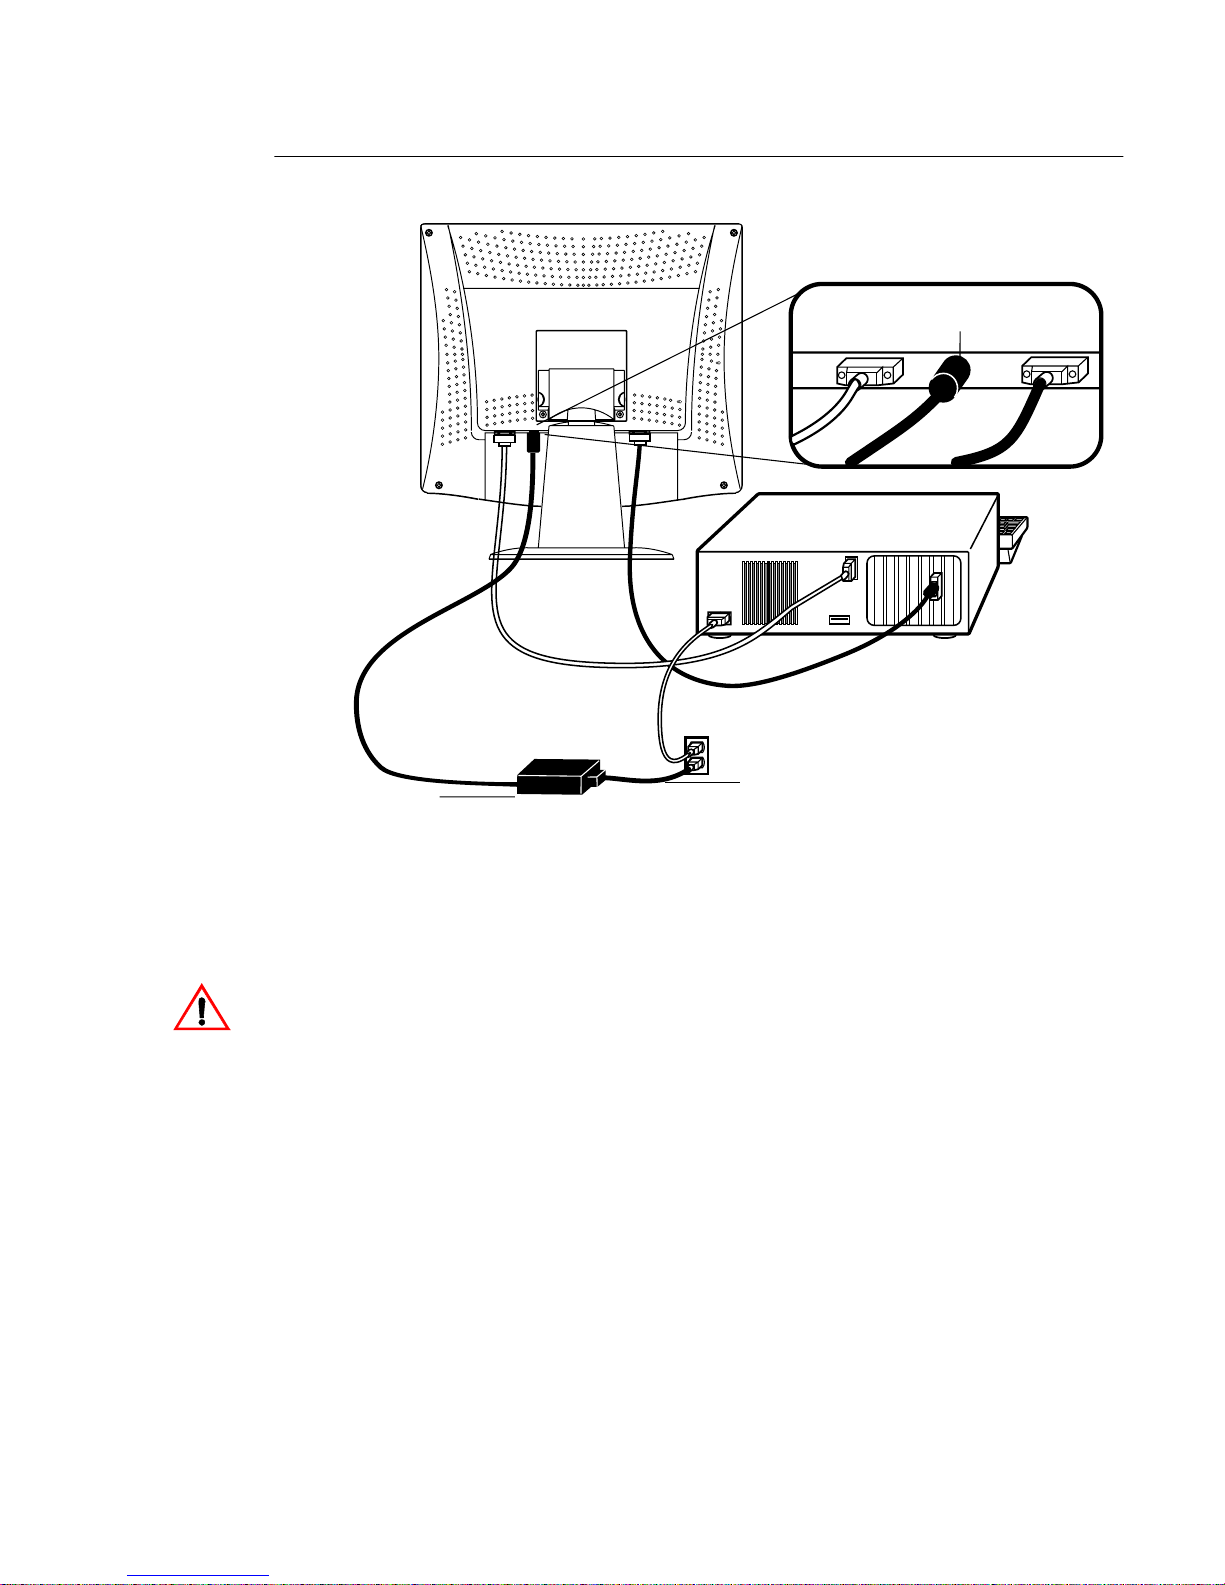
P o wer Cable Connection
Connections on underside
DC 12V Brick power
cable port
Power
Brick power supply
cable
1 Depending on where you li ve, you will use either the European or
US/Canadian po wer cable. Connect the female end of the power cabl e to the
Brick power supply.
2 Connect the Brick power supply into the power port on the touchmonitor.
To protect your equipment against risk of damage from electrical surges in the power
line, plug the Brick supply ’s power cord into a surge protector, and then connect the
surge protector to a grounded (three-pronged) AC electrical outlet.
2-7

Video Inp ut Pin A ssignm ent
This section descr ibes the pin assignment of the LCD’s 15 Pin Mini D-sub
(video cable) connector.
Pin No. Signal Connector
1 Red Video Si gnal
2 Green Video Signal
3 Blue Video Signal
4 N.C.
5 Ground
6 Ground for red video signal
7 Ground for green video signal
8 Ground for blue video signal
9 N.C.
10 Ground
11 N.C.
12 DDC data
13 Horizontal sync signal
14 Vertical sync signal
15 DDC clock
2-8 Elo Entuitive Touchmonitor User Guide
 Loading...