

Elo TouchSystems Entuitive ET1566L-7SWA-1, Entuitive ET1566L-9SWA-1, Entuitive ET1566L-9SWA-6 User Manual

Elo Entuitive Touchmonitor
User Guide
15" LCD Panel Mount Touchmonitor
1566L Series
Revision B
P/N 008531
Elo TouchSystems, Inc.
1-800-ELOTOUCH
www.elotouch.com


Copyright © 2001 Elo TouchSystems Inc. All Rights Reserved.
No part of this p ubl icatio n may be reprod uced, tra nsmi tted, tra nscri bed, sto red in a retrieval syst em,
or tr ans lated in to any language or computer la nguage, in any f or m or by any means , including, but not
limited to, electronic, magnetic, optical, chemical, manual, or otherwise without prior written
permi s s ion of Elo TouchSystems.
Disclaimer
The inform ation in this do cument is sub ject to change w ithout notic e. Elo TouchSystems ma kes no
representations or warranties with respect to the contents hereof, and specifically disclaims any
implied warr anties o f merchan tabilit y or fitnes s for a parti cular pu rpose. El o TouchSystems re serves
the right to revise this publication and to make changes from time to time in the content hereof
with ou t ob ligation of El o TouchSystem s t o no t i f y any person of such revisions or ch an ges.
Trademark Acknowledgments
IntelliTouch, SecureTouch, AccuTouch, Entuitive, and MonitorMouse are trademarks of Elo
TouchSystems, Inc.
Other product names mentioned herein may be trademarks or registered trademarks of their
respective companies. Elo TouchSystems claims no interest in trademarks other than its own.
i

ii

Table of Contents
Chapter 1
Introduction 1
Precautions . . . . . . . . . . . . . . . . . . . . 1
About the Product . . . . . . . . . . . . . . . . . 1
Chapter 2
Installation and Setup 3
Unpacki ng Your Pan el Mount
Touchmonitor . . . . . . . . . . . . . . . . . . 4
Product Overview . . . . . . . . . . . . . . . . . 5
Main Unit . . . . . . . . . . . . . . . . . . . . 5
Rear View . . . . . . . . . . . . . . . . . . . 5
Bottom View . . . . . . . . . . . . . . . . . . 6
Remo te OSD with Cabl e A ttachment . . . . . 6
Mounting Your Touchmonitor . . . . . . . . . . . 7
Connecti ng Your Touchmonitor . . . . . . . . . . 8
Optimizing the LCD Display . . . . . . . . . . . 11
Installing the Driver Software . . . . . . . . . . 12
Installing the Serial Tou c h D r ive r. . . . . . . 1 3
Install ing the Serial T o uch Driver for Windo ws
2000, Me, 95/98 and NT 4.0 . . . . . . . 13
Install ing t he Serial Touch Driver for MS-DOS
and Windows 3.1 . . . . . . . . . . . . . 14
Chapter 4
Troubleshooting 23
Solutions to Common Problems . . . . . . . . 23
Appendix A
Native Resol utio n 25
Appendix B
Touchmonitor Safety 27
Care and Handling of Your Touchmonitor. . . . 28
Appendix C
Technical Specifications 29
Compatibility Modes . . . . . . . . . . . . . . 29
Touchmonitor Specifications . . . . . . . . . . 30
15" LCD Touchmonitor (ET1566L)
Specifications . . . . . . . . . . . . . . . 30
AccuTouch Touchscreen Specifications . . . 31
CarrollTouch Specifications . . . . . . . . . 32
15" LCD Panel Mo unt Touchmonitor
(ET1566L-XSWA-X) Dimensions . . . . . 34
Panel Cutout . . . . . . . . . . . . . . . . . 36
Regulatory Information 37
Chapter 3
Operation 15
About Touchmonitor Adjustments . . . . . . . . 15
Connecting the OSD Module . . . . . . . . . . 16
OSD Module Controls. . . . . . . . . . . . . . 17
Using the OSD Menus. . . . . . . . . . . . . . 18
Auto Adjustment. . . . . . . . . . . . . . . . . 18
First OSD Menu . . . . . . . . . . . . . . . . . 19
Contrast . . . . . . . . . . . . . . . . . . . 19
Horizontal Position . . . . . . . . . . . . . . 20
Vertical Position . . . . . . . . . . . . . . . 20
Horizontal Size . . . . . . . . . . . . . . . . 20
Tracking . . . . . . . . . . . . . . . . . . . 21
Second OSD Menu . . . . . . . . . . . . . . . 21
Display Mode. . . . . . . . . . . . . . . . . 22
OSD Off-Time . . . . . . . . . . . . . . . . 22
Language . . . . . . . . . . . . . . . . . . 22
Text-Graphic . . . . . . . . . . . . . . . . . 22
Reset . . . . . . . . . . . . . . . . . . . . . 22
Warranty 41
Index 43
iii

iv

C HAPTER
1
C
HAPTER
1
I
NTRODUCTION
Congratulati ons o n you r purch ase of an El o Touc hSystems Entu itive LCD panel
mount touchmonito r. Your new high-resolution industrial touchmonitor
combines the relia ble performance of Elo’s touch technology with the latest
advances in LCD display design. This combination of fe atures creates a natural
flow of information be tween you and your touchmonitor.
Precautions
Follow all warnings, precautions and maintenance as recommended in this
user’s manual to maximi ze the life of your unit. See Appendix B for more
information on touc hmonitor safety.
Abou t the Pr od uct
Your LCD panel moun t Touchmonitor is a 15" XGA TFT colo r display wit h the
following featur es:
• Direct analog RGB input
• 15.1" dia gonal screen size
• 16.7 million displayable colors
• 1024 x 768 resolution
• XGA / SVGA / VGA / VESA / Mac compatible
• 24-60kHz horizonta l scan
• 56-85Hz high refre sh rate
1-1

• Auto adjustment capability
• High quality full sc reen re-scaling
• Multilingual OSD menus in four languages: English, German, Spanish, and
Japanese
• Corded remote OSD controlle r
• VESA DDC 1/2B data communication
• VESA DPMS power saving
• VESA flat panel monitor phys ical mounting interface (75mm)
• 19 inch computer hardwar e rack adaptor available. Contact the factor y.
• Worldwide agency approvals that include UL*, CUL*, TÜV- Bauart, FCC,
CE, C-Tic k, V CC I
• Certified by UL to NEMA 4, 4x and 12: ET1566L-7SWA-1*
• Designed to meet NEM A 4, 4x & 12: ET1566L-9S WA-1/5*
*ITE recognized compone nt
For full Product Spec ifications refer to Appendix C.
1-2 Elo Entuitive Touchmonitor User Guide

C HAPTER
2
C
HAPTER
2
I
NSTALLATION AND
This chapter disc usses how to install your LCD panel mount touchmonitor and
how to install Elo TouchSys tems driver softwar e.
S
ETUP
2-3

Unpacking Your Panel Mount
Touchm onitor
Check that the following 10 ite ms are present and in good condition:
Brick power supply
LCD Display
Serial touchscreen
cable
Monitor power cable (US/ Canada)
Elo QuickStart
CD
Software
User
Guide
User’s Guide,
Quick Start Guide and software CD
Video cable
AUTO/SEL DOWN UP MENU
OSD module
European monitor power cable
(Note: shipments to the UK will
contain a UK power cord.)also
2-4 Elo Entuitive Touchmonitor User Guide
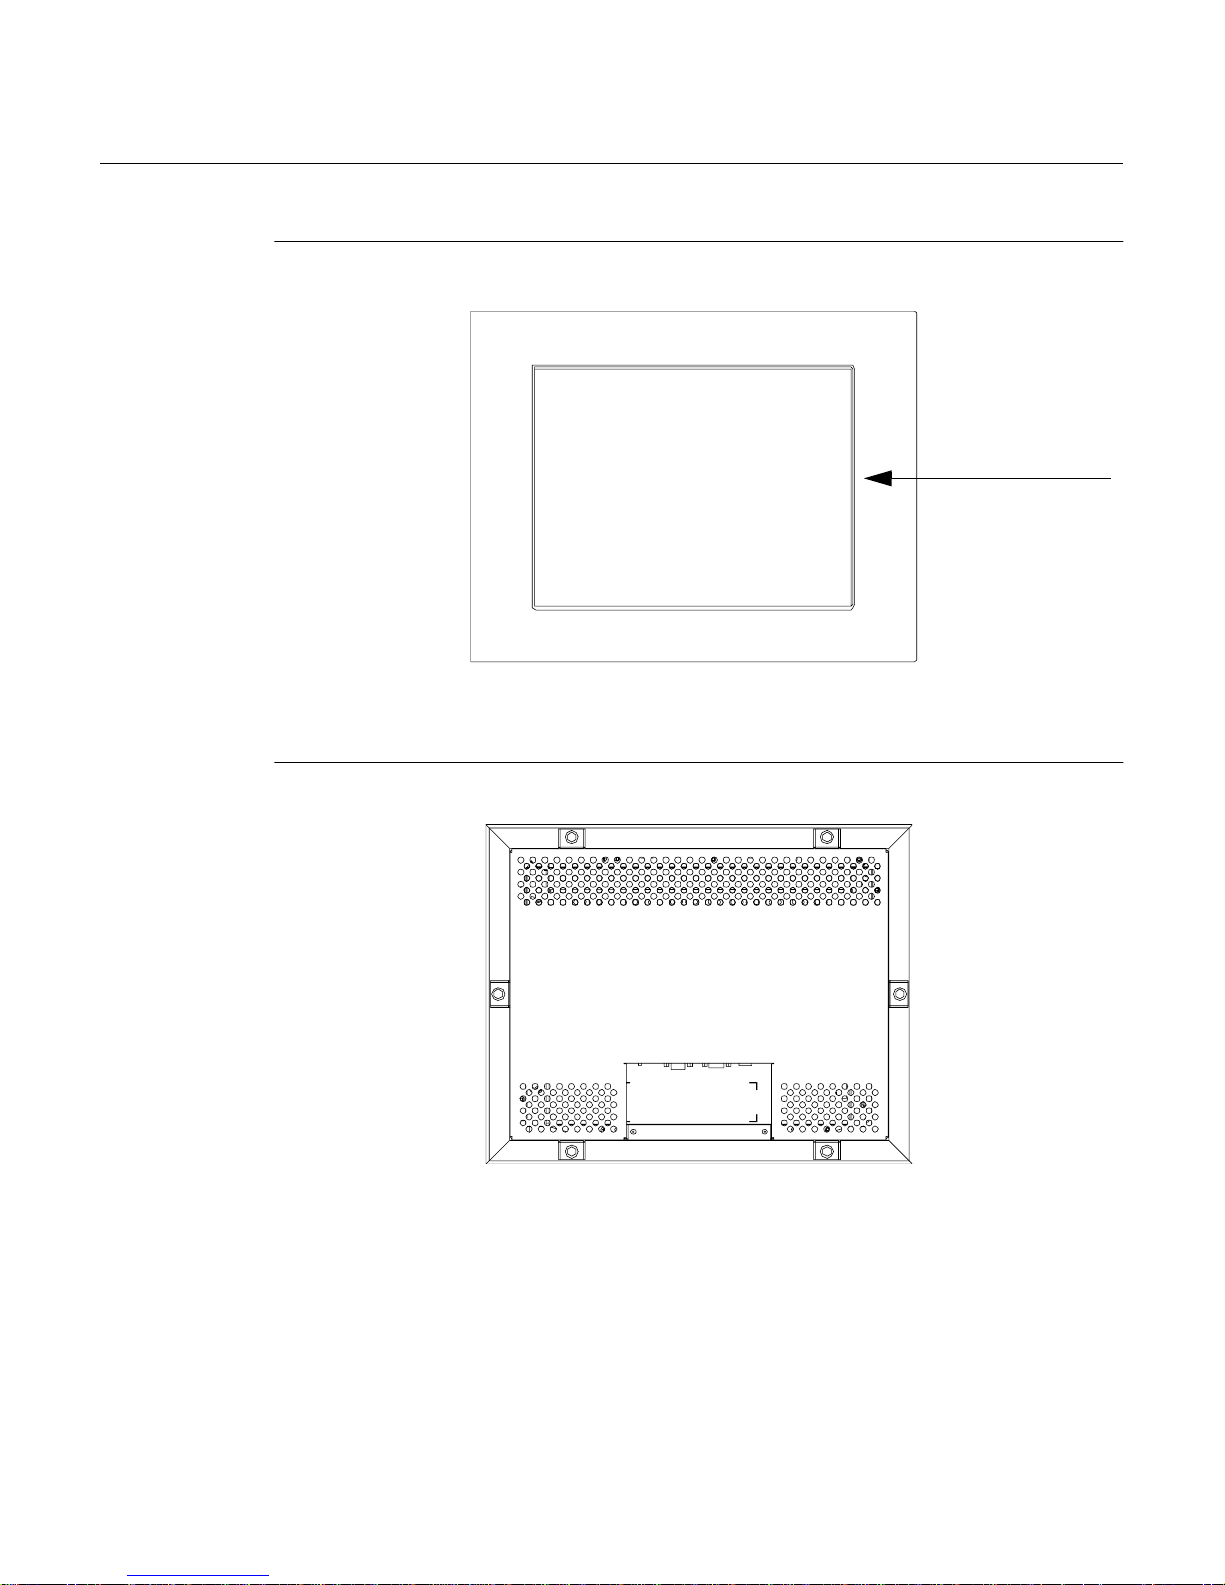
Pr oduct O vervie w
Main Unit
LCD Display
Rear View
2-5
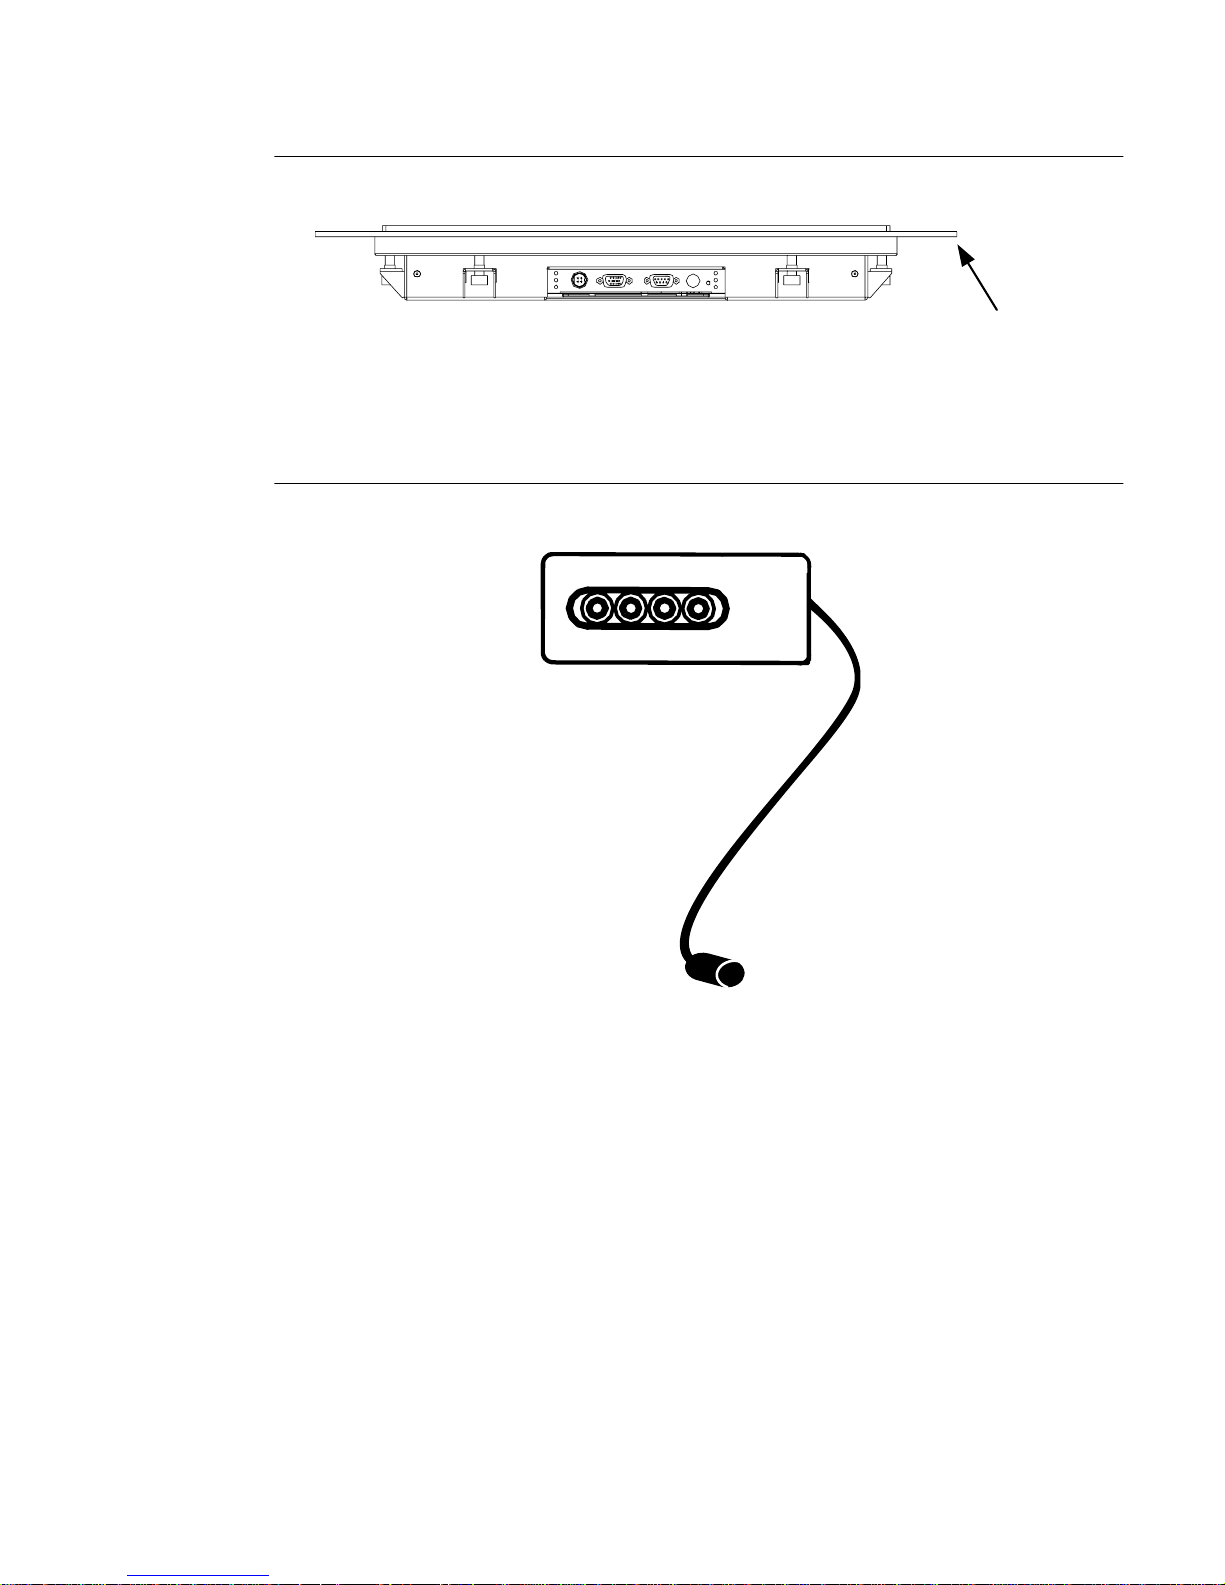
Bottom View
Remote O SD with Cable Att achment
AUTO/SEL DOWN UP MENU
Customer Panel
2-6 Elo Entuitive Touchmonitor User Guide

Mounting Your T ouchmonitor
N
OTE
:
You will need a 6mm allen socket and torque wrench (He x) to attach the mounting
brackets.
Your panel mount touchmonitor comes with 6 mounting brackets (and 6
screws). You will need 6 brackets to mount your touchmonitor. Two brackets
attach to the top and bott om and one on each side.
To mount your touchmonitor to a pa nel, follow the steps below:
1 Prepare the opening in the panel (307mm x 398.2mm/12.08" x 15.68"). See
page C-36. M ounting panel thickness must not exceed 13m m.
2 Disassemble the 6 brackets and NEMA frame.
3 Verify that your touchmonitor will clear the opening as you attempt to front
mount it. The opening will be covered by the bezel flanges.
4 Mount the touchmonitor from the front side of the opening in the supporting
panel and temporarily secure it.
5 From the back of the panel opening , slip the NEMA frame over the rear
cover. Attach the 6 brackets into the slots. Use 2 brackets on top and bottom
and 1 on each side.
6 To secure the touchmon itor, turn the screws c lockwise until a firm contact is
made with the NEMA frame. To assure a “flat” mount, screws should be
tightened “ cris-cross” and not sequentially, i.e. tighten the upper left corner
screw first th en the low e r righ t scr ew . To rqu e sc rews to 35 in lbs. (4 Nm).
2-7
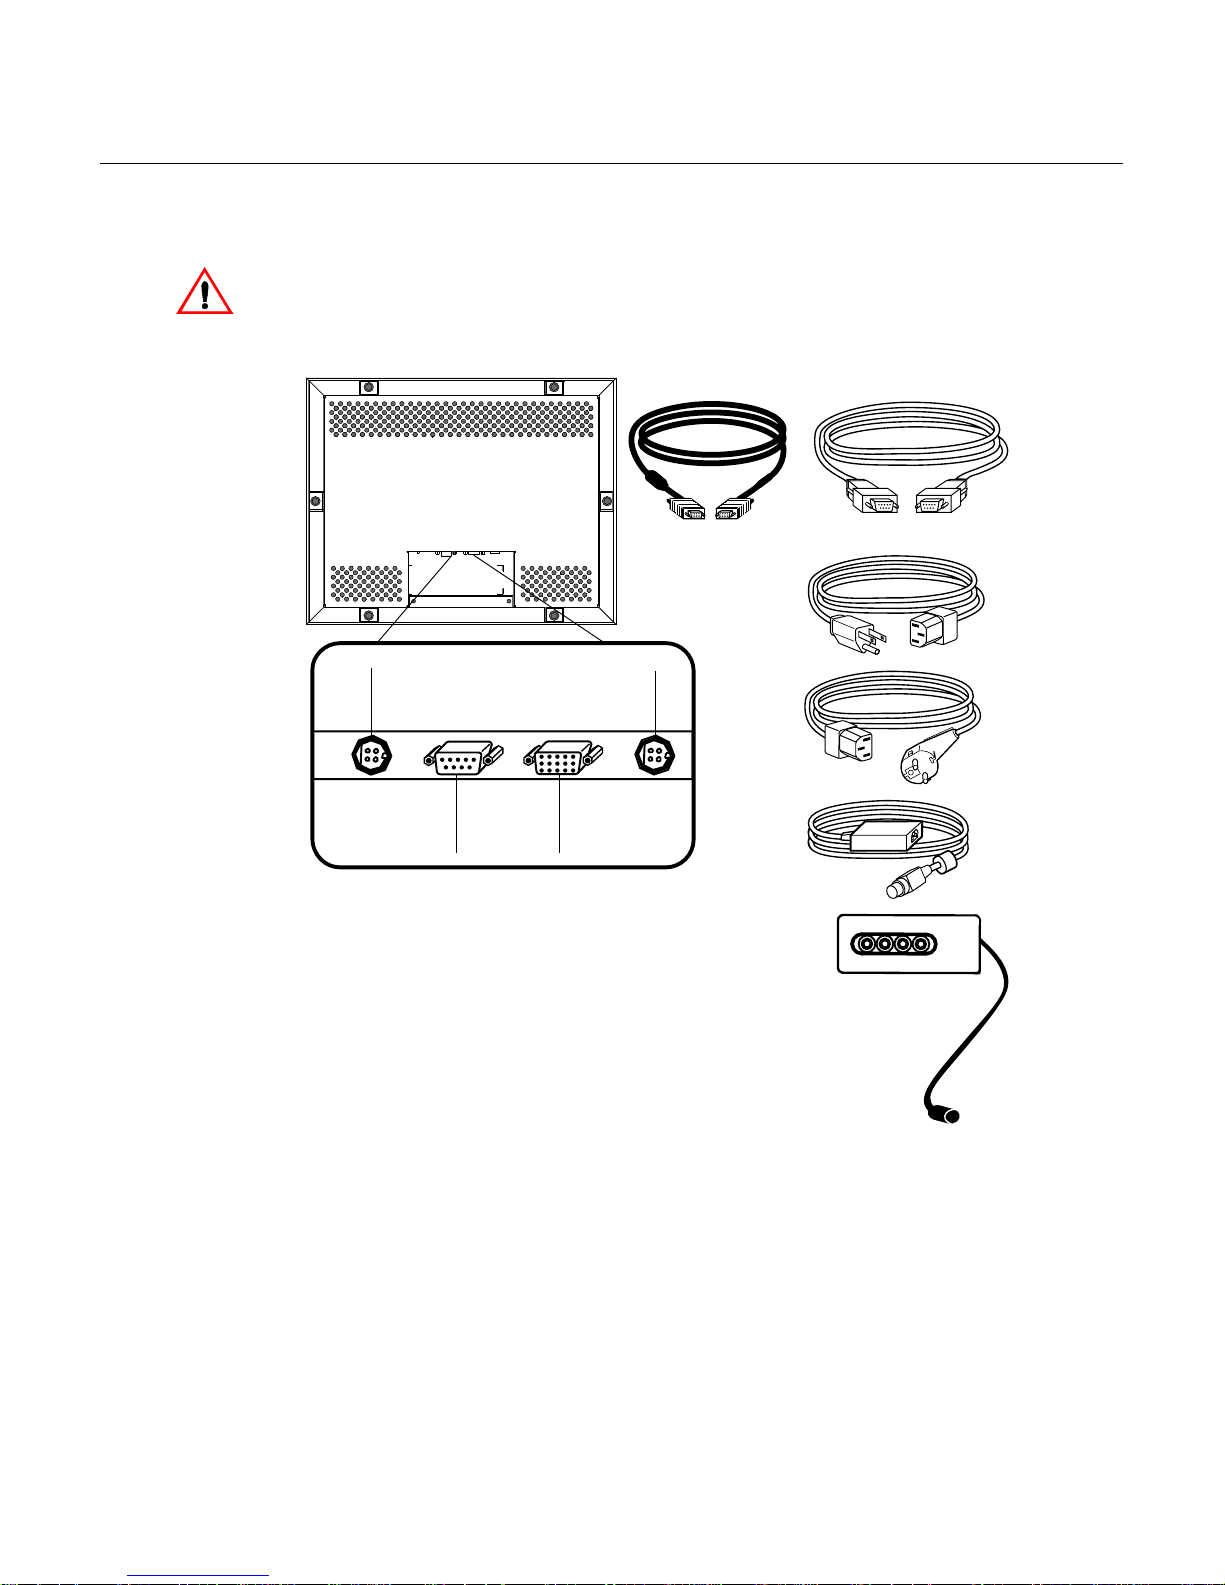
Conn ecting Your Touchmon itor
The following illustrations guide you step by step in connecting your
touchmonitor.
Before connecting the cables to your touchmonitor and PC, be sure that the computer
and the touchmonitor are t urned off.
Video cable
Serial cable
US
power cable
OSD Module connector
Serial
touchscreen
connector
Connections on underside
Power
Female 15-pin
video
connector
European
power cable
Brick
power supply
AUTO/SEL DOWN UP MENU
2-8 Elo Entuitive Touchmonitor User Guide
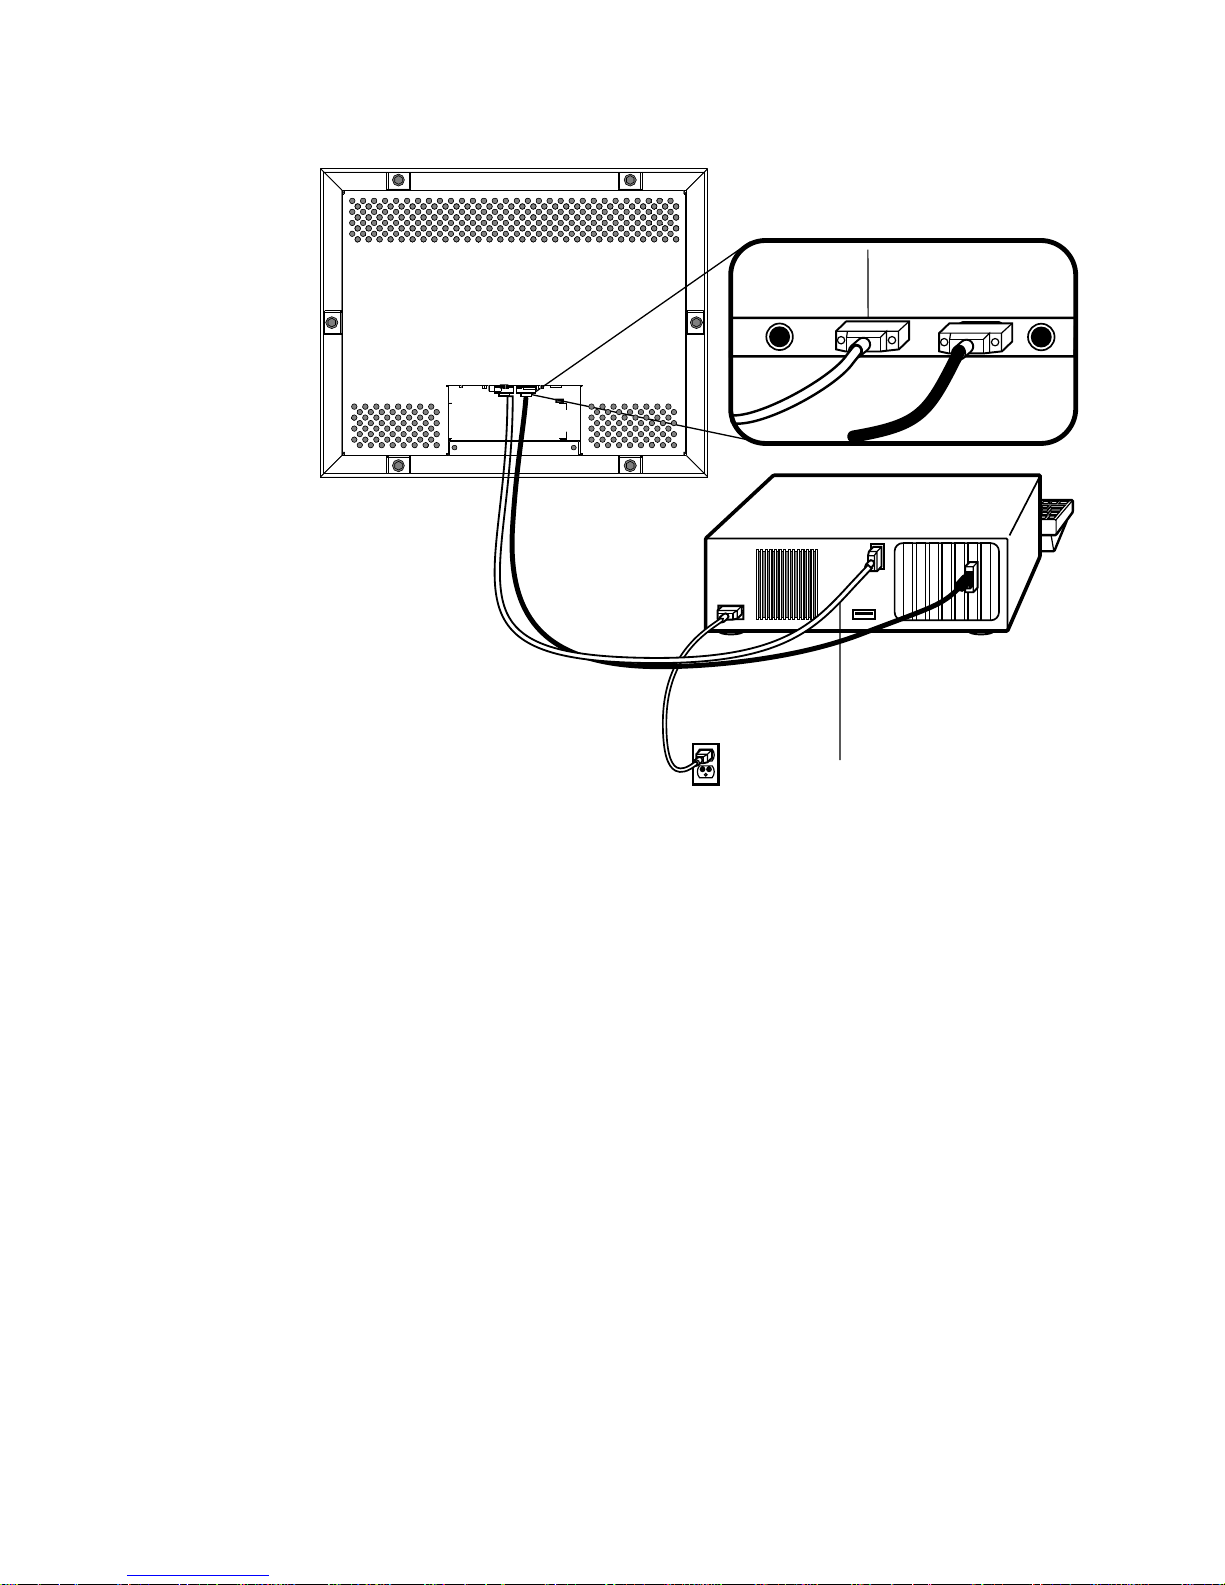
STEP 1-Connecting the Video Cable
Connections on underside
Female 9-pin serial
touchscreen
connector
Serial
touchscreen
cable
• Connect the 15-pin vide o cable (the fer rite bead end) to the video port on
your PC.
• Connect the other end of the video cable to the video connector on your
touchmonitor.
• Secure the cable to your touc hmonitor and PC by turning the screws on the
connector clo ckwise.
2-9
 Loading...