

Elo TouchSystems Elo Backpack Quick Installation Manual
Revision A
P/N E214674
www.elotouch.com
Quick Installation Guide
Elo Backpack
© 2017 Elo Touch Solutions, Inc. All rights reserved.
The information in this document is subject to change without notice. Elo Touch Solutions, Inc. and its Affiliates (collectively “Elo”) makes no
representations or warranties with respect to the contents herein, and specifically disclaims any implied warranties of merchantability or fitness for a
particular purpose. Elo reserves the right to revise this publication and to make changes from time to time in the content hereof without obligation
of Elo to notify any person of such revisions or changes.
No part of this publication may be reproduced, transmitted, transcribed, stored in a retrieval system, or translated into any language or computer
language, in any form or by any means, including, but not limited to, electronic, magnetic, optical, chemical, manual, or otherwise without prior
written permission of Elo Touch Solutions, Inc.
Elo (logo) and Elo Touch Solutions are trademarks of Elo and its Affiliates.
North America
800-ELO-TOUCH
Tel +1 408 597 8000
Fax +1 408 597 8050
EloSales.NA@elotouch.com
Europe
Tel +32 (0)16 70 45 00
Fax +32 (0)16 70 45 49
elosales@elotouch.com
Asia-Pacific
Tel +86 (21) 3329 1385
Fax +86 (21) 3329 1400
EloAsia@elotouch.com
Latin America
Tel +52 55 2281-6958
EloSales.LATAM@elotouch.com
Elo Touch Solutions Technical Support
Online self-help:
www.elotouch.com/support
1x Elo Backpack with mounting bracket attached
1x 12v DC power brick
2x AC plug adaptors
Box Contents:
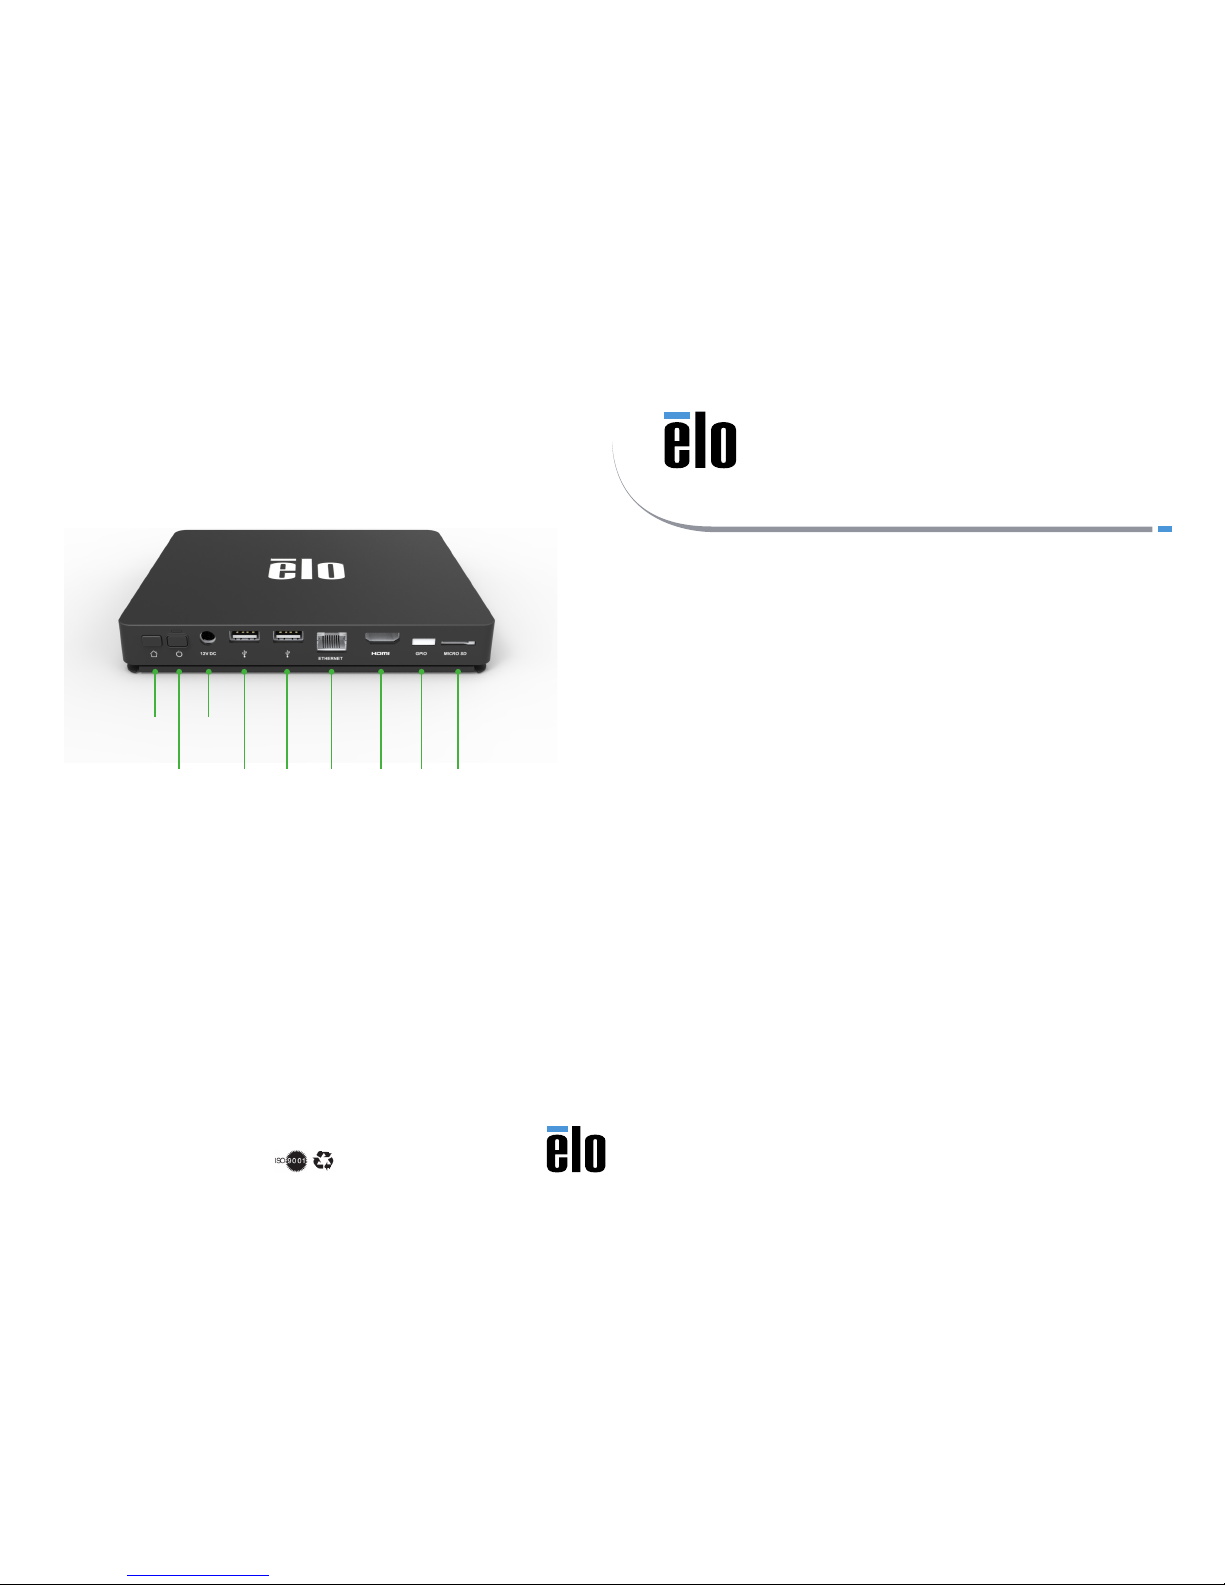
Home
Button
DV 12V
Input
Power
Button
USB
Type A
USB
Type A
Ethernet HDMI
Out
GPIO Micro SD

a. Connect 12V DC Power cable
b. Connect USB cable from Elo touch monitor to one of the USB Type A connections
c. Connect HDMI cable between Elo touch monitor and HDMI Out connection
d. Press the Power button to power on the Elo Backpack
Remove the four mounting screws on the side to access the mounting bracket holes. There
is a 75mm x 75mm and 100mm x 100mm mounting hole pattern included on mounting
bracket. Mount the bracket to a wall or desk using M4 or #8 machine/wood screws (not
included). This bracket can also be used to mount the device to the VESA mount on rear of
many Elo open-frame touch monitors.
Additional mounting bracket options available as part of accessory bracket kit P/N E802593.
IDS 02- Series
mounting brackets
Low-prole
mounting brackets
To add your device to your EloView account, go to the EloView web portal at manage.eloview.com.
After logging in, go to the ‘Devices’ page, then click the ‘add device’ button. Enter the device serial
number and a name for the device. Click ‘done’. Your device is now linked to your EloView account
and will play the assigned content in safe kiosk mode. You can also pre-set your devices in your
account. Visit www.eloview.com for details.
After powering on the Elo Backpack, the Network screen on the control panel will appear if no
wired connection is found. Set up your wireless network. Note: The control panel can be opened
any time by pressing the HOME and POWER keys simultaneously, and typing in a password. The
default password is 1elo.
Step 3 - Connect device to network
Step 1 - Optional Step for Permanent Mounting
Step 2 - Connecting device to touch monitor
Step 4 - Add device to EloView
®
 Loading...