

Page 1

- Add payment
1
module to bracket (1)
INSTALLATION INSTRUCTIONS:
E953516 KIT-EMV-INGENICO ICMP CRADLE-PAYPOINT
E002639 KIT-EMV-VERIFONE E355 CRADLE-PAYPOINT
1
- Add USB cable, route as shown.
2
QIG600028 Rev. B
VERIFONE E355
INGENICO ICMP
Screws,
2
3
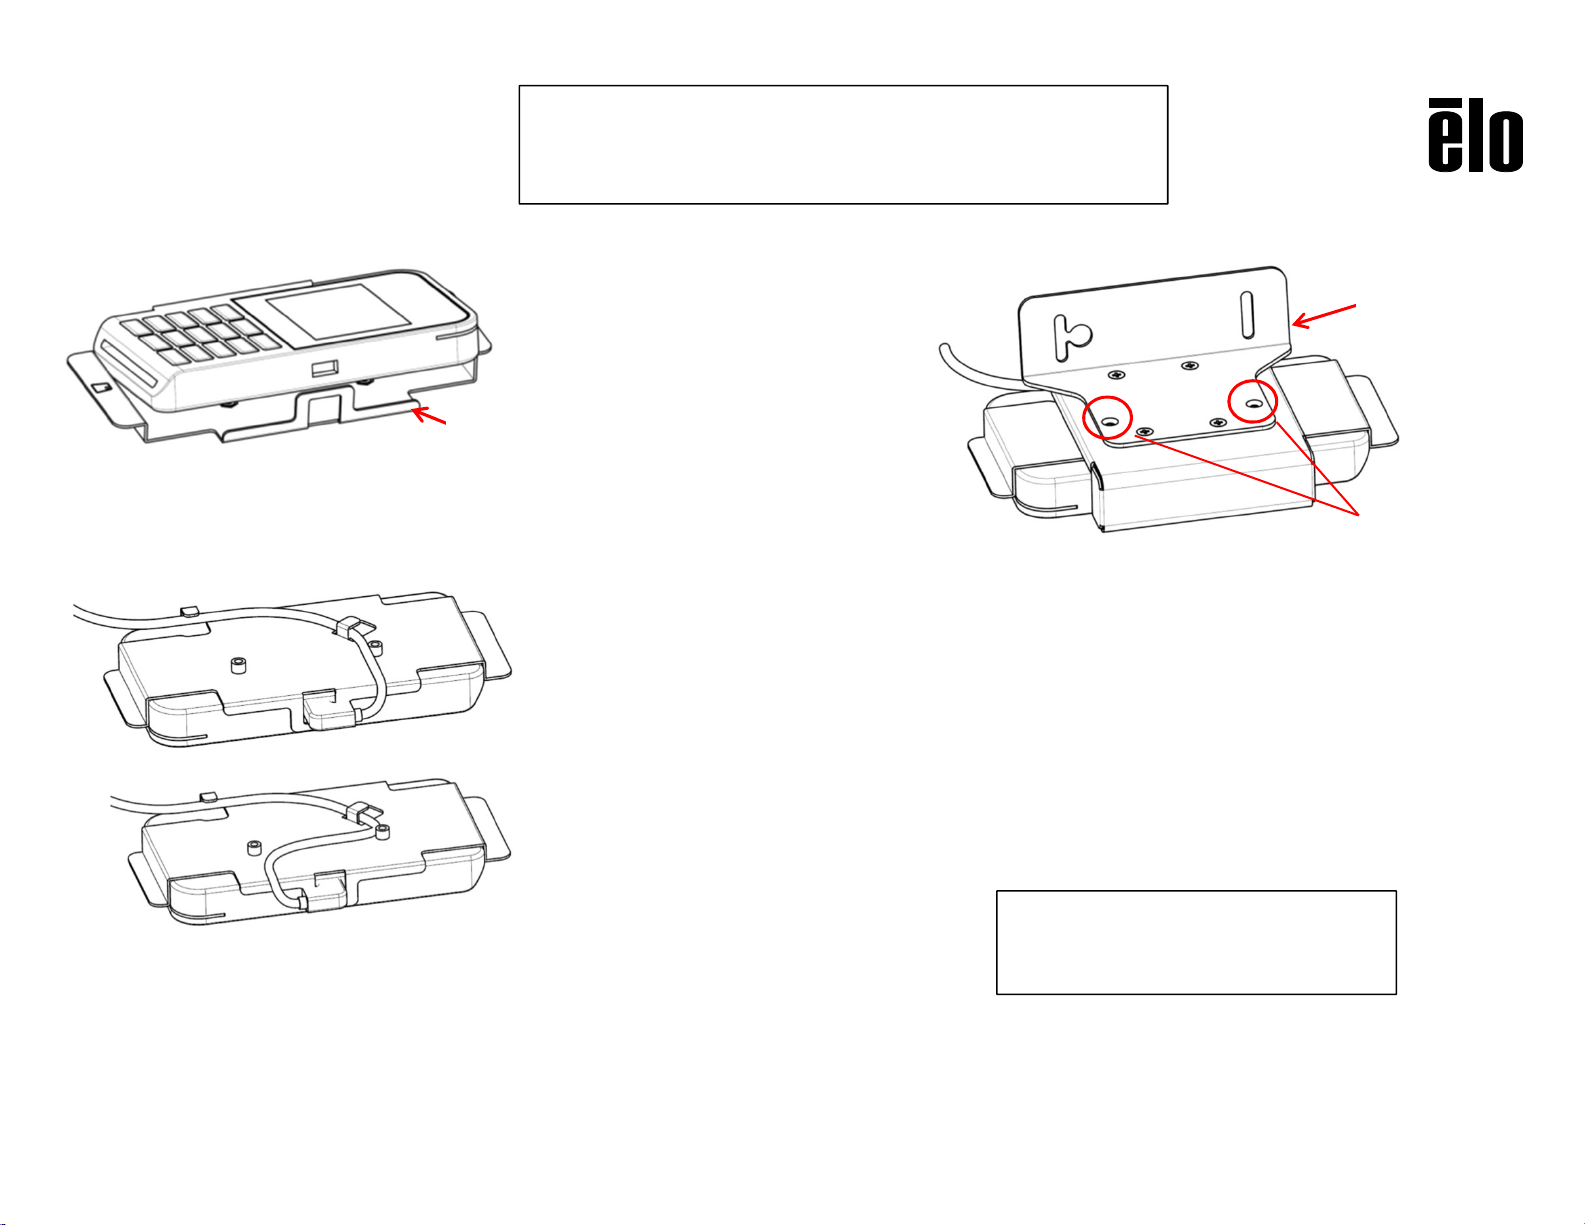
- Add payment module/bracket (1) to bracket (2)
with 2 screws from bag L.
X2
Pg.1
Page 2
INSTALLATION INSTRUCTIONS:
E953516 KIT-EMV-INGENICO ICMP CRADLE-PAYPOINT
E002639 KIT-EMV-VERIFONE E355 CRADLE-PAYPOINT
3
4
- Attach payment module assy. to
bracket (3) with 4 screws from bag G.
QIG600028 Rev. B
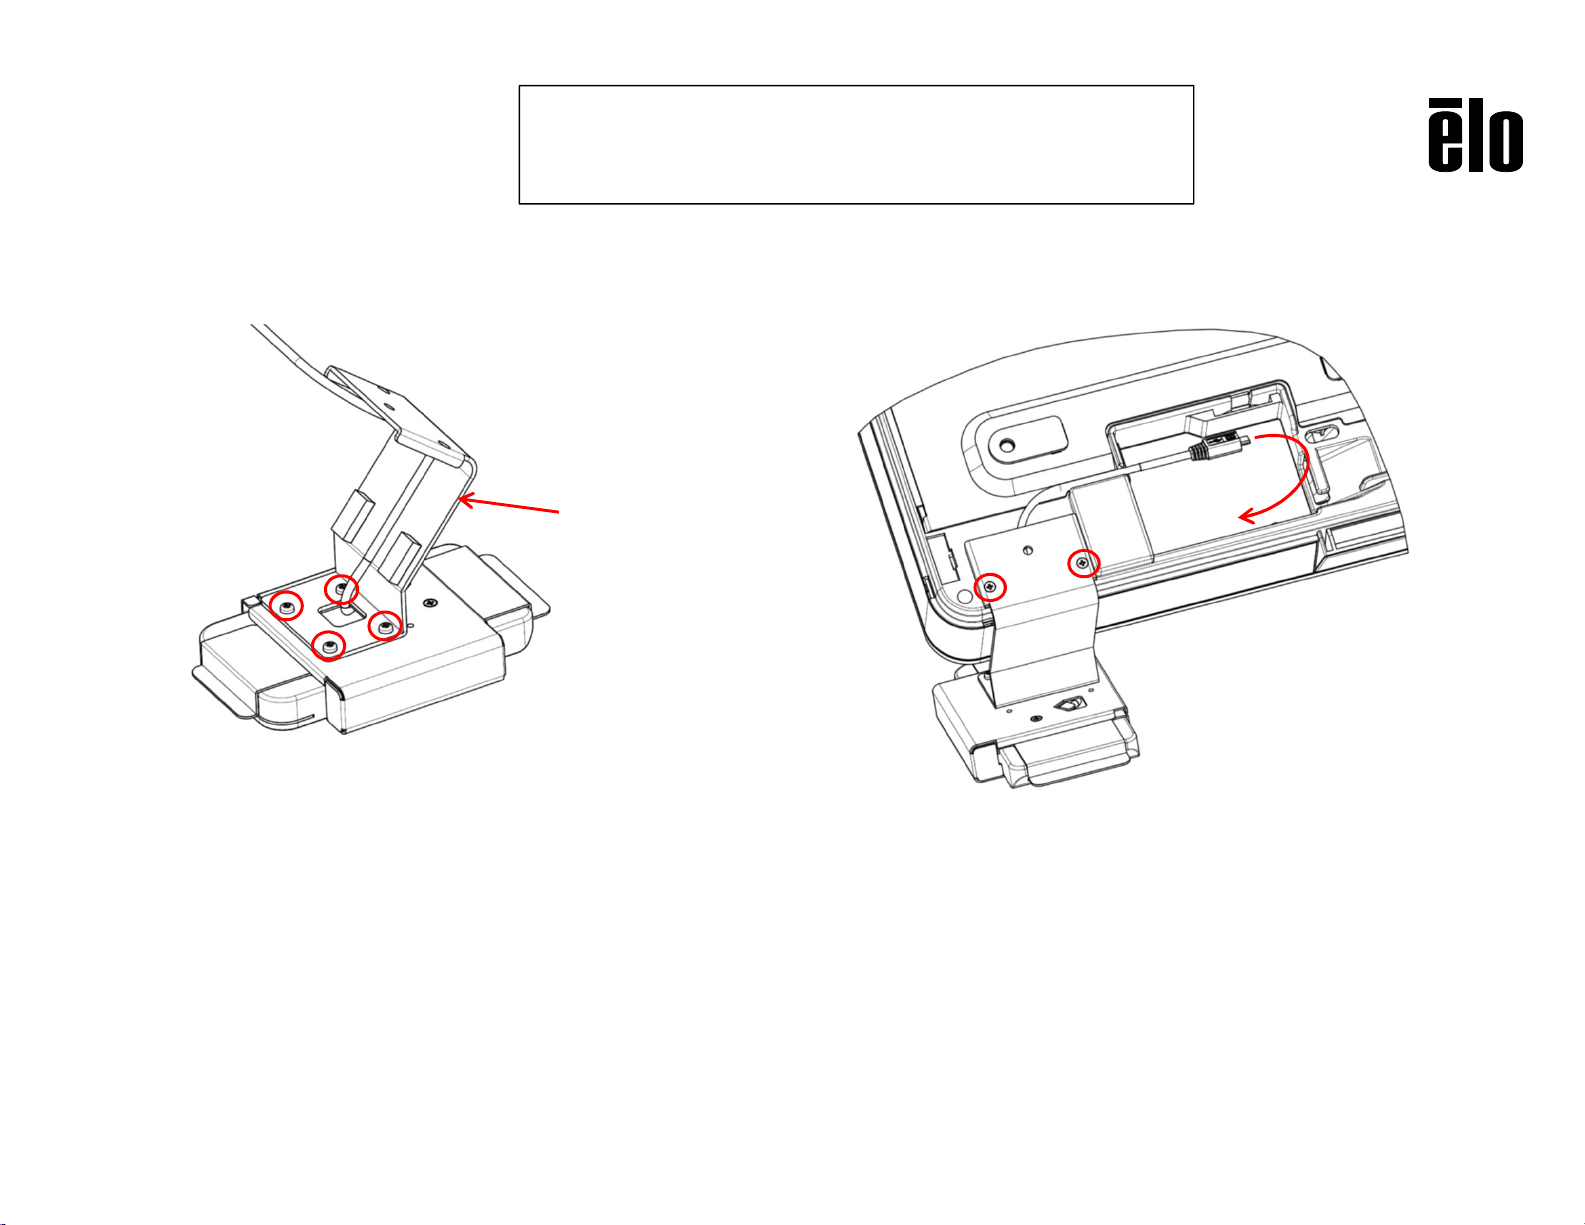
5
- Attach module + bracket (3) using 2
screws from bag K.
Attach module USB cable to computer
accessory port. Use provided USB type A
adapter where needed.
Pg.2
Page 3
- Add payment
1
module to bracket (1)
INSTALLATION INSTRUCTIONS:
E200788 KIT-EMV-INGENICO ICMP CRADLE-X/IDS02
E201363 KIT-EMV-VERIFONE E355 CRADLE-X/IDS02
2
1
Screws,
X2
3
- Add payment module/bracket (1) to bracket (2)
with 2 screws from bag C.
VERIFONE E355
2
- Add USB cable, route as shown.
10”/15”/22” landscape = short cable.
15”/22” portrait = long cable.
QIG600028 Rev. B
INGENICO ICMP
For X-series, see pg. 2.
For IDS-series, see pg. 3.
Pg.1
Page 4

USB
INSTALLATION INSTRUCTIONS:
E200788 KIT-EMV-INGENICO ICMP CRADLE-X/IDS02
E201363 KIT-EMV-VERIFONE E355 CRADLE-X/IDS02
X-series
3
L
QIG600028 Rev. B
- Attach module USB cable to computer
4
accessory port.
Attach bracket (3) using 2 screws from bag A.
- Attach payment module assy. to
5
bracket (3) with 2 screws from bag D.
(Partially attach L screw first and slide
on module to aid assy.).
Pg.2
Page 5

USB
- Attach module USB cable to computer
6
accessory port.
Attach bracket (3) using 2 screws from bag A.
INSTALLATION INSTRUCTIONS:
E200788 KIT-EMV-INGENICO ICMP CRADLE-X/IDS02
E201363 KIT-EMV-VERIFONE E355 CRADLE-X/IDS02
IDS-series
8
- Remove two existing screws from
IDS back-cover (green circles).
Attach bracket (5) using 2 screws from
4
5b
5
bag H.
Add one screw (5b) from bag A.
L
QIG600028 Rev. B
7
- Attach payment module assy. to
bracket (4) with 2 screws from bag D.
(Partially attach L screw first and slide
on module to aid assy.).
Pg.3
Page 6

INSTALLATION INSTRUCTIONS:
E200465 KIT-EMV-INGENICO ICMP CRADLE-I/M
E201088 KIT-EMV-VERIFONE E355 CRADLE-I/M
2
1
1
- Add payment
module to bracket (1)
2
- Add USB cable, route as shown.
10”/15”/22” landscape = short cable.
15”/22” portrait = long cable.
VERIFONE E355
INGENICO ICMP
- Add payment module/bracket (1) to bracket (2)
3
with 2 screws from bag C.
(Use table or box edge
to aid assembly)
- Attach payment module assy. to
4
bracket (3) with 2 screws from bag D.
(Partially attach L screw first and slide
on module to aid assy.).
Screws,
X2
3
L
Screws,
X2
QIG600028 Rev. B
Pg.1
Page 7

INSTALLATION INSTRUCTIONS:
E200465 KIT-EMV-INGENICO ICMP CRADLE-I/M
E201088 KIT-EMV-VERIFONE E355 CRADLE-I/M
For display in landscape
orientation, see pg. 3 -
QIG600028 Rev. B
For display in portrait
orientation, see pg. 5 -
Pg.2
Page 8

- Attach needed cables to computer / display
6
(eg. pwr., video, USB,).
Replace L/R cable doors.
INSTALLATION INSTRUCTIONS:
E200465 KIT-EMV-INGENICO ICMP CRADLE-I/M
E201088 KIT-EMV-VERIFONE E355 CRADLE-I/M
8
screws from bag A.
4
- Attach bracket (4) using 2
7
- Attach module USB cable to
computer accessory port.
QIG600028 Rev. B
Bracket (5) up = 2002L
Down = ESY22i, ESY15i, 1502L
8b
- Add bracket (5) to bracket (4)
using 2 screws from bag J.
For models 2002L, 1502L, ESY22i,
ESY15i.
* bracket (5) is not required for
thinner edge product – 1302.
5
Pg.3
Page 9

INSTALLATION INSTRUCTIONS:
E200465 KIT-EMV-INGENICO ICMP CRADLE-I/M
E201088 KIT-EMV-VERIFONE E355 CRADLE-I/M
6
QIG600028 Rev. B
9
- Attach bracket (3) assy. to VESA mount with 2 M4 flat head screws*.
For all systems larger than 15”, attach bracket (6) with 2 M4 flat head
screws* (red arrows).
*Use screws in bag E for 10”/15” systems, bag F for systems larger than 15”.
Attach bracket (3) assy. to bracket (4) or (5) using screw(s) from bag A
(red circles). One screw in mid. hole for ESY15/22i.
Use 4 - M4 threaded holes next to screws in VESA area to mount whole
system to stand / wall bracket (green arrows).
Pg.4
Page 10

10
- Attach needed cables to computer /
display (eg. pwr., video, USB,).
Replace L/R cable doors.
INSTALLATION INSTRUCTIONS:
E200465 KIT-EMV-INGENICO ICMP CRADLE-I/M
E201088 KIT-EMV-VERIFONE E355 CRADLE-I/M
4
USB
- Attach bracket (3) assy. to VESA mount with 4 M4 flat
11
head screws* (red arrows).
*Use screws in bag E for 10”/15” systems, bag F for systems
larger than 15”.
Attach module USB cable to computer accessory port.
Attach bracket (4) using 2 screws from bag A.
(red circles).
Use 4 - M4 threaded holes next to screws in VESA area to
mount whole system to stand / wall bracket (green arrows).
QIG600028 Rev. B
Pg.5
 Loading...