

Page 1
Quick Installation Guide
i-Series Interactive Signage
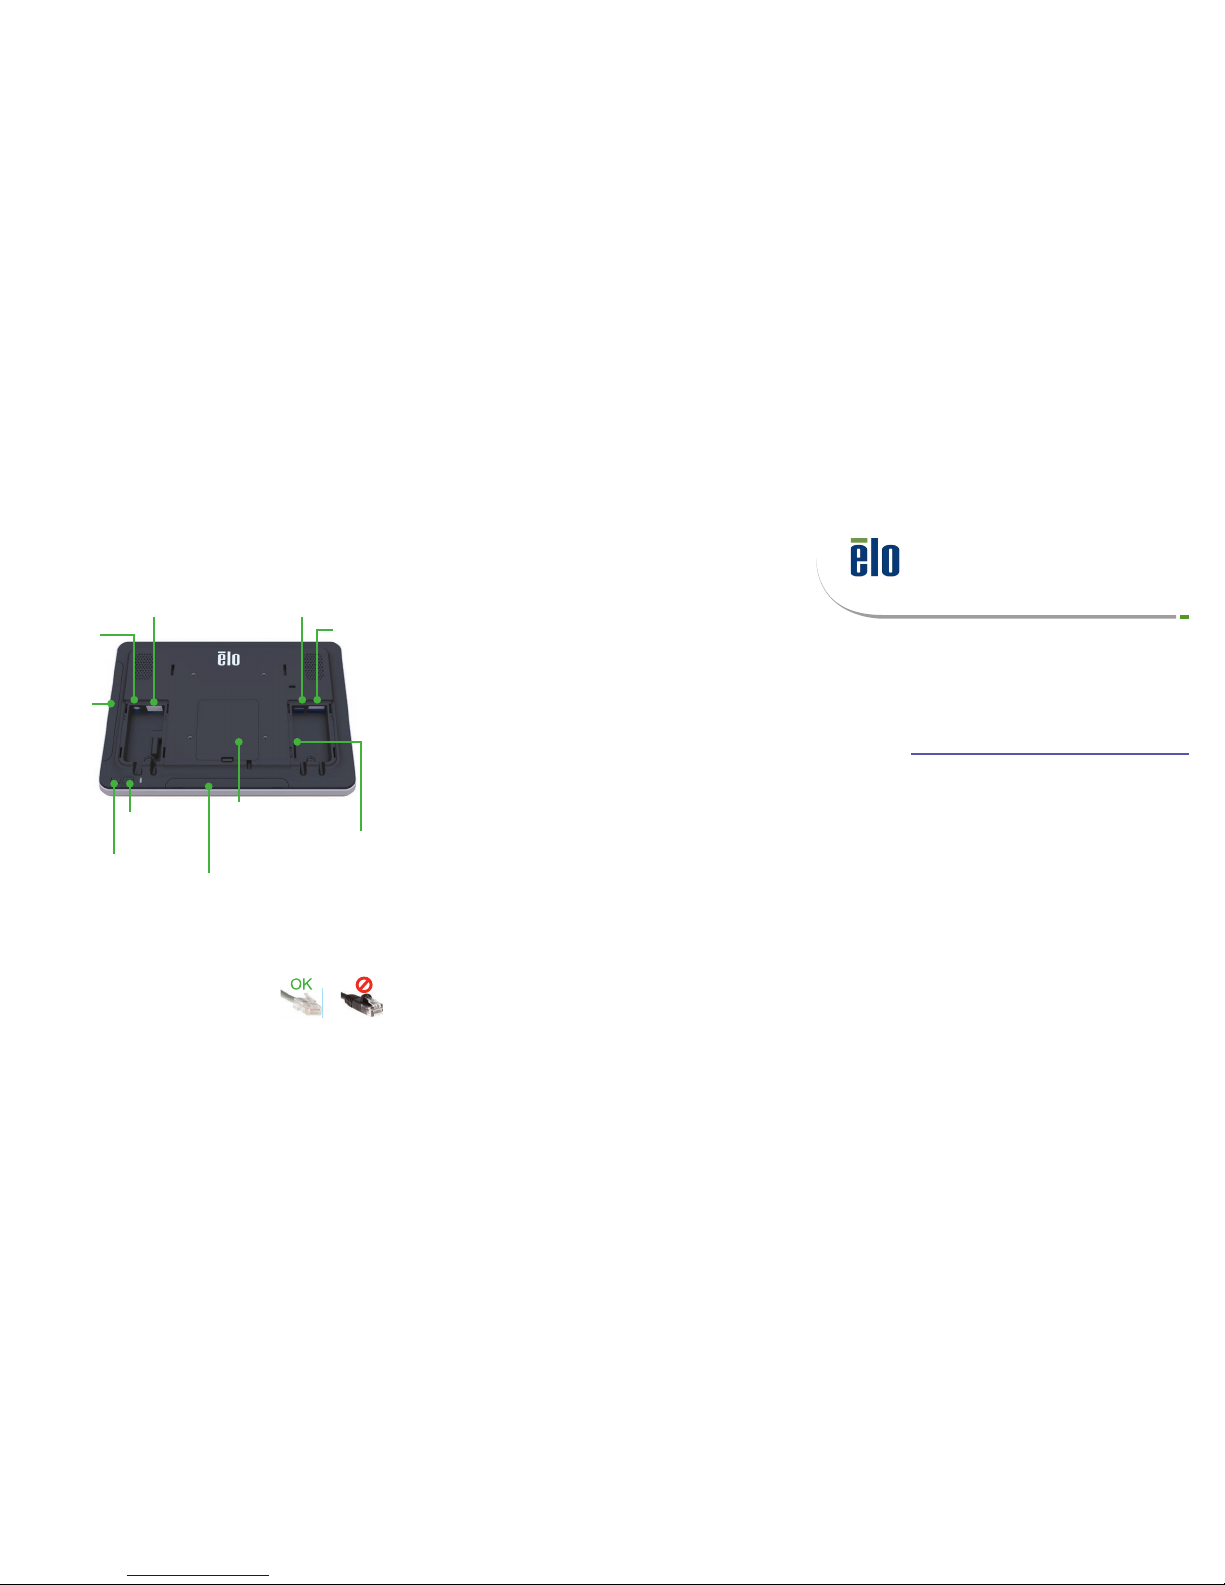
Audio Out/
Microphone In
Android Home
Button
Peripheral Bay
USB Type A
Micro SD
Slot
Micro-HDMI Out
Peripheral connections
NOTE:
This device requires non-booted ethernet cables.
The boots interfere with the power connector and
do not t under the cable cover.
Contents
1x i-Series All-in-One Touchcomputer
1x US power cable
1x EU power cable
2x Cable clamps with mounting screws
Power
Button
Peripheral Bay
Ethernet
3G/4G Expansion Bay
and
GPIO Connections
Boot Style
Non-Boot Style
Page 2

Remove the left side cable cover by sliding downward
Connect the power cable. The system will power on automatically
when plugged in.
Secure the power cable using the included cable clamp and screw and
replace the cable cover. The system must be connected to a network for
software setup. Connect an ethernet cable now or setup wi in step 5.
The device is now ready to mount in your environment. A selection of wall,
desk, shelf, and oor mount options is available at www.elotouch.com
To add your device to your EloView account, go to EloView web portal at manage.eloview.com.
After logging in, go to the ‘Devices’ page, then click on the ‘Add Device’ button. Enter the device
serial number and a name for the device then click ‘Done’. Your device is now linked to your
EloView account and will play the assigned content in safe kiosk mode.
After powering on the I-Series Display, the Network screen on the control panel will appear if
no wired connection is found. Set up your wireless network. Note: The control panel can be
opened any time by pressing and holding the HOME and POWER button simultaneously and
typing in a password. The default password is 1elo.
1 3
5
2 4
6
 Loading...