

Page 1
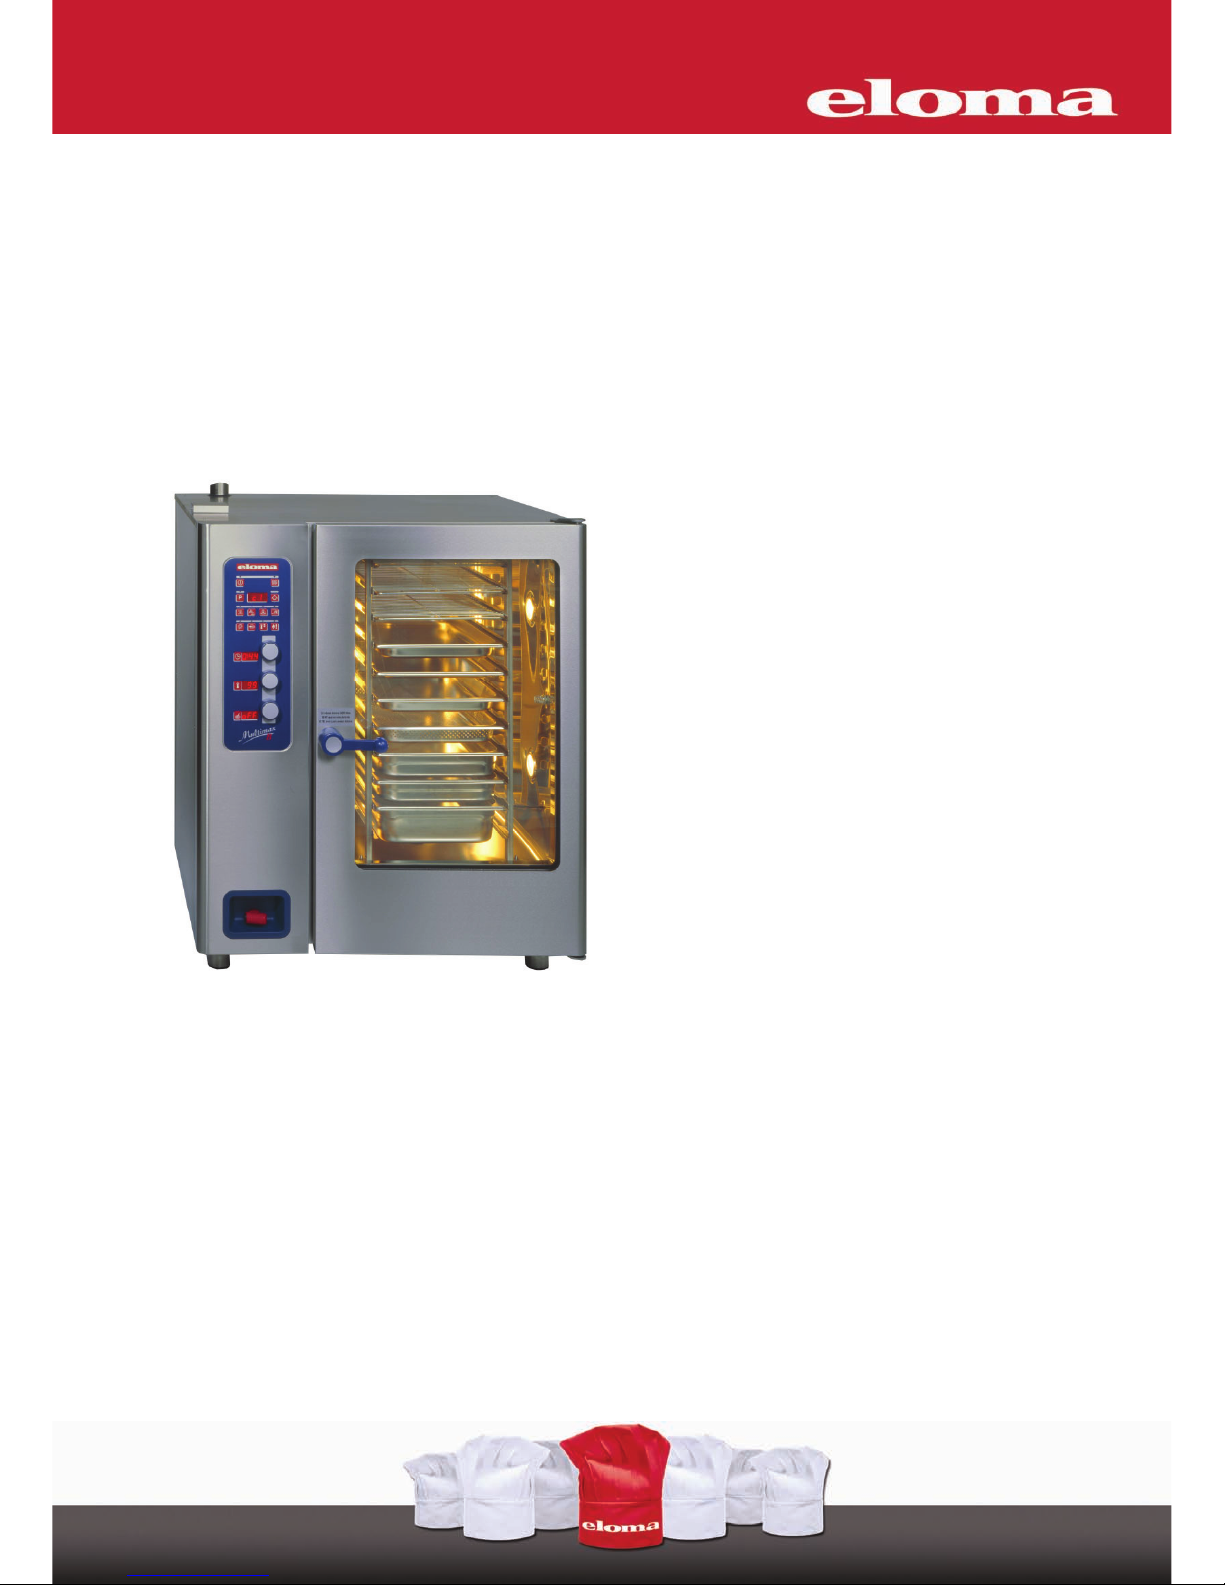
2SHUDWLRQ0DQXDO
&RPEL6WHDPHU
0XOWLPD[
Page 2

Page 3

Dear customer,
You have chosen an Eloma combi-steamer.
Thank you for your confidence.
These operation manual apply to Eloma’s combi-steamer Multimax electrical and gas appliances.
Please read the installation and operating instructions in full before starting up the appliance and make sure to
pay particular attention to the safety information.
They contain important information on correct installation and operation.
This unit may only be used for preparing food in commercial kitchens. Every other usage is against definition and
therefore dangerous.
For information and tips please contact:
Eloma GmbH . Innovative Koch- & Backtechnik
82216 Maisach / Germany Otto-Hahn-Str. 10. Tel.: +49 (0) 8141 395-0 Fax: +49 (0) 8141 395-130
For our cooking forum and user tips, visit our website at www.eloma.com.
User hotline: +49 (0) 180 / 5 22 42 71
Service
You can reach us practically around the clock, 7 days a week, 365 days a year:
Your service hotline: +49 (0) 180 / 52 24 27 2
For information on liability for material defects and warranty conditions, please consult our
general terms and conditions of business (T&C).
Eloma GmbH D-82216 Maisach
Appliance model:.............................
Appliance Nr.:..................................
Dealer: Installer:
Date:………………… Installed on:……………….
Page 4

bed_500992_mab_g_1v5_en
2
Operation Manual
Electro and Gas Combi-Steamers
Multimax A / Multimax B
6-11, 10-11, 12-21, 20-11, 20-21
Table of contents
1. Safety information ....................................................................................................................... 4
2. Control panel and functional description .................................................................................... 7
2.1
Control panel Multimax A 6-11, 10-11, 20-11, ............................................................ 7
2.2 Control panel Multimax B 6-11, 10-11, 12-21, 20-11, 20-21 ...................................... 8
2.3 Control panel Multimax B Gas 6-11, 10-11, 12-21, 20-11, 20-21 .............................. 9
2.4 Functional description of operating elements ............................................................. 10
2.5 Selecting / changing the multifunction key assignment .............................................. 13
3. Active Temp (only with Multimax B)............................................................................................ 14
4. Starting the Multimax ......................................................................................................... ......... 15
4.1 Input of operating data and start with only one cooking mode ................................... 15
4.2 Combitronic® combination of different cooking modes ............................................. 17
4.3 Core temperature control ............................................................................................ 18
4.4 Function: Delay start programming ............................................................................ 18
4.5 End of operation .......................................................................................................... 18
5. Program input and storage ......................................................................................................... 19
5.1 How to call and start an existing program “P” ? ......................................................... 19
5.2 Fast storage................................................................................................................. 19
5.3 How to enter and store a new program ? .................................................................... 20
5.4 How to change an existing program ? ......................................................................... 20
5.5 How to call, change and store individual steps of a program ..................................... 21
5.6 How to delete programs and program steps ............................................................... 21
6. HACCP ......................................................................................................................... .............. 22
6.1 HACCP Option only Multimax B models ..................................................................... 22
6.2 Printing of protocols ..................................................................................................... 22
6.3 Printed protocol in ° C ................................................................................................. 23
7. Cleaning the cooking chamber ................................................................................................... 24
7.1
Autoclean – Automatic self-cleaning ........................................................................... 24
7.2 Operation ..................................................................................................................... 25
7.3 Delay start programming ............................................................................................. 26
7.4 Units without Autoclean ............................................................................................... 27
7.5 Cleaning and maintenance ......................................................................................... 28
8.
Communication ProConnect Combi steamer ........................................................................ 30
8.1 Start up communication ProConnect Combi steamer ............................................ 30
9 Adjustment of operational parameters ........................................................................................ 31
9.1 Multimax A ................................................................................................................... 31
9.2 Adjusting the operating parameters Multimax B, Multimax B Gas .................... 32
10. Valuable information ................................................................................................................... 33
10.1 Error Message ............................................................................................................. 33
10.2 Trouble Shooting ......................................................................................................... 34
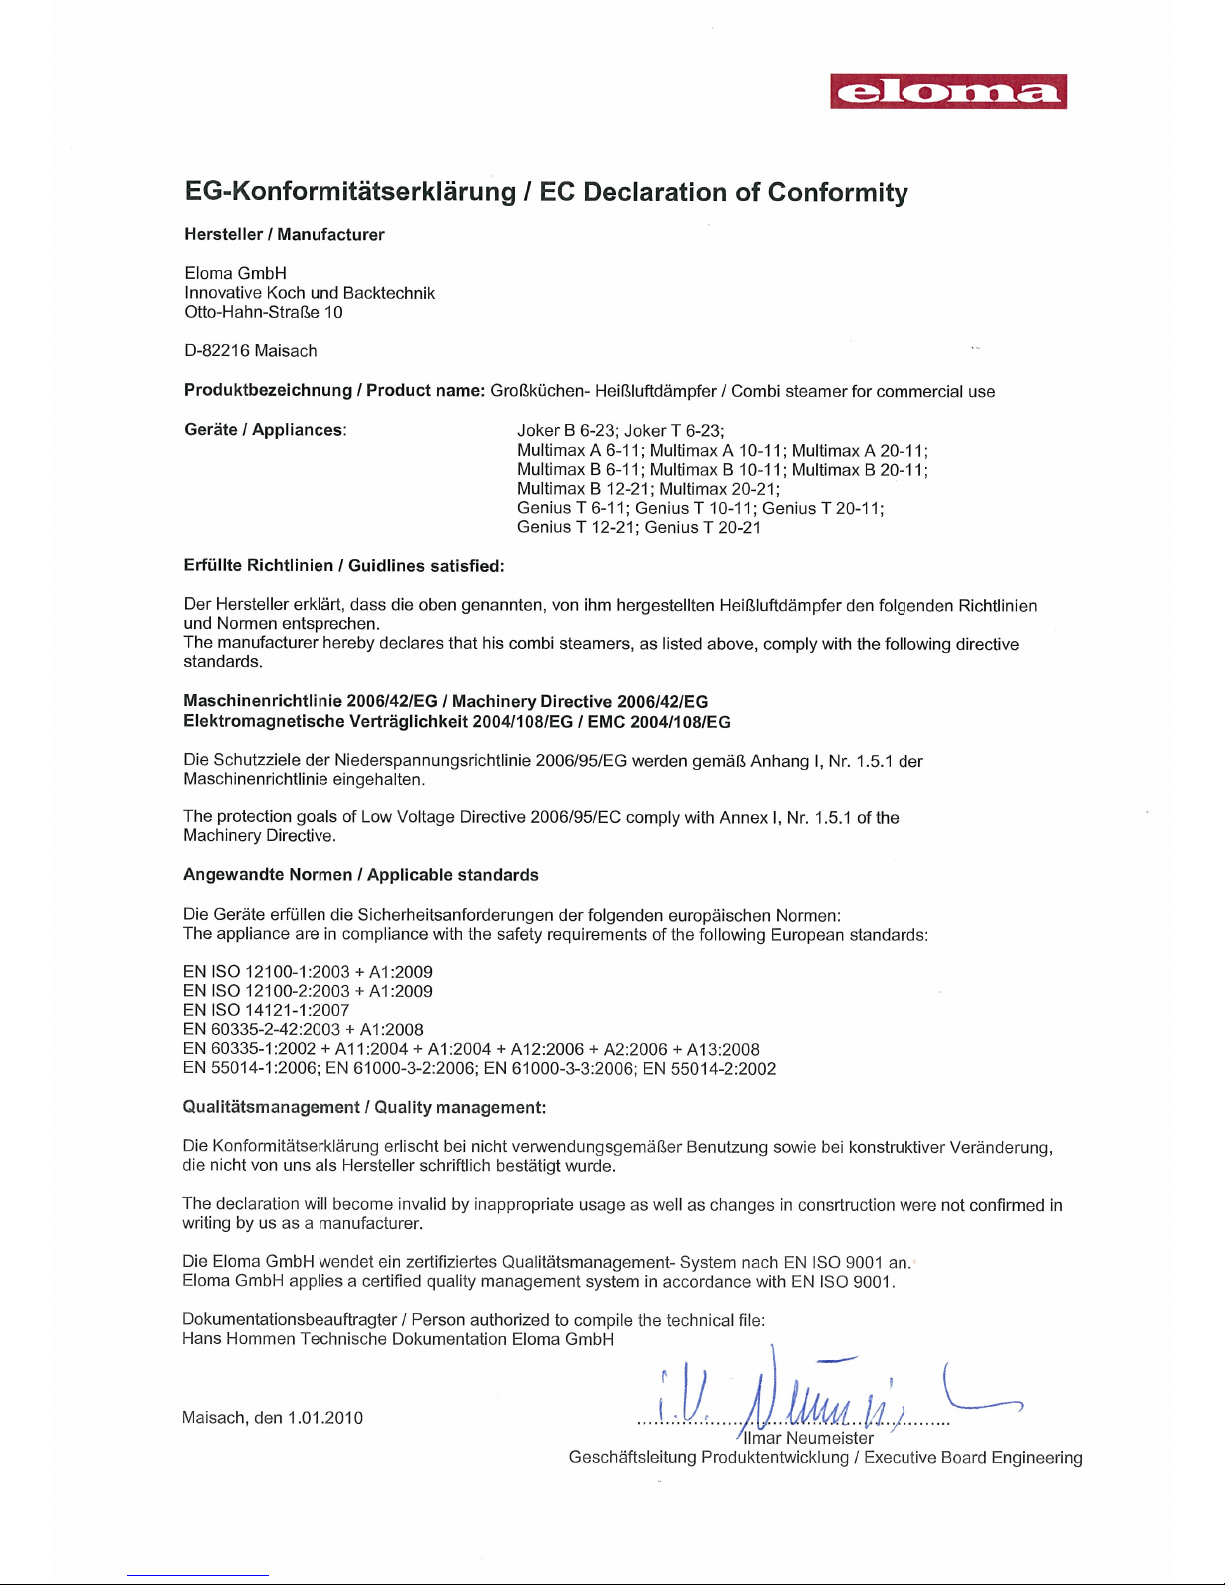
11. EC Declaration of Conformity electro appliance ......................................................................... 35
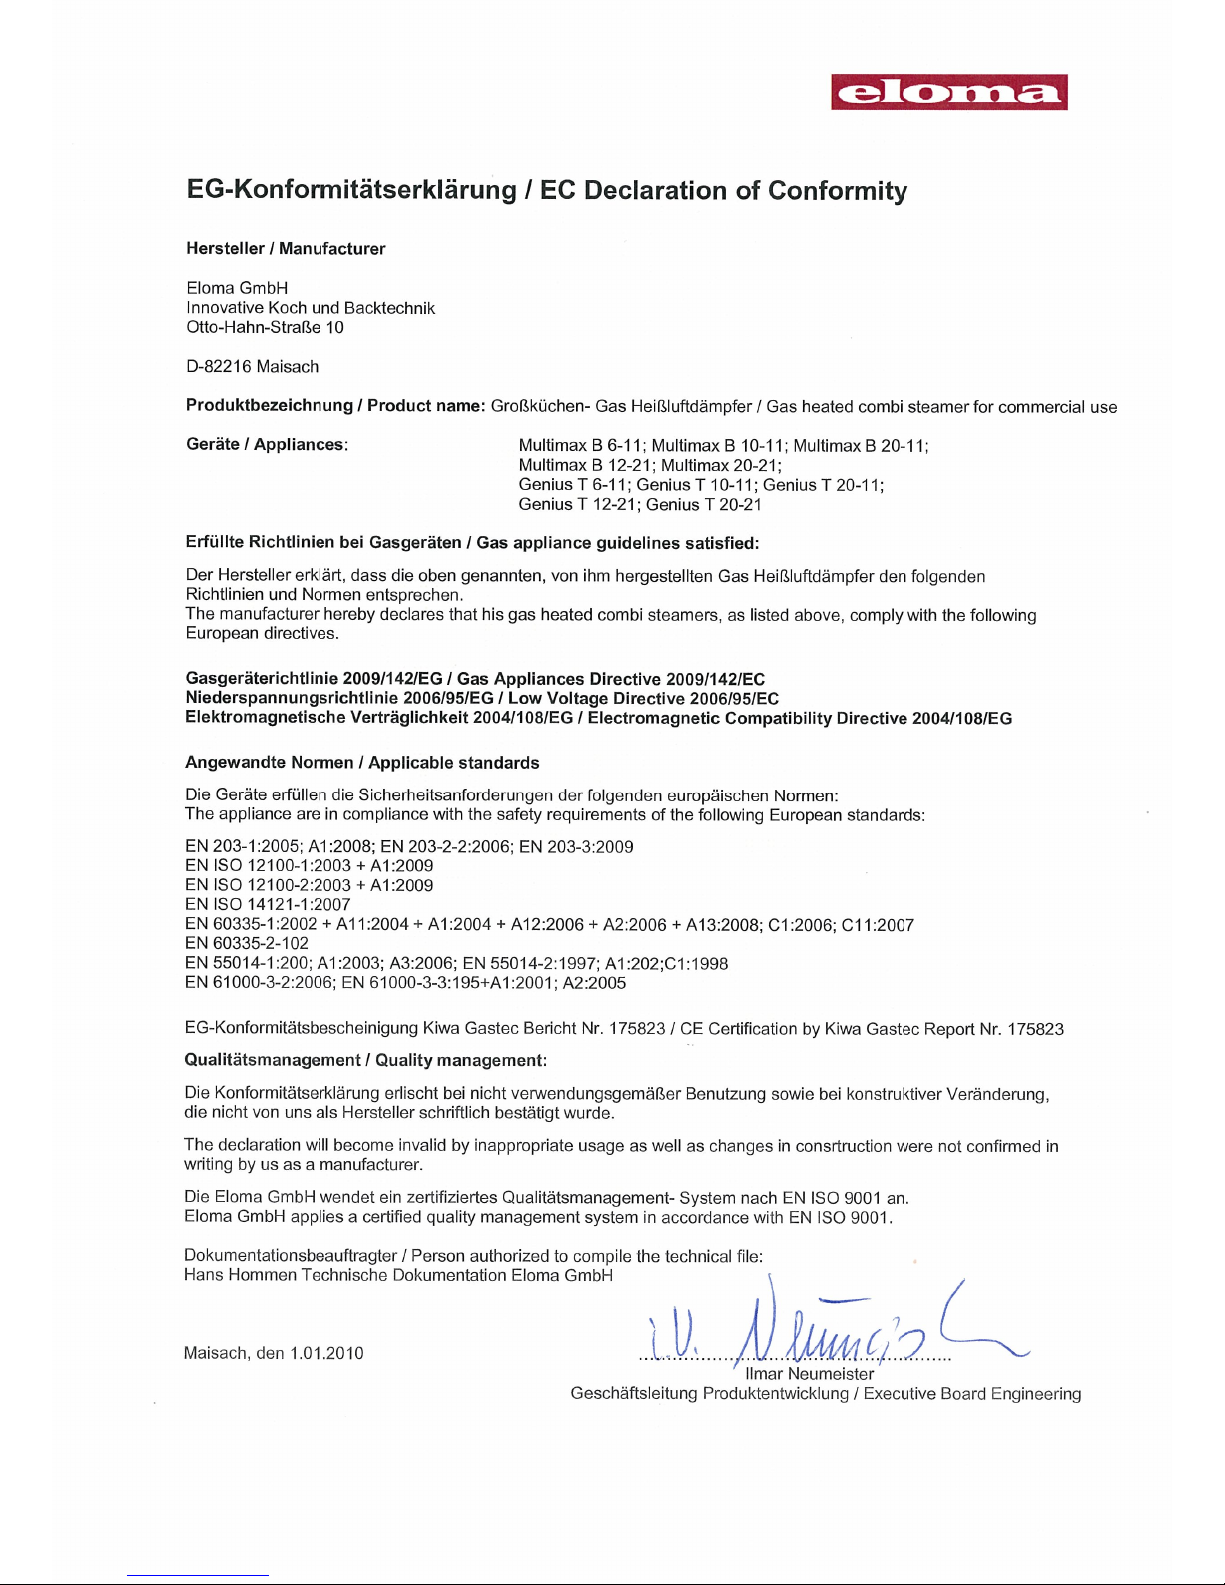
12. EC Declaration of Conformity gas appliance .............................................................................. 36
Article No.500992
Version 1.5 9/2010
Page 5

bed_500992_mab_g_1v5_en
3
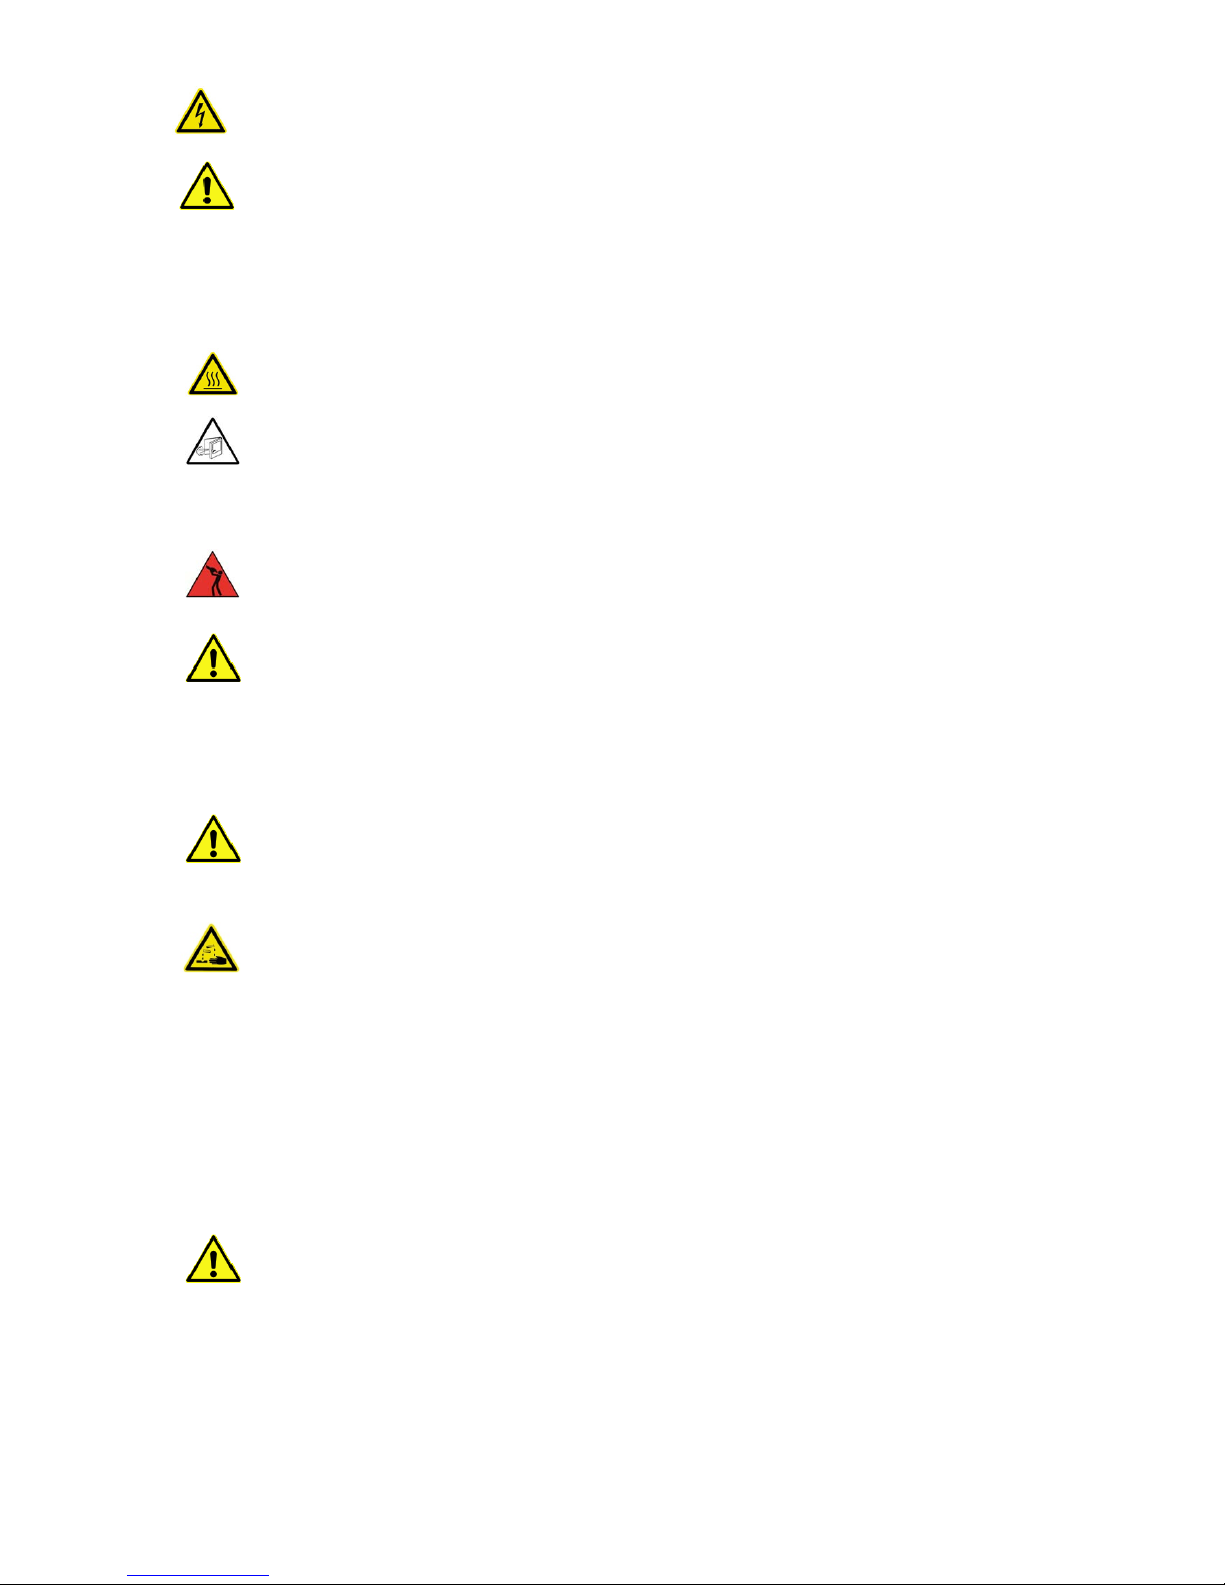
Pictograms/symbols used
Danger! Warning! Attention!
Immediate dangerous situation,
that can endanger severe injury
or death.
Possibly dangerous situation,
that possibly can endanger severe
or death.
Possibly dangerous situation,
that can endanger minor injury.
Caustic substances
Risk of explosion
Caution: Risk of burns
Caution: Hot steam
Caution: Hot liquid
Risk of fire
Warning: Dangerous electrical voltage
Page 6
bed_500992_mab_g_1v5_en
4
1. Safety information
- Installing the appliance incorrectly, making incorrect settings on it or modifying
it can lead to damage, injury or even death.
- Read the installation and operating instructions for the combi steamer through carefully before starting it up.
Use for intended purpose
- The appliance shall only be used for its intended purpose, namely the professional
preparation of food.
- Eloma combi steamers are designed for use in commercial environments.
Method of operation
- The combi-steamer Multimax offers every possibility to experience modern professional cooking technology.
- Use fresh or convenience products and select for every product the best possible cooking cabinet climate.
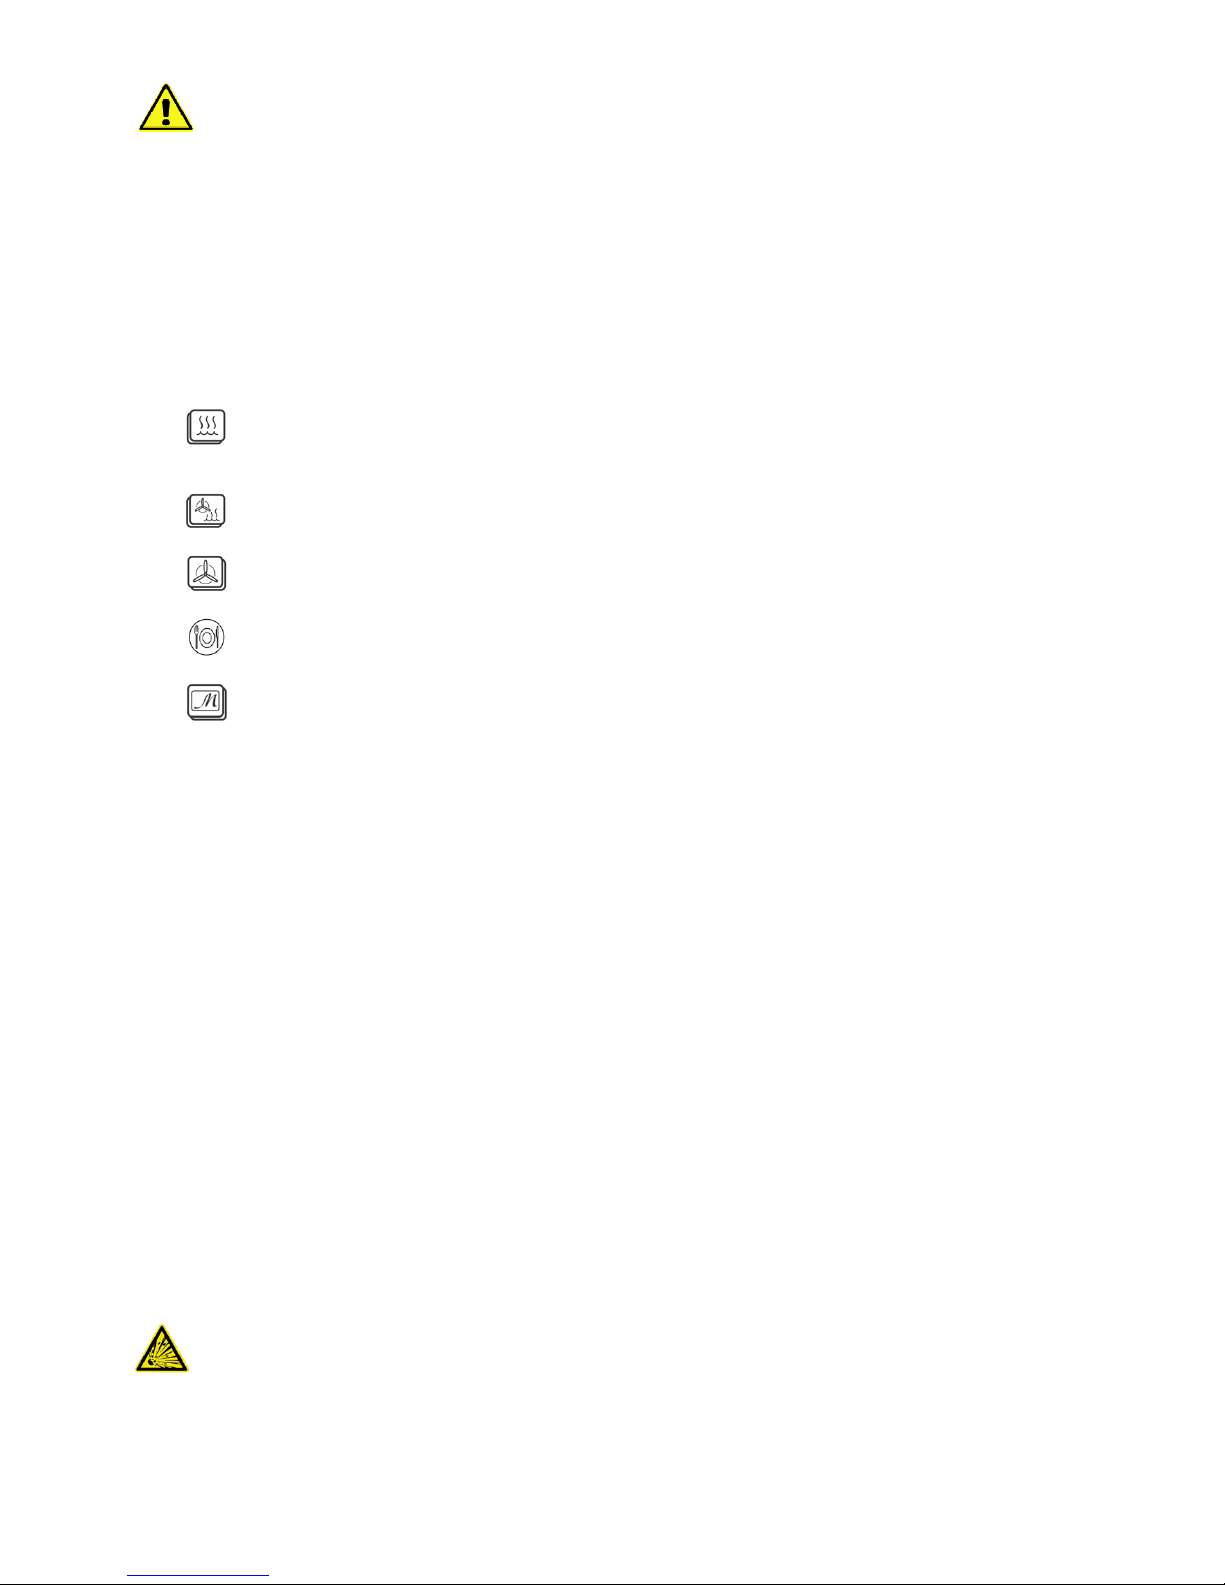
Cooking modes:
Steaming Steaming is the best, most delicate and protective cooking
mode. Food is cooked gently in a constant temperature,
surrounded by steam.
Combi-cooking A combination of the two modes steaming and convection.
This means less shrinkage especially with large roasts.
Convection The convection cooking mode is suitable for cooking all food
which should be crispy and brown. Roasting, grilling, baking.
Regeneration Regeneration of plates and pans using 3 ambient temperature
conditions.
Multifunction key “M” Assignment options for multifunction key:
Banquet / Regeneration, LT Cooking, Delta-T Cooking ,
E/2 reduced heating power
Operation
- Keep this manual in a place where it can be accessed by all users of the appliance at any time.
The combi steamer must only be operated
- By trained staff
- For its intended purpose as outlined in the operating instructions, and whilst in perfect working order.
- To prevent the risk of accidents or damage to the appliance, it is essential that operating staff are given training
and health and safety briefings on a regular basis.
The appliance must not be operated
- By children or persons with impaired physical, sensory or mental abilities, or by persons who do not have the
requisite experience and/or knowledge, unless they are being supervised by a person who is responsible for their
safety or are receiving instructions in how to use the appliance from this person
- At an ambient temperature of < +4°C
- In toxic atmospheres or atmospheres where there is a risk of explosion
- Outdoors without protection against rain
- With food containing highly flammable ingredients (e.g. alcohol)
Gas appliances
- The gas outlet pipe and its cover can reach high temperatures on gas appliances.
- Waste gas and hot sheet metal parts can cause burns.
- Do not place any flammable materials over the appliance.
- If the appliance has been installed under a hood, this must be turned on during cooking.
- When connecting to a chimney with flow protection, the exhaust line must be cleaned on a regular basis (in
accordance with country-specific regulations).
- Only operate gas combi steamers when wind conditions are calm.
What to do if a dangerous situation arises or if you smell gas
- Shut off the gas supply immediately.
- Do not touch any electrical switching elements.
- Make sure the area is well ventilated.
- Avoid creating naked flames or sparks.
- Use an external telephone and inform the relevant gas supplier/fire service as well as customer service.
Page 7
bed_500992_mab_g_1v5_en
5
- Only authorised customer service personnel may open the side wall and carry out
repairs and maintenance work.
Risk of injury
Installation
- Please refer to the installation instructions for precise information on how to install the appliance.
- Only authorised customer service personnel may install appliances, put them into operation and perform
maintenance work on them.
- There must not be any sources of heat or moisture underneath or in the
immediate vicinity of the appliance (such as deep fat fryers or portable stoves).
Risk of burns!
- The functional surfaces of the appliance become hot during operation.
Risk of burns!
- Care must be taken when opening the cooking chamber door, as hot air and
steam could escape.
Caution! Hot liquid in container
- If containers are filled with liquids or contents that will become liquid during cooking, ensure
that they are inserted at a level which will enable the user to see into them (i.e. the
containers must not be placed too high up in the appliance).
Appliance defects
- If the glass part of the door is damaged, the appliance must not be started up.
Contact customer service.
- If malfunctions occur, disconnect the appliance from the mains and close the water shut-off valve.
Contact customer service.
Warning
- If the unit is not cleaned or is not cleaned well enough, deposits of
rease or food residues in the cooking cabinet may catch fire - Risk of fire.
Cleaning
- The shower head may only be used for cleaning the cooking chamber.
- Do not spray water into the hot cooking chamber.
- Under no circumstances must water jets, steam cleaners or high-pressure cleaners
be used on the exterior of the appliance.
- The door must not be opened whilst Autoclean is running (risk of chemical burns).
- Only use Eloma Multi-Clean special cleaning agents and Eloma Multi-Clean rinse agents.
- Eloma GmbH accepts no liability for damage caused by using non-Eloma cleaning agents or rinse
agents; use of such agents will also invalidate any warranty claims.
- Please observe the instructions for use provided with the cleaning agent and rinse agent.
- Wear appropriate protective gear when carrying out manual cleaning work (gloves, protective goggles).
- Do not breathe in spray mist.
- Make sure that the air baffle and racks are used and locked in place in accordance with regulations.
- When using the Autoclean function, make sure the canisters are connected correctly:
red for the cleaning agent and blue for the rinse agent.
- Before cleaning, make sure that there is sufficient cleaning and rinse agent in the respective canisters.
- Canisters must be positioned below the bottom edge of the combi steamer. They must never be
positioned above this.
Notes on maintenance
- To keep the appliance in perfect working order, an authorised service partner should carry out
maintenance work on it at least once a year.
- An authorised customer service staff member must carry out maintenance work on gas appliances at
least once a year.
- We recommend that you agree a maintenance contract for this purpose.
- If the appliance is not going to be used for a prolonged period, turn it off, disconnect it from
the mains and close the water tap.
Page 8

bed_500992_mab_g_1v5_en
6
Hand shower with automatic pull-back
Standard with Multimax B, optional with Multimax A models
- Pull the hand shower out until you hear it click; this means that it is locked in the correct position for
operation.
- To retract the hose, pull it out until it stops making a clicking noise.
- The hose will retract automatically. Water will only flow when the hose is locked in the correct position
for operation.
- You should only ever allow the shower head to slide back into its resting position slowly.
Before turning on
- If the combi steamer has been transported at outside temperatures of < +4°C, the appliance's safety
temperature limiter may have been triggered. This must be reset by a qualified electrician.
- Lock the air baffle in place. Never reach behind the air baffle during operation and never attempt to
stop fans manually.
- Lock the rack or mobile tray rack in place correctly.
Loading/unloading
Risk of burns
- Depending on the selected cooking temperature, the food containers, grids, rack trolley and inside of
the door in particular may reach high temperatures. It is recommended that you wear protective gloves.
- The temperature of the glass part of the door and the casing may reach more than 60°C at some
points during operation.
- Containers with hot liquid foodstuffs must be covered during transportation to prevent the liquid from
spilling over the sides.
- Maximum permissible loading weight:
6-11 30 kg (max. 15 kg per tray)
10-11 50 kg (max. 15 kg per tray)
20-11 150 kg (max. 15 kg per tray)
12-21 150 kg (max. 20 kg per tray)
20-21 200 kg (max. 20 kg per tray)
Fixing the rack in place (tabletop appliances)
- Hanging in place: Push the rack up and hang it in place.
- Take care not to bend the tracks when doing this, as this will stop grids, trays and containers from
being held securely in place.
Working with mobile tray racks and trolleys
- Do not stack rack trolleys so that they are top-heavy → risk of tipping.
- Always make sure that the container locking device is closed.
- Push in the mobile tray rack as far as it will go and apply its brakes.
- To pull it out, use the handle supplied. Remove the handle during cooking.
- Empty the collecting tray at the bottom of the mobile tray rack on a regular basis; otherwise, water
spilling over the sides will create a risk of slipping.
- When transporting racks using the rack transportation trolley, make sure the rack engages in the
transportation locking device.
- During transportation over a sloping or bumpy surface, the trolley/trolley system, banquet trolley system
or rack transportation trolley may tilt.
Working with banquet systems (option for tabletop appliances)
- Remove the rack.
- Attach the push-in track to the base of the appliance.
- Push in the rack/trolley system.
Working with core temperature sensors
- Core temperature sensors can become hot! Wear protective gloves.
- Take care not to prick yourself or anyone else with the point of the sensor.
- Before piercing, check the sensor for soiling to prevent cross-contamination between products.
- Do not leave the sensor hanging out of the cooking chamber. It is a sensitive measuring instrument,
so always hang it up in the place provided for it.
- Remove the sensor from the food before taking the batch out.
Condensation hood (option)
- An optional condensation hood is available for Eloma combi steamers.
- The condensation hood is controlled fully automatically via the combi steamer.
- During the cooking process, steam is condensed as it passes over air-cooled plate condensers.
Page 9
bed_500992_mab_g_1v5_en
7
2. Control panel and functional description
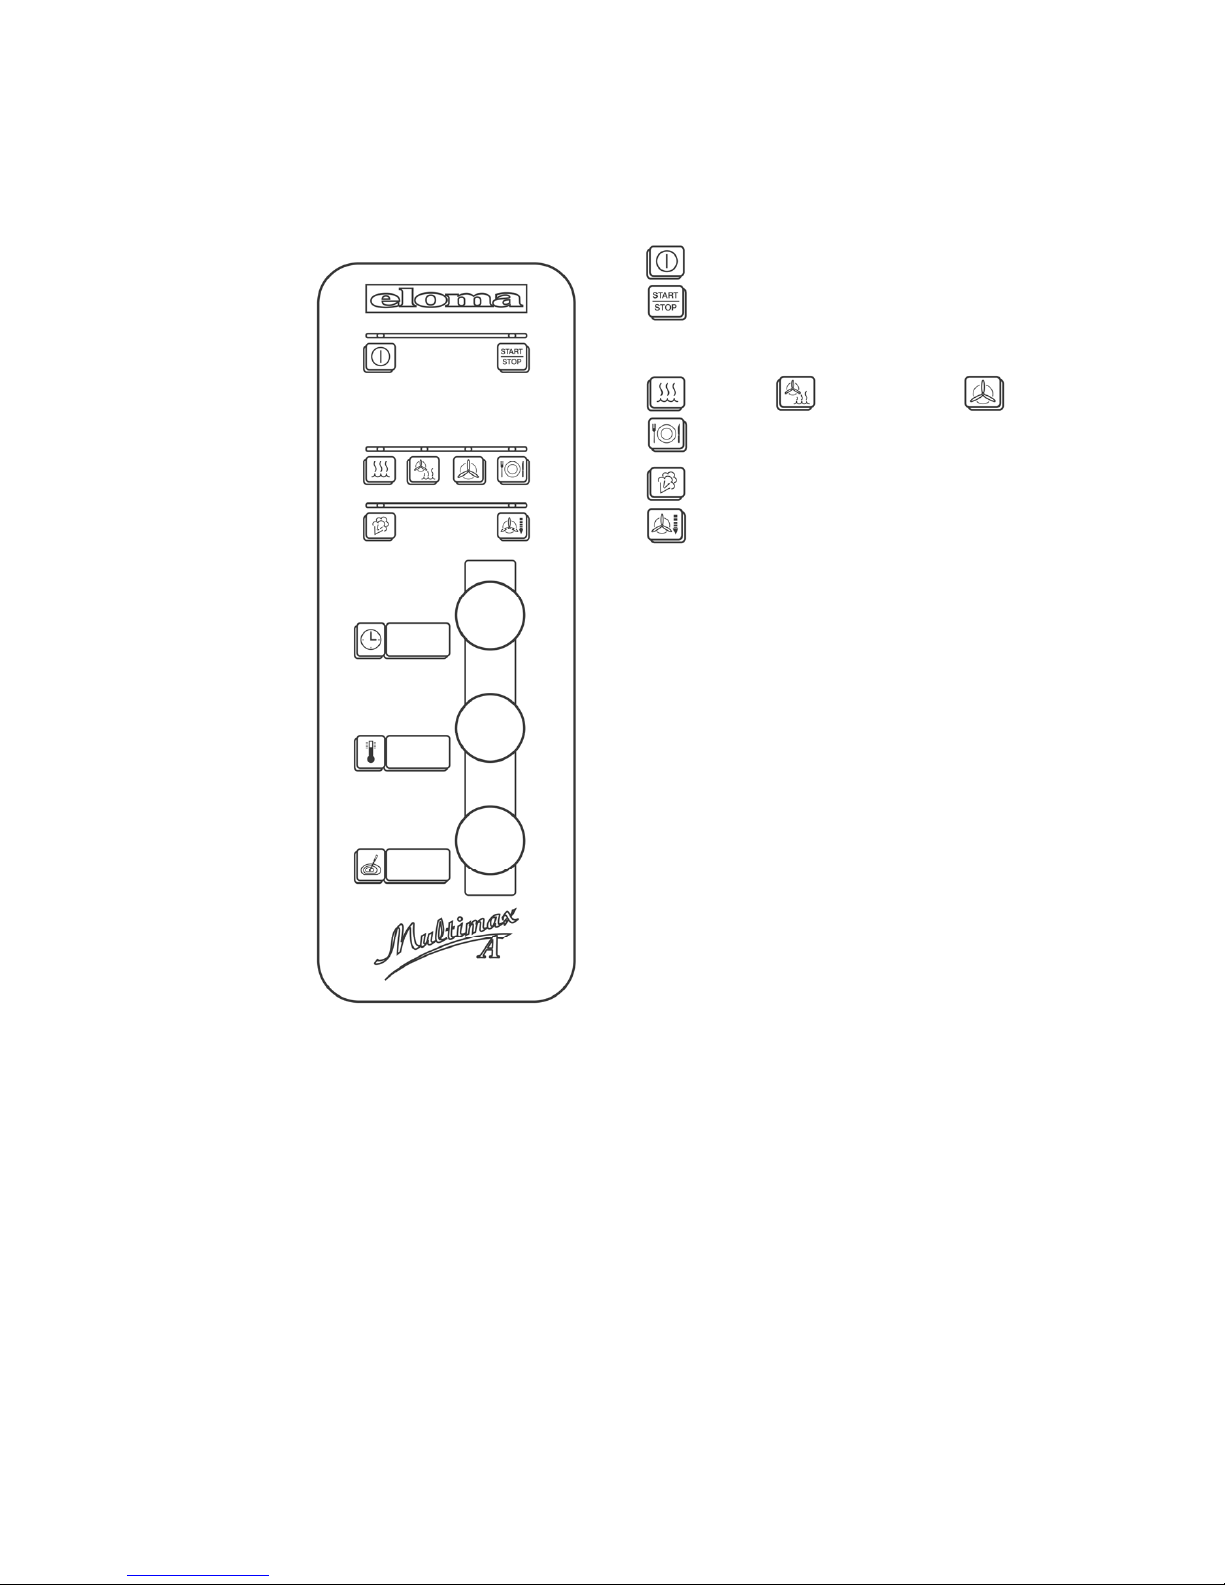
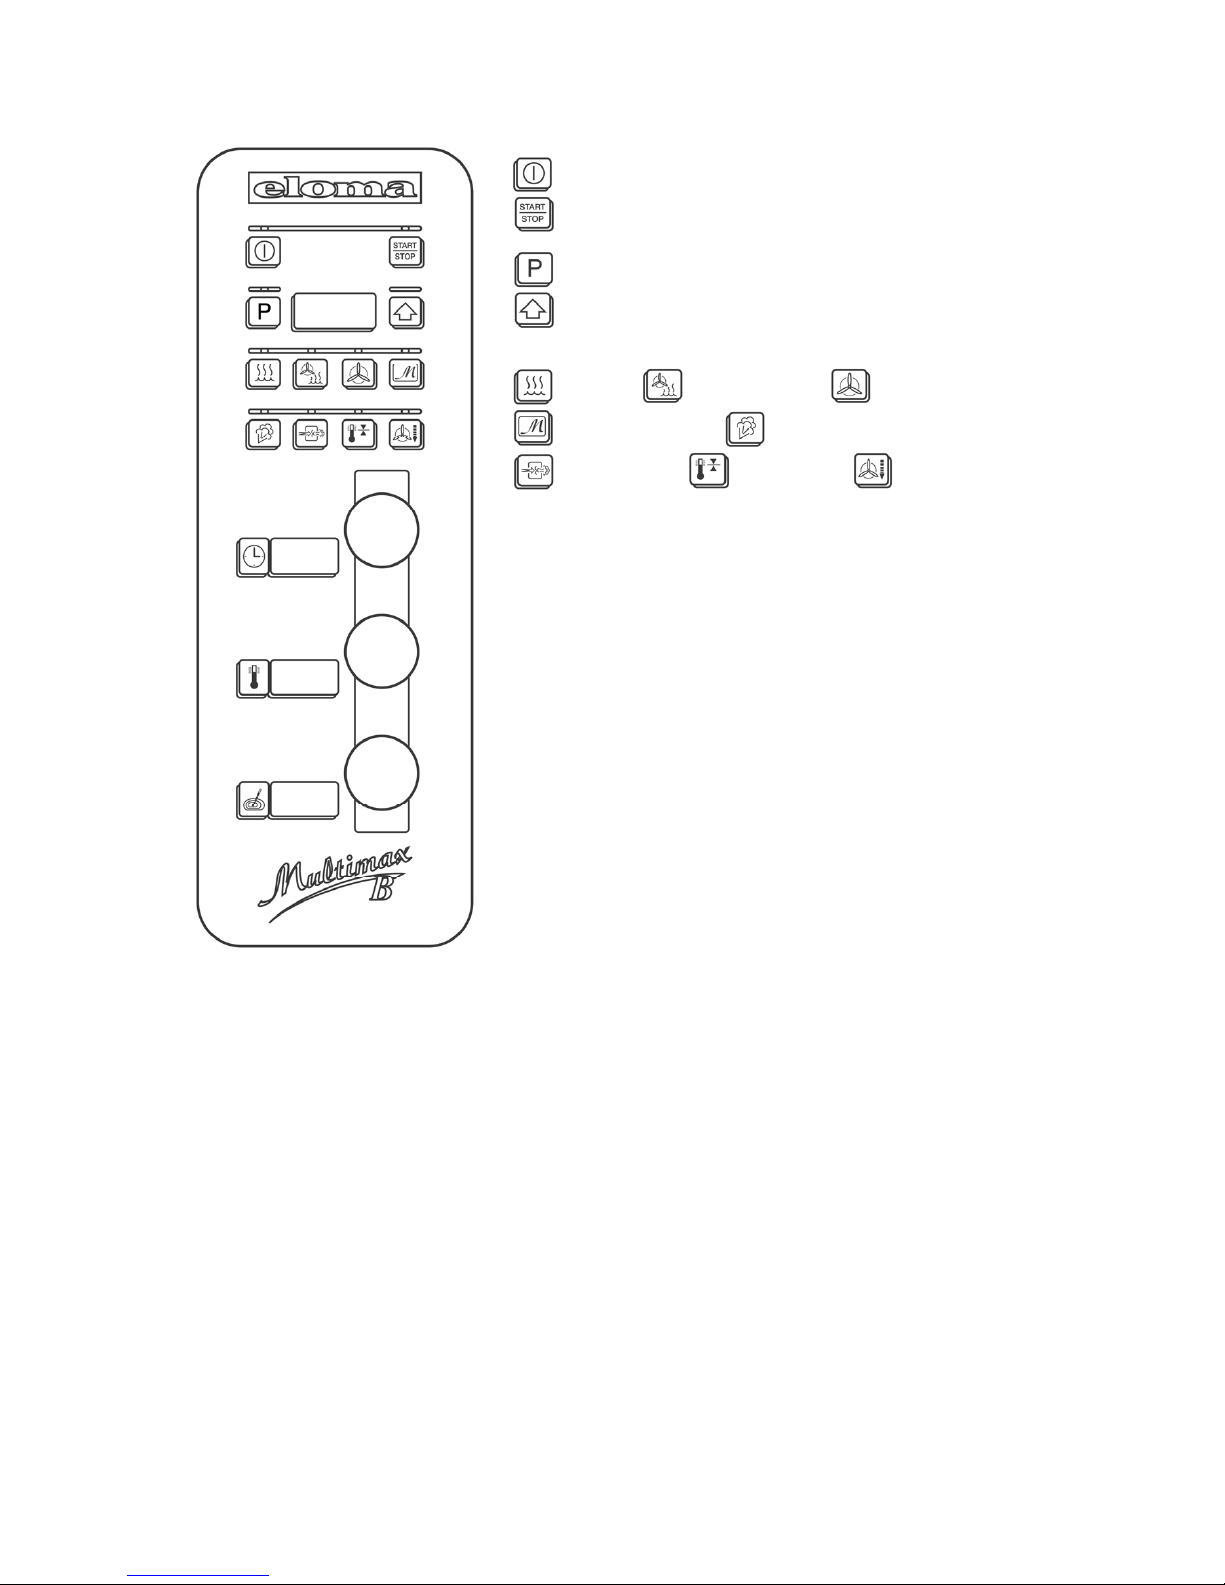
2.1 Control panel Multimax A 6-11, 10-11, 20-11,
Key ON/OFF
Key START/STOP
Touch keys : Cooking modes
Steaming Combi-cooking Convection
Regenerating (Rethermalizing)
Manual humidification,
Reduced blower speed
Display TIME
Rotary knob
Setting : 0:00 to 24.0 hours and * - - - * continuous
operation
Display TEMPERATURE
Rotary knob
Setting : 30° to max. 300° C / 85° to max. 570° F
Display CORE TEMPERATURE
Rotary knob
Setting : 20° to 99° C / 70° to 210° F
Page 10
bed_500992_mab_g_1v5_en
8
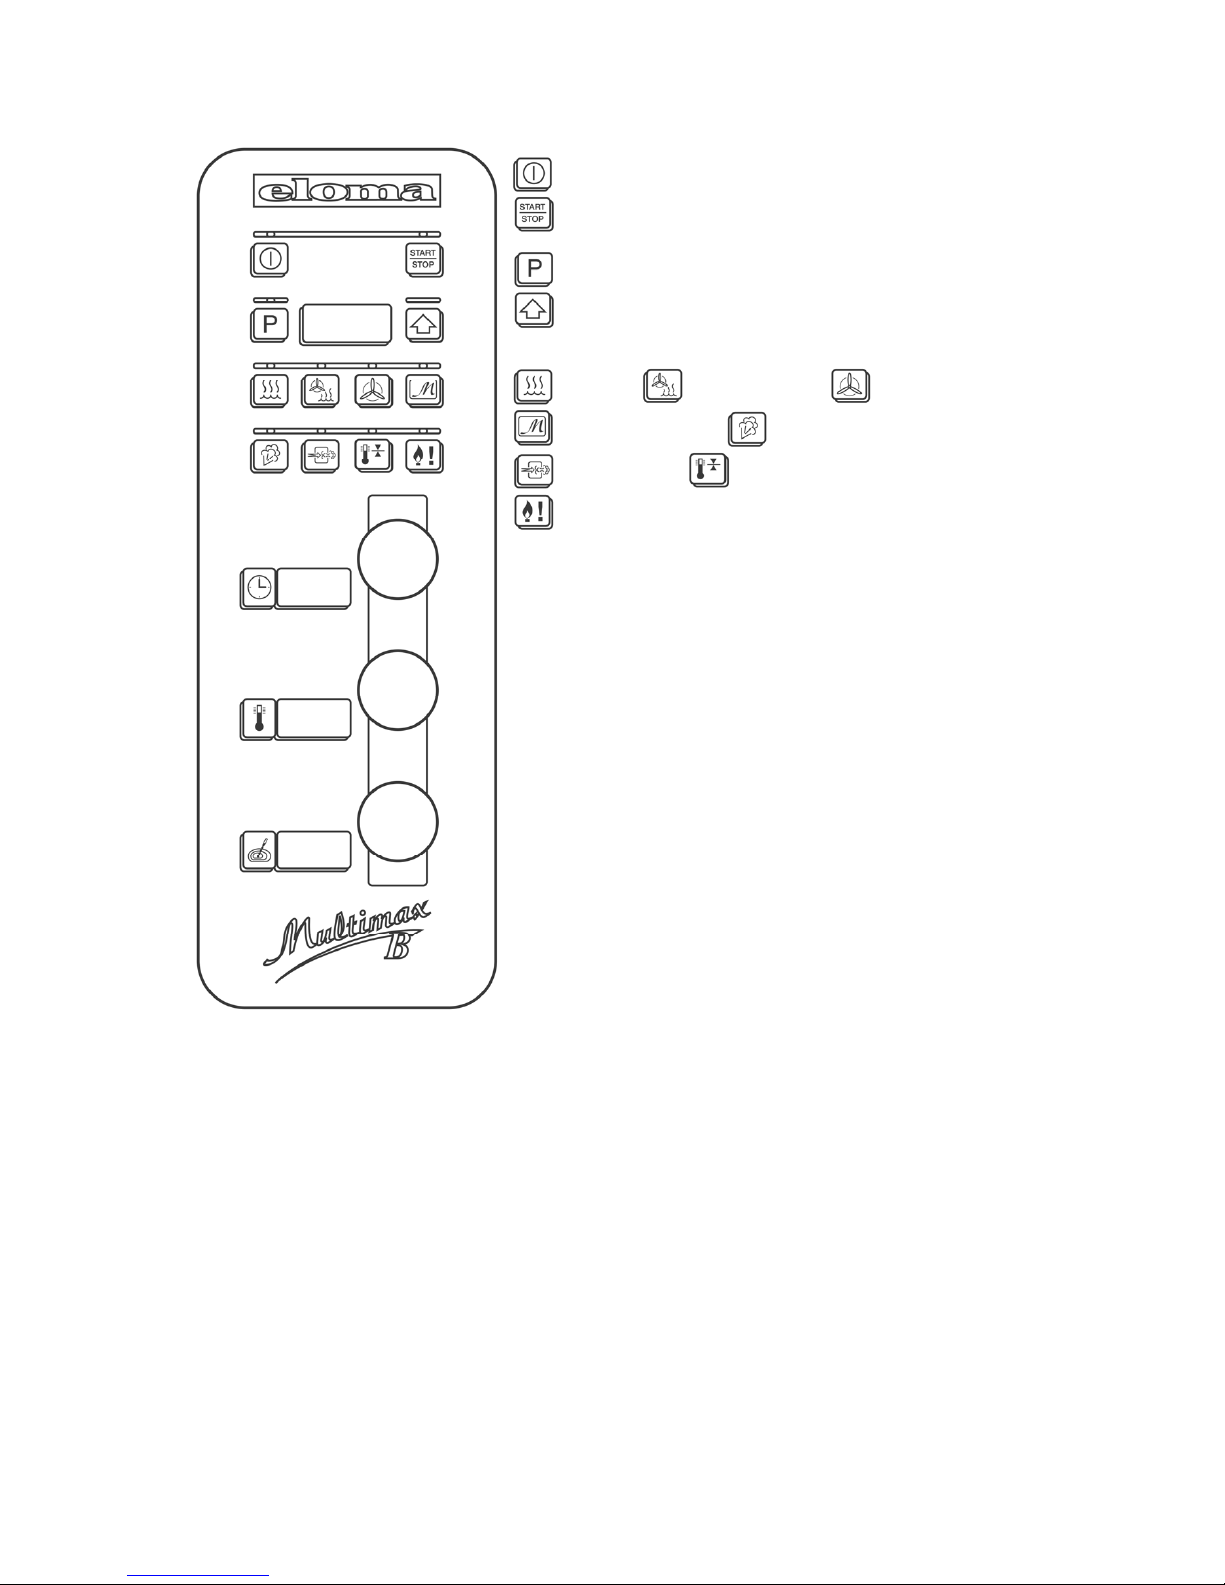
2.2 Control panel Multimax B 6-11, 10-11, 12-21, 20-11, 20-21
Key ON/OFF
Key START/STOP
Program key
Arrow key /setting key
Touch keys : Cooking modes
Steaming Combi-cooking Convection
Multifunction key, Manual humidification,
Clima-Aktiv
® ,
Active Temp, Reduced blower speed
Display TIME
Rotary knob
Setting : 0:00 to 24.0 hours and * - - - * continuous operation
Display TEMPERATURE
Rotary knob
Setting : 30° to max. 300° C / 85° to max. 570° F
Display CORE TEMPERATURE
Rotary knob
Setting : 20° to 99° C / 70° to 210° F
Page 11
bed_500992_mab_g_1v5_en
9
2.3 Control panel Multimax B Gas 6-11, 10-11, 12-21, 20-11, 20-21
Key ON/OFF
Key START/STOP
Program key
Arrow key /setting key
Touch keys : Cooking modes
Steaming Combi-cooking Convection
Multifunction key, Manual humidification,
Clima-Aktiv
® ,
Active Temp,
Gas fault “Acknowledge” key
Display TIME
Rotary knob
Setting : 0:00 to 24.0 hours and * - - - * continuous operation
Display TEMPERATURE
Rotary knob
Setting : 30° to max. 300° C / 85° to max. 570° F
Display CORE TEMPERATURE
Rotary knob
Setting : 20° to 99° C / 70° to 210° F
Page 12

bed_500992_mab_g_1v5_en
10
2.4 Functional description of operating elements
Touch key ON/OFF
Press key, MULTIMAX now ready for work, key is lit
oven chamber illuminated, Displays indicate:
LED cooking mode "steaming" is lit
Time 0:00, Temperature 99° C / 210° F
Core temperature - OFF -(only B models)
If you press again, MULTIMAX is switched off, this key is
dark and all LEDs and displays are off as well.
Touch key Start/Stop
This key starts or stops cooking processes.
LED is flashing in program flow.
Program key / Arrow key
Use the P-key to call and the arrow key
to select an
existing/stored program
Once the program is started, the display indicates the actual program
step of an operating mode i. e. c1, c2, c3, c4, or c5.
You want to know which program is running down ?
Press P-key briefly, the display indicates the program number shortly
and returns then to the actual program step, for instance c3.
The time display indicates the remaining total cooking time.
The temperature display indicates the temperature set for the actual
program step.
Touch key Cooking mode STEAMING
Press this key to select steaming. LED is lit.
Temperature display indicates automatic basic setting of
99° C / 210° F
Temperature range 30° - 130°C / 85° - 260° F
Touch key Cooking mode COMBI-COOKING
Press this key to select combi-cooking. LED is lit.
Temperature display indicates automatic basic setting of
130°C / 260° F
Temperature range 30° - 250°C / 85° - 480° F
Touch key Cooking mode CONVECTION
Press this key to select convection, LED is lit,
Temperature display indicates automatic basic setting of
150°C / 300° F
Temperature range 30° - 300°C / 85° - 570° F .
Page 13

bed_500992_mab_g_1v5_en
11
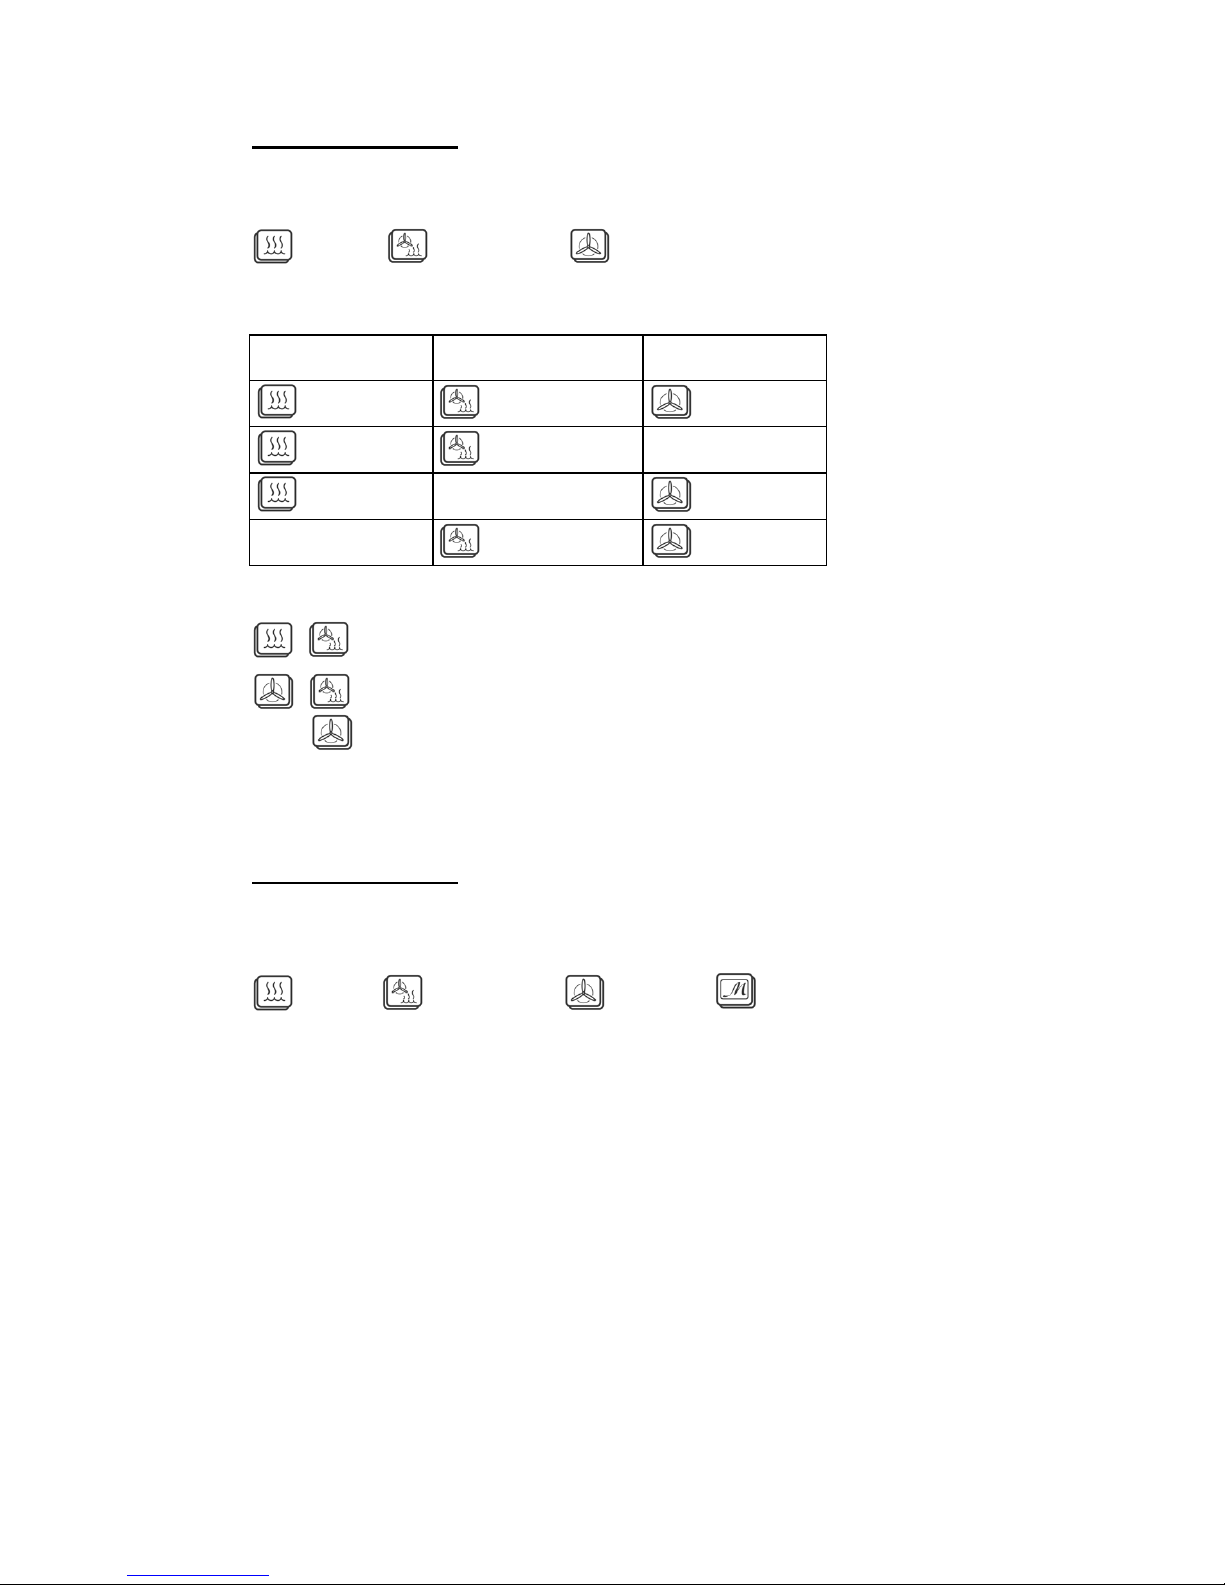
Touch key Regenerating - 3 temperature conditions
Press this key to select regenerating., LED is lit.
Temperature display indicates 120°C / 250°F
Temperature range 30° - 300°C / 85° - 570° F
Select one of the three ambient temperature conditions by pressing the
two cooking mode touch keys simultaneously
+ = DRY regeneration, basic setting 130° C
+ = MEDIUM regeneration, basic setting 120°C
+ = HUMID regeneration basic setting 115°C
Press to start the selected program
Multifunction key “M” (only Multimax B)
Selection: 'P' key together with 'M' key
Assignment options:
Banquet / Regeneration
LT Cooking
Delta-T Cooking
E/2 reduced heating power, energy-saving key
Key assignment is done as described in Section 3.5.
Multifunction key assigned for “Banquet / Regeneration”
Press key. LED lights up. The temperature display shows 140°C
(automatic default setting).
Temperature range: 90°C to 180°C.
Additional functions
Steaming and humidifying.
Multifunction key assigned for “LT Cooking”
Press key. LED lights up. The temperature display shows 80°C
(automatic default setting).
Temperature range: 30°C to 120°C.
Additional functions
Steaming and humidifying.
Multifunction key assigned for “DeltaT Cooking”
Press key. LED lights up. The temperature display shows 40°C
(automatic default setting).
Entry field: Temp. 1°C to 80°C; Core temp. 20°C to 99°C.
Additional functions
Steaming and humidifying.
Multifunction key assigned for “E/2 reduced heating power”
Can be activated/deactivated at any time during operation in the
modes Combi steaming and Convection.
Briefly press the active operating mode.
Press “Energy saving” key – the LED lights up.
With steamer types 6-11, 10-11, 12-21 : reduced heating power
With steamer types 20-11 and 20-21 : lower compartment
switched off completely (with gas-heated steamers, function is only
possible for Types 20-11 and 20-21)
Page 14

bed_500992_mab_g_1v5_en
12
“Manual steaming” key
As long as the key is pressed, water evaporates in the cooking
compartment.
Selection possible in the modes Combi steaming, Convection,
and LT Cooking.
“Clima-Aktiv®” key (only with Multimax B steamers)
Clima-Aktiv® de-humidification control can be activated during
every operating mode except Steaming.
Briefly press the active operating mode.
Press the “Clima-Aktiv
®
” key – the LED lights up.
With Clima-Aktiv® activated, steam escapes from the cooking
compartment, and the cooking climate becomes drier.
The key for humidity control can be used in the operating modes
Combi steaming and the special modes Banquet / Regeneration,
LT Cooking, and DeltaT Cooking.
Pressing the key several times permits various stages between 1
and 5 to be selected. Higher stages give higher humidity.
“Active Temp” key (only with Multimax B steamers)
With the Active Temp function, the cooking compartment of the
combi-steamer is brought to a preselected setpoint temperature.
If the cooking compartment temperature is below the setpoint value,
the heating is switched on.
If the temperature is too high for the subsequent cooking program,
the steamer is cooled down.
Reduced fan speed
The fan speed can be reduced during the active operating
mode, with the exception of steaming.
Briefly press the active operating mode.
Press the “Reduce fan speed” key – the LED lights up.
Gas fault “Acknowledge” key (only gas-heated steamers)
This key is used to acknowledge gas fault messages with gasheated steamers.
Page 15
bed_500992_mab_g_1v5_en
13
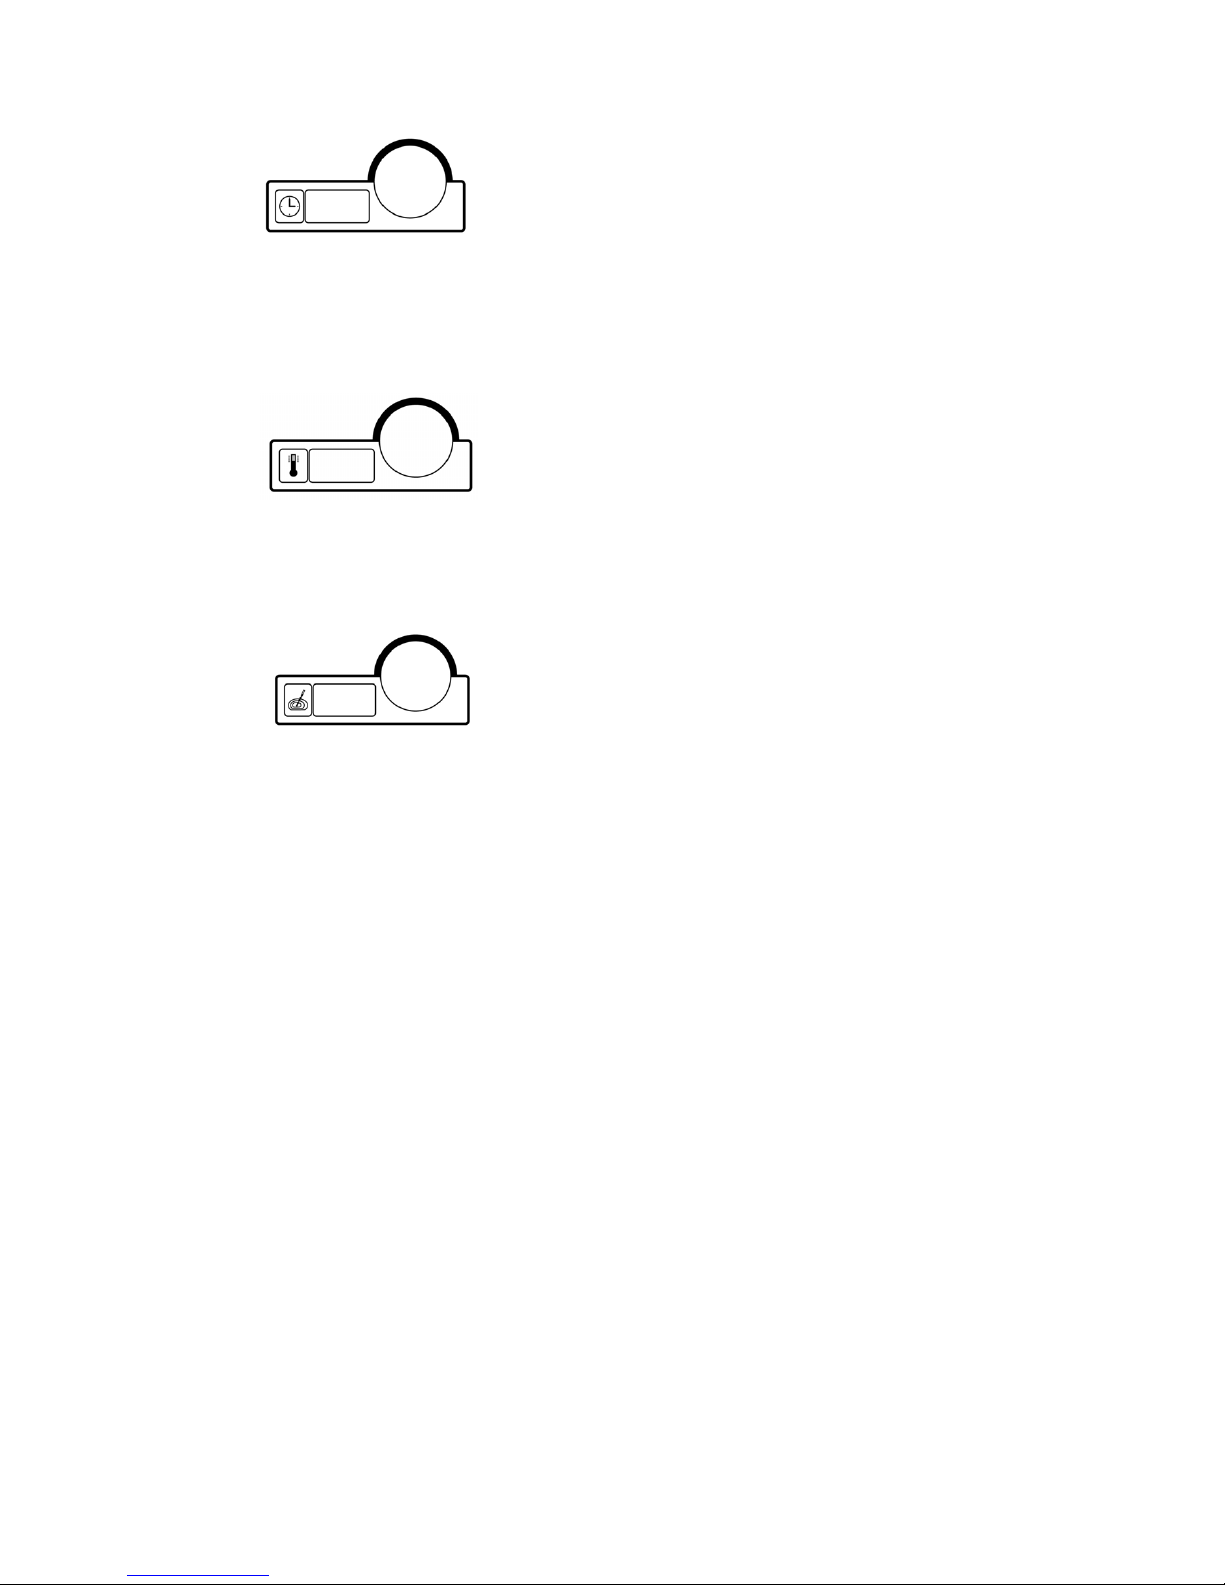
Display + Rotary knob TIMER (digital display, 3 characters)
Turn rotary knob to set the cooking time of the selected cooking
mode from 0:00 minutes to 24.0 hours. Turn left for * ---*
continuous operation.
Display up to 10 hours in minutes 10.0), from 10.1 (10 hours 10
min.) in 10-minute intervals.
B models: When working with core temperature control, time is
automatically set to * - - - * Continuous operation.
Display + Rotary knob TEMPERATURE
Turn rotary knob to set cooking temperature of the selected cooking
mode from 30° to 300° C / 85° - 570° F
As long as the heating is on, a red dot down in the right hand corner
of the display is lit.
Once this knob is turned while a program is running down, the
ACTUAL temperature in the oven cavity is displayed for 3 seconds.
Then the display returns to the set DESIRED temperature.
Display + Rotary knob CORE TEMPERATURE
Core temperature control can be used with all cooking modes.
Temperature range 20° - 99° C / 70° - 210° F
Turn rotary knob to set desired core temperature.
Time display indicates automatically * - - - * Continuous operation.
Once this knob is turned while a program is running down, the
ACTUAL core temperature is displayed for 3 seconds. Then the
display returns to the set DESIRED temperature.
2.5 Selecting / changing the multifunction key assignment
Selection and changing the required assignment of the M key is possible within the range for manual
entry. Press the P and M keys simultaneously to open the M memory – this is accompanied by an audible
signal.
Use the
key to select one of the following key assignments:
Banquet/Regeneration: display rE, NT Cooking: display Lt, Delta-T Cooking: display dt, E/2: display E2.
Pressing the M key saves the selected assignment, which is confirmed by an audible signal.
After saving, the display changes to c1 for manual entry.
An exit from the M memory is possible at any time by means of the ON/OFF key.
Page 16

bed_500992_mab_g_1v5_en
14
3. Active Temp (only with Multimax B)
The steamer should always be heated up or cooled down before cooking.
The Active Temp function is used to bring the cooking compartment of the combi-steamer to a
preselected setpoint temperature.
If the compartment temperature is below the setpoint value, the heating is switched on.
If the temperature is too high for the subsequent cooking program, the steamer is cooled down.
In the following procedural description, the shorter term PreHeat will be used instead of PreHeat - Cool.
Manual preheating
Manual preheating is done at a temperature that is 20 % above the setpoint temperature of the cooking
program.
The function is selected via the Active Temp key.
After selection of a cooking program (standard or customized), Active Temp is selected by pressing the
key. Now press the Start/Stop key; the Active Temp LED flashes, the time display shows “Prh”, and the
temperature display shows the active setpoint temperature (including the +20%).
When the higher PreHeat temperature has been reached, an audible signal is given, the time display
shows Prh, and the temperature display shows End.
The acoustic signal is repeated regularly until the door is opened.
Place food in the steamer and close the door; the program's first step starts automatically.
If the door is opened during preheating, the PreHeat sequence is interrupted.
After closing the door again, Active Temp is continued until the required temperature is reached.
The preheat temperature is maintained for max. 1 hour.
Aborting the preheating procedure with the Active Temp key will start the first cooking step immediately.
Page 17
bed_500992_mab_g_1v5_en
15
4. Starting the Multimax
Prior to start : Open water tap!
In case the ambient temperature is lower than + 5° C / +41°F, the oven must
be warmed to room temperature.
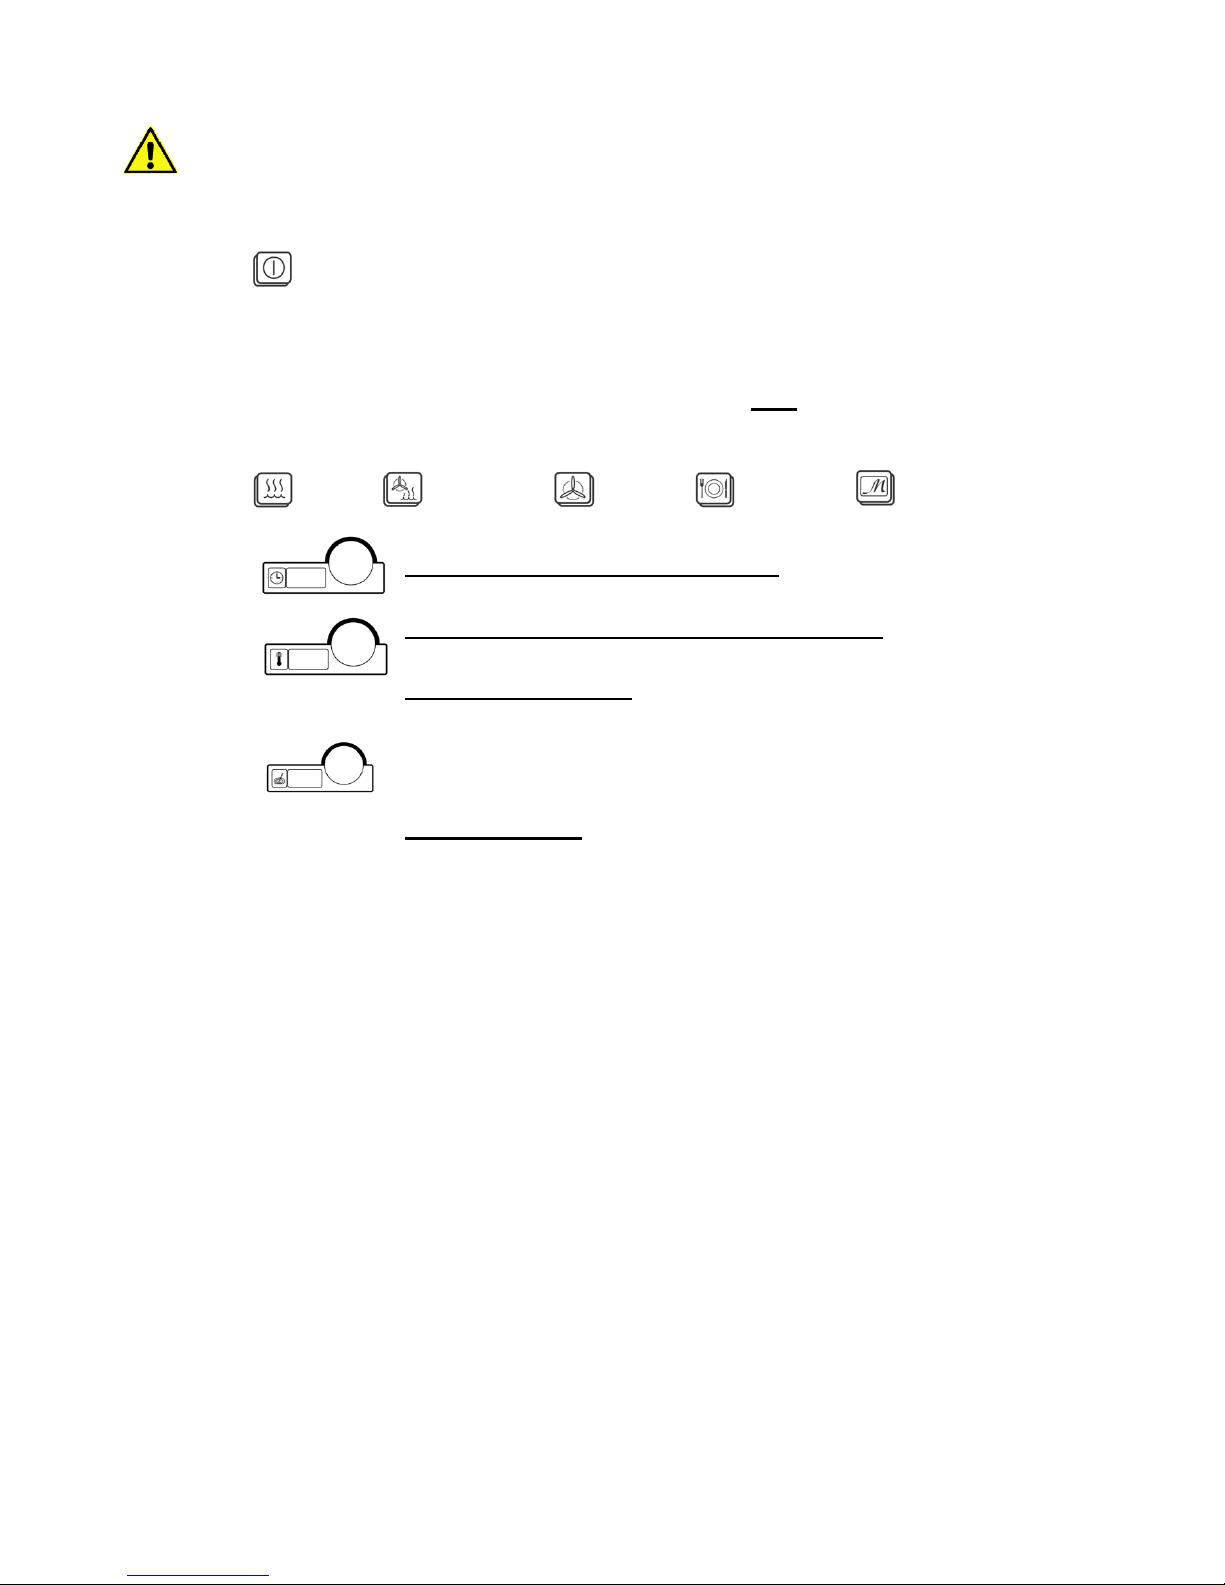
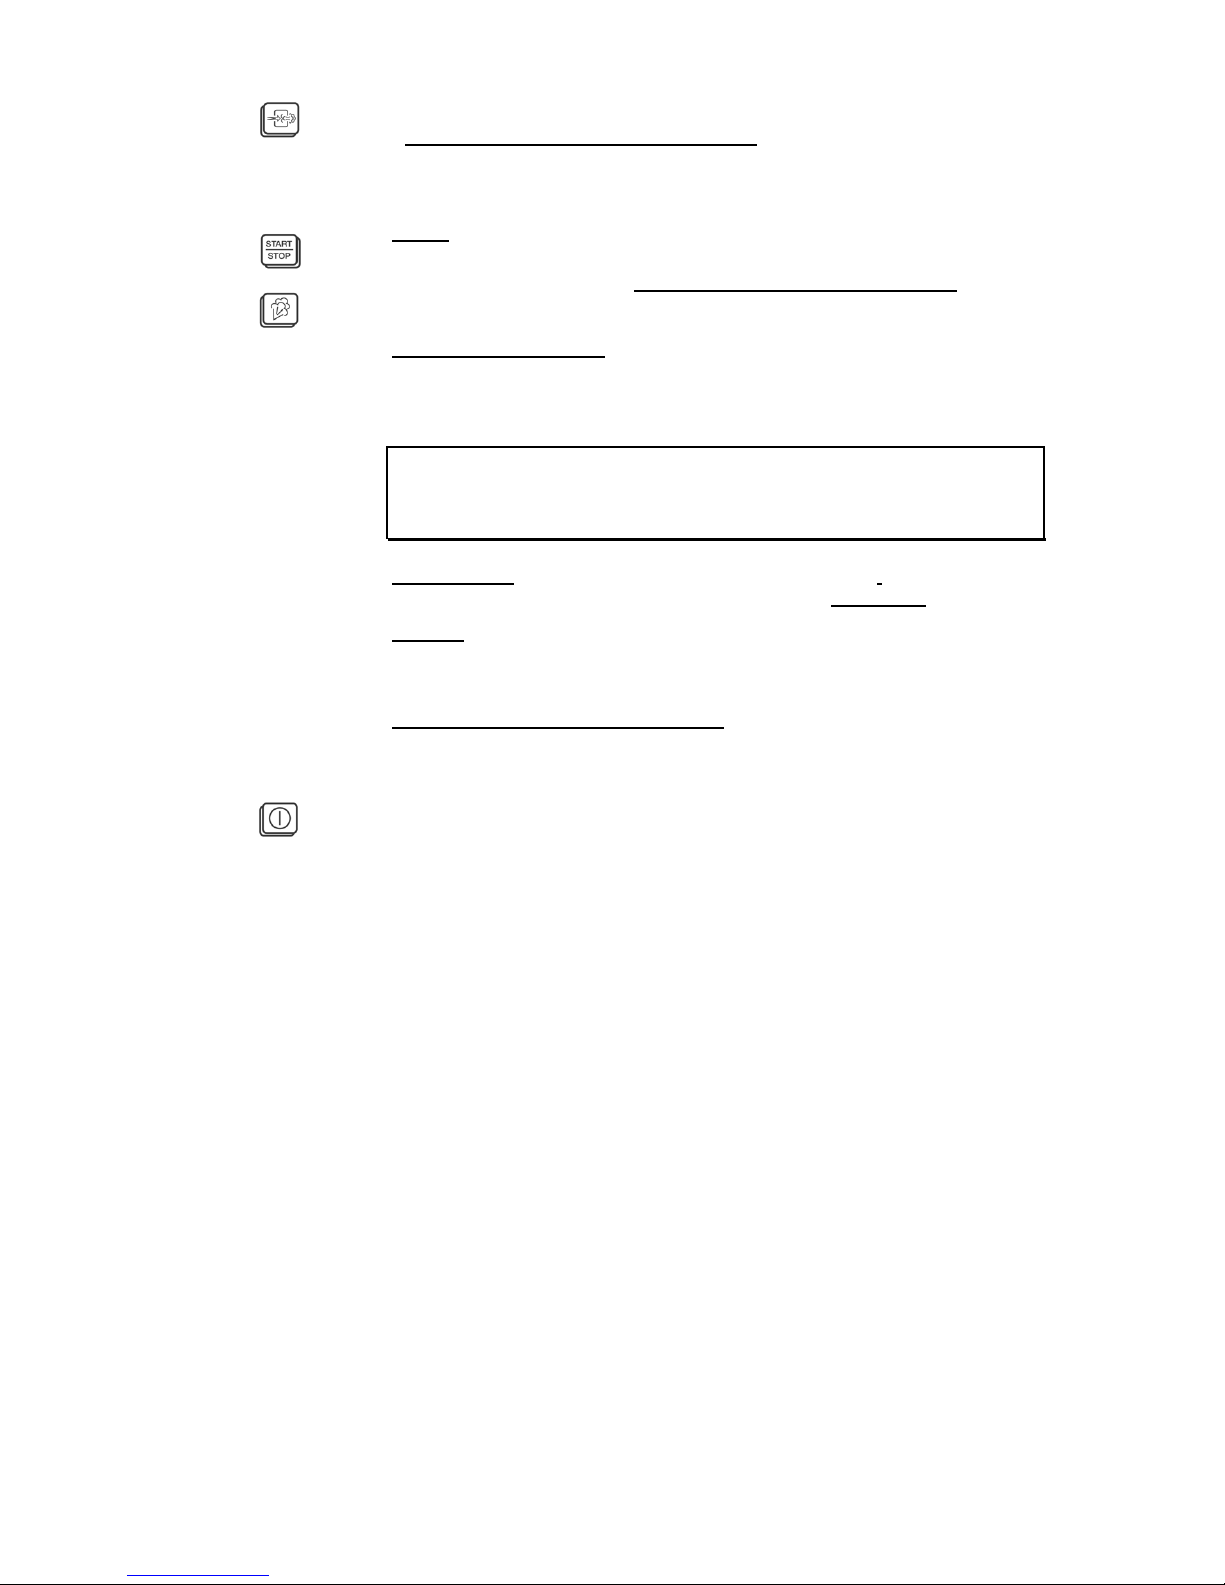
Press ON/OFF, key is lit, oven chamber illuminated, the oven is ready for work.
Program display indicates c1, basic setting is steaming, temperature display
indicates 99° C.
4.1 Input of operating data and start with only one cooking mode
Select desired mode by pressing corresponding key, LED is lit.
Steaming, Combi-cooking Convection Regeneration Multifunction key
Set TIME with corresponding rotary knob.
Set TEMPERATURE with corresponding rotary knob.
Upon selection of cooking mode corresponding basic setting is displayed
Core temperature control
Core temperature control can be used with all cooking modes.
Temperature range 20° - 99°C / 70° - 210° F
Set desired core temperature with rotary knob. The time display indicates
automatically *
- - -* = continuous operation.
Charge the oven
Punch meat probe into the center of the product
Page 18
bed_500992_mab_g_1v5_en
16
Function Clima-Aktiv® only B models
(De-humidification)
Can be used with all cooking modes except "steaming"
Press mode key briefly, then key Clima-Aktiv ® , LED is lit.
Press Start/Stop
LED Start/Stop is flashing, LED of cooking mode starts flashing .
As occasion demands press touch key for manual humidification
Not with cooking mode steaming.
Program under process
Time runs down backwards, the colon in the time display is lit.
If available and in use (B-models) , core temperature display indicates the
DESIRED core temperature. Time display shows *---* continuous operation
If the door is opened during program flow, fan motor and heating switch off,
the timer stops. Program continues if door is shut again.
Program flow may be stopped by pressing Start/Stop key. A broken off
program restarts with the originally set data.
Program end
the MULTIMAX switches off automatically. An acoustic signal
sounds for 30 seconds, to stop it immediately, press Start/Stop
Memory
The last program entered is again displayed and can be repeated just by
restarting.
How to change data in program flow:
Press touch key of corresponding cooking mode and change data:
Use rotary knobs to change time, temperature or core temperature (B
models). .Changed data is displayed but not stored..
If the unit is cut off by pressing ON/OFF, all data entered is lost.
Page 19
bed_500992_mab_g_1v5_en
17
4.2 Combitronic® combination of different cooking modes
Multimax A models
A Combitronic ® combination consists of a maximum of three cooking modes,
which run down in the following fixed sequence.
Steaming, Combi-cooking, Convection
Whatever cooking mode is selected, set the corresponding cooking data with the rotary knobs.
Cooking mode 1 Cooking mode 2 Cooking mode 3
Steaming
Combi-cooking Convection
Steaming
Combi-cooking
Steaming
Convection
Combi-cooking Convection
How to activate a combination :
+ 2 Cooking modes: Press the two cooking mode keys simultaneously
+ 3 Cooking modes: Press keys of two cooking modes first,
and add the third within 5 seconds
The corresponding LEDs are lit. Combitronic® is now activated.
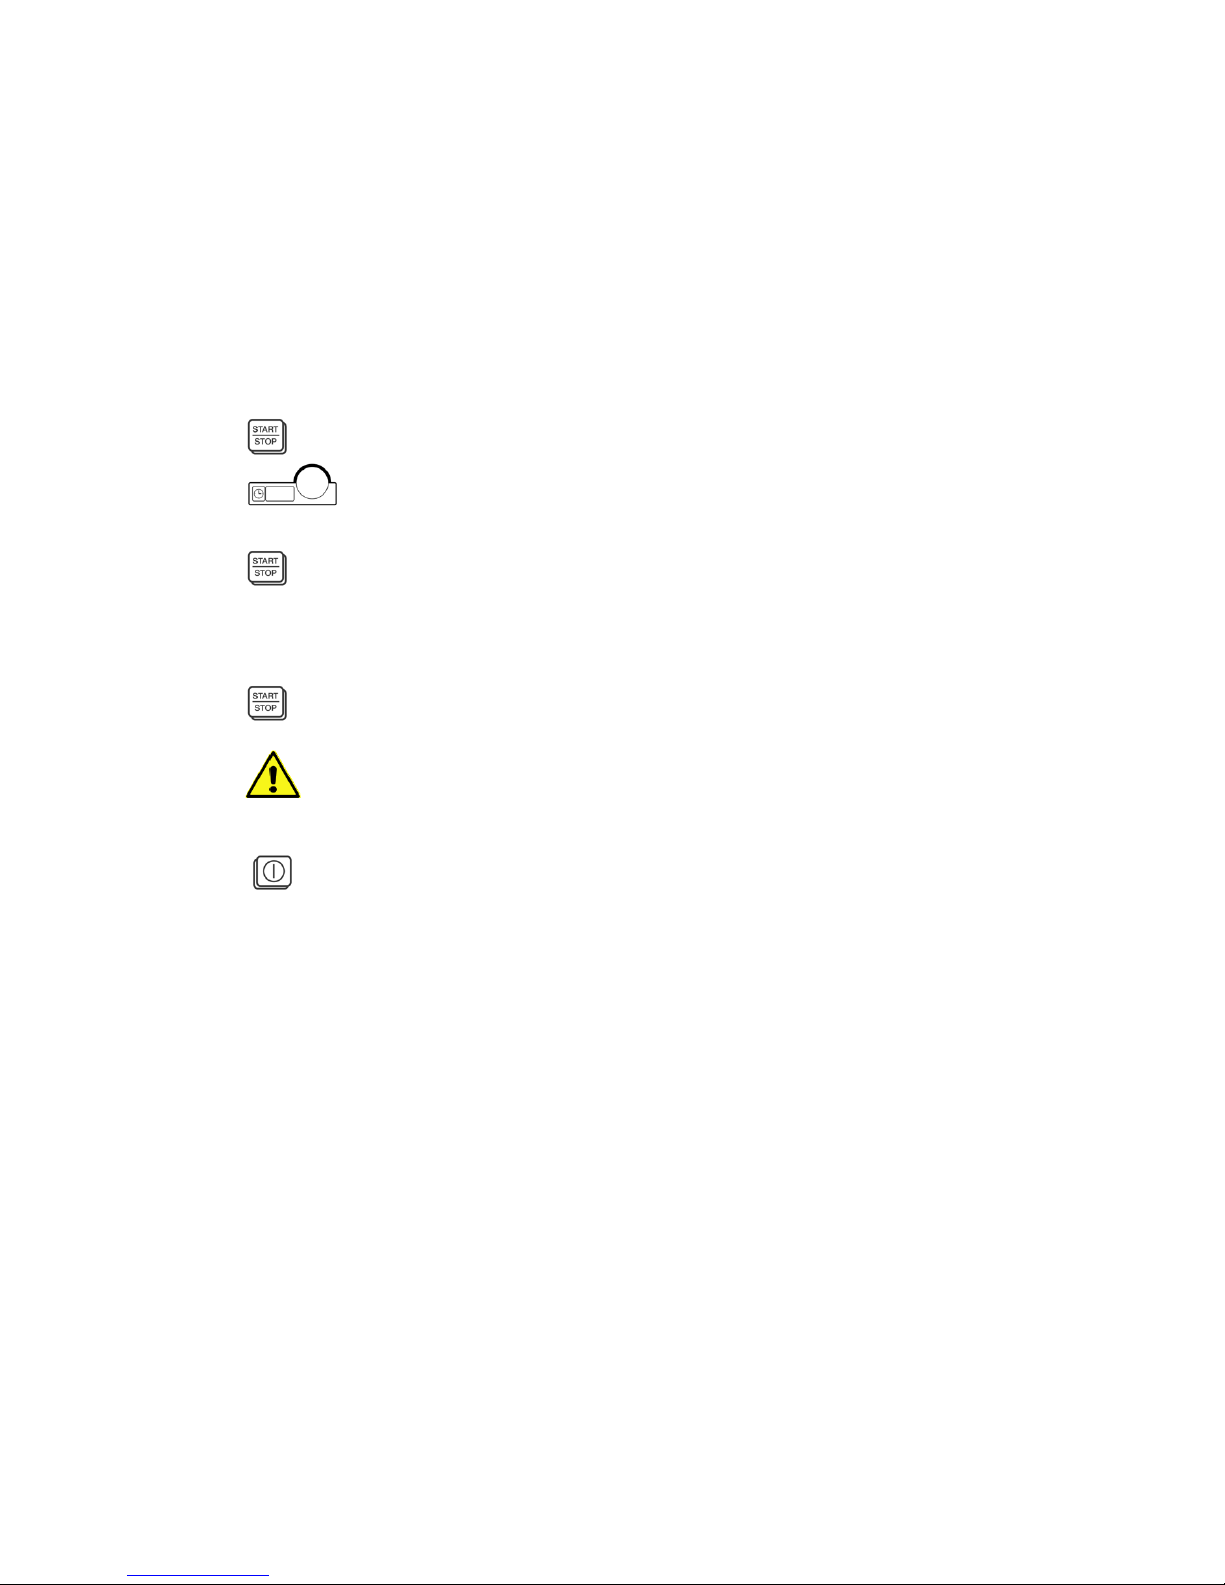
Press START/STOP key to start .
Multimax B models
A Combitronic ® combination consists of a maximum of five cooking modes,
which run down in whatever sequence is selected.
Steaming, Combi-cooking, Convection, Multifunction key
Whatever cooking mode is selected, maximum 5, set the corresponding cooking data
with the rotary knobs. Core temperature control can always be added. .
Enter program steps c1 to c5 using the arrow key
.
Page 20
bed_500992_mab_g_1v5_en
18
4.3 Core temperature control
Core temperature control can be used with all cooking modes. However, make sure
to enter always higher core temperatures in following steps, since the oven switches
automatically off, once the highest core temperature is reached.
4.4 Function: Delay start programming
This function allows to have an entered or stored program or a combination automatically
started within a period of up to 24 hours. Enter or call a program or Combitronic ®
combination and load the oven.
Program "delay start"
Keep START/STOP key pressed (about 3 seconds) until 0:00 in the time display
is flashing.
Use the rotary knob "time" to set the period of time after which this program is
supposed to start. Example : set to 5.00 = the oven will start the entered program
after 5 hours.
Press START/STOP. While the time is running down backwards, the LED in this
key is flashing.
The oven starts the entered program automatically once the time has run down.
Cancel "delay start"
Keep START/STOP key pressed (about 3 seconds) until the indication on the
display returns to normal program mode.
For hygienic reasons do not keep food too long at room temperature!
4.5 End of operation
Switch off, by pressing ON/OFF touch key.
Close water tap.
Disconnect the appliance from the mains, if it is not used for a longer period of time.
Page 21

bed_500992_mab_g_1v5_en
19
5. Program input and storage
5.1 How to call and start an existing program “P” ?
Briefly press the P key.
Use the Run key
to select the required program 1 to 99.
On electrically-heated steamers you can scroll backwards through the program list
by pressing the keys
and simultaneously;
use keys
and on gas-heated steamers.
All the LEDs for the program's operating data light up, and the display shows total
time (or “ - - - ” if core temperature has been selected).
Press START/STOP key to start the program.
Program display changes and indicates the actual program step,
for instance c1.
Time display shows the total cooking time of all programmed steps,
it runs down backwards.
Temperature display shows the temperature of the actual program step
If set with B models
Core temperature display indicates the core temperature of the actual step.
5.2 Fast storage
Once a program has run down, it is still kept in the working storage and a fast storage
into the general/program storage is now possible.
Keep P-key pressed for 3 seconds to open the program storage, the LED is lit and
signal sounds, the display shows “1“
Use the arrow key
to select a program number.
If the selected program number is flashing, the storage is free, all displays are dark.
If it is lit constantly, the storage is occupied and can only be overwritten.
Once again keep P-key pressed for 3 seconds to shift this program from the working
storage to the program storage. Simultaneously program and working storage are
closed.
The LED at the P-key extinguishes.
Once the unit is switched off, the program is deleted from the working storage.
Page 22

bed_500992_mab_g_1v5_en
20
5.3 How to enter and store a new program ?
Keep P-key pressed for 3 seconds, the LED is lit, a signal sounds and the display
indicates “1“.
Use the arrow key
to select the desired program number,
possible program numbers 1 to 9.
Keep the arrow key
pressed for 3 seconds to open the program step storage,
first indication c1.
Just touch the symbol of the desired cooking mode and set time, temperature
and/or core temperature for this first step.
Use arrow key
again, display indicates c2 and enter second cooking mode
together with cooking parameters.
Repeat this procedure until all steps in whatever cooking mode sequence are
entered, c1 to c5.
To finish programming keep arrow key
pressed for 3 seconds to close first the
program step storage.
Then keep P-key pressed for 3 seconds to close the program storage.
The LED at the P-key extinguishes and an acoustic signal confirms the storage.
5.4 How to change an existing program ?
Keep P-key pressed for 3 seconds, the LED is lit, a signal sounds and the display
indicates “1“.
Use the arrow key
to select the desired program number,
possible program No. 1 to 9.
After selection of a program, all LEDs of the cooking modes stored for this program
are lit, time display indicates the total cooking time or *---* for continuous operation in
case of core temperature control.
Keep the arrow key
pressed for 3 seconds to open the program step storage.
Time, temperature and/or core temperature of the 1st step are display.
Just touch the cooking mode symbol of this step and change its data.
Keep arrow key pressed for 3 seconds to close the step storage.
Keep P-key pressed for 3 seconds to closed the program storage.
The LED at the P-key extinguishes and an acoustic signal confirms the storage
The previously existing program is now changed or, as the case may be, completely
overwritten.
Page 23

bed_500992_mab_g_1v5_en
21
5.5 How to call, change and store individual steps of a program
Keep P-key pressed for 3seconds, the LED is lit, a signal sounds and the display
indicates “ 1“
Use the arrow key to select the program in which steps are supposed to be
changed.
Keep the arrow key
pressed for 3 seconds to open the step memory of the
program concerned, first program step c1 is displayed.
Use the arrow key to scroll to the step to be changed.
Just touch the cooking mode concerned briefly and change existing cooking
parameters.
Repeat touching of the arrow key
to scroll to the different steps of a program
Once changing is finished, keep arrow key
pressed for 3 seconds to close the
step storage. The display indicates the program with the changed steps.
Keep P-key pressed for 3 seconds to close the program storage.
The LED at the P-key extinguishes and an acoustic signal confirms the storage.
5.6 How to delete programs and program steps
Delete a complete program
Keep P-key pressed for 3 seconds, the LED at the key is lit, an acoustic signal
sounds, the display indicates “ 1 “ The program storage is open.
Use the arrow key to call the program to be deleted to the display, 1 to 9.
All LEDs of cooking modes stored in this program are lit.
Keep Start/Stop pressed for 3 seconds, the program is deleted.
Repeated touching of the arrow key scroll the different programs that shall be
deleted.
To finish deleting keep P-key pressed for 3 seconds to close the program storage.
How to delete a program step
Keep P-key pressed for 3 seconds, the LED at the key is lit, an acoustic signal
sounds, the display indicates “ 1 “ The program storage is open.
Use the arrow key
to call the program in which a program step shall be deleted.
Keep arrow key
pressed for 3 seconds to open the program step storage, display
indicates c1. Use the arrow key again to go to the step to be deleted c2 to c5.
Press corresponding cooking mode key briefly first, then long to delete this step.
Press arrow key
to close program step storage
Keep P-key pressed for 3 seconds to close program storage.
Page 24
bed_500992_mab_g_1v5_en
22
6. HACCP
6.1 HACCP Option only Multimax B models
The integrated HACCP control facilities care for recording during the cooking process for
each program the exact actual data for time, temperature and core temperature.
All processed cooking programs are stored, once the selected cooking time has run down or
if the cooking process was terminated by pressing the Start/Stop key. Programs which were
broken off are not stored and programs with cooking times of less than one minute are
not stored either.
A standard serial interface connector has been mounted under the control panel and
data may be printed by means of connecting the steamer to a printer capable of printing
at least 40 characters per line. Printer adjustment : 9600, N, 8, 1.
The port for the cable connection is in the hose shower tulip.
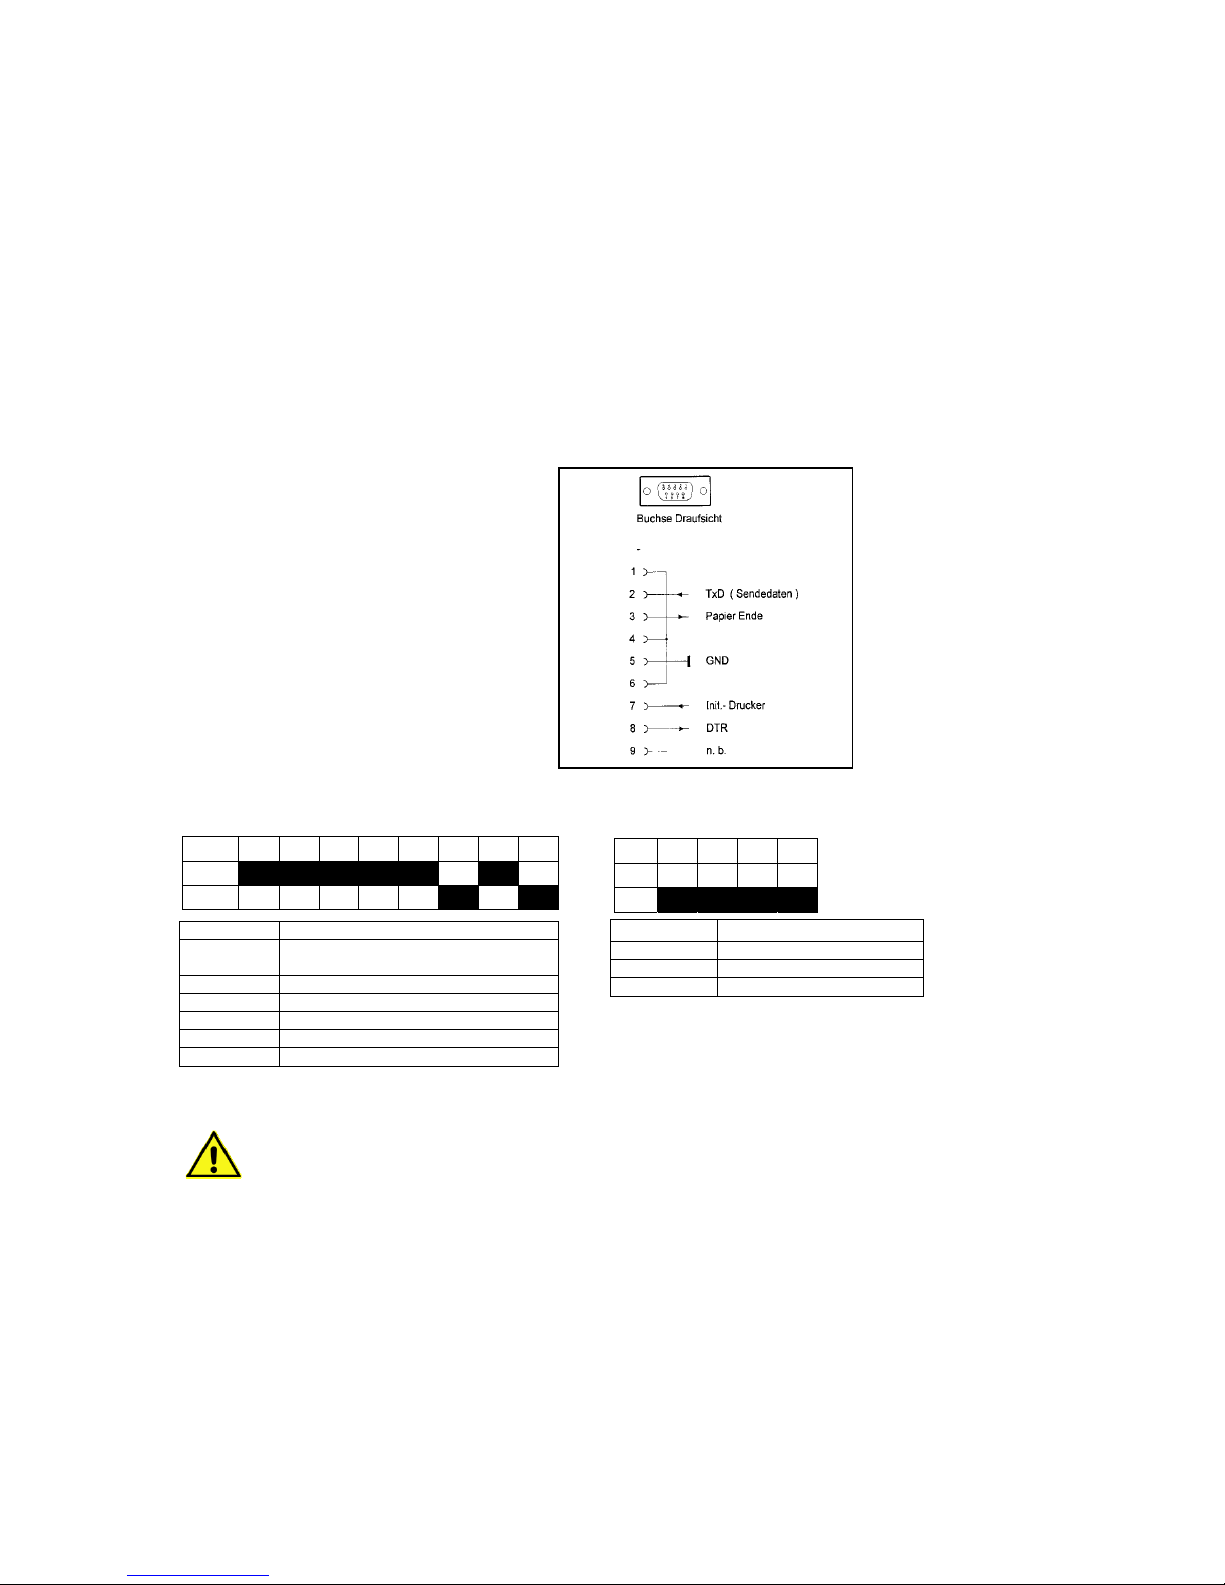
Serial interface – connecting cable
Plug No. EXTERN 9pin. Min-D bushing
Function: RS 232 C Serial Interface
(9600, N, 8, 1) 9600 BAUD,
8 databit, EVEN PARITY,
1 STOPBIT
Connect printer
Controls
Bushing top view
TxD (send data)
Paper end
GND
Init. Printer
DRT
n.b.
Setting of DIP Switch Thermal Printer NP 104
1. Parallel Interface (DIP Switch 1)
1 2 3 4 5 6 7 8
ON
OFF
Switch SOLL
1 CR/LF:
Carriage Return + LineFeed
2 40 Columns
3 Normal Character
4 Normal Zero
5...7 German
8 Not defined
6.2 Printing of protocols
The connecting cable shall only be plugged or unplugged if both, the steamer and the printer,
are switched off, otherwise the control unit or the printer may be damaged
The appliance must be switched on with no program in progress.
Any exact HACCP recording presupposes the correct setting of the real time. Refer to 6.1.3.
2. Serial Interface (DIP Switch 2)
1 2 3 4
ON
OFF
Switch
SOLL
1 Parity Check
2 Even Parity
3, 4 9600 bps
Page 25

bed_500992_mab_g_1v5_en
23
Start HACCP protocol printing
Press touch key “manual humidification“ for about 3 sec.
Printing protocols always for one production day
Turn rotary knob “time“ and set the desired day.
Turn rotary knob “temperature“ and set the desired month.
Turn rotary knob “core temperature“ and set the year.
Start printing
Press START/STOP and the protocol is printed
Terminate printing
Press touch key “manual humidification“ , the basic settng reappears
automatically.
6.3 Printed protocol in ° C
----------------------------------------------------------------Serial No. :100100
Unit type :Multimax B
Print date : 15.07.05 16:00
Total operating hours : 1
CT every 3 minutes
----------------------------------------------------------------Date : 14.01.2005
Product: : 8 9
15:00 1 Nominal 99°C Humidity 100%
15:10 1 00:10 h Hold time 00:10 h
15:20 2 Nominal 130°C Humidity 15%
15:30 2 00:10 h Hold time 00:10 h
15:40 3 Nominal 150°C Humidity 0%
15:40 3 CT °C :67
15:45 3 CT °C 20 23 26 29 31 34 37 40
16:00 3 CT °C 43 46 49 51 54 57 60 63 66
16:30 3 00:00 h Hold time 00:45 h
Total energy consumption: 1,4 kWh
-----------------------------------------------------------------
----------------------------------------------------------------Serial No. 100100
Unit type Multimax B
Print date 15.07.05 16:00
Total operating hours 1
CT every 3 minutes
----------------------------------------------------------------Date : 14.01.2005
Product LT
15:00 1 Nominal 99°C Humidity 15%
15:10 1 00:10 h Hold time 00:10 h
Total energy consumption: 0,5 kWh
-----------------------------------------------------------------
Total operating hours of the appliance
Date of cooking program
Program number
Program start
Cooking mode Steaming = 100% Humiditiy
Cooking mode Combisteaming = 15% Humditiy
Cooking mode Convection = 0% Humidity
Recording of core temperature every 3 minutes
Hold time - period the set temperature was hold.
Energy consumption of the program
Cooking mode LT cooking = 15% Humidity
Page 26

bed_500992_mab_g_1v5_en
24
7. Cleaning the cooking chamber
Hints on operational safety
Only recommended Eloma cleaning agents may be used.
All safety devices inside the unit have been designed to the use of these products in order to
comply with the standard specifications of the drinking water supply.
Other cleaning products can possibly cause irreparable rust damages in the cooking chamber, as well as
damage pumps and seals.
Eloma GmbH cannot assume liability for any damages resulting from the use of alternative products.
This will void the Eloma warranty.
Regular maintenance on every type of water treatment unit is vitally necessary.
Damages to Eloma machines resulting from neglect of maintenance will void warranty claims.
7.1 Autoclean – Automatic self-cleaning
Please do observe carefully the detailed installation instructions.
Autoclean provides a fully automatic self-cleaning of the cooking chamber.
Once started, the program runs down and switches off automatically. As soon as the appliance is
connected and once Autoclean is installed in accordance with the following instructions,
the appliance is ready for cleaning.
Exchange of canisters respectively refilling of cleaner and rinse agent
Observe the directions of the manufacturer and wear suitable protective clothing , gloves
and glasses.
For safety reasons, the door must not be opened during an Autoclean cleaning
program. Cleaner, rinse agent, hot water and steam may escape. If it is absolutely
necessary to open the door, the Autoclean program must be stopped.
If the oven is not used for a longer period of time, rinse the whole Autoclean system
thoroughly with lukewarm water to avoid cloggings caused by cleaner and rinse-agent
remainders.
Remove screwings from the canisters and clean the tube ends and the filter in a warm water basin.
Start Autoclean step Start-up and rinse the appliance until no more cleaner is remaining inside the
tubes and the cabinet.
Preparation for cleaning
Prior to starting a cleaning program make sure that there is sufficient cleaner and rinse
agent in the respective canisters. Visual control. If not, the canisters must be exchanged
or refilled. Make sure to use the correct connections, red to cleaner, blue to rinse agent.
Make sure that the cooking chamber is empty then.
Remove fat filter, drain filter, grids, trays and pans and clean those separately.
The empty trolley of floor models must be inside the combi steamer.
Page 27
bed_500992_mab_g_1v5_en
25
7.2 Operation
Prior to starting the combi-steamer Multimax B equipped with Autoclean, open the
water tap. A sound signal announces that either the water supply is shut or else the
water pressure is too low. For safety reasons do not start the appliance under these
circumstances.
The appliance is switched off
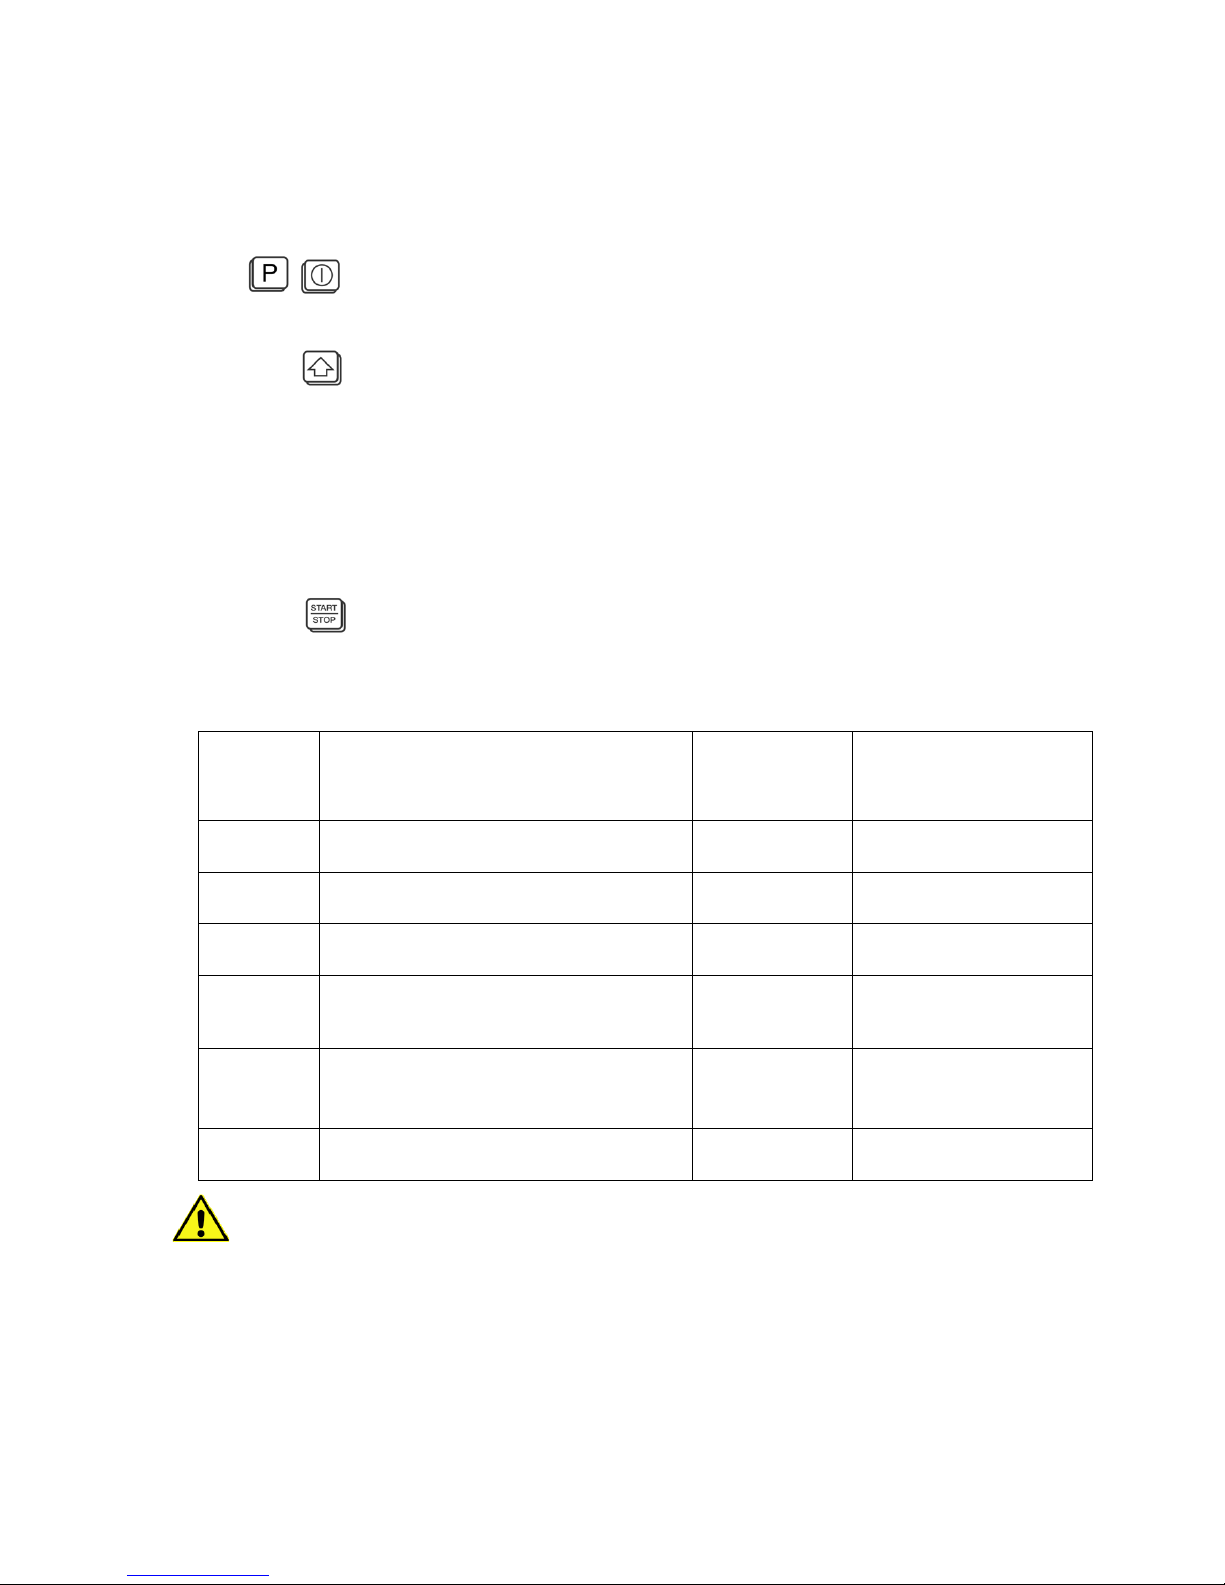
At first keep program key P and ON/OFF pressed simultaneously
until the display indicates A1. The function Autoclean is active.
Use the setting key to select the appropriate cleaning program according to
the
degree of dirt.
Choose from 6 different programs
1. A 1 Quick washing, rinsing with clear water
2. A 2 Step 1
3. A 3 Step 2
4. A 4 Step 3
5. A 5 Step 4
6. In Start-up (after refill or change of canisters)
Press START/STOP key, the selected cleaning program runs down
Autoclean Programs:
According to the degree of dirt inside the cooking chamber, different programs can be chosen
Display
indicates
Degree of dirt inside the cooking
chamber
Approximate
Duration
Program steps
A 1
Quick rinse in case of very light soiling or
during the day in between
2 min.
Quick rinsing with clear
water
A 2
Light soiling from preparation of several
lots of vegetables and meat products s.
50 min.
Soak - 1 x Clean - Rinse Dry
A 3
Medium soiling from preparation of several
lots of roasted and grilled product
1 hour 20 min.
Soak - 2 x Clean - Rinse –
Dry
A 4
Heavy soiling from repeated cooking of
vegetables and repeated preparation of
roasted and grilled products.
1 hour 52 min. Soak - 3 x Clean - Rinse -
Dry
A 5
Extreme soiling from practically constant
preparation of roasted and grilled products
with burnt-in food remainders
2 hours 23 min.
Soak - 4 x Clean - Rinse –
Dry
In
In case of first installation or
exchange/refilling of canisters
2 minutes
In case the cooking chamber temperature exceeds 80° C, the appliance is automatically
cooled down thanks to its safety cool-down function.
Prior to start cooking, make sure that no remainders of cleaning and rinsing agent
are left inside. If necessary, use the hand shower for a final rinsing!
Page 28
bed_500992_mab_g_1v5_en
26
Exchange of canisters
If not enough cleaner or rinse agent is left in the canisters, these must be refilled or
exchanged. Make sure to connect correctly. Red to cleaner and blue to rinse-agent !
Interruption of a cleaning program
The following safety precautions are taken to prevent that residues of cleaner and rinse-agent
remain in the cooking chamber, in case a program is interrupted.
Once a cleaning program was interrupted, the appliance can only be re-started after
having finished a rinsing process.
Interruption due to power failure or disconnection with key START/STOP
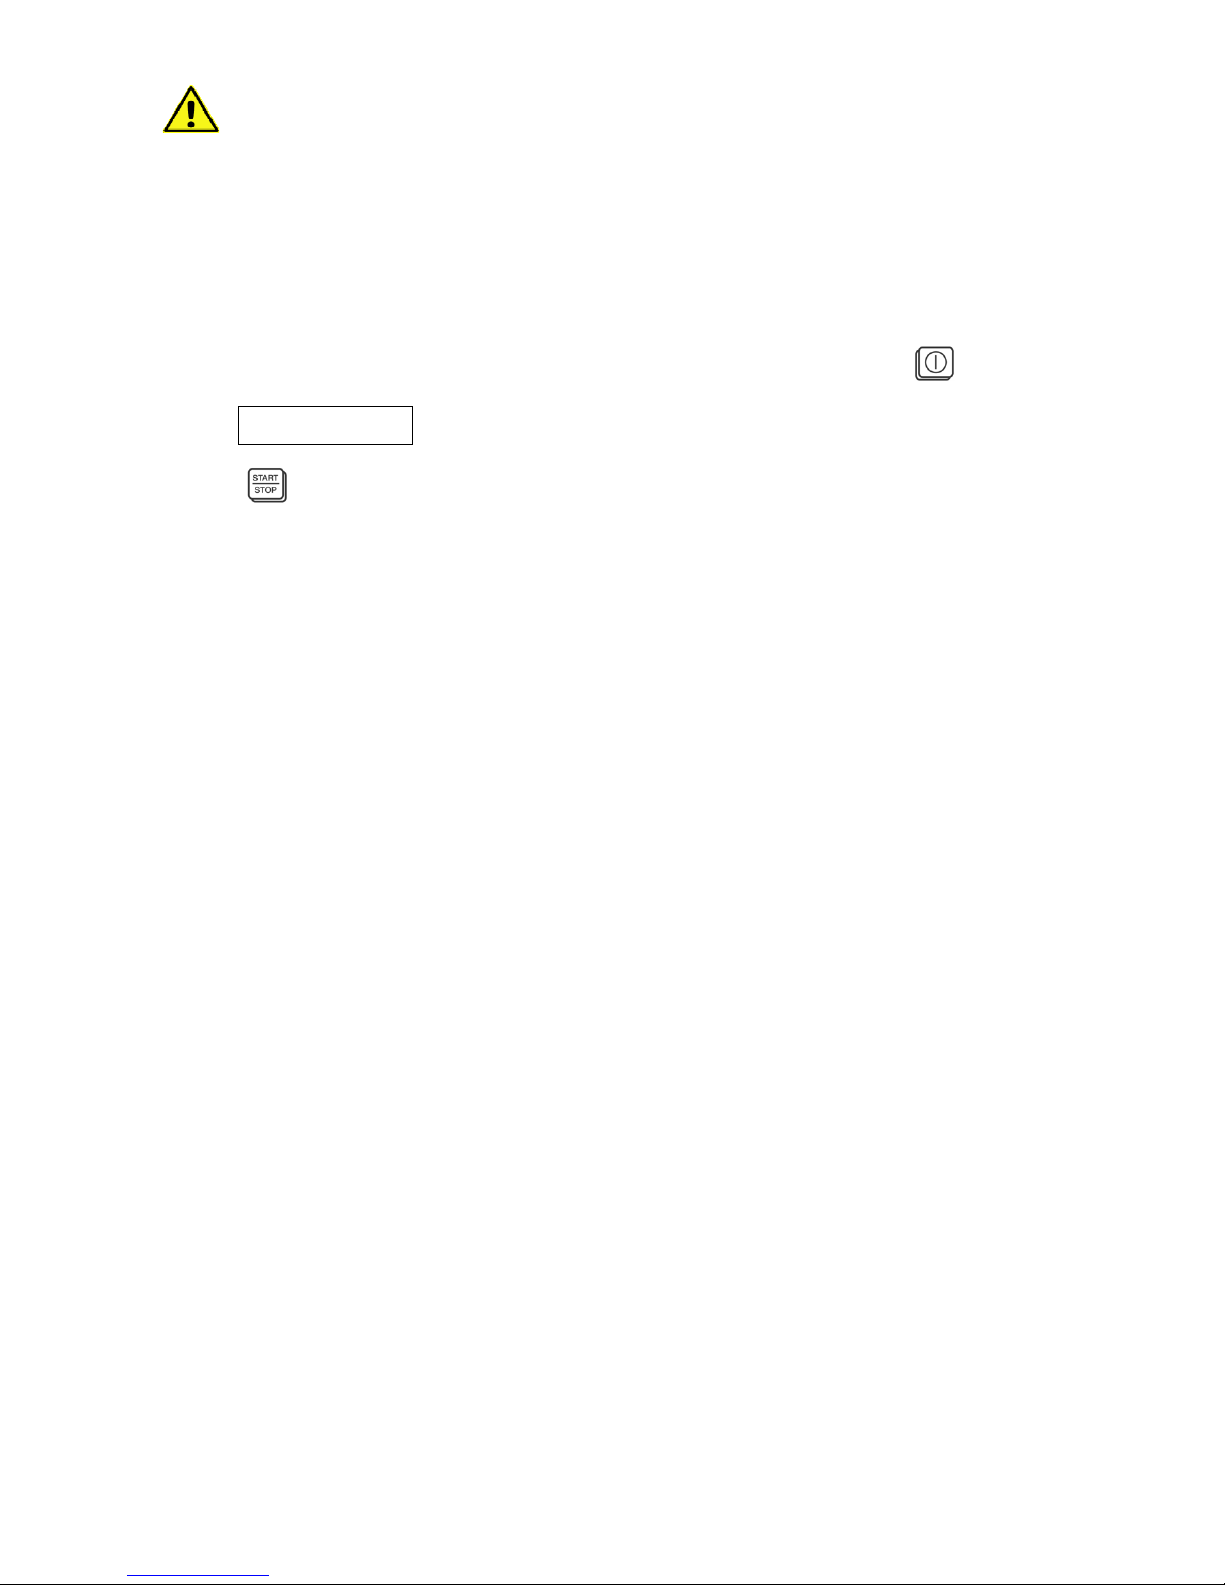
AC
Once the power is back, the display indicates AC.
Press START/STOP key now, to start an extra rinsing .
For safety reasons, the door must not be opened during the cleaning program.
Cleaner, rinse-agent, hot water and steam may escape.
If exceptionally the door has to be opened, Autoclean must be stopped beforehand.
DOOR
The door is equipped with a safety lock. To open it, press the handle down twice.
7.3 Delay start programming
It is possible to start a cleaning program at any desired time, after working hours or over night.
Start the program according to the instructions given in the operation manual Multimax B,
refer to paragraph 5.4. Delay start programming.
Page 29
bed_500992_mab_g_1v5_en
27
7.4 Units without Autoclean
Perfect and regular cleaning of the Multimax is of utmost importance. Reheating old grease
and/or food leftovers will impair taste and smell of fresh dishes considerably.
How to start the cleaning program
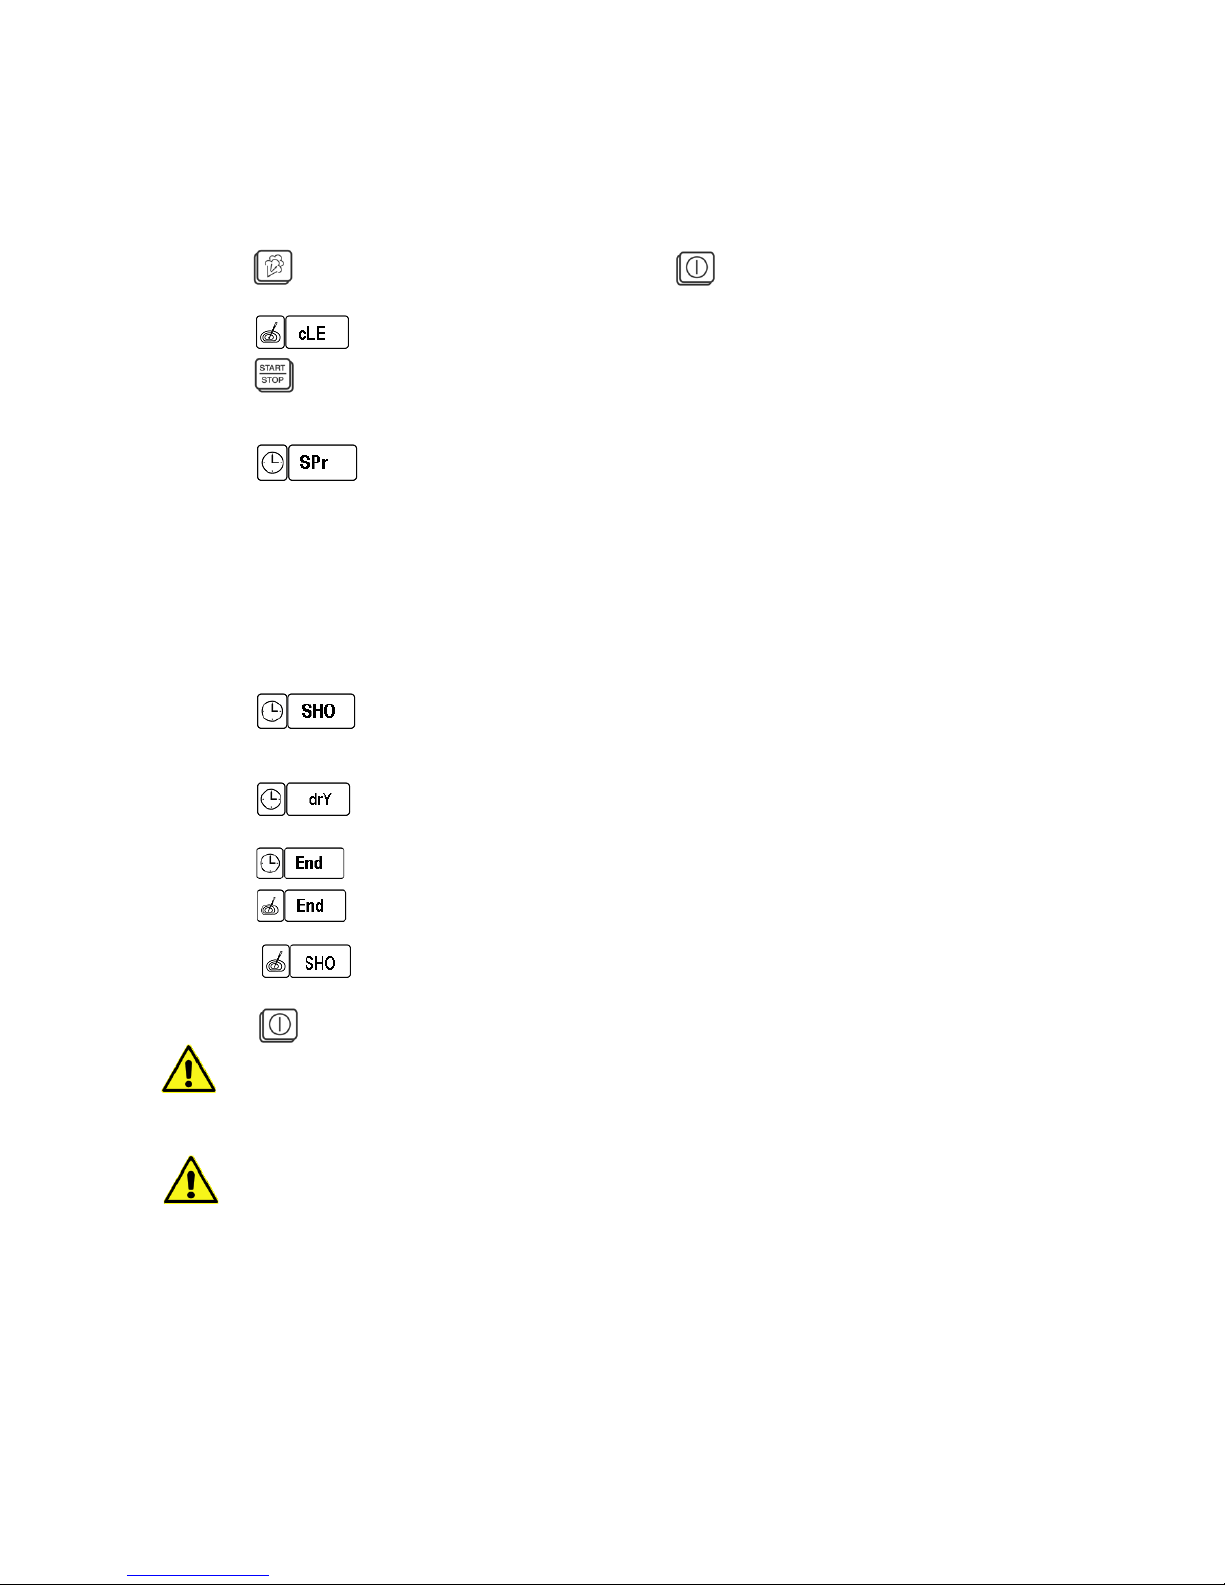
Keep key pressed and switch on by pressing
Indication in the display of the core temperature control
Press to start the cleaning program
The unit is cooled down or heated up to prescribed values (temperature max. 60°
C/140°F) and softens leftovers.
is flashing in the time display, a sound signal announces that the prescribed
values are reached.
Open the door, the sound signal stops. Spray special cleaner into the oven cavity.
We recommend to use only Eloma’s special cleaning agentThis product was developed
especially for the use in combi steamers, it was tested and approved.
If you use other products, the sealing and the interior of the cooking chamber may be damaged
by corrosion. Please observe the manufacturer's operating instructions.
Close the door and leave the cleaner to work. Burnt-in fat and food leftovers are moistened.
is flashing in the time display as soon as the softening time has run down,
there is again a sound signal Open the door and rinse the cooking chamber
thoroughly with clear water, use the handshower, if available.
is indicated in the time display, once the door is closed.
The cooking chamber is drying.
is indicated in the time display, a sound signal announces that the oven cavity is dry
is indicated in the core temperature field, announcing the end of the cleaning program.
is indicated in the core temperature display in case of a power failure. i
Turn the corresponding rotary knob, the indication disappears.
Press to switch on and continue working
Optional accessory:
Multimax A combi steamers may be equipped with a hand shower. This should only
be used for rinsing the interior but not for outer surfaces.
Do not spray into a hot oven cavity.
In case cleaning agent remains in the cooking chamber, this may cause
corrosion problems. It may also influence food products.
Dry the inside, and then leave the door open by a small gap, so that the cooking
chamber is well ventilated. Do not damage thermostat sensor when cleaning !
Page 30
bed_500992_mab_g_1v5_en
28
7.5 Cleaning and maintenance
Regular cleaning of the combi steamer Multimax is of utmost importance.
Only Eloma recommended cleaner agents may be used.
Please observe the manufacturer's operating instructions.
Caring for the door sealing
A door sealing is subject to wear.
Proper care of sealing prolongs service life.
− Grease and caustic cleaning agents attack and weaken the sealing material and thereby
accelerate the rate of wear.
− Chicken and pork grease are very aggressive. Please observe the following care instructions:
− Manually clean the sealing daily with a mild grease solvent.
− Use fresh water to remove any remaining cleaning agent.
− Leave the door open overnight to allow the door sealing to relax.
The door should also be left open when the appliance is not in use.
− Inspect the sealing regularly for damage.
Replace damaged sealing to prevent steam/air from escaping.
− The sealing of appliances with Autoclean cleaning systems must also be cleaned by hand.
Grease and cleaner deposits often collect on the outer side of the sealing. If these are not
removed, the sealing decomposes at those places.
Cleaning of glass panel:
Clean only with a soft cloth. Never use scouring agents.
Cleaning of door glasses
The door is made of two parts. The inner glass can be opened for
cleaning. Clean only with a soft cloth. Never use scouring agents.
Cleaning of outer surfaces :
Use fat/grease dissolving cleaning agents or special stainless steel cleaners.
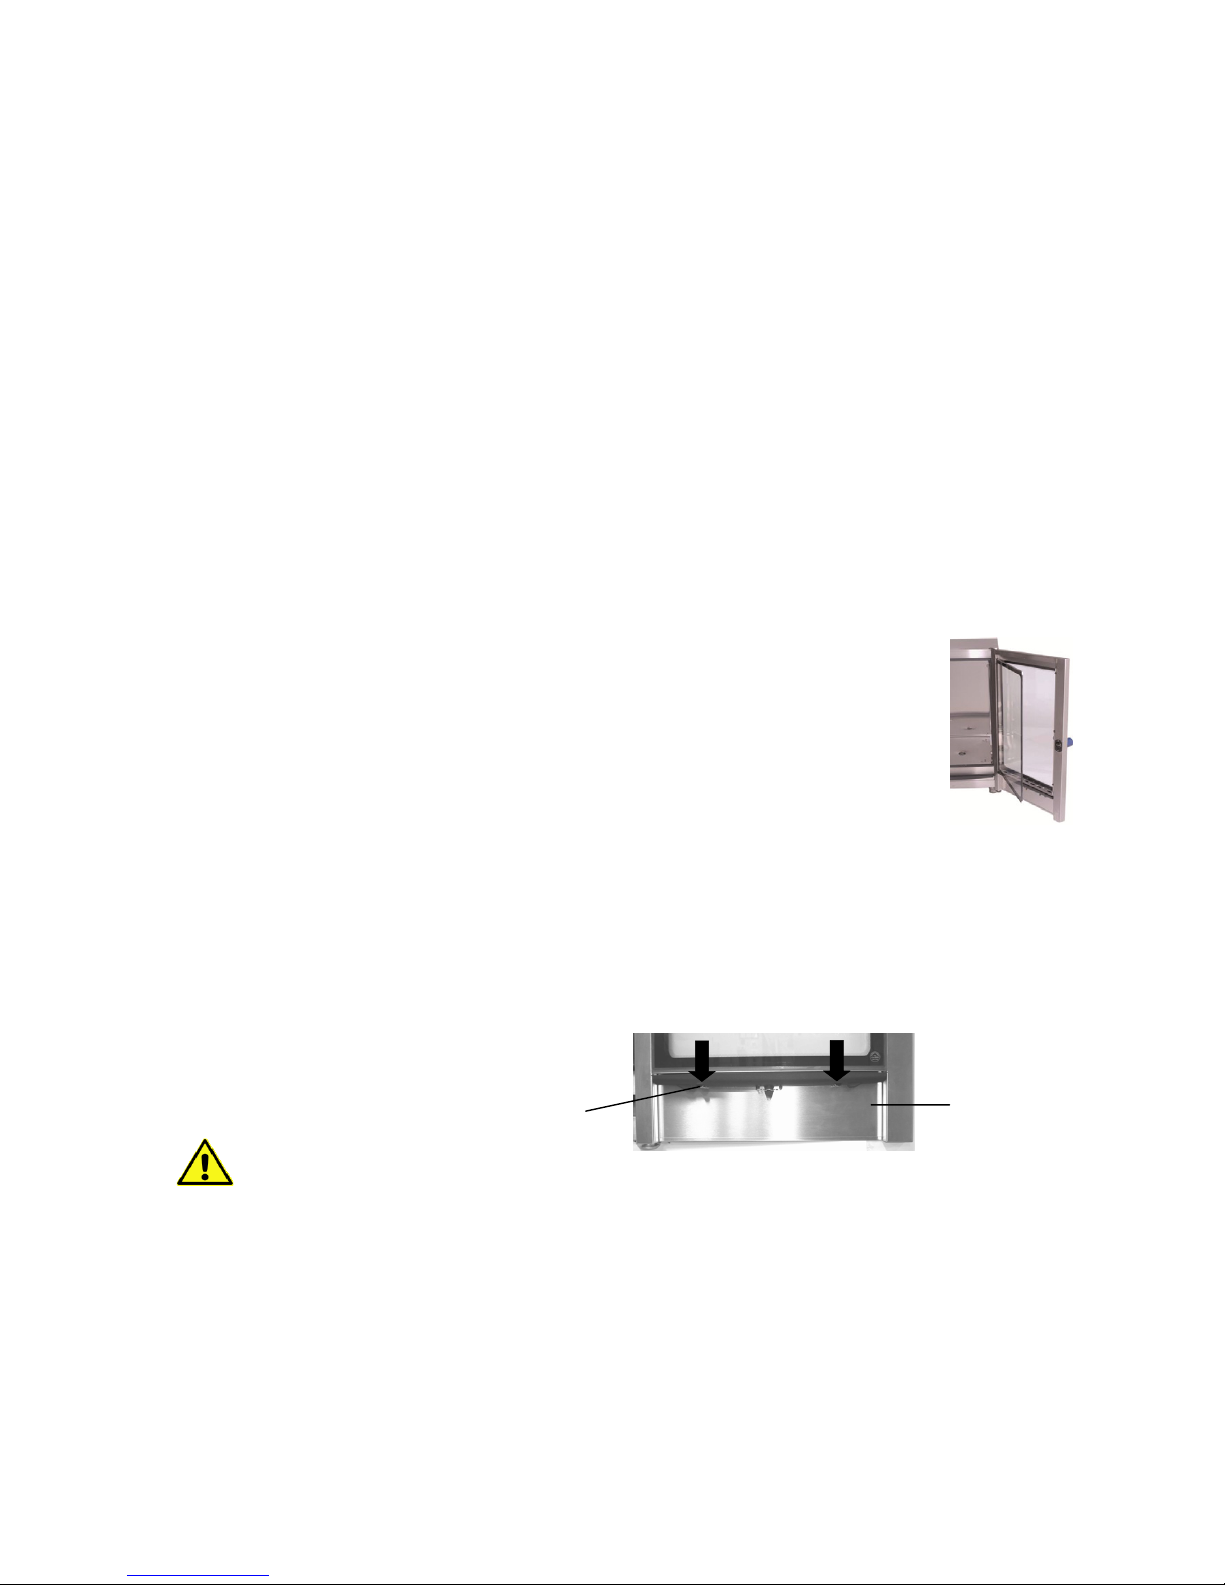
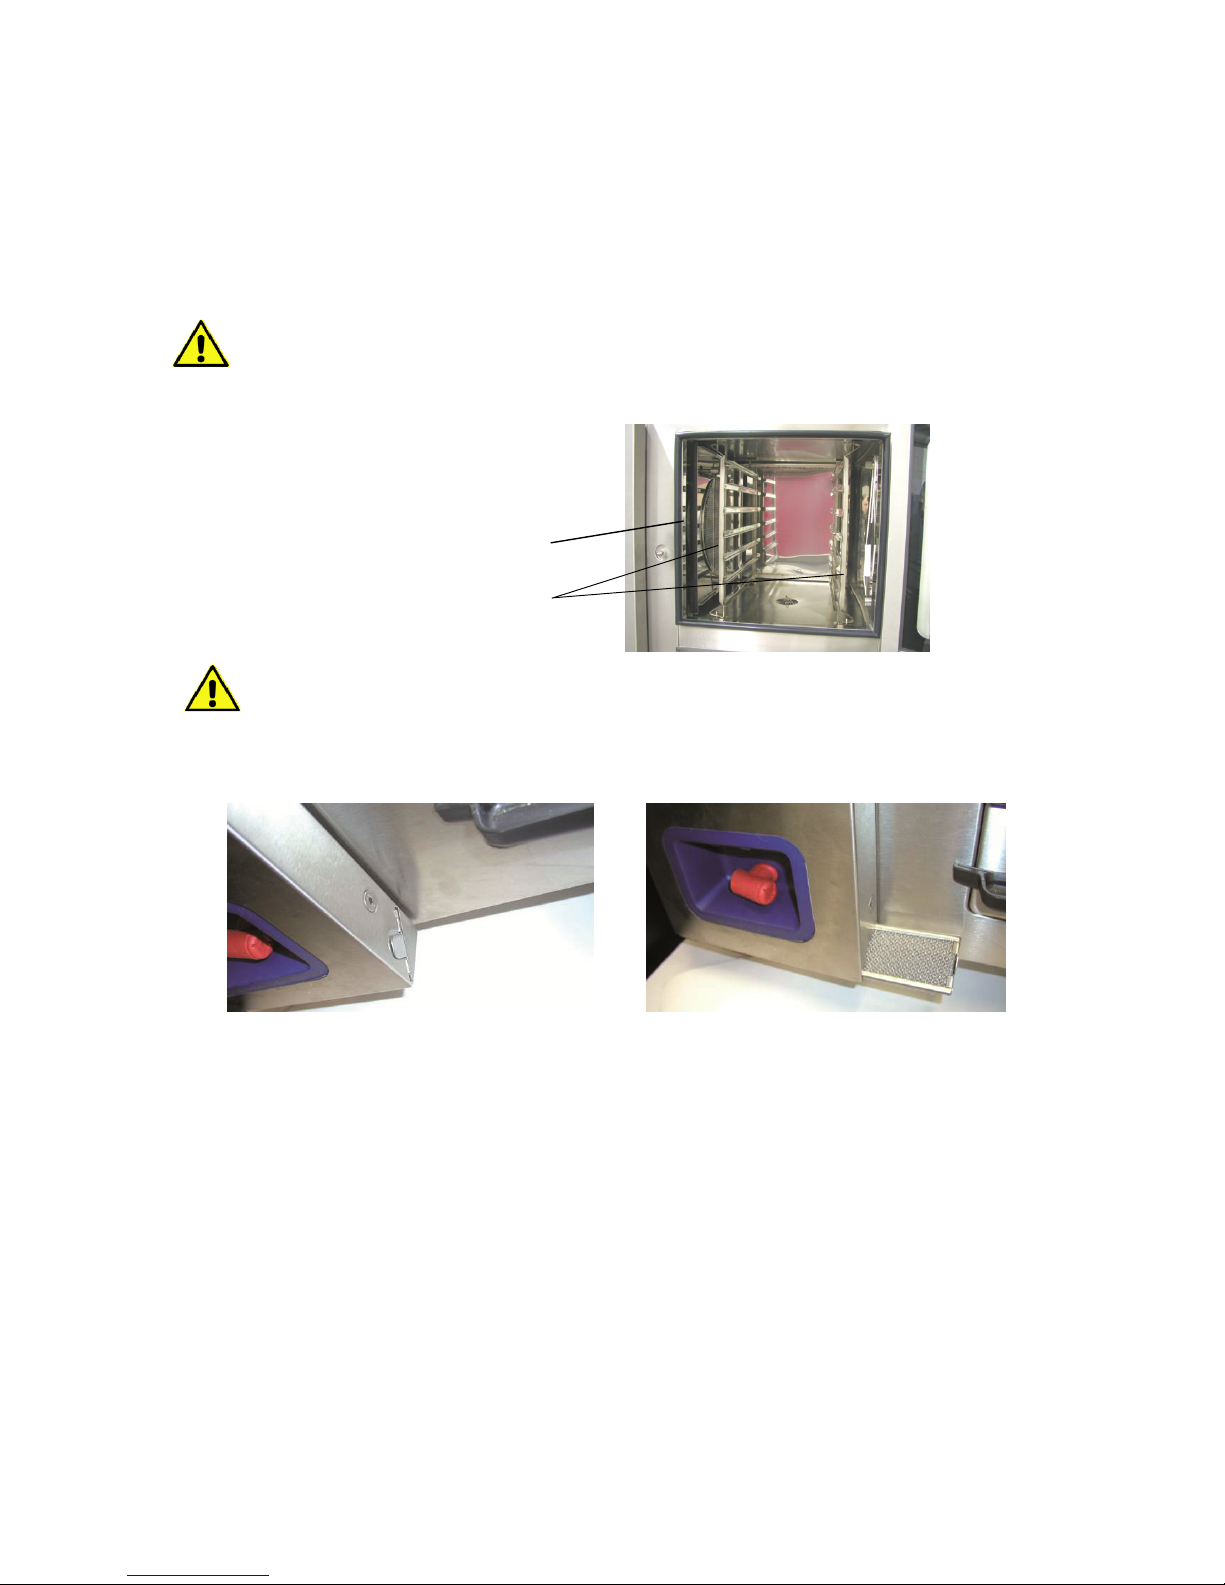
Cleaning of drip gutter and tray : ( models 6-11 and 10-11 only)
Drip gutter under the appliance : Clean it regularly including the drain opening.
Drip tray on the door : Remove it to the front for regular cleaning
by pressing the two clips underneath down.
Do not use either water jet, high pressure sprayer or steam purifier on outer surfaces.
Water jets may damage parts of the appliance or else get in contact with electric live parts.
Danger – personal injury caused by an electric shock. Do not spray into a hot oven cavity.
Door inside
Fastening clips
Page 31
bed_500992_mab_g_1v5_en
29
Cleaning the cooking chamber behind the air conducting sheet :
Clean monthly, or according to contamination.
Switch off the appliance and allow to cool down.
Remove shelf - supports (hang-in rack)
Remove fixing screws of air conducting sheet.
Remove air conducting sheet.
Floor models 20-11, 12-21 and 20-21 are equipped with tiltable
air conducting sheets.
Clean area - now accessible - thoroughly
After cleaning replace all parts removed in reverse order.
It is not allowed to operate the oven without air conducting sheet!
Cleaning the air intake filter
The air intake filter is laterally in the control panel and must be cleaned every two months.
The air intake filter can be cleaned in the wash basin or in the dishwasher.
Air conducting
sheet
Hang-in rack
Page 32
bed_500992_mab_g_1v5_en
30
8. Communication ProConnect Combi steamer
8.1 Start up communication ProConnect Combi steamer
Multimax B
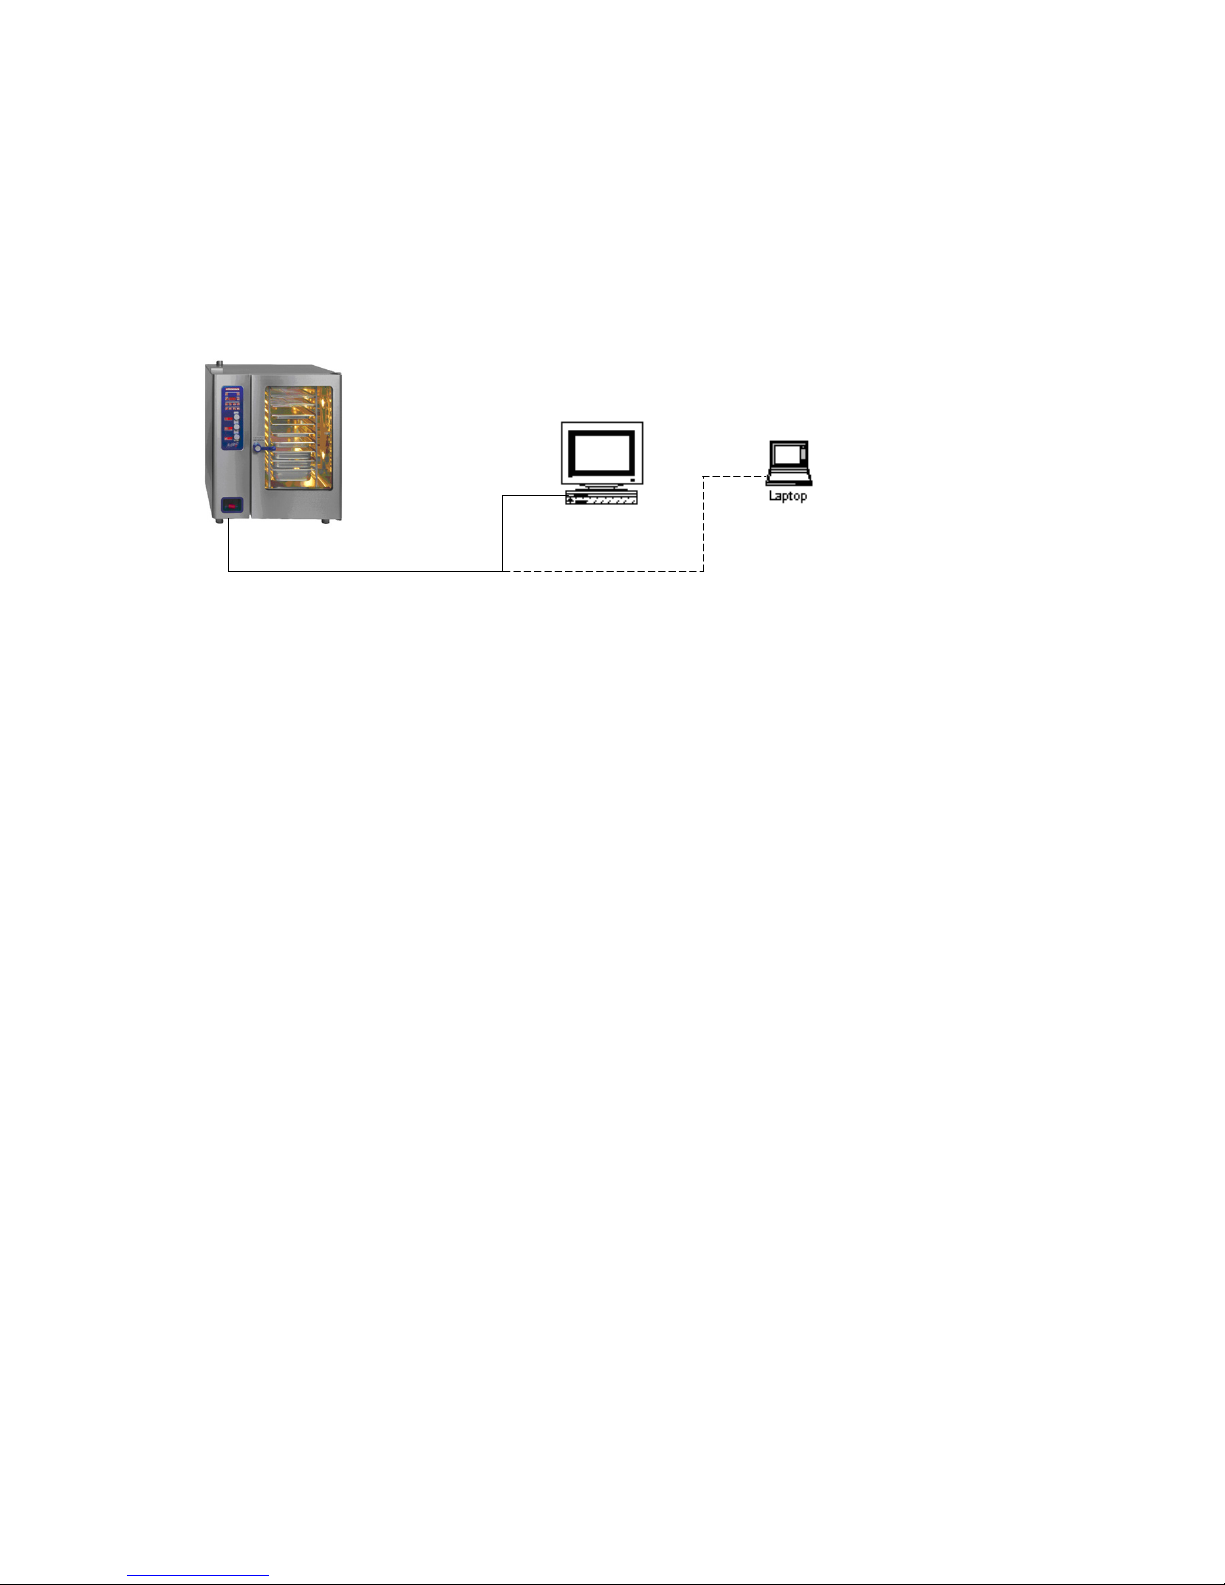
Use the appropriate cable to establish a communicating connection between PC and
combi steamer, “Point-to-Point” connection RS 232
Plug the connecting cable to external SubD9 port in the hose shower tulip and connect
the other end to the PC.
The combi steamer is in standby mode, it may be necessary to switch off the combi steamer.
The PC is switched on and ProConnect is started
Set the device address of the combi steamer in the PCPrg:
Menue/Options/device address.
Set Com-Port in the PCPrg to the one used as interface for the connection
PCPrg Combi steamer.
Provided the connection is established via USB-Port of the PC and USB/RS 232 adapter, this interface is
also indicated as Com-Port on the PC.
It is possible to test the communication in the set-up dialog for device address and port,
“check communication”.
Of course, there are further individual possibilities for connection and connectivity via
RS 485 systems
Contact our Service Hotline or our sales department for further information.
RS 232 Connection
PC
Page 33
bed_500992_mab_g_1v5_en
31
9 Adjustment of operational parameters
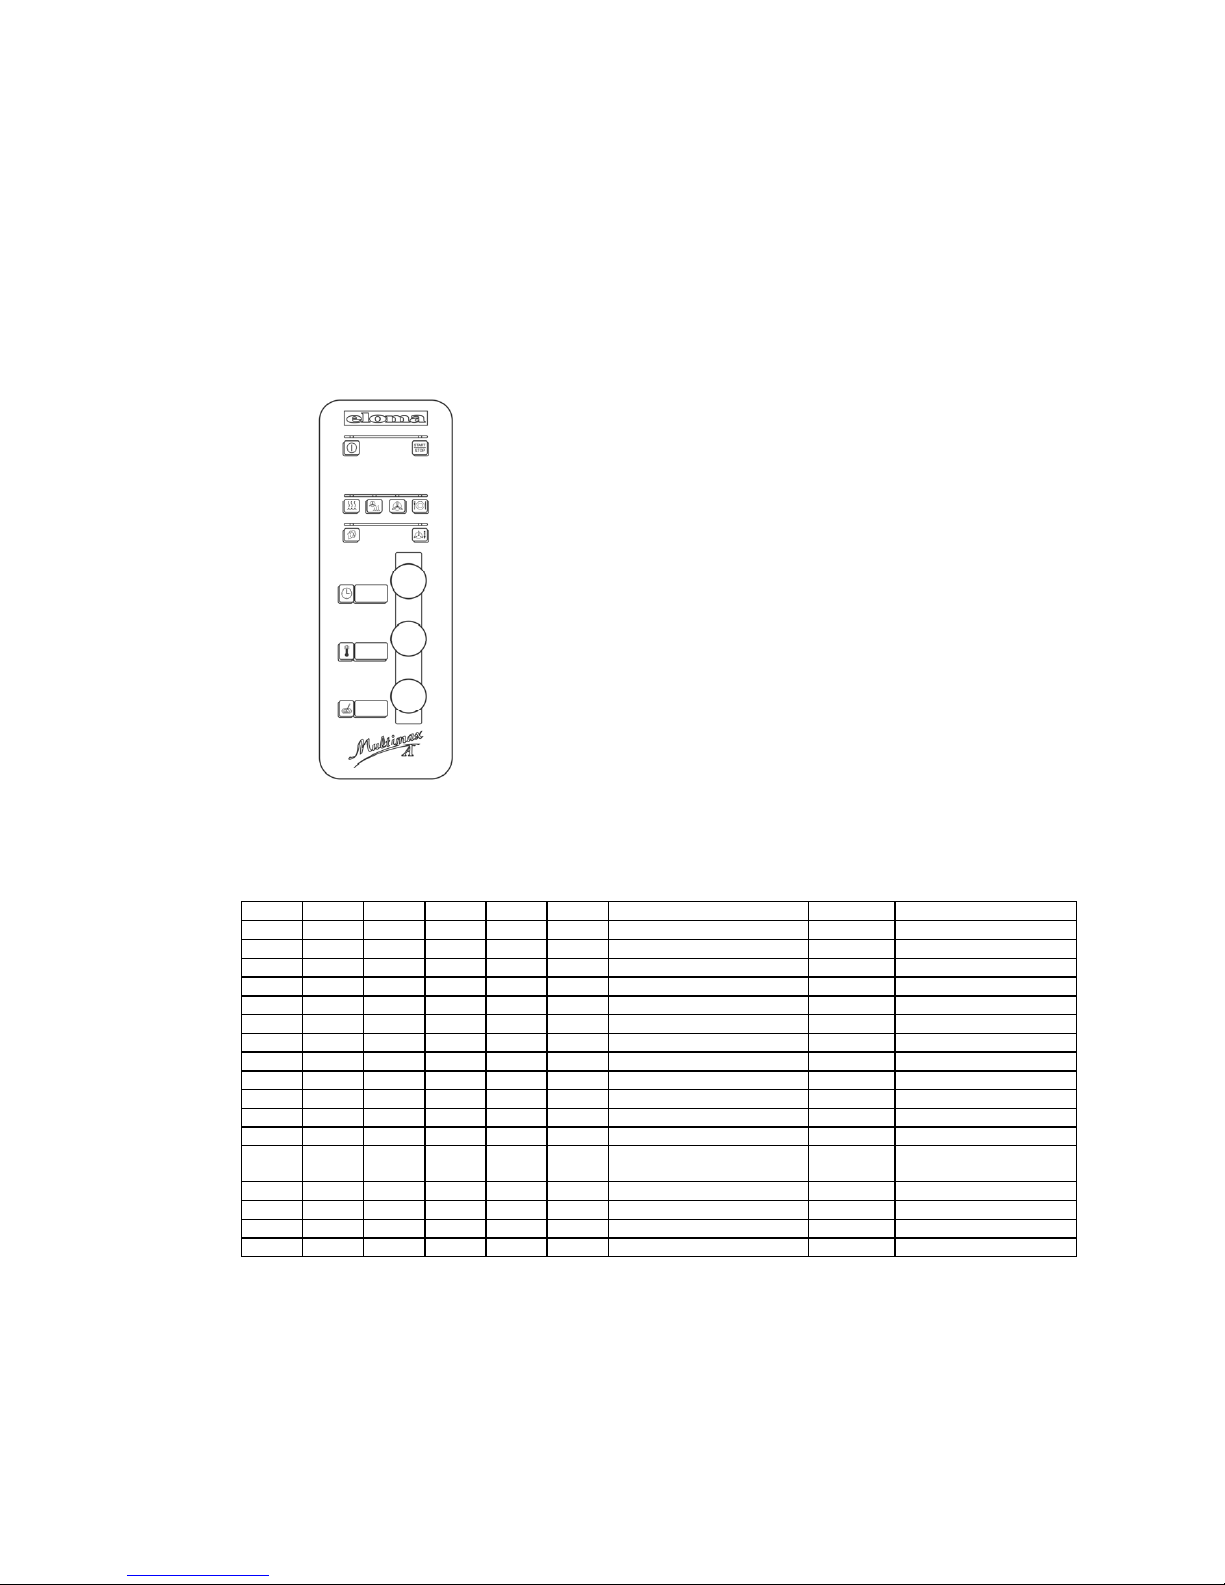
9.1 Multimax A
All operational parameters are correctly set when the combi steamer is delivered.
However, if it is necessary to change time and date (summer/winter time, incorrect setting)
proceed as follows :
The unit must be switched on but with no program
Set the time to 1:23 and press the key “ Manual humidification“ for about 2 seconds.
Adjust the different parameters at the panel in accordance with the table below
A 1 Display - Time
B 1 Rotary knob – Time
A 2 Display – Temperature
B 2 Rotary knob - Temperature
A 3 Display - Core temperature display
B 3 Rotary knob – Core temperature
B 1 A 1 B 2 A 2 B 3 A 3 Texter Standard Adjustment
Pr End
< > 101 < > 11 Hours 00-23
< > 102 < > 35 Minutes 00-59
< > 103 < > 26 Day 1-31
< > 104 < > 11 Month 1-12
< > 105 < > 01 Year 0-99
< > 106 < > 0 Format Date 0 0 = DMY24; 1:DMY2
< > 107 < > 1 Summer/winter time switch 1 0 = off 1=Europe
< > 108 < > 0 Notation °C,°F 0 0 = °C ; 1 = °F
< > 109 < > 0 Language 0 0 = German; 1 = English
< > 110 < > 30 Beep duration Program end 30 sec 0-999 sec
< > 111 < > 1 Beep duration cooking step
end
0 0-10 sec
< > 112 < > 0 Show mode 0 0 = off; 1 = on
< > 113 > 0 Internal light off – door open 1 0 = off; 1 = on
< > 114 < > 0 Address of appliance 0 0-99
< > 115 < > 3 Protocol core temperature 3 0-30 min
After all parameters have been set, respectively changed, press START/STOP.
The unit is again ready for work, time display indicates 0:00 and temperature display 99°C.
Page 34
bed_500992_mab_g_1v5_en
32
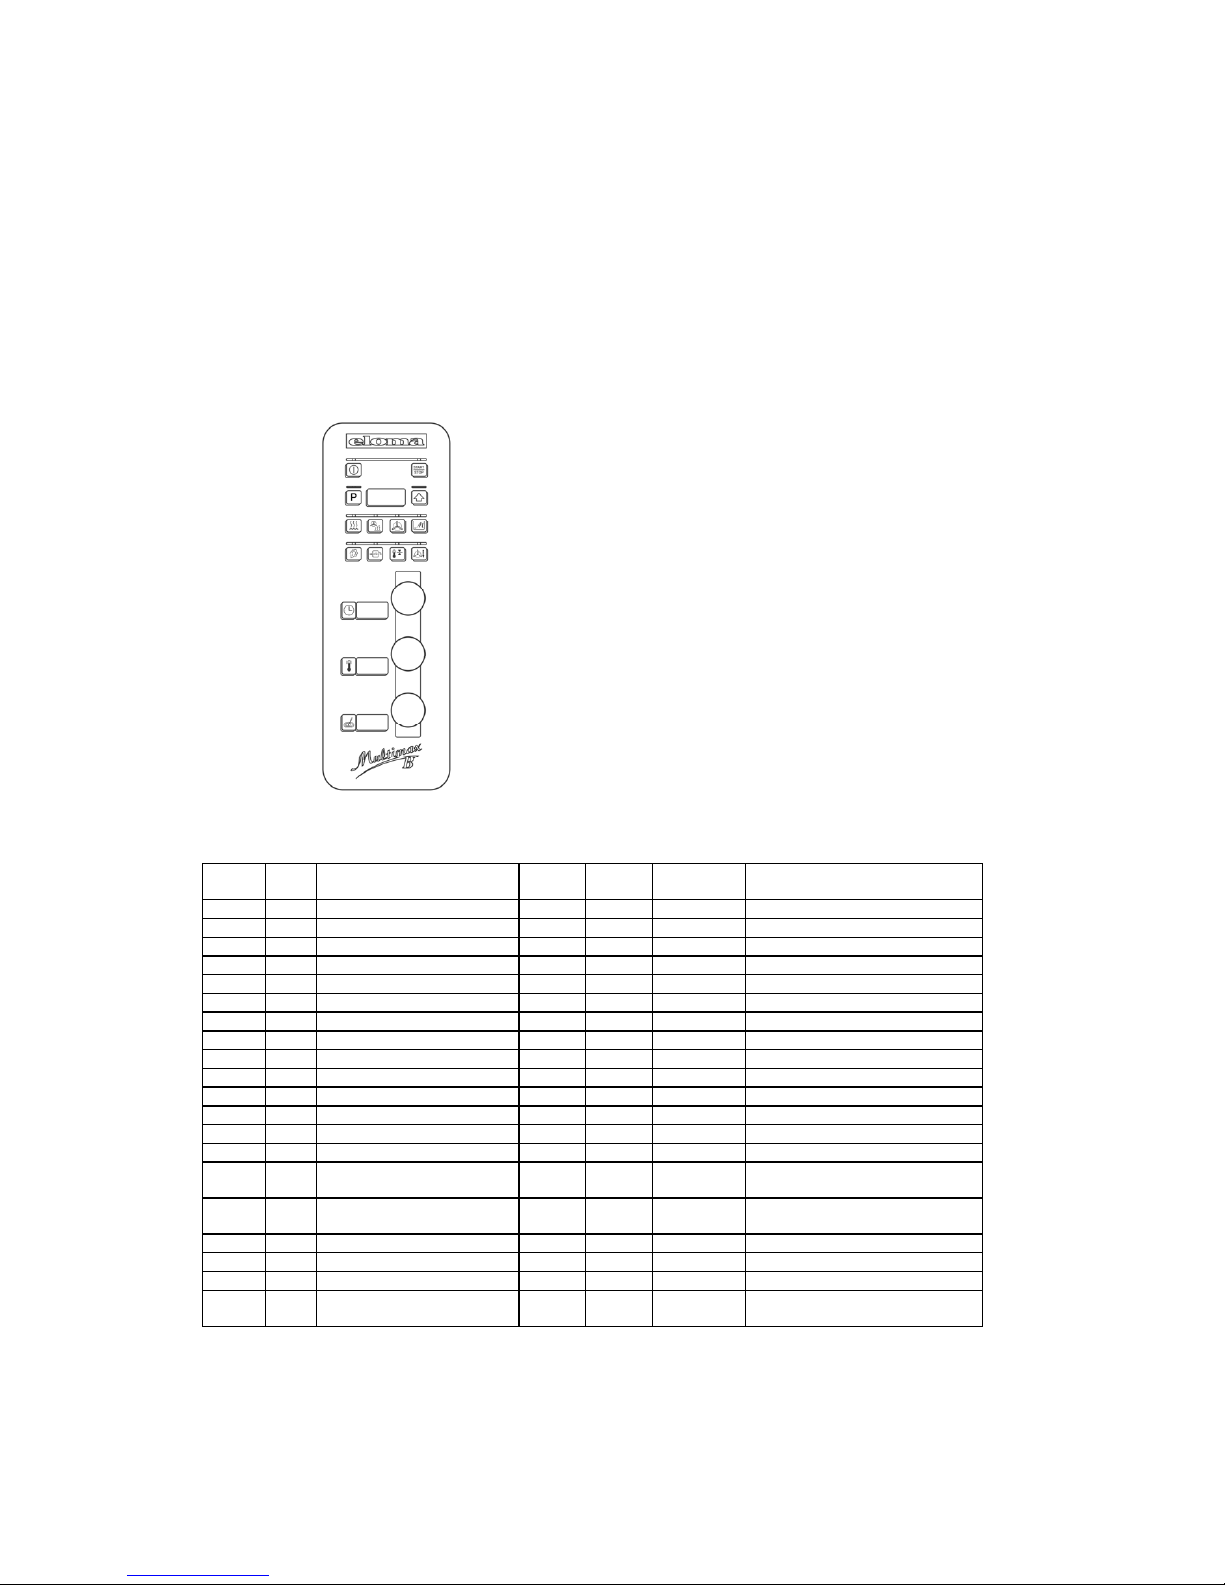
9.2 Adjusting the operating parameters
Multimax B, Multimax B Gas
The steamer is delivered with correctly adjusted operating parameters.
However, should it be necessary to change e.g. time and date (summer/winter time, incorrect time),
proceed as follows:
The steamer must be switched on, but no program may be running.
Adjust time “1:23”, and press the “Manual steaming” key for at least 2 seconds.
The time display briefly shows the software version, then Pr; the temperature display shows End.
You can now use the rotary selector switches to enter the different parameters according to the table
below.
Time display
Rotary time selector
Temperature display
Rotary temperature selector
Core temperature display
Rotary core temperature selector
Level Pos Description Min Max Unit
ServicePrg
Adjustment range
1 101 Hours 0 23 00-23
1 102 Minutes 0 59 00-59
1 103 Day 1 31 1-31
1 104 Month 1 12 1-12
1 105 Year 0 99 0-99
1 106 Date format 0 1 0: TMJ24; 1: TMJ12
1 107 Summer/winter switchover 0 1 0: Off; 1: Europe
1 108 Unit°C or °F 0 1 0:°C ; 1: °F
1 109 Language 0 1 0: German; 1: English
1 110 Signal duration ProgEnd 0 999 sec 30 sec
1 111 Signal duration ProgStep End 0 10 sec 0
1 112 Show Mode 0 1 0: Off; 1: On
1 113 Light off with open door 0 1 0: Off; 1: On
1 114 Device address 0 99
1 115 Recording time for core
temperature
0 30
1 116 Protocol for kitchen
supervisory system
0 1 0: No protocol; 1:
Protocol Type 1
1 117 No Cool-Down 0 1 0: Cool-Down enabled; 1:
Cool-Down disabled
1 118 Start display 0 1 0 = Manual;
1= Program display
Save the changed operating parameters by pressing START/STOP key.
The steamer is now ready for operation; time display shows 0:00, and temperature display shows 99°C.
Page 35
bed_500992_mab_g_1v5_en
33
10. Valuable information
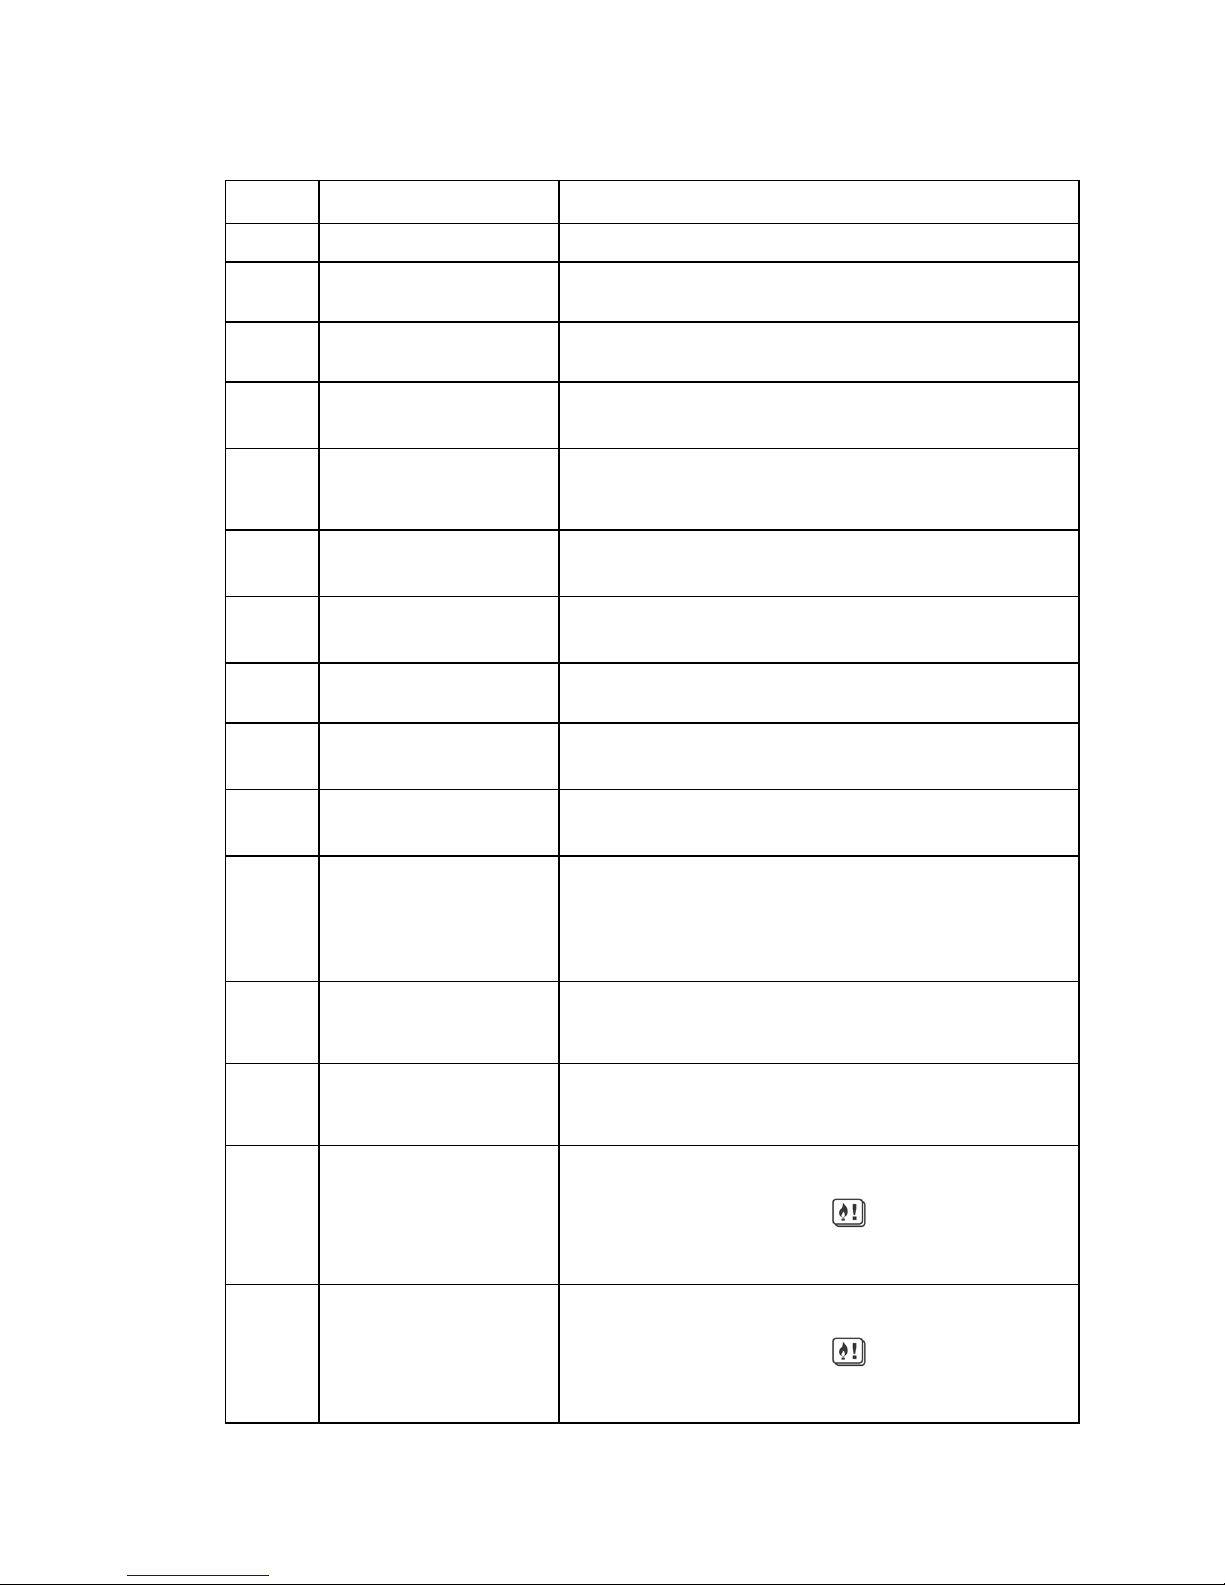
10.1 Error Message
Error Description Reaction, error remedy
Err001
Doors open Close doors or remedy defect on door switch.
Err111
Probe cooking chamber 1
no signal
Operation stop!
Customer service call!
Err112
Probe cooking chamber 2
no signal
Operation stop!
Customer service call!
Err113
Core temperature sensor
no signal
Warning!
Customer service call!
Meat probe operation is possible!.
Err114
Core temperature sensor
no signal
Warning!
Customer service call!
Meat probe operation is possible!
Err115
Core temperature sensor
no signal
Warning!.
Meat probe operation is possible!
Customer service call!
Err116
Core temperature sensor
no signal
Warning!
Meat probe operation is possible!
Customer service call!
Err117
Water vapour elimination
sensor, no signal
Operation with a defective sensor is possible!
Customer service call!
Err211
Over temperature STB
cooking chamber or motor
safety M1 released
Operation stop!
Customer service call!
Err212
Over temperature STB
cooking chamber or motor
safety M2 released
Operation stop!
Customer service call!
Err311
No water pressure Cooking operation: Warning / autoclean: Pause Open water
valve. Remedy too low customer-side water pressure.
Check the pressure switch for proper functioning.Attention!
The appliance pauses in autoclean! The appliance can be
used without water in cookingoperation!
Err511
Control module
Warning!
PCB temperature above 65°C
Operation possibile, Customer service call!
Err512
Control module
Operation stop!
PCB temperature above 70°C
Customer service call!
Err711
No flame cooking
chamber 1
Operation stop!
Restart the appliance by pressing
gas fault “Acknowledge” key
If over message appears more than twice in a row
call customer service please!
Err712
No flame cooking
chamber 2
Operation stop!
Restart the appliance by pressing
gas fault “Acknowledge” key
If over message appears more than twice in a row
call customer service please!
Page 36

bed_500992_mab_g_1v5_en
34
10.2 Trouble Shooting
If your Multimax should not work properly, take the following list and try to help yourself.
If you do not succeed, switch off, disconnect from mains, close water tap.
Call the after-sales-service
Failure
Possible Cause
Remedy
ON/OFF touch does not
light up, no interior lighting,
the oven cannot be
switched on
Mains switched off
Switch on
Mains fuse has tripped
Switch on mains fuse
No steam generation
Water tap closed
Open water tap
Water in the cooking
chamber does not run off
Drain clogged
Remove drain-sieve and clean it,
flush the drain
Calcareous deposits on
inner panels
Water too hard. Watersoftener exhausted
Correct installation ??
Connect the oven to a watersoftener
Regenerate water softener.
Formation of rust in the
cooking chamber
Poor water quality
Filter the water,
follow the installation instructions
Wrong cleaning agent
Use the Eloma product
Remains of cleaning agent
in the cooking chamber
Wash the interior thoroughly and
regularly.
There are iron chips in the
water supply system
Remove all parts of unalloyed
steel
Steam escapes from door
Door sealing exhausted, not
enough contact pressure to
the oven
Readjust the door latch
Door sealing defect.
Call the after-sales service
Gas burner does not ignite
Temperature display
shows E1 or E2
Fault in gas supply
Gas shut-off valve closed
Check gas supply
Open the valve
Confirm message with gas fault
acknowledge key.
Steamer starts automatically.
Page 37
Page 38
Page 39

Page 40

Englisch
Art. Nr.: bed_500992_mab_g_1v5_en
 Loading...