

Page 1

取扱説明書
ご使用に先だち取扱説明書をよくお読みいただき、
大切に保存してください。
INSTRUCTION MANUAL
Please read this instruction manual carefully before using
this product and keep it for future reference.
MODE D'EMPLOI
Lire attentvement ce mode d'emploi avant de mettre le Présentateur
Visuel en service. Le conserver á titre de référence permanente.
BEDIENUNGSANLEITUNG
Bitte lesen Sie diese Bedienungsanleitung sorgfältig, bevor Sie das
Gerät benutzen. Bewahren Sie die Anleitung als Referenz auf.
MANUAL DE INSTRUCCIONES
Antes de utilizar este producto, lea atentamente este manual de
instrucciones y guárdelo para consultas futuras.
Español P275~344
Deutsch P205~274 Français P135~204 English P67~134
日本語 P1~66
Page 2

Page 3

PART NAMES
AND
FUNCTIONS
SETTING UP STORING
OPERATION
PROCEDURE
VARIOUS
FUNCTIONS AND
OPERATIONS
TROUBLE
SHOOTING
SPECIFICATIONS
English
Document Camera
INSTRUCTION
MANUAL
Please read this instruction manual carefully
before using this product and keep it for future
reference.
Page 4

68
English
IMPORTANT SAFEGUARDS
Read Instructions
All the safety and operating instructions should be read before the appliance is
operated.
Retain Instructions
The safety and operating instructions should be retained for future reference.
Heed Warnings
All warnings on the product and in the operating instructions should be adhered
to.
Follow Instructions
All operating and use instructions should be followed.
Cleaning
Unplug this product from the wall outlet before cleaning. Do not use liquid
cleaners or aerosol cleaners. Use a damp cloth for cleaning.
Attachments
Do not use attachments not recommended by the product manufacturer as they
may cause hazards.
Water and Moisture
Do not use this product near water - for example, near a bath tub, wash bowl,
kitchen sink, or laundry tub, in a wet basement, or near a swimming pool, and
the like.
Placement
Do not place this product on an unstable cart, stand, tripod, bracket, or table.
The product may fall, causing serious injury to a child or adult, and serious
damage to the product. Use only with a cart, stand, tripod, bracket, or table
recommended by the manufacturer, or sold with the product. Any mounting of
the product should follow the manufacturer's instructions, and should use a
mounting accessory recommended by the manufacturer.
Ventilation
Slots and openings in the cabinet are provided for ventilation and to ensure
reliable operation of the product and to protect it from overheating, and these
openings must not be blocked or covered. The openings should never be
blocked by placing the product on a bed, sofa, rug, or other similar surface.
This product should not be placed in a built-in installation such as a bookcase
or rack unless proper ventilation is provided or the manufacturer's instructions
have been adhered to.
Page 5

69
English
Power Sources
This product should be operated only from the type of power source indicated
on the marking label. If you are not sure of the type of power supply to your
home consult your appliance dealer or local power company. For products
intended to operate from battery power, or other sources, refer to the operating
instructions.
Grounding or Polar
ization
This product may be equipped with either a polarized 2-wire AC line plug (a
plug having one blade wider than the other) or a 3-wire grounding type plug,
a plug having a third (grounding) pin. The 2-wire polarized plug will fit into the
power outlet only one way. This is a safety feature. If you are unable to insert
the plug fully into the outlet, try reversing the plug. If the plug still fails to fit,
contact your electrician to replace your obsolete outlet. Do not defeat the safety
purpose of the polarized plug. The 3-wire grounding type plug will fit into a
grounding type power outlet. This is a safety feature. If you are unable to insert
the plug into the outlet, contact your electrician to replace your obsolete outlet.
Do not defeat the safety purpose of the grounding type plug.
Power-Cord Protection
Power-supply cords should be routed so that they are not likely to be walked on
or pinched by items placed upon or against them, paying particular attention to
cords at plugs, convenience receptacles, and the point where they exit from the
product.
Lightning
For added protection for this product during a lightning storm, or when it is left
unattended and unused for long periods of time, unplug it from the wall outlet
and disconnect the antenna or cable system. This will prevent damage to the
product due to lightning and power-line surges.
Overloading
Do not overload wall outlets, extension cords, or integral convenience
receptacles as this can result in a risk of fire or electric shock.
A product and cart combination should be moved with
care
. Quick stops, excessive force, and uneven surfaces
may cause the product and cart combination to overturn.
Object and Liquid Entry
Never push objects of any kind into this product through openings as they may
touch dangerous voltage points or short-out parts that could result in a fire or
electric shock. Never spill liquid of any kind on the product.
Page 6

70
English
Servicing
Do not attempt to service this product yourself as opening or removing covers
may expose you to dangerous voltage or other hazards. Refer all servicing to
qualified service personnel.
Damage Requiring Ser
vice
Unplug this product from the wall outlet and refer servicing to qualified service
personnel under the following conditions:
• When the power-supply cord or plug is damaged.
•
If liquid has been spilled, or objects hav
e fallen into the product.
• If the product has been exposed to rain or water.
•
If
the product does not operate normally by following the operating instructions.
Adjust only those controls that are covered by the operating instructions as an
improper adjustment of other controls may result in damage and will often require
extensive work by a qualified technician to restore the product to its normal
operation.
• If the product has been dropped or damaged in any way.
•
When the
product exhibits a distinct change in performance - this indicates a need
for service.
Replacement Par
ts
When replacement parts are required, be sure the service technician has
used replacement parts specified by the manufacturer or have the same
characteristics as the original part. Unauthorized substitutions may result in fire,
electric shock or other hazards.
Safety Check
Upon completion of any service or repairs to this product, ask the service
technician to perform safety checks to determine that the product is in proper
operating condition.
Heat
The product should be situated away from heat sources such as radiators, heat
registers, stoves, or other products (including amplifiers) that produce heat.
Page 7
71
English
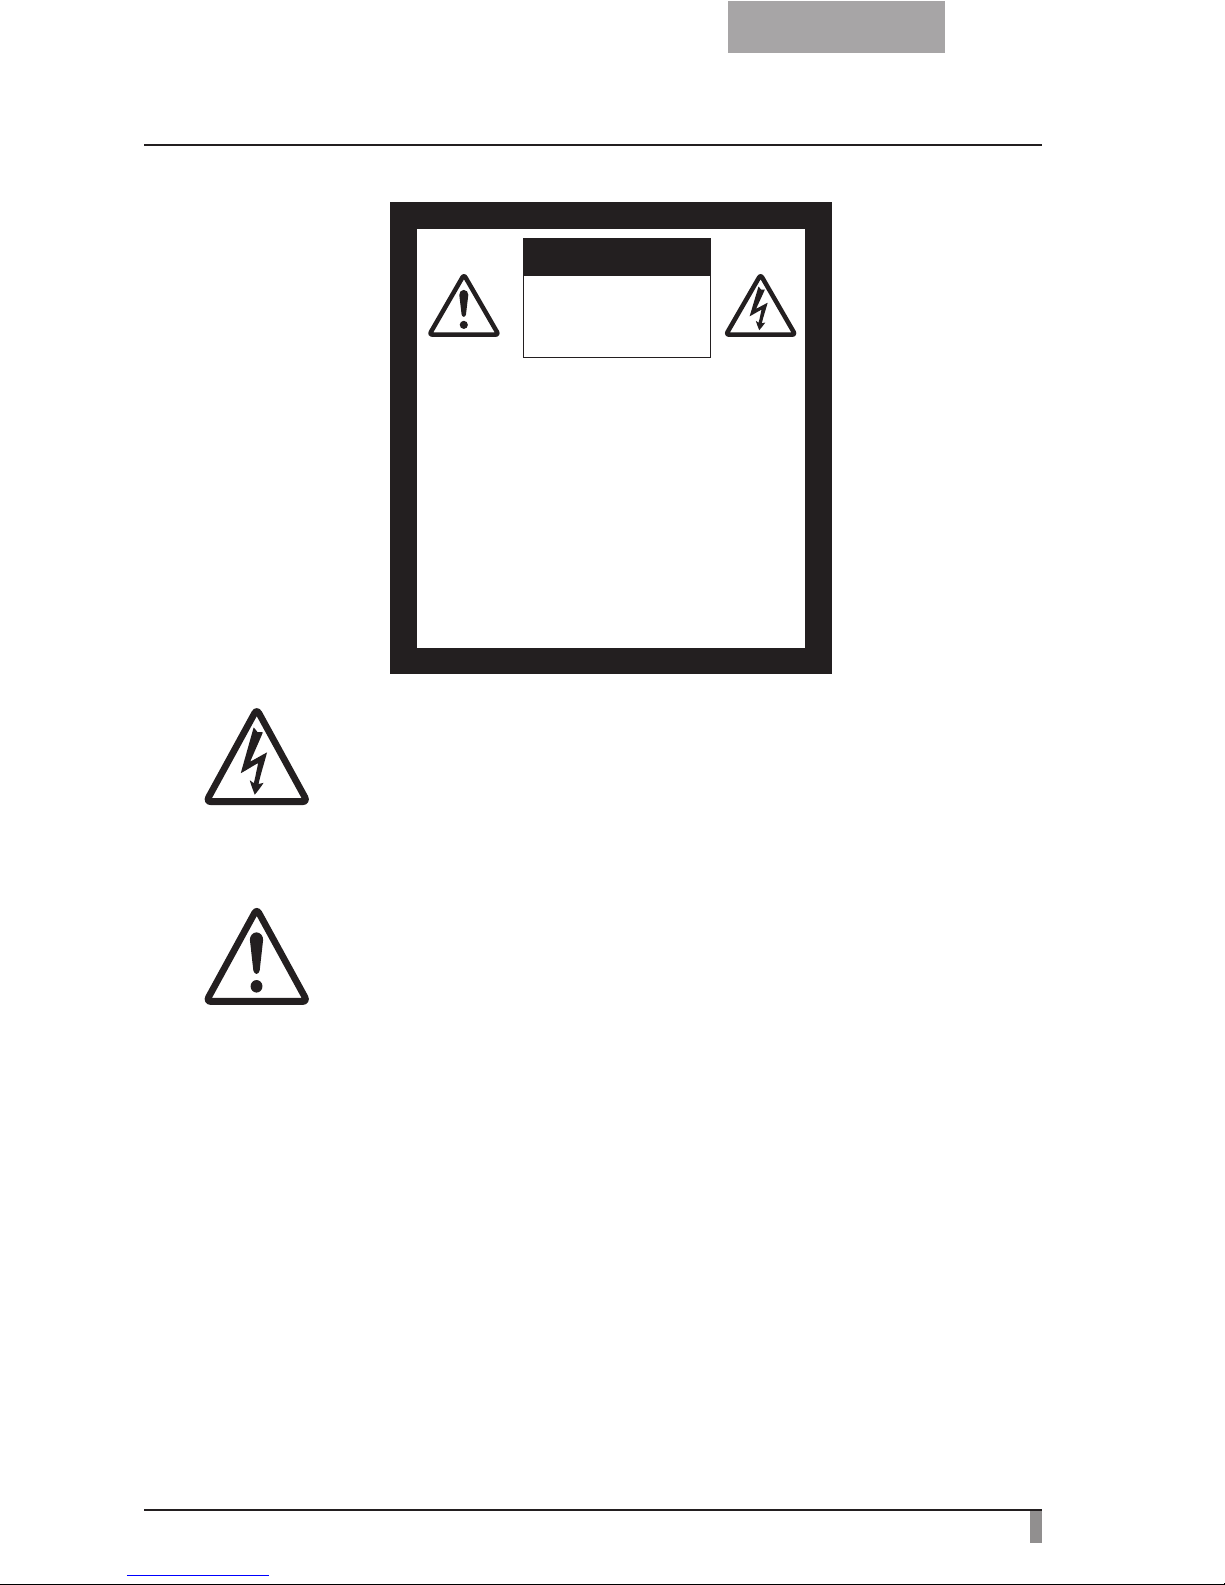
CAUTION
RISK OF
ELECTRIC SHOCK
DO NOT OPEN
CAUTION:
TO REDUCE THE RISK OF
ELECTRIC SHOCK, DO NOT
REMOVE COVER (OR BACK).
NO USER-SERVICEABLE
PARTS INSIDE.
REFER SERVICING TO
QUALIFIED SERVICE
PERSONNEL.
SA 1965
The lightning flash with arrowhead symbol, within an equilateral
triangle, is intended to aler t the user to the presence of
uninsulated "dangerous voltage" within the product's enclosure
that may be of sufficient magnitude to constitute a risk of electric
shock to persons. This marking is located at the bottom of
product.
SA 1966
The exclamation point within an equilateral triangle is intended
to alert the user to the presence of important operating
and maintenance (servicing) instructions in the literature
accompanying the product.
Page 8

72
English
WARNING:
TO REDUCE THE RISK OF FIRE OR ELECTRIC SHOCK, DO NOT
EXPOSE THIS PRODUCT TO RAIN OR MOISTURE.
The connection of a non-shielded equipment interface cable to this equipment
will invalidate the FCC Certification or Declaration of this device and may
cause interference levels which exceed the limits established by the FCC for
this equipment. It is the responsibility of the user to obtain and use a shielded
equipment interface cable with this device. If this equipment has more than
one interface connector, do not leave cables connected to unused interfaces.
Changes or modifications not expressly approved by the manufacturer could
void the user’s authority to operate the equipment.
FOR UNITED STATES USERS:
INFORMATION
This equipment has been tested and found to comply with the limits for a
Class B digital device, pursuant to Part 15 of the FCC Rules. These limits
are designed to provide reasonable protection against harmful interference
in a residential installation. This equipment generates, uses, and can radiate
radio frequency energy and, if not installed and used in accordance with the
instructions, may cause harmful interference to radio or television reception.
However, there is no guarantee that interference will not occur in a particular
installation. If this equipment does cause interference to radio and television
reception, which can be determined by turning the equipment off and on, the
user is encouraged to try to correct the interference by one or more of the
following measures.
• Reorient or relocate the receiving antenna.
•
Increase the separation between the equipment and receiver.
•
Connect the equipment into an outlet on a circuit different from that to which the
receiver is connected.
•
Consult the dealer or an experienced radio/TV technician for help.
USER-INSTALLER
CAUTION:
Your authority to operate this FCC verified equipment could be voided if
you make changes or modifications not expressly approved by the party
responsible for compliance to Part 15 of the FCC rules.
WARNING:
Handling the cord on this product or cords associated with accessories sold
with this product, will expose you to lead, a chemical known to the State of
California to cause birth defects or other reproductive harm.
Wash hands after handling.
Page 9

73
English
Before You Use
Be sure to use the power cord applicable to your local power specifications. If
the product was sold in Japan, use the power cord or AC adapter sold with the
product with 100 VAC and 50 or 60
Hz.
When storing the product, do not leave it under direct sunlight or by heaters. It
may become discolored, deformed, or damaged.
Do not
place this product in any humid, dusty, salt bearing wind, or vibrating
locations.
Only use it under the follo
wing environmental conditions:
Temper
ature:
0°C - 40°C (32°F - 104°F)
Humidity: 30% - 85% (No condensation)
Use a soft, dry cloth f
or cleaning.
Do not use any v
olatile solvent such as thinner or benzene.
Do
not point the camera lens directly at the sun. This may damage to the
device.
Luminescent and Black Spots
Th
ere may be some pixels that do not properly operate due to the use of
CMOS Area Image Sensors madeup of many pixels.
Th
ough luminescent or black spots may be found on the screen, it is a
phenomenon peculiar to the CMOS Area Image Sensors and is not a
malfunction.
Follo
w the guidelines below to prevent the unit from dropping or overturning.
• Use the product on a stable base, desk, or table. Do not place the product on an
unstable base or slanted surface.
• Place or wire the unit to prevent the AC adapter cord or video cable from pulling.
Carry the product by holding the lower part of the main unit in both hands.
Never hold the product by the column or the camera head.
Pa
y careful attention when using (including setting-up and storing) or
transferring the product, to prevent the camera head from receiving any shocks.
Do not look directly into the LED light, this can damage your e
yes.
Tr
ansfer the data from the SD card onto a device such as a PC to save a
backup copy. Malfunction of the product or repairs to it may cause the data
saved in the SD card to be deleted.
If this
product is used for longer than the warranty period, its performance and
quality may deteriorate due to the lifetime of its parts. To purchase replacement
parts, consult the dealer from whom you purchased this product or our branch/
office near your location.
Page 10

74
English
Battery precautions:
If this
product is not going to be used for a long time, take the batteries out of
the remote control.
Do not use rechargeable batter
ies (e.g. Hi-MH (nickel-metal hybrid batteries)).
Do not use new and old batter
ies or batteries of different types together.
Do not try to recharge or shor
t-circuit the batteries.
Wh
en disposing of used batteries, follow the instructions of your local
government.
Insert from one side and pa
y particular attention to the polarity (+/- directions).
Be sure to use AAA batteries.
If an
y liquid from a battery leaks onto your skin or clothes, flush the area with
clean water immediately. If it gets into your eye, flush immediately with clean
water and then contact a doctor.
Precautions regarding the remote control strap
T
o prevent unexpected accidents, please note the following points.
• This strap is for the remote control only and should not be used for any other
purposes.
•
Do not wrap the str
ap around parts of your body such as your neck, arm, or finger.
•
Do not leav
e it within reach of small children.
•
Fo
r safety reasons, the break-away section of the strap has been designed to
separate if too much force is applied. Therefore, please avoid any overly strenuous
movements and do not apply excessive force.
•
Th
e strap length adjustment feature is designed to be simple and supportive.
Excessive force or strenuous movements may change the length.
• Do not use excessive force when adjusting the strap. This could damage the strap.
Page 11

75
PART NAMES
AND
FUNCTIONS
SETTING UP STORING
OPERATION
PROCEDURE
VARIOUS
FUNCTIONS AND
OPERATIONS
TROUBLE
SHOOTING
SPECIFICATIONS
CONTENTS
English
IMPORTANT SAFEGUARDS ................................................................. 68
Before You Use ............................................................................................ 73
CONTENTS ............................................................................................ 75
1. PART NAMES AND FUNCTIONS ....................................................... 77
Part Names .................................................................................................. 77
Appearance
............................................................................................. 77
List of Functions
...........................................................................................78
Front operating panel
.............................................................................. 78
Rear panel
............................................................................................... 80
Side panel
...............................................................................................81
Remote control
........................................................................................ 82
List of functions
.......................................................................................83
OSD (On-Screen Display)
...........................................................................86
Camera mode OSD menu
....................................................................... 88
SD mode OSD menu
............................................................................... 93
SD menu
..................................................................................................94
2. SETTING UP ....................................................................................... 96
Setting Up ....................................................................................................96
Connecting the AC Adapter and Video Cable
............................................ 98
3. STORING .......................................................................................... 101
Storing .......................................................................................................101
4. OPERATION PROCEDURE .............................................................. 102
Presentation Using Printed Materials, etc. ................................................102
Presentation Using an SD Card (Commercially-available)
........................104
Transferring Images Fr
om the SD Card to a USB-connected PC
.............108
Presentation Using the Supplied Softwar
e with a USB-connected PC
.....110
Shooting Off the Stage
..............................................................................111
Presentation Using Film
.............................................................................112
5. VARIOUS FUNCTIONS AND OPERATIONS .................................... 113
Zoom ..........................................................................................................113
Focus
......................................................................................................... 114
Auto Focus (AF)
..................................................................................... 114
Normal AF mode
................................................................................... 115
One-shot AF mode
................................................................................ 115
Manual focus
......................................................................................... 116
Illumination
................................................................................................. 117
Lamp positioning
...................................................................................117
Adjusting the Brightness
...........................................................................118
Automatic brightness adjustment
.......................................................... 118
Manual brightness adjustment
.............................................................. 118
Image Selection
.........................................................................................119
White Balance
............................................................................................120
How to use [Auto]
..................................................................................120
How to use [One-Push]
......................................................................... 120
How to use [Manual]
.............................................................................120
Page 12

76
PART NAMES
AND
FUNCTIONS
SETTING UP STORING
OPERATION
PROCEDURE
VARIOUS
FUNCTIONS AND
OPERATIONS
TROUBLE
SHOOTING
SPECIFICATIONS
English
Save/call Settings ...................................................................................... 121
How to save settings
............................................................................. 121
How to call settings
............................................................................... 122
Highlight Function
...................................................................................... 123
Mask Function
...........................................................................................125
Scroll Function
........................................................................................... 126
PIP (Picture in Picture) Function
................................................................127
Using a Desktop Recorder (Optional)
....................................................... 128
6. TROUBLE SHOOTING ...................................................................... 129
Symptoms and Confirmation ..................................................................... 129
7. SPECIFICATIONS ............................................................................. 131
General ...................................................................................................... 131
Main camera
..............................................................................................131
Illumination device
.....................................................................................132
Supplied Accessories
................................................................................ 133
Page 13

77
PART NAMES
AND
FUNCTIONS
English
PART NAMES AND FUNCTIONS
1
Part Names
Appearance
(6)
(2)
(7)
(11)
(4)
(3)
(5)
(1)
(8)
(9)
(10)
Front
Rear/Side
(5)
(12)
Front
Number Name
(1) Camera head
(2) Lamp head
(3) Lamp column
(4) Camera column
(5) Infrared receiver
(6)
Front operating panel
P.78
(7) Stage
Rear/Side
Number Name
(8)
Side panel
P.81
(9)
Rear panel
P.80
(10) Cord cover
(11)
Remote control
P.82
(12)
Slide shooting adapter
P.112
• Open the cord cover when connecting
or disconnecting the cord.
•
Do not carry by the cor
d cover.
N o t e
Page 14

78
PART NAMES
AND
FUNCTIONS
English
List of Functions
Front operating panel
(1)(3) (2)(4)(15) (5) (6) (7)
(3)(8) (3)(9) (3)(10) (11)(13) (12)(14) (16)(∗)
* From here on, menu items displayed/selected on the monitor or the projection screen are
referred to as “OSD (On-Screen Display).”
Name Function
(*)
(POWER LED)
Flashes blue when the power is turned on.
Power ON: Lit blue
Standby status (remote control OFF): Lit red
(1)
(Image save)
To save the image on the SD card.
P.105
(2)
(Pause)
To pause the camera image. Press this button again to
restart.
(3) OSD
operations
P.86
(Direction)
To select an OSD menu item.
(4)
(Decision)
To decide the OSD item.
(5) MENU To show/hide the OSD menu.
The LEDs for operation buttons are not lit during OSD
menu display.
P.86
Page 15

79
PART NAMES
AND
FUNCTIONS
English
Name Function
(6)
(Lamp)
To switch illumination ON/OFF.
(7) ZOOM
Turn the dial to operate Zoom.
P.113
(8) Image select
(PC)
To switch the output image to the image input to RGB IN.
The LED is lit when RGB IN image is selected as the output image.
P.119
(9)
(CAMERA)
To switch the output image to camera image.
The LED is lit when camera image is selected as the output image.
P.119
(10)
(SD mode)
To switch the output image to images stored on the SD
card.
The SD Mode LED is lit in SD Mode.
P.119
(11)
Adjusting the
brightness
To brighten the camera image.
P.118
(12)
To darken the camera image.
P.118
(13)
SD mode
operation
Single Display: Return to the previous image.
4x4 Display: Move the cursor to the previous image.
(14)
Single Display: Move to the next image.
4x4 Display: Move the cursor to the next image.
(15)
Change between SD image single display and 4x4 display.
(16)
AF (Auto Focus)
To perform One-shot Auto Focus.
P.114
Page 16

80
PART NAMES
AND
FUNCTIONS
English
Rear panel
(1)
(2)
(3)
(4)
(5)
(7)
(8)
(6)
Name Function
Images you can
change to with
the Image select
button
(1) DVI OUT
(DVI Output Terminal)
To output digital video signal to a
projector, a PC monitor, or other DVI
input device.
P.98
Camera image
SD Mode
(2) RGB OUT
(Analog RGB
Output Terminal)
To output analog video signal to
a projector, a PC monitor, or other
RGB input device.
P.99
Camera image
[RGB IN] Image
SD Mode
(3) RGB IN
(Analog RGB
Input Terminal)
To output the image input to this
terminal when [PC] is selected by
Image select button.
P.99
(4) VIDEO OUT
(Composite
Video Output
Terminal)
To output images from the RCA
pin-jack terminal to the NTSC/PALsystem monitor (e.g., TV monitor).
P.99
Camera image
SD Mode
(5) RECORDER
(Recorder Terminal)
Terminal to connect the optional
desktop recorder via a dedicated
cable. By connecting to the desktop
recorder, you can record camera
images from this device. Refer to
the manual for the optional desktop
recorder for more details.
(6) DC IN 12V
(Power Socket)
Plug-in for the AC adapter.
(7) DC OUT (Power Outlet) Connect optional items and output.
(8) RESOLUTION/VIDEO
(Change Resolution
Switch)
A B C D
To change the resolution of the output analog image.
[A]
SXGA/720p
: 1280x1024/1280x720
[B] WXGA
: 1280x800
[C] XGA
: 1024x768
[D] VIDEO
: NTSC/PAL
Page 17

81
PART NAMES
AND
FUNCTIONS
English
Side panel
(1)
(2)
(3)
Name Function
(1) USB
(2.0 Compliant)
By connecting to a PC, you can transfer data stored on
an SD card to your PC, or transfer images and control the
main unit using the software contained in the supplied Image Mate CD-ROM.
P.98
(2)
(SD card slot)
To insert an SD card into the SD card slot.
Push the card again to remove the SD card.
P.104
(3) Main switch To turn the power ON/OFF.
• Only one image can be output at a time; either [RGB OUT] and [DVI OUT], or [VIDEO
OUT]. ([RGB
OU
T] and [DVI OUT] can be output at the same time, however [VIDEO
OUT] cannot be output simultaneously.)
•
When the RESOLUTION/VIDEO (Change Resolution Switch) is set to [VIDEO], the image
input to [RGB IN] is not output from [RGB OUT] or [DVI OUT].
(Unable to operate the [PC] button on the main unit.)
(Unable to recor
d or playback from the optional desktop recorder.)
•
[PC] mode can only be selected when [RGB OUT] is set.
Enters [CAMERA]
mode when RESOLUTION/VIDEO (Change Resolution Switch) is set
to [VIDEO OUT] in [PC] mode. The camera image status remains active even if [PC]
mode is selected in [DVI OUT].
N o t e
Page 18

82
PART NAMES
AND
FUNCTIONS
English
Remote control
(7)
(9)
(5)
(6)
(8)
(17)
(18)
(1)
(2)
(3)
(4)
(13)
(12)
(11)
(10)
(14)(15)(16)
• When setting the batteries, remove the battery case cover by pushing the [ ] mark in
the arrow direction on the back side of the remote control, and set 2 AAA batteries in the
case.
•
Insert fr
om one side and pay particular attention to the polarity (+/– directions).
•
Do not use new and old batteries or batteries of differ
ent types together.
• Be sure to use AAA batteries.
•
Replace the batteries with new ones at least once a year.
•
Us
e the supplied batteries for an initial operation check. The operating life is not
guaranteed.
N o t e
Warning
Because there is a chance that small
batteries could be ingested, be sure to
keep them out of the reach of children.
If a battery is swallowed, consult a
doctor immediately, as this could
result in suffocation or an obstacle to
digestion etc.
Page 19
83
PART NAMES
AND
FUNCTIONS
English
List of functions
Name Function
(1) (POWER ON/OFF
standby status)
To turn the power ON/OFF. Only operates when the
main power switch is ON.
(2) SD mode/
highlight/
mask/scroll
operations
(Direction)
To move forward/backward through the images saved
in SD
mode.
M
oves the highlight section in highlight mode, moves
the mask section in mask mode, and moves the displayed image in scroll mode.
Moves the small screen during PIP.
To decide the OSD cursor for the recorder in Recorder
mode.
(3) ZOOM
(TELE)
To Zoom in.
P.113
(4)
(WIDE)
To Zoom out.
P.113
(5) (Highlight) To highlight part of the image displayed. *1
(6)
(Mask) To mask an area of the output image. *1
(7)
(Scroll) To enlarge the image currently displayed and move
up, down, left, and right. *1
(8)
(SD mode) To switch the output image to SD mode.
P.119
(9) (Capture) To save the image on the SD card.
P.105
(10)
Back To return the output image to camera image.
(11)
(Recorder) To operate an optional desktop recorder. *2
(12)
PIP
(Picture in Picture)
To display a still image as a small picture while displaying a camera image.
(13)
(PC) To switch the output image to the image input to RGB
IN.
P.119
*1 This function can only be operated while displaying camera mode/SD mode.
(Cannot be used in conjunction with other functions.)
*2
Cannot be used when the desktop recor
der is not connected.
N o t e
Page 20
84
PART NAMES
AND
FUNCTIONS
English
Name Function
(14)
AF
(Auto Focus)
To perform One-shot Auto Focus.
P.114
(15)
SD mode
operations
Change between SD image single display and 4x4
display.*3
(16)
Recorder mode
operations
To decide the OSD cursor for the recorder.
(17)
BRIGHTNESS
(Brightness
adjust)
(Dark)
To darken the camera image.
P.118
(18)
(Bright)
To brighten the camera image.
P.118
*3 This function can only be used in SD mode.
N o t e
Page 21

85
PART NAMES
AND
FUNCTIONS
English
Remote Control Reception
Point the transmission unit of the remote control at the sensor unit located on the front of the
camera main unit, press the operation button for the intended operation, and operate the camera
main unit accordingly.
Receivable Range
Distance: Within approx. 7m (23ft) from the front face of the remote control sensor unit.
Angle:
Within 30º up, down, left, and right from the r
emote control sensor unit.
within 7m (23ft)
30°
30°
30°
30°
30°
30°
30°
• The receivable range may be shortened or narrowed and the laser beam from the
remote control may not be sensed depending on the surrounding circumstances (e.g.,
sunlight, position adjacent to inverter fluorescent lamp). In this case, relocate the
receiving side or shield the sunlight or fluorescent lamp.
N o t e
Page 22

86
PART NAMES
AND
FUNCTIONS
English
OSD (On-Screen Display)
OSD is used to display characters such as text and icons on a monitor or projection screen.
It displays this device’s menu screens for various operations and settings.
In this manual, this is referred to as the OSD menu.
OSD Basic Operations
The following procedure shows button operations used when setting or operating via OSD.
Operations for selecting and deciding icons
1
Press the [MENU] button on the front panel to display the OSD, and then
use the [↑↓←→] buttons to move to the icon you want to operate or set.
2
Use the [Enter] button on the front panel to enter the setting value.
Front operating panel
[Enter] button
[←] button
Move the cursor left
[↑] button
Move the cursor up
[→] button
Move the cursor right
[MENU] button
[↓] button
Move the cursor down
Back
Page 23

87
PART NAMES
AND
FUNCTIONS
English
Adjusting the level bar
1
Use the [↑↓] buttons on the front panel to adjust the setting value.
2
Use the [Enter] button on the front panel to enter the setting value.
Set the level
Increase the
level bar setting
Reduce the
level bar setting
Front operating panel
Focus
Page 24

88
PART NAMES
AND
FUNCTIONS
English
Camera mode OSD menu
After using Image select to change the output image to camera image, press the “MENU”
button to display the OSD menu.
P.119
Top menu
Icon Name Selection Item Function
Image Setting –
To display the menu for adjusting and
displaying camera images.
Function Setting –
To display the menu for function settings.
Back – To hide the OSD menu display.
Page 25

89
PART NAMES
AND
FUNCTIONS
English
Image setting menu
Icon Name
Conditions Selection Item
Function
Brightness
Auto
To automatically adjust the brightness of the camera image to suit
the subject of the image. You can
adjust the amount of auto adjustment.
Manual
To set the camera image to a fixed
brightness.
Reset
Brightness
Brightness
Auto
To reset the amount of auto adjustment to the default setting.
AF Mode
Norm
To automatically focus the camera.
Shot
Press the [AF] button to automatically focus.
Focus
Use the level bar to adjust the focus
manually. Press the [AF] button to
switch to the mode selected in AF
mode, and adjust the focus.
White
Balance
Auto
To automatically adjust the white
balance.
One-Push
To set the white balance to a fixed
setting after carrying out automatic
correction.
Manual
To manually adjust the [R-Gain] and
[B-Gain].
R-Gain
White Balance
Manual
–
Use the level bar to adjust the [RGain] for the camera image. Use [↑]
or [↓] to increase or decrease the
red color.
B-Gain
White Balance
Manual
–
Use the level bar to adjust the [BGain] for the camera image. Use [↑]
or [↓] to increase or decrease the
blue color.
* The “
” symbol indicates the factory settings.
Page 26

90
PART NAMES
AND
FUNCTIONS
English
Icon Name
Conditions Selection Item
Function
Image Mode
Text1
To clearly reproduce black & white
subjects such as characters and
lines. Use this when shooting materials such as documents or text
based data. The effect grows stronger as the number is increased.
Text2
Text3
Graphics1
To clearly reproduce color subjects.
Use this when shooting materials
such as color figures and photo
based data.
Graphics2
At times it is easier to view images
when using a DLP projector.
Edge Effect
Image Mode
Graphics1
Low
Emphasizes the outline of images
making them crisper and clearer.
Middle
High
Gamma
Image Mode
Graphics1
Low
Changes the gradation of the image.
(The effect is increased in the order
Low, Middle, and High.)
Middle
High
Image
Rotation
Off
Turn ON to rotate the camera image
by 180º.
On
Color/B&W
Color
To output a color camera image.
B&W
To output a black & white camera
image. To make the image easier
to view, select this when shooting
black & white documents etc.
Posi/Nega
Posi
To output a positive camera image.
Nega To output a negative camera image.
Back To return to the top menu.
* The “
” symbol indicates the factory settings.
Page 27

91
PART NAMES
AND
FUNCTIONS
English
Function setting menu
Icon Name Selection Item Function
USB Mode
Mass Storage (
*
)
Af
ter connecting to a PC via a USB cable,
data on the SD card loaded in this device
can be sent to the PC.
Application
(*)
After connecting to a PC via a USB cable, it
is possible to take control of this device and
import images by PC.
Flickerless
60Hz (
*
)
To
reduce fluorescent lamp flickering due to
the power supply frequency. Select the same
value as used for the power supply frequency.
50Hz (
*
)
Video Format
NTSC (
*
) Video is output using the NTSC system.
P
AL (
*
) Video is output using the P
AL system.
Highlight
Darkness –
To set the darkness of the masked section
using the level bar, except for when using the
Highlight display.
Size – To set the size of the Highlight display.
Mask Darkness –
To set the darkness of the masked section
using the level bar.
Scroll
x2
To set the digital zoom magnification for scroll
display to 2x, 3x, or 4x.
x3
x4
Preset
1
To store preset settings in the memory of the
selected number.
2
3
Power On
The preset settings stored here are automatically called the next time the power is turned
on.
Exit Exits without saving settings.
* The “
” symbol indicates the factory settings.
* The factory settings for Flicker Correction and Video Format differ depending on ther
region.
[North America Specifications]
Flicker Correction - 60Hz, Video Format - NTSC
[European Specifications]
Flicker Correction - 50Hz, Video Format - PAL
• Selecting [Power On] or [Default] from [Call] provides the factory settings when the
power is turned on. However, for items with (
*)
in the [Selection Item] column, the last
status set is maintained.
N o t e
Page 28

92
PART NAMES
AND
FUNCTIONS
English
Icon Name Selection Item Function
Call
1
To call the setting saved in the memory of the
selected number.
2
3
Default
Current settings are returned to the Default
status.
(∗)
Power On
Current
settings are returned to the Power On
status.
(∗)
Exit Exits without calling settings.
Guide
On
When turned on, the device’s operating status
and an explanation of the icons is displayed
on the screen.
Off
Language
Japanese (∗)
Changes the OSD menu language to Japanese.
English
(∗) Changes the OSD menu language to English.
RESOLUTION
(Chang e the
resolution)
SXGA
(∗)
Changes DVI and analog RGB output resolution to SXGA.
720p 60Hz (∗)
Changes DVI and analog RGB output resolution to 720p 60Hz.
720p 50Hz (∗)
Changes DVI and analog RGB output resolution to 720p 50Hz.
Back To return to the OSD menu display top menu.
* The “
” symbol indicates the factory settings.
•
Sel
ecting [Power On] or [Default] from [Call] provides the factory settings when the
power is turned on. However, for items with (∗) in the [Selection Item] column, the last
status set is maintained.
N o t e
Page 29

93
PART NAMES
AND
FUNCTIONS
English
SD mode OSD menu
After using Image select to change the output image to SD mode, press the “MENU” button
to display the OSD menu.
P.119
OSD top menu
Icon Name Selection Item Function
SD SD settings menu To display the setting menu for SD images.
Slide Show
Slide Show
settings menu
To display the setting menu for Slide Show.
Back – Hides the OSD menu display.
Page 30

94
PART NAMES
AND
FUNCTIONS
English
SD menu
On this menu, when any item except for [Back] is selected, a [Yes] or [No] confirmation
message is displayed. Select [Yes] to perform the operation, or [No] to cancel.
Icon Name Selection Item Function
Delete
Current
To delete the image currently displayed.
(Locked images cannot be deleted.)
All
To delete all images stored on the SD card.
(Locked images cannot be deleted.)
Exit Exit without deleting anything.
Lock
Current
To lock th e i mage cu rrently displayed.
(Locked images cannot be deleted.)
All
To lock all images stored on the SD card.
(Locked images cannot be deleted.)
Exit Exit without locking anything.
Unlock
Current
To unlock the image currently being dis-
played.
All To unlock all images stored on the SD card.
Exit Exit without unlocking anything.
Format Media
To format an SD card. When this item is se-
lected, a confirmation message is displayed.
Select [Yes] to format or [No] to cancel.
When formatting, all of the data on the SD
card, including locked images, are deleted.
Check before formatting the card.
Back To return to the OSD menu display top menu.
Page 31

95
PART NAMES
AND
FUNCTIONS
English
Slide show menu
Icon Name Selection Item Function
Start Slide
Show
To start a slide show.
Interval
5sec
The image changes at the interval set when a
slide show is performed.
10sec
15sec
30sec
Select
All
To use all images stored on the SD card for
the slide show.
Locked Only
To use only locked images from the images
stored on the SD card for the slide show.
Repeat
Off
The slide show is only shown once.
On The slide show is repeated.
Order
Forward
To give a slide show in ascending order of
serial No.
Backward
To give a slide show in descending order of
serial No.
Back To return to the OSD menu display top menu.
* The “
” symbol indicates the factory settings.
Page 32

96
SETTING UP
English
SETTING UP
2
Setting Up
1
Raise the camera column. The lamp
column is raised at the same time.
(1)
2
Rotate the camera head.
(2)
3
Adjust the lamp column and lamp head
to a suitable position, as shown in the
illustration on the right.
(3)
Page 33

97
SETTING UP
English
4
Connect the analog RGB cable to the
[RGB OUT] terminal and connect the
AC adapter’s DC plug to the [DC IN
12V] terminal. (Connecting the AC
Adapter and Video Cable.
P.98
)
5
Turn on the projector.
• When using this unit, be sure to adjust the lamp column and the lamp head to a suitable
position to allow easy operation.
•
Be careful not to catch your fingers etc. when raising or lowering the column.
N o t e
Page 34

98
SETTING UP
English
Connecting the AC Adapter and Video Cable
(2) DVI OUT terminal
· To projector
· To PC monitor
(3) RGB OUT terminal
· To projector
· To PC monitor
(7) DC IN 12V terminal
· To power plug
(8) DC OUT terminal
· To optional
accessories
(6) RECORDER terminal
· To desktop recorder
(sold separately)
(5) VIDEO OUT terminal
· To monitor
(4) RGB IN terminal
· To PC
(1) USB terminal
· To PC
SD card
• To protect the unit and connected peripheral devices, turn off all devices.
•
When plugging in or unplugging the connector cable, hold the plug of the cable.
N o t e
(1) Connecting to the PC with a USB cable
Connect the USB cable to the [USB] terminal on the side panel.
•
We r
ecommend using a USB 2.0 compliant USB cable.
•
If
you plug into a USB connector with the power on, the PC may not recognize this
device.
• Depending on the USB environment used by the PC or peripheral equipment using the
USB 2.0 compliant cable, image transfer may be disrupted.
•
Operation is not guaranteed for all environments.
N o t e
(2) Connecting to the unit with a DVI input terminal equipped
Connect the supplied DVI cable to the [DVI OUT] terminal on the rear panel.
Page 35

99
SETTING UP
English
(3) Connecting to the unit with analog RGB input terminal equipped
Connect the supplied analog RGB cable to the [RGB OUT] terminal on the rear panel.
•
Th
e display position may be displaced from the center of the screen. In such a case,
adjust the horizontal and vertical positions manually from the connected device.
•
Ver
tical stripes may appear on the projector or PC monitor screen. This can be mitigated
by manually adjusting the dot clock from the connected device of the unit with analog
RGB output terminal equipped.
(4) Connecting to the unit with analog RGB output terminal equipped
Connect the supplied or commercially-available analog RGB cable to the [RGB IN] terminal
on the rear panel.
•
When using
a laptop PC with external output mode switching, set the laptop PC side
to the external output mode after pushing the manual operation button [PC] of this
equipment.
N o t e
Specifications of the analog RGB input terminal of this product
Signal allocation
10
9 8 7 6
5 4 3 2 1
15 14 13
DSUB 15P shrink terminal (Female)
12 11
Video signal: Analog 0.7V (p-p) with 75Ω terminated
Horizontal synchronized signal: TTL level (Positive/negative polarity)
Vertical synchronized signal: TTL level (Positive/negative polarity)
Pin assignment
Pin No. Name
1 Video signal
(Red)
2 Video signal
(Green)
3 Video signal
(Blue)
4 N.C
5 GND
Pin No. Name
6 GND (Red)
7 GND (Green)
8 GND (Blue)
9 N.C
10 GND
11 GND
12 N.C
Pin No. Name
13 Horizontal
synchronized
signal
14 Vertical
synchronized
signal
15 N.C
(5) Connecting to the unit with a composite video input terminal equipped
Connect an RCA pin plug video cable to the [VIDEO OUT] terminal on the rear panel.
(6) Connecting the desktop recorder
Connect the optional desktop recorder to the main unit with a dedicated cable.
(7) Connecting the AC adapter
Connect the DC plug of the supplied AC adapter to the [DC IN 12V] terminal on the rear
panel before inserting the AC adapter in an outlet.
Page 36

100
SETTING UP
English
(8) Connecting the optional Light Box
Connect the optional Light Box to the main unit with a dedicated cable. Do not connect any
other device. Malfunctions may result.
•
Only one
image can be output at a time; either [RGB OUT] and [DVI OUT] or [VIDEO
OUT]. For more information on switching the image output, refer to “RESOLUTION/
VIDEO” (Change Resolution Switch)
P.81
• To protect the unit and peripheral devices, unplug the power plug and the AC adapter,
and turn off all other devices before connecting the video cable.
•
When plugging
in or unplugging the power plug, the AC adapter, or video cable, hold
the plug of the cable.
N o t e
Page 37

101
STORING
English
STORING
3
Storing
1
Rotate the lamp head and the lamp
column and fold them down onto the
stage as shown in the illustration on the
right.
(1)
(2)
• Before storing the main unit, be sure to turn the
power off.
N o t e
2
Rotate the camera head and the
camera column and fold them down.
(3)
(4)
Page 38

102
OPERATION
PROCEDURE
English
OPERATION PROCEDURE
4
Presentation Using Printed Materials, etc.
Setting the main unit
Set the main unit as shown in the figure above. Then connect it to a projector or a PC
monitor, and turn on the power for the main unit.
P.98
Lamp positioning
While watching the screen, adjust the angle of the lamp column and lamp head so that
light covers the stage evenly. Pointing the light emitting part of the lamp head straight down
allows the illumination to cover the stage evenly.
• Depending on the position of the lamp, the camera column’s shadow may fall across the
screen.
P.117
N o t e
Adjusting the size
Place an object on the stage and adjust the zoom dial on the front panel or the zoom
buttons [ / ] on the remote control so the part you want to shoot fits the screen size.
P.113
Adjusting the focus
In normal AF mode, the focus is automatically adjusted. In One-shot AF mode, the focus
is adjusted by pressing the [AF] button on the operating panel or on the remote control.
P.114
Adjusting the brightness
Press the [BRIGHTNESS ]/[BRIGHTNESS ] buttons on the front panel or on the
remote control to adjust the image brightness.
P.118
Page 39

103
OPERATION
PROCEDURE
English
Turning the illumination lamp ON/OFF
Press the Illumination lamp button on the unit to switch between ON and OFF.
•
Before
connecting the main unit to other devices, be sure to turn off the power for all of
the devices.
• When copying B&W characters or documents etc., use [Text1] to [Text3] from the OSD
(Camera image) as the image mode.
A better image may be produced by selecting Graphics1 mode with DLP projector.
•
When connected
to a DLP projector, select the image mode according to the displayed
image, as both text and photos can be beautifully reproduced by switching to
Graphics2 mode.
N o t e
Page 40

104
OPERATION
PROCEDURE
English
Presentation Using an SD Card (Commercially-available)
SD card
• Before starting, insert a commercially-available SD card into the SD card slot on the side
panel. Push the card again to remove the SD card.
•
In
sert the SD card with the label facing up. Forcing it into the slot in the wrong
orientation may cause a malfunction.
•
Before
loading or unloading the SD card or turning the power off, be sure to select the
camera image by pressing the camera button [ ] on the operating panel, and confirm
that the output image has been switched to camera image. Otherwise, the SD card
contents could be damaged or the camera could malfunction.
•
The SD
card is composed of parts vulnerable to static electricity. Therefore, due to static
electricity, the SD card could malfunction or its contents could be destroyed. When
handling the SD card, take care to avoid static electricity.
•
Yo
u may not be able to display image data other than that saved in this product or
converted using the conversion function of the software supplied. Also, images of 7MBs
or more cannot be displayed.
•
When displaying image data in an unsupported for
mat, [ ] or [ ] is displayed on the
output screen.
•
If you
try displaying image data on an SD card without inserting an SD card, a black
screen with the message [ ] is displayed.
• After using the SD card, do not leave it inserted in this product; be sure to remove it.
•
We
recommend using SD cards (512MB, 1GB, and 2GB) made by Panasonic, and
SDHC cards (up to 4GB) made by Panasonic.
The resolution for the stored images is 1280x1024 (for SXGA output), 1280x800 (for
WXGA output), and 1280x960 (for XGA output).
This product can store up to 2048 images.
•
ELMO is
not liable for any damage caused by the loss of the data in the SD card or
passive damage.
•
When an
SD card is inserted, “Card Reading” is displayed on the screen, and to allow
this device to check the contents of the SD card, it may take some time between
inserting the card and the JPEGs being displayed and captured.
In that case, please wait a short time before performing any of the operations mentioned
above.
•
When an
SD card is inserted and then the power to the main unit is turned on, it may
take a while before operations can be performed on the main unit.
•
Pl
ease wait a short time until the power switch on the main unit lights blue before
performing any operations.
N o t e
Page 41

105
OPERATION
PROCEDURE
English
Saving the image
(1)
Press the
[ ] button on the operating panel or the [ ] button on the remote control to
switch the output image to the camera image.
(2)
Ma
ke sure that the OSD is not displayed, and then press the [ ] button on the
operating panel or on the remote control.
(3) Saving begins when the [ ] mark is displayed on the screen. Saving is complete when
the symbol disappears.
• Only optically zoomed images may be saved, digitally zoomed images will revert back
the maximum optical zoom prior to saving.
•
Saved images will not be Time/Date stamped.
•
Please confirm images ar
e saved correctly to the SD card or PC.
ELMO is not liable for lost images or failure to capture images.
•
The [
] mark is only displayed on the screen when [Function Setting] → [Guide] is set
to ON from the Camera OSD menu.
•
When the SD card is write-pr
otected, images cannot be saved in the SD card.
•
If the
SD card is full when recording, an [ ] mark is displayed on the screen. Delete
any unnecessary images or use another SD card.
•
Ne
ver remove the SD card while it is reading or writing data. This may cause
malfunctions to occur.
•
Do not
turn off the power to this product while the SD card is reading or writing data.
This may cause malfunctions to occur.
N o t e
Displaying the image
There are two display modes for SD images. You can use Single display to display one
image only, or 4x4 display to display 16 images.
z Single display
(1)
Make
sure that the OSD is not displayed, and then press the [ ] button on the
operating panel or on the remote control. The output image changes to SD mode, and
the images stored on the SD card are displayed as single images.
(2)
Ma
ke sure that the OSD is not displayed, and then press the [ ] button on the
operating panel or the [ ] button on the remote control to change to the next image.
Press the [ ] button on the operating panel or the [ ] button on the remote control
to return to the previous image.
(3)
You
can zoom in or out of the image being displayed by using the zoom dial on the
main unit, and you can reset zoom in/out by using the AF button on the main unit.
•
When an
SD image is enlarged, the Scroll function cannot be used. If you want to use
the Scroll function, press the AF button to reset the image enlargement, and then scroll.
N o t e
Page 42

106
OPERATION
PROCEDURE
English
z Changing display mode
(1)
During
Single display in SD Mode, make sure that the OSD is not displayed, and then
press the [ ] button on the operating panel or the [AF ] button on the remote
control to change the display from Single display to 4x4 display.
(2)
Press the
[ ] and [ ] buttons on the operating panel or the [ ] and [ ] buttons on
the remote control to move the image selection cursor.
(3)
Press the
[ ] button on the operating panel or the [AF ] button on the remote
control to display the image selected with the image selection cursor in Single display.
Deleting, loc
king, and unlocking images
(1)
Make
sure that the OSD is not displayed, and then press the [ ] button on the
front panel or on the remote control. The output image changes to SD mode, and the
images stored on the SD card are displayed as single images. When you want to work
in 4x4 display, press the [ ] button on the operating panel or the [AF ] button on the
remote control to change to 4x4 display.
(2)
Use the
[ ] / [ ] buttons on the operating panel to select the image you want to
delete.
In Single display, the image you want to delete is displayed. In 4x4 display, use the
image selection cursor to select the image you want to delete.
(3)
Press the [MENU] button on the oper
ating panel to display the SD Mode OSD menu.
z Deleting images
From the OSD menu, select [SD] → [Delete].
To delete the image currently selected, select [Current]. To delete all images, select [All].
z Locking images
From the OSD menu, select [SD] → [Lock].
To lock the image currently selected, select [Current]. To lock all images, select [All].
z Unlocking images
From the OSD menu, select [SD] → [Unlock].
To unlock the image currently selected, select [Current]. To unlock all images, select [All].
Page 43

107
OPERATION
PROCEDURE
English
Formatting the SD card
When you need to format the SD card, insert the SD card into this product, and execute
formatting.
(1)
Make
sure that the OSD is not displayed, and then press the [ ] button on the
operating panel or on the remote control to switch the output image to SD mode.
(2)
Press the [MENU] button on the oper
ating panel to display the SD Mode OSD menu.
(3)
From the OSD men
u, select [SD] → [Format Media].
(4)
Select [Yes] to star
t formatting. (If you do not want to format, select [No].)
Slide Show
(1)
Make
sure that the OSD is not displayed, and then press the [ ] button on the
operating panel or on the remote control to switch the output image to SD mode.
(2)
Press the [MENU] button on the oper
ating panel to display the SD Mode OSD menu.
(3)
From the OSD men
u, select [Slide Show] → [Start Slide Show].
(4)
Wh
en any button (excluding the [POWER ] button) on the operating panel or the
remote control is pressed, the slide show stops.
• You can set Interval, Repeat, or Order from the [Slide Show] menu of the OSD.
•
When [Mass
Storage] is set from [Function Setting] → [USB Mode] on the OSD menu
and the product is connected to a PC, you cannot delete, lock, or unlock SD images or
format an SD card.
•
Do not turn of
f the power while formatting the SD card.
• When formatting the SD card, proceed to the next operation after confirming that [ ]
has appeared.
•
Do
not format the card on any other machine. If you do format the card using a PC,
format it again using this unit.
N o t e
Page 44

108
OPERATION
PROCEDURE
English
Transferring Images From the SD Card to a USB-connected PC
SD card
• Set [USB Mode] to [Mass Storage] on the OSD Camera settings menu.
•
In
sert the SD card with the label facing up. Forcing it into the slot in the wrong
orientation may cause a malfunction.
N o t e
When this product is connected to a PC via USB, image data on the SD card can be
transferred to the PC.
The Operating System (OS) for the connected PC should be Microsoft Windows 2000 (SP4 or
later)/XP (SP2 or later)/Vista.
(1)
Tur
n on the power supply to this product and to the PC.
(2)
Connect this product to the PC with the supplied USB cable
.
•
Wh
en this product is connected to the PC for the first time, the required drivers are
installed automatically using the plug-and-play function of Windows. From the second
time and thereafter, the drivers are no longer installed.
N o t e
Page 45

109
OPERATION
PROCEDURE
English
(3) This product is recognized as a removable disk. You can view the image data on an SD
card on the PC’s viewer software.
•
The image data is stored in JPEG for
mat in the following folders:
My Computer
DCIM
Removable disk
100_ELMO
IMAG0001.JPG
IMAG0002.JPG
•
•
•
• An SD card set in this product cannot be saved, deleted, locked, unlocked, or formatted
with image data from the PC.
•
Image data cannot be recor
ded with the correct date and time.
•
When the
front panel or the remote control is in operation, do not connect or disconnect
the USB cable, as this could cause malfunctions to occur.
•
Do not switch [USB Mode] on the OSD when this product is in USB-connection.
•
We r
ecommend using a USB 2.0 compliant USB cable.
•
Depending on
the USB environment used by the PC or peripheral equipment using the
USB 2.0 compliant cable, image transfer may be disrupted.
• Operation is not guaranteed for all environments.
•
When USB
Mode has been set to [Mass Storage] and a USB cable has been connected
to the PC, an SD card cannot be deleted, locked, unlocked, formatted, and saved with
image data on this device.
N o t e
Page 46

110
OPERATION
PROCEDURE
English
Presentation Using the Supplied Software with a USB-connected PC
SD card
• Set USB Mode to Application on the OSD.
N o t e
“Image Mate” can be found on the supplied CD-ROM.
The “Image Mate” and TWAIN driver “Image Mate TWAIN” software for controlling this device
can be found on the CD-ROM and allows you to perform the following functions.
•
Tr
ansfer moving/still images to the PC
•
Operate this product from the PC
F
or information such as PC hardware requirements, OS type, software guides, and the
“Image Mate” installation manual, see the “HELP folder” on the CD-ROM.
• When the front panel or the remote control is in operation, do not connect or disconnect
the USB cable, as this could cause malfunctions to occur.
•
We r
ecommend using a USB 2.0 compliant USB cable.
•
Depending on
the USB environment used by the PC or peripheral equipment using the
USB 2.0 compliant cable, image transfer may be disrupted.
•
Operation is not guaranteed for all environments.
N o t e
Page 47

111
OPERATION
PROCEDURE
English
Shooting Off the Stage
<Shooting forward> <Shooting downward>
Close-up
lens holder
When the camera head section is set horizontally, you can shoot walls, distant views, etc.
If the subject is far away, open the close-up lens holder forward.
•
To shoot an object in fr
ont of the main unit, set the OSD to rotate the image by 180°.
•
Shooting range when the close-up lens holder is open:
TELE : 500mm (19
3
4
in) to from the zoom lens
WIDE : 100mm (3
15
16
in) to from the zoom lens
N o t e
Page 48

112
OPERATION
PROCEDURE
English
Presentation Using Film
[A] [B]
[C]
Slide shooting adapter
Film
Pass film through clips
Slide
Setting the main unit
After folding the lamp onto the main unit as shown in Figure A, and then connecting a
projector or PC monitor, turn on the power.
Setting the slide shooting adapter
Co
ver and place the supplied slide shooting adapter on the lamp head, and adjust the
position while watching the screen, so that the opening of the slide shooting adapter points
to the center of the screen. (Figure B)
Adjusting the size
Set the film or slides in the slide shooting adapter as shown in Figure C, and then use the
zoom buttons [ / ] on the operating panel or the remote control to adjust the slide to
fit the screen size.
Adjusting the focus
In
normal AF mode, the focus is automatically adjusted. In One-shot AF mode, the focus is
adjusted by pressing the [AF] button on the operating panel or on the remote control.
Adjusting the brightness
If the
screen is too bright or too dark, you can adjust the brightness from [Brightness] on
the OSD setting menu or by using the [BRIGHTNESS ]/ [BRIGHTNESS ] buttons on
the remote control.
•
Depending on
the film, change the display setting from the [ Posi/Nega] OSD setting
menu to [Posi] or [Nega], or use the [Posi/Nega] button on the remote control.
•
If
you feel that the screen is too dark even after adjusting the brightness, you can
improve the brightness by placing a white sheet of paper on the stage and then
attaching the slide shooting adapter.
N o t e
Page 49

113
VARIOUS
FUNCTIONS AND
OPERATIONS
English
VARIOUS FUNCTIONS AND OPERATIONS
5
Zoom
The display range of the document can be adjusted by
rotating the zoom dial on the main unit [ , ] or by pressing
the zoom buttons on the remote control [ , ].
• WIDE (ZOOM-OUT
) :
Object can be shown in small size.
• TELE (ZOOM-IN
) :
Object can be shown in large size.
• Zoom ratio: Optical 16x, Digital 8x
•
Within the digital zoom range, the image quality is degraded.
•
In SD mode, SD images can be digitally zoomed (enlarged/reduced).
N o t e
Page 50

114
VARIOUS
FUNCTIONS AND
OPERATIONS
English
Focus
Auto Focus (AF)
Normal AF mode or One-shot AF mode can be selected on the main unit.
• The
objects listed below may not be brought into focus by Auto Focus. In such cases,
use the manual focus.
•
Low contrast objects
• Objects
with fine r
epeated
patter
ns,
such as lateral stripes and crisscr
oss
stripes
•
Objects
glittering or r
eflecting
str
ong
light
•
Objects
on the far side of glass which is wet or dir
ty
• Objects
with a bright backgr
ound
or excessive contrast
•
Objects that are entirely dark
• Objects
in motion
•
In
nor
mal
AF mode, the focus is adjusted constantly
.
To
fix the focus, select One-shot AF mode or use manual focus.
•
Focus
range
•
With
close-up lens
TELE:
250mm (9
13
16
in) to 440mm (17
5
16
in) from the close-up lens
WIDE:
90mm (3
1
2
in) to 440mm (17
5
16
in) from the close-up lens
• Without
close-up lens
TELE:
500mm (19
3
4
in) to from the zoom lens
WIDE:
100mm (3
15
16
in) to from the zoom lens
• In
SD mode, digital zoom settings for SD images can be r
eset.
N o t e
Page 51

115
VARIOUS
FUNCTIONS AND
OPERATIONS
English
Normal AF mode
The focus is adjusted constantly and the camera focuses on objects automatically.
(factory setting)
One-shot AF mode
Yo
u can automatically adjust the focus by selecting [AF Mode] → [Shot] from the OSD
menu or pressing the [AF] button on the operation panel or the remote control. Once the
camera has been focused, AF is released and the focus is fixed in that position.
Norm
> Shot
Page 52

116
VARIOUS
FUNCTIONS AND
OPERATIONS
English
Manual focus
You can change the focus position by pressing the [ ] and [ ] buttons on the main unit
after selecting [Focus] from the OSD menu.
Use this function (manual focus) to focus on any part of a 3-D object.
Focus
Move the
cursor up
Move the
cursor down
Page 53

117
VARIOUS
FUNCTIONS AND
OPERATIONS
English
Illumination
The illumination lamp turns on when you press [ ] on the operating panel. It turns on or off
each time the [ ] button is pressed.
When the illumination lamp does not provide enough light on the stage’s surface, or when
shooting 3-D objects, it renders a high quality, vivid image.
Lamp positioning
Wh
ile watching the screen, adjust the angle of the lamp
column and lamp head so that light covers the stage
evenly. Pointing the light emitting part of the lamp head
straight down allows the illumination to cover the stage
evenly.
• Depending on the position of the lamp, the camera column’s shadow may fall across the
screen.
•
Do not look into the lamp section. This could damage your eyesight.
•
The brightness deteriorates after using the lamp (LED illumination) for a long time.
•
When the lamp is on, the temperature incr
eases. Do not touch the lamp section.
N o t e
Page 54

118
VARIOUS
FUNCTIONS AND
OPERATIONS
English
Adjusting the Brightness
Press the [BRIGHTNESS ] or
[BRIGHTNESS ] button on the
operating panel or on the remote
control to adjust image brightness.
The following two adjustment modes
can be set by selecting [Brightness]
from the OSD menu.
Automatic brightness adjustment
([Brightness] → [Auto] in the OSD)
The brightness of the image changes automatically
according to the brightness of the object.
Manual brightness adjustment
([Brightness] → [Manual] in the OSD)
The brightness of the image is fixed to the specified level.
Auto
> Manual
• Factory setting is set to [Auto].
• Manual
adjustment fixes the brightness and does not adjust to changes in brightness of
the object.
• By setting [Guide] to [On] in the OSD menu, the setting details are displayed on the screen.
• To go back to the factory settings, press the [BRIGHTNESS ] and [BRIGHTNESS ]
bu
ttons
on the fr
ont
pa
nel
at the same ti
me,
or set [R
eset
Br
ightness]
from the OSD me
nu.
• In places where the object is exposed to bright sunlight (e.g.
near a wi
ndow),
or ex
tremely
br
ight
li
ghts,
the br
ightness
of the sc
reen
may not dim su
fficiently,
even when the
[BRIGHTNESS
] button is pressed.
In
such ca
ses,
ad
just
the am
ount
of li
ght
by cl
osing
the
curtains or moving the source of the light.
N o t e
Page 55

119
VARIOUS
FUNCTIONS AND
OPERATIONS
English
Image Selection
You can switch to camera image when you press the [ ] button on the operating or the [ ]
button on the remote control, switch to the image input to the analog RGB input terminal [RGB
IN] by pressing the [
] button on the operating panel or on the remote control, and switch to
images saved on the SD card by pressing the [
] button on the operating panel or on
the remote control.
By connecting PCs and other devices to the analog RGB input terminal [RGB IN], you can
switch output images without disconnecting cables.
•
The fr
ont panel and remote control [
] buttons cannot be used when the RGB/VIDEO
switch is set to VIDEO.
•
When using
a laptop PC equipped with external output selection, set the output mode of
the PC to “external” after pressing the [
] button on the operating panel or the remote
control.
•
En
ters [CAMERA] mode when the output is [RGB OUT] and [VIDEO] is set for [PC]
mode.
N o t e
Page 56

120
VARIOUS
FUNCTIONS AND
OPERATIONS
English
White Balance
How to use [Auto]
Adjust the white balance automatically according to the color
status of the document.
Factory setting: [Auto]
> Auto
One-Push
Manual
How to use [One-Push]
To be used when the color balance of the image is lost.
Shoot a sheet of white paper and then set [White Balance]
→ [One-Push] from the OSD menu. The white balance for
the color temperature is then fixed.
Auto
> One-Push
Manual
How to use [Manual]
Setting [White Balance] → [Manual] from the OSD menu
fixes the white balance to allow [R-Gain] and [B-Gain] for the
OSD to be adjustable.
Auto
One-Push
> Manual
R-Gain
• The color temperature that can be automatically followed ranges from approx. 3000K to
8000K.
•
By
setting [Guide] to [On] in the OSD menu, the setting details are displayed on the
screen.
N o t e
Page 57

121
VARIOUS
FUNCTIONS AND
OPERATIONS
English
Save/call Settings
The operation status of the unit can be saved to or called from the memory. The unit saves
4 conditions (1 to 3 and Power ON) under the following storage conditions.
•
Current zoom ratio (The range of the optical zoom)
• Brightness
•
Image mode settings
•
Edge enhancement (in Graphics mode)
•
Gamma value setting (in Gr
aphics mode)
•
Status of image rotation
•
Status of white balance
•
Illumination lamp
settings (only for ON setting)
•
In
tensity of red color (when selecting
[White Balance] → [Manual])
•
Intensity of
blue color (when selecting
[White Balance] → [Manual])
•
Posi/nega settings
•
Color/B&W switch settings
•
AF mode
•
The saved conditions are saved even if the power is tur
ned off.
N o t e
How to save settings
Select [Preset] → [1] to [3] from the OSD menu to save
current unit configuration as the selected number. (Excluding
USB Mode settings)
Select [Preset] → [Power On] from the OSD menu to save
the settings that are called when the power is turned on for
the main unit. (Excluding USB Mode settings)
Exit
Power On
3
2
1
• Only [Power ON] can be saved for the illumination lamp settings.
•
Zo
omed areas cannot be saved during digital zooming. However, when saving the
settings in digital zoom mode, when the zoom size of view is at the maximum position
[ZOOM-IN
], the area within the range of the optical zoom can be saved.
N o t e
Page 58

122
VARIOUS
FUNCTIONS AND
OPERATIONS
English
How to call settings
Select [Call] → [1] to [3] from the OSD menu to call the
settings for the selected number.
Select [Call] → [Power On] from the OSD menu to call the
settings for when the power is turned on.
Select [Call] → [Default] from the OSD menu to call the
factory settings. (Excluding USB Mode settings)
Power On
Default
Exit
3
2
1
• Unable to operate the zoom dial on the front operation panel or the remote control while
calling settings.
N o t e
Page 59

123
VARIOUS
FUNCTIONS AND
OPERATIONS
English
Highlight Function
It you want to draw attention to a particular section of the output image, you can use Highlight
display.
Highlight settings
From the Camera Mode OSD Menu, select [Function Setting] → [Highlight]. When
[Darkness] is selected, the level bar is displayed, and you can then set the darkness for the
areas outside the highlighted section with the [
] and [ ] buttons on the operating panel.
Also, when you select [Size], you can adjust the size of the highlighted section vertically
by using the [
] and [ ] buttons on the operating panel, and you can adjust the size
horizontally using the [
] and [ ] buttons.
Page 60

124
VARIOUS
FUNCTIONS AND
OPERATIONS
English
Highlight operations
When you press the [
] button on the remote control while the output image is Camera
Image or SD Mode, the highlight display uses the darkness and size set previously.
You can move the highlighted area using the [
], [ ], [ ]. and [ ] buttons on the remote
control. The highlight display is cleared when you press the [
] button on the remote
control again.
• The Highlight function cannot be used when the output image is PC.
•
In
the optical zoom range, the highlight size remains the same. In the digital zoom
range, the highlight size expands and contracts depending on the magnification ratio.
•
Cannot perfor
m a capture of a highlighted image.
•
Wh
en the highlight size is selected from the OSD menu, the highlight size currently
displayed returns to the initial settings.
N o t e
Page 61

125
VARIOUS
FUNCTIONS AND
OPERATIONS
English
Mask Function
You can mask a section of the output image.
Mask settings
From
the Camera Mode OSD Menu, select [Function Setting] → [Mask]. The level bar to set
[Darkness] is displayed, and you can then set the darkness for the masked areas with the
[
] and [ ] buttons on the operating panel.
Mask operations
When you press the [
] button on the remote control while the output image is Camera
Image or SD Mode, the mask display uses the darkness set previously.
You can move the masked area using the [
], [ ], [ ]. and [ ] buttons on the remote
control.
The mask display is cleared when you press the [
] button on the remote control again.
• The mask function cannot be used when the output image is PC.
•
In the
optical zoom range, the mask size remains the same. In the digital zoom range,
the mask size expands and contracts depending on the magnification ratio.
•
Cannot mask the entire output image.
N o t e
Page 62

126
VARIOUS
FUNCTIONS AND
OPERATIONS
English
Scroll Function
The image expands to the digital zoom set previously, and the screen can be scrolled.
Digital zoom settings
From
the Camera Mode OSD Menu, select [Function Setting] → [Scroll], and set the digital
zoom ratio to x2, x3, or x4.
Scroll operations
When you press the [
] button on the remote control while the output image is Camera
Image or SD Mode, the image expands to the digital zoom set previously.
You can scroll the enlarged image by using the [
], [ ], [ ]. or [ ] buttons on the remote
control. Digital zoom is canceled when you press the [
] button on the remote control.
• The scroll function cannot be used when the output image is PC.
•
When digital
zoom has already been performed from the zoom dial on the main unit or
the zoom buttons on the remote control, digital zoom is released and the scroll function
works at the magnification ratio currently set.
•
Cannot use digital zoom while scrolling.
•
Within the digital zoom range, the image quality is degraded.
N o t e
Page 63

127
VARIOUS
FUNCTIONS AND
OPERATIONS
English
PIP (Picture in Picture) Function
When you press this button, you can display a quarter-size still image on a live camera
display.
PIP operations
If you press the [
] button on the remote control while the output image is Camera Image,
a quarter-size still image is displayed at the bottom left of the screen.
By using the [
], [ ], [ ]. and [ ] buttons on the remote control, you can move the still
image to the bottom left, top left, top right, and bottom right. PIP display is canceled when
you press the [
] button on the remote control.
Live image
1/4 still image sub-screen
• PIP can only be used when the output image is Camera image. It cannot be used during
SD mode or PC mode.
•
When the
output image is digitally zoomed, the still screen is at the edge of the optical
zoom image.
•
Cannot use digital zoom while using PIP function.
N o t e
Page 64

128
VARIOUS
FUNCTIONS AND
OPERATIONS
English
Using a Desktop Recorder (Optional)
By connecting the optional desktop recorder to the main unit with a dedicated cable, you
can record camera images from the main unit with the desktop recorder, and output video
playback for the desktop recorder from the analog RGB output terminal of the main unit.
Connecting the desktop recorder
(1)
Tur
n off the power supply to the desktop recorder and to this product.
(2)
Connect this
product to the desktop recorder using the cable supplied with the desktop
recorder.
(3)
Tur
n on the power supply to the desktop recorder and to this product.
Operating the desktop recorder by remote control
(1)
Connect the
desktop recorder to this product and press the [
] button on the remote
control.
(2)
Operate
the desktop recorder by using the [↑], [↓], [←], [→], and [
MENU] buttons on
the remote control.
←
→
ENTER
↑
↓
• Refer to the manual for the optional desktop recorder for operating details.
•
Cannot use the remote contr
ol while using the desktop recorder.
N o t e
Page 65

129
TROUBLE
SHOOTING
English
TROUBLE SHOOTING
6
Symptoms and Confirmation
Check the following items. If any abnormality is found, consult the dealer from whom you
purchased this product or our nearest branch/office.
Symptom Possible causes/countermeasures
No image is displayed. • The cable is not correctly connected.
•
The AC adapter is disconnected from the w
all outlet.
•
The A
C adapter is disconnected from the power supply socket of
the presenter.
•
The pow
er is not on. (Blue lamp)
• Zoom is set at the TELE side, displaying only the white/black part
of the document.
•
If y
ou turn the power on immediately after turning it off, the unit
may not start. Wait for several seconds after turning the power off,
and then turn it back on.
•
The slide
switch is not set to the correct image output. In such a
case, set the dip switch correctly by referring to “RESOLUTION/
VIDEO (Change Resolution Switch)”.
P.81
No image is displayed
from the USB.
• No image is output from the USB during USB Mode (Mass
Storage) or SD Mode. Check whether or not it is set to Mass
Storage or SD mode. Switch the USB mode from Mass Storage to
Application, referring to “Function Setting Menu”. When using SD
mode, change the output image to Camera image.
P.91
The image is out of
focus.
• The document (object) is too close to the lens.
•
Some auto
focus may be difficult to adjust. Focus on an image
manually, referring to “Manual focus”.
P.116
The output image is
disarrayed.
• Is the video output system set to PAL? If it is set to PAL, and
the product is connected to a monitor specially designed for an
NTSC system, the video image may not be normally output, but be
disarrayed or in black and white. Check if the video output system
is set to PAL.
• There are cases where the output image may be disarrayed while
zooming using the digital zoom. However, this is not a malfunction.
The image is too dark. •
The intensity
of the lighting is insufficient. Press the [BRIGHTNESS
] button on the front panel or on the remote control to adjust the
brightness.
The image is striped. •
This ma
y be interference fringes between dots of printed matter
and TV scanning lines or CMOS pixels. Changing the projection
range may mitigate the trouble.
• Vertical stripes may appear on an LCD projector image. Manually
adjusting the dot clock at the projector side may mitigate the trouble.
Page 66

130
TROUBLE
SHOOTING
English
Symptom Possible causes/countermeasures
Button operations are
delayed or ineffective.
• Is an operation that is overloading the product, such as continuously
pressing a button, or performing another operation while pressing
a button, being performed?
Turn the power off, and then turn it on again.
Images on the SD
card are not displayed.
•
Remov
e the SD card and then reinsert it after a few seconds.
The image does not
move.
•
Camera
image is set to [Pause]. Press the Pause button on the
operating panel again to unpause.
The remote control
does not work.
• Battery performance is reduced. Replace the batteries with new
ones.
•
The incorrect
remote control is being used. Use the supplied
remote control.
Cannot perform operations when the SD
card is inserted.
•
The SD card is not being read correctly.
Use it after perf
orming the following 2 formatting operations.
First, format the card using your PC. Second, format the card using
the main unit.
The resolution does
not change when setting the OSD to 720p.
•
Is RESOLUTION/VIDEO
(the change resolution switch) set to
SXGA?
If the RESOLUTION/VIDEO is set to WXGA or XGA, output
resolution does not change to 720p even after switching the
resolution to 720p by OSD.
Does not start even
when the power is
turned on.
•
Is the SD card full?
If the
SD card is full and inserted when you start up, it may take
some time to start.
About the lamp (LED lighting)
•
The brightness
of the lamp with which this product is equipped will degrade with long-term usage.
If its brightness has been degraded greatly, we will replace the part for a charge. Consult the dealer
from whom you purchased this product or our branch/office near your location.
About long-term usage of this product
• If this product is used for longer than the warranty period, its performance and quality may
deteriorate due to the lifetime of its parts. In this case, we will replace the parts for a charge. Consult
the dealer from whom you purchased this product or our nearest branch/office.
Page 67

131
SPECIFICATIONS
English
SPECIFICATIONS
7
General
Item Specifications
Power source 12VDC (AC adapter AC100 - 240V)
Power consumption 20W (AC adapter included)
30W (AC adapter included when the DC OUT terminal is connected)
Outside dimensions
W377 x D482 x H196mm (W14
13
16
x D19 x H7
3
4
in) (When folded)
W377 x D482 x H613mm (W14
13
16
x D19 x H24
1
8
in) (When set up)
Weight Approx. 4.5kg (9.9lbs) (Main body only)
Input selection Main/External
Output terminal DVI output DVI-D 24P connector, female x1
RGB output Mini Dsub 15P connector, female x1
Composite video output RCA pin jack/75 Ω unbalanced x1
(NTSC/PAL)
Input terminal RGB input Mini Dsub 15P connector, female x1
Ext. control terminal USB (2.0 compliant) Type B receptacle x1
Memory interface SD card slot x1
Main camera
Item Specifications
Lens f=4.9mm to 78.4mm (16x zoom) f=2.7
Frame rate Max. 30 frames/sec.
Shooting area SXGA
: Max. 405mm x 324mm Min. 30mm x 24mm
HDTV
: Max. 405mm x 223mm Min. 30mm x 17mm
WXGA
: Max. 405mm x 248mm Min. 30mm x 19mm
XGA
: Max. 405mm x 303mm Min. 30mm x 23mm
Limit of focus
adjustment
With close-up lens
TELE
:
250mm (9
13
16
in) to 440mm (17
5
16
in) from the close-up lens
WIDE
:
90mm (3
1
2
in) to 440mm (17
5
16
in) from the close-up lens
Without close-up lens
TELE : 500mm (19
3
4
in) to from the close-up lens
WIDE
:
100mm (3
15
16
in) to
from the close-up lens
Optical zoom 16x
Digital zoom 8x
Focus Auto/Manual
Image pick-up
element
1/3” CMOS
Total pixels Horizontal 1384, Vertical 1076 ... Approx. 1,490,000 pixels
Page 68

132
SPECIFICATIONS
English
Item Specifications
Effective pixels SXGA : Horizontal 1280, Vertical 1024
HDTV
: Horizontal 1280, Ver
tical 720
WXGA
: Horizontal 1280, Ver
tical 800
XGA
: Horizontal 1280, Ver
tical 960
Synchronized signal Internal
Resolution Analog RGB Horizontal 800TV lines or more, Vertical 800TV lines or
more
Video output Horizontal 500TV lines or more
DVI (DVI-D) output TMDS data signal 0.5 V(p-p)
50 Ω (terminated)
SXGA : 1280 x 1024@60Hz VESA compliant
Horizontal frequency
:
63.981kHz
Vertical frequency
:
60.020Hz
HDTV : 1280 x 720@60Hz HDTV compliant
Horizontal frequency : 44.96kHz
Vertical frequency
:
60Hz
HDTV : 1280 x 720@50Hz HDTV compliant
Horizontal frequency : 37.5kHz
Vertical frequency
:
50kHz
WXGA : 1280 x 800@60Hz VESA compliant
Horizontal frequency
:
49.306kHz
Vertical frequency
:
59.910Hz
XGA : 1024 × 768@60Hz VESA compliant
Horizontal frequency
:
48.363kHz
Vertical frequency
:
60.004Hz
Analog RGB output Analog RGB output 0.7 V(p-p)
75 Ω unbalanced
Synchronized signal
SXGA
: Positive polarity
HDTV
: Negative polarity
WXGA
: Ho
rizontal negative
polarity and vertical
positive polarity
XGA
: Negative polarity
Composite video
output
Compliant with NTSC/PAL
White balance
Auto/One-Push/Manual
Video output
selection switch
Provided (NTSC/PAL)
Brightness Control Auto/Manual
Posi/Nega
conversion
Provided
Color/B&W selection Provided
Image rotation Provided (0°/180°)
Mode Text1/Text2/Text3/Graphics1/Graphics2
Gamma setting Provided (Only for Graphics mode)
Edge Enhancement Provided (Only for Graphics mode)
Pause Provided
Image storage Provided (SD card)
Slide Show Provided (SD image data)
Illumination device
Illumination lamp White LED
Page 69

133
SPECIFICATIONS
English
Supplied Accessories
Name Quantity
AC adapter 1
Power cord (1.5m) 1
RCA video cable (3m) 1
Analog RGB cable (Dsub 15P connector) (2m) 1
DVI cable 1
Remote control (infrared wireless type) 1
AAA batteries 2
Remote control strap 1
P10 user’s guide 1
P10 warranty card 1
USB cable (1.8m) 1
Image Mate installation manual 1
Image Mate CD-ROM 1
Slide shooting adapter 1
•
Use pin plug for RCA pin in accordance with EIAJ RC-6703.
•
The above specifications are subject to change without notice.
N o t e
Trademarks
is a trademark of ELMO Co., Ltd.
VESA is the registered trademark of Video Electronics Standards Association.
: SD logo is a trademark.
All other company/product names described in this manual are trademarks or registered
trademarks of their respective companies.
Page 70

取扱説明書
ご使用に先だち取扱説明書をよくお読みいただき、
大切に保存してください。
INSTRUCTION MANUAL
Please read this instruction manual carefully before using
this product and keep it for future reference.
MODE D'EMPLOI
Lire attentvement ce mode d'emploi avant de mettre le Présentateur
Visuel en service. Le conserver á titre de référence permanente.
BEDIENUNGSANLEITUNG
Bitte lesen Sie diese Bedienungsanleitung sorgfältig, bevor Sie das
Gerät benutzen. Bewahren Sie die Anleitung als Referenz auf.
MANUAL DE INSTRUCCIONES
Antes de utilizar este producto, lea atentamente este manual de
instrucciones y guárdelo para consultas futuras.
ご 注 意
●
スライド・書籍・写真等は個人で楽しむほかは、著作
権法上、権利者に無断で録画できませんのでご注意く
ださい。
●
この装置は、商工業地域で使用されるべき情報装置で
す。住宅地、またはそ の隣接した地域で使用すると、
ラジオテレビジョン受信機等に、受信障害を与えるこ
とがあります。
●
補修用性能部品について
当社ではこの製品の補修用性能部品(製品の機能を維
持するために必要な部品)を、製造打ち切り後 8 年間
保有しています。この部品保有期間を修理可能の期間
とさせていただきます。
●
カメラシステムを使用して撮影する人物・その他の映
像で、個人を特定できるものは個人情報となります。
その映像の開示・公開等の取扱いは、システムを運用
する方の責務となりますので、ご注意ください。
〒 467-8567
名古屋市瑞穂区明前町 6 番 14 号
Web: http://www.elmo.co.jp/
Unauthorized recording of copyrighted slide films,
materials, photographs, etc. may infringe on the
rights of copyright owners and be contrar y to
copyright laws.
La co pi e de fi lm / do cu me nt / photograp hi e
protégé est interdite sans autorisation expresse
des détenteurs des droits de reproduction (Loi sur
le Copyright). Ce Présentateur Visuel est conçu
pour son emploi dans l'environnement industriel et
commercial. Son emploi dans une zone résidentielle
est susceptible de provoquer des interférences
rad ioélect riqu es nuisibles pour le voisinag e
(récepteurs radio et téléviseurs).
WARNING
AVERTISSEMENT
OVERSEAS SUBSIDIARY COMPANIES
U.S.A. ELMO USA CORP.
Headquarters
1478 Old Country Road
Plainview, NY 11803-5034, U.S.A
Tel:(516) 501-1400 Fax:(516) 501-0429
E-mail: elmo@elmousa.com
Web: http://www.elmousa.com
West Coast Branch
Cypress Pointe Business Park
5676 Corporate Avenue
Cypress, CA 90630, U.S.A
Tel:(714) 828-8457 Fax:(714) 828-8429
WARNUNG
Ni ch t ge neh mi gte Au fn ahm en vo n rec ht lic h
geschützten Diafilmen, Fotografien und ähnlichen
Dokumenten können Urheberrechte verletzen und
werden ggf. rechtlich verfolgt.
Germany ELMO (Europe) G.m.b.H
Neanderstr. 18
40233 Düsseldorf, Germany
Tel:(0211) 386470 Fax:(0211) 376620
E-mail: info@elmoeurope.com
Web: http://www.elmoeurope.com/
ADVERTENCIA
La grab ación no aut or izada de dia posit ivas,
materiales, fotografías, etc. sujetos a derechos de
autor puede infringir los derechos de los propietarios
y las leyes de propiedad intelectual.
6-14, Meizen-cho, Mizuho-ku, Nagoya,
467-8567, Japan
Printed in Thailand
6X1VHTA04 R1-Gb
 Loading...