

Page 1
MP-350
QUICK START GUIDE
ENGLISH
■ Read this guide and the separate “IMPORTANT SAFEGUARD” carefully before
using the projector.
■ This guide describes the basic operation of the projector taking for ex ample o f the
connection to a com puter. Refer to the instruction manual of the BOXi for any o ther
operations and detailed information.
《BOXi Instruction manual》
©2012 Copyright ELMO Co., Ltd. All rights reserved.
Any names, company names and product names referred to in this guide are trademarks
or registered trademarks of the respective companies.
Download the instruction manual from the following BOXi
website.
BOXi Product Website:http://boxi.elmoglobal.com/
Page 2

TABLE OF CONTENTS
TABLE OF CONTENTS ....................................................................................... 2
1 GETTING STARTED ........................................................................................... 3
Checking the packag e co nte nts ........................................................................... 3
Part names and functions ..................................................................................... 4
Preparing the remote control ................................................................................ 5
2 USING THE PROJECTOR .................................................................................. 6
Installing the projector .......................................................................................... 6
Connecting to a device ......................................................................................... 7
Powering on ......................................................................................................... 8
Detecting the input signal ..................................................................................... 9
Adjusting the projected image ............................................................................ 10
Powering off ........................................................................................................ 11
2
Page 3
the Protective cover.
N o t e
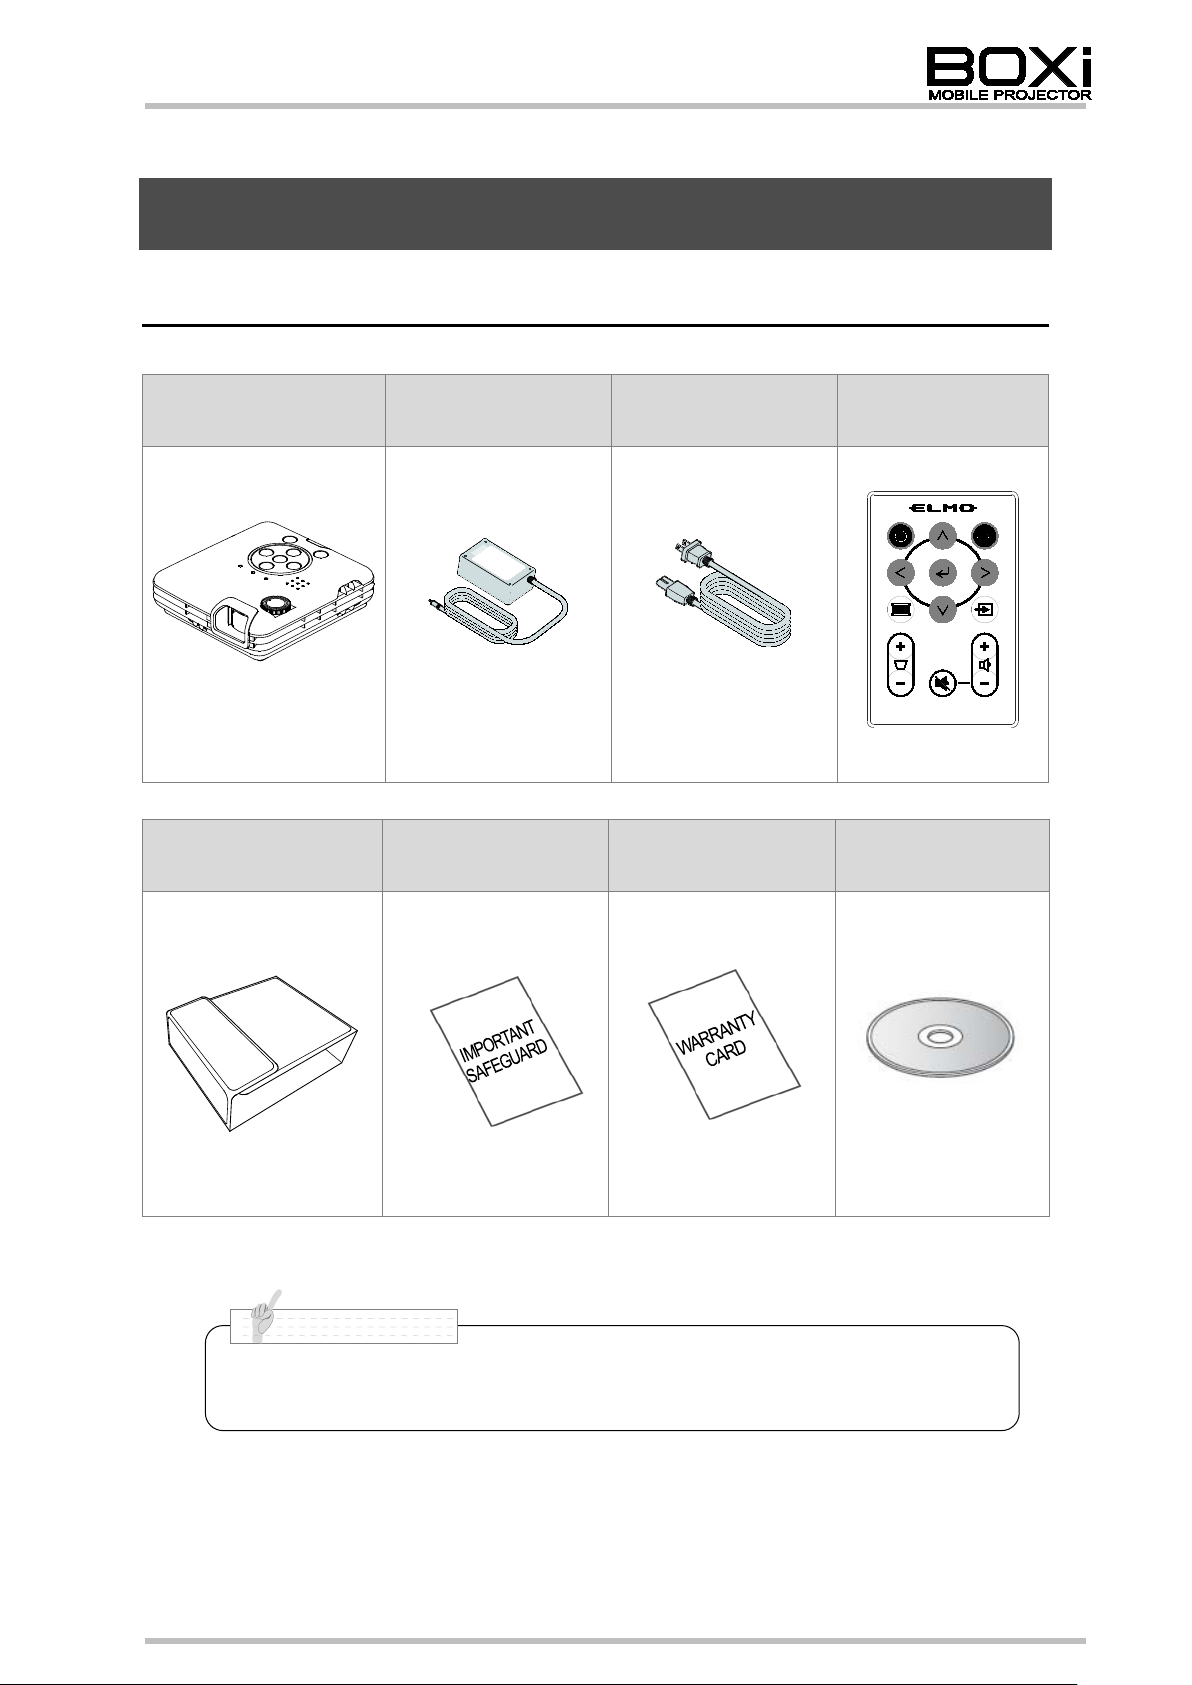
1 GETTING STARTED
Checking the package conten ts
Projector AC adapter Power cord Remote contr ol
Protective cover
IMPORTANT
SAFEGUARD
WARRANTY CARD CD-ROM
*Battery included
*with Hook and loop
fastener (2pcs)
*QUICK STAR T
GUIDE included
■ Refer to the instr uction manual of the BOXi for details how to use
3
Page 4
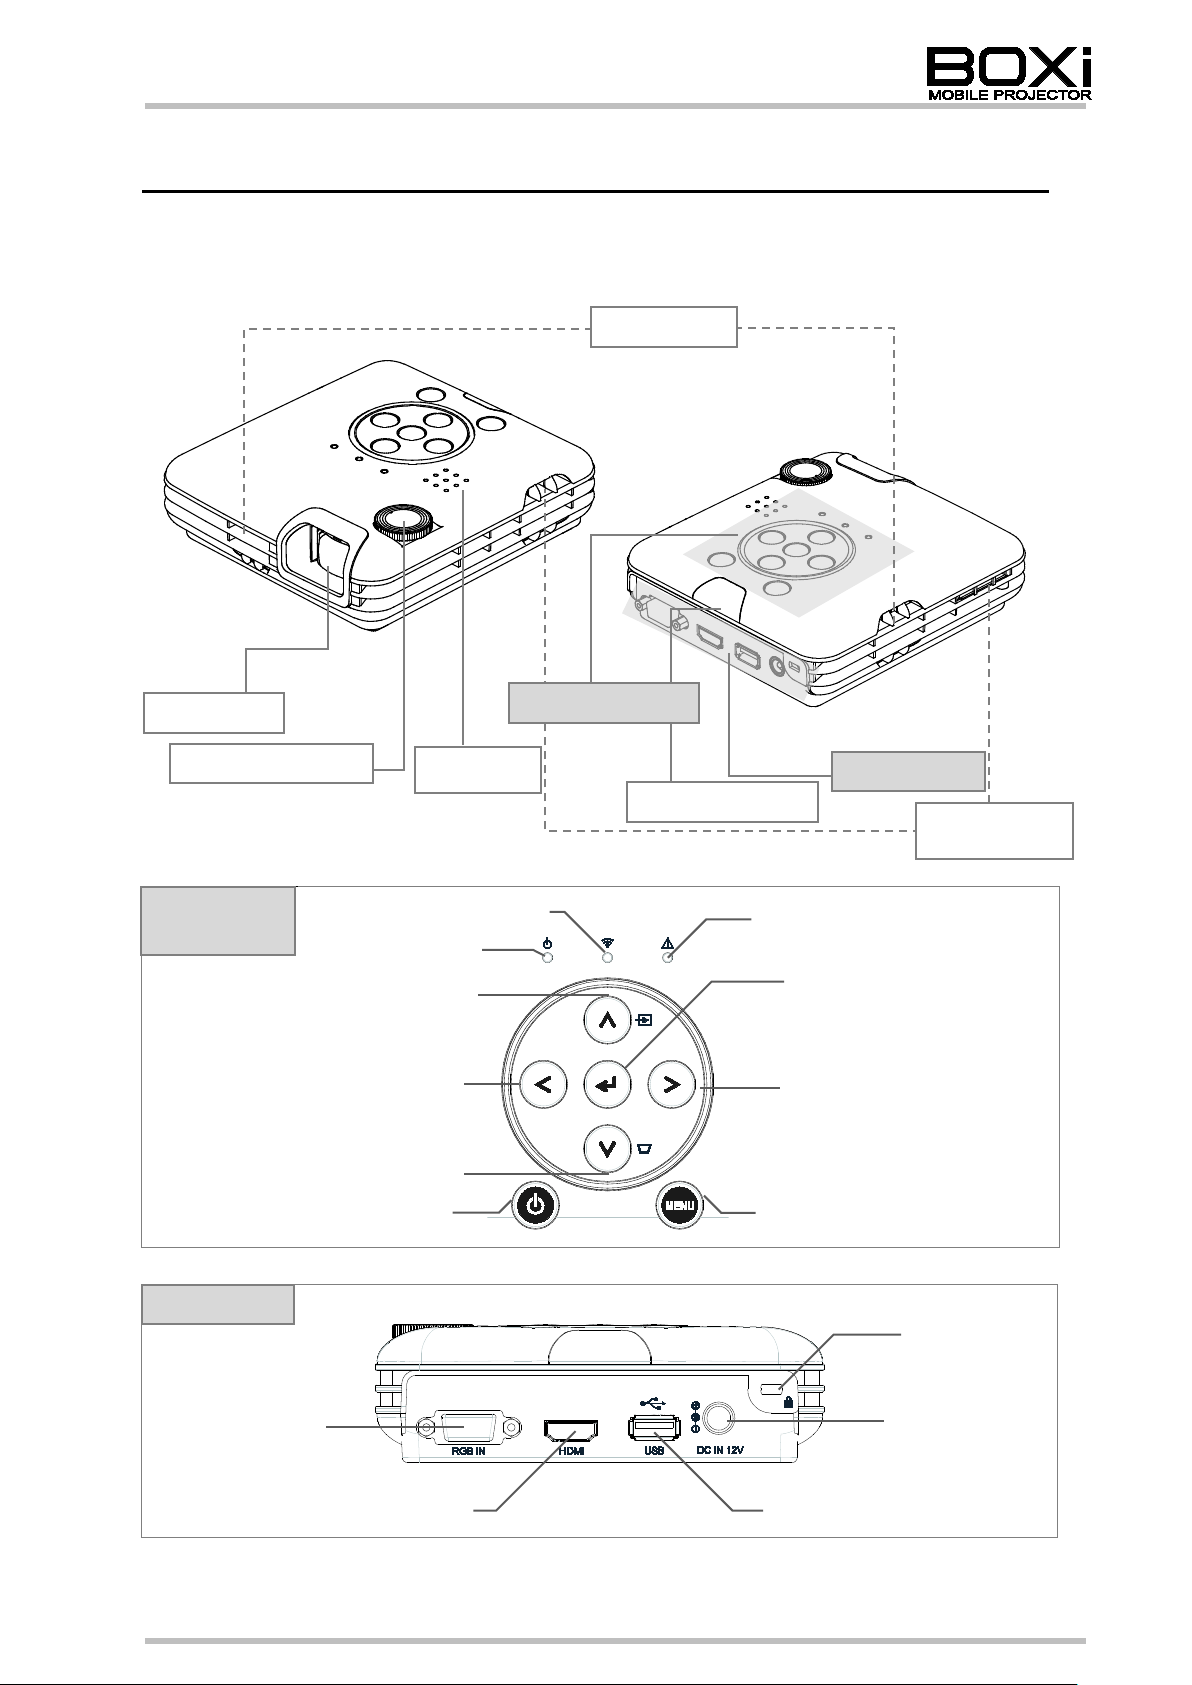
Part names and functions
Control
Rear panel
Rear panel
Remote sensor
Focus dial
Lens
Intake vents
Speaker
Control panel
TOP/FRONT TOP/BACK
panel
Wireless LAN indicator Warning indicator
Power indicator
LEFT button
DOWN button
Power button
UP button
Exhaust vent
Enter button
RIGHT button
Menu button
Security slot
RGB IN
DC IN 12V
HDMI
4
USB
Page 5

Remote control
Insulation sheet
Power button
UP button
LEFT button
Blank screen button
DOWN button
Keystone + button
Keystone - button
Menu button
ENTER button
RIGHT button
Input selection button
Volume+button
Volume-button
MUTE button
Preparing the remote control
A battery is pre-installed in the remote control
at the time of shipment (with insulation sheet).
Remove the insulation sheet before using the
remote control for the first time.
5
Page 6

N o t e
L
Screen size (inch)
Height
2 USING THE PROJECTOR
Installing the projec t or
Decide the position to place the projector.
The distance between the projector and the screen should be between 48cm (screen
size: 25 inch) and 133cm (screen size: 68 inch).
Width
Screen size Projection distance
Inch Width (cm) Height (cm) L(cm)
25 53.8 33.7 48
30 64.6 40.4 58
35 75.4 48.0 68
40 86.1 53.8 78
45 96.9 60.6 88
50 107.7 67.3 98
55 118.5 74.0 108
60 129.2 80.8 118
65 140.0 87.5 128
68 146.5 91.5 133
■ The values in the table are design values and may vary. Use them
as an indication only.
■ The aspect ratio of the proj ecte d imag e in full screen i s 1 6:10. When
the aspect ratio of the input signal is different from 16:10 (such as
16:9 or 4:3), top and bottom or left and right of the image will not be
displayed and the scr een siz e becomes s maller than t hose sp ecifi ed
in the above table.
→ Refer to the instruction manual of the BOXi for detailed information.
6
Page 7

RGB cable
(Sold separately)
Device (such as a computer )
AC adapter
Power cord
Connecting to a device
-Connecting using RGB terminal
1. Connect the power supply (AC adapter and power cord) to the projector.
2. Connect the projector to the device such as a computer using RGB cable.
BACK
When using HDMI, use the HDMI terminal and HDMI cable (sold separately).
7
Page 8

N o t e
Powering on
1. Press button on the projector or the remote control.
Control panel
Remote control
Power indicator turns green.
(Wireless LAN indicator turns on at the same ti me.)
The opening screen appears.
■ It will take some time before you can operate the projector after the
power is on.
■ Refer to the instruction manual of the BOXi for det ai l s about t he
wireless LAN indicator and functions of the wireless LAN.
8
Page 9

HDMI
RGB
N o t e
N o t e
Detecting the input signal
Wait until the projector aut om ati c al ly dete ct s t he input signal
AUTO function to automatically detect the input signal is enabled at the time of
shipment. When the d evice is connected using RGB terminal or HDMI terminal,
the input signal is detected automatically.
■ Take the following steps to select the input signal manually.
Selecting the input signal from the menu
1. Press button on the remote control or button on the control panel.
「Input signal selecti on men u」 appears.
2. Select the input signal using buttons.
Control panel
Input signal selection menu
Remote control
3. Press
button to execute.
HDMI RGB USB WiFi
■ Input signal selection can only be done from the menu when
USB or WiFi is selected.
■ Refer to the instruction manual of the BOXi for details about
the operation.
9
Page 10

Press this button when the projection
Press this button when the projection
Adjusting the projected image
Focusing the image
1. Use the focus dial to focus the image.
Correcting the keystone dis t ortions
1. Press + or - of button on the remote control.
「Keystone adjustment di alog」 appears.
Remote control
Keystone adjustment dial og
2. Press + or - of button on the remote control.
Remote control
Press+button
(
angle is increasing.)
Press-button
(
angle is decreasing.)
10
Page 11

When the warni ng i ndicator is lit or flashing, it indicates that some malfunction
CAUTION
Powering off
1. Press button on the projector or the remote control.
Control panel
Remote control
2. The message appears. Then press button again.
Power indicator turns off.
(Wireless LAN indicator
Unplug the cable after the fan has stopped.
turns off at the same time.)
Press Power button again to
turn off the projector.
occurred to the projector. Refer to the instruction manual of the BOXi.
11
Page 12

Nagoya, 467-8567, Japan
ELMO USA CORP.
ELMO Europe SAS
1478 Old Country Road
Immeuble Elysées La Défense,
Tel. (516) 501-1400 Fax.(516) 501-0429
92056 Paris La Défense, France
Web: http://www.elmousa.com
Fax. 33 (0) 1 73 02 67 10
West Coast Branch
German Branch
Cypress, CA 90630, U.S.A.
40549 Düsseldorf Germany
Fax. 49 (0) 211 544756 60
OVERSEA S S UBSIDISRY COMP ANIES
6-14, Meizen-cho, Mizuho-ku
Headquarters
Plainview, NY 11803, U.S.A. 7C, Place du Dôme,
E-mail: elmo@elmousa.com Tel. 33 (0) 1 73 02 67 06
5676 Corporate Avenue Hansaallee 201, Haus 1
Headquarters
Tel. (714) 828-8457 Fax. (714) 823-8429 Tel. 49 (0) 211 544 756 40
6X1SPJBC3(en) R0-Xex
12
 Loading...