

Page 1
1
UBEC 1AT AUTO TANK Fill System
1302 WEST BEARDSLEY AVE • ELKHART, IN 46514 • 574-295-8330 • 800-346-0250 98330000 REV A
© 2012 ELKHART BRASS MFG. CO., INC. • WWW.ELKHARTBRASS.COM
08899155 & 08899156
Installation, Operation, & Setup Instructions
Page 2

2
TABLE OF CONTENTS
PRODUCT SAFETY INFORMATION 3
MONITOR CALLOUT DRAWING 4
OVERVIEW 5
INSTALLATION INSTRUCTIONS 7
TankVision Display Module 7
AUTO TANK Control Module 8
Pressure Sensor 9
Control Valve 10
CALIBRATION 11
Overview 11
Calibration Steps 12
OPERATIING INSTRUCTIONS 14
Theory 14
Modes 14
Valve Position Indicators 15
Operational Check 15
SPECIFICATIONS 17
WIRING 18
To view the most current parts list, drawings, or demonstrations of common EXM commands,
please visit www.elkhartbrass.com
Page 3

3
PRODUCT SAFETY INFORMATION
All personnel who may be expected to operate this equipment must be thoroughly trained in its safe
Important: Before installing and operating this equipment, read this manual
thoroughly. Proper installation is essential to safe operation.
and proper use.
Become thoroughly familiar with the hydraulic characteristics of this equipment.
Always open and close valves slowly to avoid water hammer.
After each use, and on a scheduled basis, inspect equipment per instructions in the maintenance
section.
Keep fingers and hands clear of movings parts.
Disconnect power before servicing and electric valve or electric valve controller.
Use only mild dish soap to clean the controller.
Any modifications to the electrical will destroy the NEMA 4 rating and void warranty coverage of the
enclosure and all components within.
SYSTEM INFORMATION:
SERIAL NUMBERS:__________________________________________________________________________
KIT DETAILS:
__________________________________________________________________________________________
__________________________________________________________________________________________
__________________________________________________________________________________________
__________________________________________________________________________________________
__________________________________________________________________________________________
Page 4
4
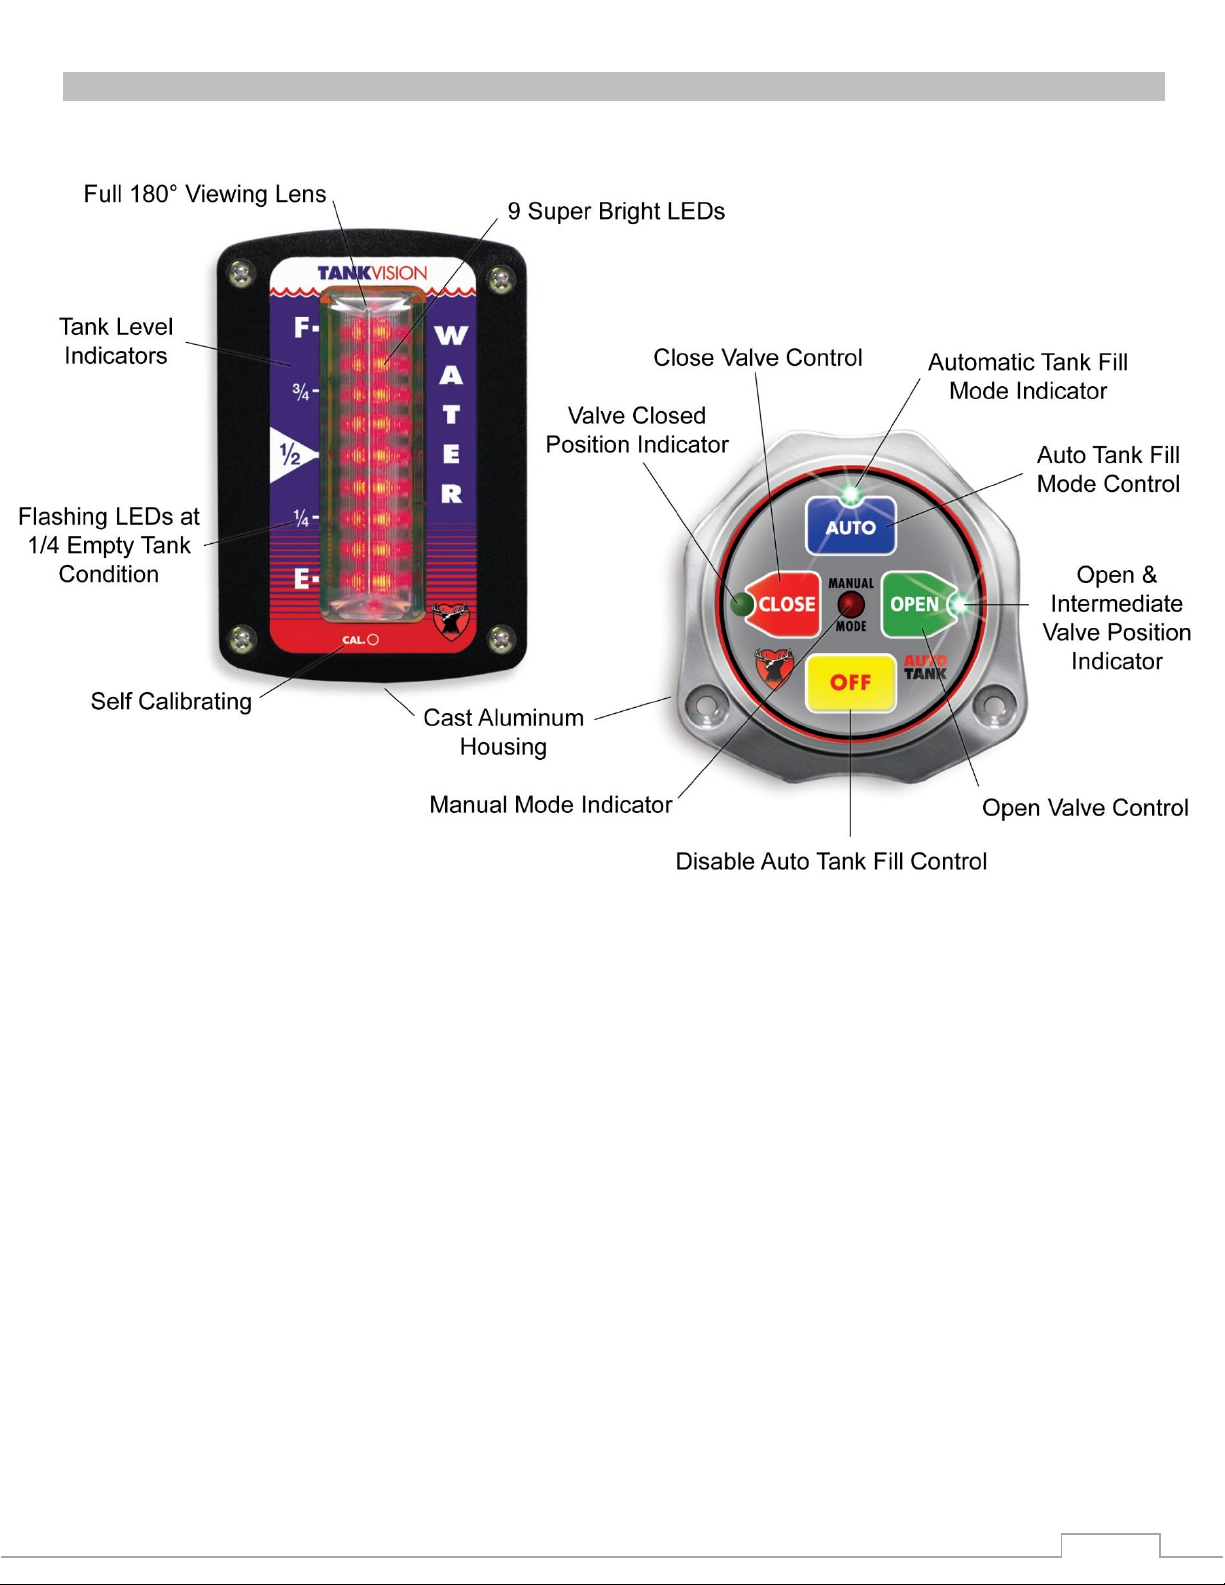
SYSTEM CALLOUT
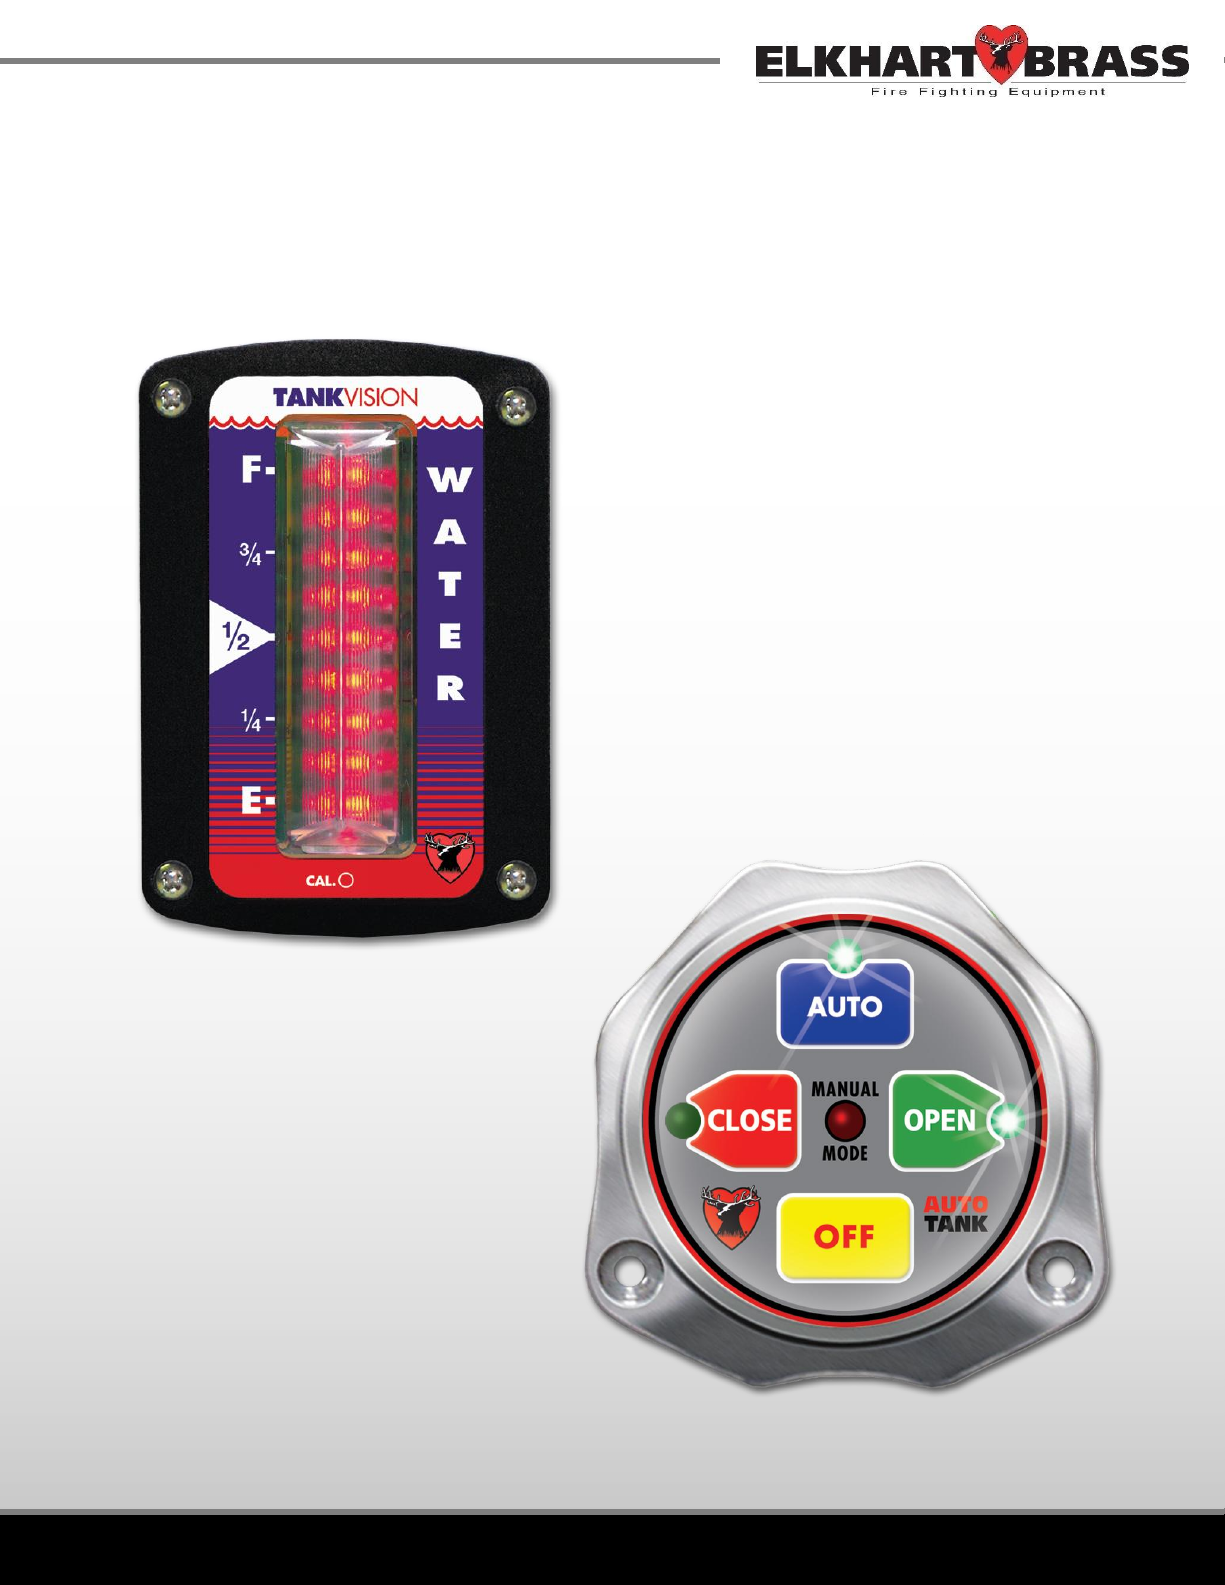
Figure 1: AUTO TANK System
Display & Control Modules
Page 5

5
OVERVIEW
The AUTO TANK System is designed to work with around-the-pump foam systems where there is a
need to fill the water tank and maintain low pressure at the pump intake while pumping foam.
Normal operations would require pressurized water from a hydrant or pumper in relay to be connected
to the input of the pump. During foam operations excessive pressure at the input side of the pump can
cause the foam system to operate at partial capacity or fail to inject foam. This limits foam system
operations to the amount of water in the tank. When pressurized supply water flow is controlled the
AUTO TANK system, the water volume in the tank of a pumper is automatically maintained. Low
pressure water is available at the input side of the pump continuously to extend foam system
operational capabilities
Features
Maintains tank water volume between 50% and 95% full (P/N 08899155), or between 75% and
100% full (P/N 08899156)
Controls water flow for any GPM rate
For use with tanks over a 500 capacity
Self-Calibrating for any shape or size tank
Automatic or manual control
Components
TankVision Display Module
AUTO TANK Control Module
Pressure Sensor
Elkhart E3F Unibody Control Valve (Sold Separately)
All necessary component harnesses
TankVision Display Module
The tank volume display module is waterproof and has dimensions of 4.4 inches high by 3 inches
wide. An output signal from a pressure sensor mounted on the tank is input to the display module. It is
processed and the volume of liquid in the tank is shown on the 9 LED display. An output from the
display module controls the opening and closing of the control valve when the automatic mode is
selected.
AUTO TANK Control Module
The control module provides an interface between the TankVision display module and the valve. It has
four push buttons that allow the operator to select the mode of operation. The control module also has
automatic tank fill and manual valve control indicators. The open and close LEDs provide valve
position feedback.
The controller for P/N 08899155 stays in manual or automatic mode until changed. The controller for
P/N 08899156 powers up in automatic mode even if it was in manual mode when powered down.
Page 6

6
Pressure Sensor
The pressure sensor is mounted on a side of the tank near the bottom. It provides a signal that is
proportional to the volume of liquid in the tank to the input of the primary display module. The
electrical connector is waterproof and molded into the pressure sensor housing.
The pressure sensor is used on tanks between 1 and 10 feet in vertical height.
Control Valve
The E3F electric actuator is utilized for control of the tank fill valve. The AUTO TANK control module
communicates to the E3F electric actuator via the J1939 data bus. It can be mounted on any standard
sized Unibody valve.
NOTE: An Elkhart control valve is not included with the AUTO TANK Fill System, and must be
purchased separately.
Page 7

7
INSTALLATION INSTRUCTIONS
TankVision Display Module
Figure 2: Display Module Dimensions
Note: It is recommended to mount the display at eye level for accurate tank level readings.
1. Measure and mark mounting location for display module panel cutout and mounting screw holes.
Make sure there is a clearance behind the panel for the display and cables before cutting holes.
Refer to Figure 2 below.
2. Cut out a 4” by 2 1/8” hole and drill four (4) holes (clearance or tapped) for 6-32 mounting
screws.
3. Place Display Module in position and secure with four (4) screws.
4. Connect the Display Module cables and wires. (Please refer to Wiring Section on page 17)
Page 8

8
AUTO TANK Control Module
Figure 3: Control Module Dimensions
1. Measure and mark mounting location for cutout and mounting screw holes. Make sure there is
clearance for the module and cables before cutting hole. Refer to Figure 3 below.
2. Cut out a 2 ¾” diameter hole and drill two (2) holes (clearance or tapped) for 10-32 mounting
screws.
3. Place control module in position and secure with two (2) screws.
4. Connect the cables and wires. (Please refer to Wiring Section on page 18)
Page 9

9
Pressure Sensor
Figure 4: Pressure Sensor Dimensions
The pressure sensor is mounted on one of the tank sides approximately 2 inches from the bottom. The
pressure sensor can only be utilized for tanks between 1 and 10 feet in vertical height. Installation of
the pressure sensor in tanks larger than these limits could result in permanent damage to the sensor.
Note: When mounting the pressure sensor on a tank with thin walls (less than 3/8”), it is recommended
that the tank wall be reinforced at the sensor mounting location.
1. Measure and mark mounting location for sensor (Mounting hole should be approximately 2” from
bottom of tank). Make sure there is clearance for sensor and cable before drilling hole. Refer to
Figure 4 below.
2. Drill and tap a ¼-18 NPT hole.
3. Apply sealant around base and threads of pressure sensor.
4. Screw sensor into hole.
5. Connect sensor cable. (Please refer to Wiring Section on page 17)
Page 10

10
Control Valve
Installation instructions for the control valve can be found in the Unibody Valve and Controller Manual
(Document P/N 98311000). After installing the control valve, connect the AUTO TANK Control Module
to the control valve using the supplied harness. Please see Wiring section on page 18.
Note: Be sure to perform an automatic position calibration on the control valve after installation. This
procedure can be found on page 13.
Note: The AUTO TANK Fill Controller is intended to be used only with Elkhart Unibody control valves
that utilize an E3F electric actuator. Do no attempt to use with any other control valve, doing so could
result in damage to the Controller and will void the warranty.
Page 11

11
CALIBRATION
The TankVision has unique calibration programs that enable it to be used on tanks of all shapes and
OVERVIEW
sizes.
Note: The standard pressure sensor is limited to a max tank height of ten (10) feet.
Magnet Sensor
The calibration programs are accessed by activating the CAL. Magnet sensor that is located at the
bottom on the front of the display module. The sensor is activated by placing the north pole of a small
magnet in close proximity of the sensor. (The sensor will not respond to the south pole of the magnet).
The magnet is then moved about 1” away, this will produce an electronic signal that is similar to a
button being released. If the LEDs in the display do not change try moving the magnet farther away
from the sensor.
In these procedures the term ‘swipe’ will mean to move the magnet up to and then away from the
magnetic sensor at the bottom of the display.
Non-Linear Calibration
The first program is a non-linear calibration procedure that can be used for any shape or size tank.
This procedure must to be used for irregular shape tanks (e.g.: T-shape, oval, elliptical, tank with
through hole, etc.). The program compares the pressure in the tank, as the tank fills at a steady rate, to
time. This provides for very accurate displays.
Linear Calibration
The second program is a linear calibration procedure that can only be used when the tank volume is
proportional to the height. This would include square or rectangular shape tanks with no irregularities.
It is quick way of calibrating a tank to an empty tank, takes the difference and divides it into eight
equal volume displays.
Full Tank Correction
This program is for use to fine tune the tank display after a non-linear or linear calibration procedure
has been completed. It would only be needed in cases where one type of liquid is used for calibration
when a different liquid would normally be in the tank. For example, this would allow the basic
calibration of a foam tank to be done using water and then the calibration would be fine tuned when
the tank is filled with foam concentrate.
Control Valve Position Calibration
This calibration will automatically adjust the AUTO TANK Control Module to the E3F control valve
position. This process must be done in order for the AUTO TANK Controller to function properly.
Page 12

12
CALIBRATION STEPS
Non-Linear Calibration
This non-linear calibration procedure can be used for any shape or size tank. The calibration process
requires that the tank be empty at the start of the procedure and the filled at a steady rate of flow.
1. Empty the tank.
2. Apply power to the display module.
3. Swipe the magnet three (3) times to enter calibration mode (Non-Linear).
Result: Top three (3) display LEDs flash on and off.
4. Fill the tank at a steady rate of flow.
Note: once the calibration process is activated, the flow rate of liquid into the tank must remain
constant for the procedure to be accurate.
5. When the tank is full stop the flow.
6. Swipe the magnet three (3) times to set the calibration into memory.
Note: The program only acts on three (3) swipes to set the calibration into memory, or eight
swipes to terminate calibration mode. If a wrong entry is made, wait six seconds and it will clear.
7. After six (6) seconds the calibration process will terminate and all the LEDs will be lit to show that
the tank is full.
To exit calibration mode, swipe the magnet eight (8) times. The top eight (8) display LEDs will turn on,
calibration mode terminates, and no program data is changed.
Linear Calibration
This linear calibration procedure can only be used for square or rectangular shape tanks with no
irregularities. The calibration process requires that the tank be full at the start of the procedure.
1. Fill the tank. (Do not fill up into the fill tower)
2. Apply power to the Display Module.
3. Swipe the magnet four (4) times to enter calibration mode (Linear).
Note: Once the calibration process is activated, there is a six (6) second timeout. Do no wait more
than six (6) seconds to move from step 3 to step 4.
4. After three (3) seconds, swipe the magnet four (4) times to set the calibration into memory.
5. After six (6) seconds the calibration process will terminate and all the LEDs will be lit to show that
the tank if full.
To exit calibration mode, swipe the magnet eight (8) times. The top eight (8) display LEDs will turn on,
calibration mode terminates, and no program data is changed.
Full Tank Correction
This fine calibration procedure is used to fine tune the tank display after a non-linear or linear
calibration has been completed. The calibration process requires that the tank be full at the start of the
procedure and the display shows 75% or more.
Page 13

13
1. Fill the tank. (Do not fill up into the fill tower)
2. Apply power to the Display Module.
3. Swipe the magnet five (5) times to enter calibration mode (Full Tank).
Note: Once the calibration process is activated, there is a six (6) second timeout. Do no wait more
than six (6) seconds to move from step 3 to step 4.
4. After three (3) seconds, swipe the magnet five (5) times to set the calibration into memory.
5. After six (6) seconds the calibration process will terminate and all the LEDs will be lit to show that
the tank is full.
To exit calibration mode, swipe the magnet eight (8) times. The top eight (8) display LEDs will turn on,
calibration mode terminates, and no program data is changed.
Control Valve Position Calibration
A valve position calibration must be performed prior to operation. This calibration can be initiated
through the AUTO TANK Control Module by making use of the following steps:
1. Hold the OPEN and CLOSE buttons for ten (10) seconds until the AUTO light begins to flash.
2. Hold the AUTO light for five (5) seconds to initiate the automatic valve position calibration. During
this process the MANUAL mode LED will flash.
3. When the calibration process is complete, the CLOSE LED will turn on and stay lit.
Page 14

14
OPERATING INSTRUCTIONS
The AUTO TANK system is designed to automatically maintain the water volume in the tank of a
THEORY
MODES
pumper. It is more specifically designed to be used on tanks that supply water to around-the-pump
foam systems.
System Operating Parameters
The minimum size of the pumper tank is 500 gallons. There is no maximum tank size.
There is no minimum pump discharge flow rate. The maximum discharge flow rate is 500 GPM.
An Elkhart E3F electrically actuated ball valve is required.
The supply water flow rate at the input to the tank must be at least 20% above the pump
discharge flow rate.
The supply water must enter the tank through the fill tower to avoid potential over pressurization
of the tank, or pressure surges through the tank as the valve is opened and closed. Plumb from
the valve to the tank fill tower.
With all the system parameters met and operating in the automatic mode, the AUTO TANK system P/N
08899155 will keep the tank between 50% and 95% full, and AUTO TANK system P/N 08899156 will
keep the tank between 75% and 100% full.
For efficient operation around-the-pump foam proportioning systems should be operated with low
pump intake pressure, less than 20 PSI. During normal operations pressurized water from a hydrant or
pumper in relay would be connected to the input of the pump. This excessive pressure at the input side
of the pump can cause the foam system to operate at partial capacity, fail to inject foam, or allow
water to enter the foam tank. The UBEC-1AT system continuously fills the tank as required so that low
pressure water is available at the input side of the pump.
During operations a supply line from a pressurized source of water (hydrant or pump in relay) is
connected to the input side of the control valve. A dedicated line connected from the output side of the
valve to the fill tower feed water to the tank. The TankVision display monitors the water in the tank. It
sends a signal to the control module to indicate a low or full level. In auto mode the control module
then sets the position of the valve as needed.
The control module allows the operator to select the automatic, manual, or off mode of operation.
On power-up the controller for system P/N 08899155 initializes to the same mode of operation it was
in when power went off, and system P/N 08899156 initializes in automatic mode even if it was in
manual mode when power went off.
No operator input is required for the TankVision to be operational. When power is on, the display will
be operating. The signal from the pressure sensor is processed and the volume of liquid in the tank
shows on the display.
Page 15

15
During all modes of operation the TankVision display functions normally and the volume of water in
VALVE POSITION INDICATORS
OPERATIONAL CHECK
the tank is shown on the 9 LED display.
All 9 LEDs are on when the tank is full. Each LED goes off starting at the top and working down as
the liquie in the tank decreases.
The bottom two (2) LEDs flash when the tank is less than ¼ full.
All 9 LEDs rapidly down-chase when the tank is almost empty.
Automatic Mode
Pressing and holding the AUTO button puts the system in the automatic mode and the green LED
comes on. The opening and closing of the valve is controlled by the control module on the control
valve. The valve stays closed until the tank water level goes below 50% or 75% (depending on your
system). The valve then opens fully and allows supply water to flow into the tank. When the tank is
refilled to approximately 95% or 100% (depending on your system) the valve will close. The valve takes
approximately 7 seconds to move from fully closed to fully open or from fully open to fully closed. The
valve cycles as needed during operations to maintain the water volume in the tank.
Manual Mode
Pressing the OPEN or CLOSE button puts the system into the manual mode and the MANUAL MODE
LED comes on. In the manual mode, the opening and closing of the valve is controlled by the OPEN
and CLOSE buttons.
Off (Valve Shut) Mode
Pressing the OFF button closes the valve.
The TankVision display functions normally and the volume of water in the tank is shown on the 9 LED
display.
Solid Close – CLOSED LED is lit when valve is fully closed.
Solid Open – OPEN LED is lit when valve is fully opened.
Flashing Open – OPEN LED is flashing when valve is anywhere between fully open and fully closed.
Note: For this check, the input to the AUTO TANK system control valve does not have to be connected
to a water source. The tank can be filled at the fill tower by any method that is convenient. (This will
check the operation of the AUTO TANK system, but it will not verify the plumbing between the valve
and tank)
1. Fill the tank with water and apply power to the AUTO TANK system.
2. Press the OPEN and CLOSE buttons.
Result: The valve and the indicating lamps follow the switch position.
3. Press the OPEN button to open the valve.
4. Press the AUTO button.
Page 16

16
Result: The system is put into automatic mode, the green LED comes on, and the valve closes.
5. Drain water from the tank.
Result: The display shows tank volume. When it reaches 50% or 75% (depending on your system)
the valve opens.
6. Stop draining water and refill tank.
Result: The display shows tank volume. When it reaches 95% or 100% (depending on your
system) the valve closes.
Page 17

17
SPECIFICATIONS
System Requirements
Tank Size:
o Min 500 Gallons
o Max No Maximum (Less than 10 vertical feet tall)
Total Discharge flow rate:
o Min 0 GPM
o Max 500 GPM
Supply Water flow rate into tank:
o Min 20% above discharge flow rate
o Max No Maximum
TankVision Display Module
Supply Voltage: 9-30 VDC
Supply Currant: 0.25 AMP Max
Dimensions: 4.4” x 3.0”
Housing: Waterproof Cast Aluminum
Indicators: 9 Super Bright LEDs
Viewing Angle: 180°
AUTO TANK Control Module
Supply Voltage: 9-30 VDC
Supply Currant: 0.25 AMP Max
Dimensions: 3.25” x 3.25”
Pressure Sensor
Housing: Stainless steel with ¼-18 NPT for mounting
Sensor: Ceramic Diaphragm
Pressure Range: 1-5 PSI (Maximum tank height: 10 feet)
Excitation Voltage: 5 VDC
Page 18

18
WIRING
Figure 5: Display Module Wiring Diagram
Supplied Harness (P/N 37069000)
Supplied Harness
(P/N 37068000)
Page 19

19
Figure 6: Conrtol Module Wiring Diagram
Page 20

ELKHART BRASS
1302 WEST BEARDSLEY AVE
P.O. BOX 1127
ELKHART, IN 46514
PHONE: 574-295-8330 • 800-346-0250
FAX: 574-293-9914
WWW.ELKHARTBRASS.COM
© ELKHART BRASS MFG. CO., INC. 2012
UBEC 1AT AUTO TANK FILL SYSTEM
08899155 & 08899156
INSTALLATION, OPERATION, & SETUP INSTRUCTIONS
98330000 REV. A
 Loading...