

Elkay EDFP214RC Installation Manual
EDFP210EC EDFP210RC EDFP214EC EDFP214RC EDFPVR214RC
Installation/Care/Use Manual
Composite Non-Refrigerated Fountains
Installer
T o assure you install this model easily and correctly ,
PLEASE READ THESE SIMPLE INSTRUCTIONS BEFORE ST ARTING THE
INST ALLATION. CHECK YOUR INSTALLA TION FOR COMPLIANCE WITH
PLUMBING, ELECTRICAL AND OTHER APPLICABLE CODES. After installation, leave
these instructions inside the fountain for future reference.
IMPORTANT
ALL SERVICE TO BE PERFORMED BY AN AUTHORIZED SERVICE PERSON
IMPORTANT! INSTALLER PLEASE NOTE.
THE GROUNDING OF ELECTRICAL EQUIPMENT SUCH AS TELEPHONE, COMPUTERS, ETC. TO
WA TER LINES IS A COMMON PROCEDURE. THIS GROUNDING MA Y BE IN THE BUILDING OR MA Y
OCCUR A WA Y FROM THE BUILDING . THIS GROUNDING CAN CAUSE ELECTRICAL FEEDBACK
INTO A FOUNT AIN, CREA TING AN ELECTROLYSIS WHICH CAUSES A METALLIC T ASTE OR AN
INCREASE IN THE METAL CONTENT OF THE WATER. THIS CONDITION IS A VOIDABLE BY USING
THE PROPER MA TERIALS AS INDICA TED. ANY DRAIN FITTINGS PROVIDED BY THE INST ALLER
SHOULD BE MADE OF PLASTIC TO ELECTRICALL Y ISOLA TE THE FOUNT AIN FROM THE BUILDING
PLUMBING SYSTEM.
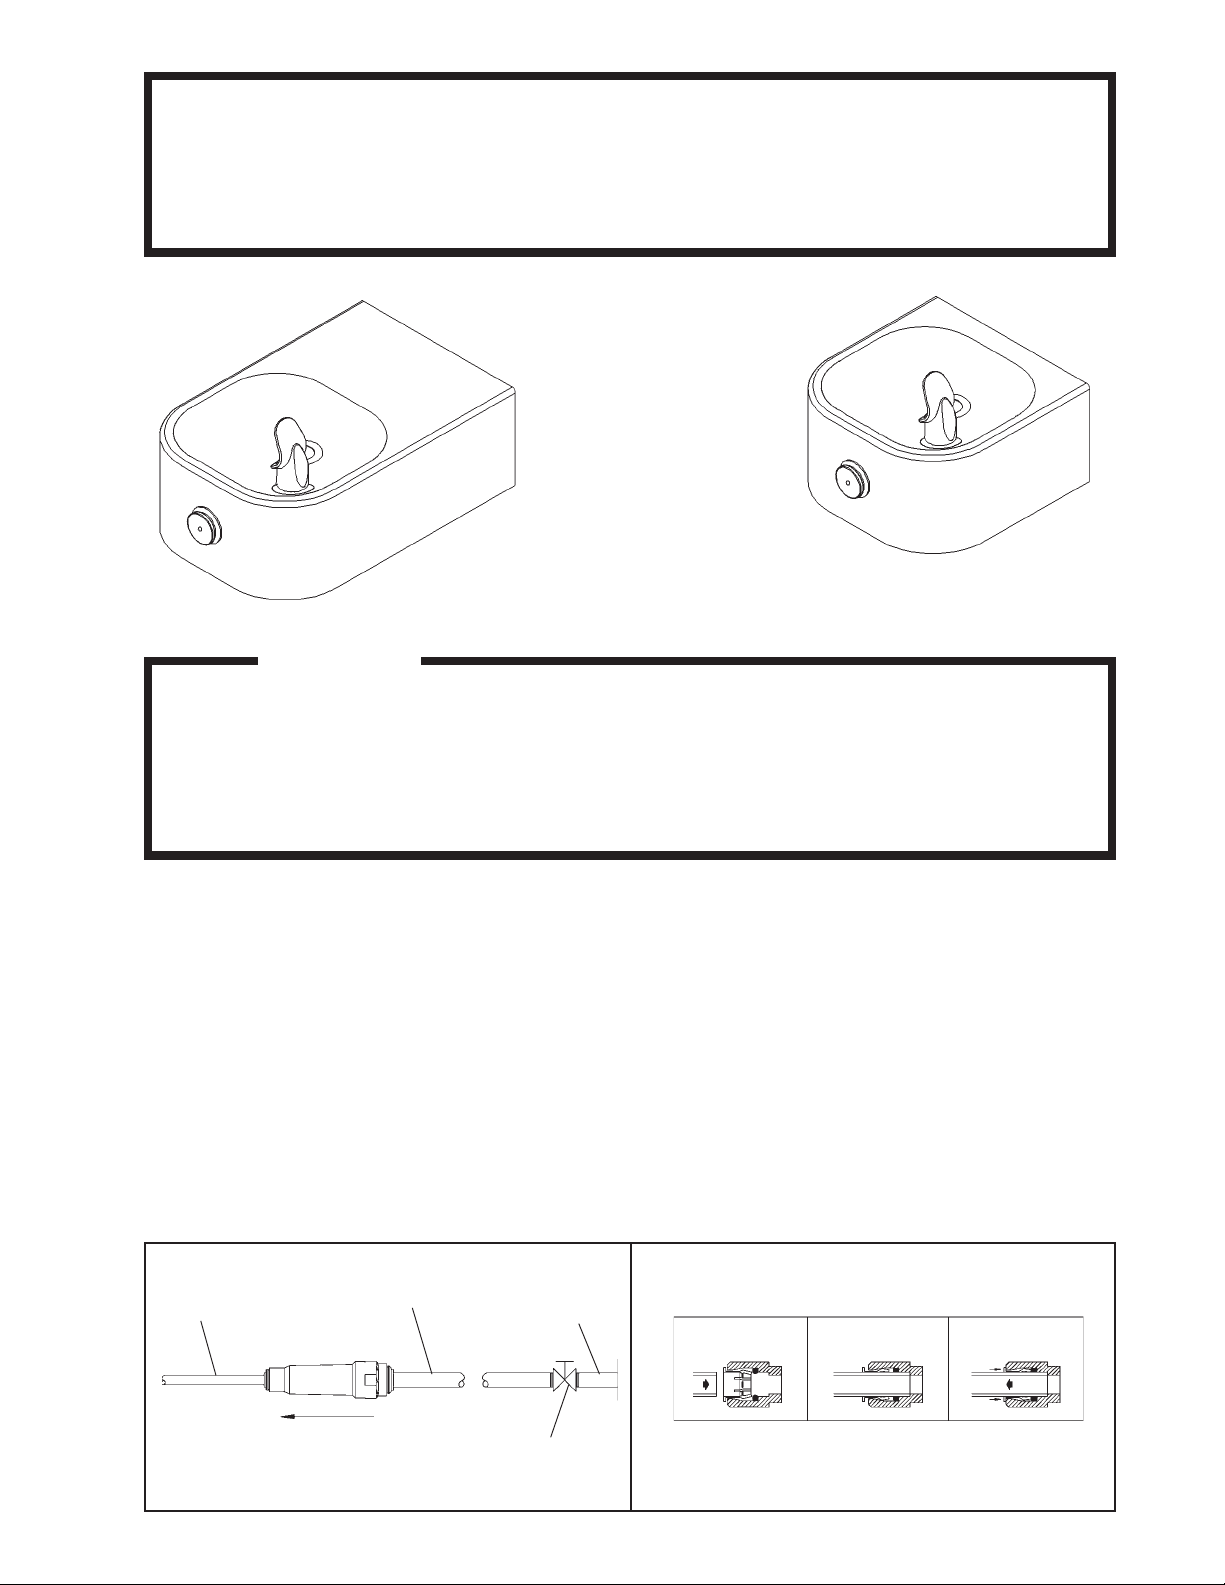
1/4" O.D. TUBE
WATER INLET
TO COOLER
FIG. 1
3/8" O.D. UNPLATED
COPPER TUBE CONNECT
COLD WATER SUPPL Y
NOTE: WA TER FLOW
DIRECTION
BUILDING WA TER INLET
SERVICE STOP
(NOT FURNISHED)
OPERA TION OF QUICK CONNECT FITTINGS
SIMPLY PUSH IN
TUBE TO ATTACH
TUBE IS
SECURED
IN POSITION
PUSH IN COLLET
TO RELEASE TUBE
PUSHING TUBE IN BEFORE
PULLING IT OUT HELPS TO
RELEASE TUBE
FIG. 2
96916C (Rev. M - 4/05)
EDFP210EC EDFP210RC EDFP214EC EDFP214RC EDFPVR214RC
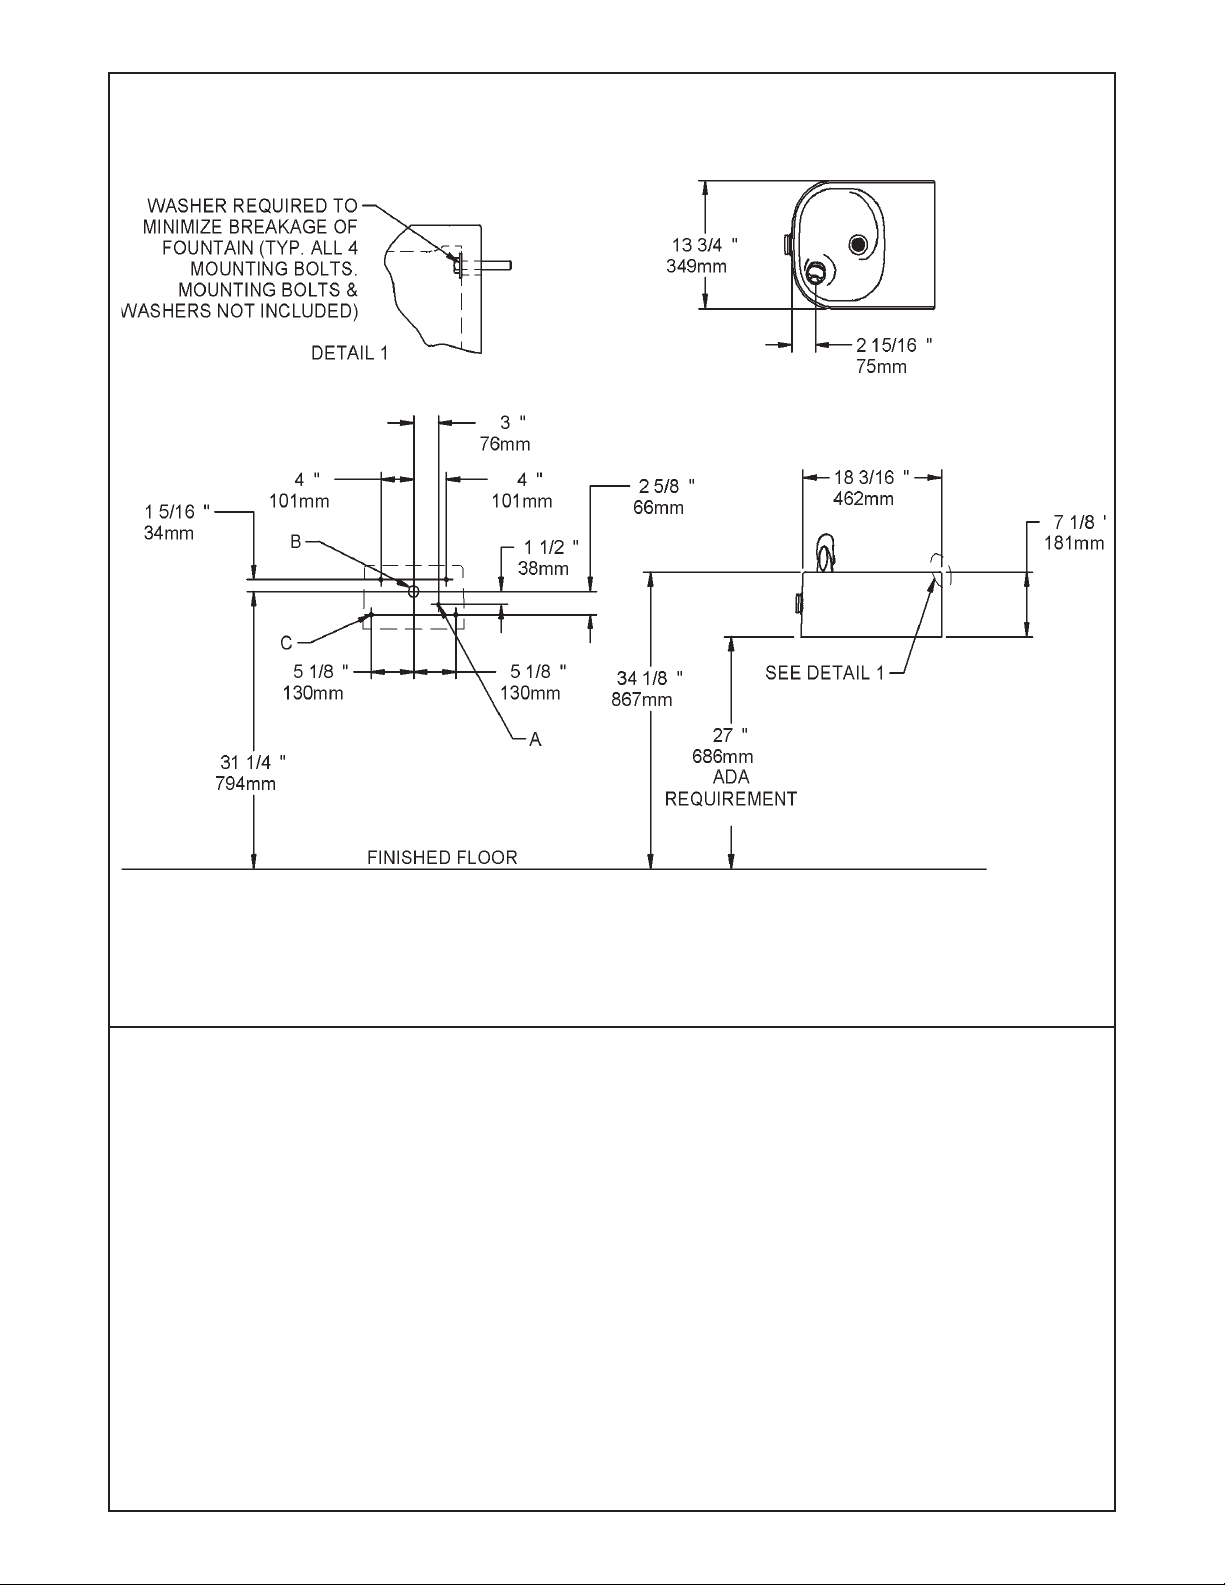
LEGEND:
A = RECOMMENDED W A TER SUPPL Y LOCA TION 3/8 O.D. UNPLA TED COPPER TUBE CONNECT
B = RECOMMENDED LOCATION FOR W ASTE OUTLET 1-1/4" O.D. DRAIN
C = MOUNTING HOLES FOR SECURING FOUNTAIN T O WALL
FIG. 3
INSTALLATION INSTRUCTIONS
1. Wall should already be framed for the fountain using the positioning dimensions shown in Figures 3 and 4. Shown
dimension pertain to installation location (framing must support up to 150 lbs. weight).
2. Install rough-in plumbing as shown in Figures 3 and 4. Run supply water inlet line and connect to a service stop (not
provided). Turn on supply water and flush thoroughly. Close water supply.
3. Remove bottom access panel from fountain basin and save the screws. Install the fountain to the wall using (4) 5/16" bolts
and washers (not provided). Bolts should be long enough to securely fasten the fountain to the wall. Tighten securely, but do
not over tighten. Over tightening will crack the Composite Fountain.
4. Remove elbow from end of p-trap (item 1) and attach it to drain tube. Re-attach elbow to p-trap and cut waste tube to
required length using plumbing hadware and trap as guide.
5. Make water supply connections from service stop to the fountain strainer (item 16) by inserting the water inlet line into the
inlet side of strainer until it reaches a positive stop about 3/4", (See Figure 2, Page 1). Turn on water supply and check for leaks.
Newly installed water supply line should be insulated after leak check is completed. DO NOT SOLDER TUBES INSERTED INTO
THE STRAINER AS DAMAGE TO THE O-RINGS MAY RESUL T.
6. These products are designed to operate on 20-105 PSIG supply line pressure. If inlet pressure is above 105 PSIG, a
pressure regulator must be installed in the supply line. Any damage caused by reason of connecting these products to supply
line pressure lower than 20 PSIG or higher than 105 PSIG is not covered by warranty.
7. Check stream height from bubbler. Stream height is factory set at 45-50 PSI. If supply pressure varies greatly from this,
adjust the screw on regulator (item 14) by using a small screwdriver through the small hole in the push button (item 8)(See
Figure 7, Page 4). Clockwise adjustment will raise stream height and counter-clockwise adjustment will lower stream height. For
best adjustment stream height should be approximately 1" (25mm) above the bubbler guard.
8. Replace bottom access panel to fountain basin using screws provided. Tighten securely.
96916C (Rev. M - 4/05)
PAGE 2
 Loading...