

Elkay ECTSRAD25226TBG4 Installation Manual
Attention Installer:
• Elkay recommends that drop-in sinks be installed by a professional, experienced installer.
• Elkay is not responsible for the sink or countertop if damaged during installation.
• Metal edges may be sharp. Use caution when handling.
• Follow all local plumbing and building codes.
• Inspect sink for damage prior to beginning installation.
Required Tools (not included)
Cut Resistant
Installation Instructions:
Dual Mount Drop-in Sinks
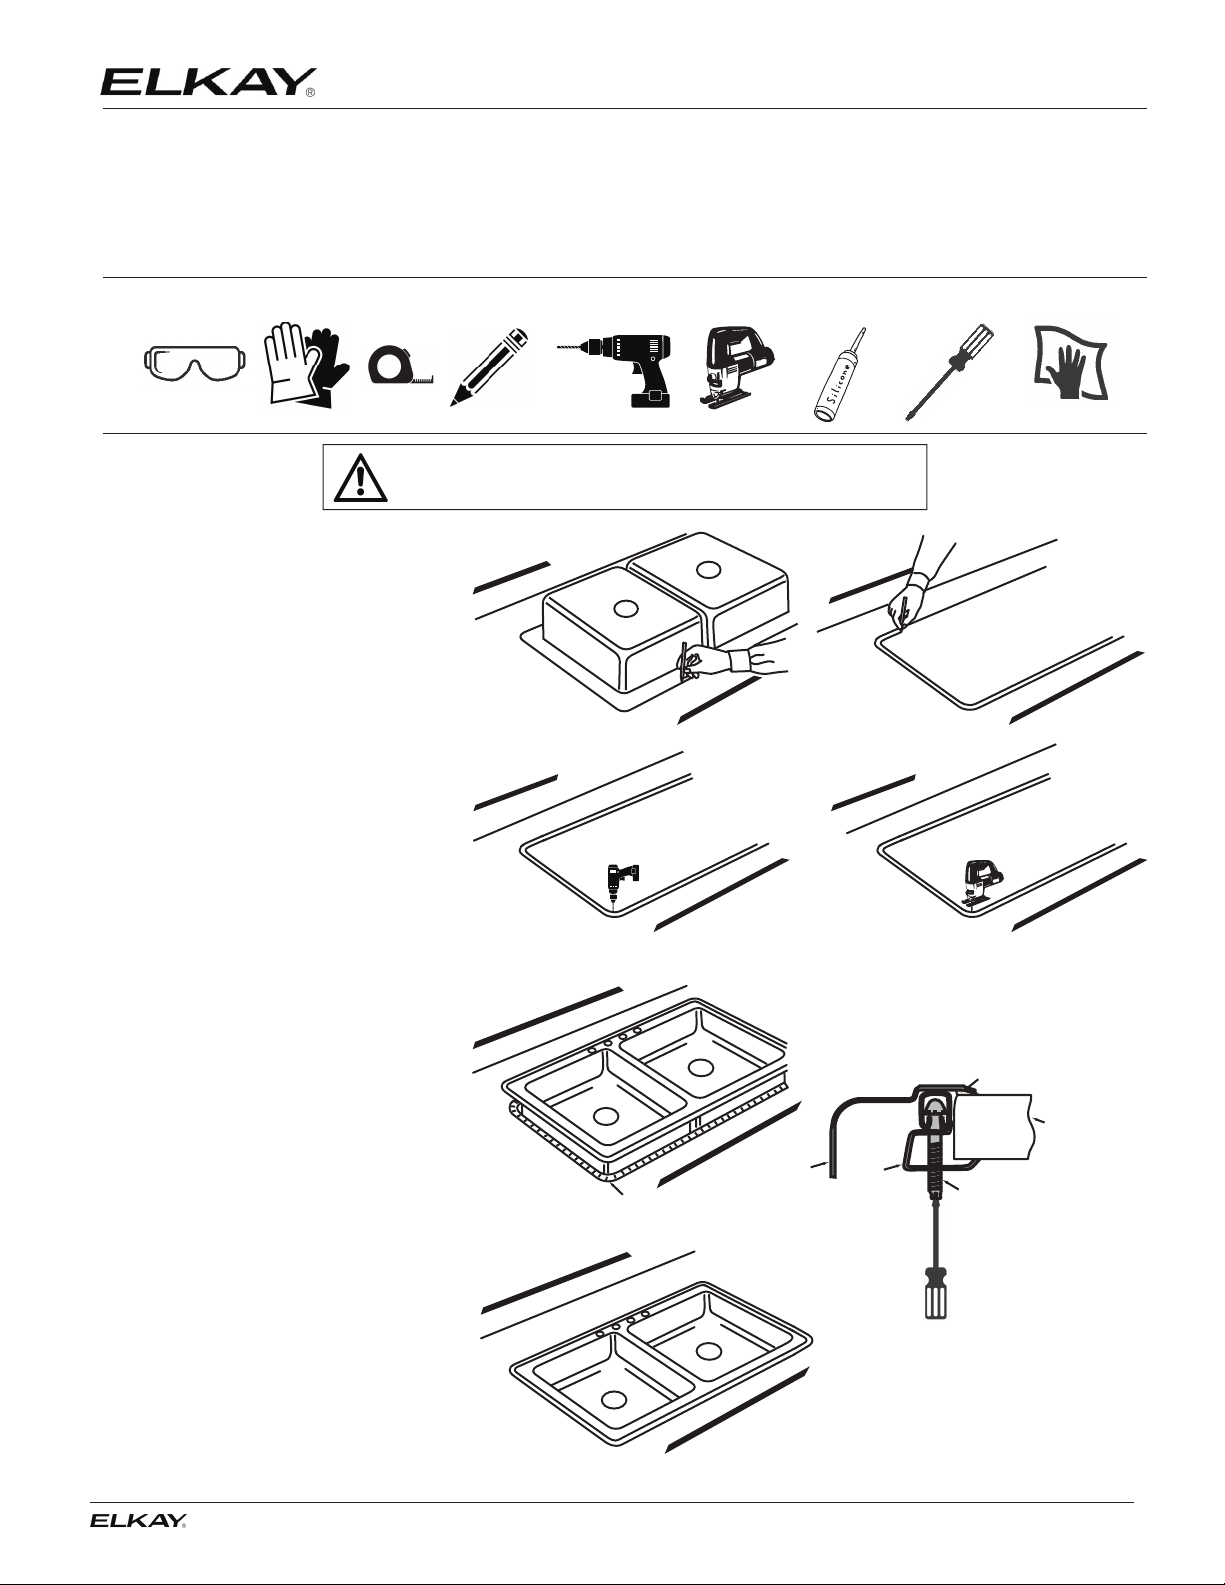
Installation
Position the sink upside down on
1
the countertop.
Trace a line around the edge of the sink.
Draw a line 5/16" inside of the outline of
the sink.
Drill a pilot hole in all four corners of the
2
inside line.
Use a saber or jig saw to cut on the
inside line.
Place a support underneath the cutout
portion of the countertop to prevent it from
falling during cutting.
Apply silicone caulk (not included)
3
around the cutout in the
countertop surface.
Carefully lower the sink into the cutout.
Assemble the clips and screws.
From the underside, place a clip in the
center along each side and hand tighten to
hold sink in place. Fasten the remaining
clips along the edges and space them
approximately 3" from each end, and
equally along the font, back, and sides.
For countertops thicker than 3/4", clips can
be spaced as close as 1-1/2".
WARNING: Always wear safety goggles and gloves when using
power tools or handling the sink to prevent personal injury.
Silicone caulk
(Not furnished)
Sink
Installation Profile
Silicone caulk
(Not furnished)
Countertop
Clip
Screw
From the top, check the seal between the
sink edge and countertop. Lightly tighten
clips evenly with a screwdriver until the
sink is tight to the countertop. Do not
over tighten.
Wipe away any excess caulk with a rag.
1333 Butterfield Road, Suite 200 | Downers Grove, IL 60515 | elkay.com
©2019 Elkay Manufacturing Company (8/19) 1000005237.pdf
Installation Instructions:
Dual Mount Undermount Sinks
Attention Installer:
• Elkay recommends that undermount sinks be installed by a professional, experienced installer.
• Enclosed in the sink carton is a cutout template that can be used to make the countertop cutout per the
installation type of the sink model purchased (1/2" sink rim reveal or a 1/8" no reveal). For sink models that
have a cutout template with both a reveal and no reveal option, please use caution in selecting the correct
outline on the template for your desired installation type. Your installer may also retrieve the desired DXF file
from our website, www.elkay.com.
• Elkay undermount sinks should only be fastened to a solid surface countertop (i.e. granite / Corian
Elkay recommends that the sink cutout and mounting holes be cut by the countertop fabricator prior
to installation.
• Elkay is not responsible for the sink or countertop if damaged during installation.
• Metal edges may be sharp. Use caution when handling.
• Follow all local plumbing and building codes.
• Inspect sink for damage prior to beginning installation.
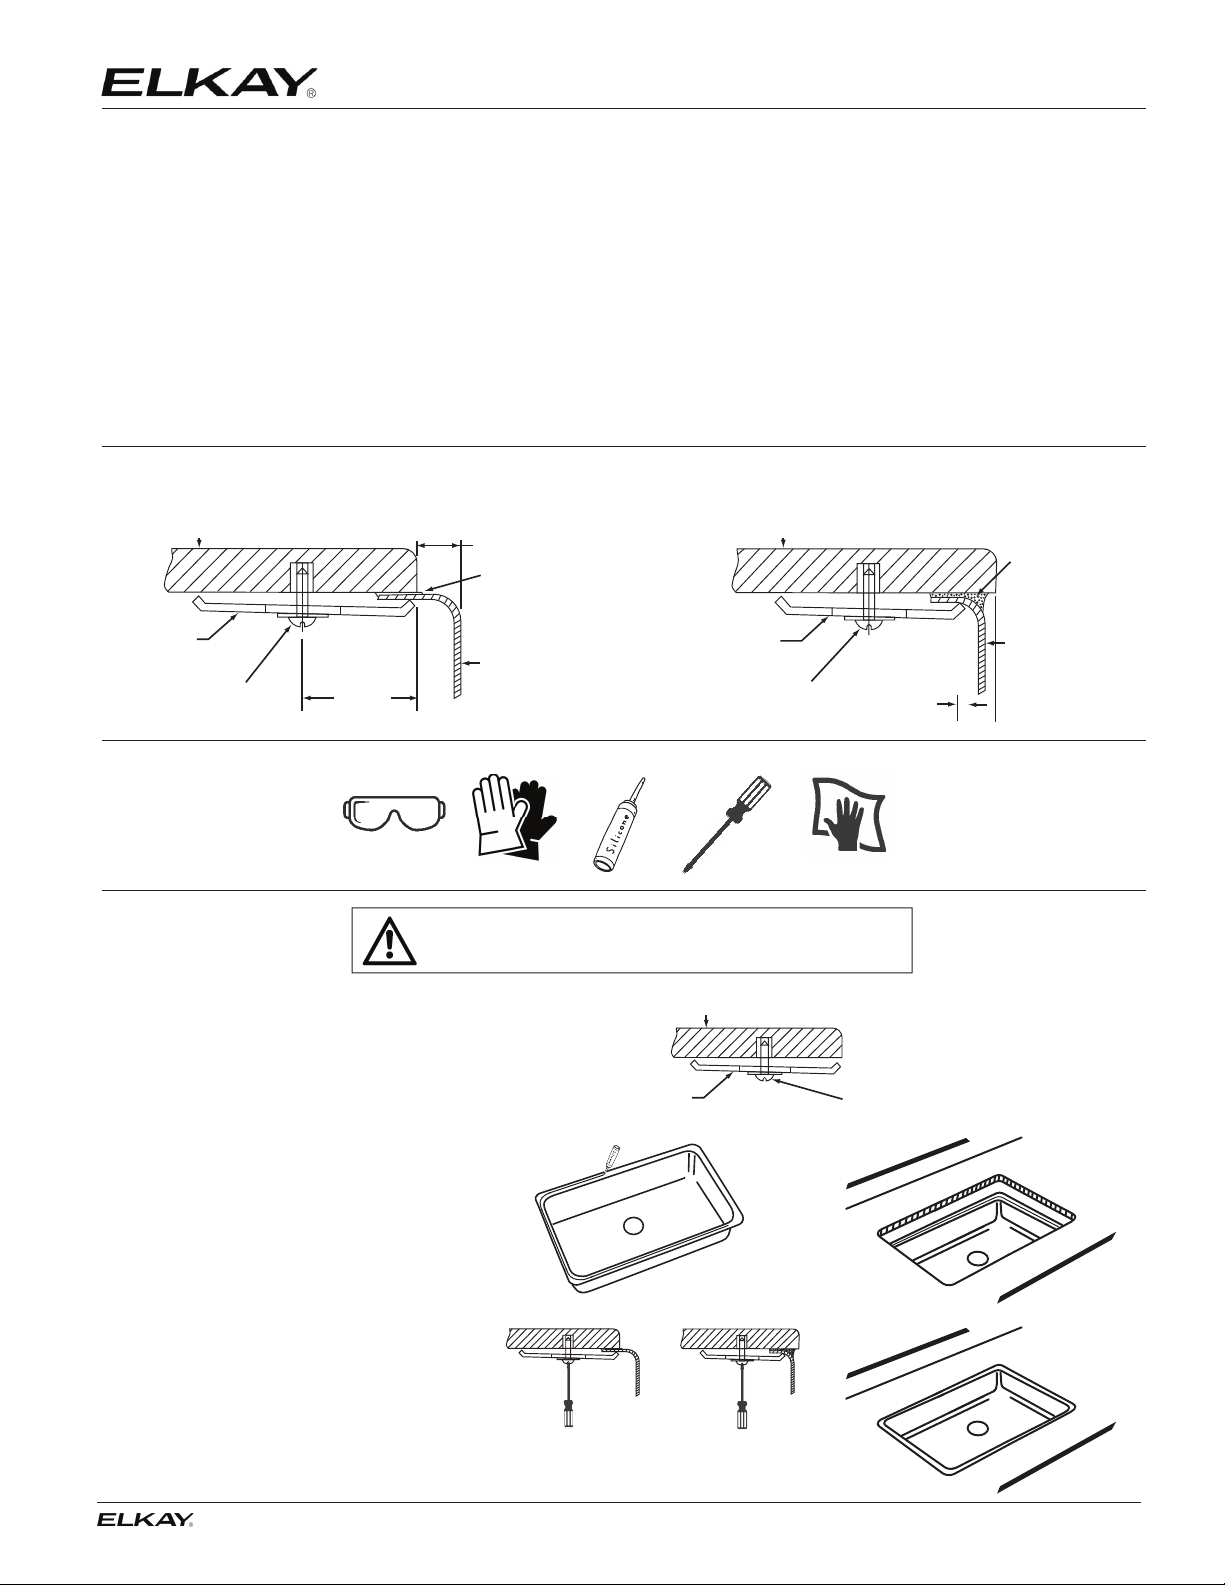
Installation Profiles
1/2" Sink Rim Reveal Installation 1/8" No Reveal Installation
Countertop
Mounting
bracket
(Optional
accessory)
Fastener
(Not furnished)
Countertop recessed
approx. 1/2"
Silicone caulk
(Not furnished)
Sink
1-1/8"
Countertop
Mounting
bracket
(Optional
accessory)
Fastener
(Not furnished)
®
).
Silicone caulk
(Not furnished)
Sink
Countertop
overhang
approx. 1/8"
Required Tools (not included)
Installation
Fasten the mounting brackets (optional
1
accessory - LKUCLIP8) loosely
into the pre-drilled mounting holes in
the countertop.
Apply silicone caulk (not included) evenly
2
around the top of the sink flanges.
Position and align the sink under the
countertop opening. Press the silicone
and flange up onto the countertop.
From the underside, lightly tighten the
3
fasteners with a screwdriver until the sink
is snug against the countertop.
Cut Resistant
WARNING: Always wear safety goggles and gloves when
installing the sink to prevent personal injury.
Countertop
Mounting bracket
(opptional accessory)
Or
Fastener
(not furnished)
Check alignment of the sink to the
countertop opening and then tighten
the fasteners until the sink is tight against
the countertop. Do not over tighten.
Wipe away any excess caulk with a rag.
1333 Butterfield Road, Suite 200 | Downers Grove, IL 60515 | elkay.com
©2019 Elkay Manufacturing Company (8/19) 1000005237.pdf
 Loading...