

Elkay DLR172210PDMR2, ELUHAD131645PD, ELUHAD141850PD, ELUHAD211545PD, ELUHAD281645PD Installation manual
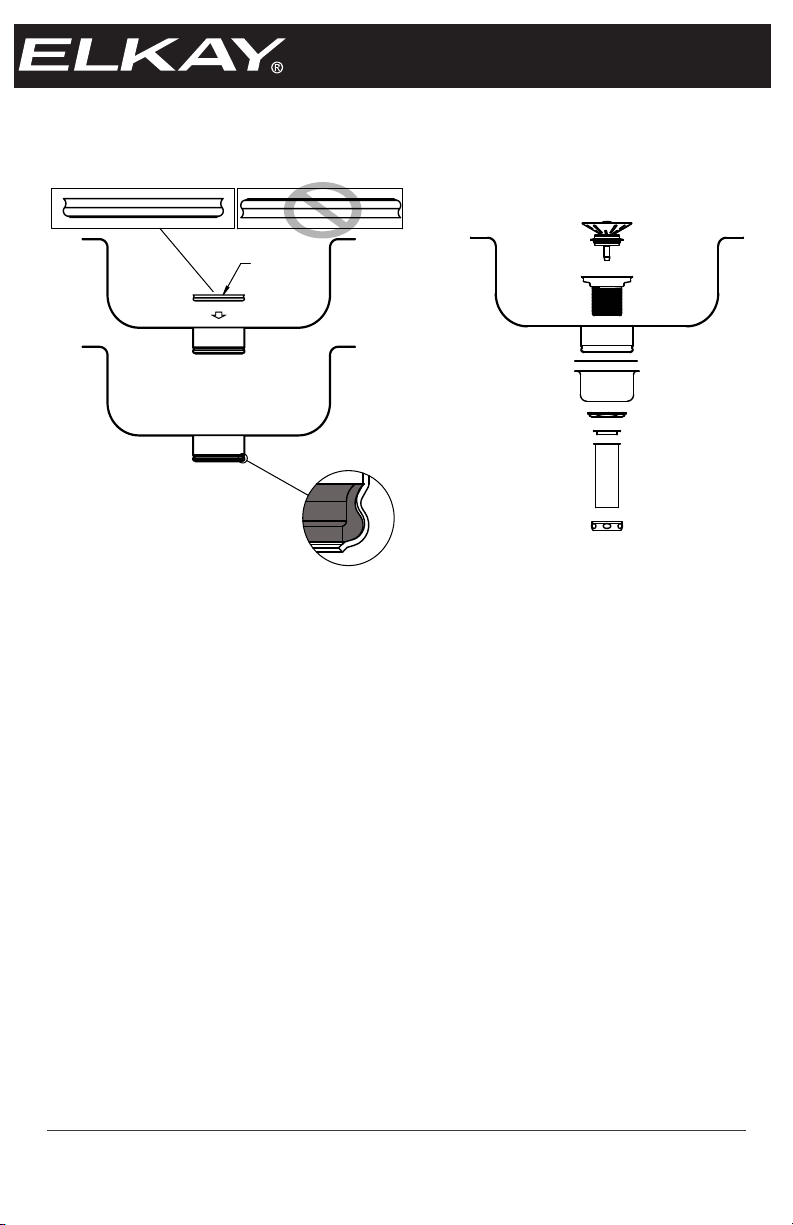
Illustration Instructions
For all non-disposer installations. For disposer applications
follow the directions supplied with the disposer.
SEAL
STEP 1 STEP 2
MAKE SURE THE SEAL IS CORRECTLY INSTALLED WITH THE PROPER
ORIENTATION. INCORRECT INSTALLATION MAY ALLOW LEAKS AND
VOID THE WARRANTY.
INSTRUCTIONS:
1) Insert Seal As Illustrated in Step 1.
2) Assemble And Tighten Securely All Components In Sequence
As Illustrated In Step 2. Be Careful To Not Over Tighten The Fittings.
No Additional Sealant Or Plumbers Putty Is Required.
3) Check For Leaks.
In keeping with our policy of continuing product improvement, Elkay reserves the right to change
product specifications without notice. Please vist elkayusa.com for most current version of Elkay
product specification sheets.
Elkay
2222 Camden Court
Oak Brook, IL 60523
©2011 Elkay
elkayusa.com
This specification describes an Elkay product with design, quality, and functional benefits to the
user. When making a comparison of others producers offerings, be certain these features are not
overlooked.
(6/11) PART NO. 74180340
Printed in China
 Loading...