

Elite Window Fashions Z - RS Fascia Installation Instructions Manual

Z - RS Fascia
Cleaning and Child Safety
1 Applewood Crescent, Unit 1 Concord, Ontario L4K 4K1 | 1-800-387-3566 | www.elitewf.com
Light Vacuuming or
dusting
No Solvents, chemicals,
or abrasives
Thank you for your purchase. For any questions or comments please
contact Elite customer service at the number listed below.
Installation Instructions / Montage
Nettoyage et Sécurité des Enfants
For child and pet safety
please secure cords and
chains with supplied
tension device.
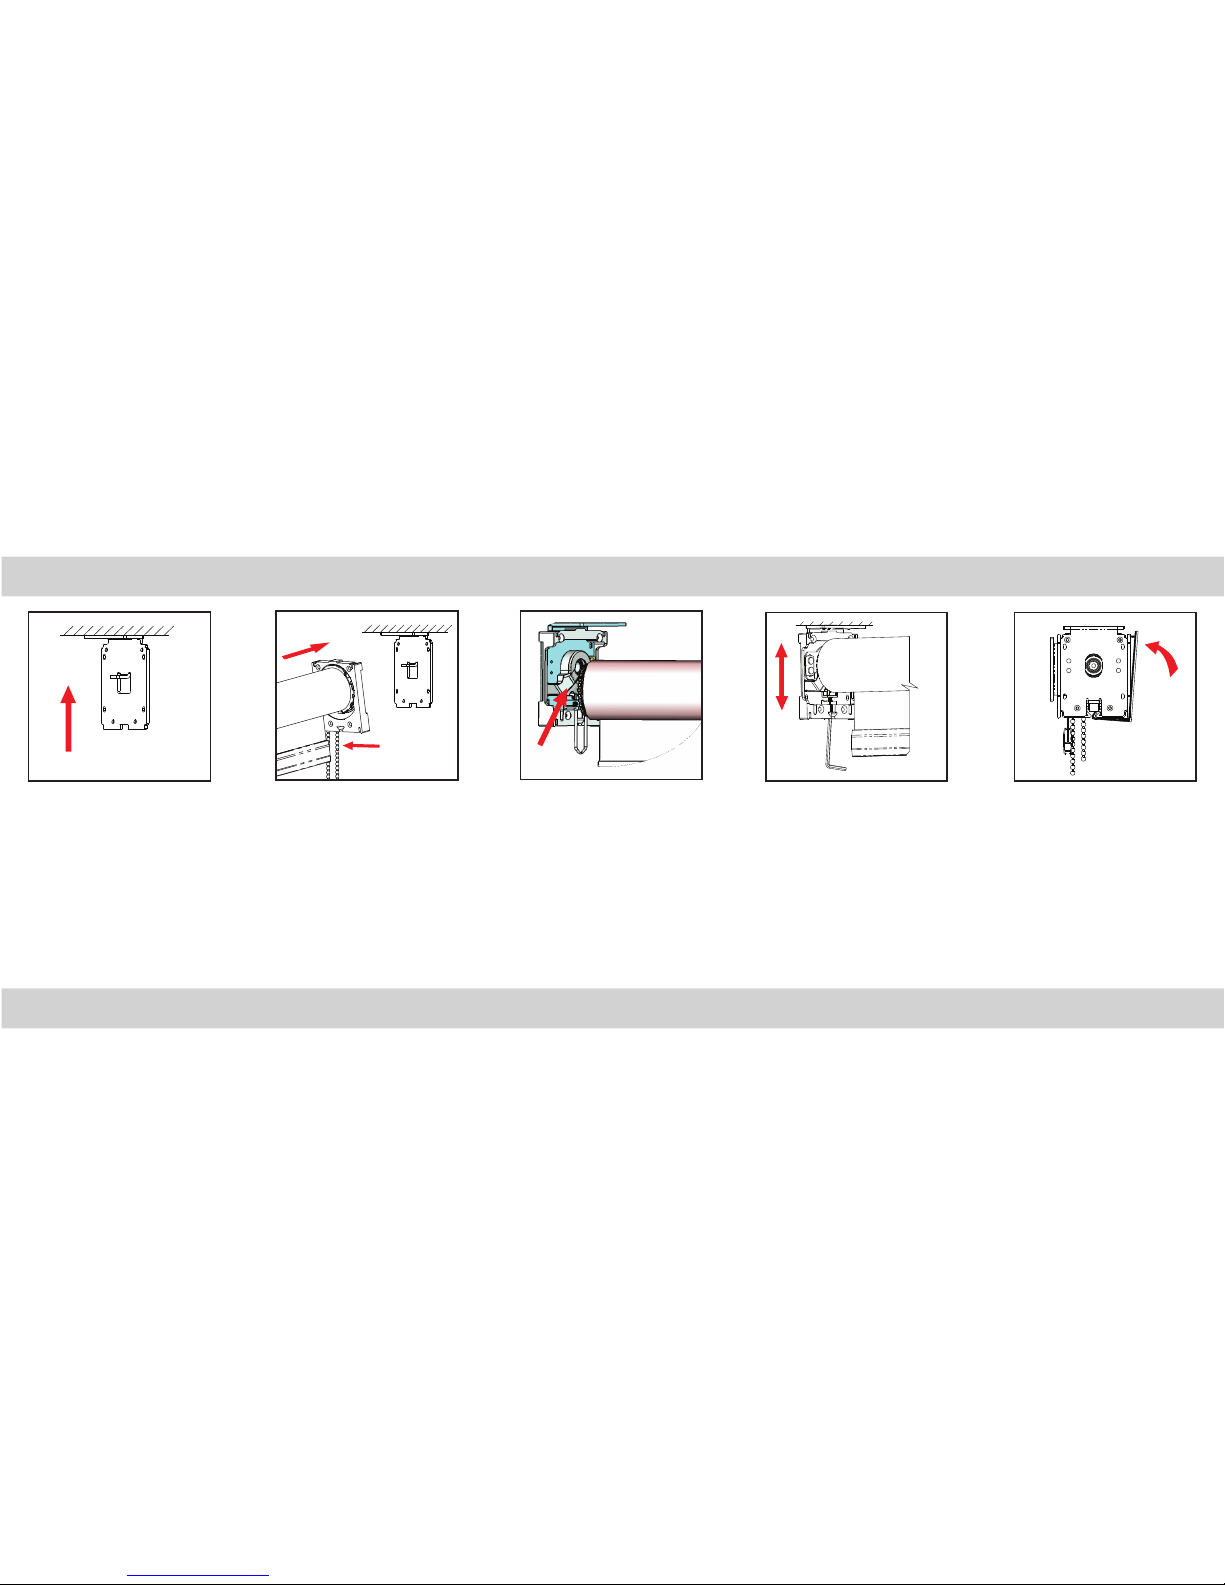
Shade Installation / Montage
© Elite Window Fashions 2014
1. Mount installation brackets to ceiling or wall (fig. 1).
2. Install clutch on bracket (fig. 2) and pass chain through rear chain guides. If using side channels, chain must pass through front chain guides.
3. Compress the idler end pin and slide into the bearing hole using the guide ramp (fig 3).
4. Screw clutch into bracket using at least 2 screws. 1 screw must be installed between the chains. Shade level can be adjusted if necessary by using the suppied allen key
(located in the idler bracket, see fig. 4).
5. Install the fascia by hooking into bottom of brackets, then snap top portion into place (fig. 5). Install plastic endcaps.
Removal: Pull top of fascia to remove using red hook tool (supplied). Unscrew clutch, then use plastic wrench (supplied) to retract idle end pin, slide shade out of brackets.
fig. 1
fig. 2
fig. 3
fig. 4
fig. 5
rear chain
guides
guide
ramp
 Loading...