

Page 1

Smart Security PIR’s
ECSPPIR
ECSPPET
General
Our products are designed to comply with the
recommended codes and practice, and is to be
installed and serviced by competent persons in
accordance with the relevant regulations.
Contents
The Smart PIR is supplied with required batteries,
mounting bracket and mount pack.
First Use
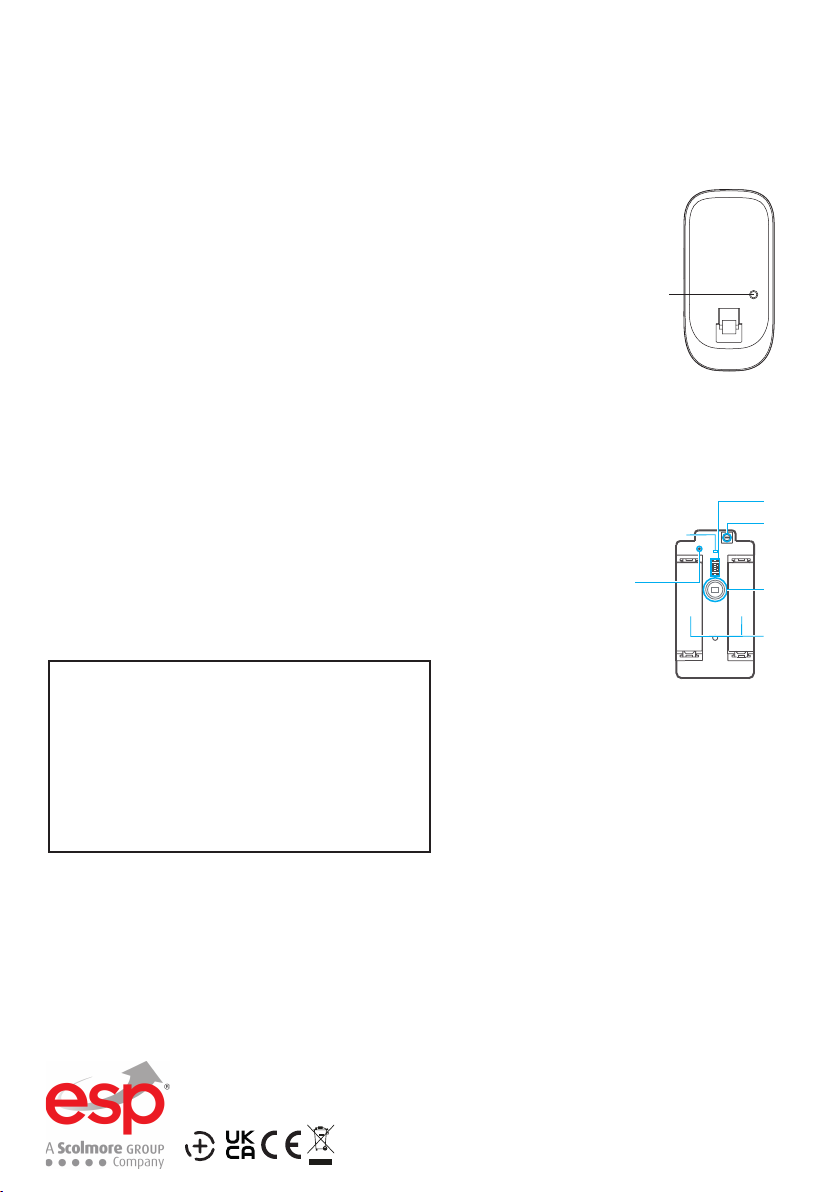
Find the screw on the bottom of the PIR.
Undo the screw and open the front part of the casing.
• Insert the batteries, with the correct polarity.
• Once the batteries are inserted, the detectors will start its
self-test procedure for 30 seconds.
• After self detection has completed, complete configuration.
are compatible with the Clicksmart+ APP
1. Detection window
2. LED indicator
3. Bracket
Products bearing this mark
Installation
Fix the bracket on the wall, with screws and attach the detector to the bracket. Adjust the bracket to
change thedetection distance and angle. It is recommended to mount the detector 2m from the ground.
Avoid mounting the detector close to windows, AC units, heater(s), refrigerator(s), oven(s), sunshine,
and places where there are severe changes in temperature, or where the air stream flows frequently.
If two detectors are installed in the same detection area, adjust the location to avoid interference,
and false alarms.
PIR detectors are more sensitive to horizontal movements, than vertical.
ECSPPET includes Pet immunity up to ≤ 25kgs
Top view Side view
Page 2
Mode Setting
Testing Mode
Once the self-testing is complete, long press the test button. The sensor switches to testing mode,
and scans once every 10 seconds. After 3 minutes, the LED blinks twice, and the sensor switches
to working mode.
Working mode / Stand-by mode
In working mode, if the sensor is triggered more than twice within 3 minutes,
it will switch to standy mode to save power. If no movement is detected within
the next 3 minutes, the sensor will switch to working mode.
Test
Register the detector in the alarm system
Button
Switch to connection mode on the control panel. Press the test button of the
sensor twice. The control panel beeps once; the motion detector is registered.
If you hear two beeps, the detector has already been connected.
To check if the registration is complete, arm the system and trigger the sensor again. If the siren rings
out, the registration is successful.
PCB Layout
Infrared Sensor: Detects the infrared rays released by human body motion.
Do not touch the surface, keep the surface clean.
Tamper Switch: When the alarm system is armed, the tamper switch will
trigger the alarm if the case is opened.
Jumper setup: Function Reserved
LED ing indicator
work
enna
Ant
Tamper switch
Jumpers
Infrared sensor
AA 1.5V LR6
LED Indication
Flashes Continuously: Self-Testing
Flashes Once: An intruder is detected
Flashes Twice: Self-testing is complete; entering
operating mode
Flashes 3 times every 3 second: Under-voltage
indications, the batteries must be replaced
(the user will be informed that the batteries
are low).
Guidance
>Smart alarm accessories are specified at a maximum of 80 meters Line of Sight (LoS) in
open air. For every obstacle the signal strength is reduced.
> Battery life depends on working and environmental factors.
For more product information please visit the ESP website
For pairing instructions, please refer to the main Hub Manual.
Elite Security Products
Redditch B98 8YN
Telephone : 01527 51 51 50
Fax: 01527 51 51 43
Email : info@espuk.com
Web : www.espuk.com
E&OE - Errors and omissions excepted.G21
 Loading...