

Page 1
Limit switch adjustment
NOTE: Elite Screens does not recommend making unnecessary adjustments to the screen, as
improper adjustments will damage the
wrench
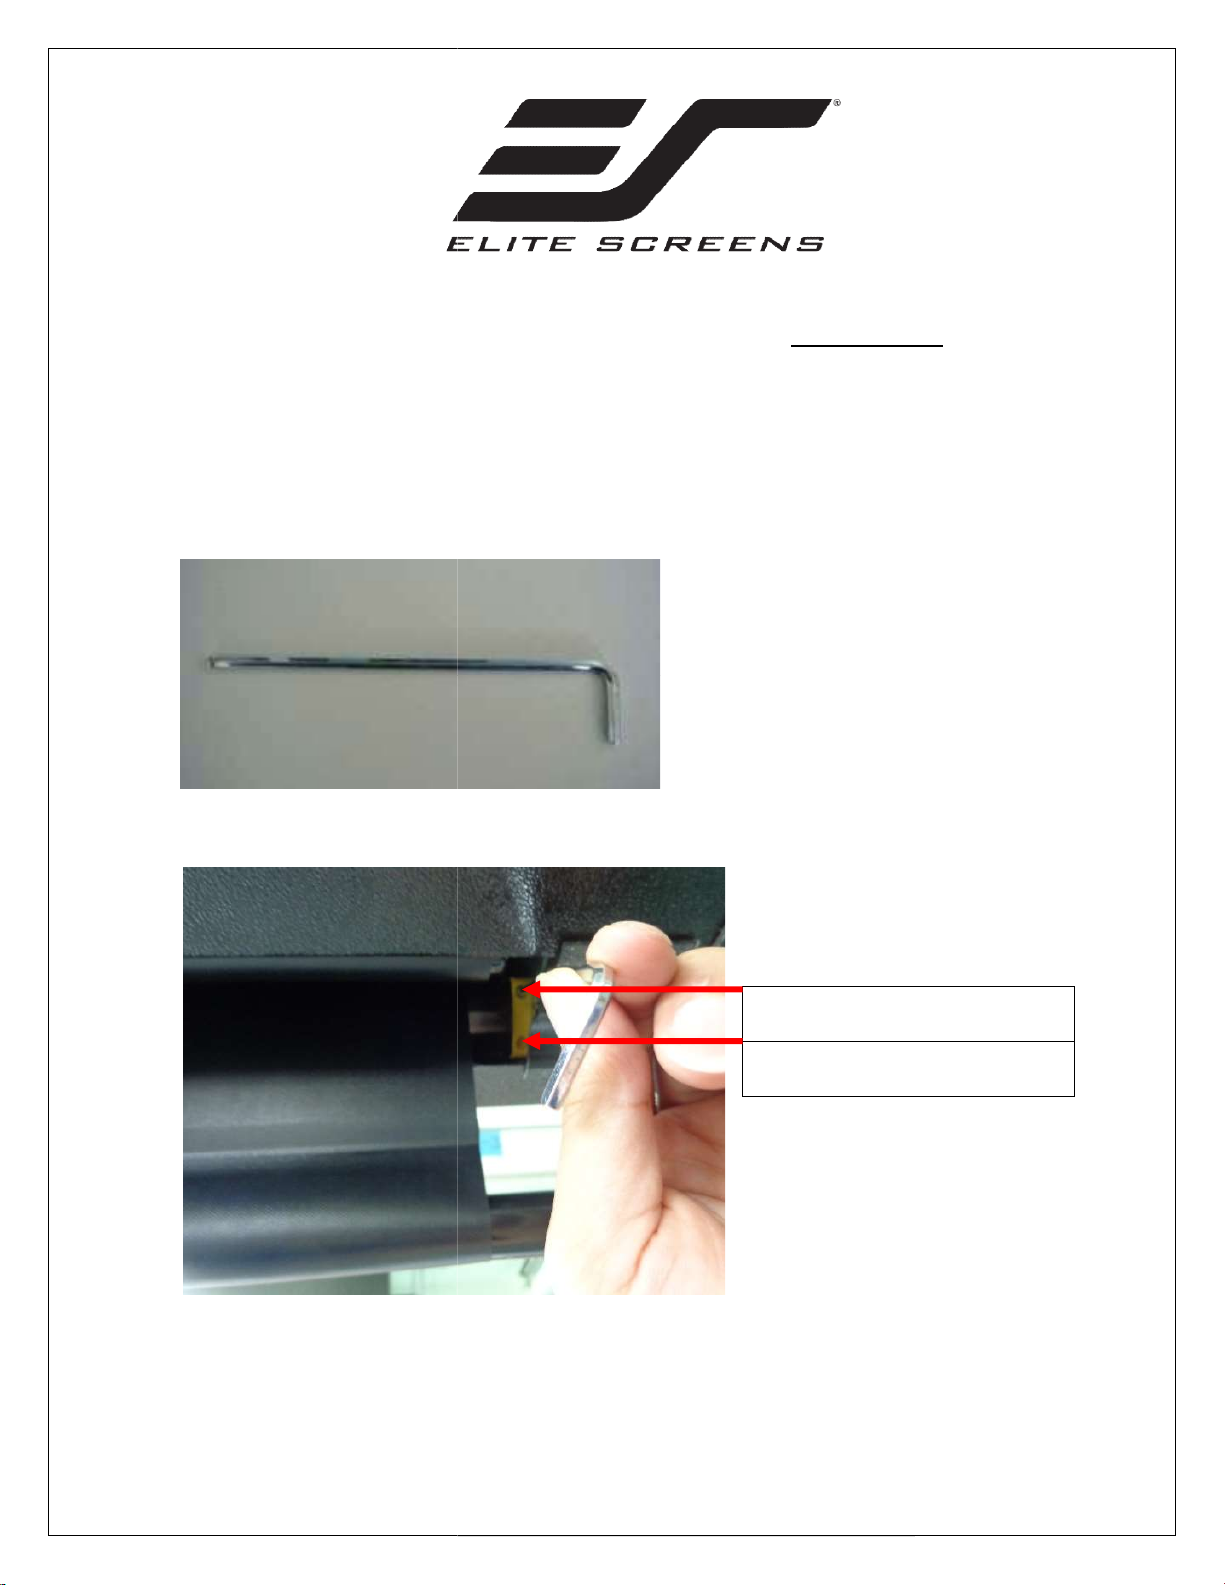
Limit Switch Adjustment Locations
When turning the limi
one inch
www.elitescreens.com
ual
circle turn in either
limit adjustment
limit adjustment
1. Tool – 5/32 Allen-
2.
instructions for VMAX D
unit and may void your warranty.
Series
Upper
Lower
NOTE:
direction will create a
Rev, 8/17/16
t switches, bear in mind that a full‐
adjustment.
1
screws
screws
Page 2

3. If the screen does not retract all the way in to the housing, use the
following instructions.
Press the UP button on the
remote to retract the screen as
much as possible.
Use your Allen-wrench to turn the UP switch
counter-clockwise. When you turn the UP
switch, the screen will retract correspondingly.
Stop rotating the switch once the weight bar
lines up with the casing. (WARNING: If you
continue to rotate the switch once the weight
bar fits flush with the casing, the screen will
attempt to retract further, causing damage to
the unit. DO NOT over turn the switch.)
NOTE: If the screen retracts too far, just rotate the UP adjustment switch 2-3 turns
clockwise, and test the rise by lowering the screen ¼ of the way down, and then raise it
up again. Do this until the screen automatically stops before the weight bar hits the
housing.
Rev, 8/17/16 2 www.elitescreens.com
Page 3

4. Adjusting the Top Black Masking.
If the screen lowers too much, simply
rotate the DOWN adjustment switch
clockwise. The screen will not react
when turning the screw. (NOTE:
Please avoid over-turning the switch.)
Note: Top Black Masking should only be increased if you previously decreased the drop
and want it back. The screen’s Top Black Drop is already set to its maximum drop
distance. There is NO extra black top drop in the roller.
Do not attempt to increase more black drop as the screen material will come off
the roller and void your warranty.
Use the remote to deploy the
screen as far down as possible
by pressing the DOWN button.
Insert the Allen wrench into the lower
limit screw and turn it clock-wise.
Rev, 8/17/16 3 www.elitescreens.com
Page 4

To check the adjustment made for
the drop, simply raise the screen
about ¼ of the way, and then drop it
down again. Measure the top black
masking to ensure it drops down to
the proper distance.
5. Adjusting the rise of the 2:35 screen
NOTE: The limit adjustment screws for the 2.35 screen are located on the front of the
housing on the left hand side.
UP limit adjustment screw.
DOWN limit adjustment screw.
If the 2.35 screen will not retract
completely, use the following
steps.
Use the remote to retract the
screen as much as possible by
pressing the UP button.
Rev, 8/17/16 4 www.elitescreens.com
Page 5

Use your Allen-wrench to turn the UP switch
counter-clockwise. When you turn the UP switch,
the screen will retract correspondingly. Stop
rotating the switch once the weight bar lines up with
the casing.
WARNING: If you continue to rotate the switch
once the weight bar fits flush with the casing, the
screen will attempt to retract further, causing
damage to the unit. DO NOT over turn the switch.
NOTE: If the screen retracts too far, just rotate the UP adjustment switch 2-3 turns
clockwise, and test the rise by lowering the screen ¼ of the way down, and then raise it
up again. Do this until the screen automatically stops before the weight bar hits the
housing.
6. Adjusting the drop of the 2:35 screen.
If you need to increase the
amount of top black masking,
refer to the following steps.
Rev, 8/17/16 5 www.elitescreens.com
Page 6

Use your remote control to fully
lower the screen by pressing the
2.35 DOWN button.
Use your Allen-wrench to turn the
DOWN switch counter-clockwise.
When you turn the DOWN switch, the screen will
lower correspondingly. Stop turning the switch once
the screen reaches the desired position.
(WARNING: If you over-turn the switch, the screen
will lower completely and damage the unit.)
If the screen lowers too much, simply rotate
the DOWN adjustment switch clockwise. The
screen will not react as you turn the screw.
(NOTE: Please avoid over-turning the switch.)
Rev, 8/17/16 6 www.elitescreens.com
 Loading...