

Page 1
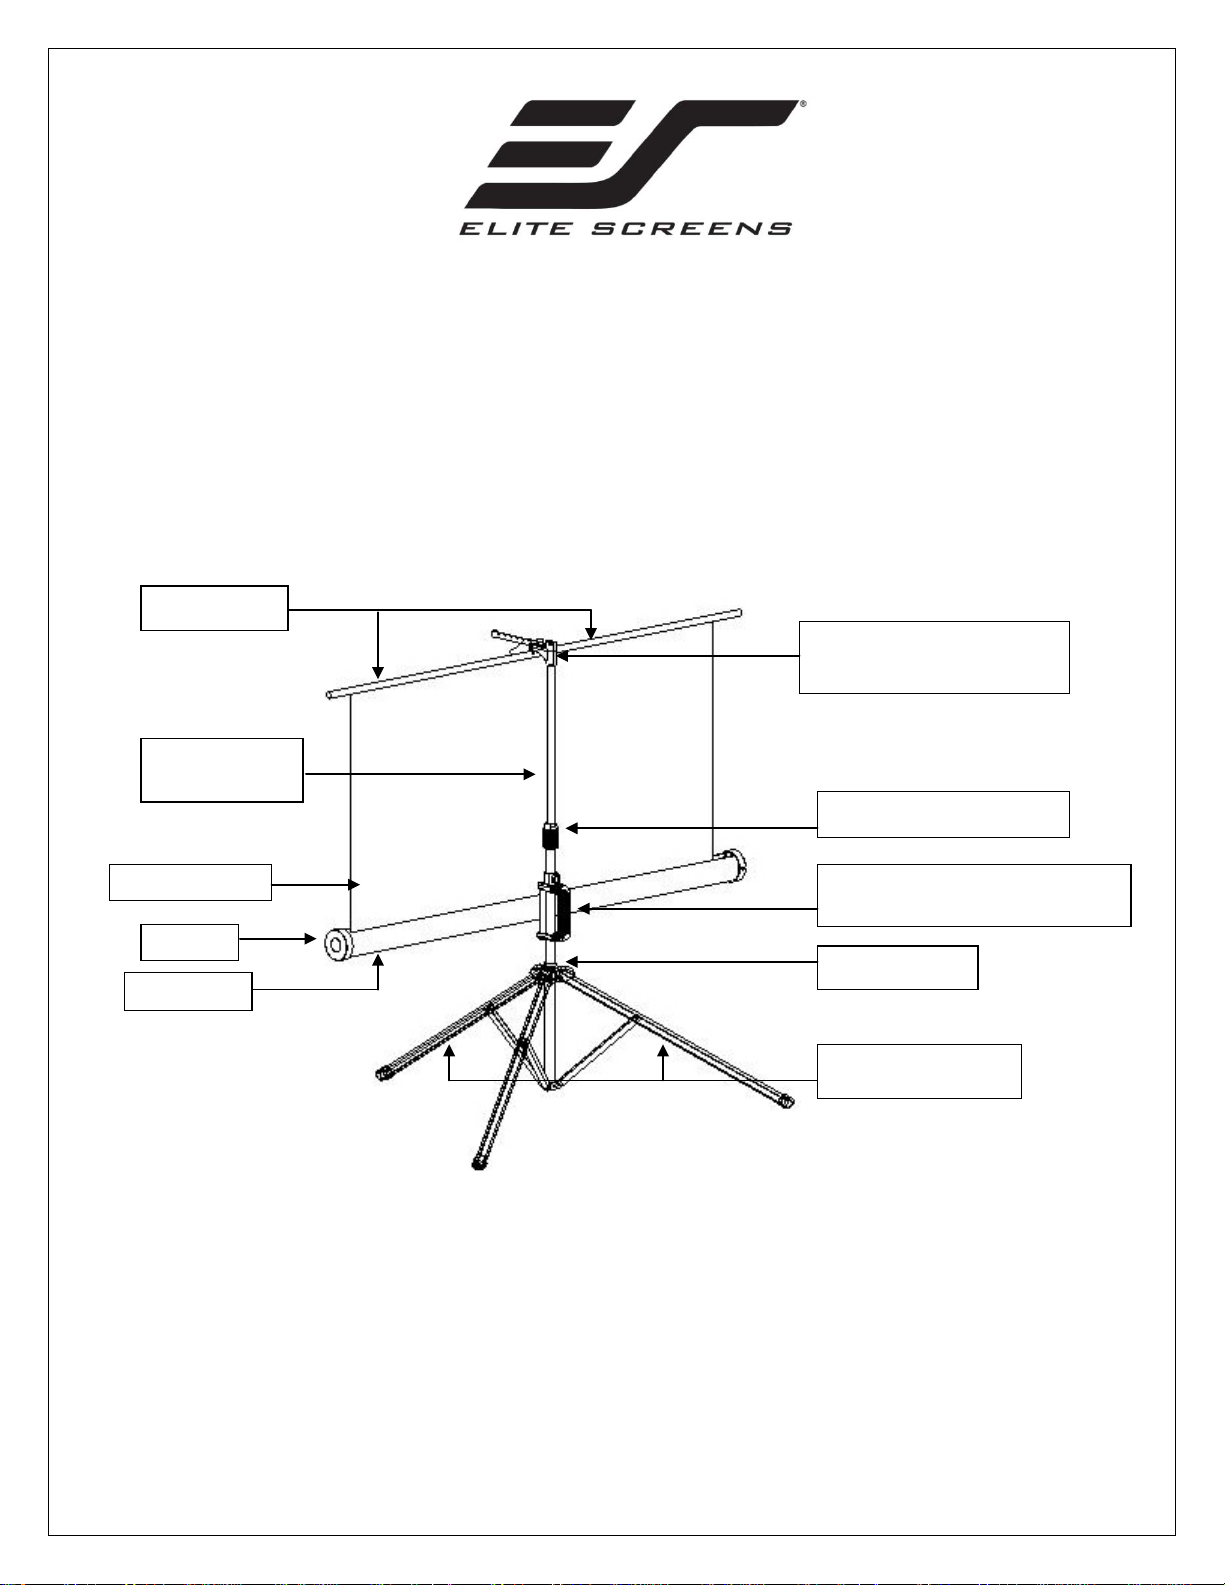
Top Hook, Keystone
Vertical locking sleeve ring
Support beam
Vertical
Screen Material
Screen case
Carrying handle & Scree n hei ght
adjustment lock/release tab
Tripod junction
Tripod Support Legs
End cap
Tripod Portable Projection Screen
Tripod Series / Tripod Pro Series
USER’S GUIDE
Tripod Screen Parts Identification
Extension B ar
Eliminator & Screen Handle
Using the Screen
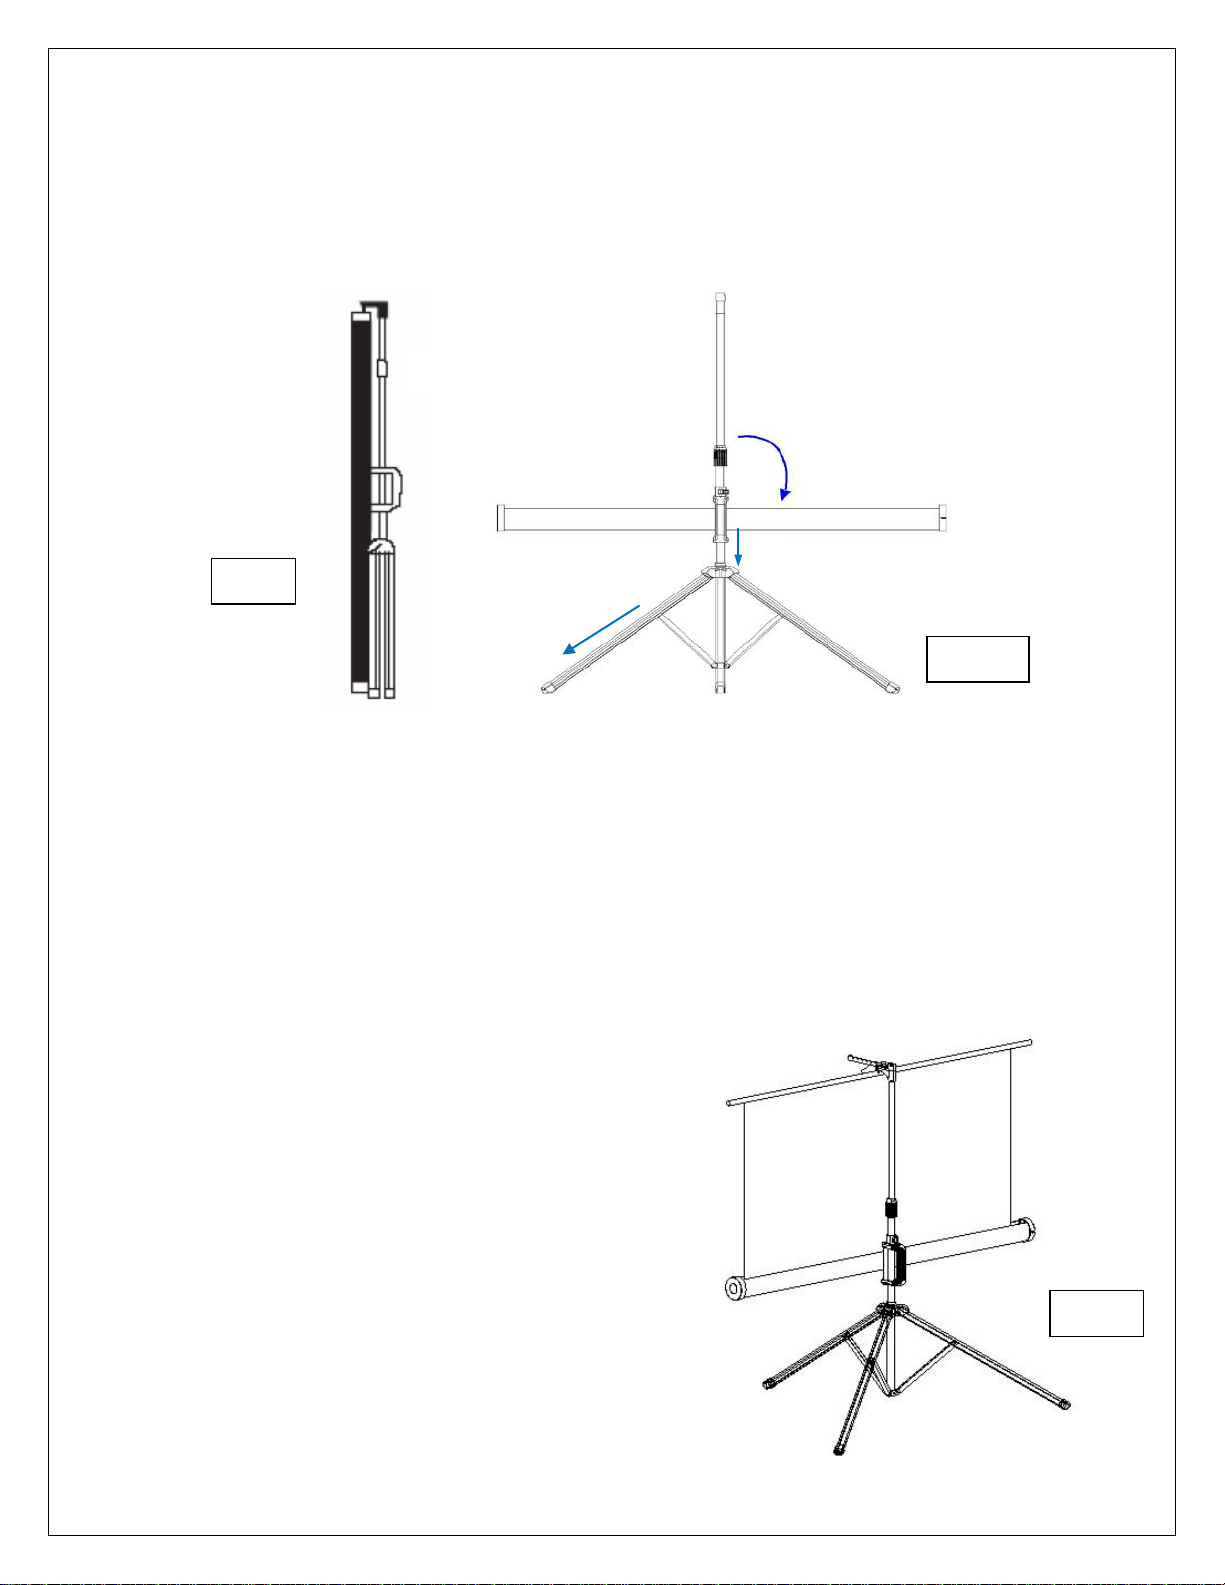
A. Setting up the screen:
Follow the steps below and Fig. 1 & 2.
1. Place the screen in an upright position (fig.1) with the legs toward the ground.
2. Deploy the Tripod Support legs by pushing down on the Tripod Junction.
Rev. 051117 DR 0 www.elitescreens.com
Page 2
3 2 4
Fig. 2
Fig.1
1
1
2 3
Fig. 3
3. Turn the tripod’s screen casing in a 90-degree horizontal position so that the screen casing is now
parallel to the ground with the screen handle facing the bottom of the top hook.
4. Completely extend the legs as much as possible so they are stable and position them away from
objects that may interfere with their balance. DO NOT stand the tripod on an unstable platform to avoid
an injury should the tripod screen collapse.
B. Preparing the tripod screen for projection:
Follow the steps below and Fig. 3.
1. Pull the screen handle up vertically and hook the screen handle on the Top Hook.
*Note: Use the Keystone Eliminator to prevent “Keystone Effect” from occurring. Keystone Effect is
caused when a projector presents its image at a downward angle causing a trapezoid-shaped image to
appear on the screen. The Keystone Eliminator is designed to eliminate that effect by sloping the screen
forward.
2. Twist the Vertical Locking Sleeve Ring counterclockwise to unlock the current position of the Vertical
Extension Bar and raise it as necessary to the desired
height.
3. Pull the Screen Height Adjustment Lock/Release tab
out (to the left) located just above the Carrying Handle
to raise or lower the bottom of the. Once the desired
height has been set, push the tab in to lock the position in
place.
Rev. 051117 DR 1 www.elitescreens.com
Page 3

1
2 3 4
C. Disassembling the screen:
Follow the steps below and Fig. 4.
1. Unlock the Adjustment Handle by pulling the locking tab to the left and slowly slide the handle all
the way down to bring down the position of the screen’s case.
2. Hold the Extension Bar and twist the Vertical Locking Sleeve Ring counter-clockwise to unlock
and release the position of the extension bar. Once the extension bar has been brought all the way down,
unhook the screen material from the Top Hook and slowly retract the screen back into the case.
* Note: It is very important to remember to hold the extension bar first and then unlock the sleeve to
prevent the extension bar from slamming and damaging the screen.
3. Turn the screen’s case vertically clockwise and insert the Top Hook’s bottom pin to lock into the
screen’s end cap hole.
4. Close the tripod legs by pushing them in. Lastly, tighten the Vertical Locking Sleeve Ring by
twisting it clockwise.
Fig. 4
Note:
o To ensure the screen is stable, extend the tripod’s legs as much as possible.
o Do not fold the screen or allow any sharp objects to touch the screen’s surface.
o Clean the screen surface often when needed.
o Careful use will extend the lifetime of this product.
For more information, technical support or your local Elite Screens contact,
please visit www.elitescreens.com
Rev. 051117 DR 2 www.elitescreens.com
 Loading...