

Elite Screens OMS103HR, OMS123HR User Manual
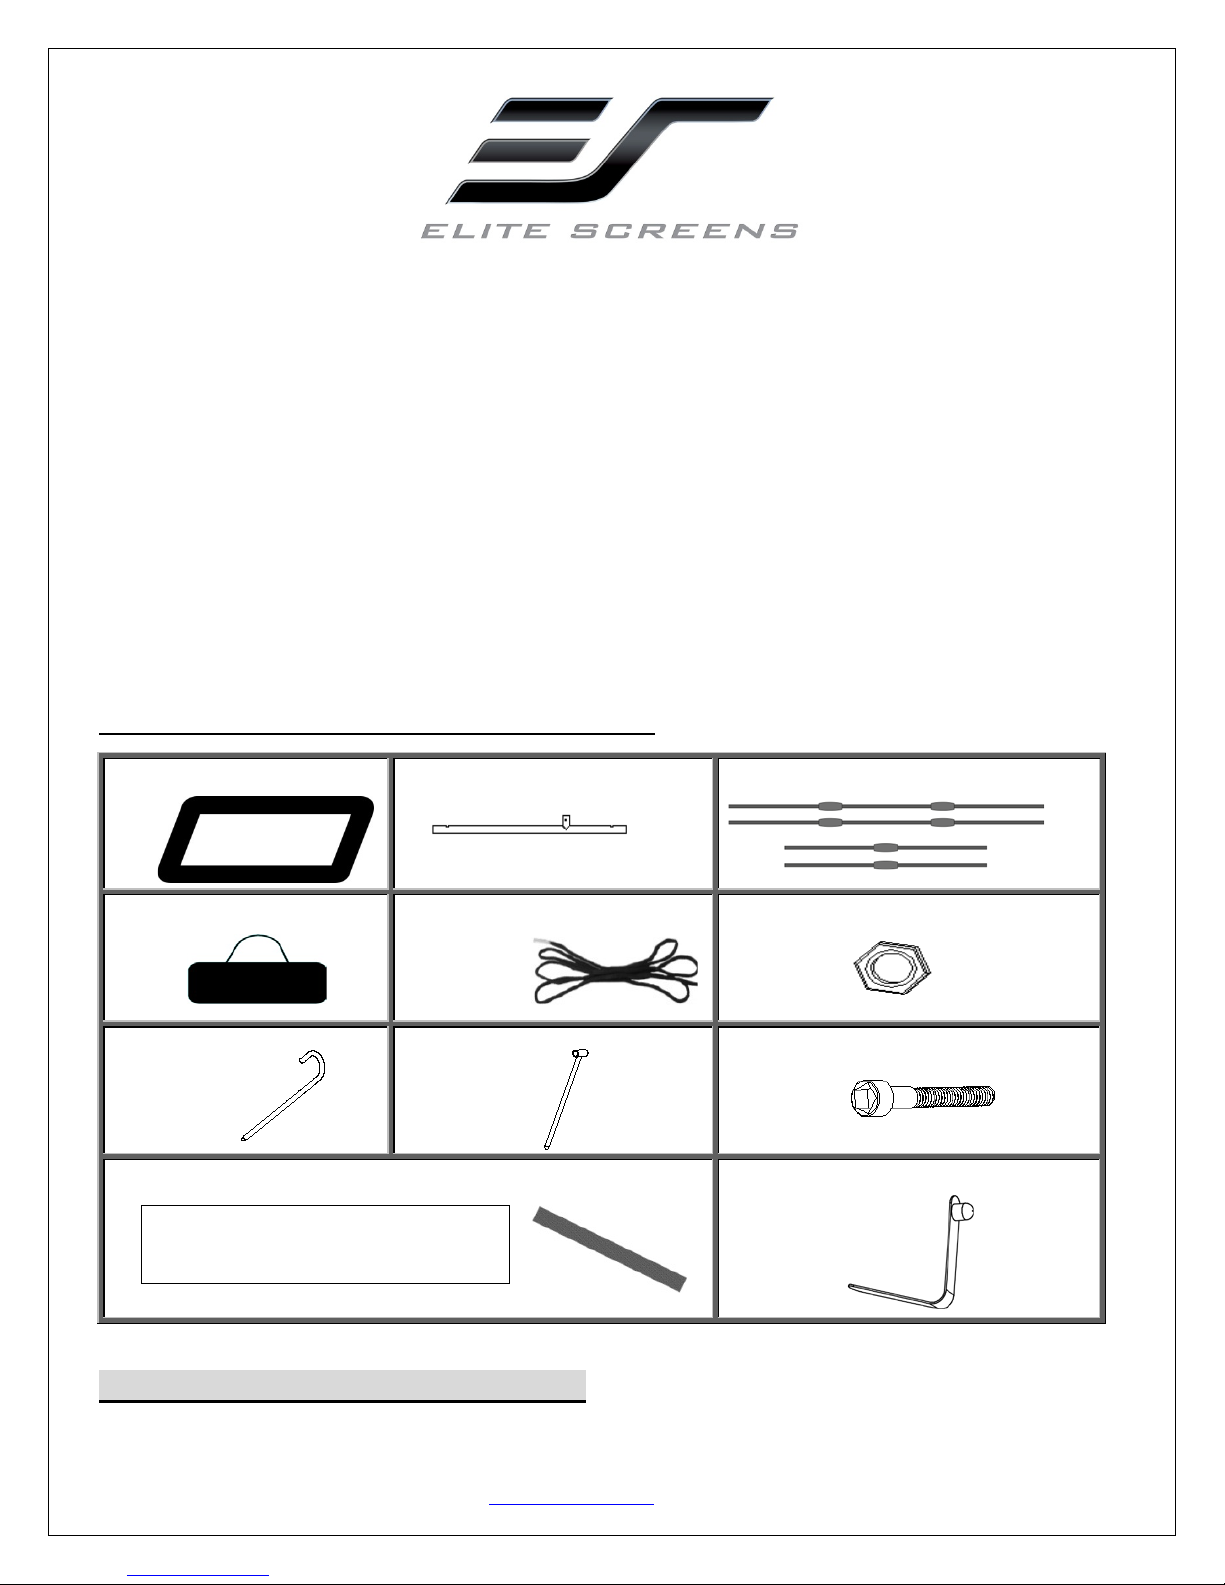
G. Curved stake x4
H. Ring stake x4
I. M6x43mm hex screw x2
Yard Master Series
Rear Projection Outdoor Movie Screen
User’s Guide (v. 2)
Note:
1. The Ring-Stakes, Curved-Stakes & Guy Rope should always be installed for Stability.
2. Use of this product is not recommended in gusty winds over 20mph.
Maintenance:
1. Soft cloth with mild soap &water may be used to clean the screen’s surface.
2. To prolong the lifespan of this product, store it in its carry case when not in use.
Parts checklist (Model: OMS103HR/OMS123HR)
A. Screen material x1 B. Steel tube x12-14
C. Fiber glass pole x4
D. Carrying bag x1
J. Velcro band x24
14 Top/Bottom sections - 15cm bands
10 Left/Right sections - 13cm bands
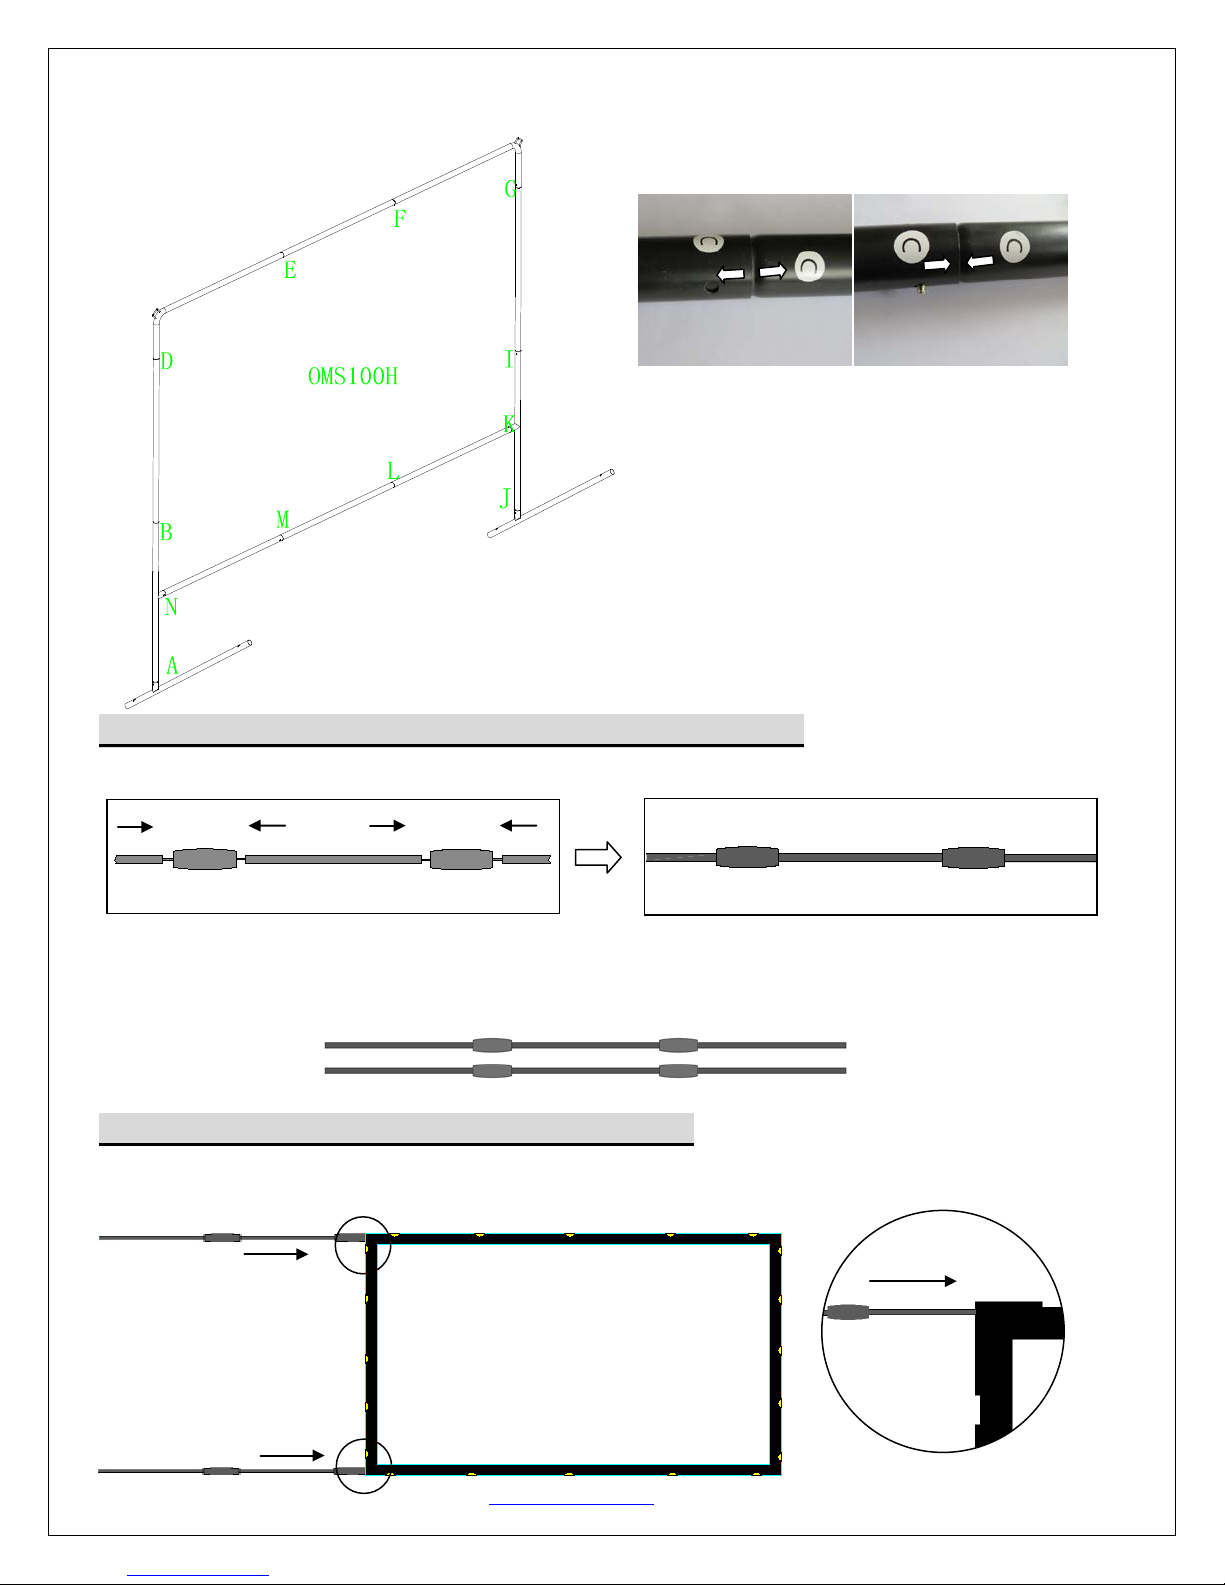
A. Main Support Metal Frame Assembly
1. Assemble the steel tube frame by connecting the letters on the ends of the tubes together as shown in the
picture. For example, A to A, B to B etc.
042117DR www.elitescreens.com 1
E. Guy-ropes x4
F. M6hex nuts x2
K. Lock Pins (Spare parts) x 5
Horizontal support rod
3. After the frame has been built, lay it on a clean
Horizontal support rod
Horizontal Support Rod x2
2. A and J are attached and secured with the provided Hexagonal Screws (G). This will be the last step.
scratch-free area.
Step 2:Screen Material Fr ame Assembly (Fiber glass pole s)
1. Join the Fiber Glass Pole to form a straight support rod as shown in the diagram below.
2. Repeat to complete the two horizontal rods. Keep the two vertical rods disconnected for the next steps.
Step 3: A ttaching the screen material to the frame
1. Lay out the material on a clean, scratch-free area.
2. Insert the horizontal support rods into the top and bottom sleeves of the screen material.
042117DR www.elitescreens.com 2
 Loading...