

Elite Screens IWB85SW2a, IWB5X10W2AF, IWB5X20W2AF, IWB114XW2AF User Manual
Insta-DE2a/2aF Series
Self-Adhesive Dry-EraseFront Projection Screen Film
with Frame Border and Pen Tray
User’s Guide
Thank you for choosing the Insta-DE2a Series dry-erase whiteboard projection screen! Please read through this
user guide before utilizing the screen. Correct usage and maintenance will ensure a long product life.
Precautionary Notes:
Before using the dry-erase function of your whiteboard screen, please make note of the following instructions to
properly maintain and clean your dry-erase surface projection screen. (Th ese Whiteboard cleaning tips are just
as relevant with any dry-erase writing surface as they are with our Whiteboard-Projection Screens.)
1.Only use a high density foam eraser when removing dry-erase markings from the Whiteboard screen.
2. Do not use abrasive erasers as these may scratch the surface of the screen.
3. Never spray the whiteboard cleaner solution onto the surface while marker writing is present and then attem pt
to use a high density foam eraser to rem ov e. This will only smear the dry-erase marker ink making the surface
more difficult to clean and will likely ruin the foam eraser.
4. If there are any dry-erase markings left behind even after attempting to remove themusing our high density
erasers, spray our whiteboard cleaning solution directly onto the screen surface and use only a soft microfiber
cloth to wipe-down and clean the area.
For a video demonstration, please visit: http://www.elitescreens.com/whiteboardscreen-cleaning
If replacement cleaning accessories are needed, please visit the Whiteboard cleaning accessories section of our
website at
Product Features
Application Advantages
041217 DR 1 www.eliteproav.com
http://www.elitescreens.com/clean-whiteboard
Anti-reflection surface reduces glare and hot-spot while using a
projector.
Special anti-scratch layer to ensure long use as a dry-erase/projection
screen.
1.1 gain with 180 degree wide viewing angle.
Award winning and GREENGUARD certified VersaWhite material.
Instantly converts flat surfaces/walls into a dry-erase whiteboard projection screen.
Includes adhesive black velveteen border to enhance contrast and overall appearance.
Perfect dry-erase and projection solution for today's short throw projectors
Ideal and effective instructional presentation tool in the classroom, boardroom, and training facilities.
For a full installation demonstration, please see our Insta-DE 2aF Installation Video
Specifications:
Color display
White
Thickness
2.1mm
Material composition
High molecular weight copolymer of Terephthalic acid ethyl esters
Weight
377g/m2
Temperature
At room temperature
Gain
1.1
Viewing Angle
180°
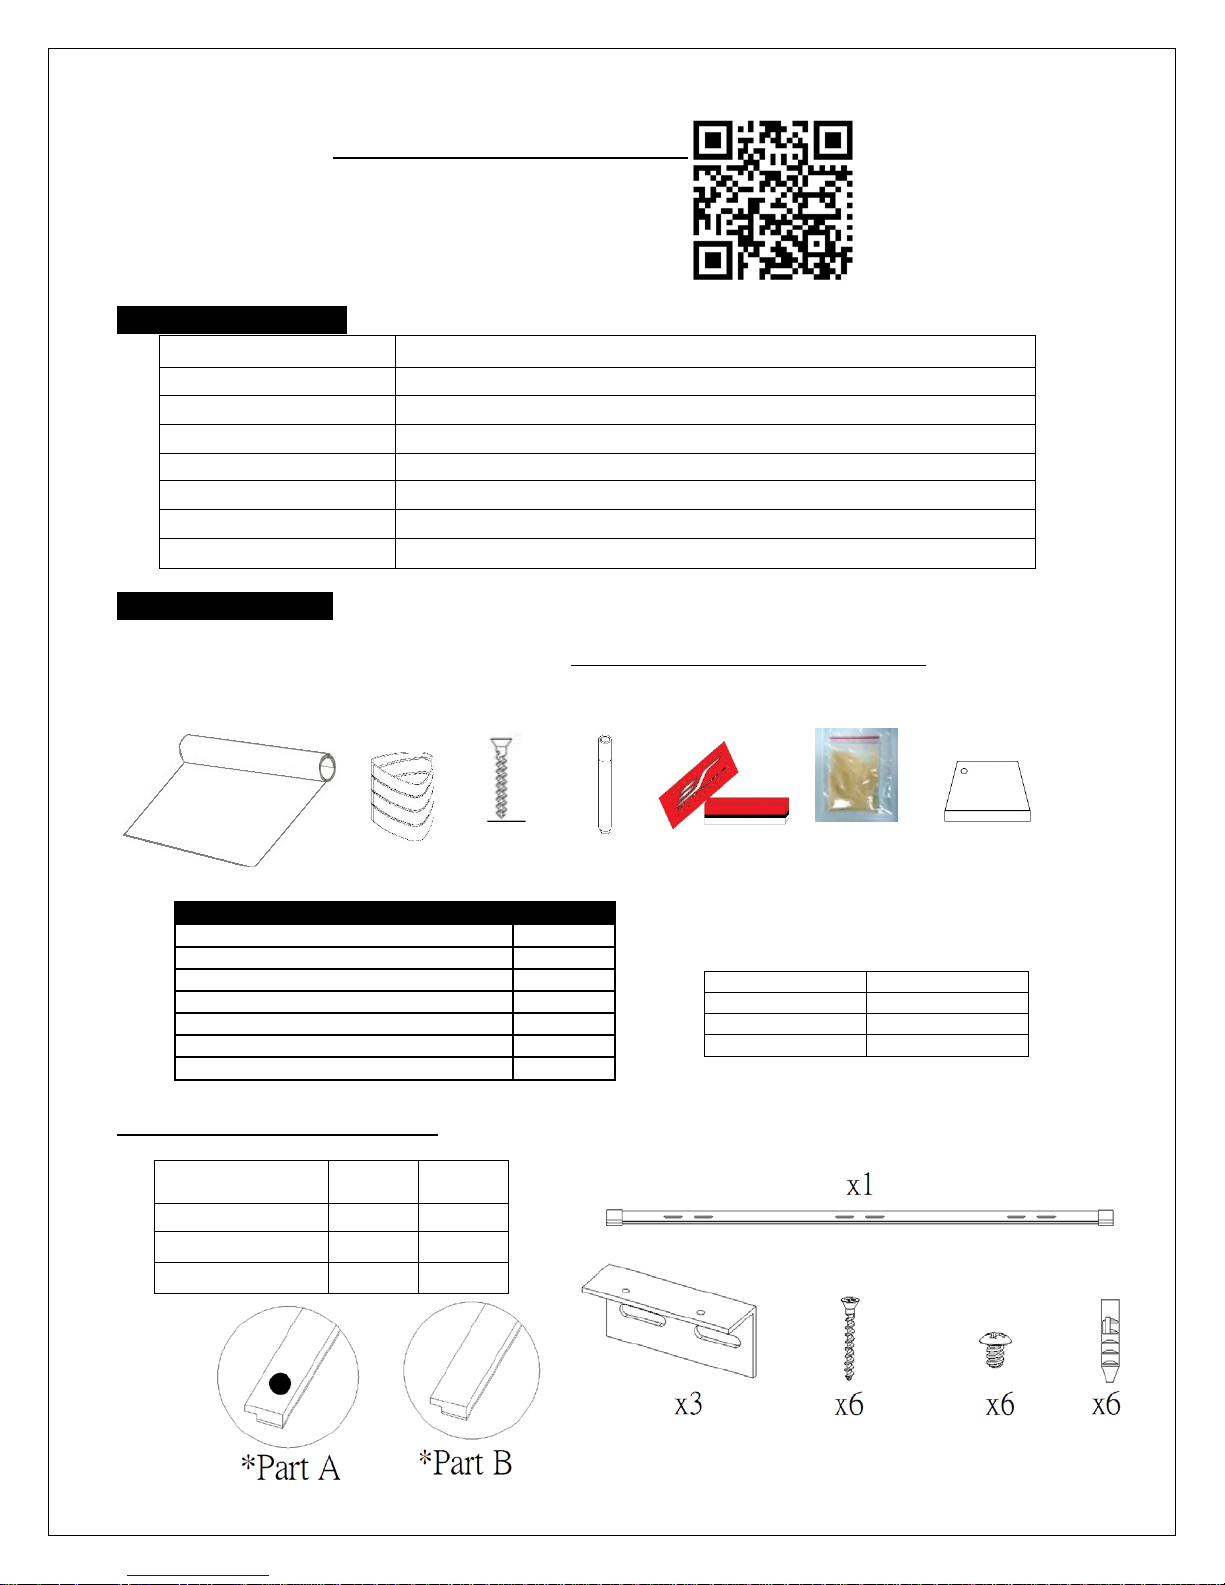
Parts List
QTY
a. Insta-DE2a Screen Material Film Roll
1
b. Pen Holder (Self-stick cra dle)
1
c. 4.5mmx30mm screw
1
d. Whiteboard markers (pens)
2
e. High density eraser
1
f. Glue powder bag
See table
g. Scraper (smoothing tool)
1
Model Number
Powder bag qty
iWB114XW2aF
1
iWB5x10W2aF
1
iWB5x20W2aF
2
Part A
Qty
Part B
Qty
iWB114XW2aF
2
4
a.
f.
e.
d.
c.
b.
g.
Installation Video
Watch our installation video on-line at
www.elitescreens.com/ide2afinstall
or scan the QR code
Product Specifications
What’s in the package
Please make sure all parts listed below are included.
Notes: For best results and maximum product longevity, ONLY use a high density whiteboard eraser.
Frame and Pen Tray Parts List
Frame Parts Qty
iWB5x10W2aF 2 6
iWB5x20W2aF 2 10
041217 DR 2 www.eliteproav.com
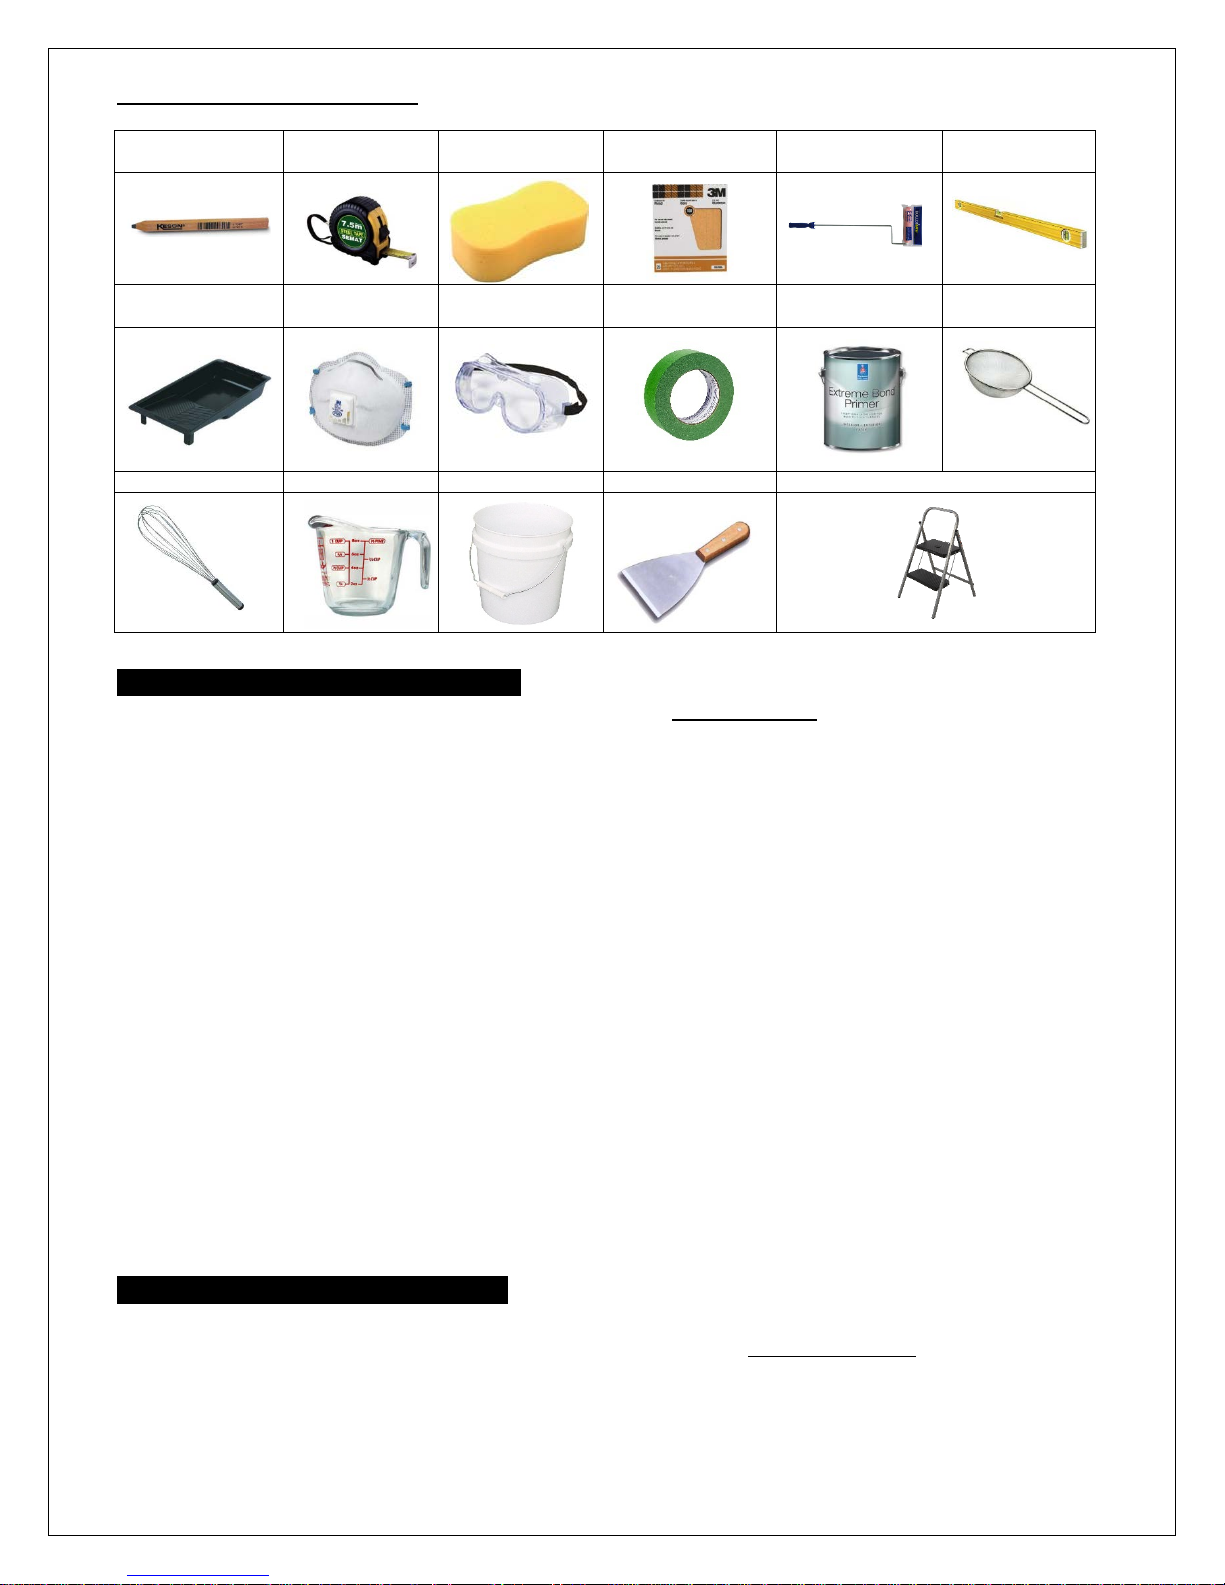
Tools required (not included)
Carpenter’s Pencil
Tape Measurer
Sponge
150 grit sandpaper
Roller cover and
frame
Level
Paint Tray
Dust Mask
Safety goggles
Painting tape
Acrylic based
Primer
Strainer
Whisk
Measuring cup
Small bucket
Scraper
Step Stool/Ladder
Preparing the installation surface:
The Insta-DE 2a product is to be solely installed on a flat Level 5 surface. The dry erase function of this
product requires a smooth writeable surface.
The smoother the surface, the better the result of the finished
product will be.
Any surfaces that are textured (ex. orange peel, drilled holes, glue/tape residue, dents, etc.) should be patched,
sanded, and primed before applying the Insta-DE2a screen. We recommend sanding the area first to make sure
you have a clean flat and smooth surface. Failure to remove such imperfections can damage the product.
EliteProAV is not responsible should these instructions are not properly followed.
The warranty of this product will be voided if any bubbling occurs due to the use of an after-market
spray adhesive or if the screen was applied on to a textured wall.
Before applying the Insta-DE 2a, the application surface must be dry, clean, smooth, and structurally
sound.
1. Clean the surface to remove any dirt, grease, and wax.
2. Fill any depressions or holes with a drywall compound
3. Use sandpaper to smooth any bumps and blemishes. Sand until the surface is completely flat.
4. Level-5 finish to the surface and apply one coat of acrylic based primer.
Commercial use recommendation
If you would like your screen to have a professional-grade finish that is flat, durable, and free from
imperfections – EliteProAV strongly recommends hiring a professional wallpaper install er.
041217 DR 3 www.eliteproav.com
Glue Powder Compound Method for dry-wall (porous surfac es) installations
Wall
Installation
We strongly recommend three or more people for this installation.
1. Measure and draw a line around the screen installation area.
2. Apply one coat of Professional R-35 Primer and allow it to dry.
3. Un pack the Insta-DE 2a material from the box and lay it on a clean surface.
4.Scrape the installation area to assure a smooth surface. Sand as needed and clean dust with sponge.
5. Pour 25 oz. of room temperature water into a bucket, mix it with an entire glue powder bag and stir it with a
whisk until all lumps are gone and the compound has a syrup texture. This will make the mixture into an
adhesive compound for sticking the film to the wall.
Note: Once the compound has been mixed, it must be applied within 4 hours to ensure a sealed installation
of the Insta-DE 2a to the wall. Use one bag for every 25 oz. of water.
6. Pour the mixed glue compound thru a strainer into a paint tray. This is to avoid using compound that has
lumps which could result on the wall and causing bumps on the material.
7. Put a 3-4-inch piece of painter’s tape on the outer edge markings of the screen’s installation area. Space them
out approximately 18 inches apart.
8. Dip the paint roller in the paint tray and evenly apply a thin coat of the glue compound to the wall surface in 5
feet increments.
Do not allow the glue to dry. Use a spray bottle to gently wet the dry areas.
9. Carefully place and align the Insta-DE 2a on the left-hand side of the installation area. Once it has been
placed, peel off18 inches of the back film to expose the self-adhesive backing and attach to the installation area.
10. Use the painter’s tape that was put on the outer edge and tape the Insta-DE 2a to keep it from moving.
Note: The Insta-DE 2a material cannot be moved once attached, please make sure it is properly aligned on
the marked position.
11. Smoothing the Insta-DE 2a
a) Start from the Right-Middle area of the Insta-DE2a.
b) Make sure the Insta-DE2a adheres properly to the wall before proceeding.
c) Continue scraping as needed in an up/down/left direction as shown in the picture below, Step-2, Step-3.
Continue doing this until all material is attached.
041217 DR 4 www.eliteproav.com
 Loading...