

Page 1
Specifications:
Color display
White
Thickness
2.1mm
Material composition
High molecular weight copolymer
of Terephthalic acid ethyl esters
Weight
1m2/377g
Temperature
At room temperature
Gain
1.1
Viewing Angle
160∘
Insta-DE2 Series
Dry-Erase Front Projection Screen Film
User’s Guide
Product Features
Award winning and GREENGUARD certified VersaWhite
material.
1.1 gain with 160 degree wide viewing angle.
Special anti-scratch layer to ensure long use as a
dry- erase/projection screen.
Application Advantages
Instantly converts flat surfaces/walls into a dry-erase whiteboard projection screen.
Includes adhesive black velveteen border to enhance contrast and overall appearance.
Perfect dry-erase and projection solution for today's short throw projectors.
Ideal and effective instructional presentation tool in the classroom, boardroom, and training facilities.
Product specifications
062013-JA 1 www.elitescreens.com
Page 2
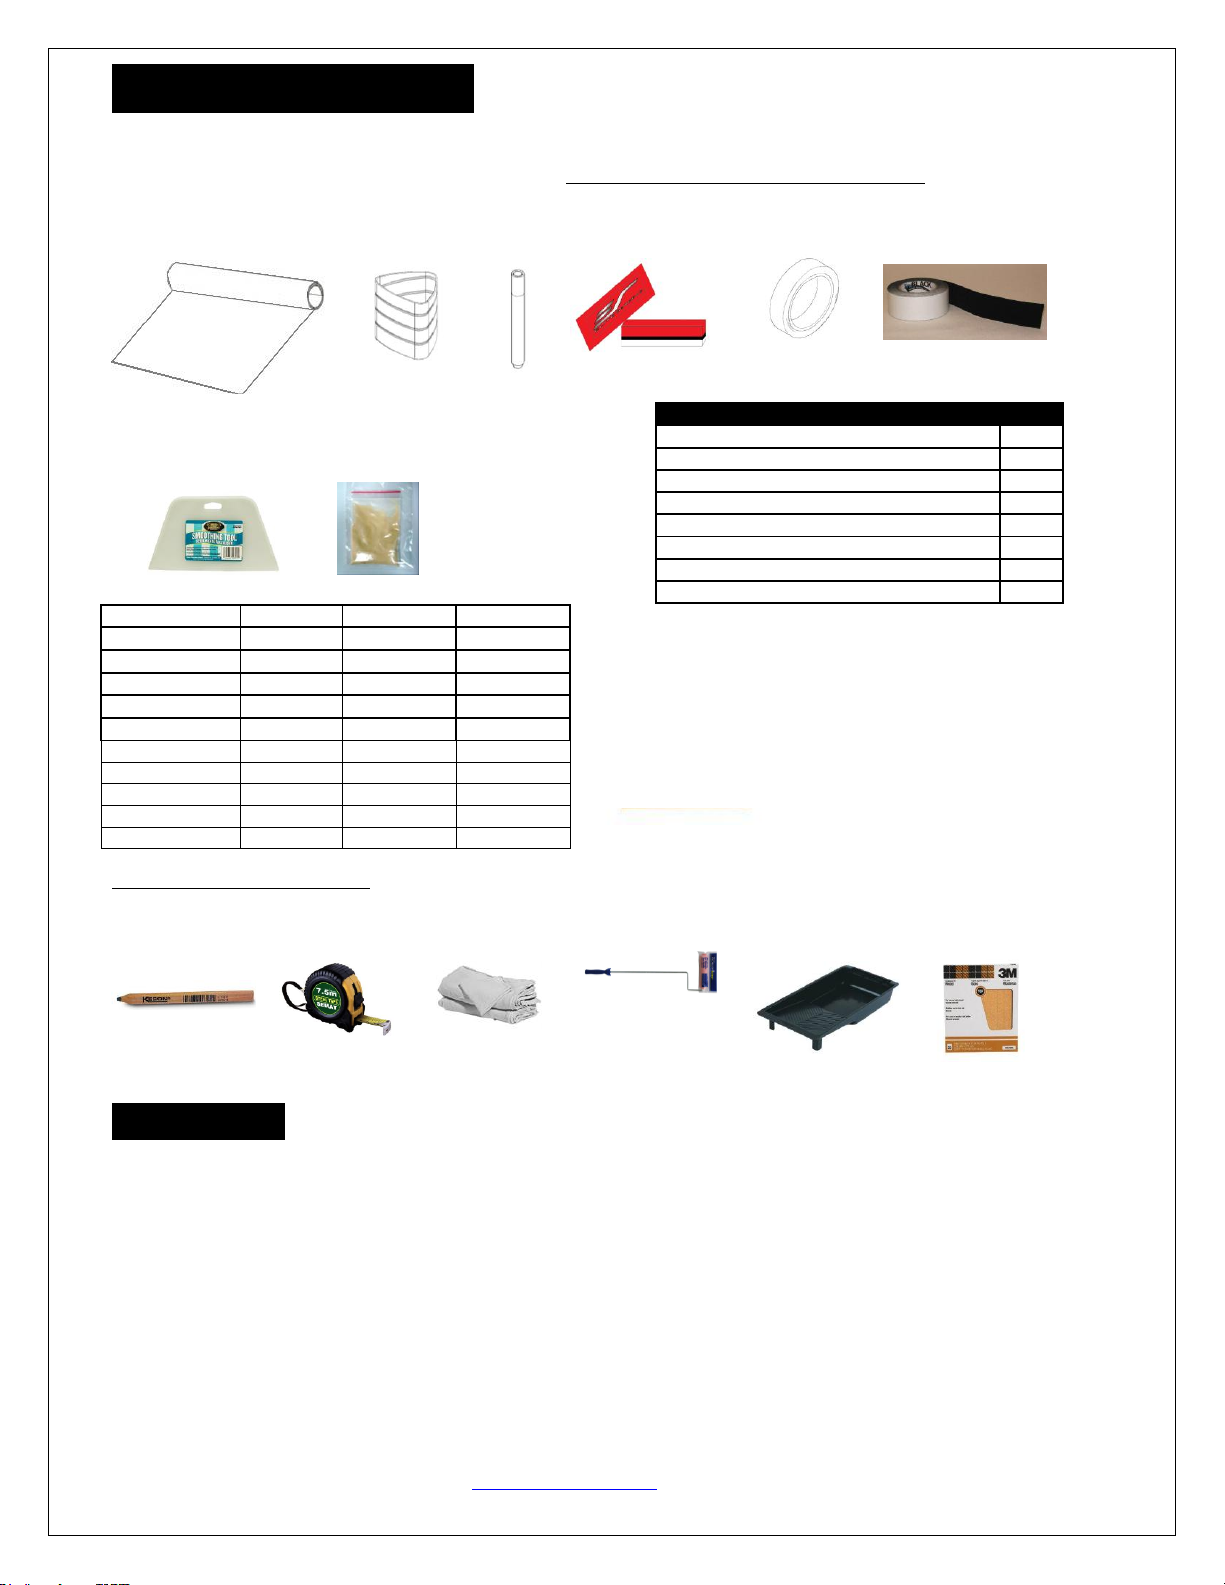
What’s in the package
Parts List
QTY
a. Insta-DE2 Screen Material Film Roll
1
b. Self-stick cradle
1
c. Whiteboard pens
2
d. High density eraser
2
e. double-sided tape
1
f. Black velvet border adhesive strip roll
1
g. smoothing tool
1
h. Powder compound
1-3
Model Number
1 bag(25g)
2 bags (50g)
3 bags (75g)
IWB86VW2
X
IWB97XW2
X
IWB105HW2
X
IWB4.2x10W2
X
IWB4.2x20W2
X
IWB4.2x30W2
X
IWB114XW2
X
IWB5x10W2
X
IWB5x20W2
X
IWB5X30W2
X
Please make sure all parts listed below are included.
Notes: For best results and maximum product longevity, ONLY use a high density whiteboard Eraser.
a. b. c. d. e. f.
g. h.
Tools required (not included)
Carpenter’s Pencil Measuring Tape Shop towels Roller cover and frame Paint Tray 150 grit sandpaper
Preparation
The Insta-DE 2 product is to be solely installed on a flat surface. The dry erase function of this product
requires a smooth writeable surface. Elite Screens is not responsible should these instructions not be
properly followed. Any surfaces that are textured (ex. orange peel, drilled holes, glue/tape residue, dents,
etc.) should be patched, sanded, and primered before applying the Insta-DE2 screen.
The warranty of this product will be voided if any bubbling occurs due to the use of an after-market
spray adhesive or if the screen was applied on to a textured wall.
Please consult with a professional wallpaper installer for further assistance. We strongly recommend two
or more people for this installation.
020514-JA www.elitescreens.com 2
Page 3

Installation
Wall
Watch the installation video at: www.elitescreens.com/ide2install
1. Smoothen the entire surface of the wall with sandpaper.
2. Clean the entire surface with a wet sponge or lint-free towel to remove any dust left from sanding the
wall.
3. Measure and draw line around the screen installation area.
4. Apply the included double-sided tap over the line. Do not remote the top film of the tape
5. Pour an entire powder bag into a paint bucket filled with 27 oz. of room temperature water and stir until
all lumps are gone and the compound has a syrup texture. This will make the mixture into an adhesive
compound for sticking the film to the wall.
Note: Once the compound has been mixed, it must be applied within 4 hours to ensure a sealed
installation of the Insta-DE2 to the wall. Use one bag for every 27 oz. of water.
6. Pour the mixture into a paint tray and dip the roller.
7. Apply a thin coat of adhesive to the surface evenly with a paint roller.
8. Once the adhesive has dried, sand the surface to ensure no adhesive residue is left on the wall.
9. Then, apply/spray water on the surface to regain the stickiness from the compound glue.
10. Unroll the Insta-DE2 on to the wall lining it up with the drawn line from Step 3.
Note 1: Each side of the material is labeled FRONT/BACK
Note 2: Do not allow the material to wrinkle or crease to avoid permanent damage.
9. Flatten the surface with a flexible wall smoothing tool in a 45 degree angle to avoid scratching the
surface.
020514-JA www.elitescreens.com 3
Page 4

10. Lift edges and smoothen out any remaining air bubbles.
Caution
The smoothing tool’s edge is sharp. Carefully scrape the screen when removing air bubbles to avoid scratching
the surface.
11. Peel off the top layer of the double-sided tape and flatten the screen’s edges with the smoothing tool.
12. Use a soft damp towel or sponge to clean entire surface.
Adhesive black velvet border installation
1. Measure the top/bottom and left/right sides of the Insta-DE2 screen to obtain the required length of the velvet
border you will need to use for bordering your screen.
2. Peel a small portion off of the velvet border and place it about half an inch over the white area of the screen.
Continue to peel off and roll out the remainder of the velvet border until you have reached the end and cut the
edge.
Note: For best results we recommend cutting the edge in a 45° angle.
3. Repeat the process for the remainder of the sides until all sides are bordered as shown below.
081513-JA 4 www.elitescreens.com
Page 5

4. Allow the compound to dry for approximately 3-4 hours before using the dry-erase feature of the Insta-DE2.
Use only the included erasers to remove and erase dry-erase markings. For a deep clean, we recommend using
a non-alcohol based dry-erase board cleaner with a soft microfiber cloth.
Elite offers a replacement kit (part number ZER3) which includes:
1 x bottle of 8.45 oz cleaning solution
1 x microfiber cloth
2 x high density foam erasers
2 x sets of dry-erase markers (4 total)
Contact your reseller or visit shop.elitescreens.com for pricing and purchase.
Safety Precautions:
A. Avoid using sharp objects directly on the screen which can result in permanently damaging the product and
voiding your warranty.
B. Creases or wrinkles caused by improper installation are not removable.
For more information, technical support or your local Elite Screens contact,
please visit www.elitescreens.com
081513-JA 5 www.elitescreens.com
 Loading...