

Page 1
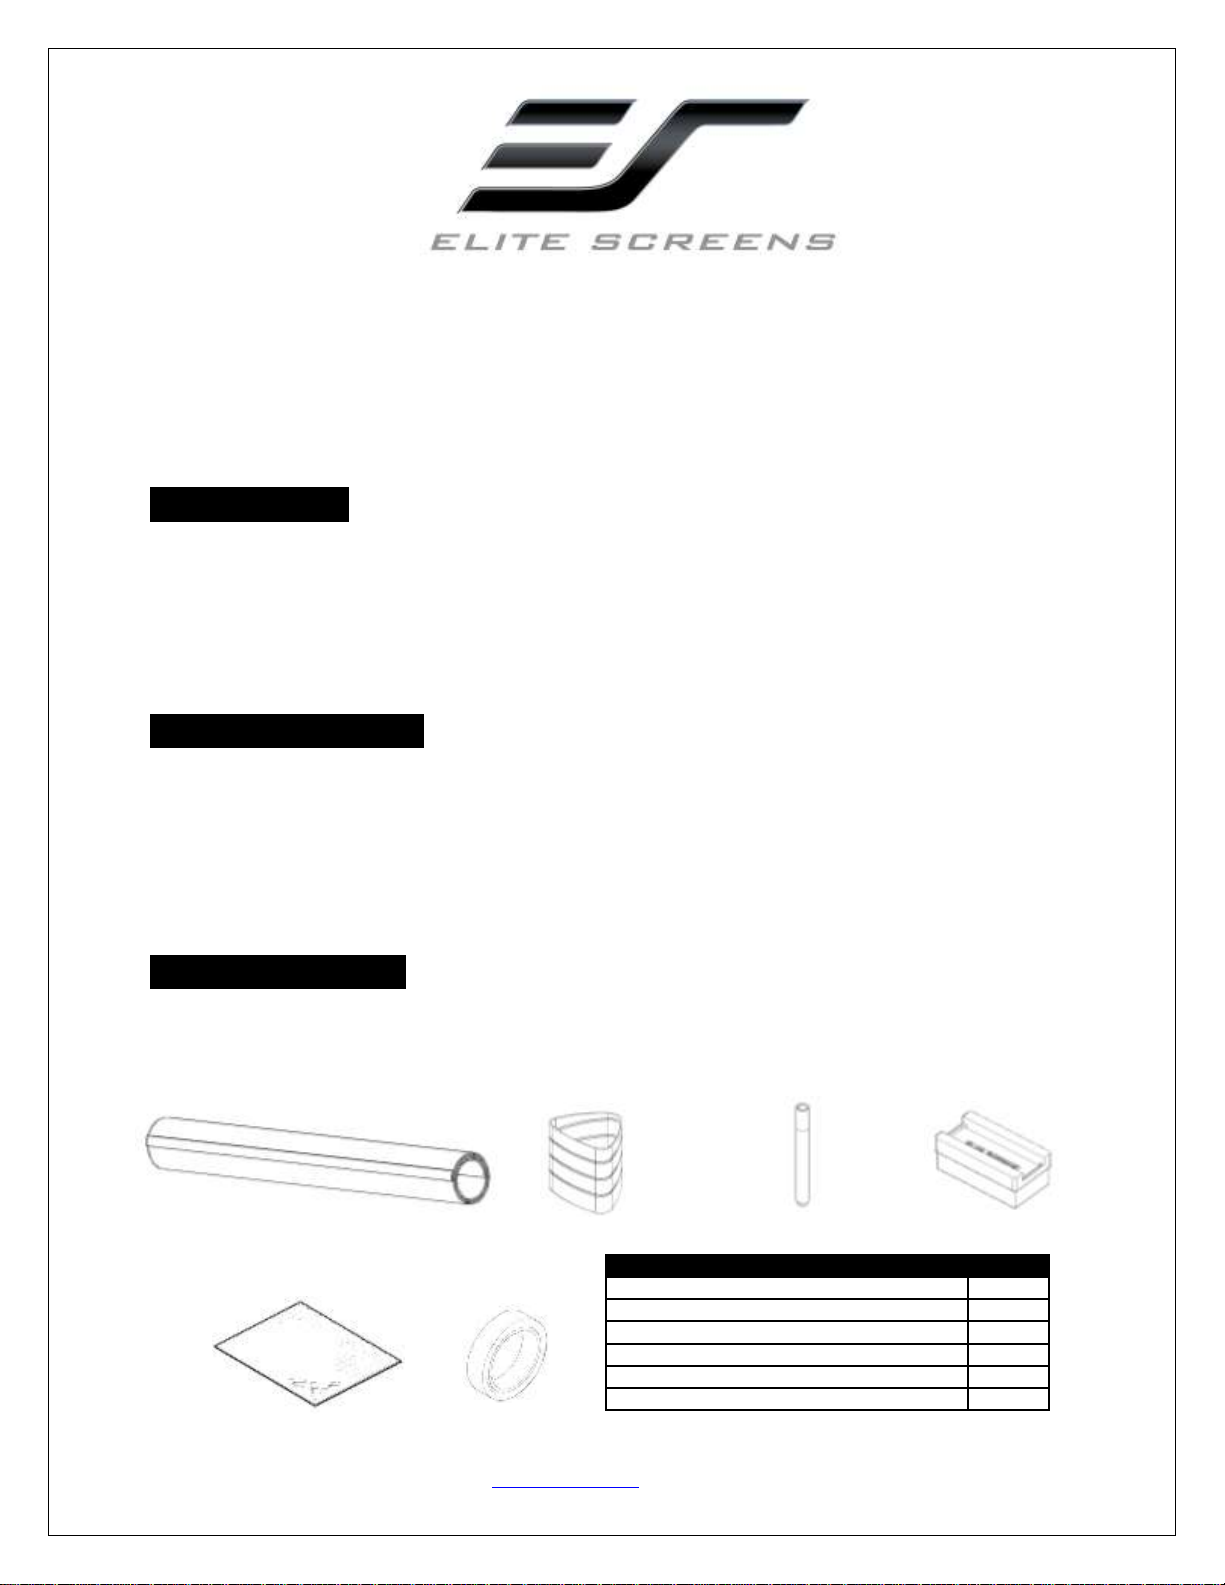
Parts List
QTY
a. Insta-DE Screen Material
1
b. Pen Holder
1
c. Whiteboard markers
3
d. Elite special high density eraser
2
e. Microfiber cleaning cloth
1
f. Double-sided adhesive tape
1
Insta-DE Screen Series
Dry-Erase Whiteboard Front Projection Screen
User’s Guide
Product Features
Award winning and GREENGUARD certified VersaWhite material.
1.1 gain with 180 degree wide viewing angle.
Special anti-scratch layer to ensure long use as a dry-erase/projection screen.
Anti-reflection diffusion surface eliminates glare and hot-spot while using a projector.
Soft padded backing allows installation on almost any surface
Application Advantages
Instantly converts any surface/walls into a dry-erase whiteboard projection screen.
Perfect dry-erase and projection solution for today's short throw projectors.
Ideal and effective instructional presentation tool in the classroom, boardroom, and training facilities.
What’s in the package
Please make sure all parts listed below are included. If anything is missing please contact Elite Screens
immediately.
a. b. c. d.
e. f.
Rev051613-JA www.elitescreens.com 1
Page 2
Installation
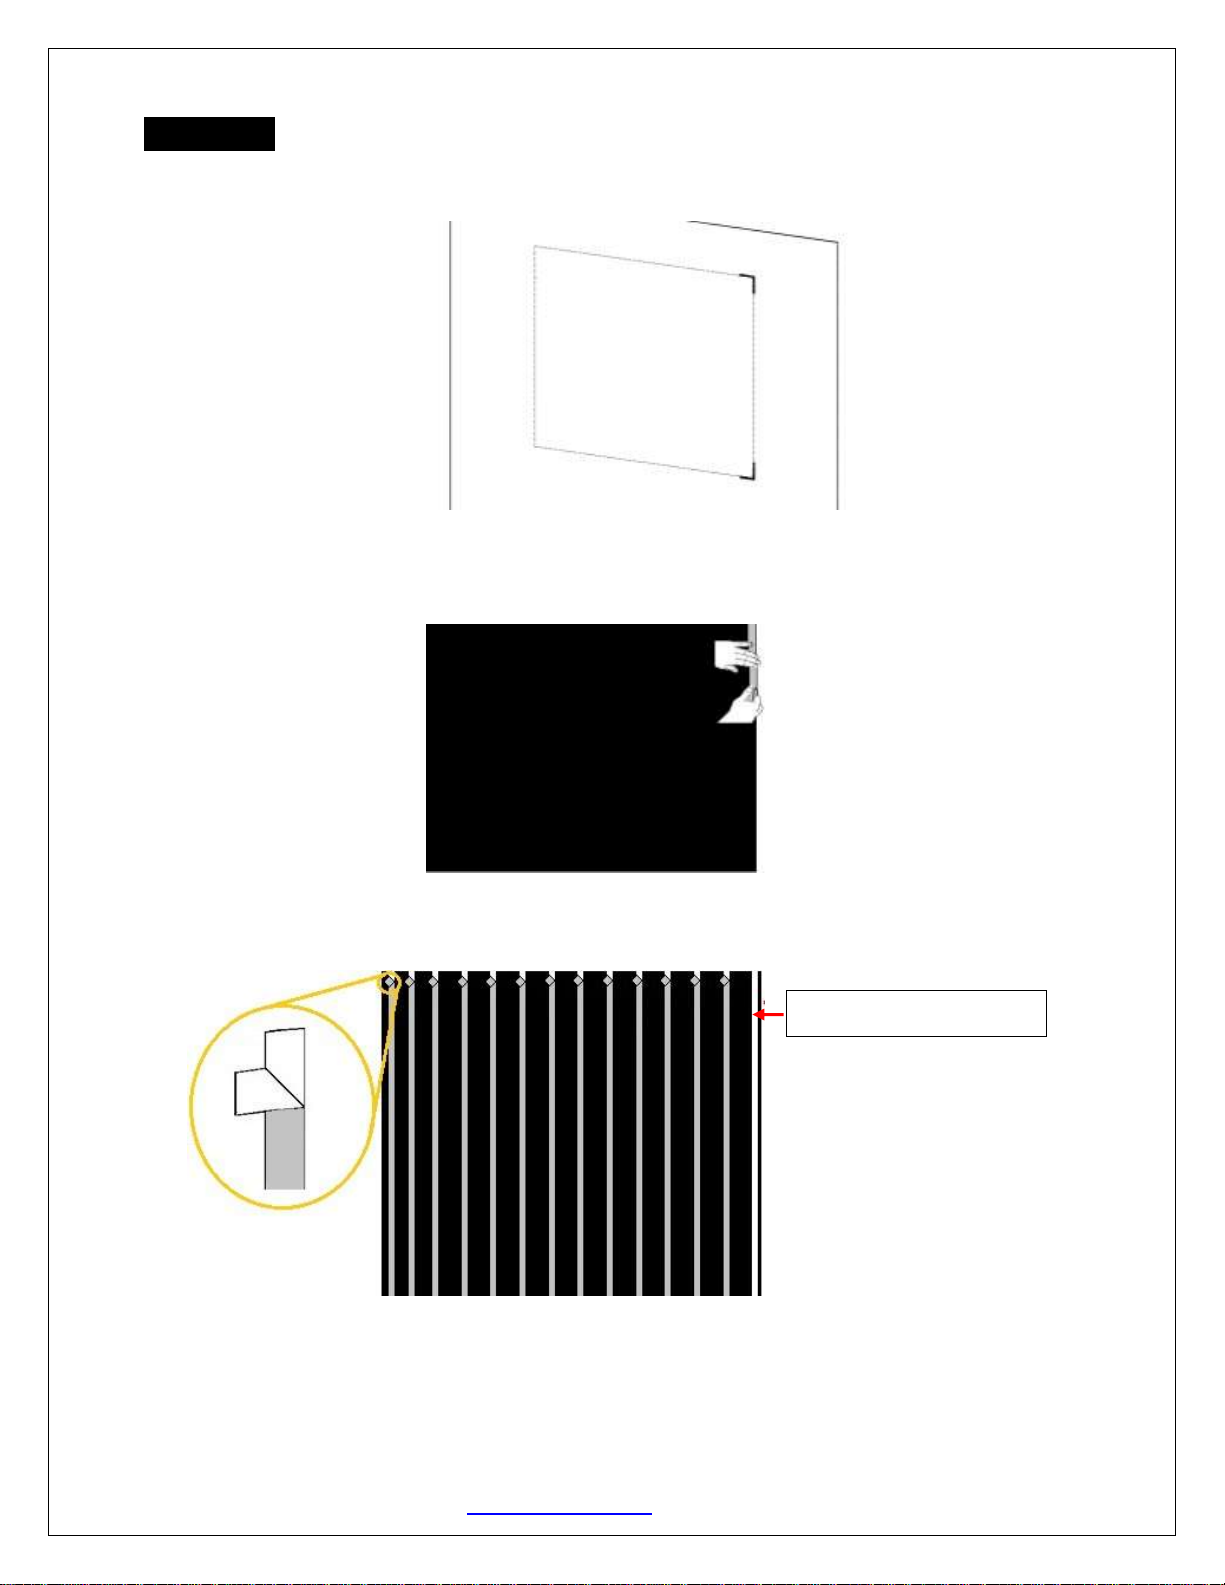
Tape strip completely removed
1. Clean the location where the Insta-DE Screen will be installed.
2. Measure and mark the top-right and bottom-right corner of the installation area as shown below.
3. Peel off one side of the double-sided adhesive film tape and apply it from top to bottom (vertically)
every four to six inches apart from one end to the other.
4. After the double-sided tape has been applied, completely peel off the first strip and peel off the rest
about an inch as shown below.
Two people recommended:
5. Carefully pick up and attach the Insta-DE Screen to the top-right and bottom-right corner of the
installation location. Do not allow the material to fold in any way to avoid wrinkles or crease which can
cause permanent damage.
Rev052013-JA www.elitescreens.com 2
Page 3
Wall
Wall
Wall
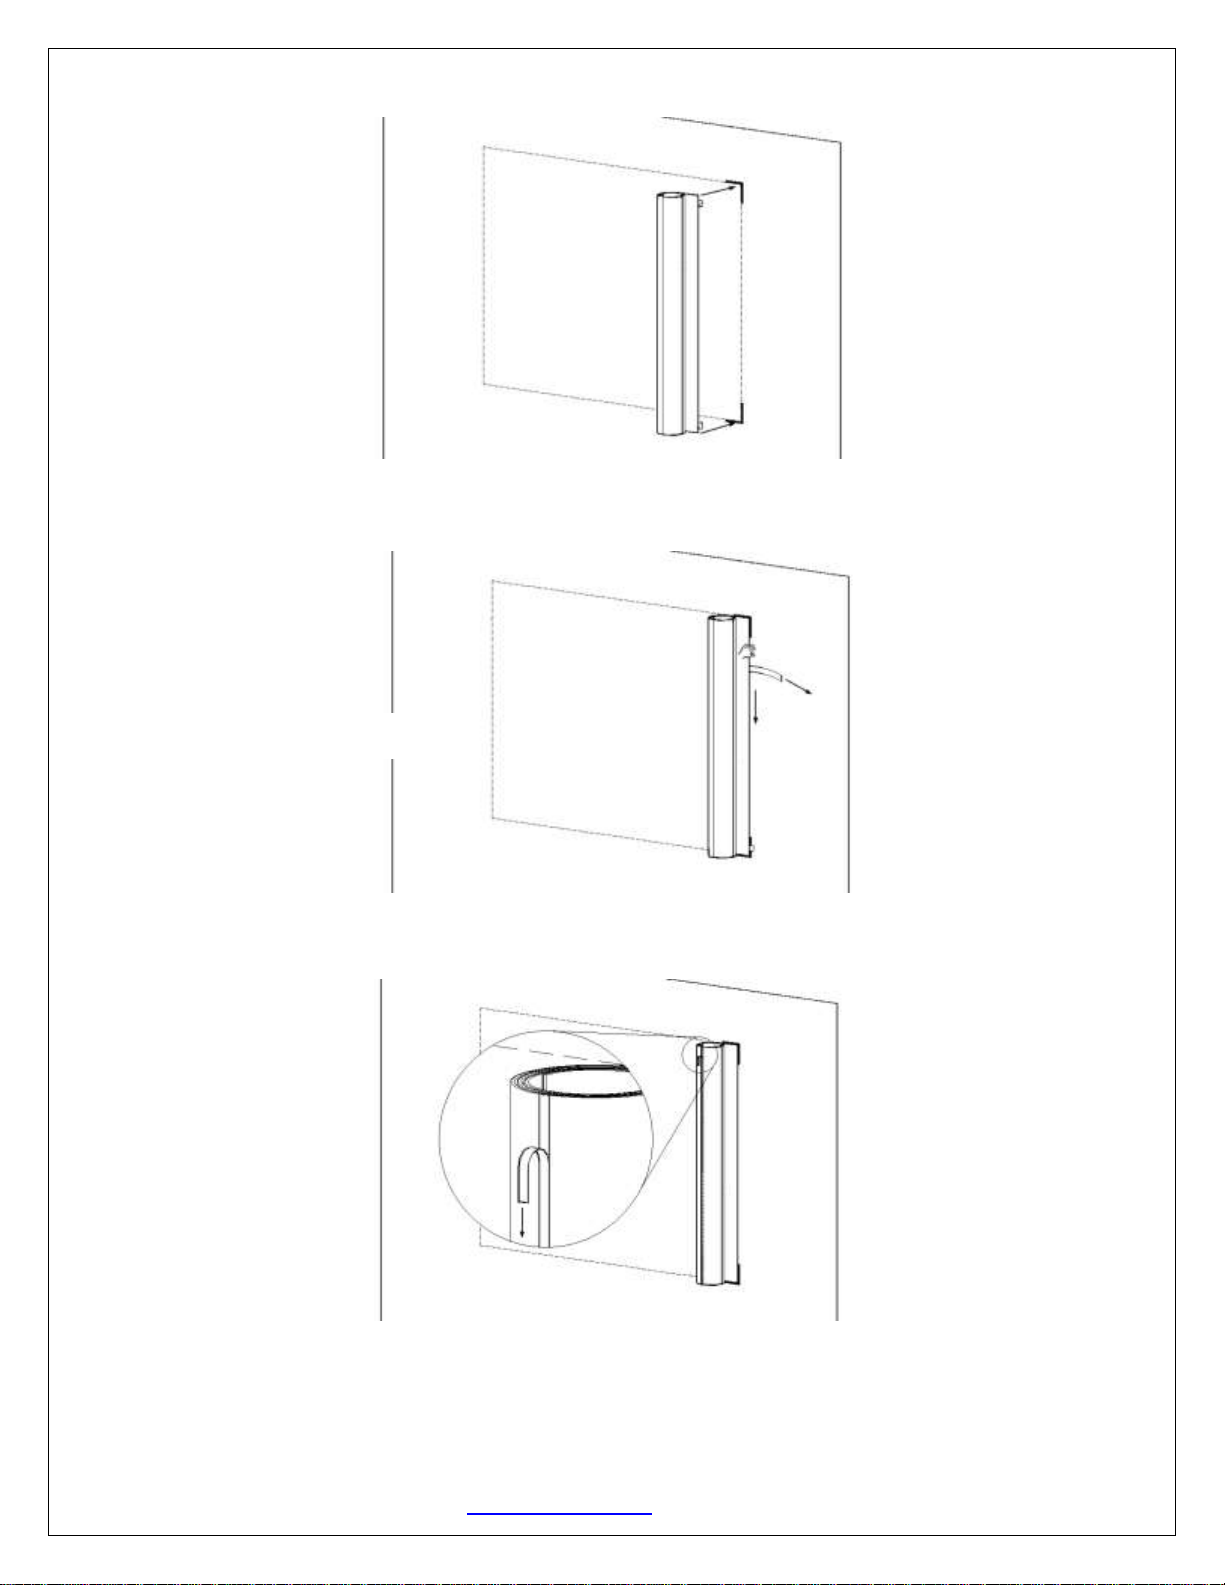
6. Peel off the tape’s film strip while unrolling the material and firmly attach the first taping line with
pressure.
7. Continue removing the entire tape film on the rest of the tape strips one by one.
8. Unroll the material to the left and firmly attach the Insta-DE to the installation area until you’ve
reached the other end. Make sure that the material has completely rolled out perfectly flat.
Rev052013-JA www.elitescreens.com 3
Page 4
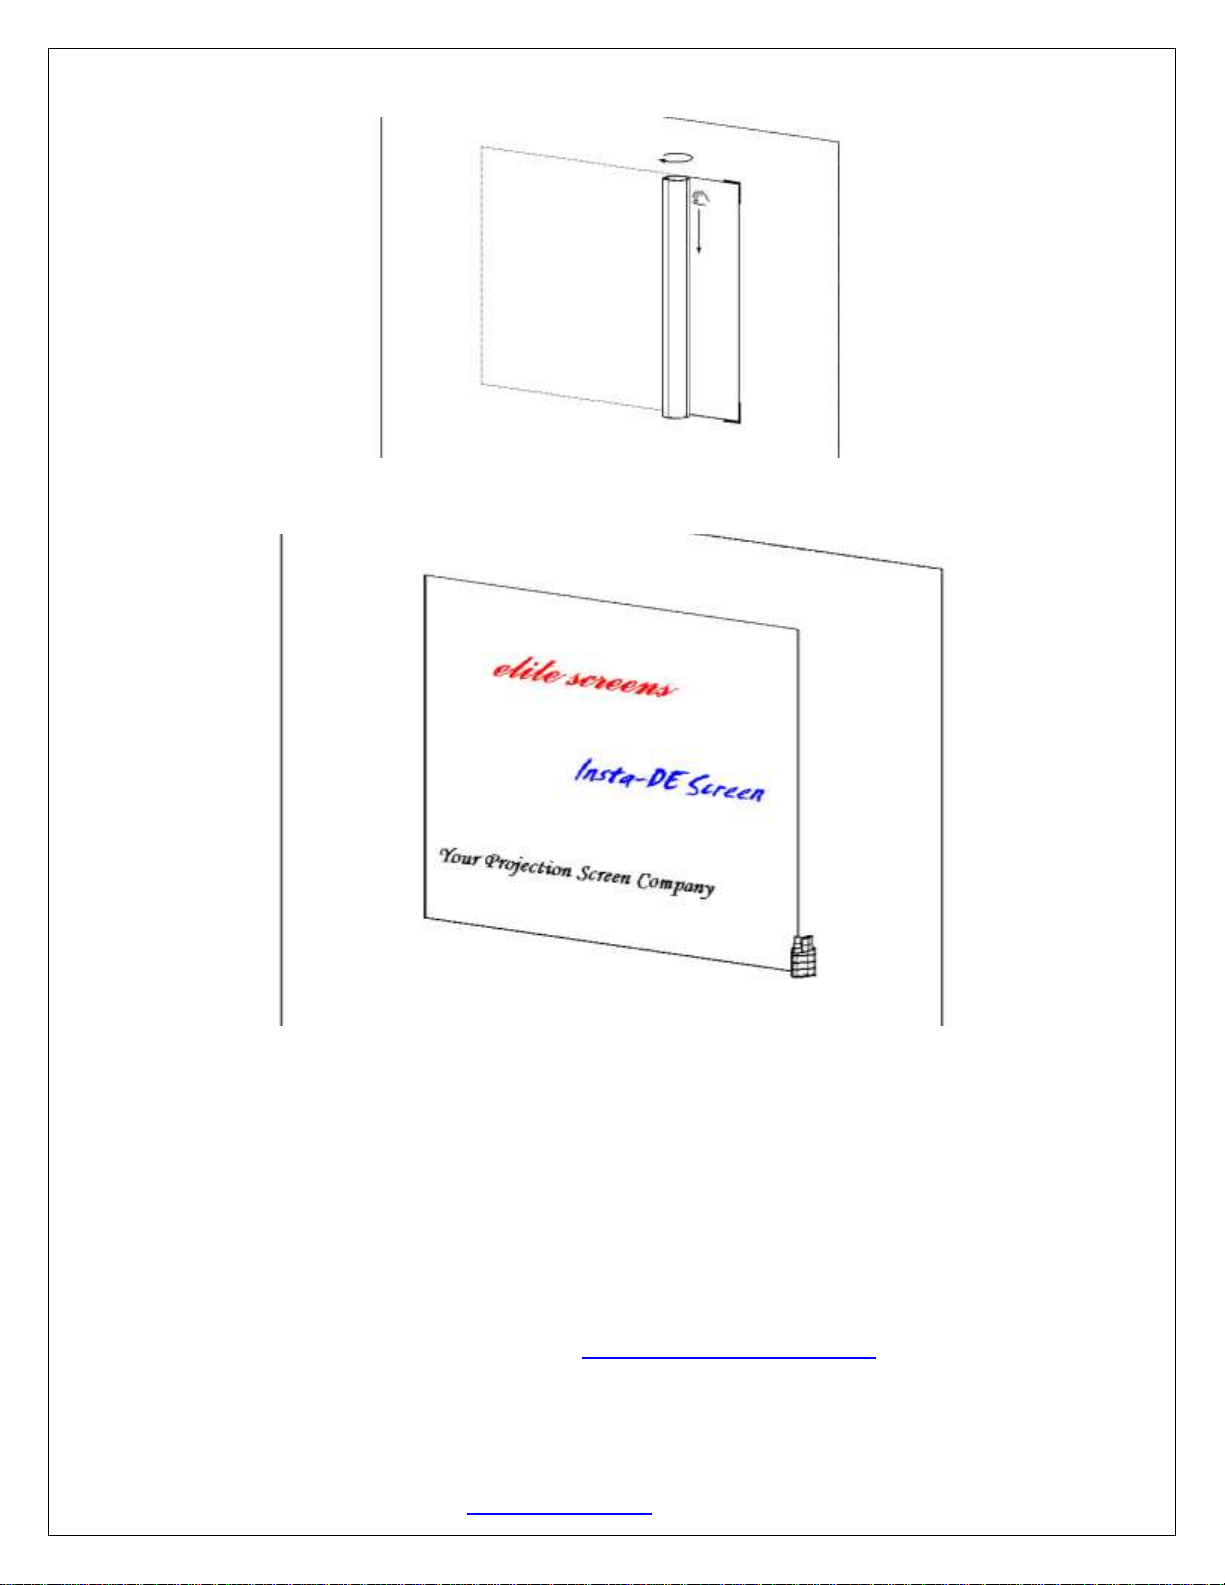
9. Installation is complete and ready for projection and dry-erase use.
Caution:
The adhesive surface is meant to be permanent for the life of the product. It does not
remove easily. Please attach very carefully to avoid having to remove the product and
positioning it in a different location. This product does not stick well directly to drywall
surfaces, due to the nature of the material.
For more information, technical support or your local Elite Screens
contact, please visit www.elitescreens.com
Rev052013-JA www.elitescreens.com 4
 Loading...