

Page 1
What’s included?
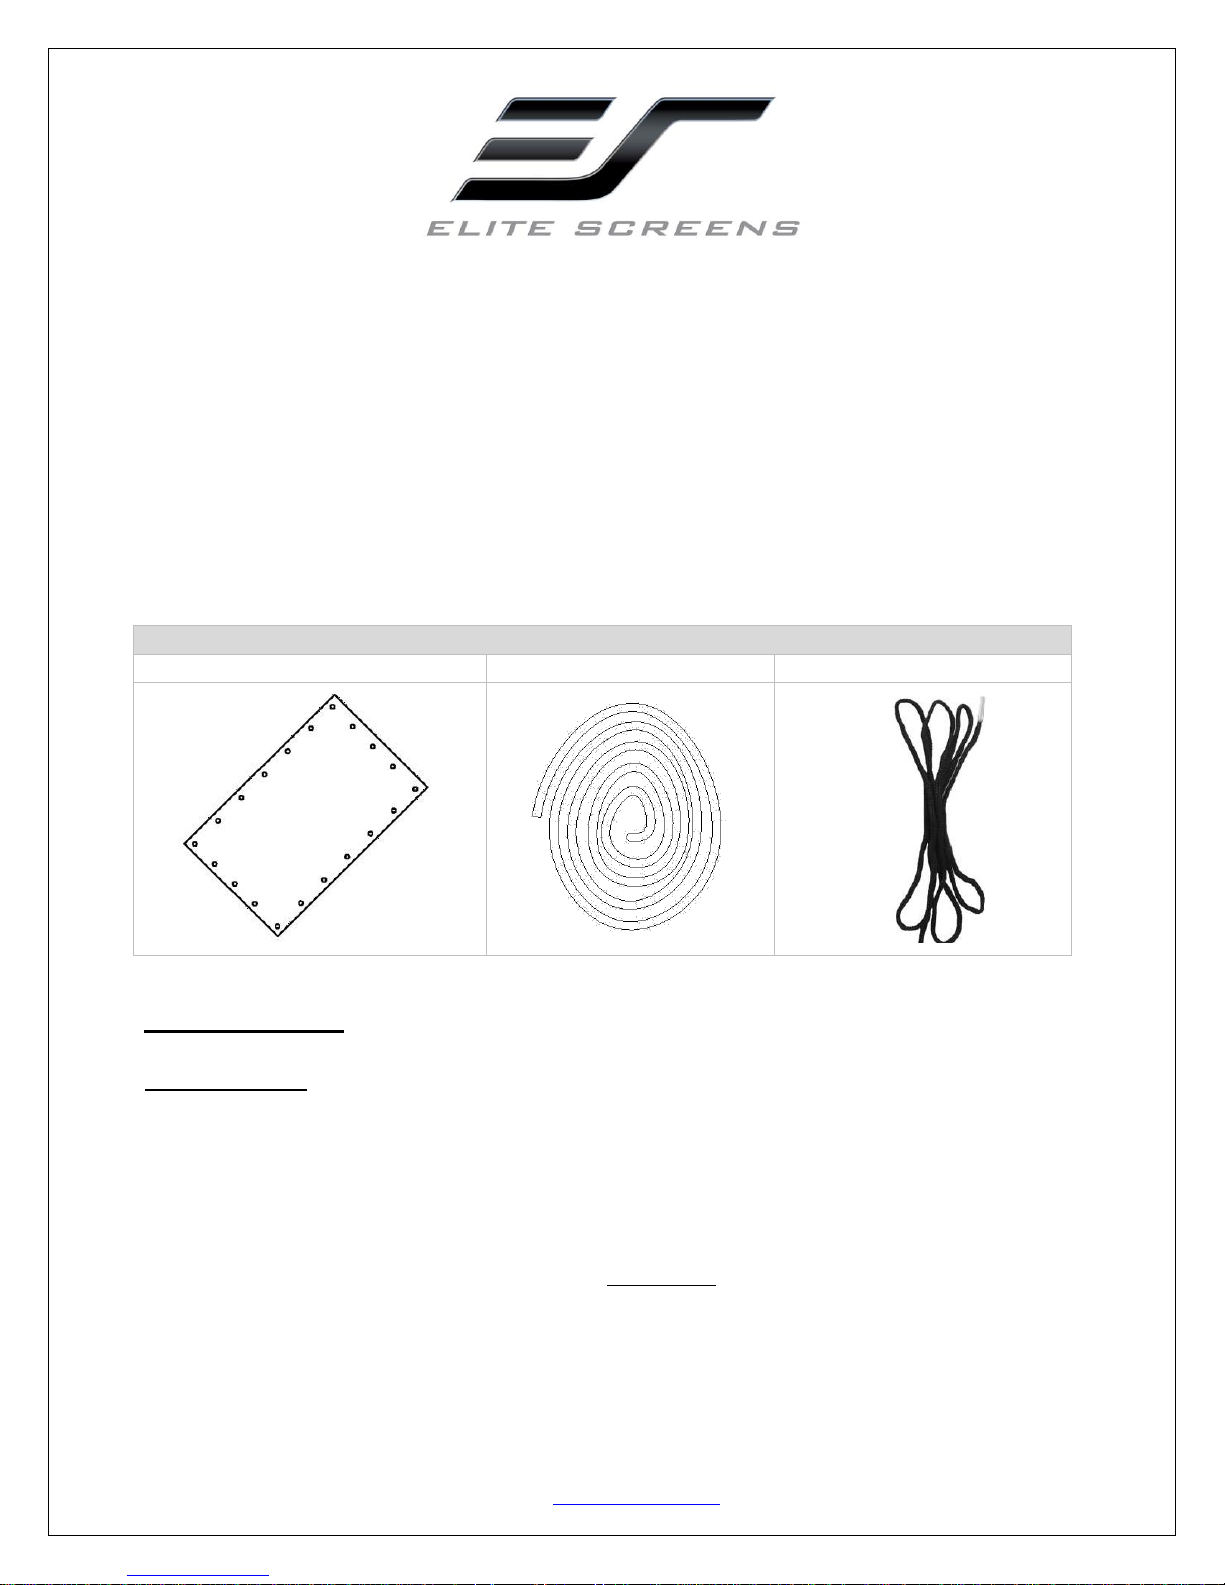
a. DIY Outdoor Screen Material x 1
b. Dynamic Rope x 4
c. Polypropylene Rope x1
Do-it-Yourself Outdoor Projection Screen
DIY/DIY Pro Screen Series
User’s Guide
Thank you for choosing the DIY Screen Series portable projection screen! Please read through this user
guide before utilizing the screen. Correct usage and maintenance will ensure a long product life
Please make sure all parts listed below are included before proceeding with the installation.
Setup Procedure
PLEASE NOTE: Prolonged storage of the DIY Screen Series in its factory packaging may result in
having noticeable horizontal lines on its surface. The lines are identified as “Memory Lines”. The
Memory Lines can be eliminated by leaving the screen in the down position for a few days after the
installation. This allows the material to stretch out. After the few days of leaving the screen
installed, the Memory Lines should vanish without return.
There are many unique ways for the DIY/DIY PRO to be installed. Below is a general guideline for the
installation of the screen. Please note that a frame is not included with the DIY/DIY PRO screen.
1. Unroll the screen material on a clean surface.
2. Insert the Polypropylene rope through each grommet in the material and attach to the
installation location.
Updated 8/11/2014 EA www.elitescreens.com 1
Page 2

Note: The Screen material is not designed to be left outdoors for an extensive period of
time. Leaving the screen outdoors will result in a reduced lifespan of the screen material. To
prevent damage caused by the outdoor elements, we recommend that you disassemble the
screen after each use and store it indoors.
(Image below is of DIY Pro Series- Actual screen appearance will vary based on series and model number)
Tightly fasten the Polypropylene rope throughout each grommet to make the screen flat while
fastening the rope to the installation location. Do several tests to ensure the rope stretches the
material to its maximum extent. Once the approximate length of rope that is needed can be
determined, remove any excess rope by simply cutting it.
Note: Wrap rope with tape before cutting
3. The bungee cord can be attached to each of the four corners of the material and to the support
structure to create a more secure installation while at the same time stretching the material.
When placed at each corner, the elasticity of the cord will tension the screen making it more
flat provide a more uniform surface.
For more information, technical support or your local Elite
Screens contact, please visit www.elitescreens.com
Updated 8/11/2014 EA www.elitescreens.com 2
Page 3

Limited Warranty Policy
What is Covered: Elite Screens, Inc. (“Elite Screens”) warrants its products to the first retail purchaser, if purchased new and
operated in the United States or Canada, to be free from defects in workmanship and materials (except as provided below) for a
period of (2) years from the date of original purchase, and (3) years for products purchased directly by educational, non -profit,
religious or government organizations.
Refurbished products purchased directly from Elite Screens are warranted for a period of (90) days from the date of original
purchase.
For warranty service, you must provide proof of purchase and the serial number of your product.
How to Get Service: Should this product prove defective during the warranty period, please visit
www.elitescreens.com/rmaform and submit a warranty claim form. You must provide your proof of purchase, the serial number
of your product, and describe the problem you are experiencing with your screen. An Elite Screens representative will determine
whether the product requires service, and provide you with further instructions on how to proceed with your warranty claim.
Missing Parts: If your product is missing parts, Elite Screens will, at its option, replace the part without any charge, including
shipping and handling, provided that that you report your claim within (7) days of receipt. If you report your claim after (7) days
of receipt, but within (30) days of receipt, Elite Screens will, at its option, replace the part without charge, but you will bear the
cost of shipping and handling. If you report your claim after (30) days of receipt, you will bear all costs to replace the part.
Returns and Exchanges: If a return is needed, Elite Screens will issue you a Return Merchandise Authorization (“RMA”)
Number. This number is valid for (45) days from the date of issue, and is required to process any returns. A returned item sent to
Elite Screens without a visible or valid RMA Number is subject to refusal by Elite Screens. You are responsible for the cost of
returning the item and ensuring the product is properly packaged to prevent damage in transit.
Once a returned product is received, Elite Screens will, at its option, replace the product or part without charge, including ground
service freight. The replacement product or part may be new or refurbished to the Elite Screens standard of quality, and is subject
to stock availability. Elite Screens’ liability for replacement of the covered product will not exceed the original retail selling price
of the covered product. Exchange products and parts assume the remaining warranty period of the original product covered by
this limited warranty.
What is Not Covered: This warranty is not transferable and does not cover product purchased by another end user. This
warranty does not cover incidental damages, such as loss of time, loss of use, or installation costs of defective, repaired or
replaced product. This warranty does not cover product that has been damaged or rendered defective as a result of (a) neglect,
abuse or misuse; (b) modification of the original product; (c) improper use or installation of products not manufactured by Elite
Screens; (d) service provided by anybody other than Elite Screens; (e) abnormal mechanical or environmental conditions; (f)
unusual physical or electrical stress -including failure or fluctuation of electrical power, lighting, static electricity, fire, tornadoes,
or other natural disasters.
Elite Screens does not warrant against freight damage, concealed or otherwise, unless product is shipped directly from an Elite
Screens facility. You must contact the vendor and the delivering carrier to report freight damage within (7) days of receipt. Failure
to report freight damages within the carrier’s guidelines may result in you bearing all costs.
THIS LIMITED WARRANTY AND REMEDY PROVIDED ABOVE ARE EXCLUSIVE AND IN LIEU OF ALL OTHER WARRANTIES. ELITE
SCREENS, INC. DISCLAIMS ALL OTHER WARRANTIES, WHETHER EXPRESS, IMPLIED OR STATUTORY, INCLUDING ANY
WARRANTY OF MERCHANTABILITY, ANY WARRANTY OF FITNESS FOR A PARTICULAR PURPOSE AND ANY IMPLIED
WARRANTIES ARISING FROM A COURSE OF DEALING OR USAGE OF TRADE. THIS LIMITED WARRANTY GIVES THE END USER
SPECIFIC LEGAL RIGHTS, AND THE END USER MAY HAVE OTHER RIGHTS WHICH VARY FROM STATE TO STATE.
EXCEPT AS PROVIDED IN THIS WRITTEN WARRANTY, ELITE SCREENS, INC. SHALL NOT BE LIABLE FOR ANY LOSS,
INCONVENIENCE, OR DAMAGE, INCLUDING DIRECT, SPECIAL, INCIDENTAL OR CONSEQUENTIAL DAMAGES, RESULTING FROM
THE USE OR INABILITY TO USE THE ELITE SCREENS PRODUCT, OR FOR LOST DATA OR LOST SOFTWARE WHETHER
RESULTING FROM BREACH OF WARRANTY OR ANY OTHER LEGAL THEORY. SOME STATES DO NOT ALLOW THE EXCLUSION OR
LIMITATION OF INCIDENTAL AND CONSEQUENTIAL DAMAGES, SO THE ABOVE LIMITATION MAY NOT APPLY.
In Canada, warranties include both warranties and conditions. Some jurisdictions do not allow limitations on how long an implied
warranty lasts and some jurisdictions do not allow the exclusion or limitation of incidental or consequential damages, so the
above limitations and exclusions may not apply to you. This warranty gives you specific legal rights, and you may also have other
rights which vary from jurisdiction to jurisdiction.
International Warranty: Elite Screens, Inc. does not provide warranty coverage outside of the United States or Canada. For
more information on the warranty coverage, terms and conditions in your region, contact your Elite Screens International
Distributor directly.
Updated 8/11/2014 EA www.elitescreens.com 3
 Loading...