

Elicom Electronic ETS series User Manual
Elicom Electronic Ltd.
Electronic Price Computing
Label Printing Scale
E T S
User’s Manual
Table of Contents PAGE
1. Warranty Card..................................... 3
2. Brief Description ................................ 4
3. Main Functions ................................... 4
4. Technical Data .................................... 4
5. Operating Instructions ...................... 5
6. Scale Overview ................................... 6
7. Preparing For Use .............................. 7
8. Operation Modes ................................ 9
8.1. Weighing Mode ............................ 9
8.2. Label Printing ............................. 12
8.3. Service Mode.............................. 14
9. Error Mode ........................................ 23
10. ЕO Declaration of Conformity ......... 24
Scale Models Series ETS
ETS xx L
ETS xx S
ETS xx B

Elicom Electronic Ltd.
1. Warranty Card
MODEL NAME: Electronic Scale Model: ETS
DATE OF PURCHASE:……………………..…
SERIAL №…………………………………
LIMITED WARRANTY
The warranty period for the Electronic Scale ETS is 12 months from the day of the purchase. To obtain and
receive warranty service, you need to present the original Owner’s Manual along with Warranty Card in any
authorized dealers and services.
In order for the warranty to be valid, the product shouldn’t be opened; all stamps, lead seals and company logos
on the scale should be untouched from any mechanical damages. Product damages should not be caused by
any improper use of the scale. The warranty does not apply if:
1. The electronic scale has been opened or repaired by unauthorized services by Elicom Electronic
Ltd.
2. The product does not operate correctly because of mechanical damage caused by improper use:
damaged keyboard foil, broken display, mechanical hit or overload of the weighing platform or the
load cell.
................................... Dealer:…………………….
(Date) (Signature)
Customer: .......................
(Signature)

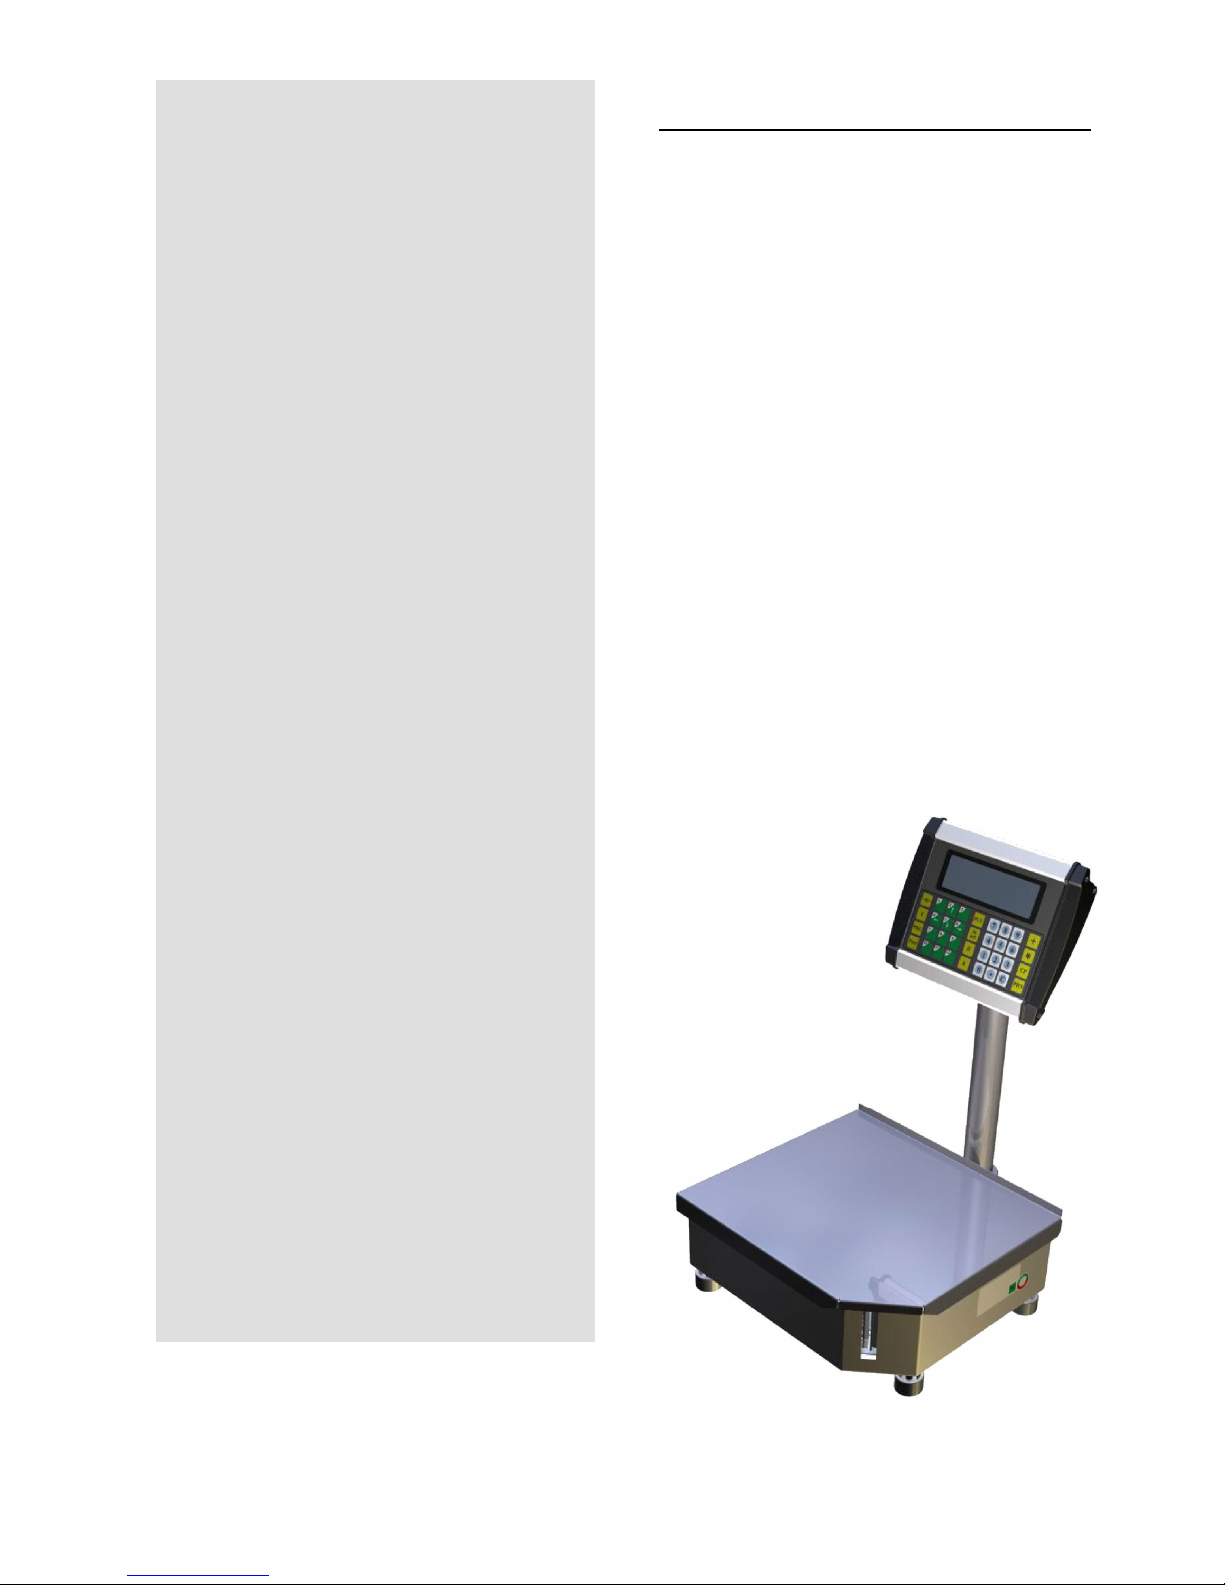
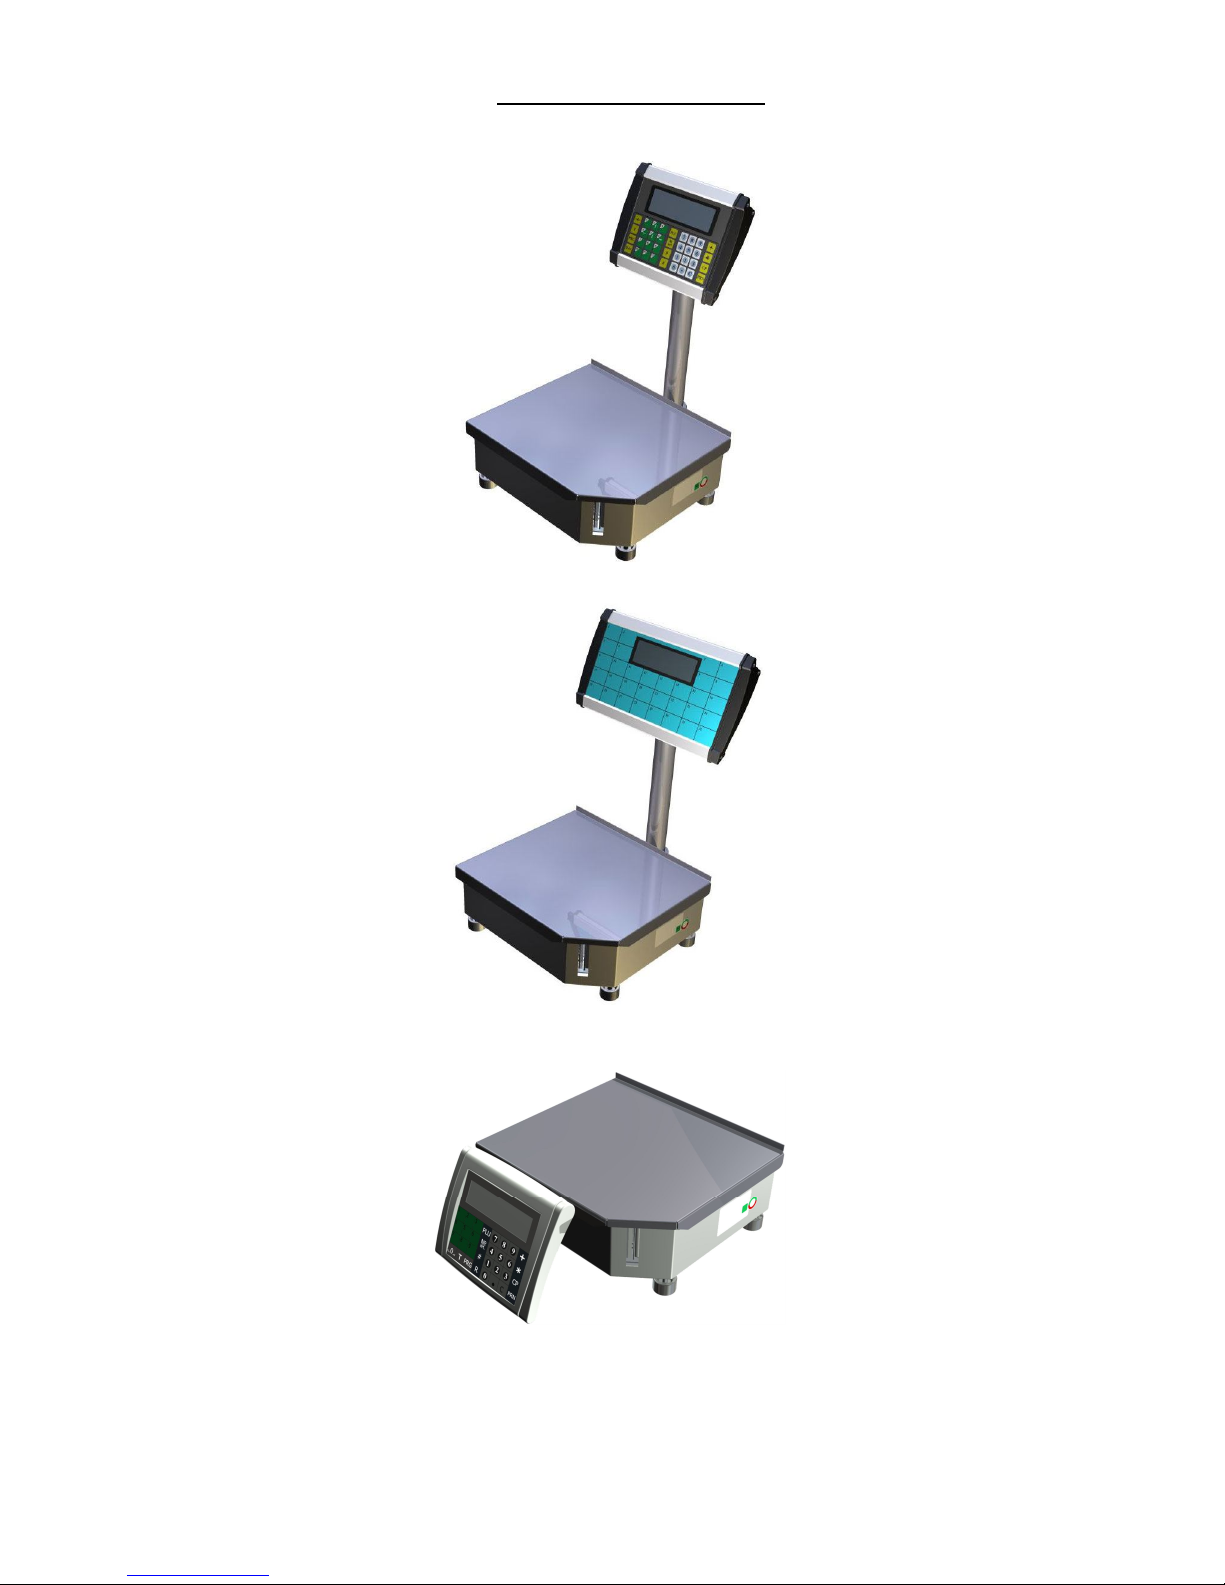
2. Brief Description
The information in the present instruction is given for electronic scales series ETS xx L1, L2, B1, B2,
and S. The basic modifications of the scales from this series are:
- ETS xx L1 – Display Colum, User Display Window, Customer Display Window
- ETS xx L2 – Display Colum, User Display Window, Customer Display Window, Additional Keyboard with
56 buttons for direct choice of articles
- ETS xx B1 – User Display Windows, without Display Colum and Customer Display Window
- ETS xx B2 – User Display Colum, Additional Keyboard with 56 buttons for direct choice of articles,
without Display Colum and Customer Display
- ETS xx S – Display Window with Keyboard for Self-Service
* „хх” indicates the maximal load for the particular model
The major function of electronic scales from series ETS is to determine the cost of the goods in
correlation with their weight and price followed by printing the result on a label with barcode. The price can
be determined by two ways: manually by using the digital keyboard or by using previously programmed
commodity code or key for easy access.
The scales allow storing information about the commodities in the form of names, price per unit, article
code, expiration date and other text information. The build in memory allows storing more than 8,500 different
articles.
3. Main Functions
Weight determination of the weighed products
Input of the price per 1 kg
Storing data for price, Tare, name, expiration date and est. of more than 8,500 articles
Displaying the information for the weight, price per unit and total value of the product on two widow
displays one for the user and one for the customer
Label printing of the chosen articles and their weight and price
Redirecting the information to PC, cash registers
Reports for the weighed goods
Sound signals
4. Technical Data
4.1. General data for scales from series ETS
1. Dimensions: 350 х 300 х 130 mm
2. Shipping weight: 12 kg
3. Display: graphic LCD 240x64, displaying weight,price per unit, total price, information about the
commodity
4. Printer – direct thermal print, width 75mm, print speed 50mm/sec
5. Classified Accuracy According to the Bulgarian State Standard EN 45501:2001
6. Error Limitation according to the Bulgaria State Standard EN 45501:2001
7. Number of check divisions: n = 3000
8. Working Conditions
- Power Supply - AC adapter ~ 220 V / ~ 24 V / 2,5A
- Maximum Power Consumption 60W
- Operating Temperature: -10 °C to +40 °C
- Air Humidity: 20 % to 80 %
9. Metal Platter:
- Size 350 х 310 mm
III
Electronic Scales –models ETS хх L1, L2, B1, B2, S1, S2
5
4.2. Meteorological Specifications
Type
ETS xx-x
Manufacturer
“Elicom electronic” Ltd , Bulgaria
Classified Accuracy III
Maximal Load 3 kg ≤ Max ≤ 30 kg
Minimal Load 0,020 kg ≤ Min ≤ 0,200 kg
Value of the Real and Check Division 0,001 kg ≤ e ≤ 0,010 kg
Number of Check Divisions n ≤ 3000 for every partial measuring interval
Range of TARE
-Max1 – for dual range
-Мах - for single range
Power Supply АС/DС adapter 220V AC/24V DC/ 3A
Number of Measuring Intervals 1 or 2
Operating Temperature -10 ºС to 40 ºС
5. Operating Instruction
1. Open the box and take out its contents:
- Electronic Scale
- Display Window
- Display Colum
- AC adapter
- User’s Manual
2. Pass the Display Window cable through the metal Display Colum (tube).
3. Connect the Display window cable with the cable of the scale.
4. Insert the Display Colum (tube) into the display bracket in the back of the scale. Screw the Display column
with the 2 assembly screws.
5. Fasten the Display Window to the Display Colum with the 2 assembly screws.
6. Place the scale onto horizontal surface (table). Level the scale by using the 4 adjustable legs at the bottom
of the scale. Turn the legs clockwise or counterclockwise so the bubble of the leveling gauge is inside the
indicated circle which is located under the metal platter in the left side of the scale.
7. Plug the scale AC adapter into a power outlet.
8. Turn On the scale using the ON/OFF switch located on the bottom left side of the scale. After the scale is
turned on, an automatic self-check is started. Wait 10 minutes before you start using the scale. Turning the
scale off is done by the same ON/OFF switch.
9. DO NOT place the scale on the following locations:
- Locations with quick changing temperature
- Locations on direct sun light
- Dusty places and location with high humidity
- Locations with direct path of oscillating fans, ventilation systems or vibrations
10. DO NOT leave loads on the platter for long periods of time
11. DO NOT place the scale near high magnetic fields or utilities generating electromagnetic filed
12. Keep the scale from spilling liquids because they can damage the electronics inside the scale
13. Avoid strong hits or shakes of the scale
Owner’s Manual
6
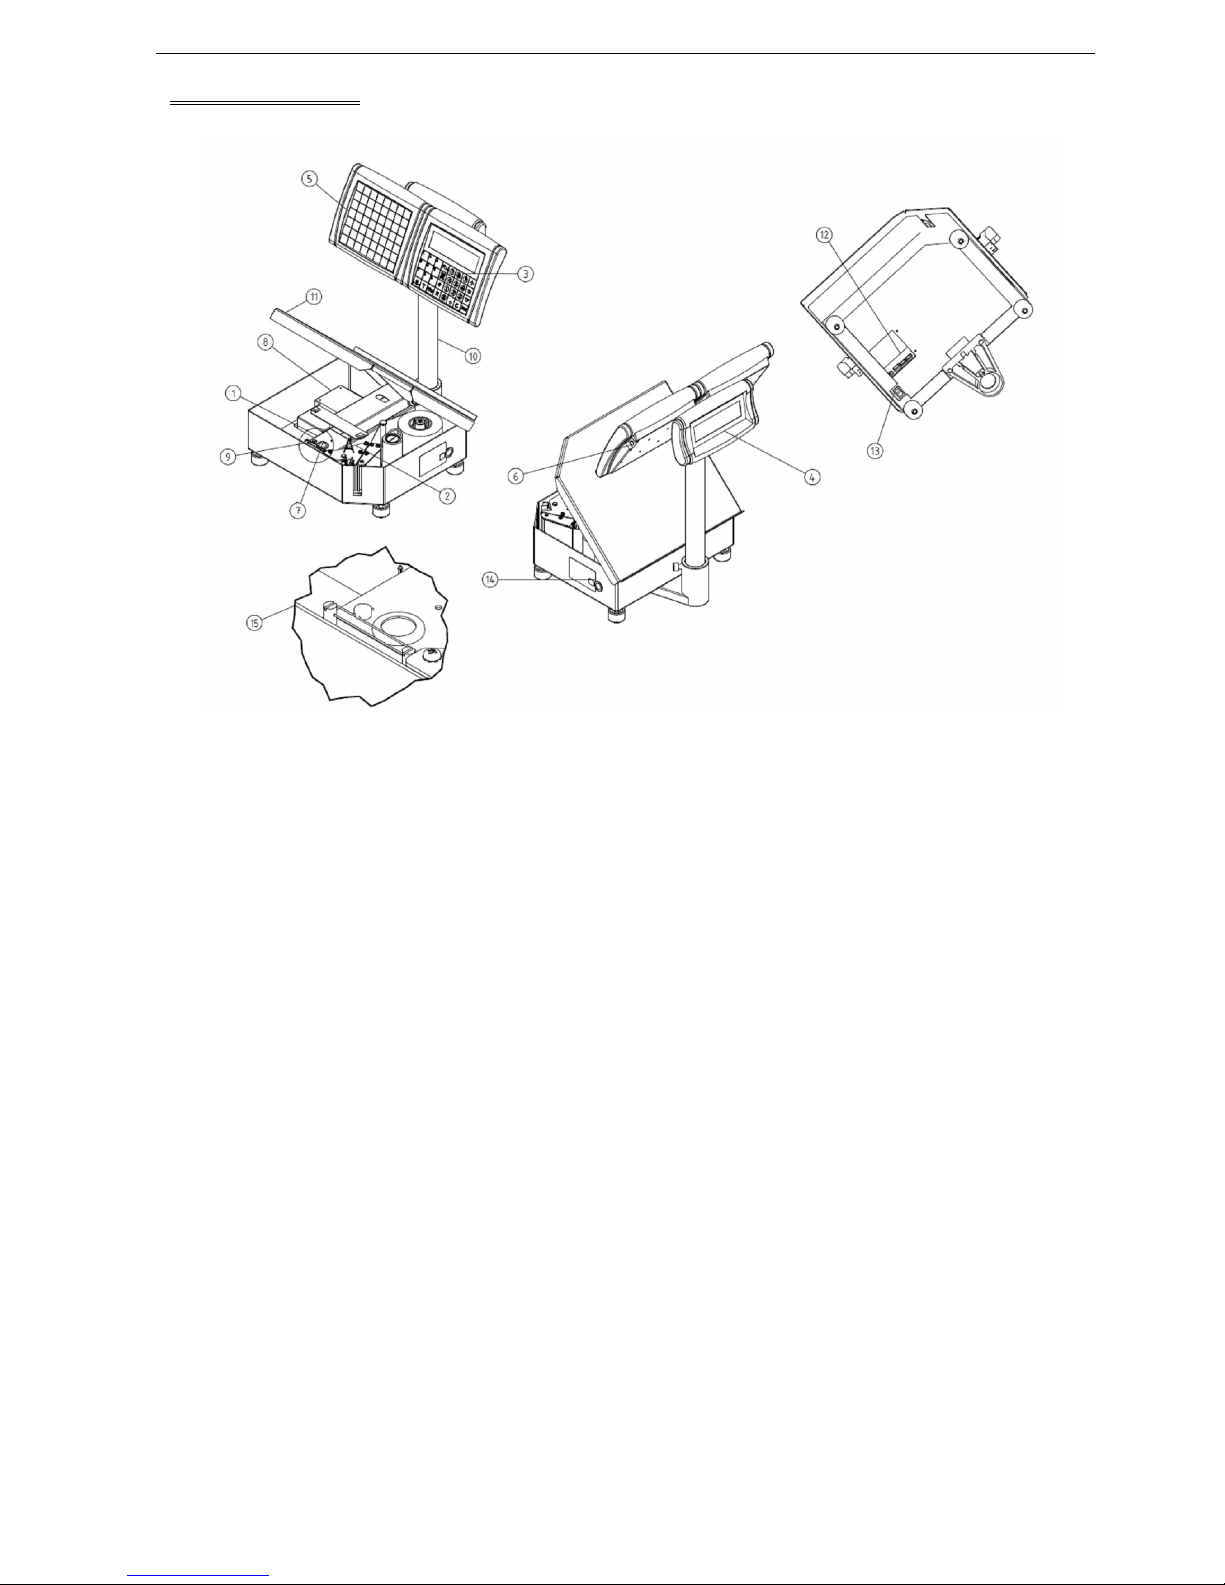
6. Scale Overview
6.1 Overview
6.2. Description
1. Measuring block
2. Barcode Label Printer:
Printer type: direct thermal print
Automatic unstuck of the label and winding of the main tape
мах width of the label: 56mm ,203 dpi
print speed: 75mm/sec
5 build in barcode print types: EAN13, EAN8, UPCA и др.
3. Main keyboard with User Display Window
a. Display:
Graphical LCD, 240x60, backlight
Displaying information:
Name of the commodity
Weight: 5 digits
Unit Price: 5 digits
Total Price: 6 digits
b. Keyboard: 32 keys, 9 keys for direct choice of PLU
4. Clients Display Window – Fig.8.1
Graphical LCD, 240x60, backlight
Displaying information:
Name of the commodity
Weight: 5 digits
Unit Price: 5 digits
Total Price: 6 digit
5. Keyboard with 56 buttons for direct choice of articles
6. Connector for additional devices: barcode scanner, PC keyboard
7. Leveling gauge
8. Collecting interface module
9. Lead seal screws
10. Display column (tube)
11. Metal platter
12. Power supply jack, interface connectors RS232, Ethernet
13. Power switch ON/OFF
14. Serial number plate, Metrological specifications, Control stamps
15. Method of lead sealing

Electronic Scales –models ETS хх L1, L2, B1, B2, S1, S2
7
6.3. Stamps and Lead Sealing
The scales from series ETS have ЕО certificate for approved type and correspond with the “Regulation for the
main requirements and the measure of quality for scales with non-automatic operation”
According to the requirements in appendix 8 from the Regulation, on the left side of the scales is placed a label
with serial number, meteorological characteristics of the scale, CE logo for correspondence and the year of
which the valuation for correspondence was done. The scales are also stamped with lead seal against
unauthorized opening and disassemble.
7. Preparing For Use
7.1. Turn On the Power Source
Before installing the scale is necessary to inspect the device for any mechanical damages that may have
occurred during the transportation. After the inspection is done the scale is ready for installation. Place the scale
onto horizontal surface. Level the scale by using the 4 adjustable legs at the bottom of the scale. Turn the legs
clockwise or counterclockwise so the bubble of the leveling gauge is inside the indicated circle which is located
under the metal platter in the left side of the scale.
After the scale is properly placed for work, normal working conditions should be provided:
Operating Temperature - 10 °C to +40 °C
Air Humidity 20 % to 80 %
Power Source 220V
Power Source Frequency 50 Hz
DO NOT plug the AC adapter in any power source different from the 220V/50Hz!!!
Avoid overload of the scale with weights greater that the specified Maximal Load!
Fig. 7.1
ON/OFF switch

Owner’s Manual
8
7.2. Installation of the Label Roll
1. Open the top cover (platter)
2. Place the label roll
3. Unlock the thermal print head by pushing the button (Fig.7.2)
4. Feed the paper tape through the slot between the 2 shafts and the thermal print head
5. Fix the caring paper tape to the rolling mechanism with the Press Bracket (Fig.7.2)
6. Close the thermal print head by pushing it against till you hear “CLICK”
7. Press the PRN key with the top cover open. The printer should eject one or more blank labels
Fig. 7.2
7.3. Connecting External PC Keyboard
Connect the keyboard to the connector labeled „KEYB” located on the side of the Main Display block
Fig. 7.3
7.4. Connecting External Devices
On Fig.7.1 are shown all interface connectors of the ETS scale.
1. The scale can be connected via Ethernet Connection to network SWITCH or HUB by its standard 8 pin
RJ45 connector labeled on Fig.7.1 as “Ethernet”
2. The connectors RS232 are labeled on Fig.7.1 as „RS232” and are designed as:
a. RS1 – 4 pin RJ11 is situated in the middle next to the 8 pin RJ45 – designed for direct RS232
connection with PС. The speed of the transfer is setup in SERVICE MODE.
b. RS2 - 4 pin RJ11 is situated on the far left end – designed for loop connection with scales
type EVL or EEP.
3. Unlocking the
thermal print head
5. Press bracket
 Loading...