

ELEY 1042, 1041 Assembly/installation Instructions
Free Standing Hose Reel
Model 1042
Assembly & Installation Instructions
Page 2
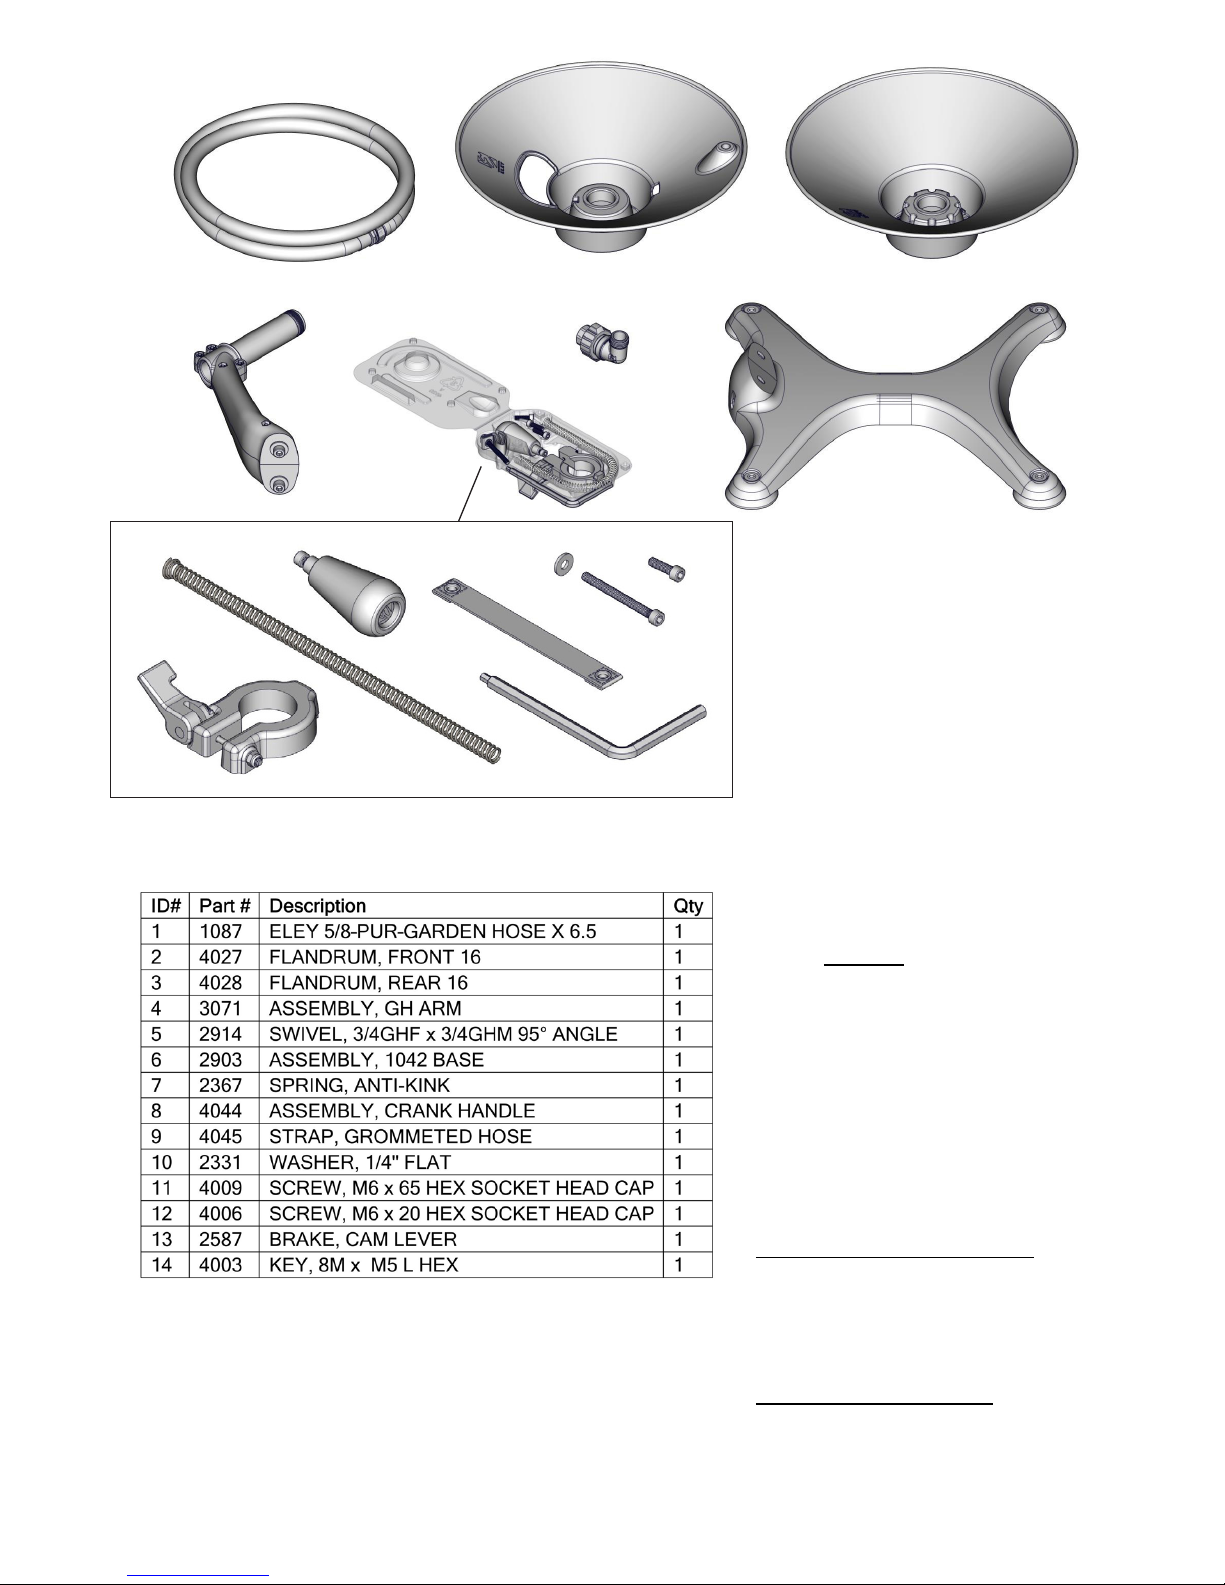
CONTENTS
1
2
3
4
5
6
7
8
9
10
11
12
13
14
Reel Specications
Max. Temperature....140° F (60° C)
Max. Pressure.............150 PSI (10 Bar)
Please DO NOT contact or return this
item to the retailer. Seek assistance
directly from ELEY Corporaon using
the informaon below.
PHONE:
1-866-523-2363 (toll free)
MON- FRI, 8am to 5pm (CST)
E-MAIL:
support@eleyhosereels.com
MON- FRI, 8am to 5pm (CST)
ONLINE:
The SUPPORT secon on our website
www.eleyhosereels.com is available
24/7/365 and contains assembly
videos, repair instrucons and FAQ’s.
QUESTIONS?
PROBLEMS?
Page 3
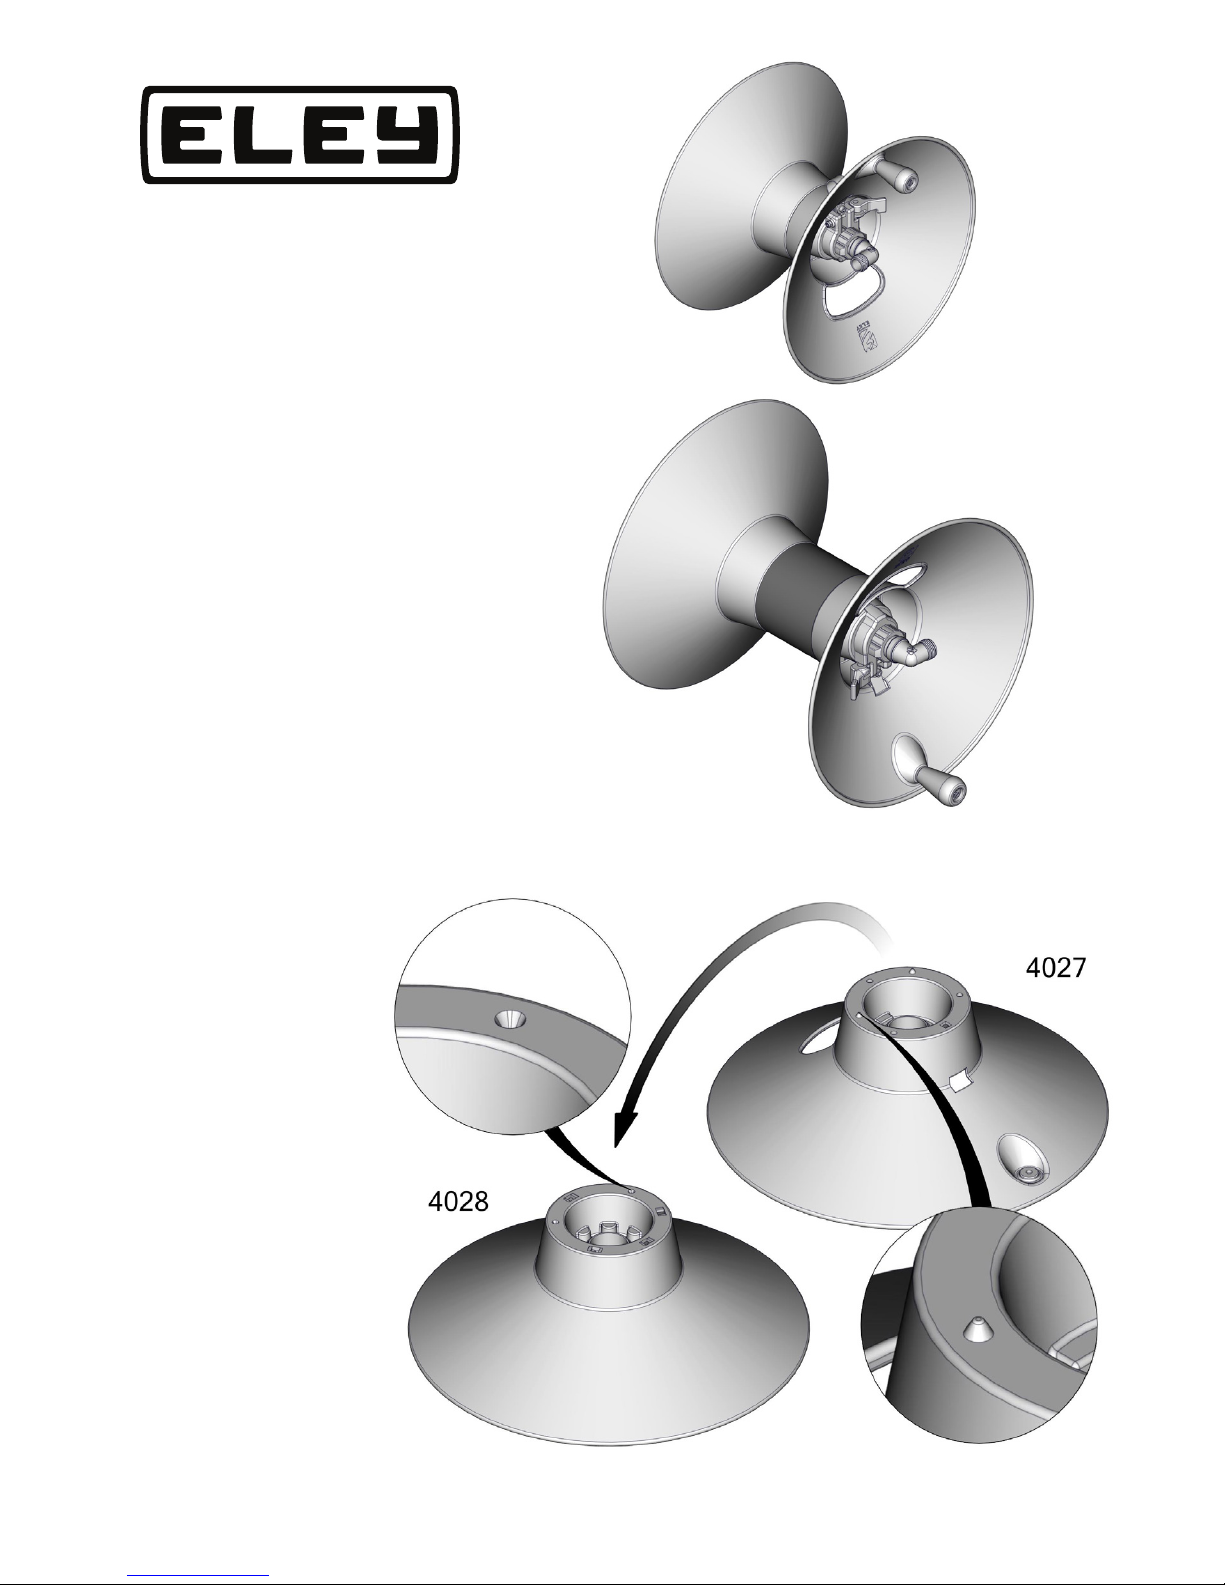
STEP 1
Place the Front
Flange (4027) on
top of the Back
Flange (4028).
Pins and sockets on
the anges will aid in
proper alignment.
IMPORTANT!
If you purchased an Extra-Capacity Kit
(Item# 1044) with your reel, please refer
to the assembly instructions included
with the Extra-Capacity Kit now. When
you have completed those instructions,
then proceed to Step 3 of this manual.
Standard Reel
Upgraded with
Extra-Capacity Kit
Page 4
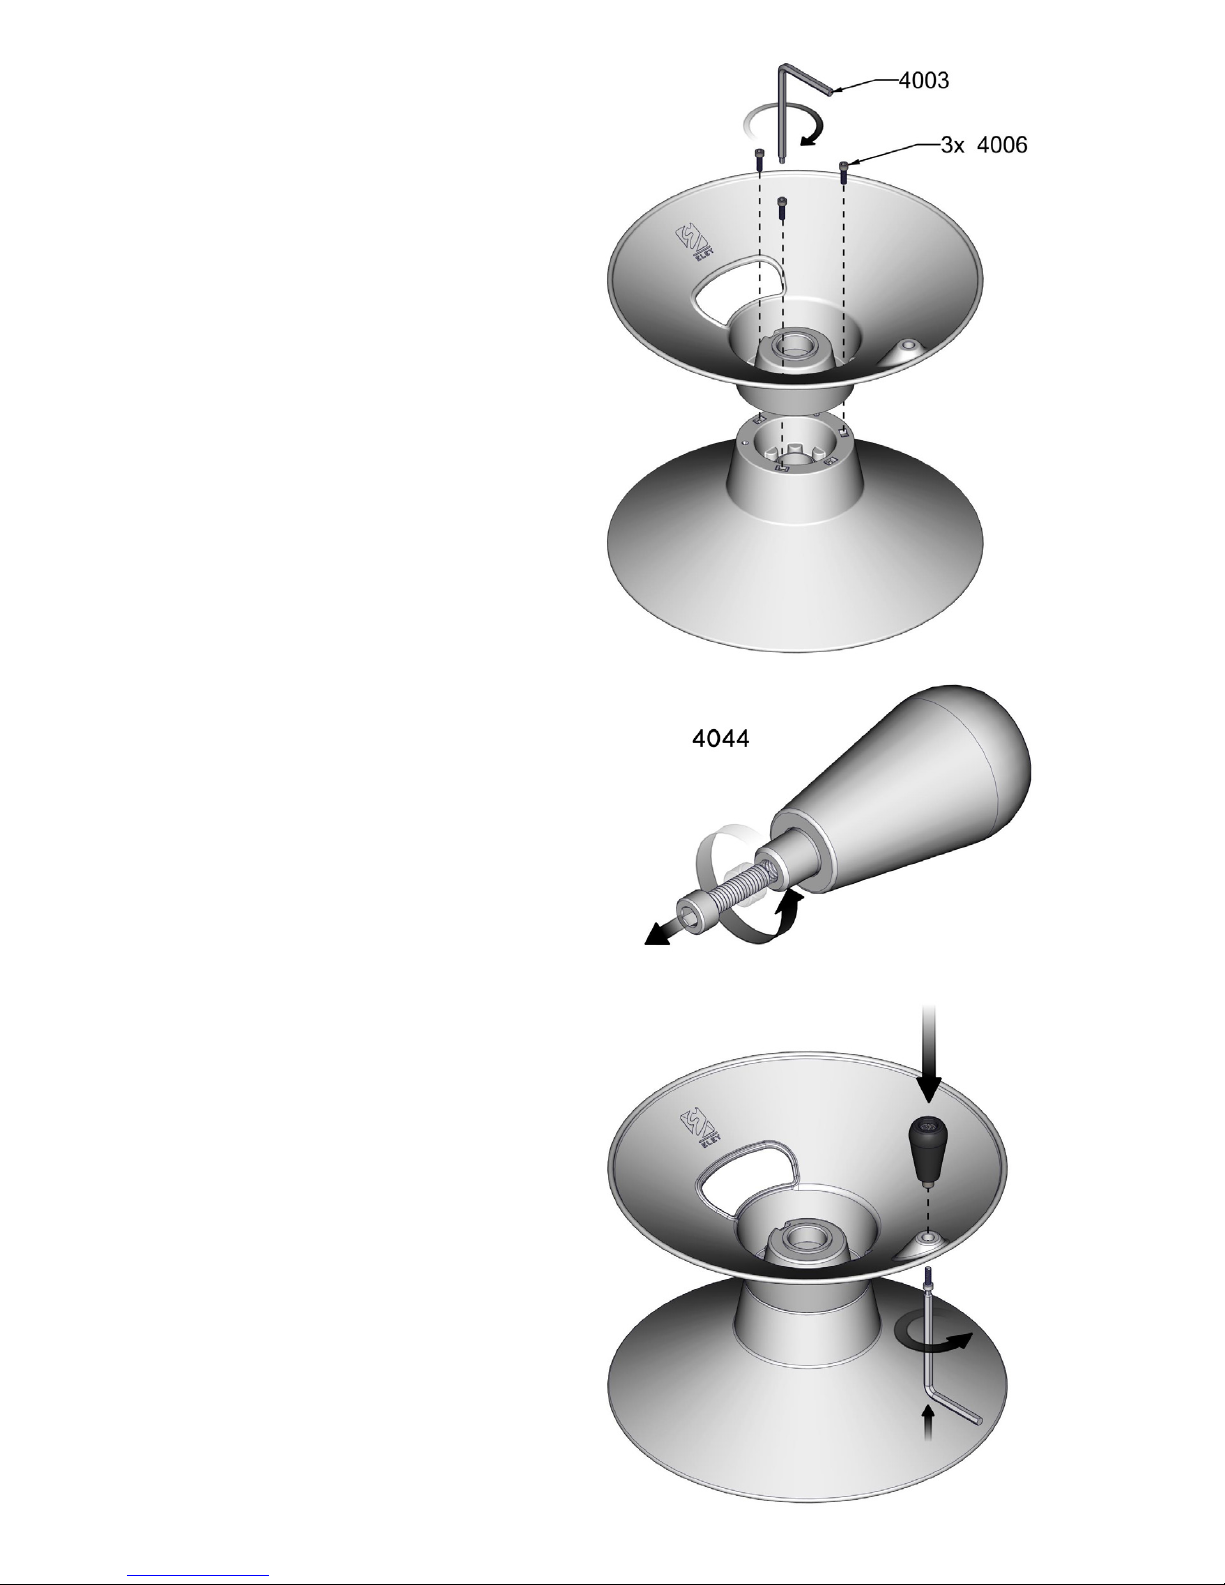
STEP 2
Fasten anges together using the three
M6 x 20 Hex Socket Head Cap Screws
(4006) and the small hex end of the
Hex Key Wrench (4003).
STEP 3
Remove the screw from the
Handle Assembly (2654).
STEP 4
Install Handle Assembly
onto the Front Flange.
 Loading...