

UMTH12 - Rev.1 - 17/04/2018
CRYO T-SHOCK U
S E R M A N U A L
1

2
UMTH12 - Rev.1 - 17/04/2018
CRYO T-SHOCK U
S E R M A N U A L
index
1.0 INTRODUCTION . . . . . . . . . . . . . . . . . . . . . . . . . . . . . . . . . . . . . . . . . . . . . .3
2
.0

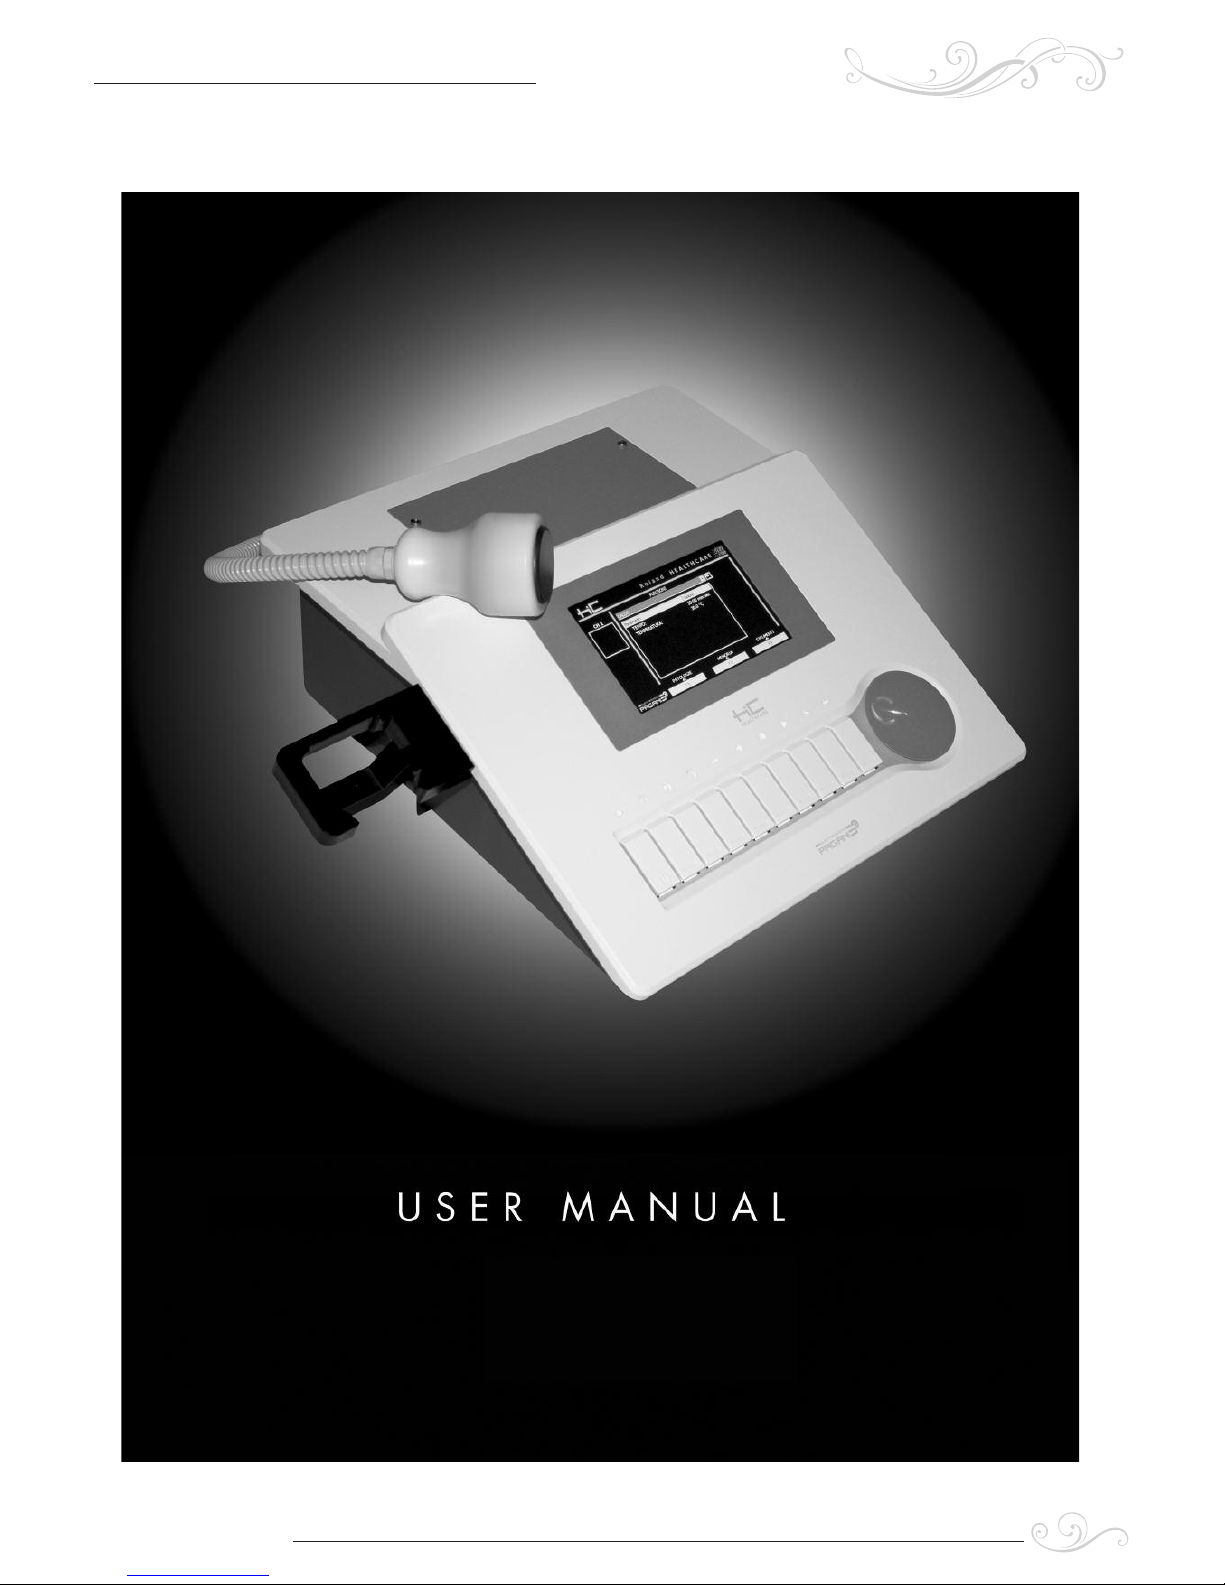
1.0 INTRODUCTION
This manual gives all the necessary information for a proper use of HC CRYO
T
SHOCK unit, APHRODITE. This device is not a medical device HC CRYO T-SHOCK
offers a practical innovation; is an almost exclusive product.
On year 2014, HC CRYO T-SHOCK has been awarded by an international jury at
the Gicare Exhibition in Paris for the most innovative device both in terms of technology and application. Cold and heat exchanges are obtained thanks to a solid state
system, which allows us to use a quite compact device. There is no use of gas, ice,
liquid. Temperatures and fast exchange between heat and cold make HC CRYO
TSHOCK a special device.
HC CRYO T-SHOCK is provided with wide coloured graphic display. A very simple
software is allowing the operators to use some pre-set programs and also to operate
manually by setting all parameters. Software is using Windows CE platform for granting versatility and up-grading. Free memory allows the most expert operators to store
several customised programs. All functions are automatically checked while the main
switch is turned on and are continuously monitored during application.
2.0 INSTALLATION
Before apply the unit to your Clients, we suggest to switch the unit on and carry out
a safety test and a working test, in order to check the integrity of the unit after the carriage.
Read the all this manual and all further annexed information.
WARNING!
Any application must be carried out on CONSCIOUS people. Furthermore, pay always
attention to the client’s feeling during application. Adjust temperature with reference to the
feedback of each person.
UMTH12 - Rev.1 - 17/04/2018
CRYO T-SHOCK U
S E R M A N U A L
3
4
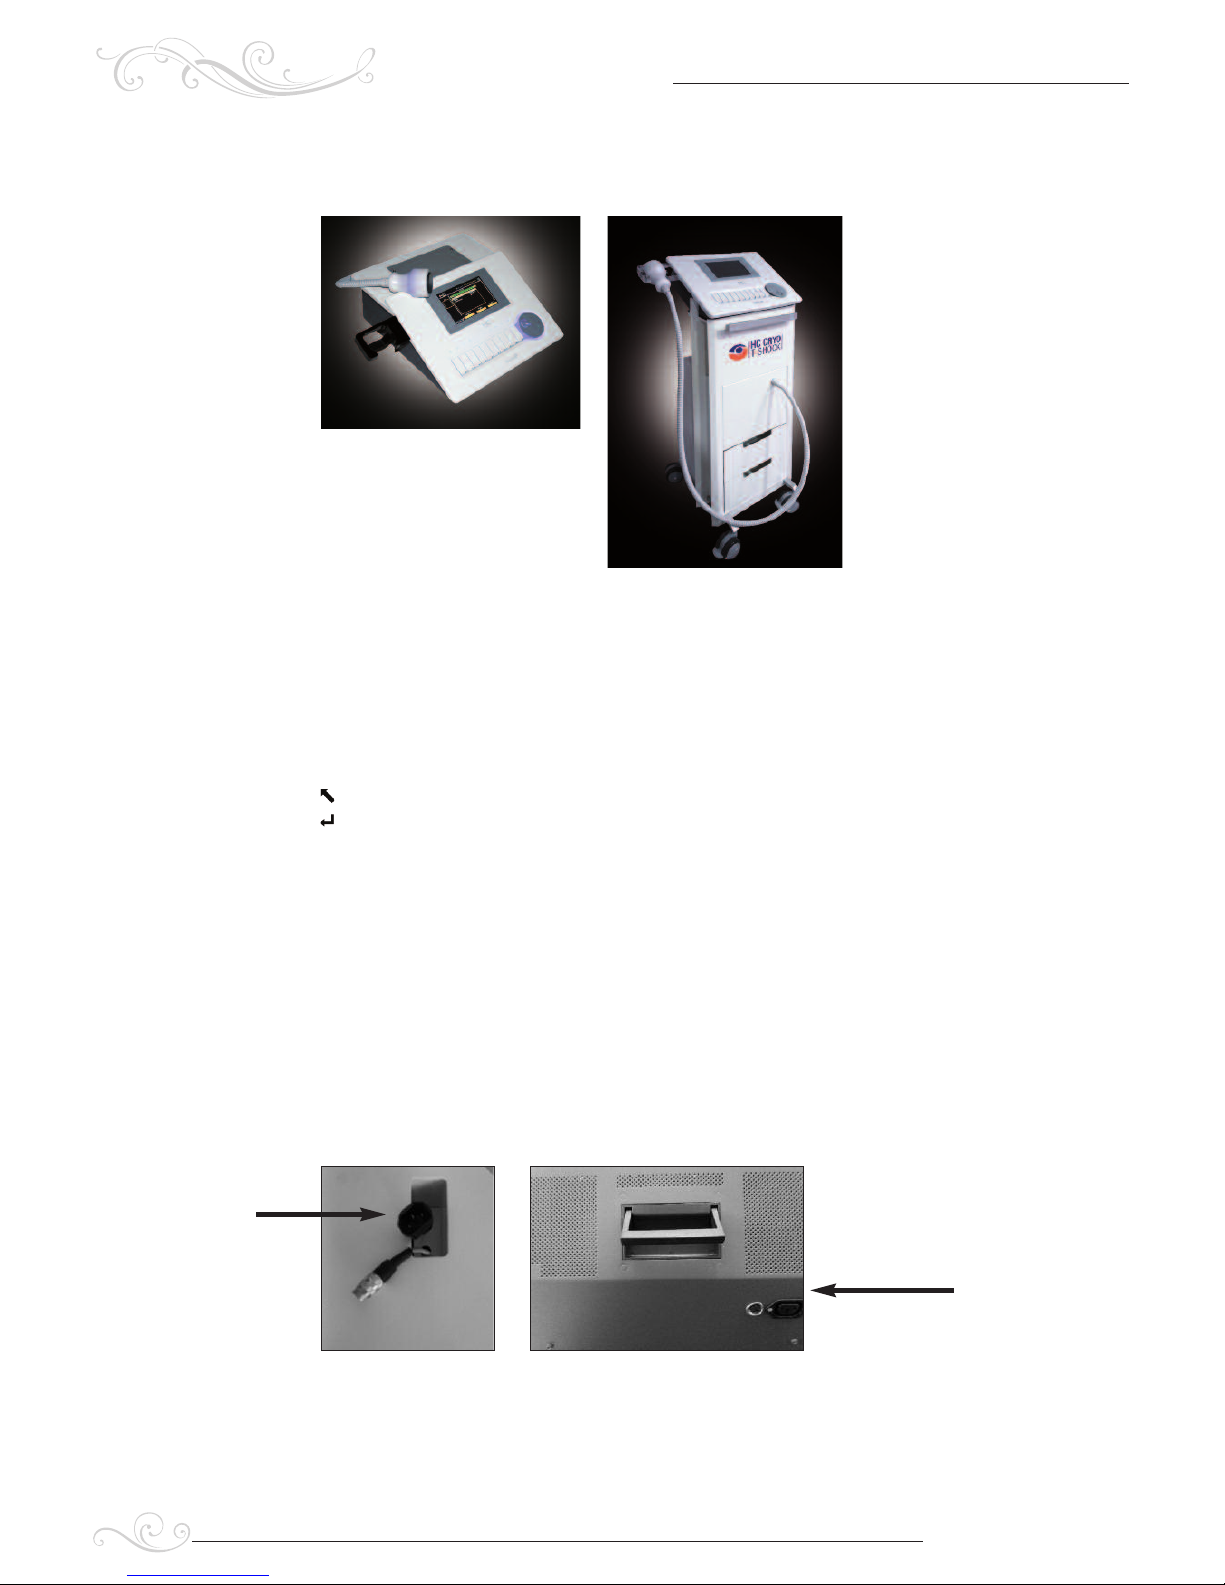
3.0 CONTROL PANEL
Desktop device
Device on trolley
The keyboard is provided with 10 keys with the following features:
F1; F2; F3 function keys: each of them depends on the display description
–: decreases the value of parameter selected
+: increase the value of parameter selected
n : stop the treatment
d :start the treatment
: go back to the previous screen
: select the parameter
4.0 HOW TO PLACE THE DESK-TOP DEVICE OVER THE
TROLLEY
(for wheeled frame device only) Before switching the unit on and before operating
with the unit, be care to install the desk-top device over the trolley following here
below mentioned procedure.
4.1. Electronic and electrically connections
Over the top of the trolley you’ll see two different leads. The first one with black plug
is granting electrical connection between the trolley and desk-top device.
Take the above mentioned plug with care and connect it to the relevant socket placed
on the bottom of the desk-top device (see pictures below).
BLACK PLUG BLACK SOCKET
UMTH12 - Rev.1 - 17/04/2018
CRYO T-SHOCK U
S E R M A N U A L
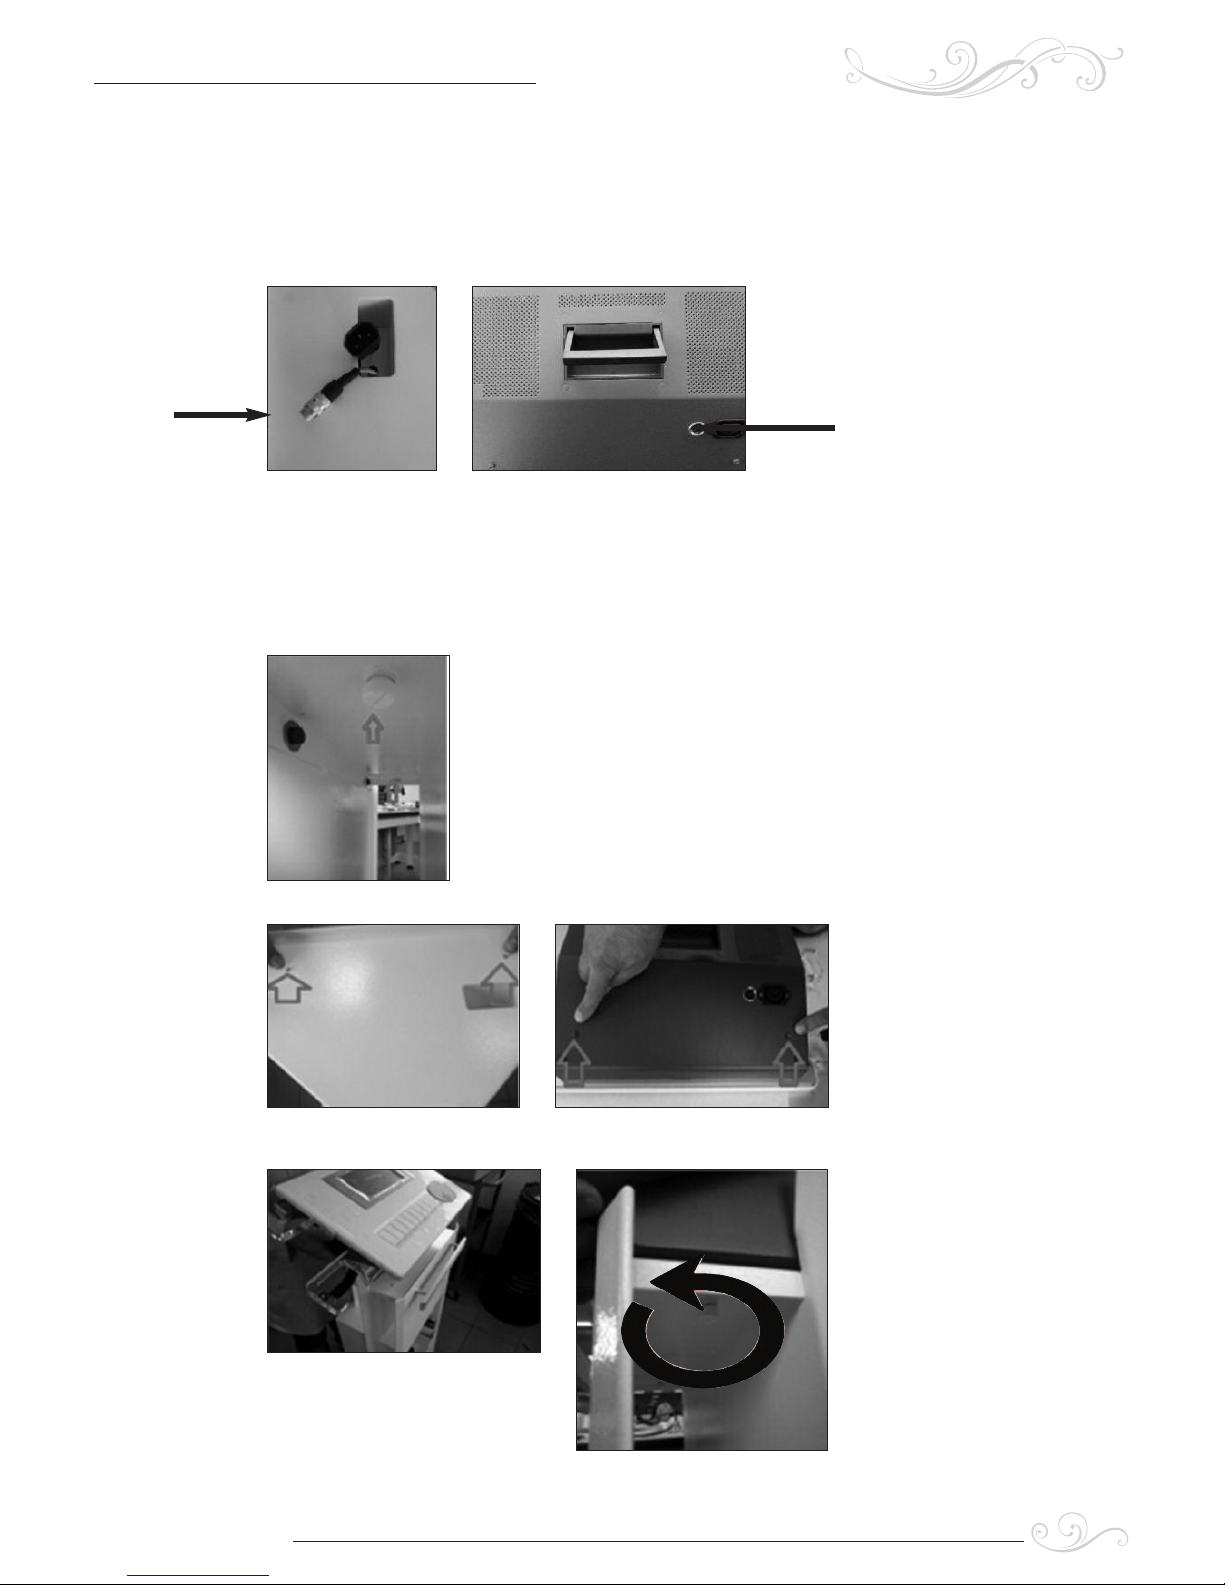
The second one is granting electronic signals between desk-top device and trolley.
T
ake the metal connector coming from the top of the trolley and push it into the socket
placed on the bottom of the desk-top device, by screwing it for assuring it.
Male connector Female connector on the bottom
on the top of trolley of the desk-top device
4.2 Fixing desk-top device to the trolley
While electrical end electronic connections have been done, we suggest to fix desktop device to the trolley for making system more stable.
Two screws are available under the top of the trolley. While
the desk-top device has been placed over the trolley, use the
two screws for fixing it.
On the bottom side of desk-top device, two holes are available
After this, push the screw to the
console and with your hand
rotate like as shown into the picture.
UMTH12 - Rev.1 - 17/04/2018
CRYO T-SHOCK U
S E R M A N U A L
5
6
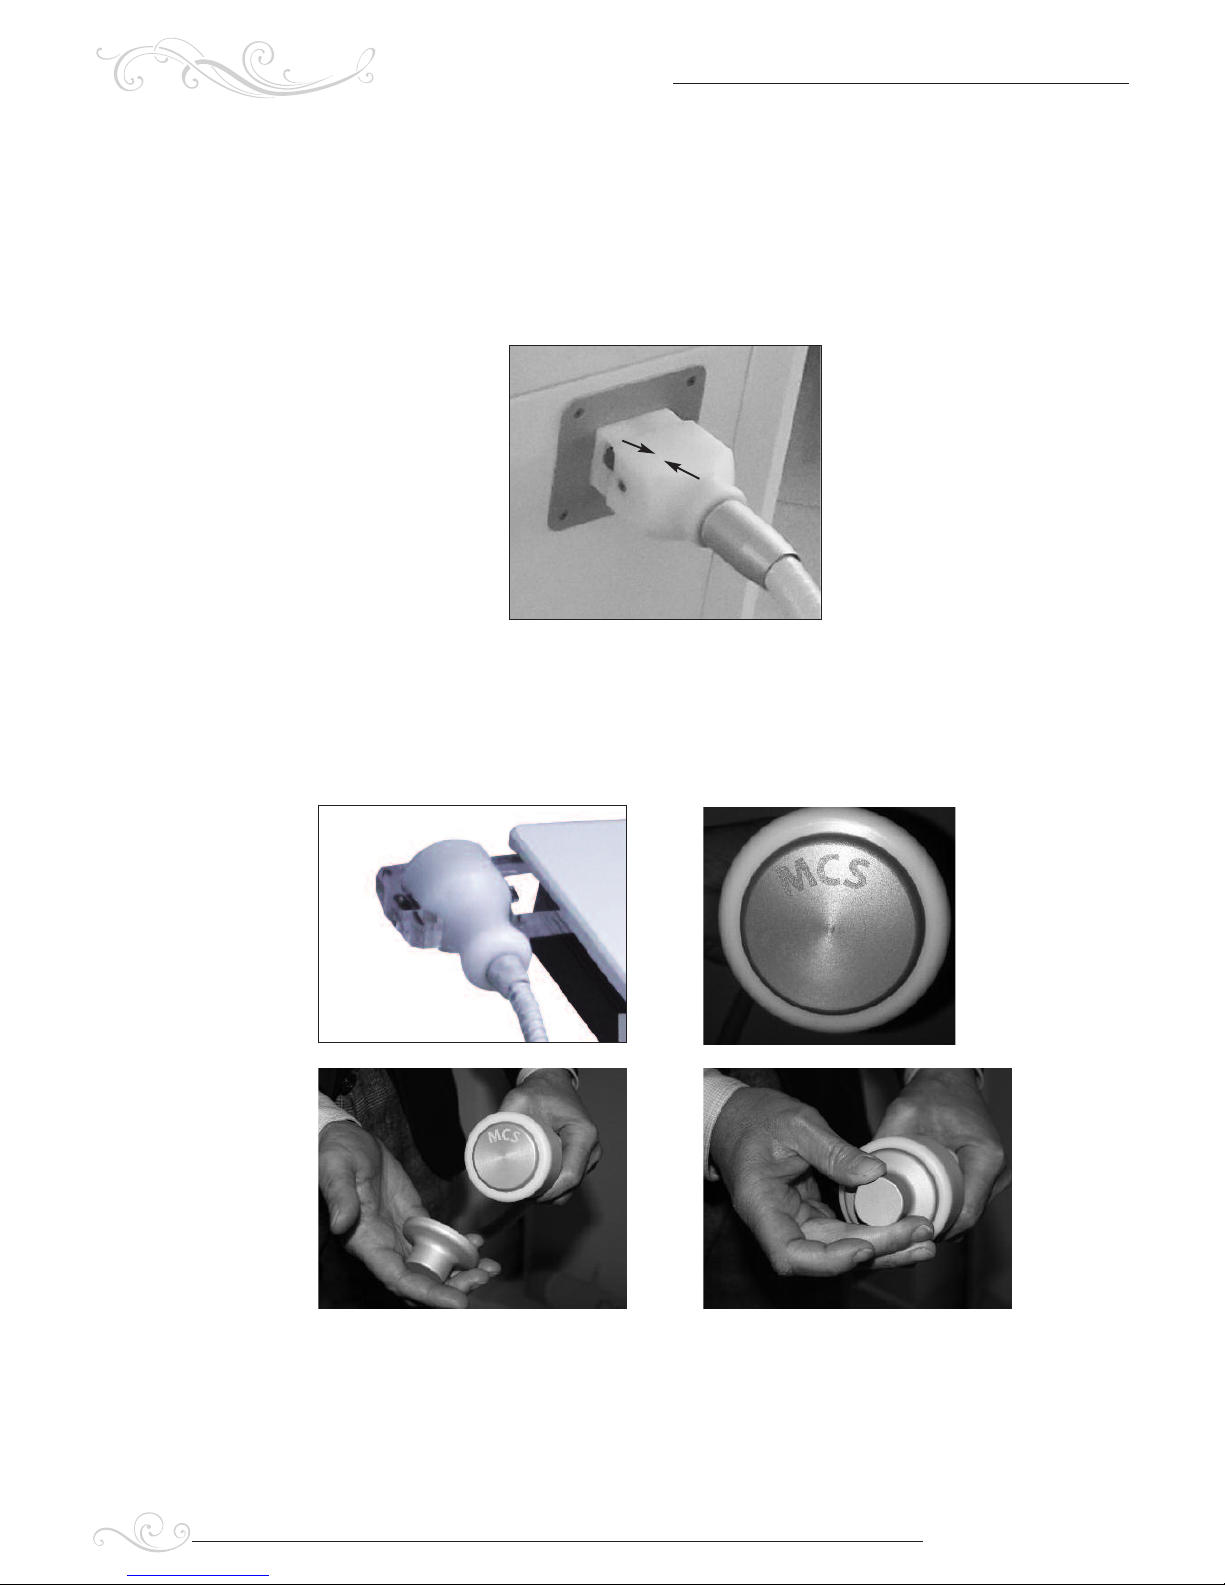
5.0 HOW TO USE THE HAND-PIECE
The hand-piece is provided with a separable connector. Be careful to push the connector by respecting placement of the plug. Over the connector the proper way is
shown.
Remove the connector by pressing the metal parts placed over the sides of the conn
ector itself.
Place the hand-piece in a stable position over the relevant holder on the left side of
the unit.
Holder Magnetic applicator
Adapter for treatment Face and small parts of the body
UMTH12 - Rev.1 - 17/04/2018
CRYO T-SHOCK U
S E R M A N U A L
FEMALE
MALE
Standard surface of hand-piece is around 50 mm large and it should be useful for
a
lmost all applications. For being more focused and precise over small parts of the
various parts of the body (face, small joints, etc.), it is also available a special adapter
granting a surface of around 30 mm large.
It’s easy to place the adapter over the standard hand-piece, due to the special
Magnetic Coupling System made by PAGANI.
I
n fact, place the standard head close to the back side of the adapter and Magnetic
Coupling System shall grant perfect coupling.
While you have to remove the adapter, just take it away by externally moving the
adapter.
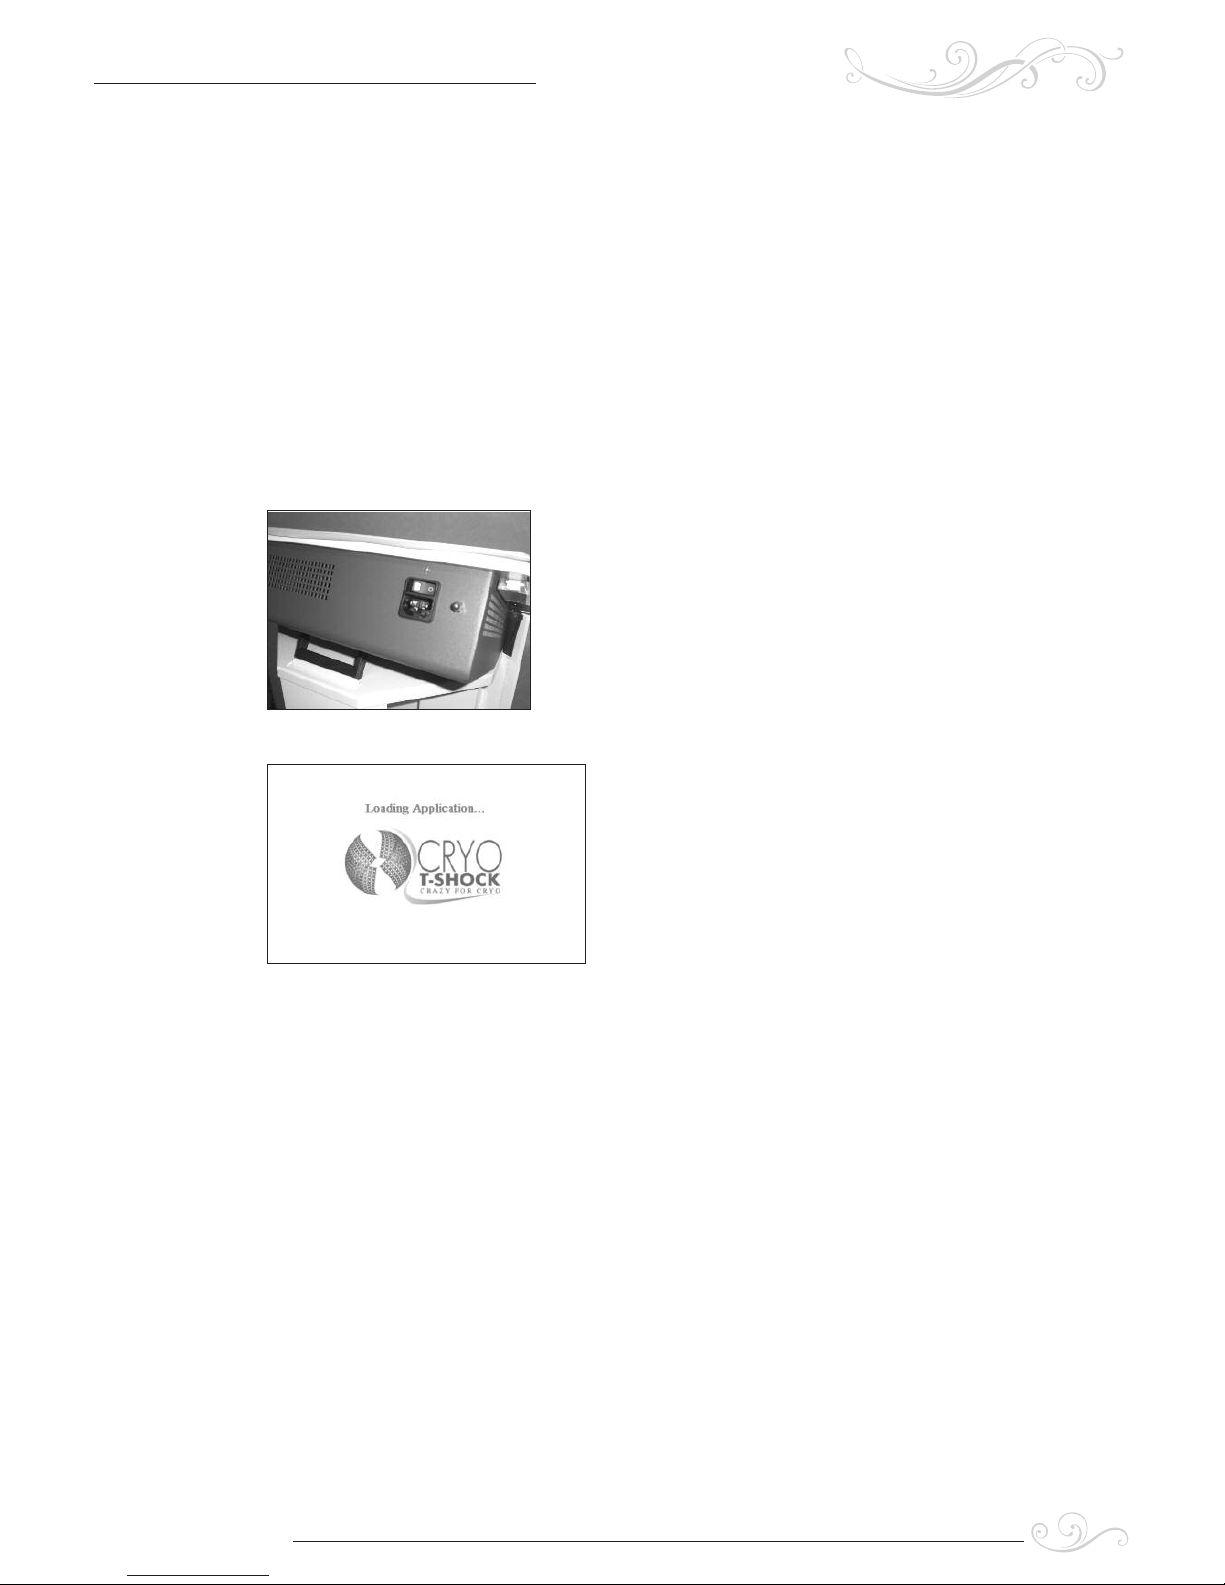
6.0 SWITCHING ON
Press on/off switch placed on the back of the unit
Wait few seconds to load the software
UMTH12 - Rev.1 - 17/04/2018
CRYO T-SHOCK U
S E R M A N U A L
7
8
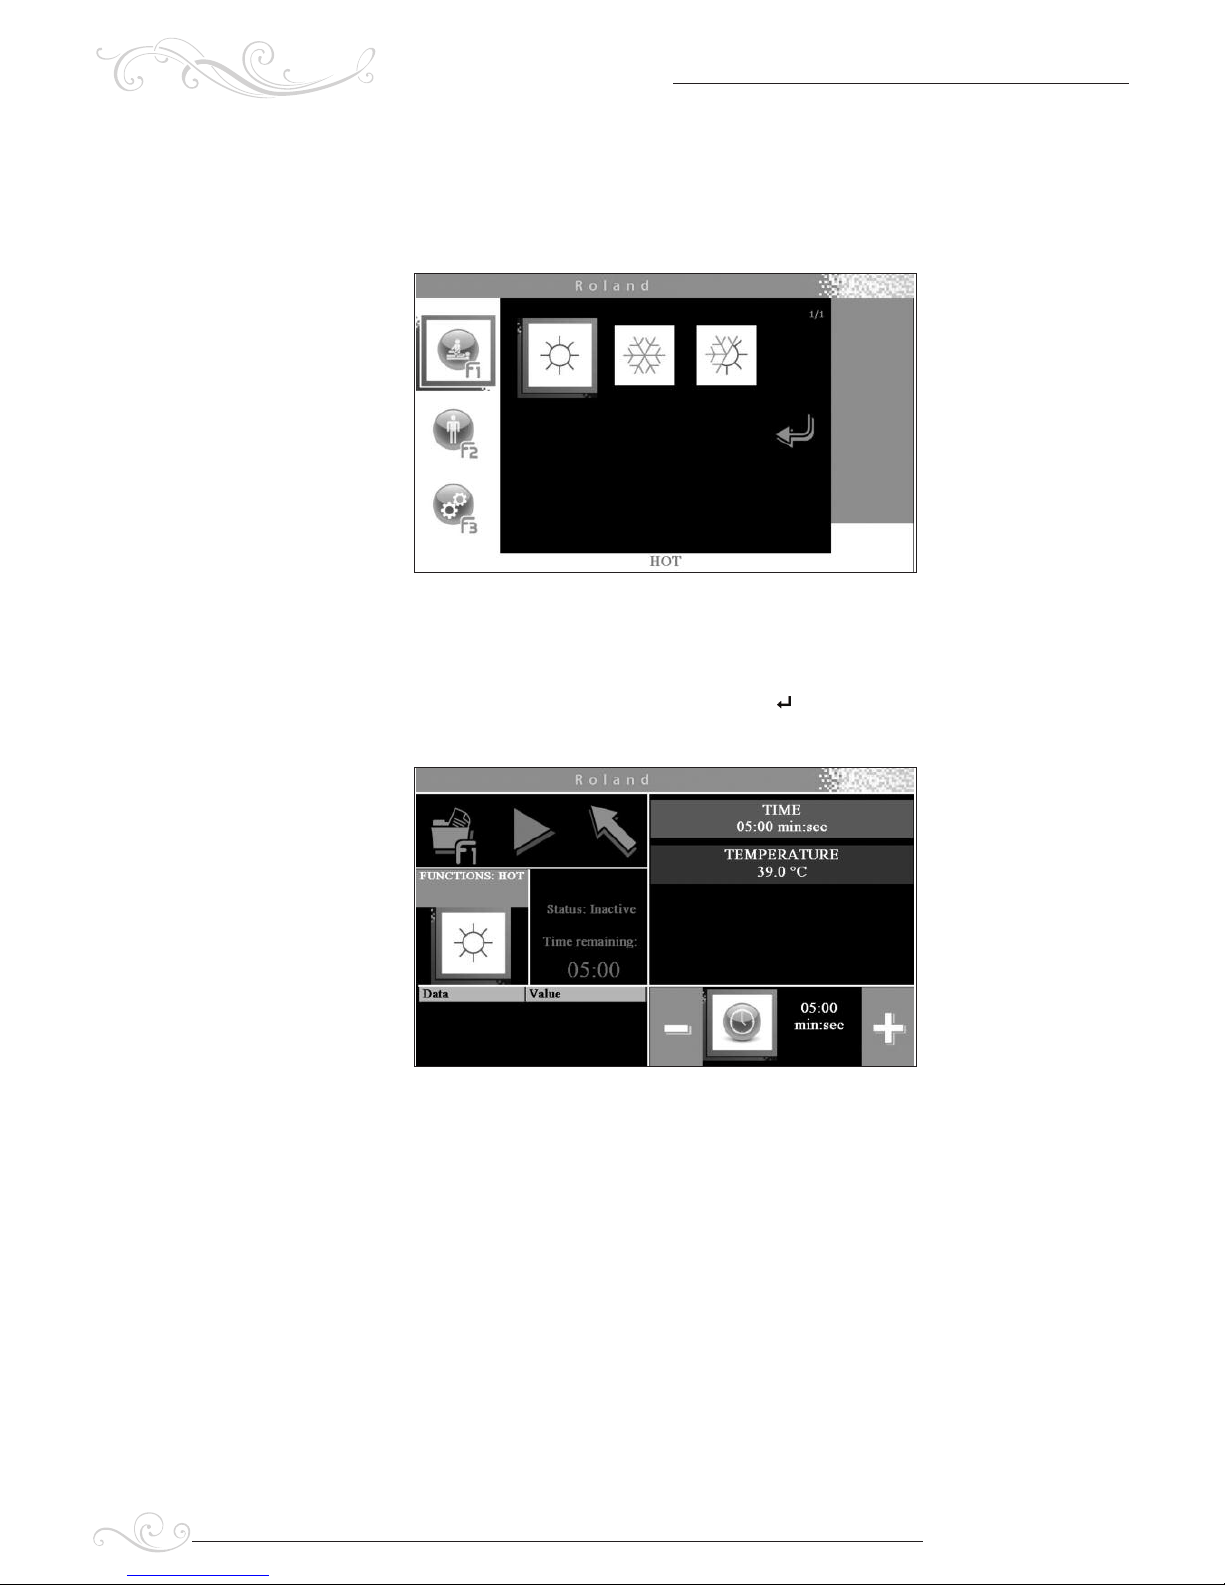
7.0 MAIN MENU
Display shall show the following screen:
8.0 MANUAL SETTING
From main menu use + and - keys or move the knob for scrolling available functions.
After selecting the desired function confirm by pressing
This screen shall appear.
If you wish to start the program without changing the parameters, press the button ►
otherwise turn the knob and you can select the desired parameter. After selecting the
parameter, press - and + keys respectively for decreasing it or increasing it.
That done, press ► to start the treatment.
The following screen shall appear:
UMTH12 - Rev.1 - 17/04/2018
CRYO T-SHOCK U
S E R M A N U A L
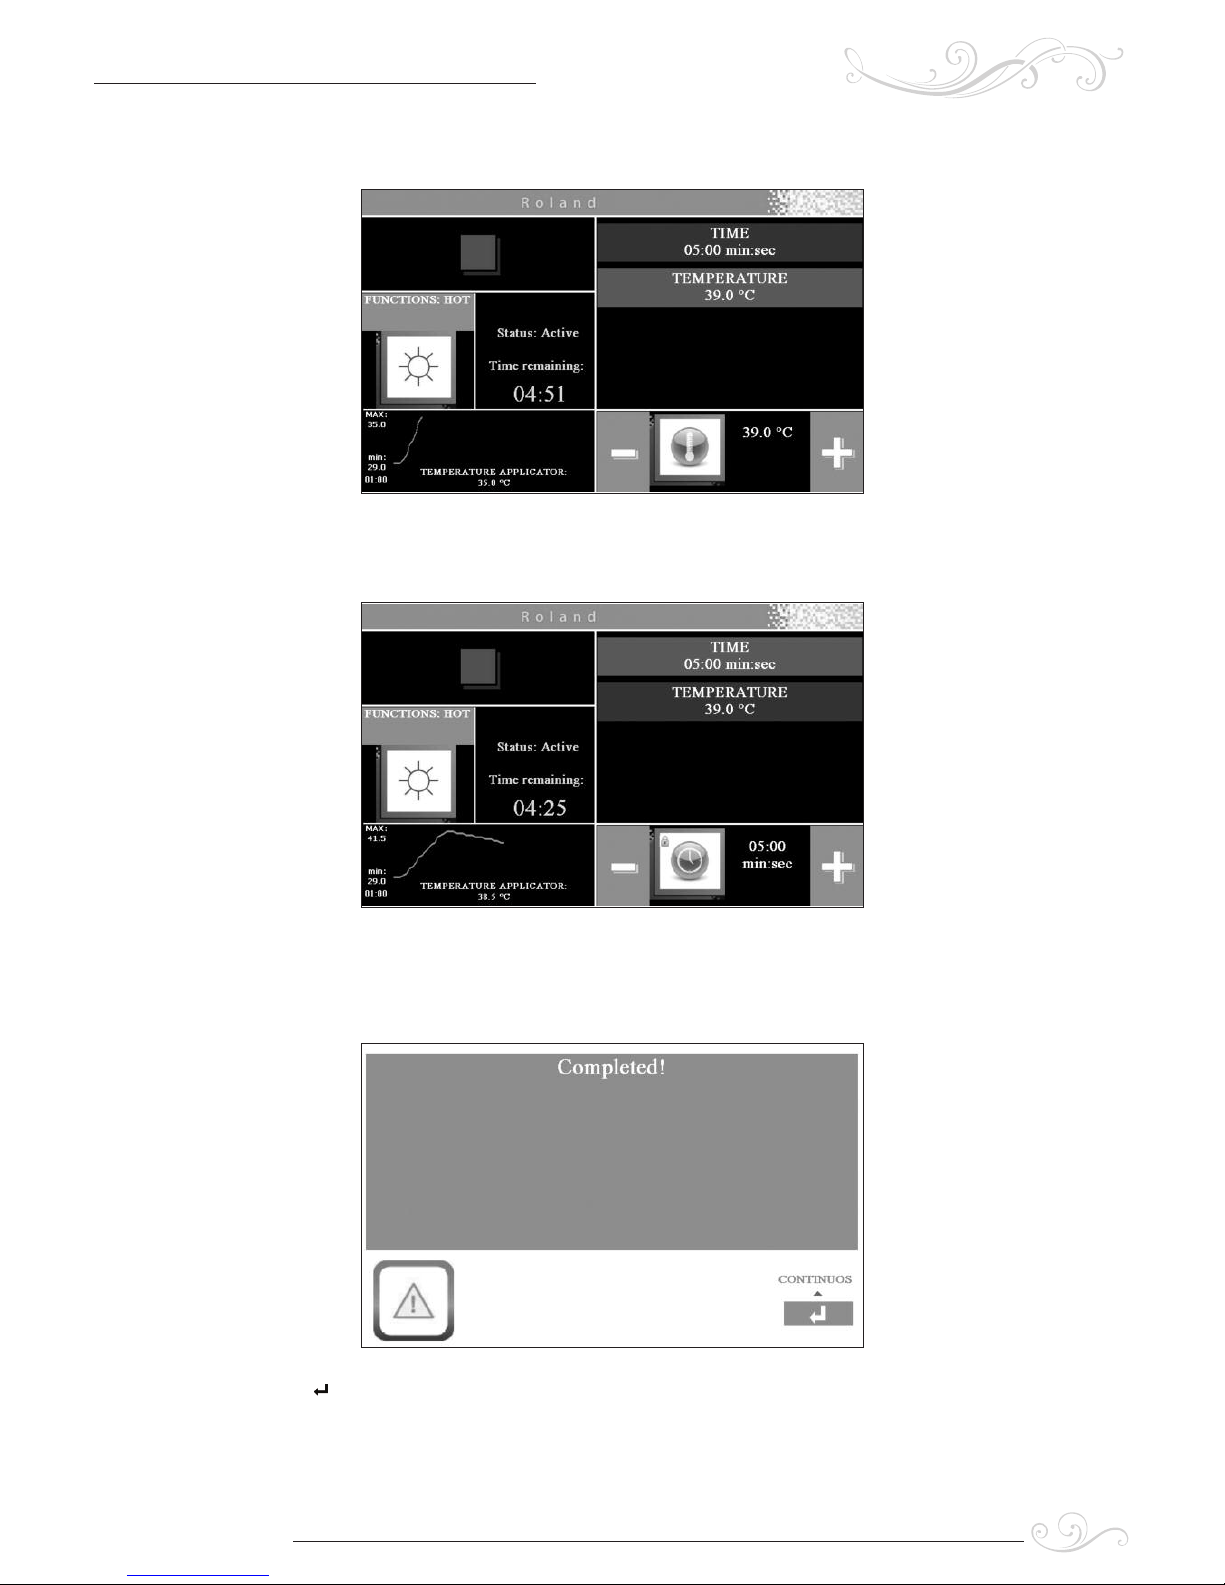
The parameters marked by using the padlock symbol on the left, as pictured below,
can not be modified
At the end of application time, the device shall generate an acoustic signal and the
following message may appear.
Press to exit.
UMTH12 - Rev.1 - 17/04/2018
CRYO T-SHOCK U
S E R M A N U A L
9
10
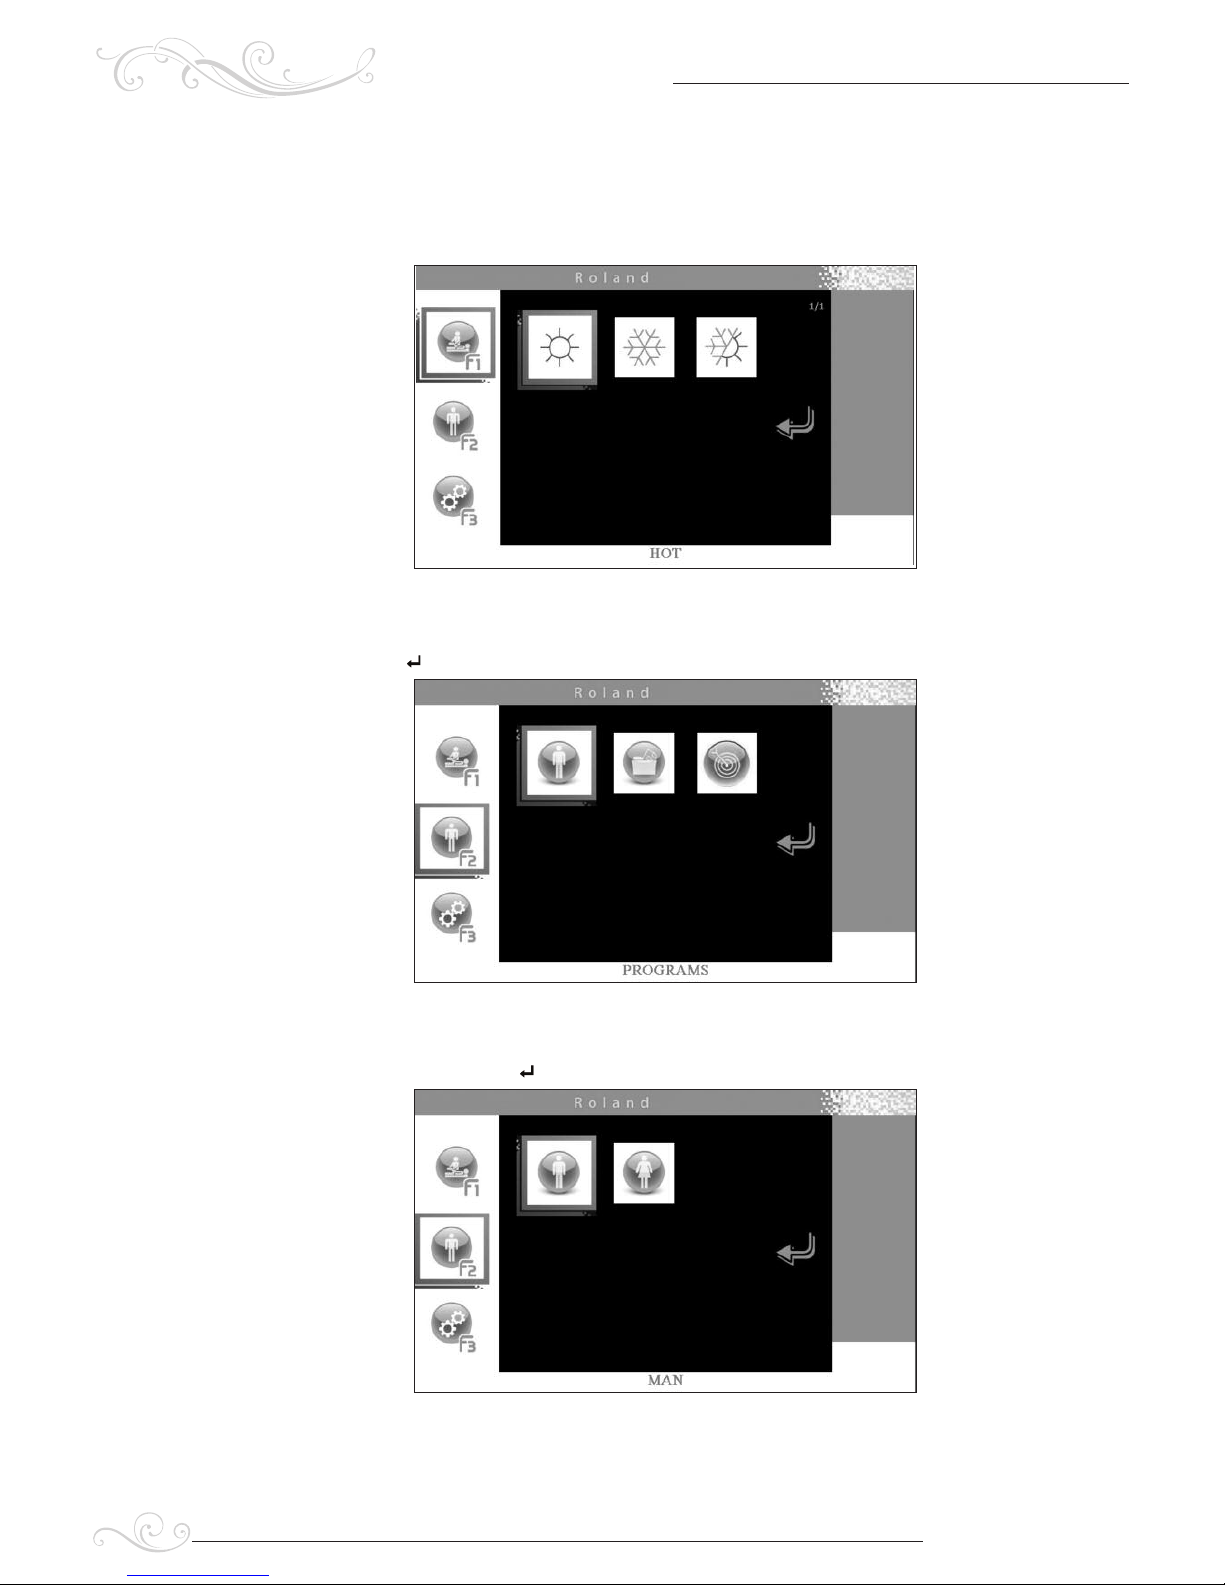
8.1 USING A PRE-SET PROGRAM
From main menu press F2.
The following screen shall appear with two icons, the first one concerning programs
and the second one concerning memories. Use the knob for selecting "programs"
and press .
Select between MAN or WOMAN for a more appropriate application.
Use the knob and press
UMTH12 - Rev.1 - 17/04/2018
CRYO T-SHOCK U
S E R M A N U A L
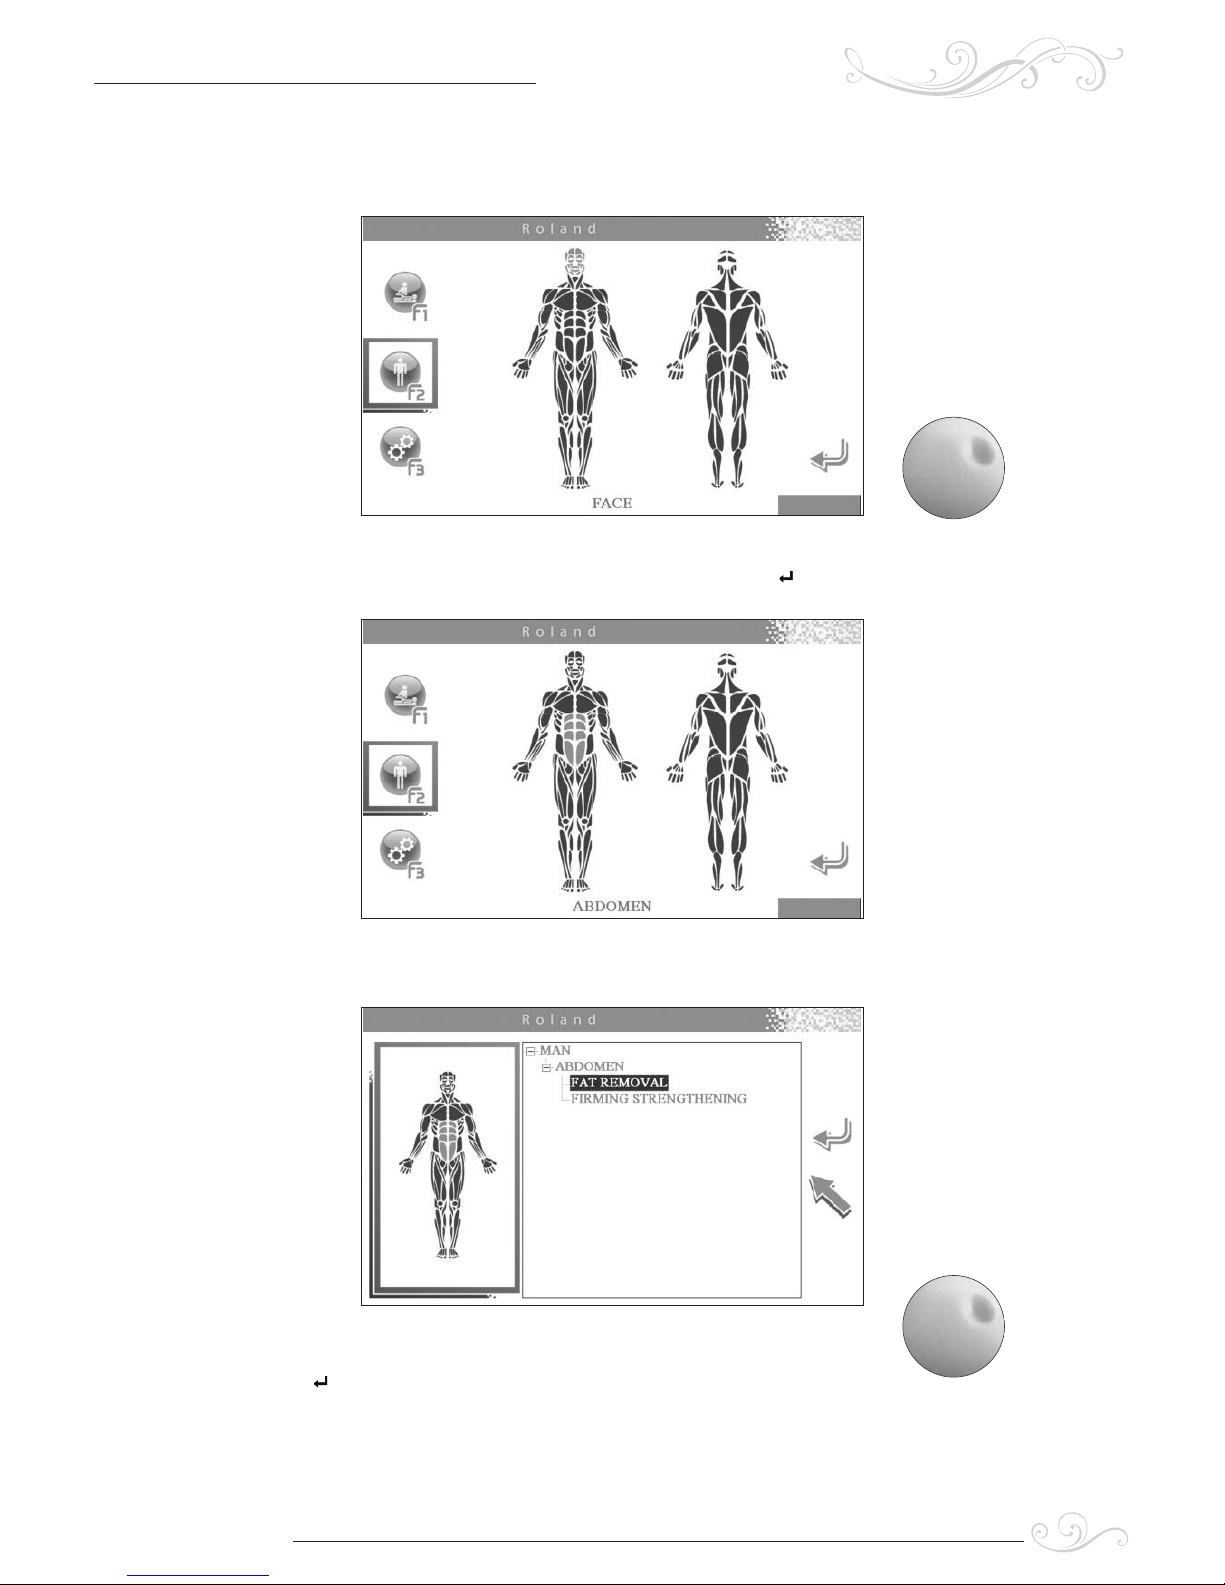
When you select man, the following screen shall appear
To select the desired part of the body turn the knob and press
The following screen appear:
Turn the knob to scroll the list of programs.
Press to select the desired condition.
If in that district were not present programs, you’ll see the following message on the
screen:
UMTH12 - Rev.1 - 17/04/2018
CRYO T-SHOCK U
S E R M A N U A L
11
Knob

12
Should you select a program made by more than one single step, the following screen
shall appear:
To have a look at the parameters for a special step it’s necessary to scroll through the
step by pressing F1 and F2 keys. If you wish to change the value of a parameter select
the parameter by turning the knob and then press the - and + buttons.
Press d for starting application.
The following screen shall appear:
UMTH12 - Rev.1 - 17/04/2018
CRYO T-SHOCK U
S E R M A N U A L
The program automatically starts.
F
rom the previous screen, you can change the parameters by turning the knob and
by increasing or decreasing the value using the + or - button.
Go back to the previous screen by pressing button
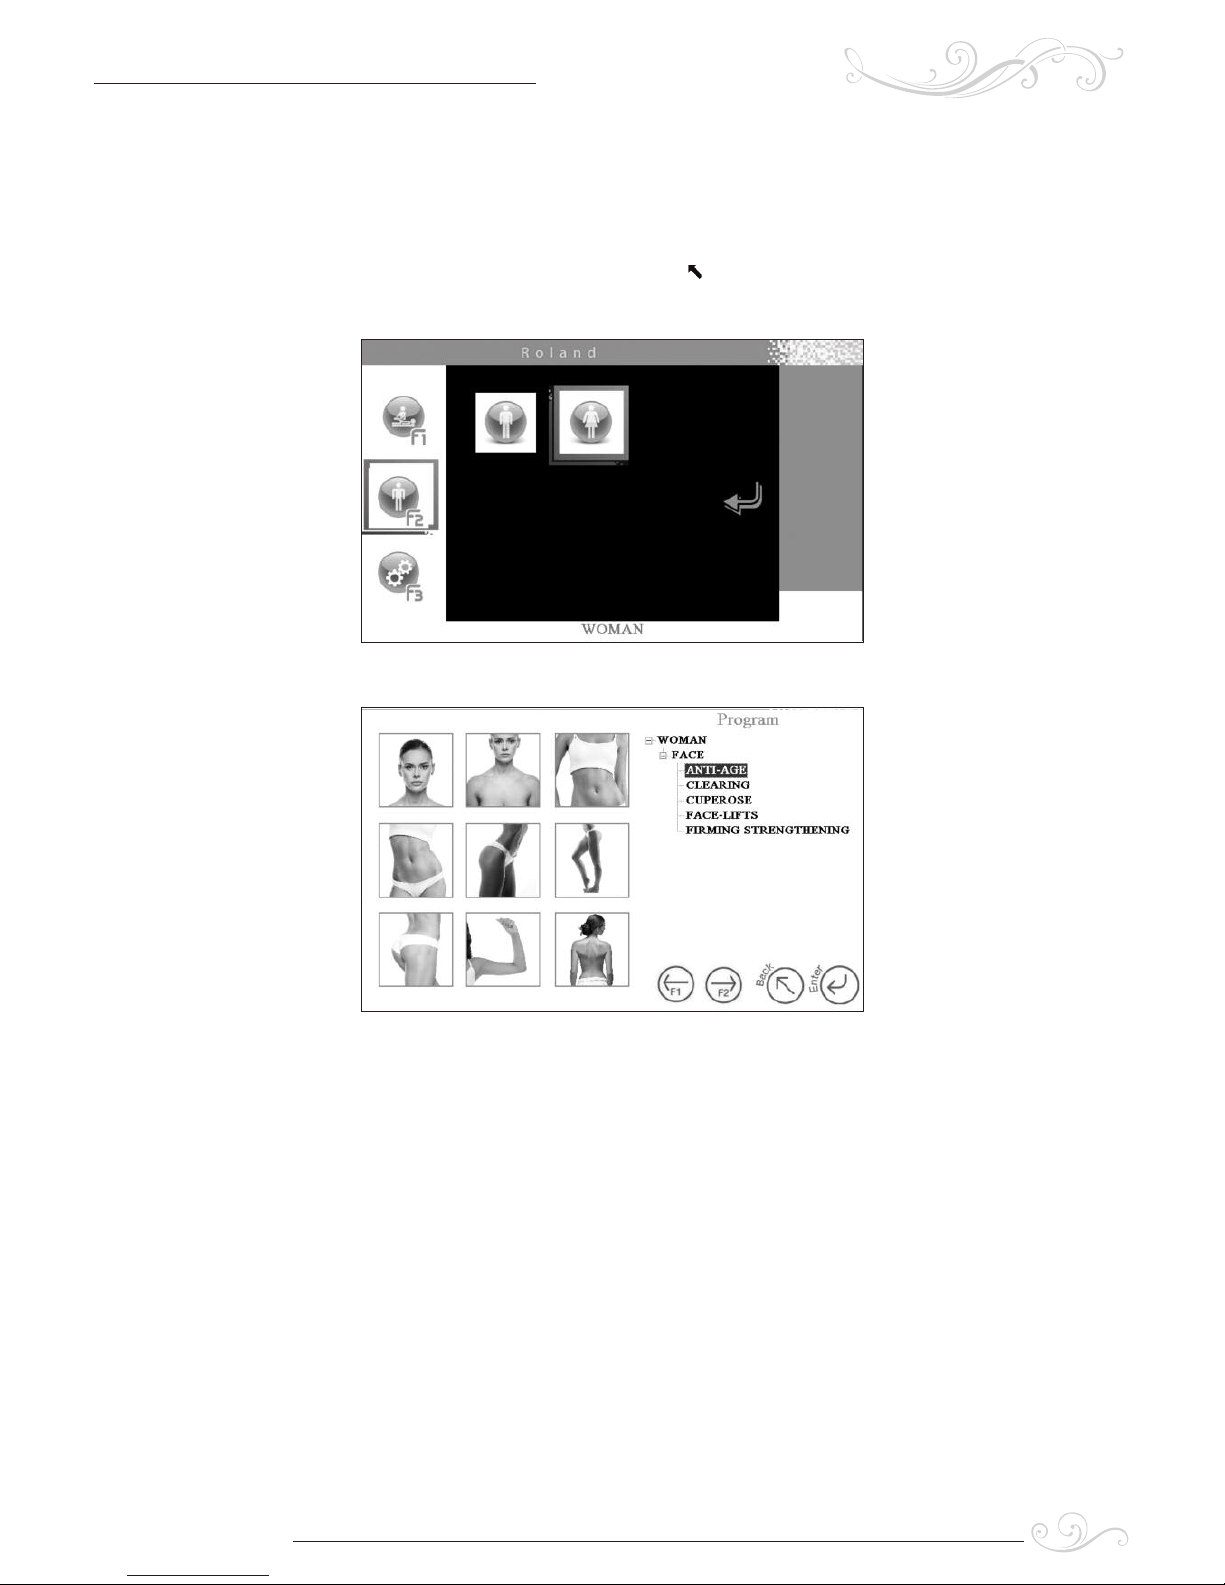
When you select woman:
the following screen shall appear
To select the desired part of body press f2 or f1.
Touching the already selected icon with your fingers enlarges the image
Touching the icon again returns to the previous screen.
From both situations you can turn the knob to scroll the list of programs and press
enter to select the desired condition.
To start the program proceed like shown for man.
UMTH12 - Rev.1 - 17/04/2018
CRYO T-SHOCK U
S E R M A N U A L
13

14
8.2 USING A TARGET
The unit gives the possibility to work both for specific treatments (programs see par.
9.1) and for objectives (target see par. 9.2).
In the first case the unit suggest setting depending from the part of body selected in
t
he second one suggest the setting depending from your desired objectives.
For example the unit suggest the setting for fat removal depending from target small,
medium, large or extra large.
To use the target modality from main menu press F2
The following screen shall appear with 3 icons, the first one concerning programs, the
second one concerning memories and third one concerning target.
Use the knob for selecting target and press ↵
the following screen shall appear
UMTH12 - Rev.1 - 17/04/2018
CRYO T-SHOCK U
S E R M A N U A L

Use the knob for selecting part of body and press ↵
The following screen shall appear
Use the knob for selecting the target and press ↵
Then proceed like shown in the pre-set program
8.3 MEMORY ENTERING
Select the desired function , change the parameter and then press F1 to save.
The following screen shall appear:
UMTH12 - Rev.1 - 17/04/2018
CRYO T-SHOCK U
S E R M A N U A L
15

16
Choose each word by turning the knob; to select adjacent space pressing key + and
-. Press to save and to esc without saving.
8.4 MEMORY LOADING
Your customised programs could be selected from the memory from main menu.
Press F2
The following screen shall appear:
UMTH12 - Rev.1 - 17/04/2018
CRYO T-SHOCK U
S E R M A N U A L

Use the knob for choosing the second icon "MEMORY" and press , the following
screen appears
If multiple memories are present turn the knob to select the desired one, and press
Proceed as Programs and Functions.
UMTH12 - Rev.1 - 17/04/2018
CRYO T-SHOCK U
S E R M A N U A L
17

8.5 TOUCH SCREEN
Each unit is equipped with touch screen. It is possible use both keyboard and touch
screen by using the standard pen.
In touch mode to select the desired function or parameter you need to touch with a
p
en through the desired icon. At this point it will be possible by touching the + and icons to change the parameters or by touching the icon d start the treatment.
For all other commands, just tap the corresponding icon.
The touch screen is touched only by pen supplied with the device.
Use the touch directly with your fingers may cause the device to malfunction.
8.6 SWITCHING OFF
When the unit stops press the button placed on the back side of the unit for switching
the unit off.
UMTH12 - Rev.1 - 17/04/2018
CRYO T-SHOCK U
S E R M A N U A L
18

UMTH12 - Rev.1 - 17/04/2018
CRYO T-SHOCK U
S E R M A N U A L
19

20
1.0 INTRODUCTION
This is a device based on the technology of Péltier cells, with two components:
●Diathermy, capable of generating heat;
●Transdermal cryo, capable of subtracting heat.
Therefore, HC CRYO T-SHOCK allows to use cryo-therapy alone, or hyperthermia stim
ulation, i.e. thermal shock therapy in which cryogenic treatments are followed by
hyperthermia treatments in a dynamic, sequential and temperature controlled manner.
A special sensor, transmits the target temperature (to be reached) and the instantaneous temperature in real time to show the operator how the therapy is acting on the
client.
Elettronica PAGANI has created the HC CRYO T-SHOCK, and combined two sources
(cryogenic and hyperthermia), as a global and broad-spectrum response to
Compared to the few systems available today on the market, HC CRYO T-SHOCK
allows not only performing Cryo or hypothermia separately, but also and above all
thermal-shock therapy in a dynamic and controlled manner
2.0 AN INNOVATIVE DEVICE FOR A SUCCESFULL APPLICATION
HC CRYO T-SHOCK,
Aphrodite type, is a Compact cryo-therapy and shock diathermy generator for
Wellness and Aesthetics
Cryo hyper stimulates the skin and tissue, greatly speeding up all cellular activities.
Cryo has a proven high efficacy in the aesthetics for slimming and body “sculpting”
The results that Cryo achieves also applies to the skin. It immediately improves appearance by tightening skin and causing a healthy glow.
Multiple sessions result in increased collagen and elastin.
Cryo relaxes facial muscles and larger targeted muscles.
Cryo causes blood vessels and capillaries to expand by up to 400%. This greatly
improves the skins permeability and consequential product absorption ability.
Offering Cryo comes at minimal to no financial risk due to low breakeven requirements.
3.0 MAIN FEATURES
● Universal power supply for 110 and 230 V, 50/60 Hz
● Electric Class 1, Type B
● Power consumption: max. 300 VA
● Cold temperature: max – 18°C
● Hot temperature: max. 41°C
● Manual hand-piece with radiating area of 50 mm large; adapter with Magnetic
Coupling System for reducing radiating area at 29 mm large for facial applications
● Highest performances thanks to real-time temperature control with sensor attesting
skin’s temperature
● Standard accessories: main unit, hand-piece with detachable connector, 29 mm
adapter for treating small parts and doing facial applications, power cord with “shucko” plug, cryo-gel 1 Kg, operating manual
4.0 SPECIAL FEATURES
System with two components: a hyperthermic device capable of generating endogenous heat with consequent sensitive and rapid increase of the local temperature and,
a cryogenic device adjustable up to -18°C, capable of subtracting heat, even in the
deepest layers with a exogenous system. The two components, administered in
sequence according to precise therapeutic protocols, produce a localised and deep
thermal shock effect.
UMTH12 - Rev.1 - 17/04/2018
CRYO T-SHOCK U
S E R M A N U A L

The three effects (hyperthermia, hypothermia and thermal shock) can be modulated in
d
epth and intensity.
● Automatic adjustment (feedback system) of the energy administered in relation to
target temperature
● Use of temperature
● Adjustment of temperature with reference to the feeling of people
●
L
ocalised system
● Cryothermia adjustable by up to -18°C with hand-piece on direct contact
● Effective remedy for muscular relaxing
●
No operating costs
● The hyperthermia stimulation can be operated separately
● The unit doesn’t apply any gas (Freon, Azotum, etc.)
The new CRYO T-SHOCK system allows adjusting the operating temperature of the
applicator from -18°C to 41 °C.
The cold produced by the Peltier cell is applied on the client’s body and a temperature
sensor measures the body temperature viewing it on the display to allow the operator
to immediately control the temperature change on the treated person.
The risk of freezing the treated area is a remote possibility, but there is a risk of an
ice burn if not used correctly.
5.0 HOW TO USE IT
HC CRYO T-SHOCK is the most innovative and versatile device for the treatment of
localised fat, cellulite and “orange skin”, thermo-shock drainage and anti-age treatment.
Thermal energy is one of the easier sources to be applied and it allows a lot of advantages from cold and. HC CRYO T-SHOCK, thanks to its special features, the possibility
to handle the probe, to make controlled massage over different areas, easy operation
modality and software, is a very friendly device which each trained operator could
manage very simple.
5.1 ALL YOU NEED TO KNOW ABOUT CRYO AND CRYOSTIMULATION
CELLULITE REDUCTION WITH CRYO
According to statistics, over 80% of women suffer from cellulite, and until now there
hasn’t been much of a solution. Modern technology provides us with the answer –
Cryo. It has been found that low temperatures have a positive affect on the skin, and
overall body condition as a whole.
5.2 HOW CAN CRYO HELP IN REDUCING CELLULITE?
Cryo reduces fatty deposits by using extreme cold to constrict the blood vessels.
It is a non-invasive treatment of adipose tissue to induce lipolysis - the breaking down
of fat cells - to reduce body fat without damage to other tissues. It consists of a special
developed technique where warm and cold are used and applied directly to the client’s skin Subcutaneous fat cells are naturally more vulnerable to the effects of cold than
other surrounding tissue.
Exposure to cooling causes fat cell apoptosis – a natural, controlled cell death, which
leads to the release of cytokines and other inflammatory mediators that gradually eliminate the affected cells. Inflammatory cells gradually digest the affected fat cells in
the months after the procedure, reducing the thickness of the fat layer. Lipids from the
fat cells are slowly released and transported
by the lymphatic system to be processed and eliminated.
The thermo-shock Sculpting procedure using HC CRYO TSHOCK is fundamentally different from other non- or minimally invasive modalities. Other methods of fat removal
UMTH12 - Rev.1 - 17/04/2018
CRYO T-SHOCK U
S E R M A N U A L
21

22
primarily involve necrotic cell death by damaging fat with heat, high-intensity focused
u
ltrasound, or chemical injections.
Each approach poses potential technical challenges, particularly with respect to targeting the right tissue depth and unintended damage to other structures close to or
within the fat layer. Predictability of efficacy using these other techniques is also uncertain.
I
n contrast, the Cool-Sculpting procedure using Cryolipolysis induces apoptosis only
in fat cells to gently and gradually reduce the fat layer while preserving all other tissue
The result of this therapy is a reduction in cellulite and a more wholesome appearance.
Individuals are not all the time aware of what to anticipate when going by means of
a Cryo cellulite treatment. There are a couple of basic points that must be understood.
5.3 DRAINAGE IS MANDATORY AFTER THE PROCESS
One of the outcomes of Cryo is an increase in metabolic processes and circulation.
This causes the body to burn extra calories that it normally would. The rise in metabolism is not sufficient to trigger a dramatic reduction in weight without some accompanying actions from the client. It is usually steered that a vigorous train routine lasting
for 30 to 60 minutes be performed immediately after the procedure so that the accelerated metabolism will improve the quantity of calories which might be burned.
Exercise ought to continue every time potential after the remedy as a way to maximize
the results of the Cryo. Common Cryo Destroys Fat Cells.
5.4 EFFECTIVENESS COULD BE STABLE WITHIN 20-30 DAYS
The chilly temperatures that are used throughout Cryo for cellulite reduction actually
penetrate under the skin. Cellulite is caused by subcutaneous deposits of fats all
through the physique that are found principally in the belly, thighs and hips.
Temperatures that are beneath freezing will trigger the fluids that bind fat cells together to crystallize. This crystallization really destroys the cells and the bonds holding
the deposits together. Repeated remedies will slowly take away upper ranges of fat.
The cells which have been destroyed are pulled into the blood stream after which
disposed of by means of the lymphatic system.
5.5 FREEZE YOUR FAT OFF!
Cryo makes your metabolism work three times faster and reduces cellulite. The subzero temperatures make your blood circulation soar, boosting oxygen and nutrients
around the body, speeding up removal of toxins and even toning your muscles. After
three sessions – that’s like, nine minutes in total –your cellulite will be reduced and
you’ll be burning fat faster..
5.6 ANTI-AGING & SKIN REJUVENATION
Cryo improves the general condition of the skin by increasing oxygen and
nutrient supply to the skin. Frequent Cryo tightens the skin and prevents wrinkles.
During Cryo treatment the skin vessels and capillaries undergo a period of vasoconstriction (constriction of blood vessels) followed by vasodilatation (dilation of blood
vessels) upon finishing the session. This causes toxins stored in the layers of the skin
to be broken down and flushed away. The intense cold activates collagen production
in the deeper layers of the skin, leaving your skin firm and tight. After several applications, clients have noticed the skin becoming smoother and more even toned
with regained elasticity and improved overall “youthful” feeling.
Provoking a shock by cooling and or shocking (alternating cold and warm) the skin
with Cryo around the face and neck, triggers deep layers of collagen into production.
UMTH12 - Rev.1 - 17/04/2018
CRYO T-SHOCK U
S E R M A N U A L

This will smooth out facial lines, reduce blemishes, wrinkles and makes tighter appear
ance within few minutes. A full set of applications (from 4 to 8) will naturally begin
to renew production of collagen. Consequently, the result of a course of treatments is
a long lasting return of a more youthful, clear and youngest skin.
- Appearance of wrinkles and fine lines shall be highly reduced.
· Production of collagen resulting in fuller, more youthful and beautiful rejuvenated
s
kin.
- Puffiness around the eyes shall be significantly reduced or totally eliminated.
· Pores on the face and neck shall be reduced in size, limiting the intake of toxins, dirt
and grime.
- Benefits over lymphatic system, flushing away built up toxins, soothe inflammation
and irritation, removing puffiness, and redness.
· Skin conditions like Dermatitis, Eczema, Acne and Psoriasis could be reduced.
· Metabolic rate increases, Endorphin levels shall be stimulated.
After one session you can clearly see the reduction of lines, puffiness and clearing of
skin colour. Cryo Face-Lifts safely performed with high benefits and without any special collateral effects and contra-contraindications by using not so hard temperature
for respecting comfort of each client without any limit into the age. This modality is
executed using high technological solutions belonging to HC CRYO T-SHOCK a new
and innovative device, using gas and liquid free system, handling from the operator
who can follow step by step all evolution of treatment.
5.7 FAT LOSS AND CELLULITE REDUCTION
The many different functions and processes which take place in the body are caused
by chemical reactions occurring between hormones and receptors. These are carried
around the body by the blood. The areas of the body which have a lot of fat, tend to
have a poor blood supply. This means that the blood borne hormones which trigger
lipolysis - the break down of fat - are actually unable to reach the fat cells and therefore, the fat can't be broken down. It also means that mobilized fat can't get away
from the fat cell to be burned elsewhere in the body. Cryostimulation cools the surface
of the skin very rapidly. The body reacts to this extreme cold by turning up its metabolic
rate to produce heat. The blood vessels in the area widen, leading to an increase in
blood flow, allowing the hormones in the blood to reach the fat cells and break down
the fat. This also improves lymphatic drainage in the area, which helps to reduce cellulite.
UMTH12 - Rev.1 - 17/04/2018
CRYO T-SHOCK U
S E R M A N U A L
23

24
6.0 AVAILABLE PROGRAMS
UMTH12 - Rev.1 - 17/04/2018
CRYO T-SHOCK U
S E R M A N U A L
TARGET
Face-lifts Anti-aging
1 min 37°C
6 min 4°C
2 min 37°
Décolleté
2 min 36°
12 min 4°C
Double chin
1 min 37°
8 min 4°C
1 min 37°
Wrinkles
2 min 38°
8 min 4°C
2 min 38°
Fat removal Small
3 min 39°C
30 min 0°C
3 min 39°C
Medium
3 min 39°C
30 min - 2°C
3 min 39°C
Large
3 min 39°C
30 min - 3°C
3 min 39°C
XLarge
3 min 39°C
40 min - 4°C
3 min 39°C
Shape & Definition Small
5 min 38°C
20 min -0°C
Medium
5 min 38°C
30 min 0°C
Large
3 min 39°C
30 min - 1°C
XLarge
3 min 39°C
40 min - 1°C
Firming Small
1 min 37°C
20 min 5°C
Medium
1 min 37°C
20 min 4°C
Large
2 min 37°C
20 min 4°C
XLarge
2 min 37°C
Body part Woman Body part Woman

UMTH12 - Rev.1 - 17/04/2018
CRYO T-SHOCK U
S E R M A N U A L
25
30 min 4°C
Cellulite Oedematous
Cellulite
2 min 39°C
20 min 2°
3 min 39°C
Fibrous Cellulite
2 min 39°C
20 min 0°C
3 min 39°C
Sclerotic Cellulite
2 min 39°C
20 min -2°C
3 min 39°C
Muscle relaxing Small
5 min 8°C
5 min 39°C
5 min 8°C
5 min 39°C
Mid
5 min 7°C
5 min 39°C
5 min 6°C
5 min 39°C
Large
5 min 6°C
5 min 39°C
5 min 6°C
5 min 39°C
XLarge
5 min 6°C
5 min 39°C
5 min 5°C
5 min 39°C
Body part Woman Body part Woman
WOMAN PROGRAMS
Face/Neck Face-lifts
2 min 37°C
8 min 6°C
1 min 37°C
Anti-aging
Anti-aging
1 min 37°
6 min 4°
1 min 37°
Nettoyage/Cleaning
- 2°C 15 min
Cuperose
8 min 5°
Décolleté Décolleté
2 min 36°
12 min 4°C
Body part Programs Body part Programs

UMTH12 - Rev.1 - 17/04/2018
CRYO T-SHOCK U
S E R M A N U A L
26
WOMAN PROGRAMS
Double chin
1 min 37°
8 min 4°C
1 min 37°
Wrinkles
2 min 39°
10 min 4°C
2 min 39°
Connective tissue
2 min 38°
2 min 5°
2 min 38°
Arm Fat removal
3 min 39°C
20 min - 2°C
3 min 39°C
Firming
5 min 4°
2 min 38°
5 min 4°
Shape & definition
5 min 39°C
20 min – 2°C
Drainage
5 min 38°C
5° min 7°C
5 min 39°C
5 min 5°C
5 min 39
Slimming
5 min 39
20 min 0°C
5 min 39°C
Connective tissue
2 min 38°
2 min 5°
2 min 38°
Oedematous Cellulite
2 min 39°C
2° 20 min
3 min 39°C
Fibrous Cellulite
2 min 39°C
0° 20 min
2 min 39°C
Sclerotic Cellulite
2 min 39°C
-2° 20 min
3 min 39°C
Muscle relaxing
2 min 39°C
2 min 8°C
2 min 39°C
2 min 7°C
2 min 39°C
Leg Fat removal
2 min 39°C
25 min - 4°C
3 min 39°C
Firming
2 min 37°C
20 min 4°C
Shape & definition
5 min 39°C
30 min – 4°C
Drainage
5 min 38°C
5 min 7°C
5 min 39°C
5 min 5°C
5 min 39
Slimming
5 min 39
30 min 0°C
5 min 39°C
Connective tissue
2 min 38°
10 min 5°
3 min 38’
Oedematous Cellulite
2 min 39°C
2° 20 min
3 min 39°C
Fibrous Cellulite
B
ody part Programs
B
ody part Programs

UMTH12 - Rev.1 - 17/04/2018
CRYO T-SHOCK U
S E R M A N U A L
27
2 min 39°C
0° 20 min
2 min 39°C
Sclerotic Cellulite
2 min 39°C
-2° 20 min
3 min 39°C
Muscle relaxing
3 min 39°C
2 min 7°C
3 min 39°C
2 min 6°C
4 min 39°C
Gluteus Fat removal
2 min 39°C
30 min - 4°C
3 min 39°C
Firming
2 min 37°C
20 min 4°C
Shape & definition
5 min 39°C
30 min – 2°C
Drainage
5 min 38°C
5° min 7°C
5 min 39°C
5 min 5°C
5 min 39
Slimming
5 min 39
30 min 0°C
5 min 39°C
Connective tissue
2 min 38°
10 min 5°
3 min 38
Oedematous Cellulite
2 min 39°C
2° 25 min
3 min 39°C
Fibrous Cellulite
2 min 39°C
0° 25 min
2 min 39°C
Sclerotic Cellulite
2 min 39°C
-2° 25 min
3 min 39°C
Abdomen Fat removal
2 min 38°C
30 min - 2°C
3 min 38°C
Firming
2 min 37°C
20 min 6°C
Shape & definition
5 min 38°C
20 min – 2°C
Drainage
5 min 38°C
5° min 7°C
5 min 38°C
5 min 5°C
5 min 38
Slimming
5 min 39
20 min 0°C
5 min 39°C
Connective tissue
2 min 38°
10 min 5°
3 min 38
Oedematous Cellulite
2 min 38°C
25 min 4° C
3 min 38°C
Fibrous Cellulite
2 min 38°C
2° 25 min
2 min 38°C
Sclerotic Cellulite
2 min 38°C
0° 25 min
3 min 38°C
Hip Fat removal
2 min 39°C
B
ody part Programs
B
ody part Programs

UMTH12 - Rev.1 - 17/04/2018
CRYO T-SHOCK U
S E R M A N U A L
28
25 min - 4°C
3 min 39°C
Firming
2 min 38°C
20 min 5°C
Shape & definition
5 min 39°C
20 min – 2°C
Slimming
5 min 39
20 min 0°C
5 min 39°C
Chest Firming
2 min 37°C
20 min 7°C
Shape & definition
5 min 39°C
20 min – 2°C
Chest lifts
30 min 0°C
Slimming
5 min 39
20 min 0°C
5 min 39°C
Anti-aging
30 min 6°C
Back side Fat removal
2 min 39°C
25 min - 4°C
3 min 39°C
Firming
2 min 39°C
20 min 6°C
Shape & definition
5 min 39°C
30 min – 2°C
Slimming
5 min 39
30 min 0°C
5 min 39°C
Muscle relaxing
3 min 39°C
2 min 8°C
3 min 39°C
2 min 8°C
3 min 40°C
Body part Programs Body part Programs

UMTH12 - Rev.1 - 17/04/2018
CRYO T-SHOCK U
S E R M A N U A L
29
MAN PROGRAMS
Face Anti-aging
2 min 37°C
4 min 4°C
2 min 37°C
Double Chin
7 min 2°C
7 min 2°C
Tissue Stimulation
1 min 37°C
2 min 4°C
1 min 37°C
2 min 4°C
2 min 37°C
Arm Drainage
3 min 38°C
3 min 2°C
2 min 38°C
Fat removal
1 min 40°C
18 min -5°C
1 min 40°C
Firming
5 min 0°C
2 min 40°C
5 min 0°C
Tissue Stimulation
2 min 40°C
2 min 4°C
2 min 38°C
Leg Drainage
5 min 40°C
5° min 0°C
40 min 40°C
Fat removal
2 min 40°C
25 min -8°C
3 min 39°C
Firming
8 min 0°C
3 min 40°C
5 min 0°C
Tissue stimulation
3 min 40°C
3 min 0°C
3 min 40°C
Gluteus Fat removal
2 min 40°C
20 min -8°C
2 min 39°C
Firming
6 min 0°C
2 min 40°C
Body part Man Body part Man

UMTH12 - Rev.1 - 17/04/2018
CRYO T-SHOCK U
S E R M A N U A L
30
6 min 0°C
Abdomen Fat removal
1 min 40°C
22 min -8°C
2 min 39°C
Firming
5 min 0°C
2 min 38°C
5 min 0°C
Chest Firming
5 min 4°C
1 min 37°C
5 min 4°C
Back side Fat removal
2 min 38°C
20 min -5°C
2 min 37°C
Firming
6 min 0°C
3 min 38°C
6 min 0°C
Body part Man Body part Man

UMTH12 - Rev.1 - 17/04/2018
CRYO T-SHOCK U
S E R M A N U A L
31
7.0 How to perform a treatment

UMTH12 - Rev.1 - 17/04/2018
CRYO T-SHOCK U
S E R M A N U A L
32

UMTH12 - Rev.1 - 17/04/2018
CRYO T-SHOCK U
S E R M A N U A L
33
8.0 Some evidences
Sculping application
Fat removal
Slimming and shaping

UMTH12 - Rev.1 - 17/04/2018
CRYO T-SHOCK U
S E R M A N U A L
34
Woman 38 years old, after 10 applications
Woman 27 years old, after 8 applications
Woman 47 years old, hip and gluteus after 12 applications

UMTH12 - Rev.1 - 17/04/2018
CRYO T-SHOCK U
S E R M A N U A L
35

UMTH12 - Rev.1 - 17/04/2018
CRYO T-SHOCK U
S E R M A N U A L
36

UMTH12 - Rev.1 - 17/04/2018
CRYO T-SHOCK U
S E R M A N U A L
37
1.0 INTRODUCTION
Tests we do before supplying each unit are essential pre-requisites for meeting all safety conditions coming from the laws in force as far as electro-medical equipment are
taken into consideration (Cfr. par. 9).
However, don't forget that according laws in force, reliability and the efficiency of an
e
lectro-medical unit can be guaranteed only if:
l Installation, new settings and repairs are carried out only by the manufacturer or
PAGANI’s authorised technical staff;
l The electrical installation in the treatment room complies with the laws force;
l The unit is used in accordance with the operating instructions;
l Only original accessories are used.
All the units have to be kept in good conditions by regularly checking them and doing
the necessary repairs. This preventive maintenance should avoid possible breakdowns and guarantee:
l A correct functioning;
l Safety of both client and the user, as well as of the room in which the treatment is
performed;
l The best performance of the unit.
Preventive maintenance must be made by the operator, whereas the periodic controls
and repairs must be carried out by the Technical Assistance Service (T.A.S.). If no
regularly verification, including leakage currents testing has been made, PAGANI
decline all responsibility.
2.0 ORDINARY MAINTENANCE
l leaning of the unit and its accessories: (every day)
Cleaning of accessories it is necessary for hygienic reasons. It is suggested to wash
accessories by using water and soap the external part, while, the inner part with one
solution of 75% of water and 25% of ammonia.
WARNING
Use of alcool is forbidden
3.0 PERIODIC MAINTENANCE BY T.A.S
Checking the integrity of all the cables, the isolations, the coverings etc. designed to
avoid access to parts under voltage (every two years);
running the unit in order to check if it works properly (once a year);
measuring the leakage currents (every two years);
checking the resistance between ground and each accessible conductive part that has
to be connected to the ground (every two years);
checking you still have the handbook.
If the unit is used more intensively and for much more prolonged periods, we suggest
you should check it at least once a year. Only following this simple suggestion, your
unit will function effectively.
After each periodic control, the T.A.S technician will write down the new data in the
card enclosed at the end of the operating manual.

UMTH12 - Rev.1 - 17/04/2018
CRYO T-SHOCK U
S E R M A N U A L
38
4.0 IMMEDIATE MAINTENANCE PROCEDURE BY T.A.S.
The operator must request immediate maintenance of the unit if:
l the unit has gone through external mechanical stress (i.e. bad falling);
l the unit has come into prolonged contact with liquids without any protection;
l the unit has gone through overheating (i.e. direct sunlight, fire etc.);
l
the functionality of the unit seems altered;
l parts of the covering have been broken or removed;
l some connectors or cables seem worn-out.
WARNING
A whole electric security test must be carried out after any repair of the unit.
5.0 DISPOSAL OF THE UNIT AND ITS PARTS
The customer doesn’t must disposal the EEER(electronic electrical equipment refusals)
like city refusals and to carry out for these refusals the separate disposal.
The customer will have to give back to the distributor the equipment to the action of
the purchase of one new.
The symbol of the crossed box present on the equipment or in visible way on the confection of the same one, indicates that the equipment is on the market after 13 August
2005 and that must be object of separate disposal.
In the case of irregular disposal of such refusals, the customer will be object of endorsements.
In the table written here below, some indications for the disposal of the unit and all
its parts are given. However, we suggest referring to the laws in force in your Country.
Index Parts Disposal
1 Package
1.1 Polystyrene Differentiated collection of polystyrene.
1.2 Cellophane bags Differentiated collection of polyethylene.
1.3 Cardboard Differentiated collection of cardboard.
2 Unit
2.1 Cabinet Scrapping of metallic parts.
2.2 Electronic board Differentiated collection of electronic components
3 Cables Differentiated collection of electric cablesi
4 Applied parts
4.1 Plastic parts Differentiated collection of plastic parts
4.2 Metallic parts Scrapping of metallic parts

UMTH12 - Rev.1 - 17/04/2018
CRYO T-SHOCK U
S E R M A N U A L
39
6
.
0
PREC
A
UTI
O
NS
A
ND RI
S
KS
l
Be
s
u
r
e
t
h
a
t
o
n
t
h
e
b
a
c
k o
f
t
h
e
u
n
it
t
h
e
s
p
e
c
if
ic
a
t
io
n
t
a
g
is
p
r
e
s
e
n
t
.
l
Be
f
o
r
e
u
s
in
g
t
h
e
u
n
it
,
b
e
s
u
r
e
t
h
e
o
p
e
r
a
t
in
g
vo
lt
a
g
e
o
f
yo
u
r
u
n
it
c
o
r
r
e
s
p
o
n
d
s
t
o
t
h
a
t
o
f
t
h
e
p
o
we
r
s
u
p
p
ly.
l
W
e
s
u
g
g
e
s
t
u
n
win
d
in
g
c
o
mp
le
t
e
ly
t
h
e
p
o
we
r
s
u
p
p
ly
c
o
r
d
,
in
o
r
d
e
r
t
o
a
vo
id
a
n
y
o
ve
r
h
e
a
t
in
g
.
l
A
s
lo
n
g
a
s
t
h
e
p
lu
g
is
in
t
h
e
s
o
c
ke
t
,
t
h
e
u
n
it
is
n
o
t
d
is
c
o
n
n
e
c
t
e
d
f
r
o
m
t
h
e
p
o
we
r
s
u
p
-
p
ly.
l
D
o
n
o
t
u
s
e
a
d
a
p
t
e
r
o
r
e
xt
e
n
s
io
n
c
o
r
d
t
h
a
t
d
o
n
o
t
c
o
mp
ly
t
h
e
s
a
f
e
t
y
r
u
le
s
in
f
o
r
c
e
,
t
h
a
t
h
a
ve
a
n
o
t
r
ig
h
t
c
u
r
r
e
n
t
r
a
t
in
g
a
n
d
t
h
a
t
le
t
t
h
e
p
r
o
t
e
c
t
ive
e
a
r
t
h
r
e
s
is
t
a
n
c
e
h
ig
h
e
r
t
h
a
n
0
.
2
N
.
l
D
o
n
o
t
p
u
ll t
h
e
c
a
b
le
t
o
d
is
c
o
n
n
e
c
t
t
h
e
u
n
it
f
r
o
m t
h
e
p
o
we
r
s
u
p
p
ly.
l
D
o not p
la
ce a
nything over the u
nit.
l
Avoid
ins
ta
lling or lea
ving the u
nit:
- nea
r hea
t s
ou
rces
,
i.
e.
ra
d
ia
tors
,
a
ir d
u
cts
or hea
ters
;
- d
irectly exp
os
ed
to s
u
nlight;
- exp
os
ed
to ra
in or hu
mid
ity;
- exp
os
ed
to d
u
s
t or d
ir
t.
l
If the a
b
ove mentioned
cond
itions
a
re not followed
,
the
u
nit cou
ld
b
e
s
eriou
s
ly
d
a
ma
ged
.
l
D
o not tou
ch a
ny u
ncovered
p
a
r
t of ca
b
les
or a
p
p
lica
tors
w
hile the u
nit is
w
orking:
there is
ris
k of b
u
r
ns
.
l
In ord
er to a
void
electroma
gnetic inter
ference,
mob
ile p
hones
s
hou
ld
n't b
e u
s
ed
in
the s
a
me room w
here the u
nit is
w
orking.
l
Shou
ld
a
ny s
olid
ob
ject or liq
u
id
p
enetra
te into the u
nit,
d
is
connect it immed
ia
tely
a
nd
a
s
k ma
intena
nce of q
u
a
lified
p
ers
onnel b
efore u
s
ing it a
ga
in.
l
Be s
u
re tha
t a
good
a
era
tion gra
nts
a
p
rop
er op
era
tion of the u
nit.
l
O
perating c
lose to short-
wave units can lead to outputs instability. Working of high-
frequenc
y
units
can interfere with the functioning of electrical units. Therefore, when
used simultaneously
in the same room, a minimum safety-distance should be obser
-
v
ed.
I
n
most c
ases 1
,5 m distances is enough, but we suggest at least 5 m.
WARNING
The o
perato
r is advised against u
sing the pressure therapy in case of pregnant women, can
-
cer
s in the treatment ar
ea.
Befo
r
e treating clients with implanted heart pacemakers or with
cochlea transplant,
co
nsult a special
ist.
Before treating clients with lower limb ischemia, cardiovascular disease consult a physician.

UMTH12 - Rev.1 - 17/04/2018
CRYO T-SHOCK U
S E R M A N U A L
40
W
ARNING
All applications must be carried out on conscious patients, only. Furthermore always pay
attention to the patient’s feeling while the output energy is increasing.
If you have any question, not sufficiently dealt in this handbook, please do not hesitate
t
o consult Elettronica Pagani or your authorised dealer.
The end-user is recommended to keep a list of its unit, to conserve scrupulously the
operating manual, and to schedule an organic maintenance programme for all the
units.
The unit must be used exclusively by persons who, thanks to their professional formation and their experience, may offer the guarantee of a proper use and have been
trained; in particular the unit should be used by a doctor or under the responsibility
of a doctor.
WARNING
In case of a serious accident, please inform Elettronica Pagani immediately.
7.0 WARRANTY
Guarantee is covering all the defects of materials and workmanship for twelve month
for the applicators and two years for the other parts, starting from the purchase date,
if not differently agreed.
If the unit doesn’t work properly during the warranty, Elettronica Pagani would repair
it without any charges for the customer; in fact, guarantee includes the cost of spare
parts and labour, expect for the following conditions:
l Guarantee is valid only if the identification data (model, mark and technical featu-
res, etc) are available.
l Elettronica Pagani will repair only breakdowns. Costs and risks during removal,
transport and installation aren't covered by the guarantee.
l Elettronica Pagani or technical assistance centres authorised by Elettronica Pagani
do all repairs as per the a/m conditions. If non-authorised personnel carry out repairs,
guarantee is automatically invalid.
l Guarantee does not cover periodic checks, calibrations, maintenance and modifi-
cations, disposable and consumable parts and accessories.
l Guarantee is not valid when:
- damages have been caused by accidents, no correct uses, modifications, and use
of non-original spare parts and/or accessories;
- cables, electrodes and any other accessory subject to deterioration.
l Elettronica Pagani reserves the right to introduce changes or improvements without
being obliged to modify the units manufactured before.
8.0 MANUFACTURER RESPONSIBILITY
Elettronica Pagani is responsible about safety, reliability, and performance only whether:
l assembly, new settings, adjustments, modifies and repairs are carried out only by
the manufacturer or authorised technical staff;
l the electrical installation in the treatment room complies with the laws in force;
l only original accessories are used.

UMTH12 - Rev.1 - 17/04/2018
CRYO T-SHOCK U
S E R M A N U A L
41
9.0 WORKING AND STORING CONDITIONS
- Temperature
working: from 15°C to 35°C (from 50°F to 95°F)
s
torage : from 0°C to 45°C (from 32°F to 113°F)
- Humidity
working: from 45% to 75% RH (not condensed)
storage: from 20% to 80% RH (not condensed)
- Pressure
working: from 860hPa to 1060hPa
(from 0.860bar to 1.060bar)
storage : from 860hPa to 1060hPa
(from 0.860bar to 1.060bar)
Simbol Meaning
Warning! Refer to instruction
manual/booklet (Table D 2 - Sign 10).
Device with Applied Part type B
(Table D 1 - Sign 19)
Alternating current
(Table D 1 - Sign 1)
ON (power)
(Table D 1 - Sign 12)
OFF (power)
(Table D 1 - Sign 13)

UMTH12 - Rev.1 - 17/04/2018
CRYO T-SHOCK U
S E R M A N U A L
42
 Loading...