

Page 1
Elektralite LED Pro Line
Variable White Dazer
USER MANUAL
Elektralite (a division of Group One),
70, Sea Lane, Farmingdale, NY11735, U.S.A.
T. +1 (516)-249-3662. F. +1 (516)-249-8870
WWW.MYELEKTRALITE.COM
Page 2

1. Unpacking
Thank you for choosing the Elektralite Led Pro Line Variable White Dazer fixture. For your own
safety, please read this manual before installing the fixture. This manual covers important information
on installation and applications. Please keep this manual for future reference.
To keep this simple, we are going to refer to the fixture as the Elektralite VW Dazer throughout the
manual.
The Elektrali te VW Dazer fixture uses 36 high powered 5 watt leds in a balanced arrangement giving
incredible output. Please unpack it carefully and check whether it was damaged in shipping.
The following items should be in the box with the fixture:-
Color/Gel frame
DMX 5 pin male to 5 pin female cable
2. Safety Instructions.
This device has left the factory in perfect condition. In order to maintain this condition and to ensure a
safe operation, it is absolutely necessary for the user to follow the safety instructions and warning
notes written in this user manual. The Elektralite VW Dazer is a high voltage fixture. Be careful when
dealing with high voltages.
Please read this manual. If you do not read this manual and damages occur to the Elektralite
VW Dazer, then it could void the warranty.
During shipping, Elektrali te VW Dazer may have been exposed to high temperature changes or
humidity changes. So, as a precaution, do not switch Elektralite VW Dazer on immediately.
Condensation can damage Elektralite VW Dazer so leave it switched off, until it has reached room
temperature.
The electric connection must be carry out by a qualified person and it is absolutely essential that the
Elektralite VW Dazer be grounded. This is imperative and is a safety issue. Do not break or bend out
of the way, the ground center pin on the plug.
Always disconnect the Elektralite VW Dazer from the power source, when the fixture is not in use or
before cleaning it. Only unplug Elektralite V W Dazer from the power cord. Never pull out the plug out
by pulling on the power cord.
Please keep the Elektralite VW Dazer away from children and the general public. Please be intelligent
and use common sense when operating the Elektralite VW Dazer.
Page 3

3. General Guidelines.
The Elektrali te VW Dazer is a lighting fixture for professional use on stages, in churches, theatres,
etc.
The Elektrali te VW Dazer should only be operated at between 120 to 240 volts and only indoors.
The Elektrali te VW Dazer should not be operated 24/7 (24 hours a day; 7 days a week). The
Elektralite VW Dazer needs operation breaks to ensure that it will work for a long time without
problems. Please do not shake the Elektralite VW Dazer and avoid using brute force when installing
or operating it.
When choosing the location to install the Elektralite VW Dazer, please make sure that it is not
exposed to extreme heat, moisture or dust. The minimum distance between the Elektralite VW Dazer
and the illuminated surface must be more than 3 feet.
Always mount the Elektralite VW Dazer with an appropriate safety cable/chain.
Operate the Elektralite VW Dazer only when you are familiar with the features on the fixture. Do not
permit operation by persons not qualified to operate it.
All modifications to the Elektralite VW Dazer will invalidate the warranty. There are absolutely no
exceptions.
If Elektralite VW Dazer is operated in any way different to the one described in this manual, the
Elektralite VW Dazer maybe damaged and the guarantee will be void.
4. Installation
Please ensure that the Elektralite VW Daz er is hung using the appropriate "C" clamp or half
cheeseboro. A safety chain or cable should also be used as a secondary point of holding the fixture in
case the clamp comes loose. Never hang the fixture without a safety chain or cable. Make sure the
Gel frame (Gel holder) is clipped into position correctly and cannot come loose.
If you are not qualified or have any doubts about hanging the Elektralite VW Dazer then do NOT hang
it.
Do not clamp the cable to the U bracket or clamp. That is not a secondary safety point.
A secondary safety point is any point that will adequately hold the Elektralite VW Dazer if the "C"
clamp or half cheesboro fails. Then the safety cable would be the backup and stop the fixture from
falling to the ground. So do NOT fix the safety to the same place that the "C"clamp is attached.
Page 4
5. DMX-512 Control Connection
Ω
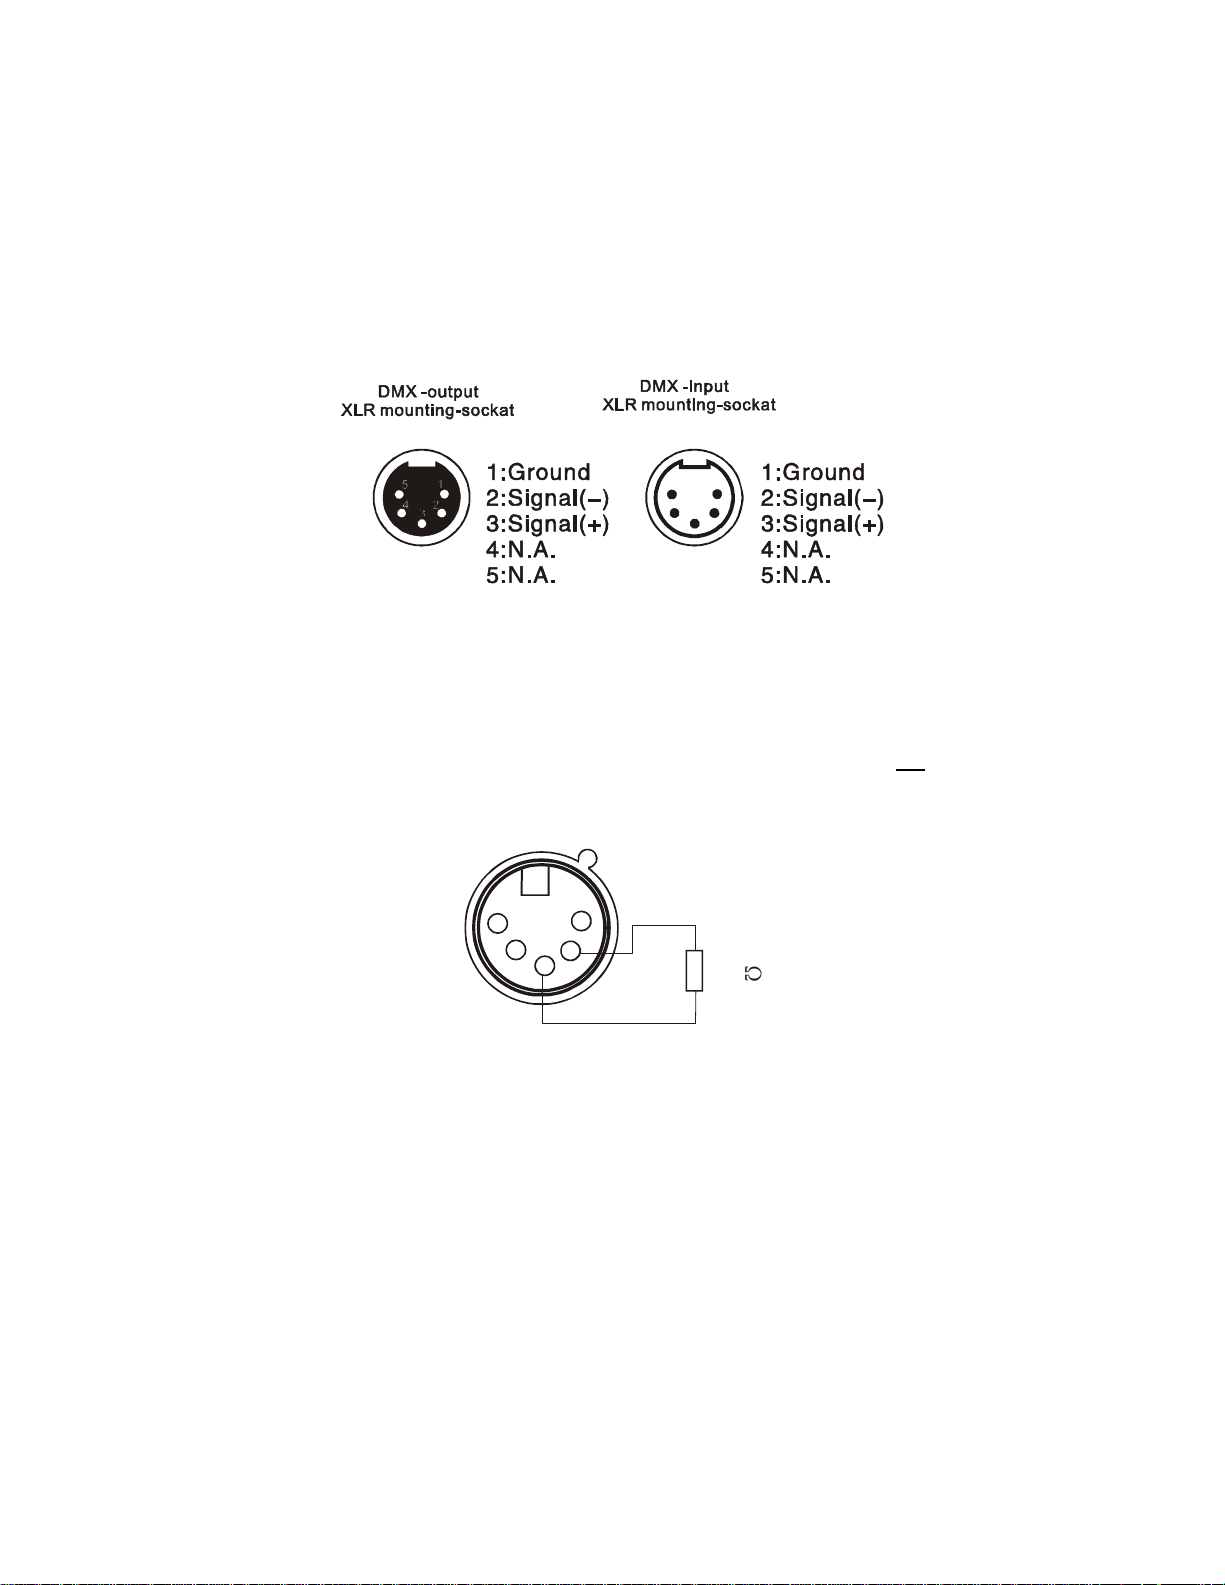
Connect the provided XLR cable to the female 5-pin XLR output of the Elektralite CP 16/24 or other
DMX controller. The other end should be connected to the male 5-pin XLR input of the Elektralite VW
Dazer . Then daisy-chain out of the first Elektralite VW Dazer and into the next Elektralite VW Dazer
or other dmx device. Never “Y” split the DMX connection.
If you need more cable, then it should be two core, screened cable fitted with a 5 pin XLR input and
output connector. Please refer to the diagram below.
1
5
4
2
3
DMX-512 connection with DMX terminator
For installations where the DMX cable has to run a long distance or is in an electrically “noisy”
environment, it is recommended that a DMX terminator is used. This helps prevent corruption of the
digital control signal. The DMX terminator is simply a 5 pin XLR plug (male) with a 120 Ω resistor
connected between pins 2 and 3. It is then plugged into the output XLR socket of the last Elektralite
VW Dazer or other dmx device in the chain. Please see illustration below.
5
4
1
2
3
120
Page 5

6. Menus in the fixture.
Root Menu Sub Menu 1 Sub Menu 2
STAT (STATIC LOOK) W(HITE) 0-255
A(mber) 0-255
S(STROBE) 0-255
RUN DMX
SLAV(E)
DMX ASSIGN DMX CHANNEL 1-512
PERS (PERSONALITY) W.A
MA.d
MA.S
WS Id
ID ID 01 THROUGH 255 1-255
SET REST (RESET)
DV
DIM
KEY OFF
ON
7. Static Look.
The Elektrali te VW Dazer can be set to a single static look quickly.
Use the Menu button to get to STAT.
Press Enter.
The next screen will read W.000. This is addressing the White leds.
Use the
↑ or ↓ to increase
or decrease the output of the leds.
Numbers are expressed in DMX values so 0 is no output and 255 is highest output.
Press Enter to save the value.
The screen will automatically advance to the strobe. S.000 means the strobe is off
Use the
↑ or↓ to
increase or decrease the speed of the strobing or leave at S.000 if you want no strobe.
S.001 is the slowest and S.020 is the fastest strobing.
Press Enter to save the value. It will automatically bring you back to the output screen again.
Press the Menu button to exit out of STAT and back to the Root directory.
8. Run Mode.
Run allows the Elektralite VW Dazer to operate in either DMX or Slave operation.
Using the Menu button in the root menu go to RUN.
Press Enter to get to DMX mode. Press Enter again to save the RUN mode as DMX.
A "ok" will appear and then the display will return to display RUN.
If the fixture is to be run in Slave mode, then when DMX mode appears on the screen instead of
pressing enter use the ↑ or ↓ to get to SLAV. Then press enter to save the SLAV mode setting.
Page 6

9. DMX 512 Setting (address).
Sets up the address for the dmx.
Using the Menu button in the root menu go to DMX
Press Enter to get into DMX menu and the display will read the current dmx channel.
The display will read for example d.001
This means the fixture's current address is 001
To change it, use the ↑ or ↓ buttons to get to the correct address.
Press Enter to save the dmx address. The display will momentarily display the word "OK" and then go
back to the DMX menu.
To exit out to the root directory, use the menu button.
10. Fixture Personality.
There are several different choices on how the Elektralite VW Dazer will operate.
What these "Personalities" do, in terms of their channel assignments, is detailed on the tables page 8
& 9.
To change a Personality use the Menu button to get to PERS
Press Enter and then using the
Press Enter to save the Personality.
↑ or ↓ buttons go to the personality required.
11. ID Address.
A Elektralite V W Daz er can be addressed (controlled) through the dmx or instead it can have its own
unique ID address.
There are a total of 255 different ID addresses from 1 to 255.
To set up the address for a fixture, use the Menu button in the root menu go to ID
Press Enter and then using the ↑ or ↓ buttons,to select the ID address.
Press Enter to save the address.
For the ID address to work you must choose the WS id personality.
This allows you to access the ID address system on channel 6.
Set the DMX address to d.001 for the fixture. So if ID address 123 is chosen then go to channel 6 on
the lighting board and set the level at 123. You will then be controlling only fixture(s) with ID address
123.
Page 7

12. SET. (Set has several Sub Menus which allow functions to be used).
1). REST
This resets all values to their default.
Using the Menu button, go through the Root Menu until SET. Press Enter and then use the ↑ or ↓
buttons to get to REST. Press Enter. The display will have 4 dots across the bottom. The password
needs to be entered. The password is the following sequence using the
↑ and ↓ buttons.
↑ ↓ ↑ ↓ then press Enter once, to complete the reset. The display will read "OK" followed by a
return to the REST sub menu. The Menu button will need pressing to return to the Root Menu. Only
when at the Root Menu will dmx control work. Please note the Reset also takes the dmx address back
to 001.
2). DIM
The Dim function allows different Dimmer curves to be chosen. There are 5 choices.
Choice 1 :- this is Dim off. The Dimmer curve is 0 which means any change in dimmer level is
instantaneous.
Choice 2:- Dim 1. The dimmer curve has the shortest fade in and fade out time.
Choice 3:- Dim 2. The dimmer curve has the 2
Choice 4:- Dim 3. The dimmer curve has the 3
nd
shortest fade in and fade out time.
rd
shortest fade in and fade out time
Choice 5:- Dim 4. The dimmer curve has the longest fade in and the fade out time.
Using the Menu button, go through the Root Menu until Set. Press Enter and then use the ↑ or ↓
buttons to get to DIM.
Press Enter and then use the ↑ or ↓ buttons to get to the DIM choice required. Once chosen, press
Enter to save it and then use the Menu button to exit back to the root directory.
3).DV
The DV setting allows the ability of the leds to not flicker when using video camera.
The choices are NTSC or PAL. NTSC is the USA system.
Go through the Root Menu until Set. Press Enter and then use the
Press Enter and then use the
↑ or↓
buttons to get to either NTSC or PAL. Once chosen, press Enter to
↑ or ↓ buttons to get to
DV.
save the setting and the Menu to exit back to the Root Menu.
13. KEY
The Key function is an access password for the fixture. The KEY can be turned OFF or ON which then
deactivates or activates the password.
To set the KEY go through the Root Menu until KEY, press Enter and use the
either OFF or ON. If the Key is turned ON then a password is required to go into sensitive Menus and
to change functions.
The password is
↑
↓ ↑ ↓ (Up + Down + Up + Down)
↑ or ↓ to set the
KEY to
Page 8

14. The Personalities of the VW Dazer.
W.A
1 0-255 White
2 0-255 Amber
3
MA.d
1 0-255 Grand Master (for fading channels 2 & 3 together)
2 0-255 White
3 0-255 Amber
4
MA.S
1 0-255 Grand Master (for fading channels 2 & 3 together)
2 0-255 White
3 0-255 Amber
4
5
0-50 Linear dimmer speed(DIM=OFF)
51-100
101-150
151-200
201-255
0-50
51-100
101-150
151-200
201-255
0-9 No Function
10-49 Synchronized strobe slow
50-99 Non Synchronized strobe slow
100-149 Random strobe slow
150-199 Non Synchronized strobe fast
200-255 Synchronized strobe fast
0-50
51-100
101-150
151-200
201-255
1-255 Each dmx value is an ID address value.
Each ID address is controlled individually at that DMX value
nonlinear speed1(DIM1)
nonlinear speed 2(DIM2)
nonlinear speed 3(DIM3)
nonlinear speed 4(DIM4)
Linear dimmer speed(DIM=OFF)
nonlinear speed 1(DIM1)
nonlinear speed 2(DIM2)
nonlinear speed 3(DIM3)
nonlinear speed 4(DIM4)
Linear dimmer speed(DIM=OFF)
nonlinear speed 1(DIM1)
nonlinear speed 2(DIM2)
nonlinear speed 3(DIM3)
nonlinear speed 4(DIM4)
Page 9

WS.Id
1 0-255 Grand Master (for fading channels 2 & 3 together)
2 0-255 White
3 0-255 Amber
4
5
6
0-9 No Function
10-49 Synchronized strobe slow
50-99 Non Synchronized strobe slow
100-149 Random strobe slow
150-199 Non Synchronized strobe fast
200-255 Synchronized strobe fast
0-50
51-100
101-150
151-200 nonlinear speed 3(DIM3)
201-255
0 All ID address work together
1-255 Each dmx value is an ID address value.
Each ID address is controlled individually at that DMX value
Linear dimmer speed(DIM=OFF)
nonlinear speed 1(DIM1)
nonlinear speed 2(DIM2)
nonlinear speed 4(DIM4)
Page 10

15. DMX Channel Assignments.
Depending on the Personality chosen, the Elektralite VW Dazer can be 3, 4, 5 or 6 channels.
Personalities:-
W.A = 3 channels (the first three channels listed below)
MA.d = 4 channels (the first four channels listed below). WS is the most common choice.
MA.S = 5 channels (the first five channels listed below).
WS.Id = 6 channels (as listed below all six channels)
WS.Id
1 0-255 Grand Master (for fading channels 2 & 3 together)
2 0-255 White
3 0-255 Amber
4
5
6
0-9 No Function
10-49 Synchronized strobe slow
50-99 Non Synchronized strobe slow
100-149 Random strobe slow
150-199 Non Synchronized strobe fast
200-255 Synchronized strobe fast
0-50
51-100
101-150
151-200
201-255
0 All ID address work together
1-255 Each dmx value is an ID address value.
Each ID address is controlled individually at that DMX value
Linear dimmer speed(DIM=OFF)
nonlinear speed 1(DIM1)
nonlinear speed 2(DIM2)
nonlinear speed 3(DIM3)
nonlinear speed 4(DIM4)
Page 11

16. Cleaning and maintenance.
Now ignoring maintenance and cleaning is very good way of creating problems "down the road" and
many companies and installations do just that. However the net result is, no matter what the fixture,
premature failure!
Changing the oil in a car most people do on a regular basis.
So with the fixtures, regular maintenance is an excellent practice, if you want the fixtures to last.
So what is the maintenance for the Elektralite VW Dazer?
Clean the fan! That’s really it!
Use a small vacuum cleaner and suck the dust and “fur balls” out.
Do not use a can of co². That will just blast the dust and dirt everywhere!
The fan keeps the LEDs cool and keep the electronics cool too.
Without the fan working efficiently and dust free, the fixtures will fail and that will be a lot more costly
than having someone vacuum the fixtures on a regular basis.
How often should the fan be cleaned? It depends on where the fixtures are; in a very dusty atmosphere
once a week. So check the fan on a regular basis, it may not need cleaned every week but a quick
“visual inspection” should be done.
The front plastic cover for the lenses should be cleaned so the light output is maintained. Use only a
moist lint-free cloth. Never use alcohol or solvents to clean the fixture.
17. T echnical Specification.
Operating voltage 100 – 250v
Frequency 50 – 60 Hertz
36 x 5 watt leds
200 VI
Fan cooled
305mm x 276mm x 230mm
12" x 10.9" x 9.1"
8.5 kgs
19 pounds
Elektralite is a division of Group One. Group One and its divisions are constantly improving
their product range and we reserve the right to make changes without prior notice.
Page 12
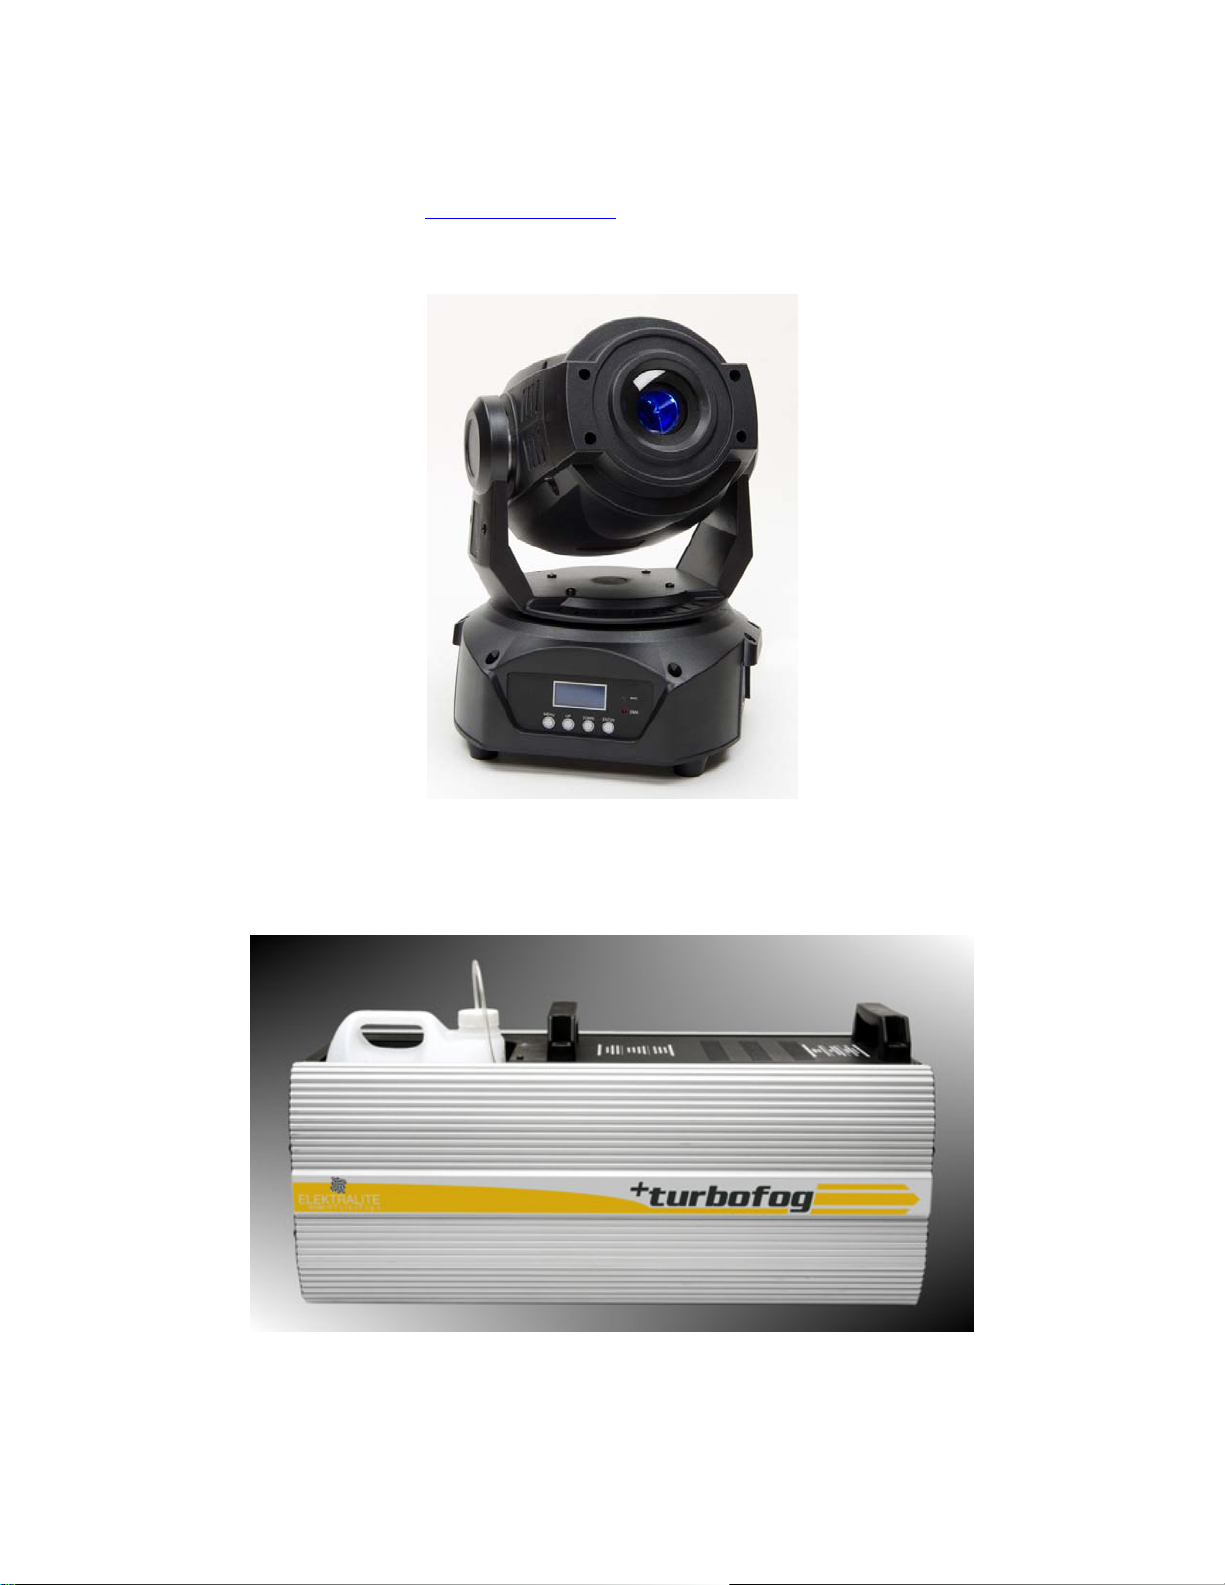
Other Products.
ElektraLED has other great products that are manufactured under the Elektralite product line.
Go check out the website at www.myelektralite.com
A preview of the products include:-
Elektralite LED Pro Line ML601
The Elektralite TurboFog (check out the ElektraFog too!)
Page 13
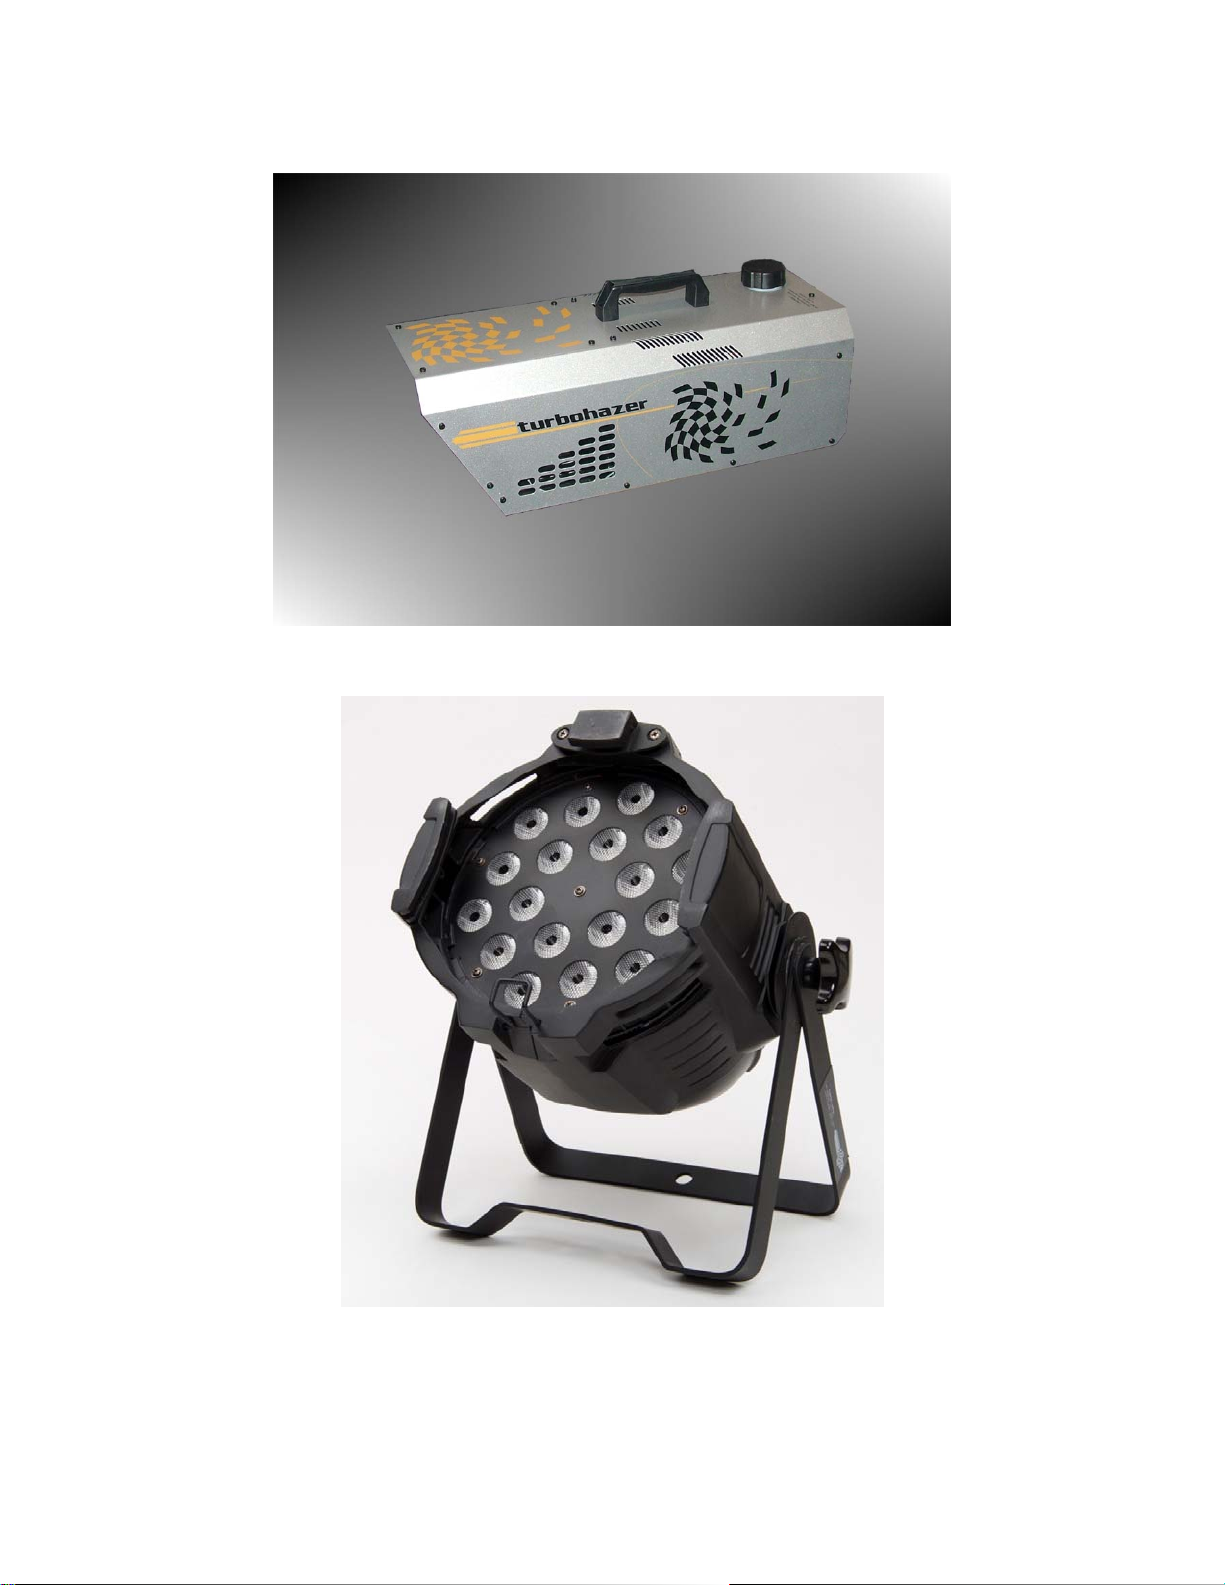
The Elektralite TurboHazer (check out the ElektraHazer too!)
The Elektralite LED Pro Line 1018 (Quad 4-in-1 leds).
 Loading...