

ELEGANT HOME CORDLESS ROMAN SHADE Installation Instructions Manual
ELEGANT
HOME
SHADE
™
CORDLESS
ROMAN
ROOM DARKENING
Installation Instructions
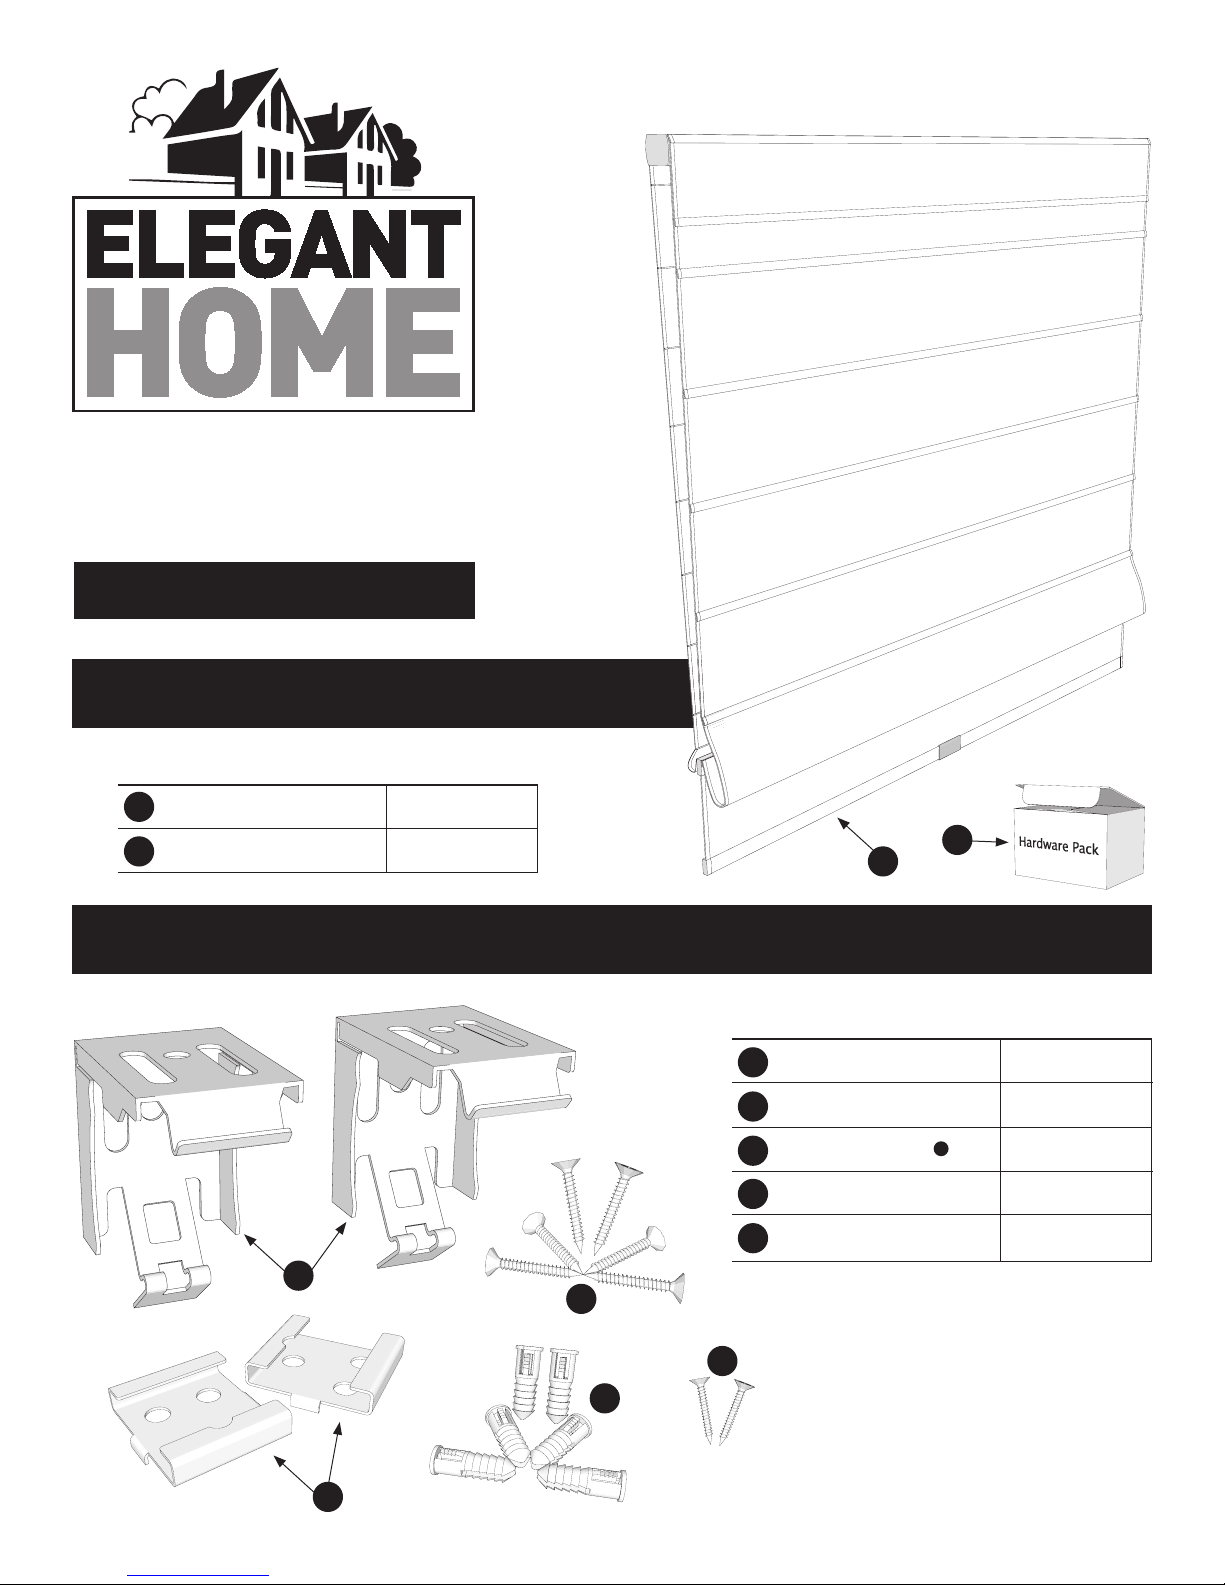
Package Contents
Name
AA
Roman Shade
Hardware Pack
BB
Hardware Pack Contents
A
Quantity
1
1
AA
Name
Mounting Brackets
A
Mounting Bracket Spacers
B
Phillips Head Screws
C
Screw Anchors
D
Small Screws
E
C
BB
Quantity*
2 - 3
2 - 3
+
* Quantities will change with size of shade.
6 - 9
6 - 9
2
B
E
D
Note:
If mounting in drywall or plaster
wall, use the provided plastic
screw anchors (D).
Safety Information
!
Please read and understand this entire manual before attempting to assemble, operate or install this product.
Preparation
Before beginning assembly of product, make sure all parts are present. Compare parts with package contents list and hardware contents
above. If any part is missing or damaged, do not attempt to assemble the product.
Estimated Assembly Time: 15 minutes
Tools Required for Installation (not included): Pencil, Safety Goggles, Phillips Screwdriver, Tape Measure, Level.
Helpful Tools (not included): Drill with 1/16 in. Bit, Step Stool.
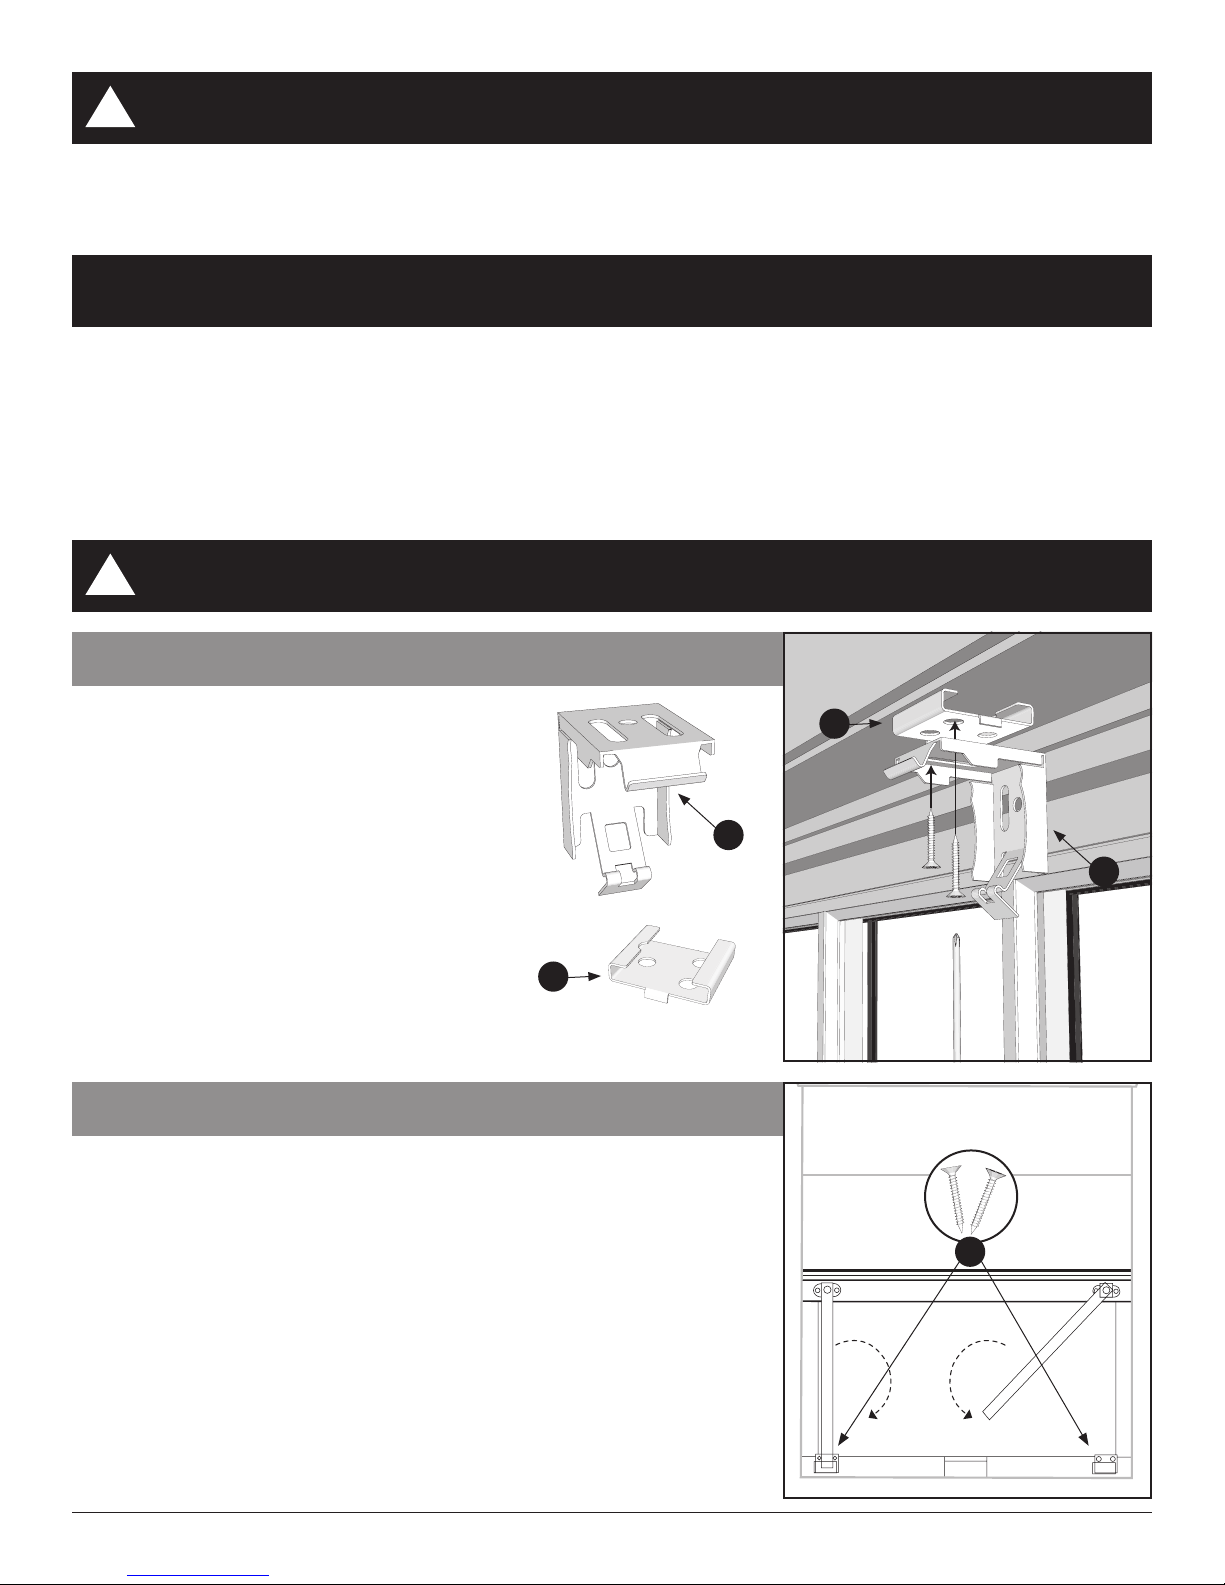
ATTENTION!
!
Use Spacers when mounting from above
The spacer is only necessary when you are mounting
from above because there is not enough clearance to
fully tilt the headrail and attach to mounting bracket during
installation.
Without use of the spacer, the top corner of the headrail
will be higher than the bracket causing it to hit the ceiling or
window frame preventing proper installation.
When mounting on the ceiling the spacer is always
necessary.
When mounting inside a window frame from above the
spacer MAY be necessary if the depth of the widow
exceeds the depth of the bracket.
B
Be sure to properly secure support rods before use
Before installing shade (AA), swing the pre-assembled support rods on the bottom
section of the back of the shade (AA) into the pre-assembled brackets. Press them
firmly sideways to snap into place.
Use small screw (DD) to secure support rod in place.
B
A
A
E
2
 Loading...