

Page 1
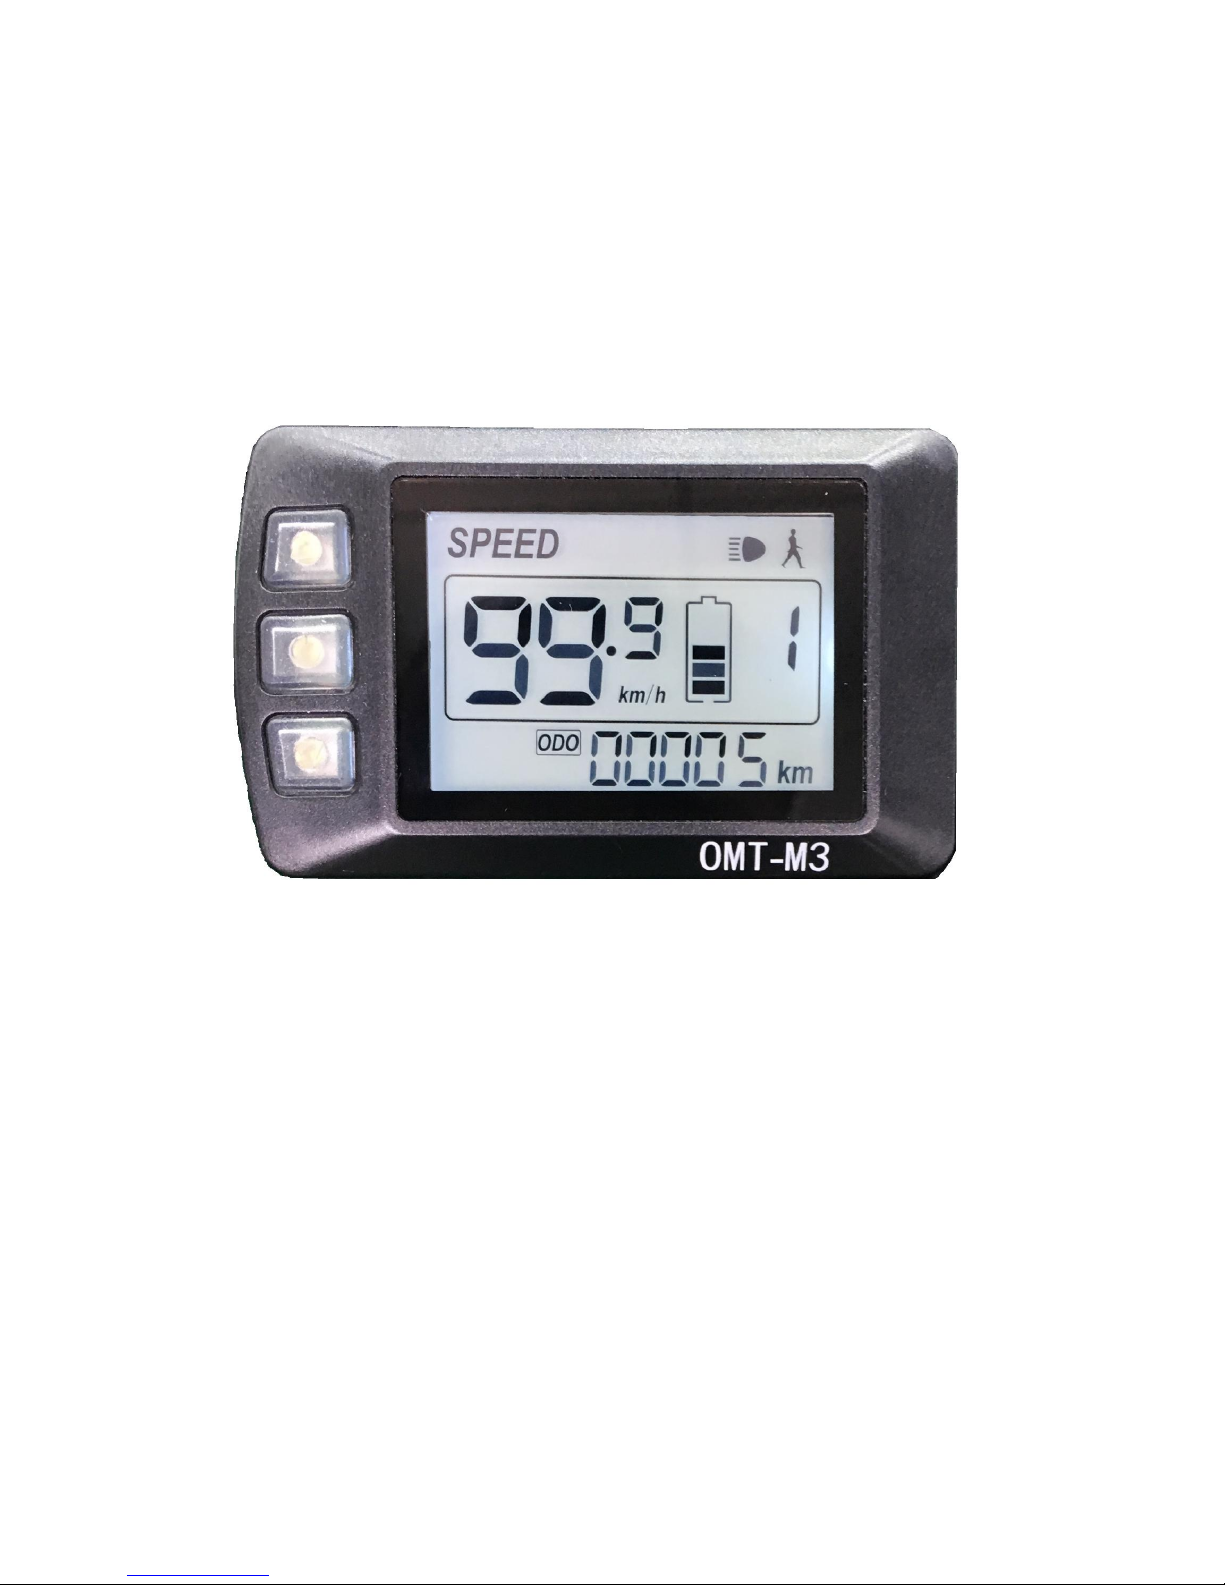
Page 2

1
1. Material&Dimension
1) Material
Caser and Cover and Press button: ABS,
LCD window: PMMA
2)Outside and mounting dimension(mm)
Scew
Page 3
2
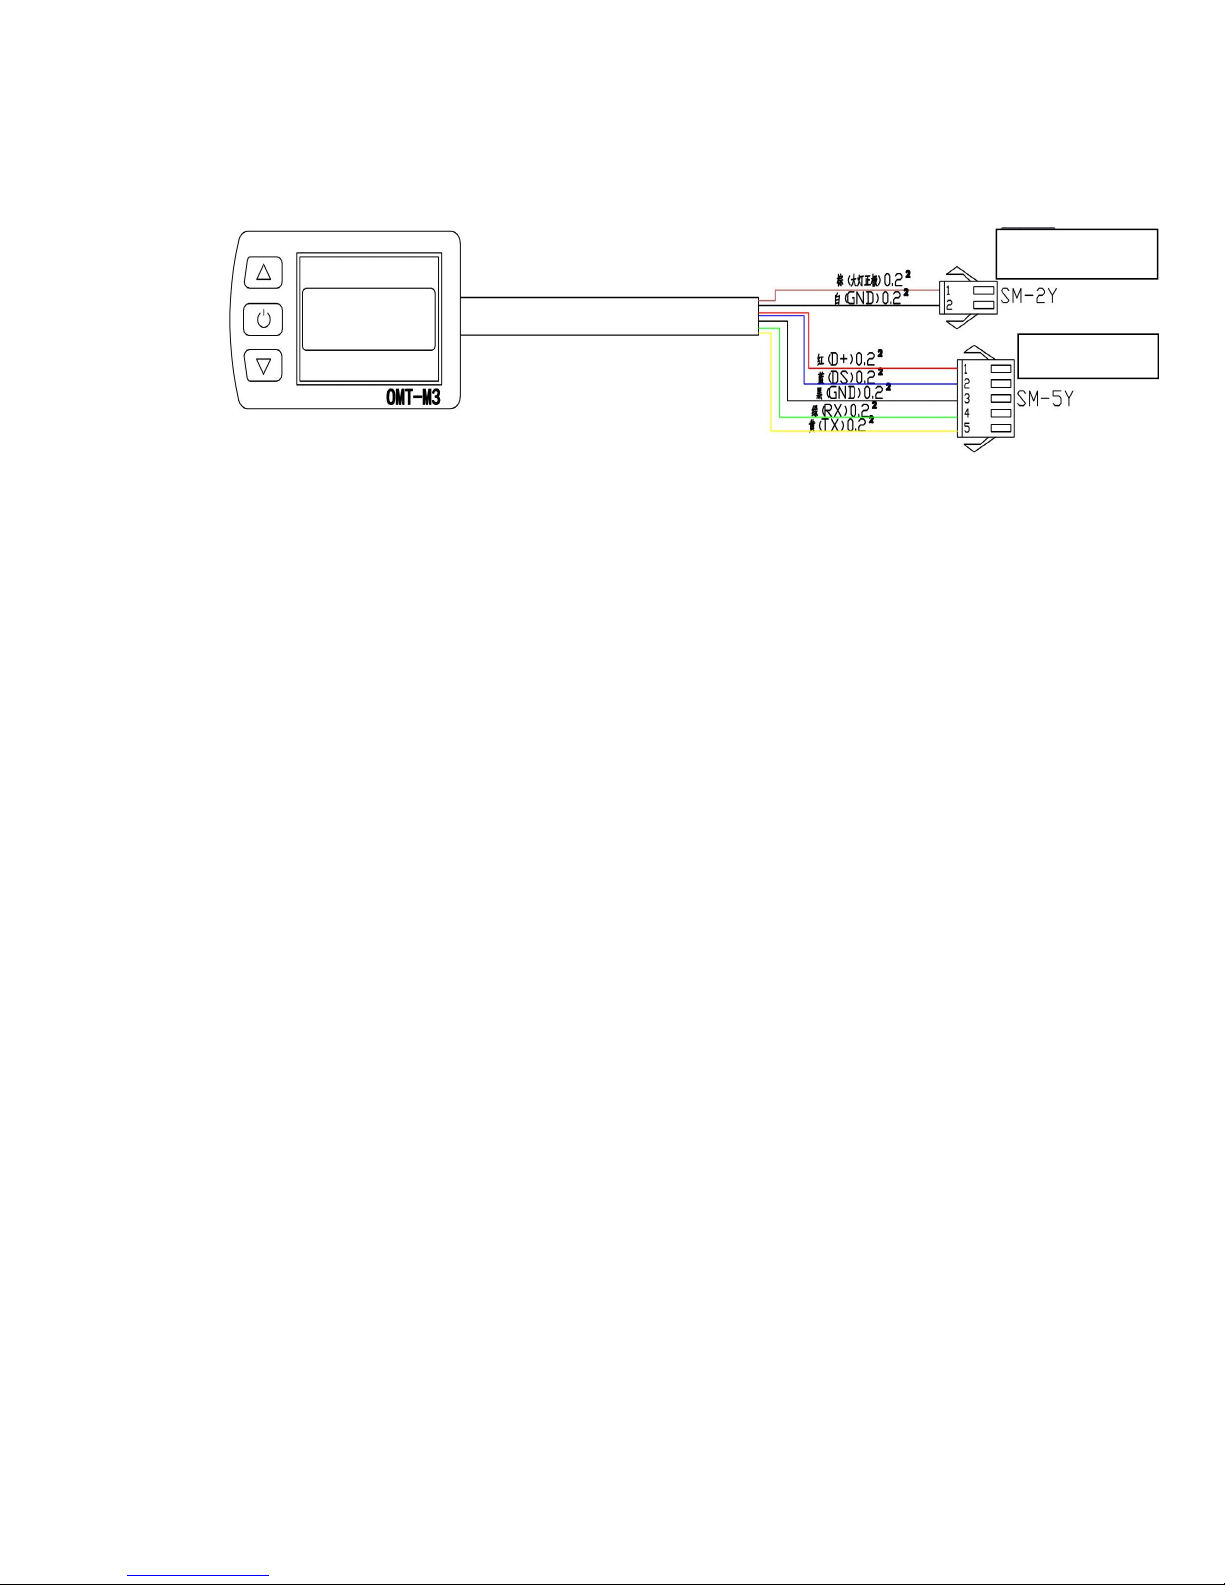
3) Connection diagram:
Wire definition:
Red
:
Power supply-VCC
Blue
:
Electronic lock-DS
Black
:
GND
Green
:
Data RXD
Yellow
:
Data TXD
BROWN
:
Head light(+) -DD
White
:
Head light(-)-GND
Remark
:
Connectors and Wire colors could be customized
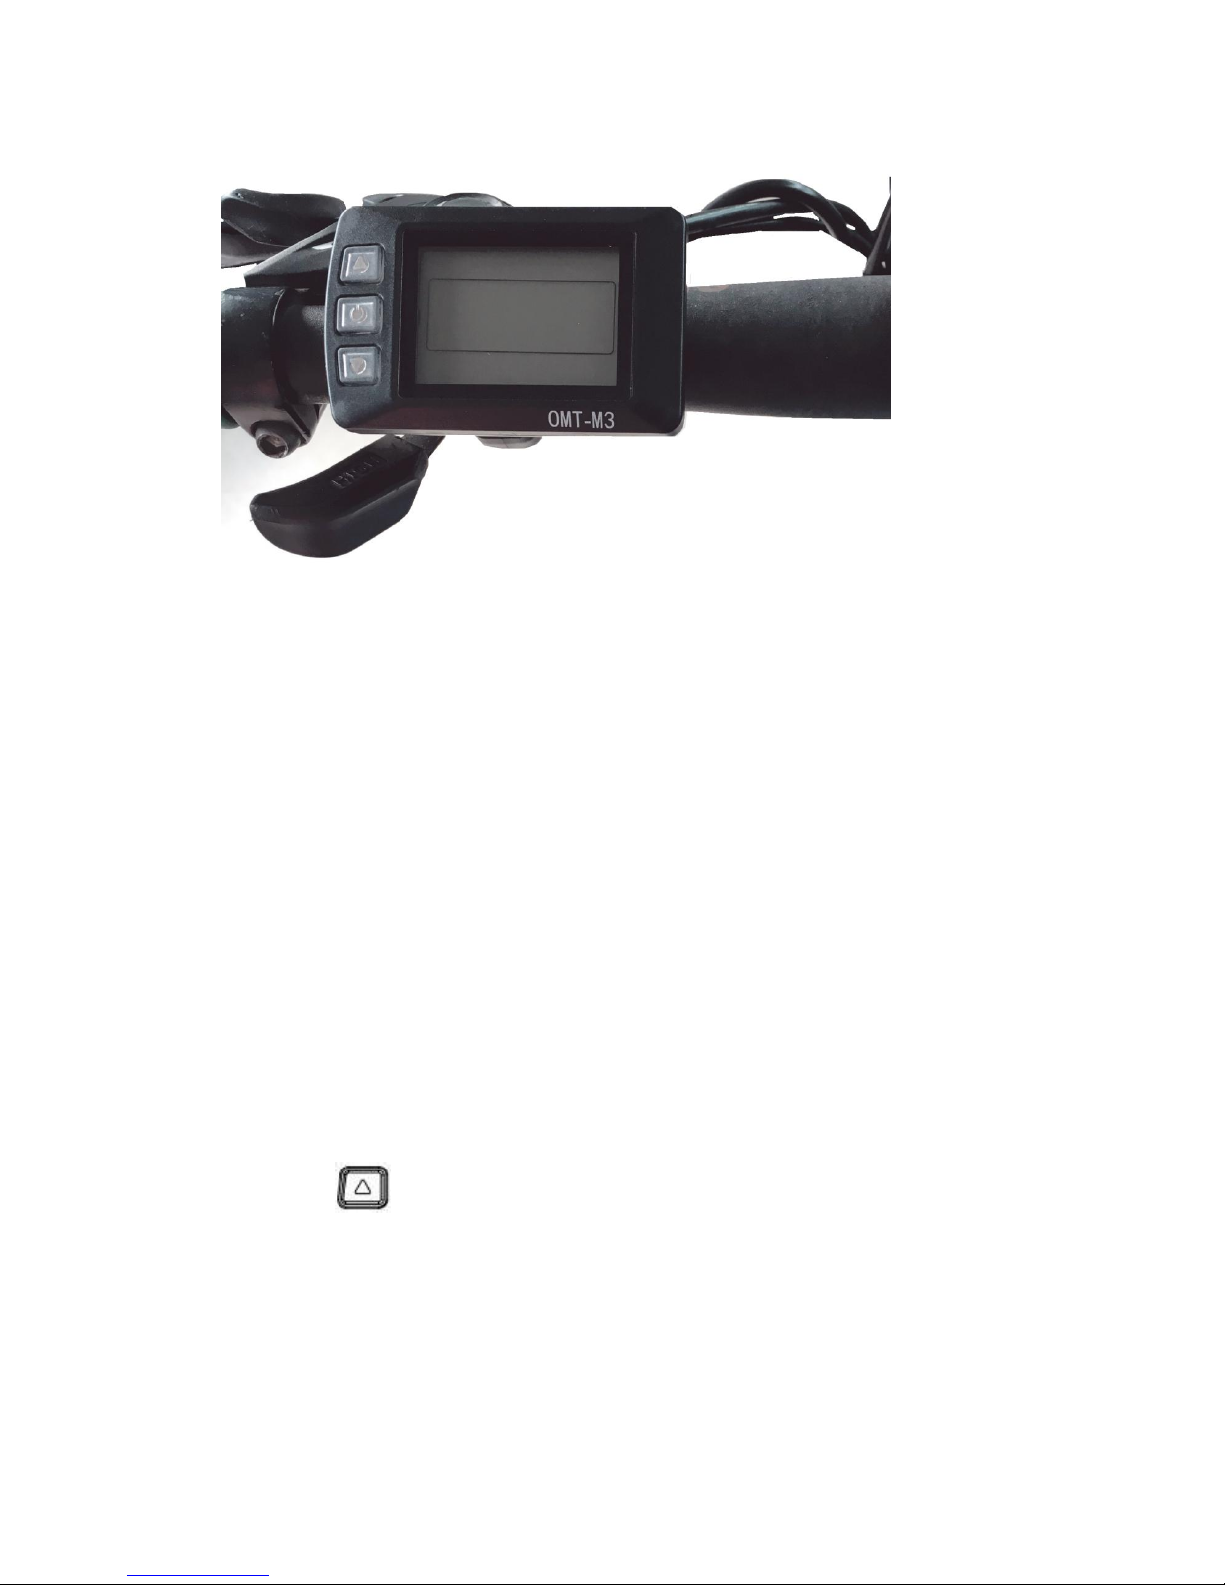
5) Installation
●
Install the display in the middle of handlebar, then adjust
to suitable angle, install the press button to left side ofhandlebar.
●
Power off the device, connect the device to controller.
●
Power on
To Head Light
To Controller
Page 4
3
2. Overview of OMT-M3
1)
UART protocol:
Equipped with independent press buttons
2)
Speed:
Real-time SPEED, MAX SPEED, Average SPEED
3)
kmh/mile:
Kmh/MPH according to habit
4)
Battery level:
Indicates the battery level in real time
5)
Back light control:
Press button for 3 seconds to power on/off
6) Back light adjustment:
3-level adjustment
7) Assist level:
Page 5
4
From 1 to 3, press button to change assist level.
8)
Distance
:
ODO/Trip/Driving duration
9)
Error code
:
Please refer to appendix table 1 for definition
10) 6km
mode:
on the screen.
In
this mode, it will display
11) Parameter
setting:
Set parameters, such as: wheel size, speed limit etc
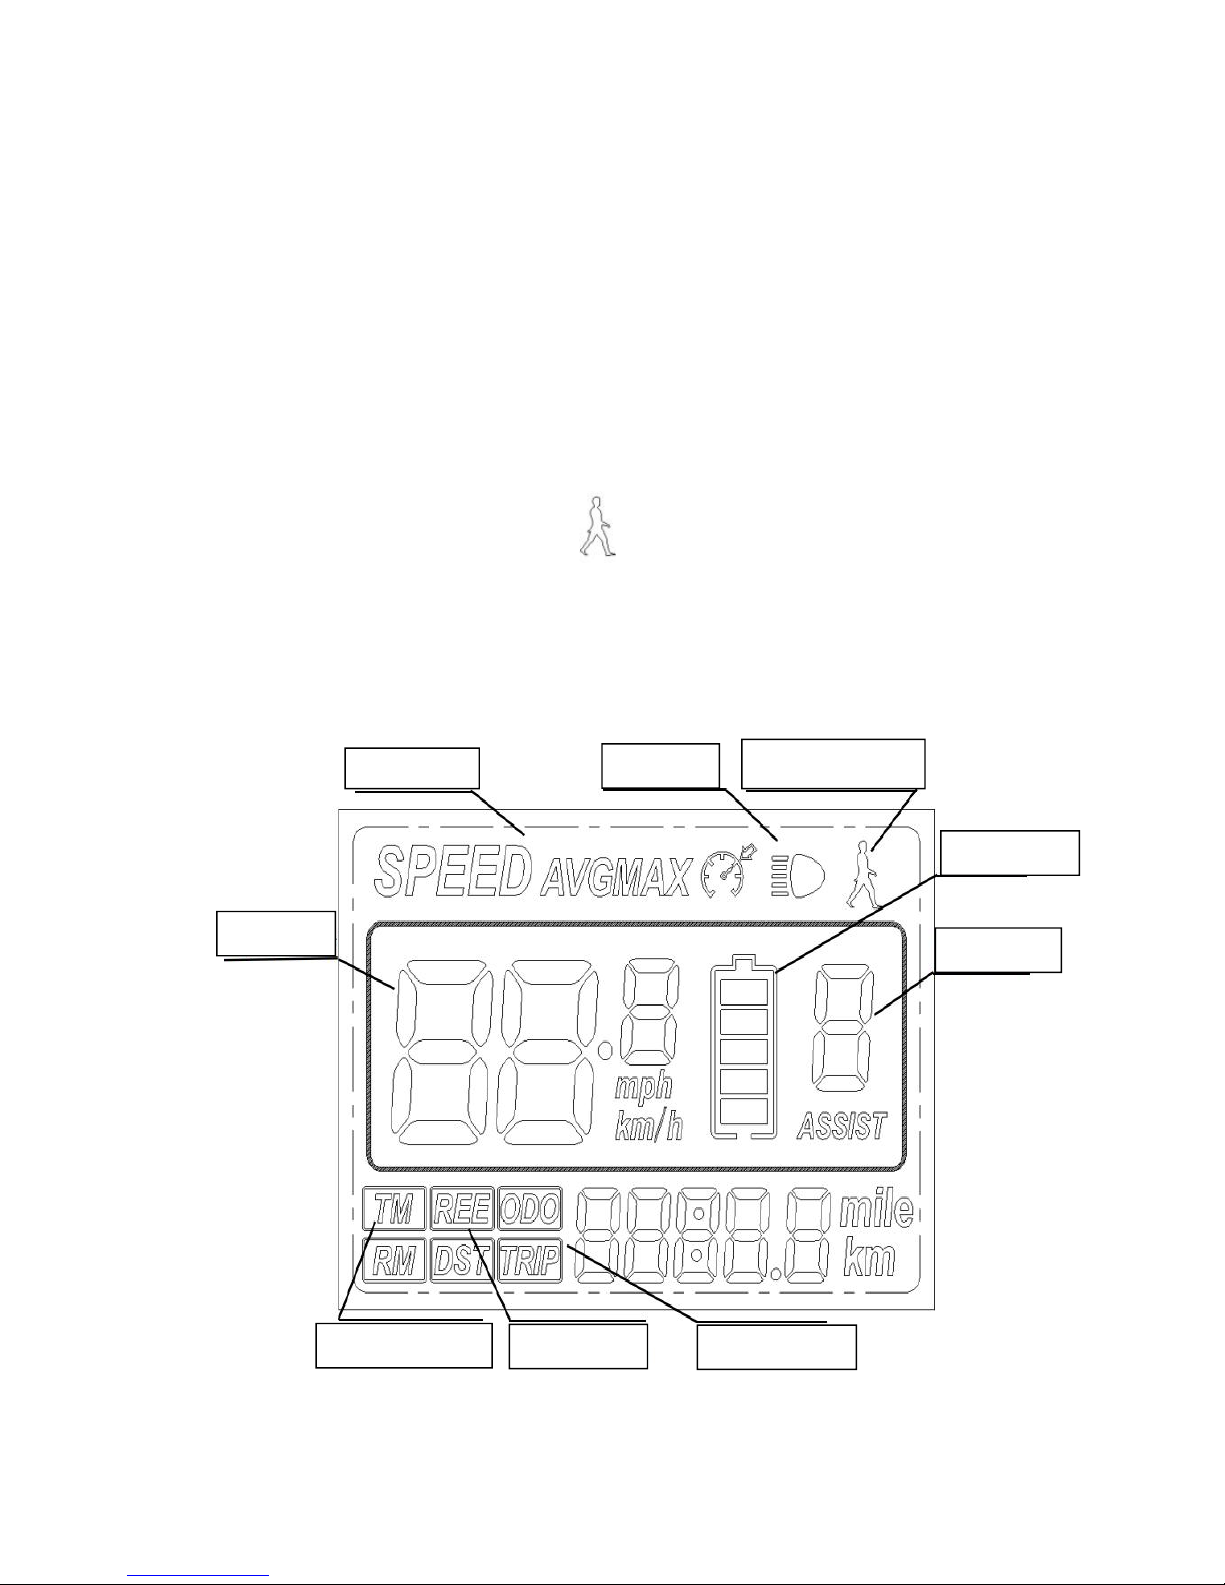
3. Presentation of screen
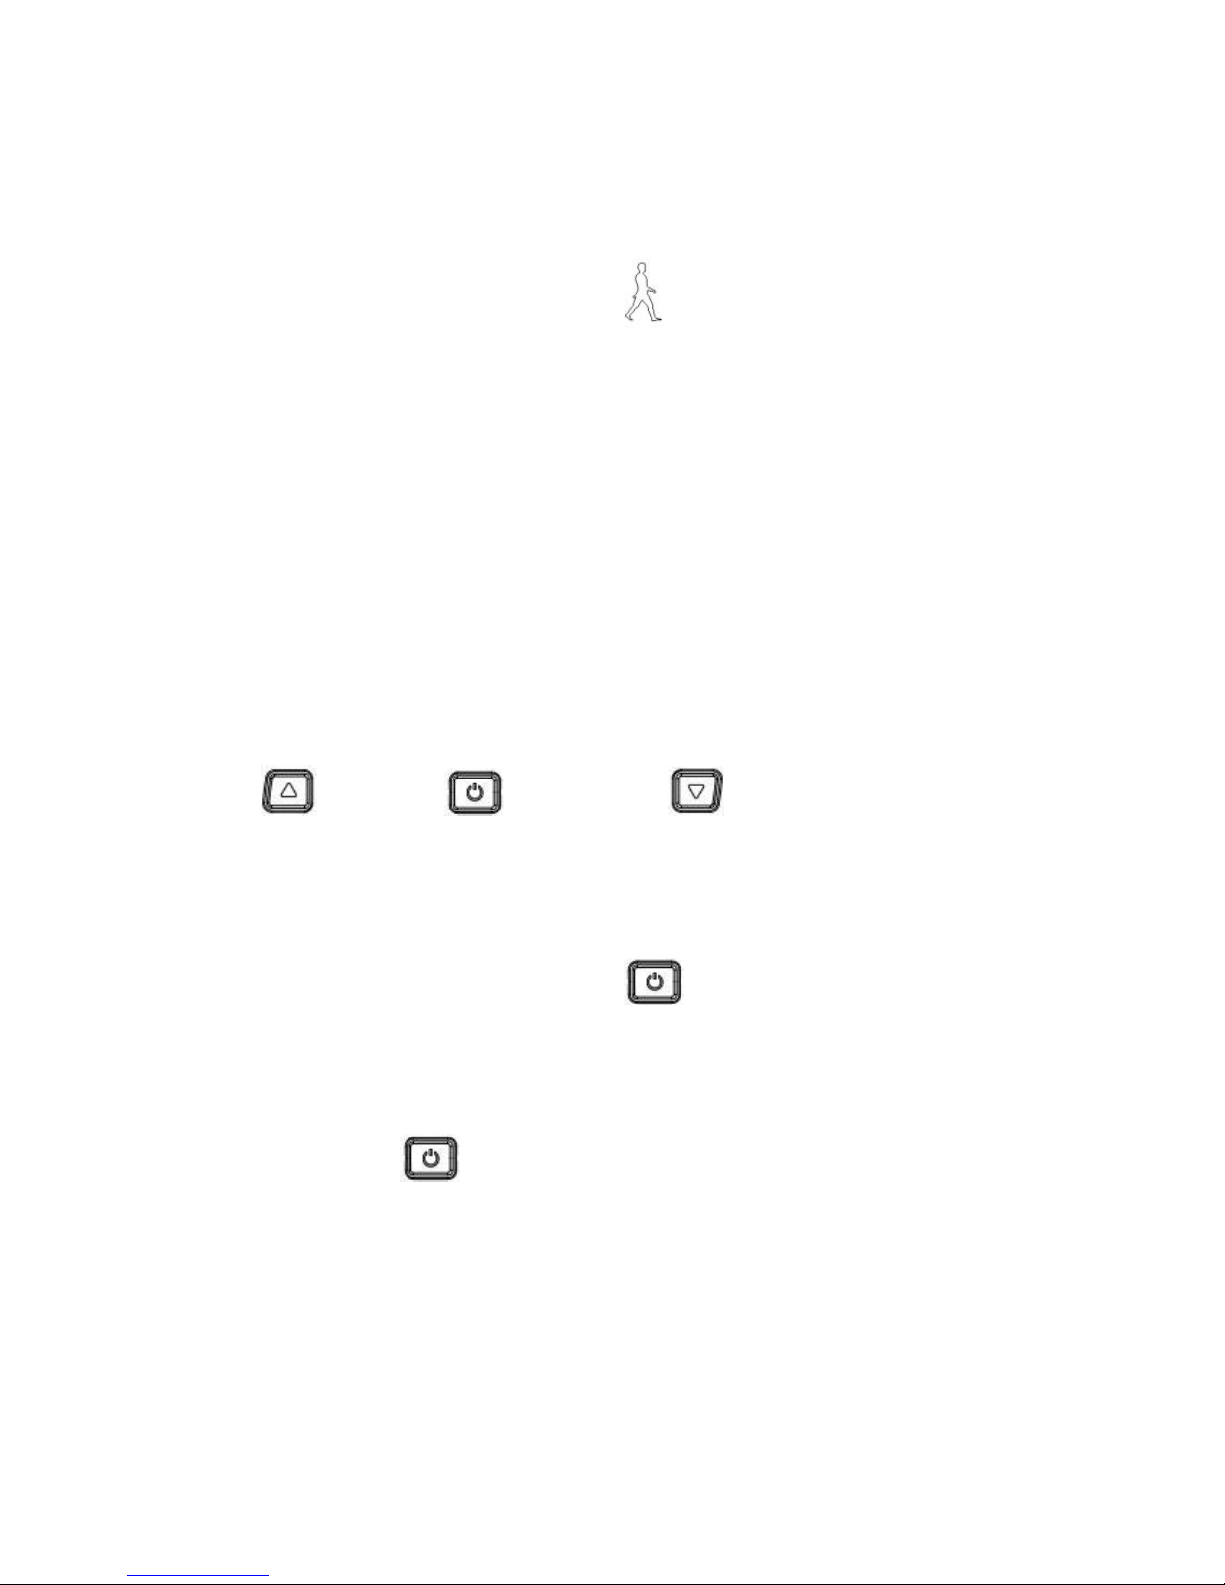
1) Battery level: 5 levels, voltage interval could be customized
Speed Mode
Back Light
6Km Mode
Speed
Driving Duration
Battery Level
Error Code
Assist Level
Distance Mode
Page 6
5
2)
Speed
:Average SPEED/MAX SPEED/Real-time SPEED
3)
Speed unit
:Kmh/MPH
4)
6km mode:6km mode Display
.
5)
Assist level
:actual assist level 1~3.
6)
Back light icon
:indicates when back light are on.
7)
Distance
:Trip/ODO.
8)
Error code
:“REE” and code when there is error
4. Press button definition
OMT-M3 uses independent press button, in total three
buttons:
“UP” “Power” “DOWN”
5. Operation instructions
1) Power ON/OFF
When the power is off, Long press
(
Power
)
during 3
seconds
,
screen will display all contents and start to normal
working mode, and controller will be turned on When the power is
on, Long press
(
Power)during 3 seconds,screen will be
powered off
,
and controller will be turned off . If no any operation
both on bike and display during 10 minutes (time could be set), the
display will turn off automatically , in this case, no power
consumption for both display and controller.
Page 7
6
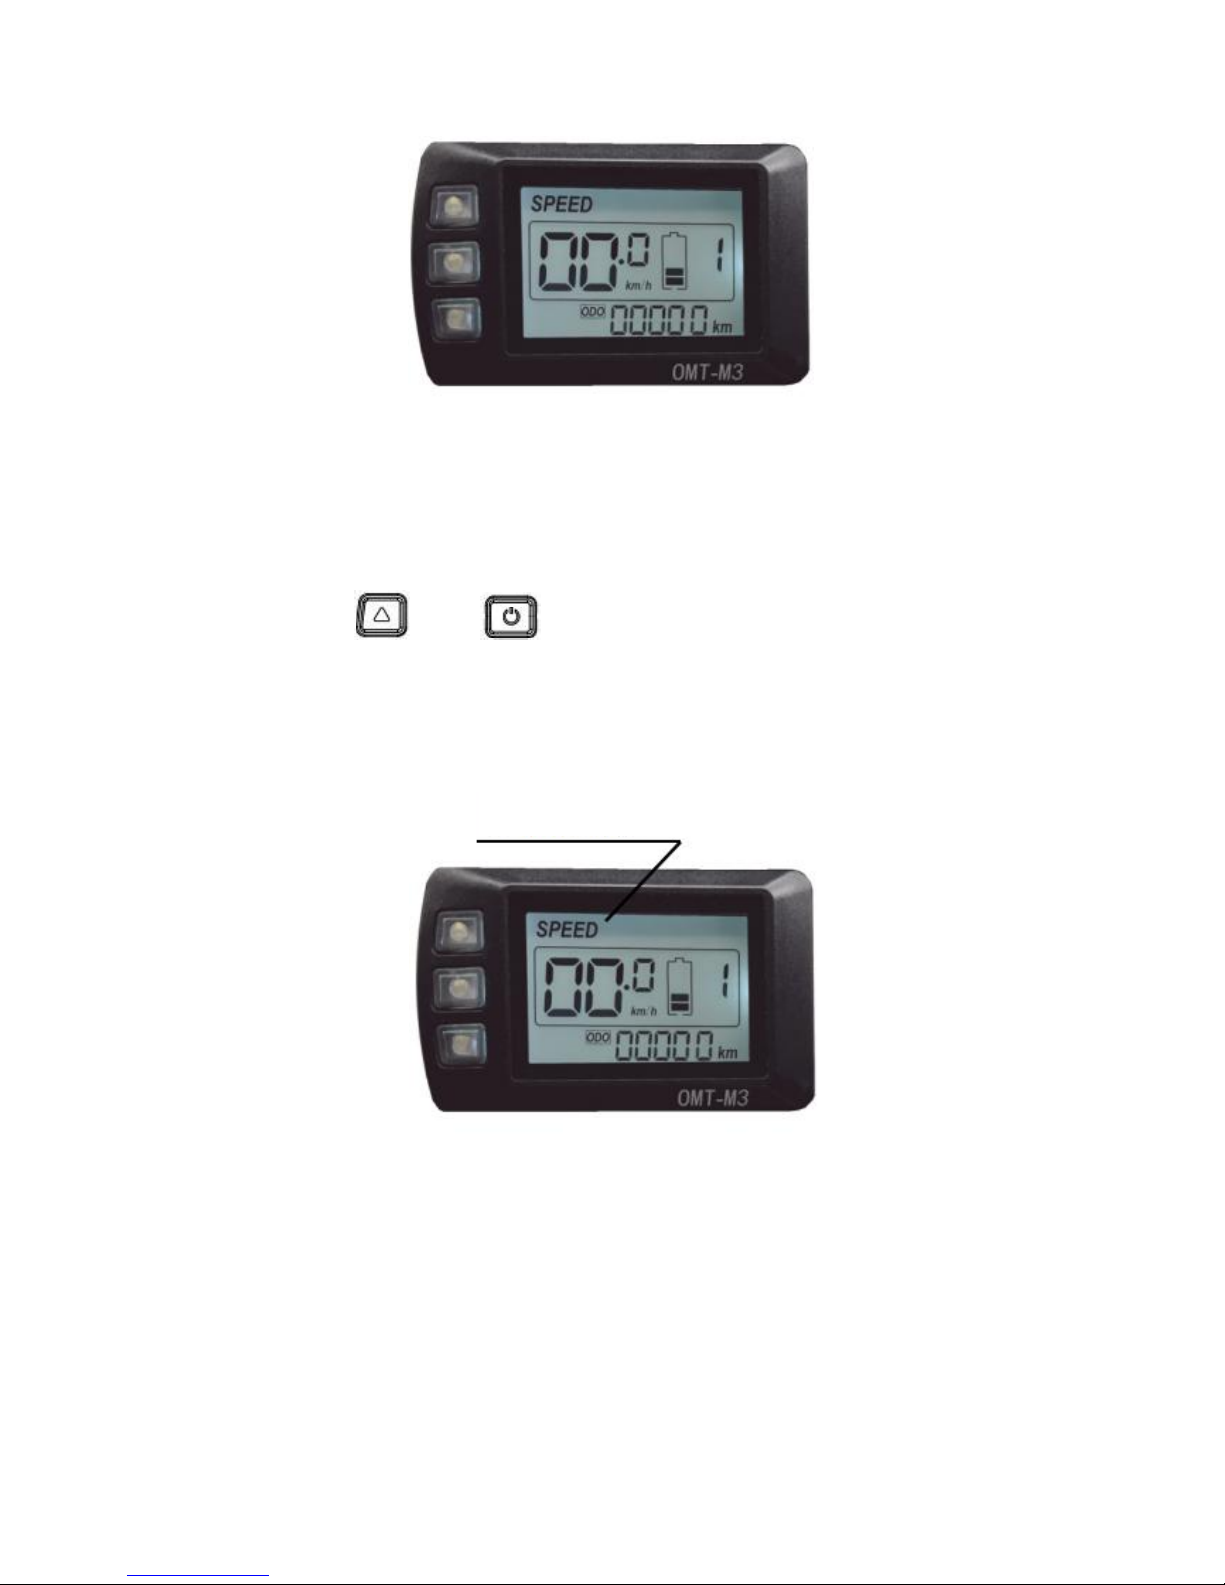
2) Different Speed display:
Long press and o switch different speed information,
Figure 2
Real time speed
(
SPEED)→ Max speed
(
MAX SPEED)→Average
speed
(
AVGSPEED
)
Figure 3
Real Speed
Page 8
7
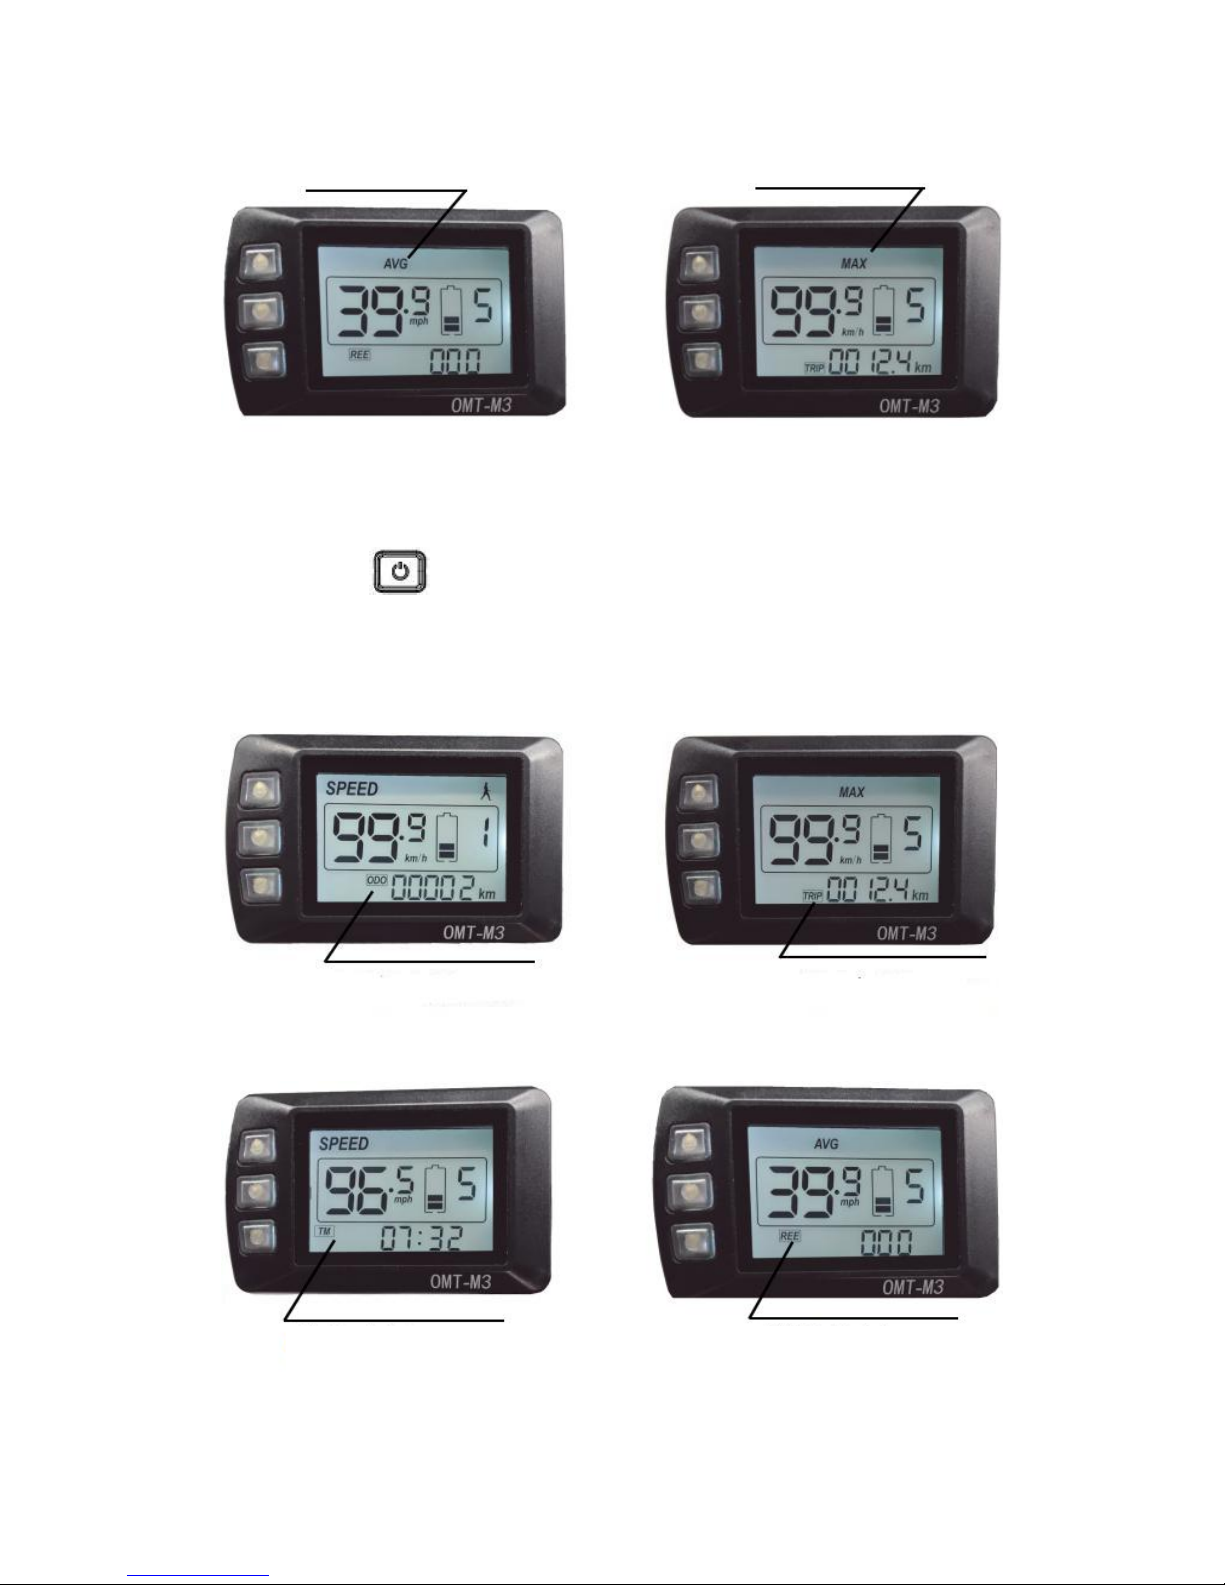
Short press to switch ODO/TRIP/ Driving Time/Error Code
Trip(Single trip distance)→ODO(Accumulated distance)
→
TM(
Driving Time
)→REE(Error Code)。
Average speed
Max speed
ODO
Figure 6
Trip
Figure 7
Driving Time
Figure 8
Error Code
Figure 9
Figure 4
3)ODO/TRIP/ Driving Time/Error Code
Figure 5
Page 9
8
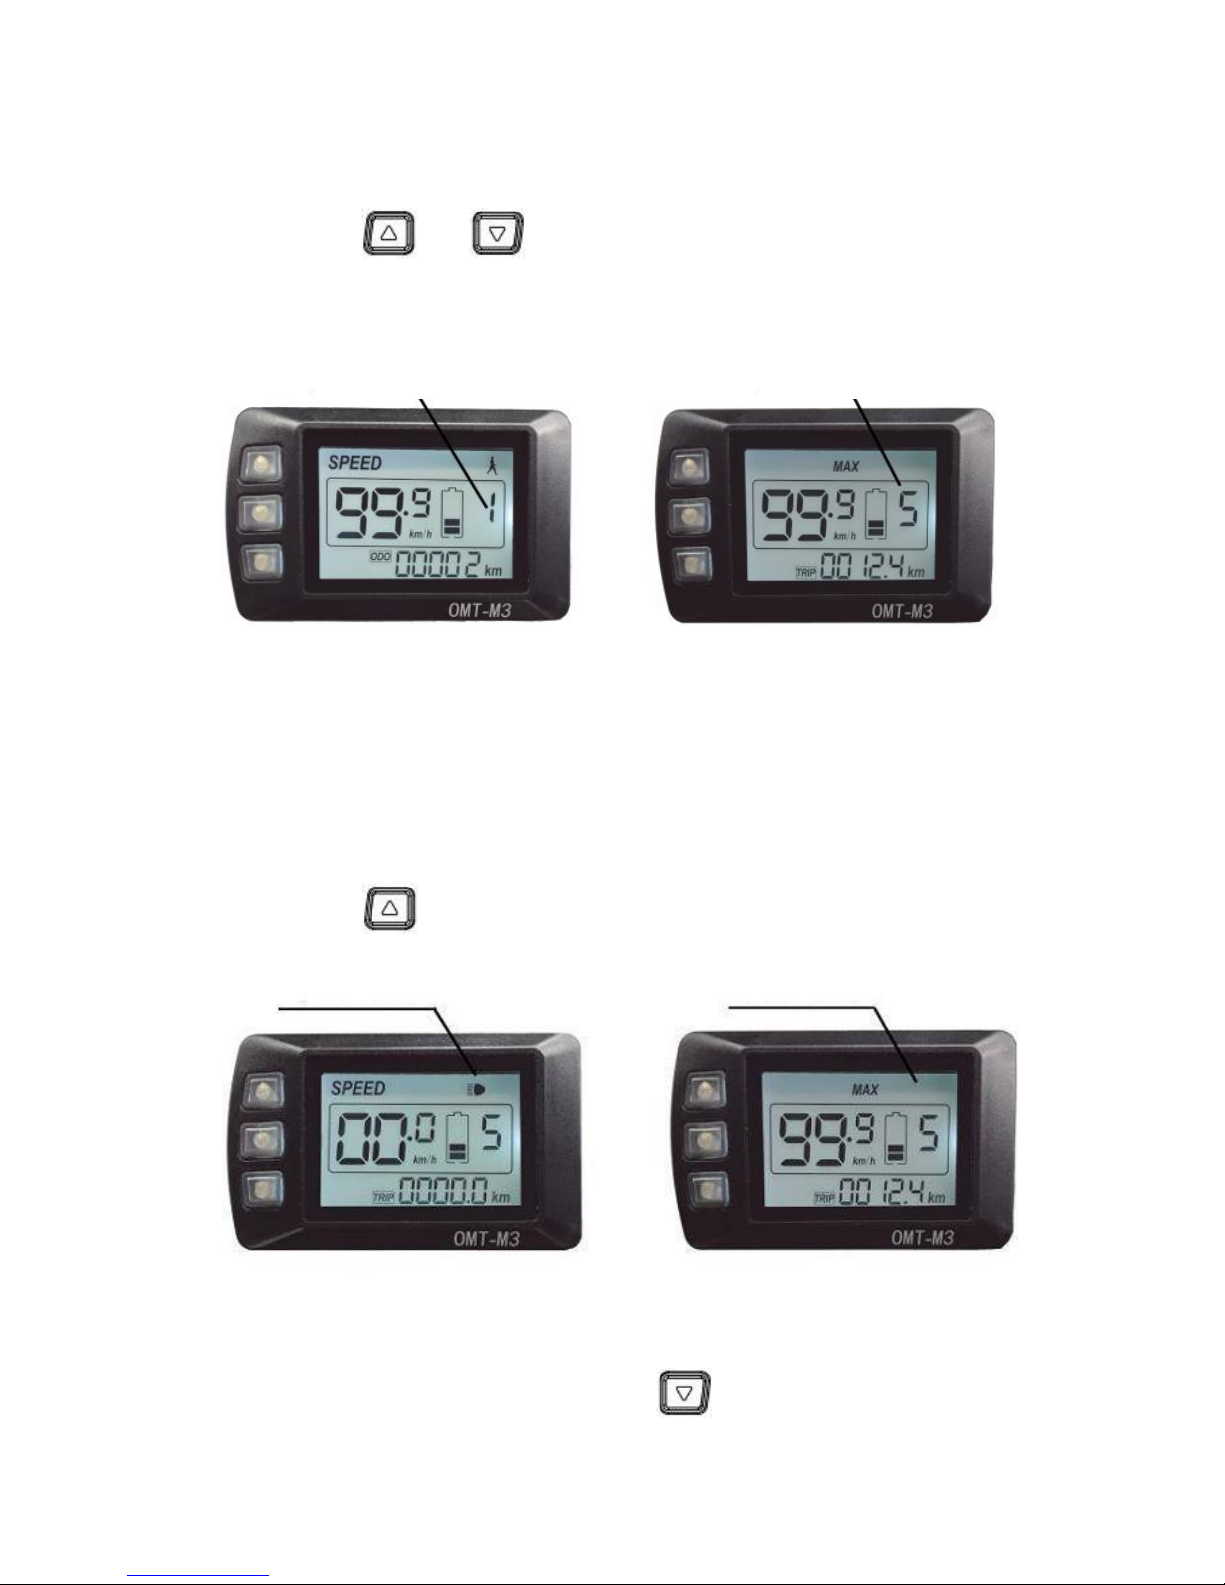
4)Assist level
Short press or to change assist level, default value is
level 1
5) Back light control
Long press
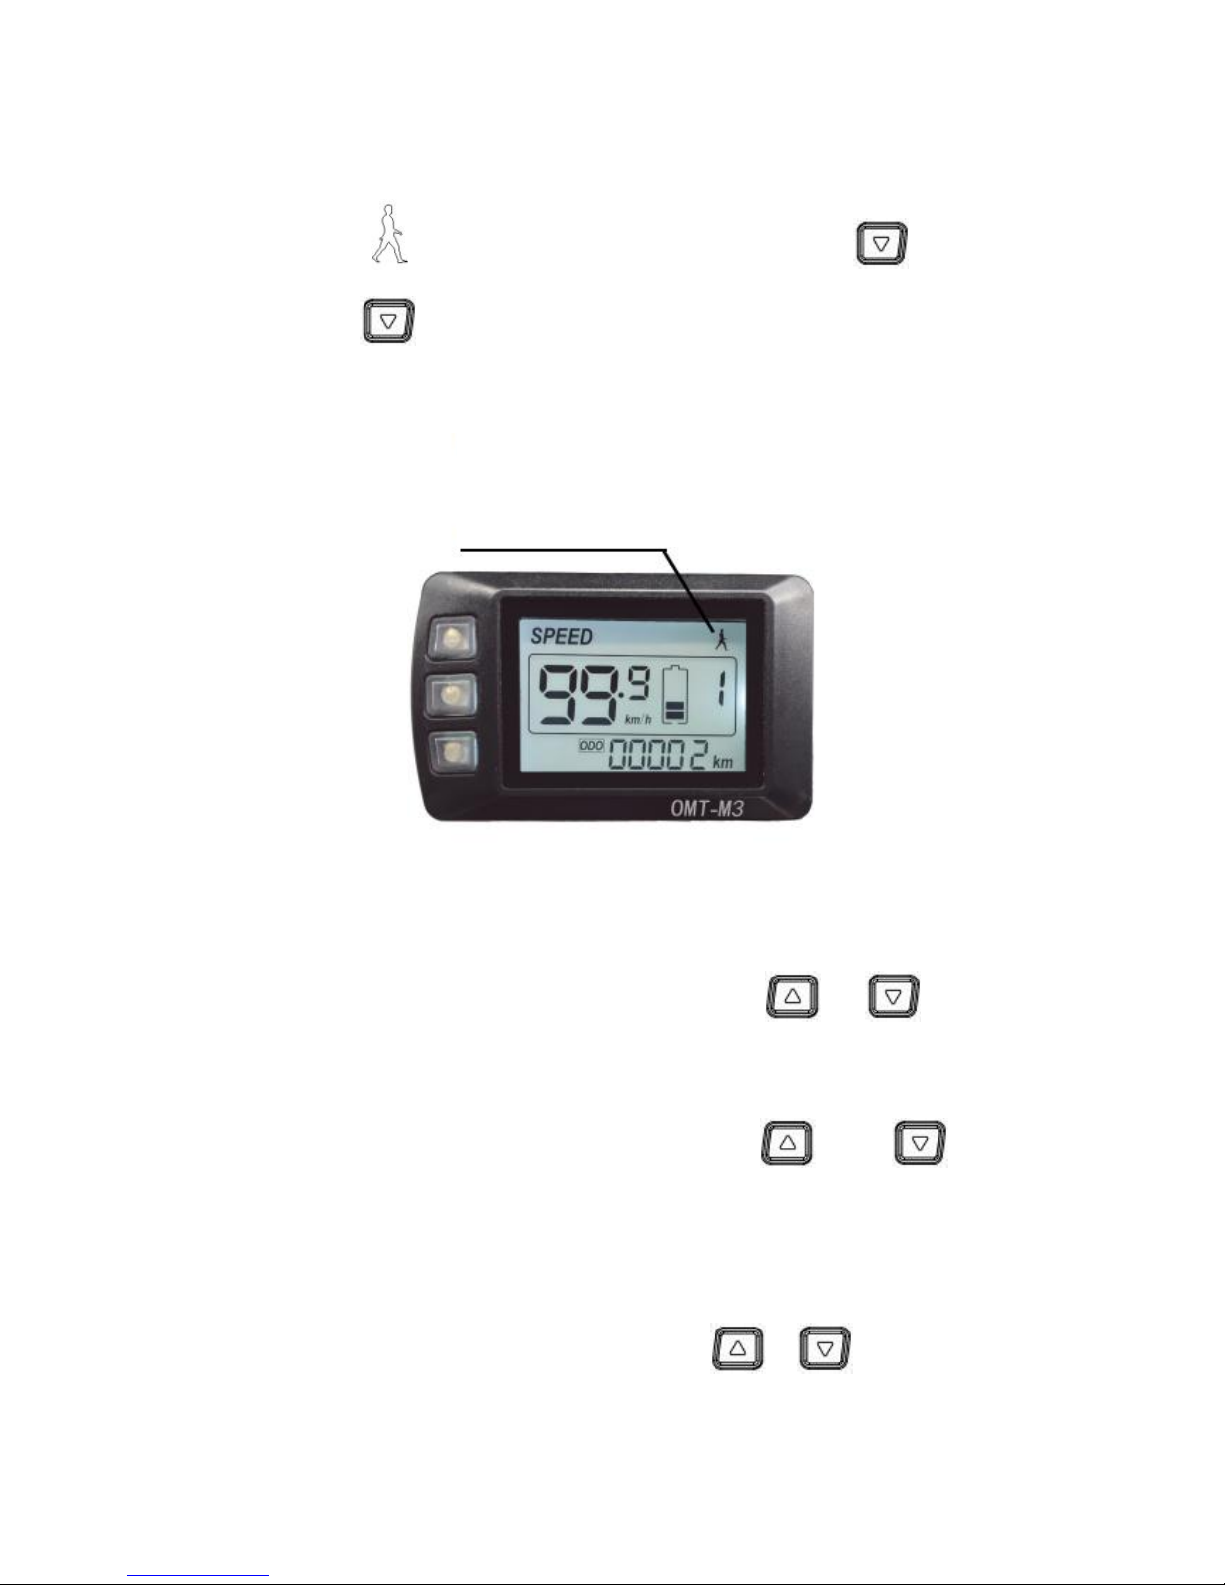
6) 6km mode
When the bike is stopped, long press , will enter 6km/h mode,
Level 1
Level 5
Figure 10
Figure 11
for 3 seconds turn on/off the back light.
Bike Light On Bike Light Off
Figure 12
Page 10
9
the speed will be 4.5~7.5km/h according to different road
conditions, “ ” will show up on screen, long press again or
short press
,
will quit 6km/h mode. Long press or short press
could be customized by clients.
When the display is powered on,long press and
will
enter parameter setting mode
Figure 14 ,
,
in this mode, can
change parameter values, long press again
and will
quit parameter setting mode or no operation during 10s will also
quit this mode.
In parameter setting
mode, short
press
/
will
6km Mode
Figure 13
6. Parameter setting
Page 11
10
will save current
change parameter value, short press
value and switch to next parameter.
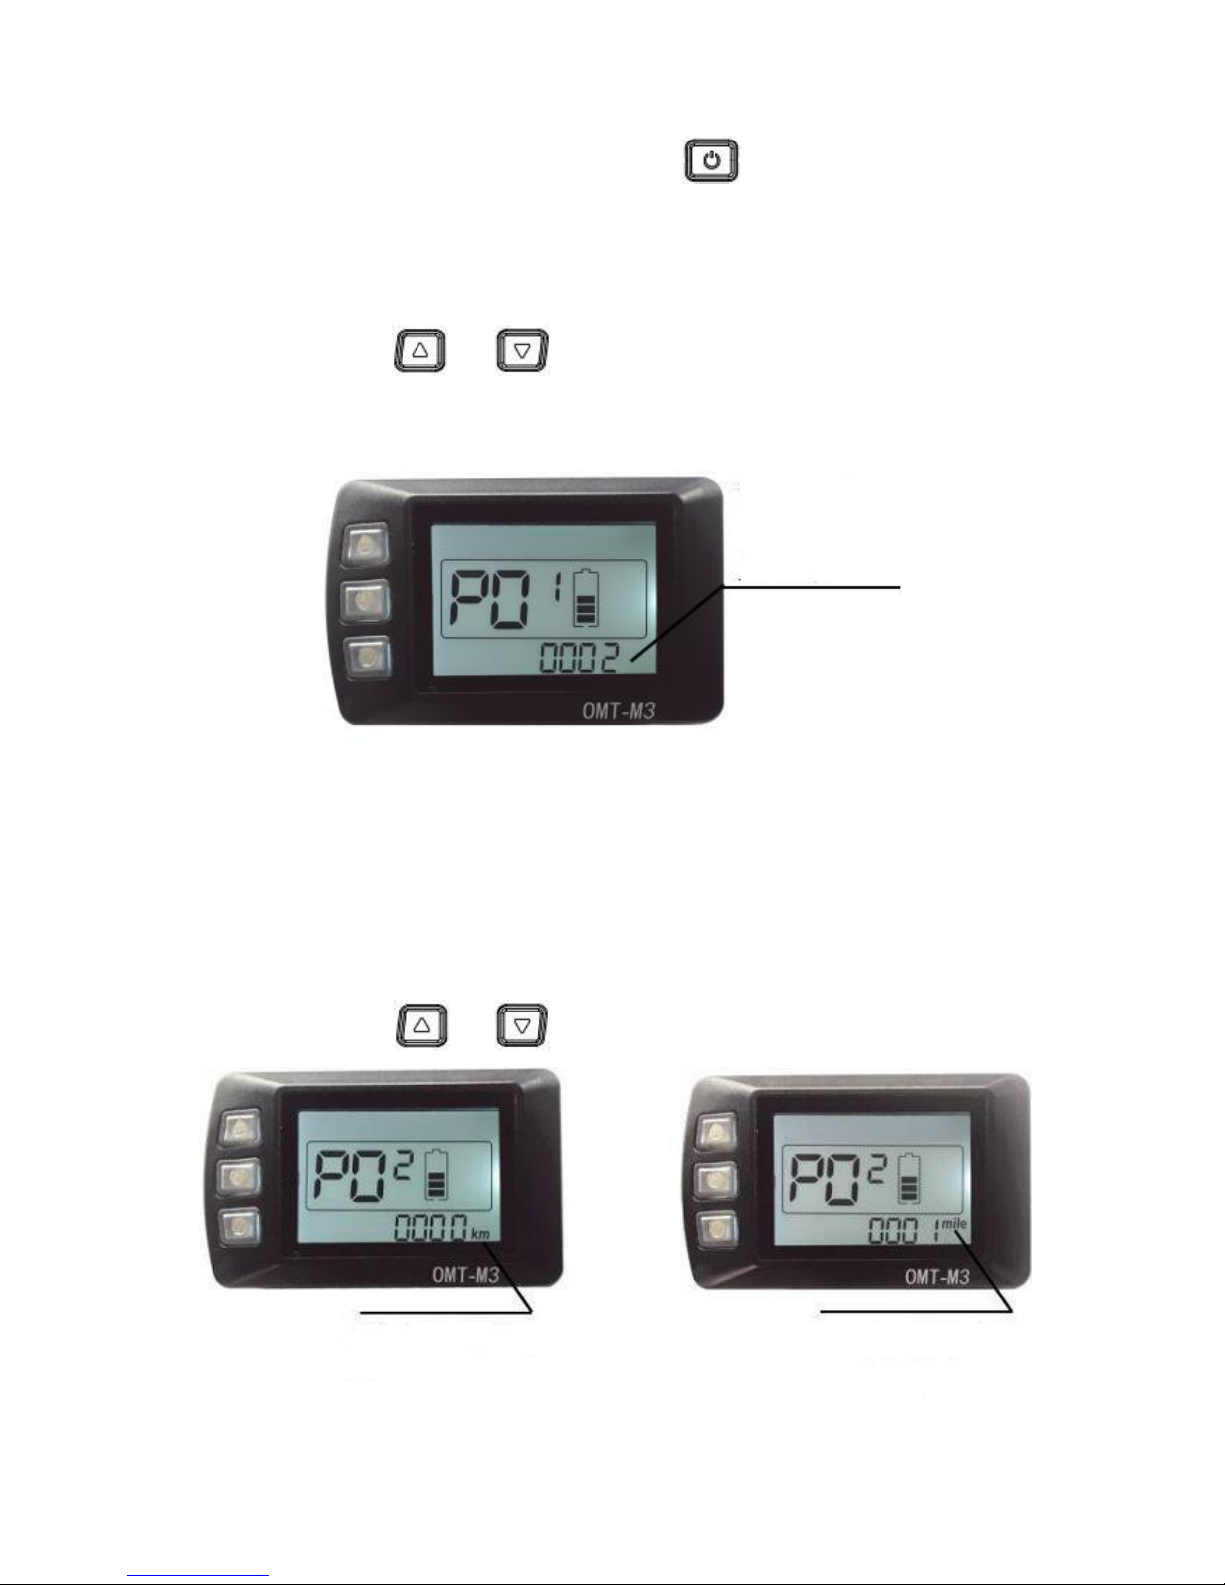
1)
P01-back light lightness
:
short press
/
will switch from 1 to 3, Level 3 is lightest.
Level 2 is default value.
2) P02-kmh/MPH:
Short press / to Switch kmh/MPH.
Figure 14
Back Light Level 2
-
default value
Figure 15
Figure 16
Range- km
Range- mile
Page 12
11
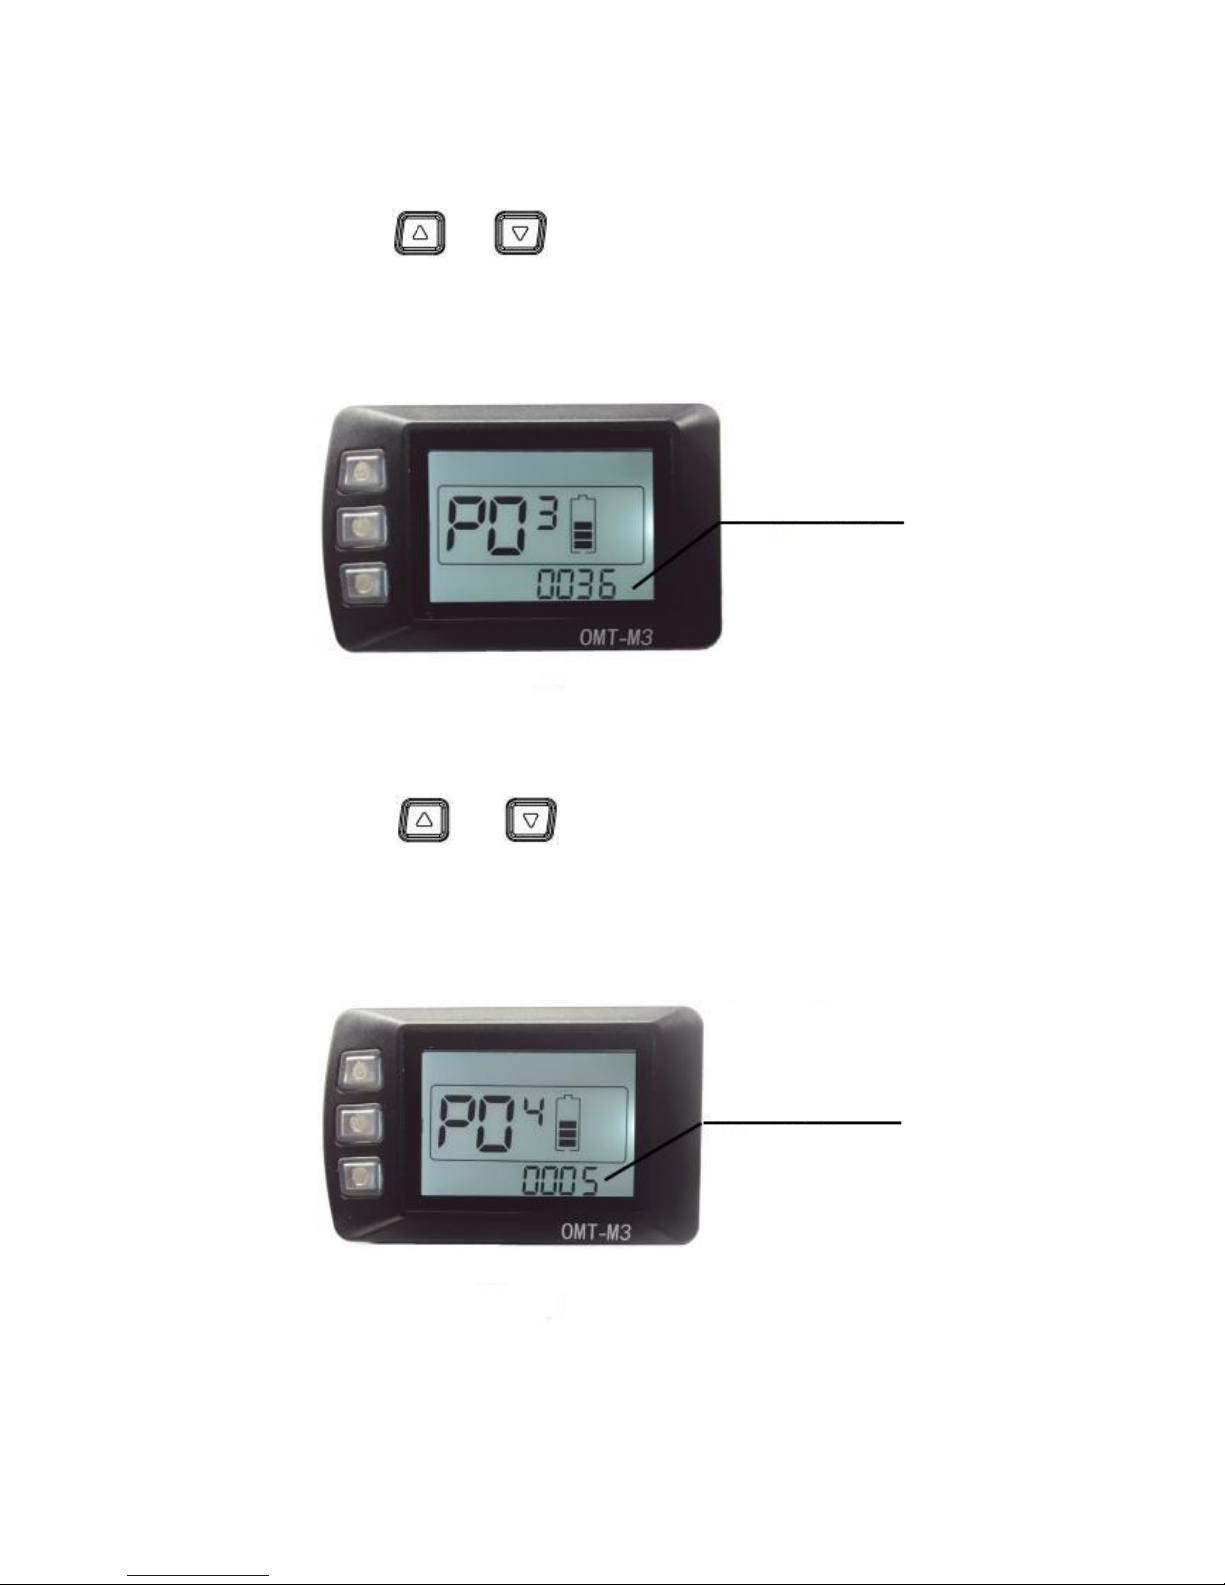
3)
P03-Working voltage
:
short press / to switch 24V,36V,48V, Default value
is 36V.
4) P04-Auto shutdown time:
short press / to switch from 0 to 60, it is the time(in
minutes) to shut down the screen automatically if no operation 0
means never shut down, Default value is 10 minutes
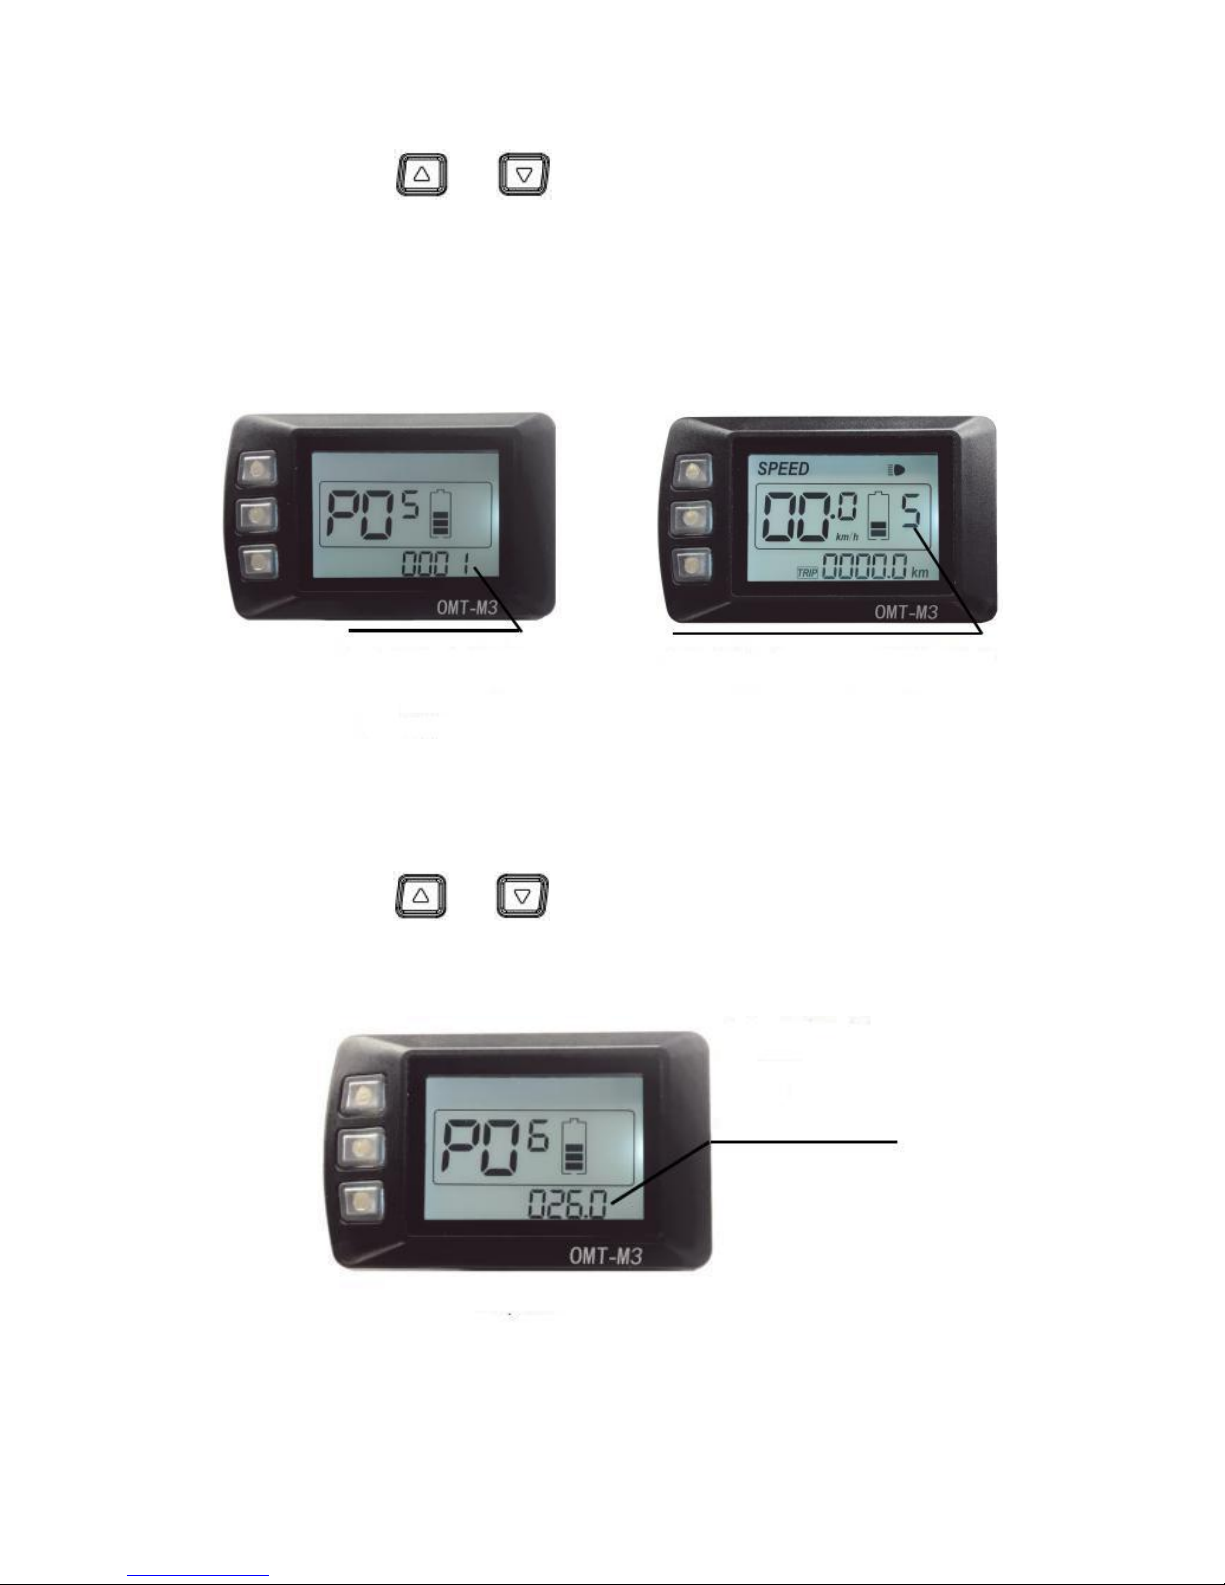
5)
P05-Number of Assist levels
:
36V by default
5minutes
Figure 17
Figure 18
Page 13
12
Short press / to change level 0->1->2.
0: 3 assist levels
1: 5 assist levels
2: 9 assist levels
6) P06-Wheel size selection:
short press / to switch wheel size, in inch, step:
0.1 inch
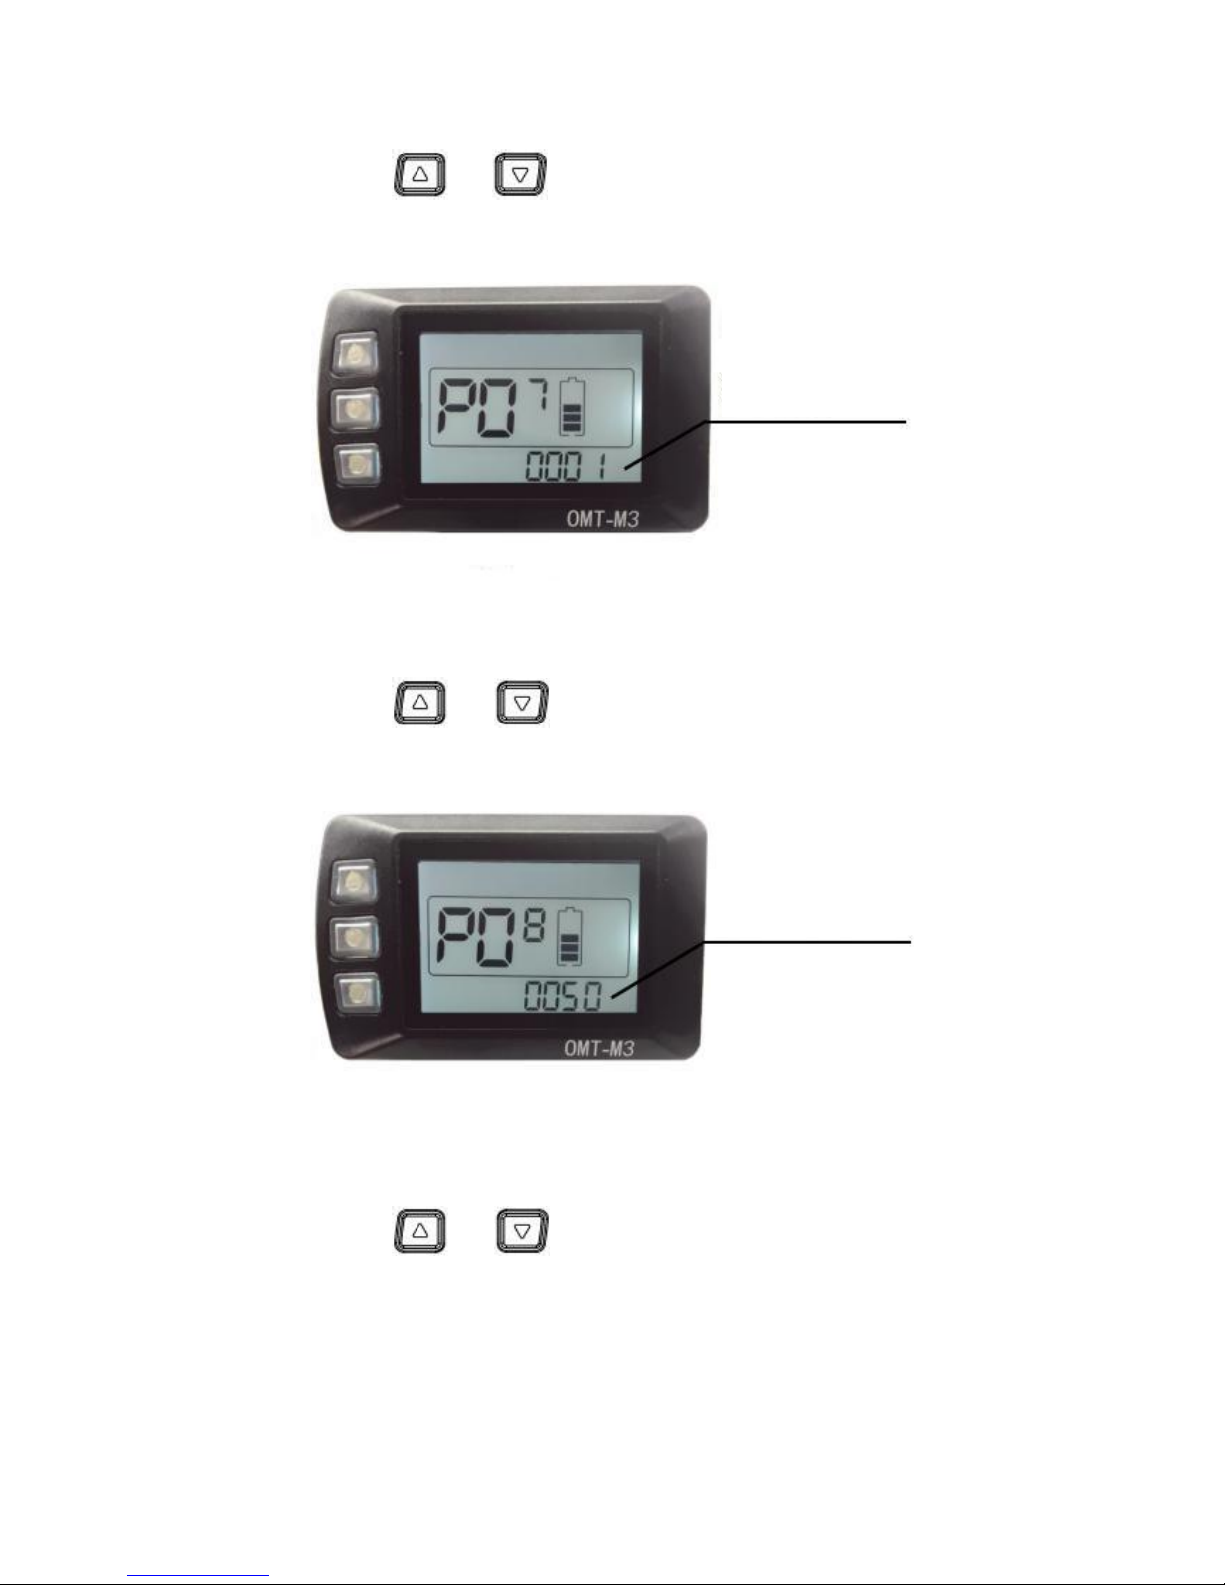
7) P07-Number of magnets for speed sensor:
Wheel Size
Assist Level
Assist Level
Figure 19 Figure 20
Figure 21
Page 14
13
short press / to switch fromt 1 to 100.
8) P08-speed limit
:
short press / to set the speed limit from 0 to 100Km/h,
100 means no limit.
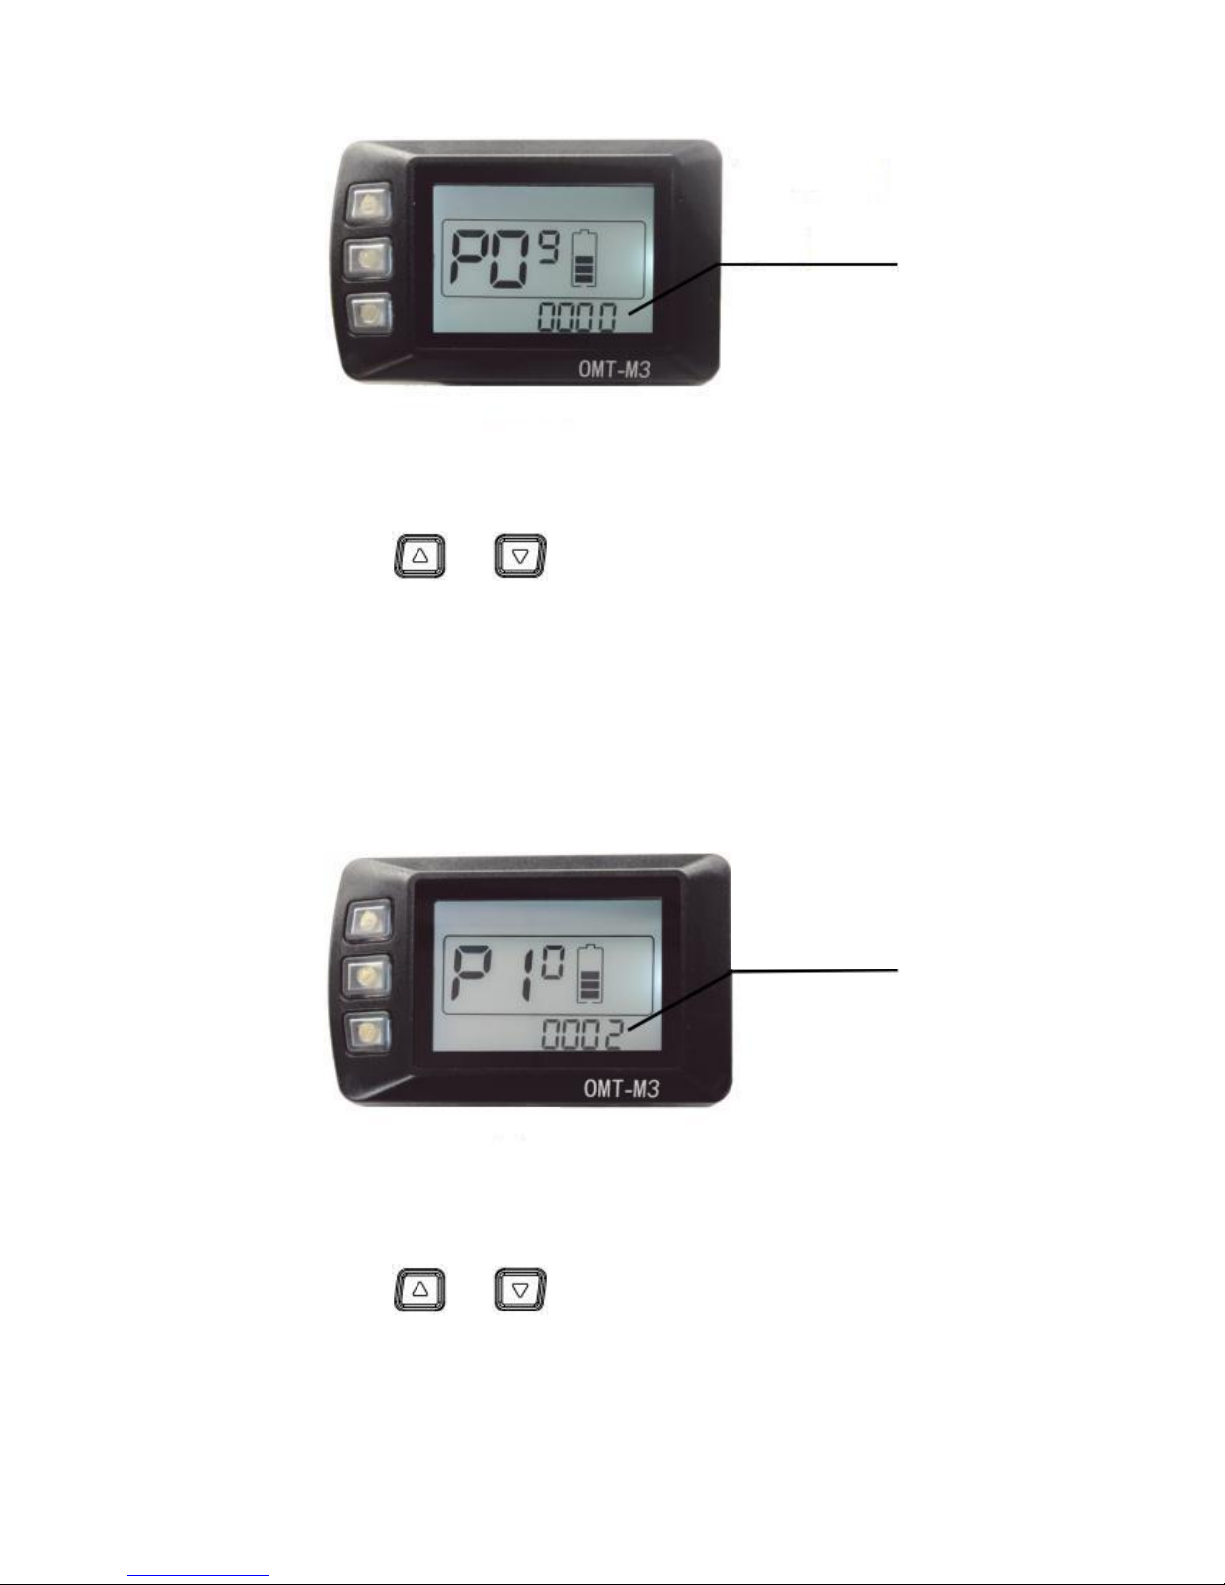
9)
P09-Non-zero speed start
:
short press / to switch from0 to 1. 0: zero speed
start,1:non-zero speed start.
Magnet quantity
of Speed Sensor
Max Speed Limit
Figure 22
Figure 23
Page 15
14
10)
P10-Driving mode selection
:
short press / to switch from 0->1->2.
0: Assist mode (throttle does not work, only assist);
1: Electrical driving mode(only throttle works, assist does not work) ;
2: Both assist and Electrical driving mode(Not available if in zero speed
start and electrical driving mode);
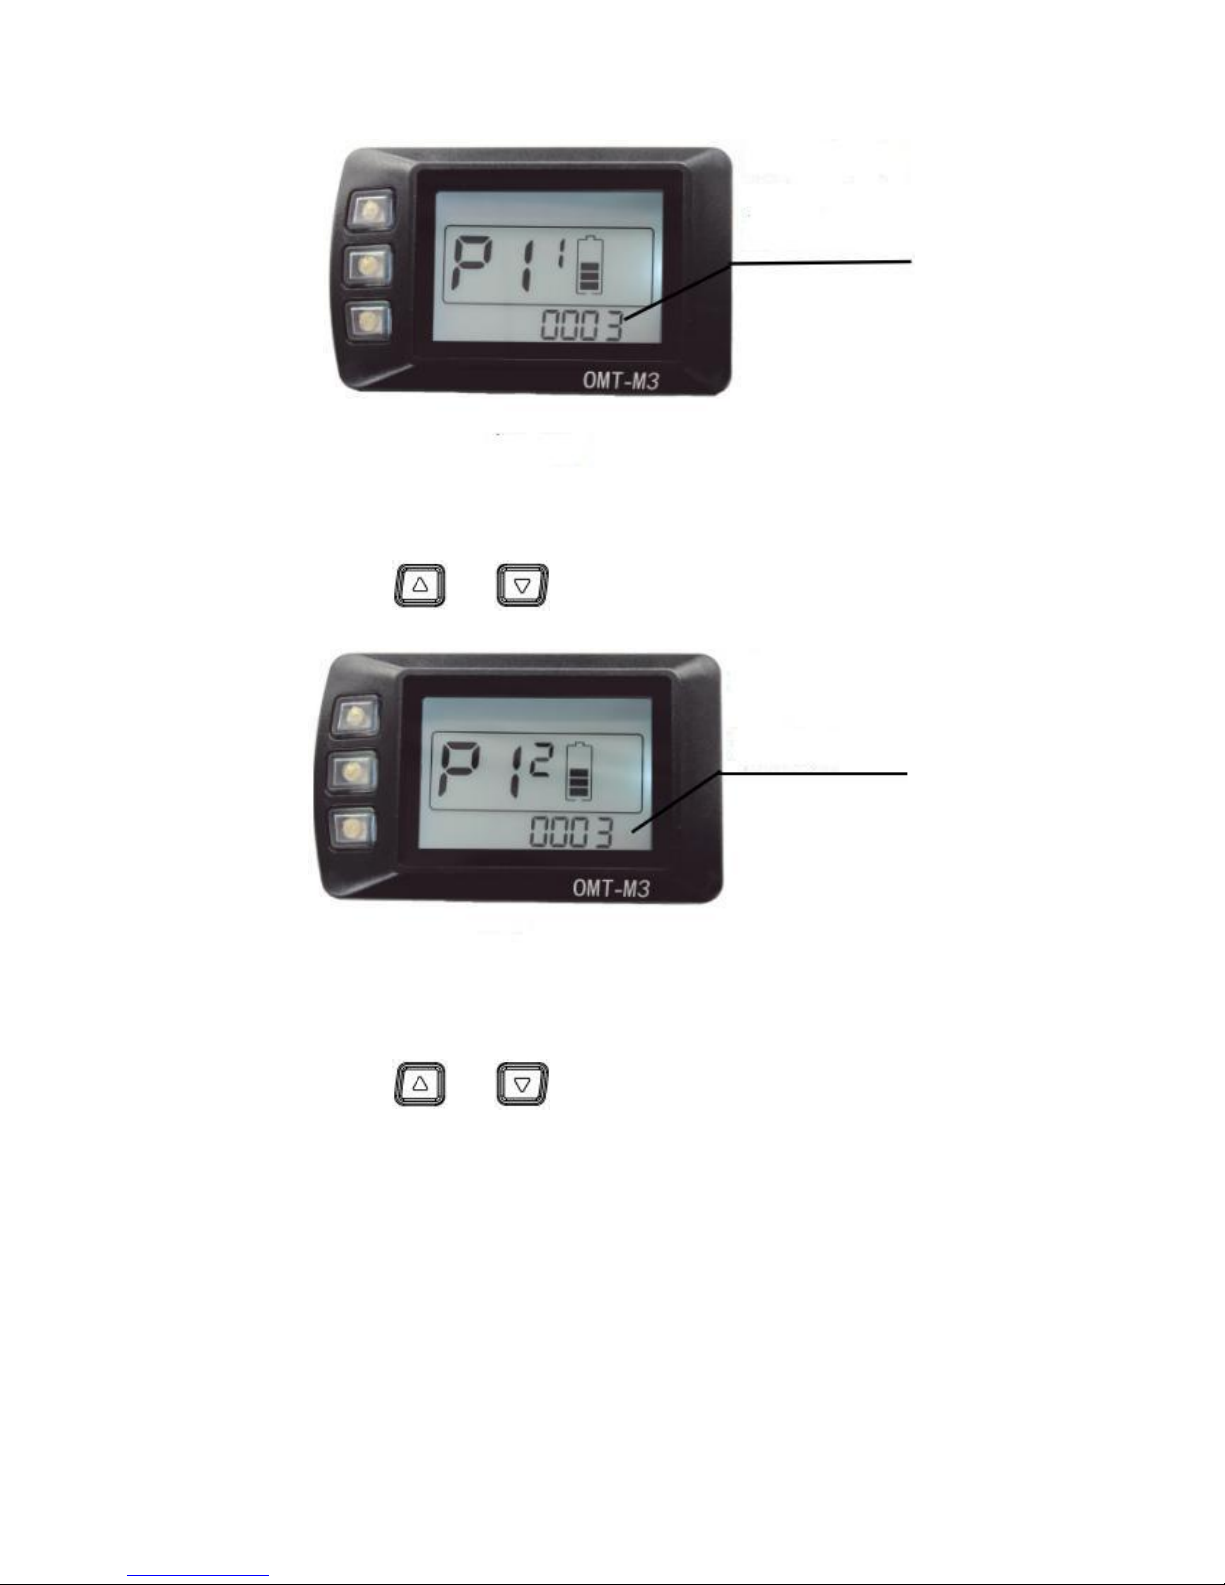
11) P11-assist sensitivity setting
:
short press / to switch from 1 to 24.
Zero speed start
Driving mode : 2
Figure 24
Figure 25
Page 16
15
12) P12-assist starting power setting:
short press / to switch from 0 to 5.
13) P13-Assist magnetic disc types
short press /
to switch from 5->8->12, different
numbers of magnets.
Assist sensitivity 3
Starting assist power
Figure 26
Figure 27
Page 17
16
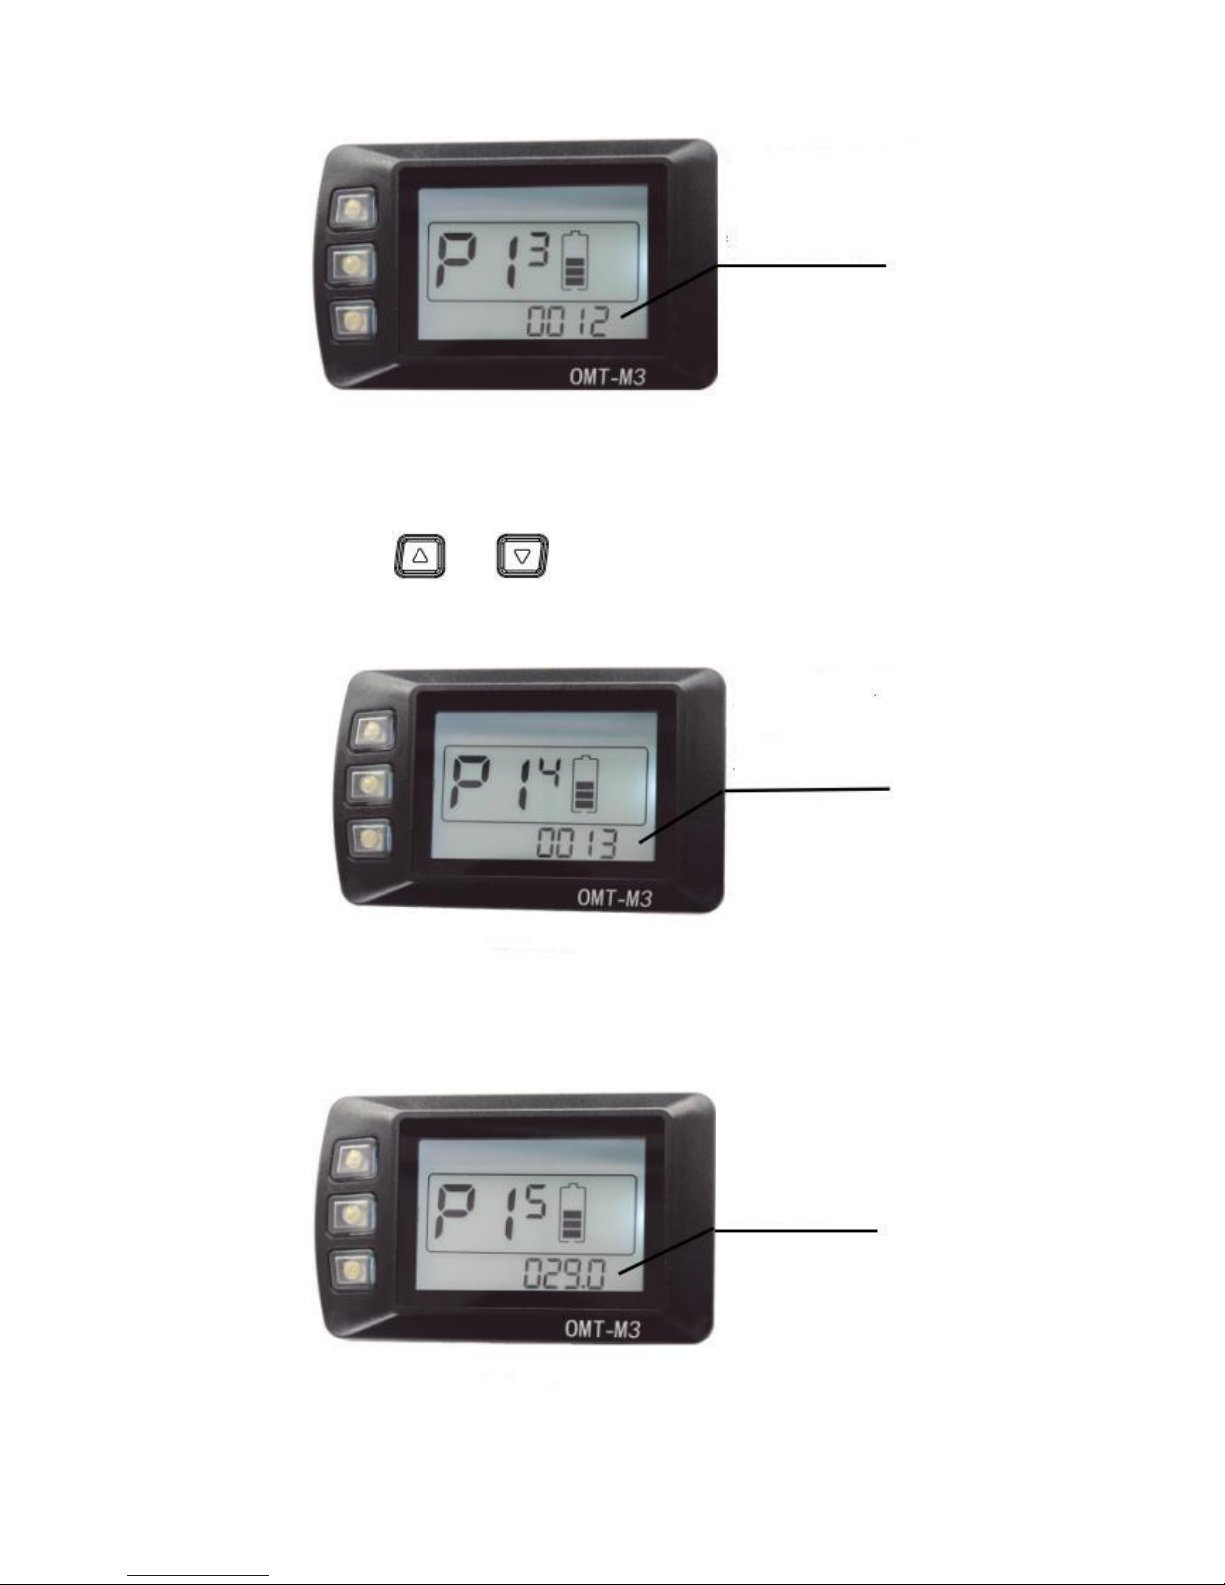
14)
P14-Current limit for the controller
:
short press / to switch from 1 to 20A
15) P15-low voltage protection for controller
Magnet quantity12 magnets
Max current in
controller
limits to 13A
Controller is
protected
under 29V
Figure 28
Figure 29
Figure 30
Page 18
17
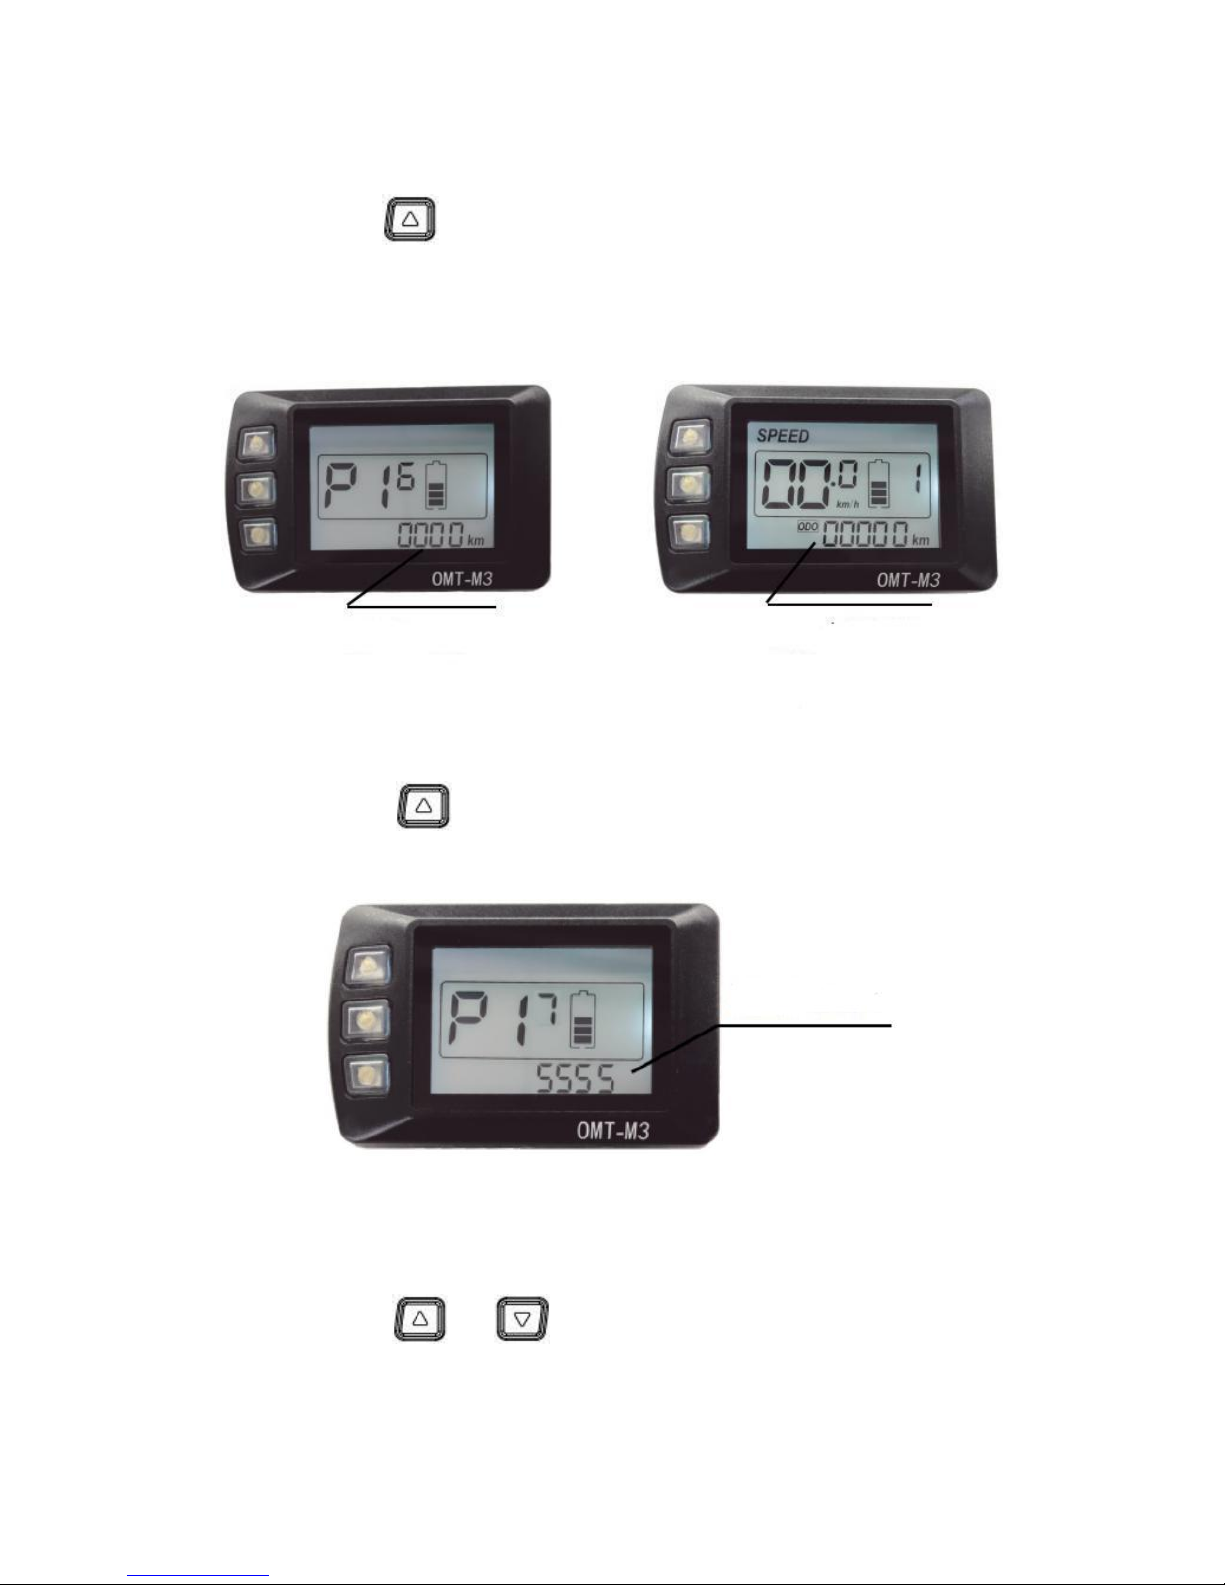
16) P16-Reset ODO distance
:
long press during 5 seconds
17)
P17-Reset all parameters
:
long press 5 seconds , when it displays “SSSS” , all
parameters reset to default values(except for the ODO distance)
18)
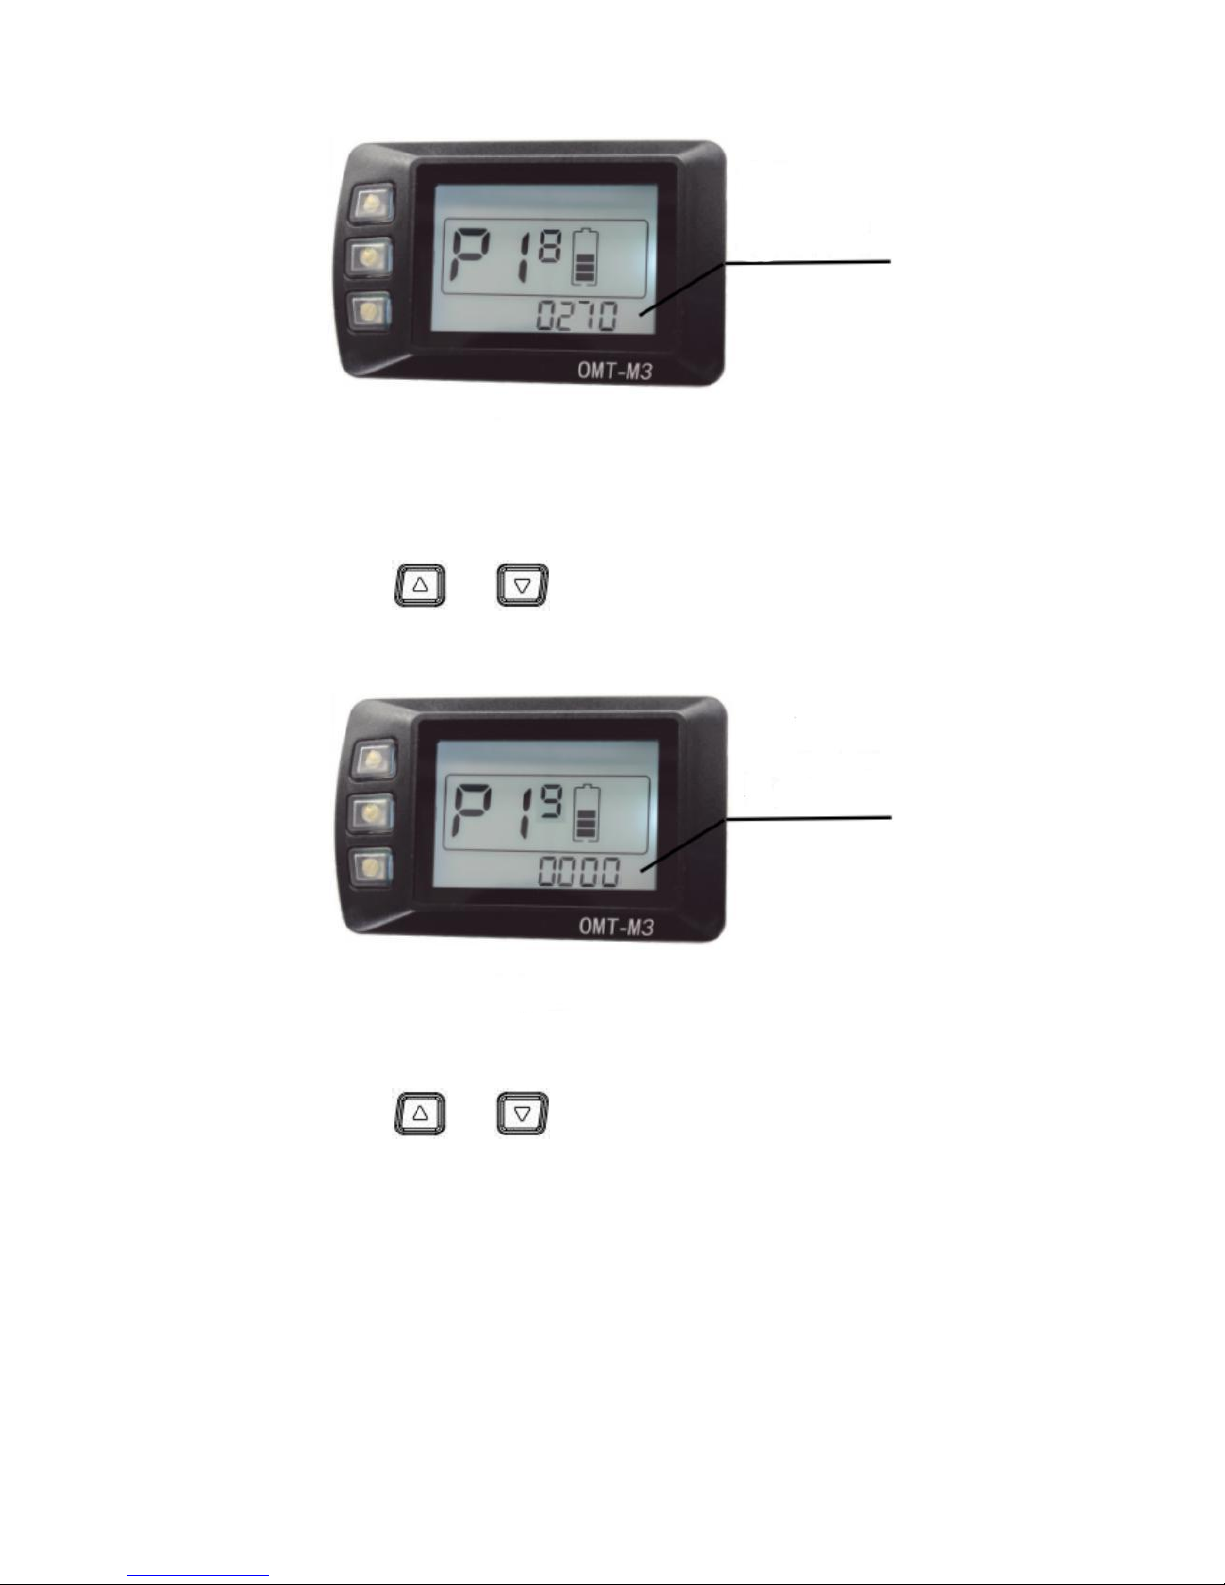
P18-Max RPM of the motor
:
short press / to switch from 120 to 1000 RPM
Cleared to 0
ODO reset to 0
SSSS means reset to
default value
Figure 31 Figure 32
Figure 33
Page 19
18
19)
P19-PAS Magnet calibration for the controller
:
short press / to switch from 0 to 1
20)
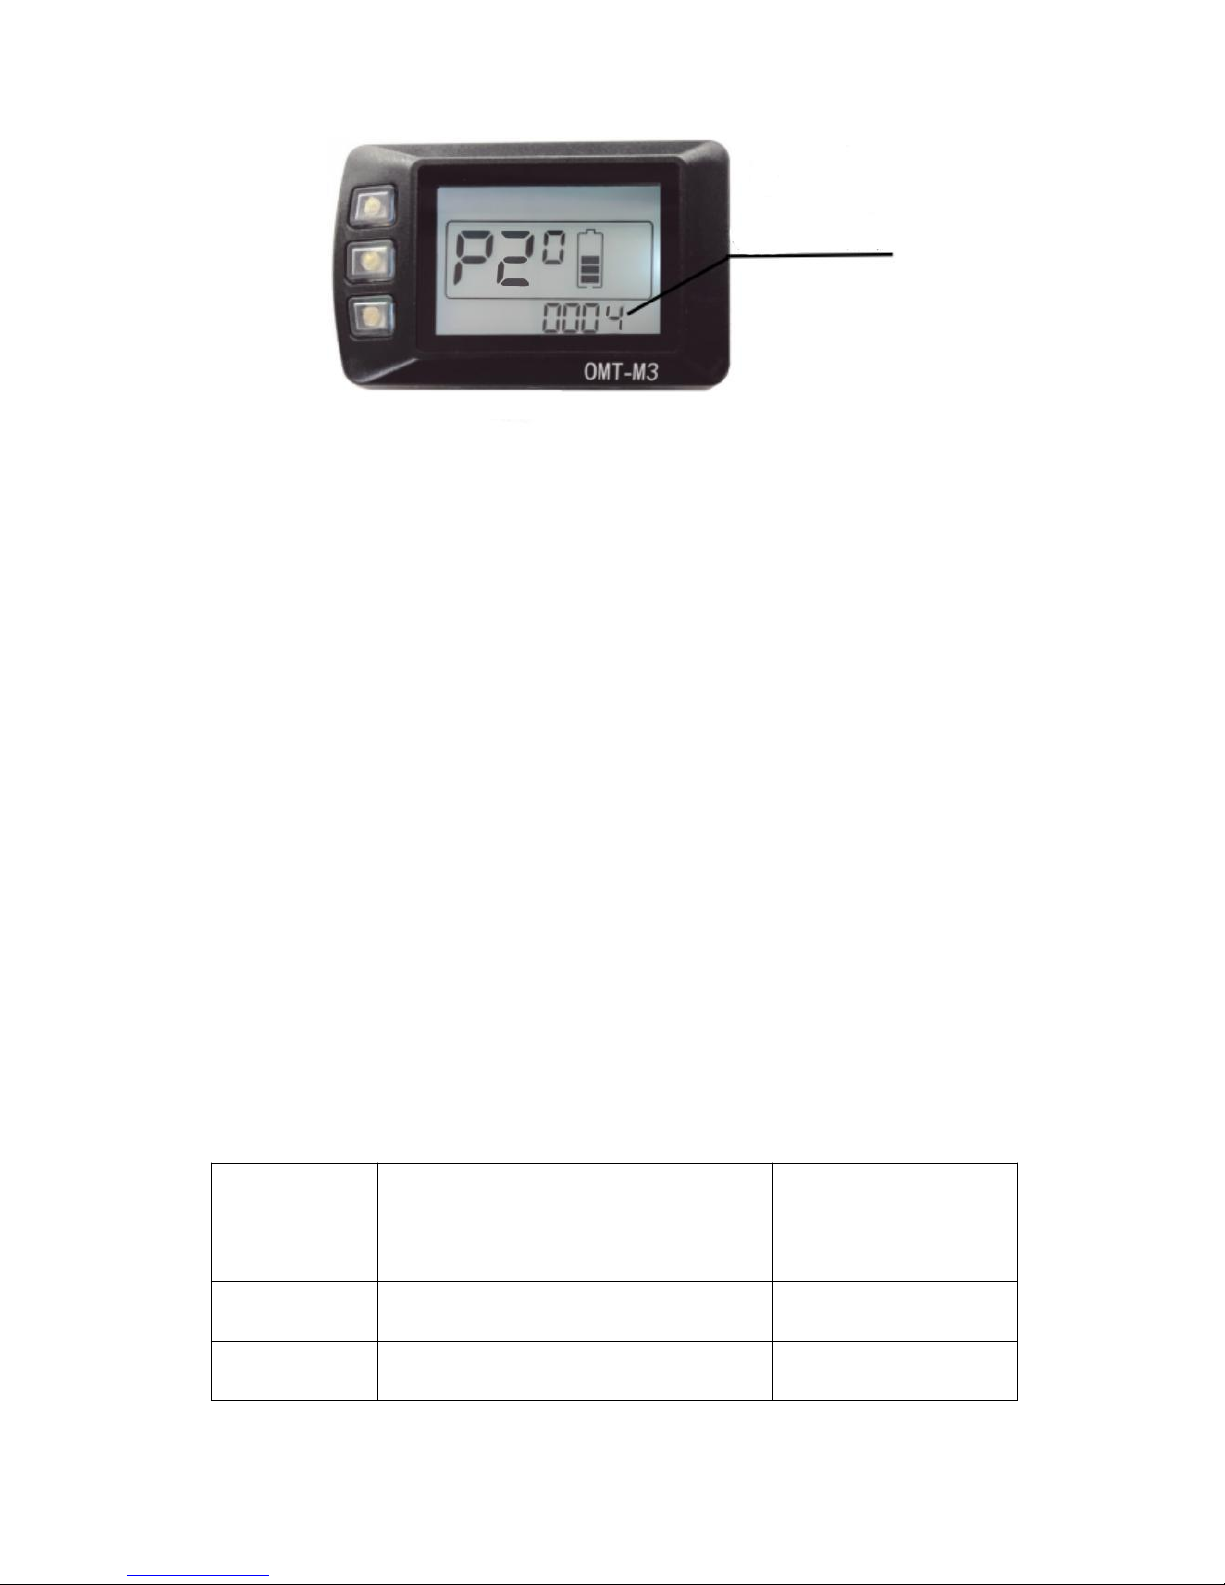
P20-Number of magnets for freewheel speed sensor
:
short press / to switch from 0 to 20
Max RPM of the
motor is 270
0 for calibration OK,
1 for start calibration
Figure 34
Figure 35
Page 20
19
7. Specifications
1) Power supply: 24V,36V,48V
2) Rated current: 10mA
3) Max current: 30mA
4) Leakage current after power off: <1uA
5) Current supply to controller:50mA
6) Working Temperature
:
-18~65℃
7) Storage temperature
:
-30~80
℃
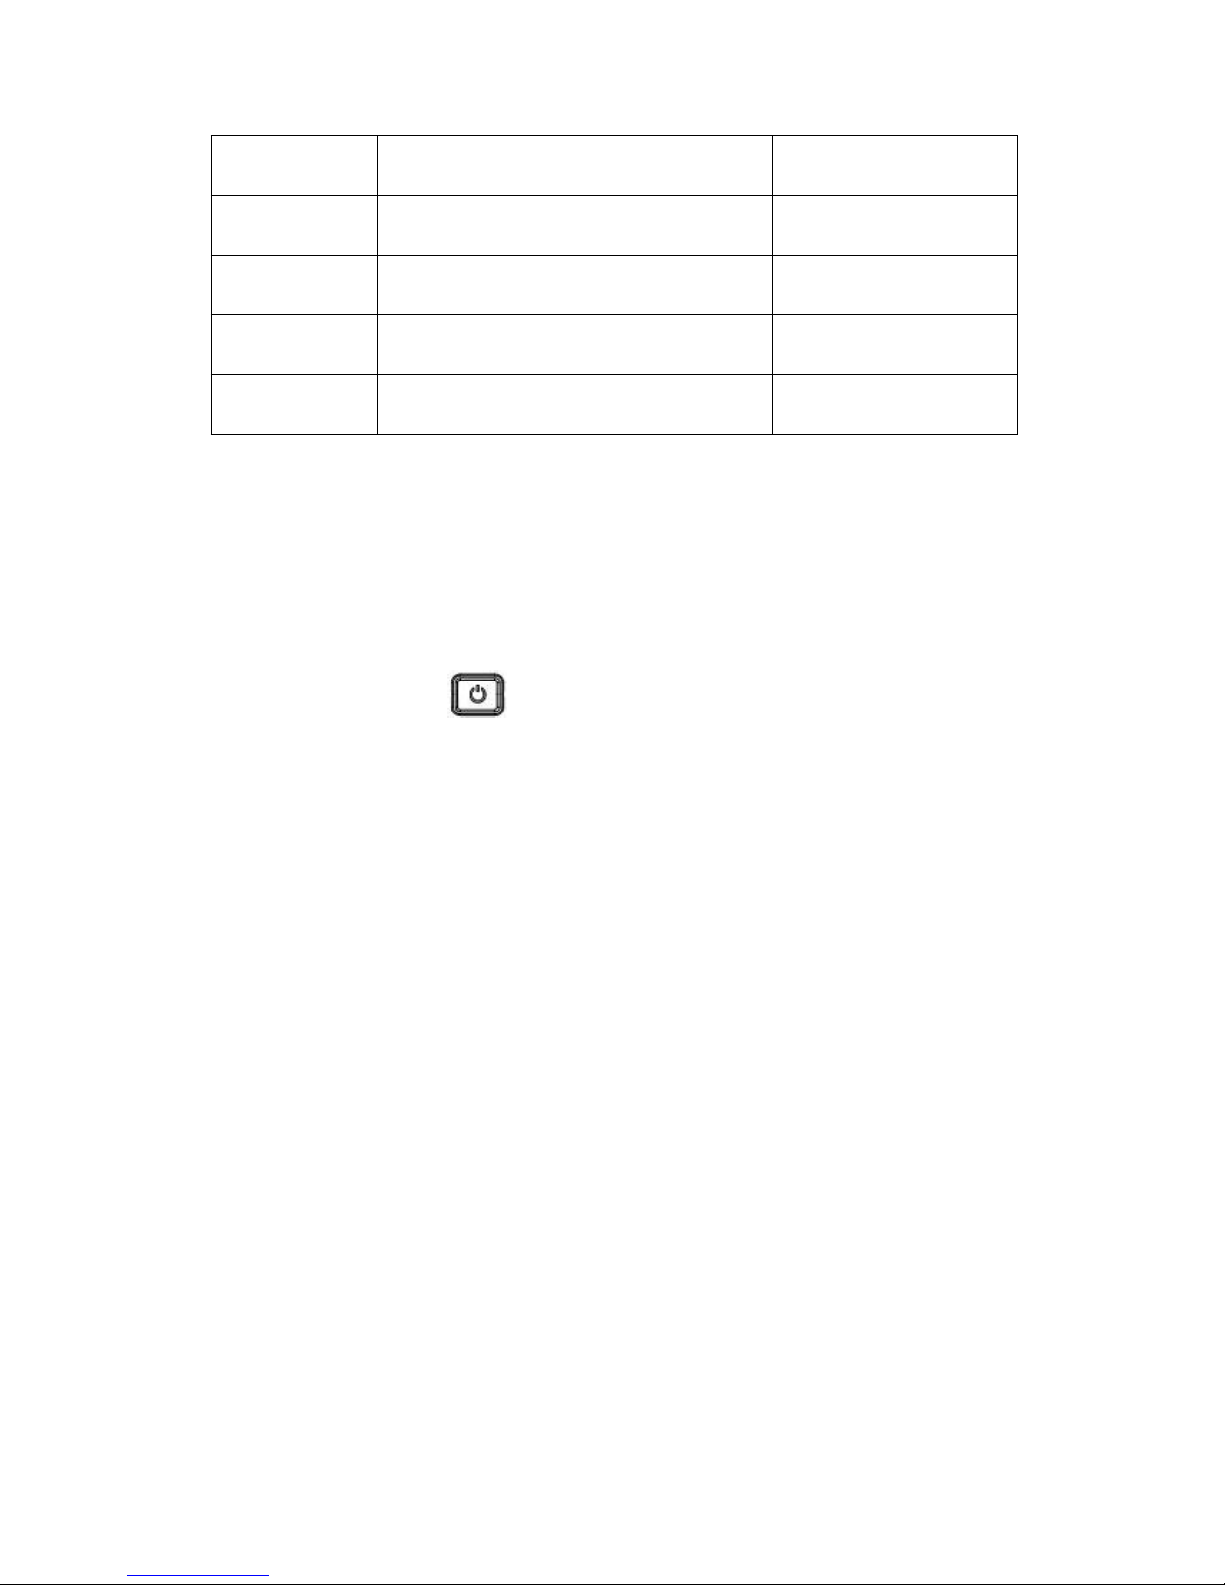
8. Error code definition
When an error appears, OMT-M3 will notice users by different
codes, please refer to table 1 for different codes:
Code
(Decimal)
Signification
0
Normal
6
Low Battery level
Number of magnets
for freewheel speed
sensor is 4.
Figure 36
Page 21
20
7
Motor error
8
Throttle error
9
Controller error
10
UART receive error
11
UART receive error
Table 1
9. Notices
Power on and power off must keep an interval of at least 3 seconds,
please don’t press “ ” button frequently when it is powered off.
When the temperature is under -10 ℃ , the screen will be a little
darker than normal, when the temperature increases, the screen
can go back to normal
10. FAQ
1) Q
:
Why I can not power off?
A
:
Please check connection between display and controller.
2) Q
:
What can I do if an error code displays?
A
:
Find a nearest shop to get repair
11. Warranty
1 year of warranty for quality issue except frame is broken.
12. Version
This is a universal manual for OMT-M3.It could be customized by
Page 22

21
each client. Please confirm all details before purchasing.
 Loading...