

Page 1
PM500 User’s Manual
Page 2

Part Number: 990-005700 REV E
Electro-Sensors, Inc.
6111 BLUE CIRCLE DRIVE
MINNETONKA, MN 55343–9108
www.electro-sensors.com
sales@electro-sensors.com
tech@electro-sensors.com
Local: 952.930.0100
Toll-Free: 800.328.6170
Fax: 952.930.0130
Copyright © 2014 Electro-Sensors, Inc. All rights reserved. No part of this document can be duplicated or distributed
without the express written permission of Electro-Sensors, Inc.
While the information in this manual has been carefully reviewed for accuracy, Electro-Sensors, Inc. assumes no
liability for any errors or omissions in the information. Electro-Sensors, Inc. reserves the right to make changes
without further notice to any part of this manual or to any product described in this manual.
ii
Page 3

Table of Contents
Table of Contents ........................................................................................................................................................ iii
List of Figures ............................................................................................................................................................. iv
List of Tables .............................................................................................................................................................. iv
Introduction to this Manual .............................................................................................................................................. v
Introduction to this Product ............................................................................................................................................ vi
The User Interface ........................................................................................................................................................... 1
The User Interface Tables ................................................................................................................................................ 2
(DIAG Menu) How to Perform the Diagnostic Functions ........................................................................................... 2
(SECR Menu) How to Change the Security Settings ................................................................................................... 2
(VAR Menu) How to Change a User Variable ............................................................................................................ 2
Diagnostics Neumonics ............................................................................................................................................... 3
(SECR Menu) The Security Variables ............................................................................................................................. 4
User Variable Descriptions and Formats ......................................................................................................................... 5
(Var 01 to Var 04) Relay Output Setpoints .................................................................................................................. 5
(Var 07) Relay ADC Select ......................................................................................................................................... 5
(Var 08) Relay Output Function .................................................................................................................................. 5
(Var 09) Switch Input Function ................................................................................................................................... 7
(Var 10 & Var 12) Analog Input A& B User Units at Lower Calibration Point .......................................................... 8
(Var 11 & Var 13) Analog Input A & B User Units at Upper Calibration Point ......................................................... 8
(Var 14) ADC Averaging ............................................................................................................................................. 8
(Var 15) Analog Input Enable ...................................................................................................................................... 8
(Var 16) Factory Calibration Selection ........................................................................................................................ 8
(Var 17) Display Function Select ................................................................................................................................. 9
(Var 20 & 22) Analog Output Minimum Rate in User Units ..................................................................................... 10
(Var 21 & 23) Analog Output Maximum Rate in User Units .................................................................................... 10
(Var 24) Analog Selection ......................................................................................................................................... 10
(Var 25) Analog Output Response ............................................................................................................................. 10
(Var 30) Modbus Node Address ................................................................................................................................ 10
(Var 31) Modbus Baud Rate ...................................................................................................................................... 10
(Var 32) Modbus Parity ............................................................................................................................................. 10
(Var 33) Modbus Data Type ...................................................................................................................................... 10
(Var 34) Modbus Integer Encoding ........................................................................................................................... 11
(Var 35 & Var 36) Modbus Faulted Sensor Value ..................................................................................................... 11
Modbus Wiring Diagram ............................................................................................................................................... 12
Programming the Analog Inputs .................................................................................................................................... 13
Programming the Relay Outputs .................................................................................................................................... 13
Programming the Analog Outputs ................................................................................................................................. 13
The LRC Non-volatile Memory Check Feature ............................................................................................................. 13
(DIAG Menu) The Diagnostic Functions ...................................................................................................................... 14
(Anou) How to Check the Analog Output ................................................................................................................. 14
(SIn) How to Check the Switched Inputs ................................................................................................................... 14
(rELY) How to Test the Relay Outputs ..................................................................................................................... 14
(HEyP) How to Verify that the Keypad is Working .................................................................................................. 14
(UEr) How to Find out the Firmware Version Number ............................................................................................. 14
(rESE) How to Reset the User Variables to their Factory Default Values ................................................................. 14
(OFFS)How to Calibrate the Analog Input Offset ..................................................................................................... 15
(SCAL) How to Calibrate the Analog Input Scale ..................................................................................................... 15
Application Examples .................................................................................................................................................... 16
Appendix A—Panel Cutout Dimensions ....................................................................................................................... 17
Wiring Practices for Industrial Equipment .................................................................................................................... 18
Appendix B—Wiring the PM500 .................................................................................................................................. 19
AC Input Power Supply (TB1-1, TB1-2) ................................................................................................................... 19
485 communications (TB1-4 to TB1-6) ..................................................................................................................... 19
Switch inputs (T1-7 to TB1-9) ................................................................................................................................... 19
4/20 mA Analog Input (TB2-10 to TB2-15) .............................................................................................................. 19
4/20 mA Analog Output (TB1-16 to TB1-18) ........................................................................................................... 19
iii
Page 4

Relay Outputs (TB3-1 to TB3-18) ............................................................................................................................. 19
Wiring Diagrams ........................................................................................................................................................ 20
Wiring Diagrams continued. ...................................................................................................................................... 21
Appendix C—PM500 Specifications ............................................................................................................................. 22
Variable Logs ................................................................................................................................................................. 23
User Variables Log .................................................................................................................................................... 23
Communication Variables Log .................................................................................................................................. 24
Calibration Variables Log .......................................................................................................................................... 24
Security Variable Log ................................................................................................................................................ 25
Index .............................................................................................................................................................................. 26
PM500 User’s Manual Back Cover................................................................................................................................ 30
List of Figures
Figure 1; key assignments for Keypad control of the relay outputs ................................................................................. 6
Figure 2; PM500 Modbus wiring diagram ..................................................................................................................... 12
Figure 3; PM500 Wiring diagram .................................................................................................................................. 20
Figure 4; 2 Relay outputs wiring diagram ...................................................................................................................... 21
Figure 5; 6 Relay outputs wiring diagram ...................................................................................................................... 21
List of Tables
Table 1; Associations Between Keys, LEDs, and Menus ................................................................................................ 1
Table 2; How to perform diagnostic functions ................................................................................................................. 3
Table 3; Security Variable “SdEF”, Security Definition .................................................................................................. 4
Table 4; Var 07, ADC select Variable ............................................................................................................................. 5
Table 5; Var 08, Relay Output Function Codes ............................................................................................................... 5
Table 6; Var 17, Display Function Codes ........................................................................................................................ 9
Table 7; Var 17, Display Function Code 4, Relay Output Status ..................................................................................... 9
Table 8; S codes (sign) ................................................................................................................................................... 11
Table 9; D codes (decimal weight)................................................................................................................................. 11
Table 10; Integer encoding for Var 43 option (2) using various values ......................................................................... 11
Table 11; User Variable Log .......................................................................................................................................... 23
Table 12; Communications Variables Log ..................................................................................................................... 24
Table 13; Calibration Variables Log .............................................................................................................................. 24
Table 14; Security Variables Log ................................................................................................................................... 25
iv
Page 5

What is in this
manual?
This installation and operation manual provides detailed technical information about the
PM500 Programmable Process Ratemeter. It should serve as your technical resource to
install, set up, operate, and test the PM500.
Who should
use this manual
(audience)
Keep in mind that the function of the PM500 installed in a mechanical process is to monitor
position, capacity, speed, etc; therefore, it must be installed by qualified personnel only. This
manual is designed for persons who have the primary responsibility to install, set up, operate,
and test the PM500.
The secondary audience would be those persons seeking technical information about the
electrical concepts and operation of the PM500.
Knowledge
level
Persons installing, setting up, and operating the PM500 should have good knowledge and
understanding of electrical and mechanical concepts and principles pertaining to
Programmable Process Ratemeters. Again, the PM500 should be installed by qualified
personnel only.
Notices
Installing Electro-Sensors, Inc., products is the responsibility of the purchaser, and is in no
way guaranteed by Electro-Sensors, Inc.
While the information in this manual has been carefully reviewed, Electro-Sensors, Inc.,
assumes no liability for any errors or omissions in this manual. Additionally, ElectroSensors, Inc., reserves the right to make changes to any part of the information in this
manual or the product described herein without further notices.
No part of this manual may be photocopied, reproduced, or translated to another language
without the prior written consent of Electro-Sensors, Inc.
Introduction to this Manual
v
Page 6

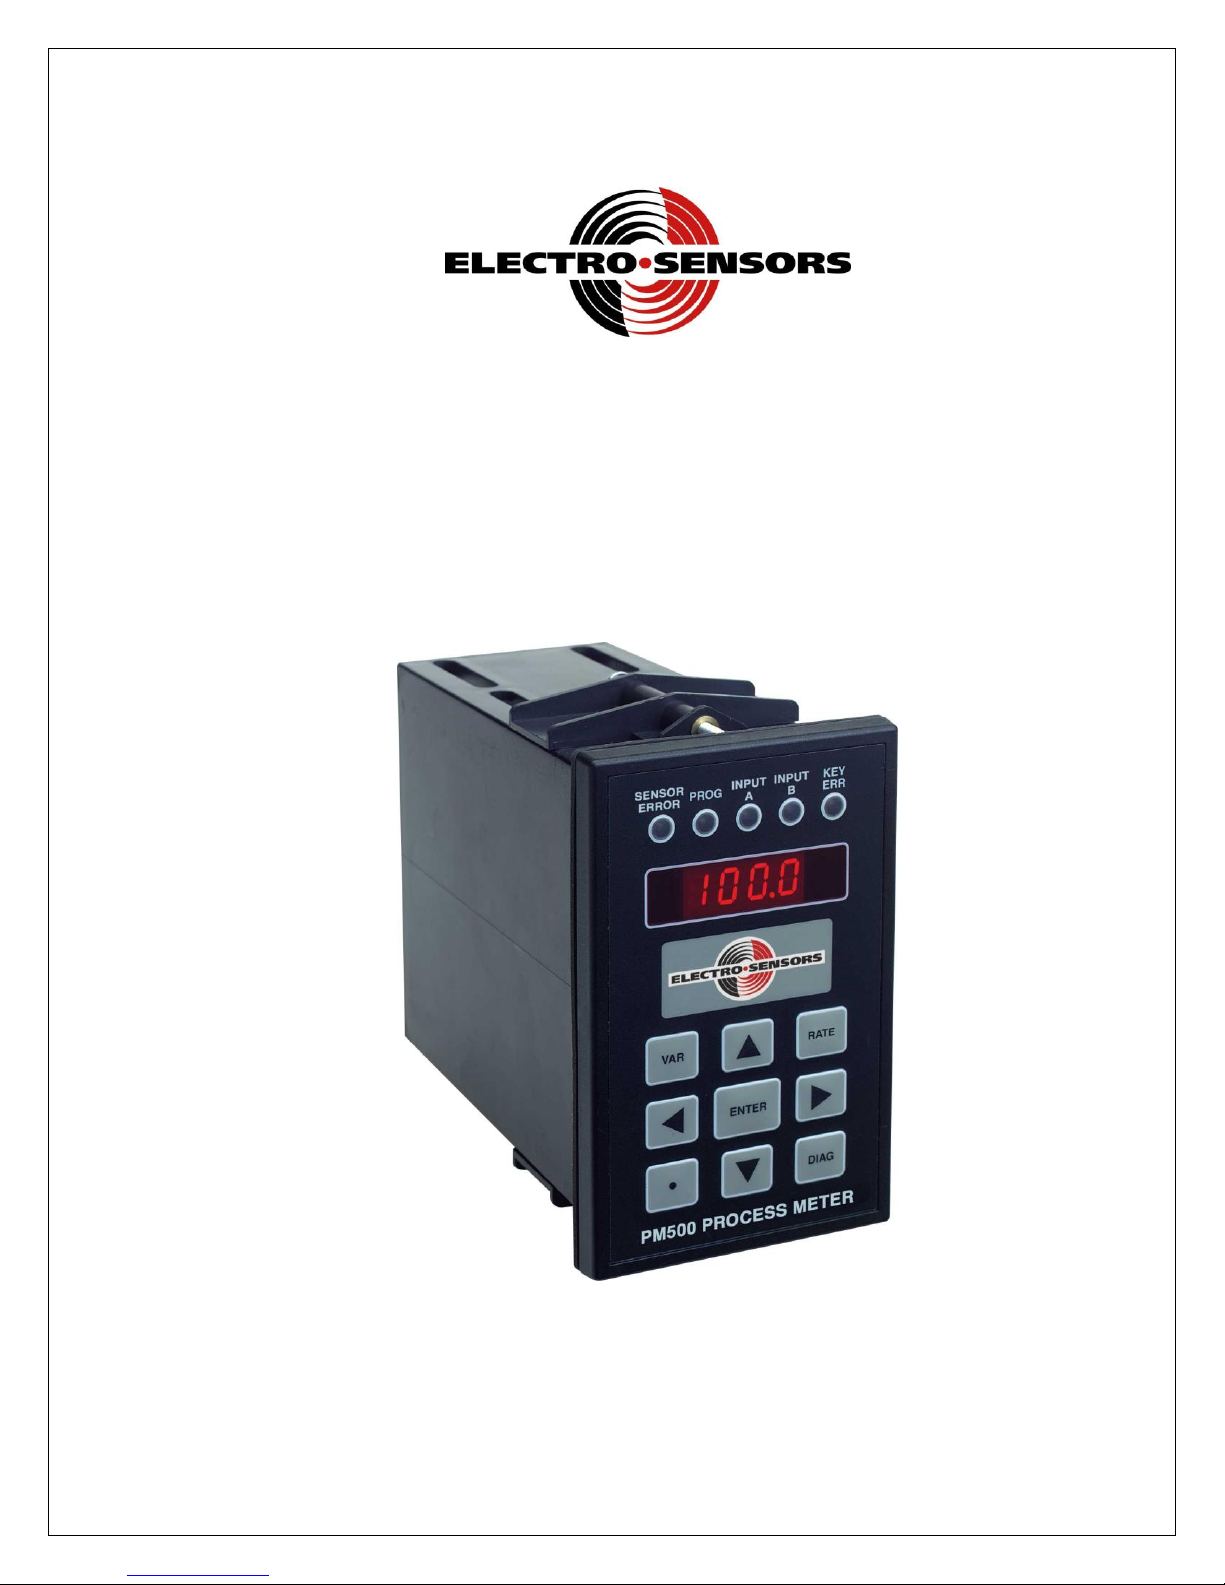
Introduction to this Product
The PM500 is a stand-alone display device that accepts up to two 4–20 mA DC analog input signals.
The display has four 7-segment LED digits with decimal points.
The PM500 can be programmed to display any value of user units from ’00.00’ to ‘9999’ and from ‘-0.00 to -
999’.
The PM500 has either two SPDT relay outputs or four SPDT with programmable functions (UNUSED,
UNDER and OVER).
The PM500 has an option for 2 16 bit 4 to 20 mA output signals, which are isolated from the 4 to 20 mA input
signals.
The PM500 display has 5 status LED’s so you can determine which input you are viewing, as well as for
indicating when the PM500 is in the programming, or diagnostics modes. It also signals the user when there is a
sensor failure.
The PM500 has 2 regulated +24 VDC outputs that can each supply 50 mA maximum. (This supply can be used
to power sensors, etc.).
vi
Page 7

The User Interface
Key
LED
Menu
Decimal Point key
PROG LED on & Disp reads “ SEC”
Change Security Variable
VAR key
PROG LED & Disp reads “Prxx”
Change User Variable
DIAG key
PROG LED & disp reads “dIAG”
Perform Diagnostic Action
The user interface consists of a keypad, the four character display, five discrete LEDs, several user variables, and
three menus—the user variable menu, the security menu, and the diagnostic menu. The three menus are each accessed
by a menu key; the VAR key accesses the user variable menu, the DECIMAL POINT key accesses the security menu,
and the DIAG key accesses the diagnostic menu. In each of these menus there is an intermediate level (level 2)
enabling you to select a menu item and a final level (level 3) enabling you to change or edit the selected menu item.
The method for selecting which menu item to edit depends on what menu you are in. In the VAR menu use the up,
down, left, and right arrow keys to edit the two digits of the user variable number. In the security menu and in the
DIAG menu use the up and down arrow keys to scroll through menu item prompts.
Once a menu item has been chosen, press the ENTER key to move to the final level (level 3) to edit the variable value
or perform the diagnostic action.
To edit a user variable value, use the left and right arrow keys to move the cursor (the flashing digit) to the digit
whose value you want to change, then use the up and down arrow keys to change the value of the digit. Press the
ENTER key to accept the value or press the ‘abort’ key to throw away the changes that you have made. (The ‘abort’
key depends on which menu you are in, i.e. the VAR key enters the user variable menu and the VAR key aborts the
user variable menu.)
For example, to change a user variable value, press the VAR key to go to level 2—select user variable number. While
in level 2, edit the display so that it shows the user variable number whose value that you want to change. Then, press
the ENTER key to accept the user variable number and go to level 3—change user variable value. While in level 3,
edit the display so that it shows the new user variable value. Then, press the ENTER key to accept that value and
return to level 1—the user units display level. When the user accepts a value the PM500 will test it and will not allow
an out-of-range or illegal value. If at any time you don’t like the changes that you have made while you are in a
particular level, press the abort key to discard the changes and go back to level 1—the user units display level.
The SECR menu works in a similar way to allow you to change the security variable values. The diagnostic menu will
allow you to perform a diagnostic test, to perform calibration actions, or to observe the state of the system, thereby
enabling you to set up your system or to troubleshoot your system installation.
The five front panel LEDs are used to indicate which menu you are in or to indicate status information about the
PM500. There are five LEDs: Sensor Error, PROG, INPUT A, INPUT B, and KEY ERR. When a menu key is
pressed the LED associated with that menu turns on to indicate which menu you are in.
The Input “A” LED is associated with input channel A. The Input “B” LED is associated with input channel B.
The Input LED that is illuminated shows the user which input channel is being displayed.l
The KEY ERR LED is used to indicate an invalid key press, an invalid user variable number, or an invalid user
variable value. It shuts off after a timeout period of 500 ms.
The PROG LED is ‘OFF’ when the display is showing a real-time value selected by the display function variable.
Table 1; Associations Between Keys, LEDs, and Menus
1
Page 8

The User Interface Tables
(DIAG Menu) How to Perform the Diagnostic Functions
1. Press the DIAG key
2. Use the arrow keys to select desired variable and press ENTER
a. When finished hit DIAG key to exit menu
3. Press DIAG key one more time to exit the DIAG Menu
Note: See table on next page for Diagnostics description
(SECR Menu) How to Change the Security Settings
1. Select the Security menu by pressing the Decimal Point Key.
2. Use up and down arrows to select the desired variable
a. Press Enter
b. Change variable and accept by pressing Enter Key or aborting change by hitting Decimal Point
Key
3. Press Decimal Point Key to exit Security Menu
(VAR Menu) How to Change a User Variable
1. Press the VAR key
2. Use the Arrow Keys to navigate to desired parameter
a. Press enter key to select or abort by hitting Var Key
b. Change variable using arrow keys and press ENTER key to accept or Var Key to abort
3. Press Var Key to exit Variable Menu.
Note: Access to the VAR menu is still permitted during an LRC error in the PM500’s non-volatile memory
2
Page 9

Diagnostics Neumonics
Diagnostic
Display Value
Function
dIAG
Diagnostics
dIAG
You have Entered Diagnostic Mode
Anou
Analog Output
Output percent “0XXX”.
Verify your analog out by scrolling
from 0 to 100% 0 = 4 mA
100 = 20mA
SIn
Switch Input
Read current Switch state
Read current switch state
rELY
Relay Test
“0000”
(When relays are off, 1 value denotes
on)
Relay states. “XXXX”
Relay one–1’s.
Relay two–10’s.
Relay one–100’s.
Relay two–1000’s.
HeyP
Keypad Test
VAR key–“1111.”.
Up arrow key–“222.2”.
REV key–“33.33”.
Left arrow key–“4.444”.
ENTER key–“5555.”.
Right arrow key–“666.6”.
Decimal point key–“77.77”.
Down arrow key–“8.888”.
Tests individual buttons on keypad
UEr
Firmware Version
“XX.XX”
Displays Firmware Version
rESE
Reset Unit
“dOnE”
Resets Unit to Factory Defaults
OFFS
ADC Offset Calibration
ADC value in hexadecimal of the
actively displayed ADC input.
SPAN
ADC Span Calibration
ADC value in hexadecimal of the
actively displayed ADC input.
Table 2; How to perform diagnostic functions
3
Page 10
Display Digits
Digit Function
Function Codes
Digit 1
VAR Menu
When this menu is locked the user
variables can be viewed but not changed.
0–Menu Unlocked
1–Menu Locked
Digit 2
DIAG Menu
When this menu is locked, access to the
diagnostic functions are denied.
Digit 3
Not used
Digit 4
Not used
(SECR Menu) The Security Variables
The SECURITY menu is accessed by pressing the DECIMAL POINT key.
In the security menu the user has access to three variables. The input password variable (PIn), the password definition
variable (PdEF), and the security definition variable (SdEF).
The security features defined by the security definition variable ‘SdEF’ are enabled anytime the input password ‘PIn’
is different from the password definition ‘PdEF’.
In other words, in order to access locked-out functions the user has to enter an input password that matches the
password definition (PIn = PdEF).
In order to lock out unauthorized changes to user variables the user must enter a password definition that is unknown
to unauthorized users (PIn ≠ PdEF). Any attempt to access the password definition by an unauthorized user will result
in a display of “HIdn” (hidden).
The following table indicates how menu access is controlled by the digits of the security definition variable.
Table 3; Security Variable “SdEF”, Security Definition
4
Page 11
User Variable Descriptions and Formats
Display Digits
Digit Function
Function Codes
Digit 1
Relay Output 1
0–Unused
1–Analog input A
2–Analog input B
Digit 2
Relay Output 2
Digit 3
Relay Output 3
Digit 4
Relay Output 4
Display Digits
Digit Function
Function Codes
Digit 1
Relay Output 1
0–Unused
1–Under setpoint
2–Over setpoint
3–Keypad control
Digit 2
Relay Output 2
Digit 3
Relay Output 3
Digit 4
Relay Output 4
(Var 01 to Var 04) Relay Output Setpoints
User Variable 01— Variable 04 These variables contains the trip point levels for relays. It is a value entered as user
units. They can have decimal places and be positive or negative.
(Var 07) Relay ADC Select
User Variable 07—Relay ADC select.
Var07 allows the user to select the ADC input that is assigned to the given relay output. The user can choose from
three function codes (one is unused). The following table gives the relay output function codes and shows which
Var07 digit corresponds to which relay output.
Table 4; Var 07, ADC select Variable
(Var 08) Relay Output Function
Allows the user to select the relay output function(s). The user can choose from three function codes (one is unused).
The following table gives the relay output function codes and shows which Var08 digit corresponds to an individual
relay output.
Table 5; Var 08, Relay Output Function Codes
5
Page 12

Output
Key assignment for keypad control
Relay state
Relay 1
Up key
Only 1 relay programmed for Keypad control
can be active at a time. It is the relay that is
associated with the currently pressed key.
Relay 2
Down key
Relay 3
Left key
Relay 4
Right key
Figure 1; key assignments for Keypad control of the relay outputs
The unused function keeps the respective relay permanently dropped-out.
The Under setpoint function pulls-in the relay when the 4/20 mA input signal rises to the trip point level, and dropsout the relay when the 4/20 mA input signal falls below the trip point level by 2%.
The Over setpoint function pulls-in the relay when the 4/20 mA input signal falls to the trip point level, and drops-out
the relay when the 4/20 mA input signal rises above the trip-point level by 2%.
The Keypad control function pulls-in the relay when the associated key is depressed, and drops-out the relay when
the associated key is not depressed. Only one of all the relays under keypad control can be active at a time.
Note: The relay hysteresis is fixed at 2% of the “Maximum Rate in User Units” value.
6
Page 13

(Var 09) Switch Input Function
This is not implemented at this time
7
Page 14

(Var 10 & Var 12) Analog Input A& B User Units at Lower Calibration Point
User Variable 10—Analog Input A User Units at lower calibration point (typically at 4 mA input).
User Variable 12—Analog Input B User Units at lower calibration point (typically at 4 mA input).
This variable (a.k.a. “Minimum Rate in User Units”) is used to scale a 4 mA signal into a displayed maximum value
in user units. The value entered into Var 10 & 12 is the number of user defined units (position, capacity, speed, etc,)
processed by the system when the analog input signal is at its lowest calibration point. The lowest calibration point is
usually at 4 mA, but that is not a requirement.
Notes:
1. When used with TT420’s this value would typically be -40.
2. When used with ST420’s this would be the min value in RPM’s the ST420 was programed for.
3. When used as a percentage meter the value in Var 10 and Var 12 should be 0.
(Var 11 & Var 13) Analog Input A & B User Units at Upper Calibration Point
User Variable 11—Analog Input A User Units at upper calibration point (typically at 20 mA input).
User Variable 13—Analog Input B User Units at upper calibration point (typically at 20 mA input).
This variable (a.k.a. “Maximum Rate in User Units”) is used to scale a 20 mA signal into a displayed maximum value
in user units.
The values entered into Var 11& 13 is the number of user defined units (position, capacity, speed, etc,) processed by
the system when the analog input signal is at its upper calibration point. The upper calibration point is usually set to
20mA, but that is not a requirement.
Notes:
1. When used with TT420’s this value would typically be 248.
2. When used with ST420’s this would be the max value in RPM’s the ST420 was programmed for.
3. When used as percentage meter the value in Variable 11 and 13 should be 100.
(Var 14) ADC Averaging
Is not implemented at this time.
(Var 15) Analog Input Enable
Analog enable is used to enable or disable inputs individually. The outputs can be disabled to prevent a sensor error
signal when only one sensor is being monitored.
Var 15 selections are:
“0000” disables both inputs.
“0001” enables input ‘A’.
“0010” enables input ‘B’
“0011” enables both the ‘A’ & ‘B’ inputs.
The default is “0001”.
(Var 16) Factory Calibration Selection
When factory calibration select is set to ”0001”, it makes the ADC inputs use factory calibrated ADC values, not the
default/user calibration value. These value are not cleared when resetting the unit. They can however be set using the
485 communications. When cleared variable 16 is resets to “0000” and the unit uses the default values/user set values.
8
Page 15

Function Code
Function Description
Display Units
Modbus Address
0
ADC A Process position, capacity,
speed, etc.
User Units1
31000
1
ADC B Process position, capacity,
speed, etc.
User Units2
31010
2
ADC A current value
ADC 1 Bits, 0 to FFFF
31020
3
ADC B current value
ADC 2 Bits, 0 to FFFF
31030
4
Analog A output DAC value
0-FFFF (0-65535)
31040
5
Analog B output DAC value
0-FFFF (0-65535)
31050
6
Relay Status
Boolean State (0 or 1)
see Table 7 for more detail
31060
7
Switch Inputs
00XX
31070
1
2
Display Digits
Digit Function
Status Code
Digit 1
Relay Output 1
0–Dropped Out
1–Pulled In
Digit 2
Relay Output 2
Digit 3
Relay Output 3
Digit 4
Relay Output 4
(Var 17) Display Function Select
Controls which real-time value is displayed by the user interface. The default function code is 0 (display in User
Units). The following table gives the display function codes and a description of their meanings. If both inputs are
enabled pressing the rate key will toggle between the inputs. So pressing the rate key will toggle the rate code between
0 and 1. It also will allow toggling between rate code 2 and 3. .
Table 6; Var 17, Display Function Codes
Table 7; Var 17, Display Function Code 4, Relay Output Status
Var11 “Maximum Rate in User Units” scales the 4/20 mA analog input signal into user units for display function 0.
Var13 “Maximum Rate in User Units” scales the 4/20 mA analog input signal into user units for display function 1.
9
Page 16

1 = 0.00
2 = 0.020
3 = 0.040
4 = 0.080
5 = 1.7
6 = 0.57
7 = 1.3
8 = 2.5
9 = 4.8
10 = 9.5
11 = 20.0
(Var 20 & 22) Analog Output Minimum Rate in User Units
Analog Output Minimum Rate in User Units: (4 mA output setpoint).
Var20 is used to set the point where the PM500 will output 4 mA on channel “A” when the display is at this value.
Var22 is used to set the point where the PM500 will output 4 mA on channel “B” when the display is at this value
(Var 21 & 23) Analog Output Maximum Rate in User Units
Analog Output Maximum Rate in User Units: (20 mA output setpoint).
Var21 is used to set the point where the PM500 will output 20 mA on channel “A” when the display is at this value.
Var23 is used to set the point where the PM500 will output 20 mA on channel “B” when the display is at this value
(Var 24) Analog Selection
When analog selection is set to (0001), it makes the analog output user units track the analog input user units. You
will not set variables 20-23, as they are ignored. When variable 24 is cleared (0000) 20-23 again have authority over
analog outputs.
(Var 25) Analog Output Response
Sets the analog output response time. This is the time it takes to change from 10-90% out. Time is listed below in
seconds. This can be used to smooth the output or to filter out slight deviations.
(Var 30) Modbus Node Address
Modbus Node Address sets the address for Modbus communications values 1 to 247 are valid..
(Var 31) Modbus Baud Rate
Modbus baud rate sets the baud rate for Modbus communications values 0-4 are valid.
0 - 1200 BAUD
1 - 2400 BAUD
2 - 4800 BAUD
3 - 9600 BAUD
4 - 19200 BAUD
(Var 32) Modbus Parity
Modbus Parity: sets the parity for Modbus communications values 0-2 are valid.
0 – No Parity, 2 stop bits (default)
1 – Odd Parity, 1 stop bit
2 – Even Parity, 1 stop bit
(Var 33) Modbus Data Type
Modbus data type: the slave must use the same data type as the master. Different slaves can use different data types, as
long as the data type of the slave’s response is the same as the data type of the master’s query. Values 0 to 5 are valid.
0 - Float High Low 32 bit Transmit Most Significant word First
1 - Float Low High 32 bit Transmit Most Significant word Last
2 - Long High Low 32 bit Transmit Most Significant word First
3 - Long Low High 32 bit Transmit Most Significant word Last
4 - Signed Integer (default) 16 bit
5 - Unsigned Integer 16 bit
10
Page 17

(Var 34) Modbus Integer Encoding
S code (sign of display)
Signed type
Unsigned type
- Negative number
-00000
30000
+ positive number
00000
00000
Display value with decimal
1234 (0 DP)
123.4 (1 DP)
12.34 (2 DP)
D Code
00000
10000
20000
Display value
-12.3
9876
-65.0
99.99
Type of integer
signed
unsigned
signed
unsigned
signed
unsigned
signed
unsigned
Sign S Code
-00000
30000
00000
00000
-00000
30000
00000
00000
D code
10000
10000
00000
00000
10000
10000
20000
20000
Display use 5 digits
00123
00123
09876
09876
00650
00650
09999
09999
Encoded value (sum)
-10123
40123
09876
09876
-10650
40650
29999
29999
Table 10; Integer encoding for Var 43 option (2) using various values
Modbus integer encoding: sets how the integer is returned. Values 0-2 are valid.
0. Integer only output (default)
1. Entire display output.
2. Decimal encoded.
Option zero (0) only shows the integer portion of the number and cannot show the sign value if using unsigned type.
This applies to all variables.
Option one (1) will show all significant digits. The sign value will be absent for unsigned type. This applies to all
variables.
Option (2) shows all significant digits and encodes the decimal in the 10K positon. For negative unsigned types it also
encodes the sign. Compare in the tables below. Encoding only occurs on user units. All other values are untouched
and come out as is. Reading certain values in 16 bit signed integers may result in reading errant numbers which are
positive (greater than 32768) but show up as negative. Using 5 digits for display values allows for easier visual
understanding of the encoding. Break your number down with the tables below and encoding becomes apparent. This
applies to all variables with user units, see variable logs tables 11-13.
Table 8; S codes (sign)
Table 9; D codes (decimal weight)
(Var 35 & Var 36) Modbus Faulted Sensor Value
Modbus Faulted sensor value: sets the value the PLC or other Modbus device gets when the sensor reads out of rang e.
Var 35 is for input A and Var 36 is for input B. All user unit values are valid. Values used would typically be an alarm
value.
11
Page 18

Modbus Wiring Diagram
Figure 2; PM500 Modbus wiring diagram
12
Page 19

Programming the Analog Inputs
The ways to get the display and analog output you desire from the PM500 are presented below:
1. Input is calibrated. (default is typically accurate enough for temp probes, otherwise you will need to go to
diagnostics and perform the offset and scale calibrations)
2. Verify Input is properly programmed.
a. If channel A is used: Variables 10 & 11 must be programmed (lower and upper setpoints).
b. If channel B is used: Variables 12 & 13 must be programmed (lower and upper setpoints).
c. Variable 15 must be set appropriately for your input configuration.
3. Verify output is programmed.
Programming the Relay Outputs
In order for the relays to operate you must do the following:
1. Enter the setpoints for the relays by setting the variables 1 through 4.
2. Set the relays to trigger on the right input by using variable 7.
3. Turn on the relay to over or under setpoint tripping.in variable 8.
Programming the Analog Outputs
There are several aspects to getting the display and analog output you desire from the PM500. They are as follows:
1. Calibrate inputs. (Default is typically accurate enough for temp probes, otherwise you will need to go to
diagnostics and preform the offset and scale calibrations)
2. Verify input is properly programmed.
3. Verify Program output is properly programmed.
a. If channel A is used: Variables 20 & 21 must be programmed (lower and upper setpoints).
b. If channel B is used: Variables 22 & 23 must be programmed (lower and upper setpoints).
c. If you want to use the input setpoints to also be the output setpoints, set variable 24 (analog
selection) to 0001. This is an easy way to make sure any changes to the inputs will always be
reflected in the outputs (mirror), otherwise leave variable 24 to 0000 and set your outputs
independent of the inputs.
The LRC Non-volatile Memory Check Feature
The LRC feature is a self-check the PM500 performs on its non-volatile memory upon power-up. User variables are
stored in the non-volatile memory.
If upon a power-up, the new LRC sum matches the previous LRC sum from the non-volatile memory, then the LRC
self-check passes. But, if the new LRC sum does not match the previous LRC sum, then the LRC self-check flags an
error. An LRC error means the values of at least one variable have been corrupted in the non-volatile memory (i.e.,
they don’t contain all the user’s previous values).
During an LRC error the PM500 goes into a ‘fail-safe’ mode. It does not show the real-time display, but rather shows
the message “LrC”. Also for an LRC error the relay outputs drop-out and the 4-20 mA analog output holds at 4.00 mA
due to the corruption of the user variables. To prevent the PM500 from performing abnormally, the PM500 essentially
stops performing (because any inadvertent change to the user variables may have changed its performance). The user
then obviously knows something is wrong with the PM500’s user variables.
Note: It is important the user fills in their application’s values in the ‘User Variable Log’ near the back of t his
PM500 User Manual. Because if an LRC error does occur, then there will be a correct list of variable
During a LRC error:
values to compare to, when attempting to fix a corrupted variable situation.
Access to the Diagnostic Menu is allowed.
Access and changes to the Security Menu are allowed (having no effect on the LRC error).
Access to the Var Menu is allowed for read only. Changes to the Var Menu are not allowed.
The unit can be reset to factory defaults.
485 communications will continue to work.
13
Page 20

(DIAG Menu) The Diagnostic Functions
The DIAGNOSTIC menu is accessed by pressing the DIAG key. Once inside the Diagnostics Menu, press the UP and
DOWN arrow keys to scroll through the list of diagnostic functions. Each of the diagnostic functions is explained
below.
(Anou) How to Check the Analog Output
At this time the 4-20 mA outputs are a fixed calibration. This diagnostic allows you to force the outputs to a
given % out.
This can be useful for trouble shooting..
(SIn) How to Check the Switched Inputs
Select “ SIn” from the diagnostics menu. The display will show the status of the switch inputs.
- The right most digit represents the first switch input (000X).
- The digit that is the second most right represents the second switch input (00X0).
- The DIAG key exits the “SIn” switch input test.
(rELY) How to Test the Relay Outputs
Select “ rELY” from the diagnostics menu. The display will show the status of the relay outputs.
- The right arrow key pulls-in relay output 1 & 3, and sets the corresponding digit of the display to a 1.
- The left arrow key pulls-in relay output 2 & 4, sets the corresponding digit of the display to a 1.
- The ENTER key drops-out all relays, clears the corresponding digits of the display to 0.
- The DIAG key exits the “rELY” Relay Output test.
(HEyP) How to Verify that the Keypad is Working
Select “HEyP” from the diagnostics menu.
Each key corresponds to a unique display. Press each key to test its response.
The DIAG key exits the test.
(UEr) How to Find out the Firmware Version Number
Select “ Uer” from the diagnostics menu. The firmware version and revision are displayed in “XX.XX”
format.
The two digits before the decimal point reflect the version number.
The two digits after the decimal point reflect the revision number.
The DIAG key exits the test.
(rESE) How to Reset the User Variables to their Factory Default Values
1. Select “rESE” from the diagnostics menu. Then press the ENTER key. This does not reset the
processor, it only resets the user variables Var01 through Var08 in both the RAM memory and the nonvolatile FRAM memory. When the display shows “done”, press the DIAG key to exit.
2. Or, hold down the DIAG key on power-up. When the display shows “rESE” then release the DIAG key.
This does everything the “rESE” diagnostic does, but also resets the processor.
Note: After doing a “reset-to-factory-defaults”, the analog inputs may need recalibration.
14
Page 21

(OFFS)How to Calibrate the Analog Input Offset
This procedure calibrates the analog input (via calibrating the A/D converter’s low end-point).
- The 4 mA low-end is initially factory calibrated via defaults, which for temperature probes should be more than
adequate. When necessary follow the steps below.
Calibrating the 4/20 mA analog input.
1. Set the display to read the input you want to calibrate. The diagnostic will calibrate whichever input is active.
The front panel LED’s will tell you which input is active for calibration.
2. Press the ‘Diag’ key.
3. Scroll to ‘OFFS’.
4. Set your sensor to its minimum value.
5. Press the enter key and the display will start reading the ADC. It will display it in Hexadecimal. The 1’s digit
will vary +/- 1 or 2 ADC bits. If it varies more wait until the sensor has settled.
6. Press enter to save the value or diag to back out without updating the ADC input.
7. Calibration is done for that channel now you should verify that variable 10 and 12 reflect the point you
calibrated. This step can be done after calibrating both channels upper and lower ADC points.
8. You are done.
(SCAL) How to Calibrate the Analog Input Scale
This procedure calibrates the analog input (via calibrating the A/D converter’s high end-point).
- The 20 mA high end calibration is initially factory calibrated via defaults, This should be more than adequate
for temperature probes. When necessary recalibration of the analog input is possible, to do so follow the
instructions below.
Calibrating the 4/20 mA analog input.
1. Set the display to read the input you want to calibrate. The diagnostic will calibrate whichever input is active.
The front panel LED’s will tell you which input is active for calibration.
2. Press the ‘Diag’ key.
3. Scroll to ‘SCAL’ and press enter.
4. Set your sensor to its Maximum value (20mA point) or a known operating value.
5. Press the enter key and the display will start reading the ADC. It will display it in Hexadecimal. The 1’s digit
will vary +/- 1 or 2 ADC bits. If it is varying more wait until the sensor has settled.
6. Press enter to save the value or diag to back out without updating the ADC input.
7. Calibration is done for that channel now you should verify that Variable 11 and 13 reflects the point you
calibrated.
8. You are done.
15
Page 22

Application Examples
A plant engineer is using an Electro-Sensors, Inc. SG1000x SlideGate Monitor to sense the position of a slide gate
controlling the amount of grain flowing out of a hopper storage bin.
The Electro-Sensors’ SG1000x SlideGate Monitor is programmed to output a 4 mA DC signal when the gate is in the
fully-closed position, and output a 20 mA DC signal when the gate is in the fully-open position. Any gate position
between the fully-closed and fully-open positions, will be represented by the SG1000x output signal being
proportionally between 4 mA and 20 mA.
Typically in such an application, the fully-closed slide gate position is referred to as being “0% open”. Likewise, the
fully-open slide gate position is referred to as being “100% open”.
In this example, an Electro-Sensors’ PM500 can be used to read the 4/20 mA signal coming from the SG1000x. The
PM500 can be programmed to display the slide gate position as a percentage, from 0% open to 100% open. The user
simply then has to view the PM500 displayed value to know the position of the slide gate at the bottom of the hopper
storage bin.
In this example using Input ‘A’ the PM500’s variables are set as follows below.
ADC select Var 05 is set to xx11, relay 1 and 2 are programmed to use ADC input ‘A’.
User units for ADC ‘A’ are programmed. Var 10 is set to 0 and Var11 is set to 100 (to read 0-100% when
the analog input is 4 to 20 mA).
The plant engineer also wants the PM500 to signal an Under alarm when the gate is in the 2% open position, and a
Over alarm when the gate is in the 98% open position.
To accomplish this he programs the PM500’s Relays as follows below.
Relay Actuation: Var06 to XX21 (Relay Output 1 as a Under alarm, Relay Output 2 as a Over alarm).
Relay Setpoint: Var01 is programmed at 0002 (to trip at 2% display value), and Var02 is programmed at
0098 (to trip at 98% display value).
The plant engineer tests the final system by closing the slide gate beneath the hopper bin, and verifies that the PM500
reads 0 (i.e., 0% for the 4 mA signal coming from the SG1000x).
When he runs the slide gate wide open, the PM500 shows 100 (i.e., 100% for the 20 mA signal coming from the
SG1000x).
He notices that when the slide gate was fully-closed relay 1 was off, and remained so until the slide gate opened up to
4% (2% setpoint and 2% hysteresis).
He also noticed that the PM500’s relay 2 was on the entire time the slide gate was near the fully-closed position, and
remained ‘ON’ until the slide gate opened-up to the 98% open position, then relay 2 turned ‘OFF’. This is the over
setpoint alarm he wanted.
16
Page 23

Appendix A—Panel Cutout Dimensions
TB1
TB2
2.61
4.31
PANEL CUTOUT
4.85
3.10 6.25
4.28
2.58
To install the PM500 into an instrument panel:
Remove the mounting brackets.
Slide the PM500 into the panel cutout.
Replace the mounting brackets and tighten the bracket screws (do not over tighten the bracket screws).
Allow a minimum of 1.5 inches clearance on all sides of the PM500.
17
Page 24

Wiring Practices for Industrial Equipment
1. All control signals must be shielded cable. The shield must be tied to common or earth ground at the
receiving end only. In some environments earth ground may contain excessive electrical noise. If you have
problems using earth ground as a shield tie point, switch the shields to signal common. All connections to the
controller are considered signal unless they carry AC power.
2. Never use a shielded cable with unused conductors. The unused conductors act as antennas. Attempting to
tie the unused conductors to ground or other signals just creates different antenna configurations. In many
cases unshielded wire would have received less electrical noise. Always insure that a shielded cable with the
correct number of conductors is pulled.
3. All control signals must be separated from power wiring. Power wiring includes any AC or DC voltages
with a current potential of greater than 1Amp or a voltage greater than 24 V. This includes, but is not limited
to, 115 VAC, 230 VAC, and 460 VAC. Do not bundle shielded cables and power wiring together.
4. Do not run signal cables along high magnetic or electrostatic generators. This includes, but is not limited
to, motors, fans, contactors, igniters, etc. Aluminum shielded cable does not stop magnetically induced noise,
braided shielded cable only partially reduces magnetically induced noise.
5. An earth ground wire must be installed on microprocessor based controllers when it is specified. Do
not rely on enclosure contact with the panel for earth ground. Earth ground is often used in noise rejection
circuitry and is not just a safety factor.
6. Contactors, solenoids, and relay coils on the same AC power or in the same enclosure (panel) as the
controller must be suppressed with a capacitor-resistor filter across the coil. These can be made with a 1 kV
capacitor and a ¼ watt resistor in series, or they can be purchased in a pre-made package. Use a capacitance
value of 0.1 F or larger and a resistance value of 500 ohms or less.
7. When power is stepped down from a higher AC voltage for controllers, a capacitor-resistor network or other
filter should be placed across the secondary.
18
Page 25

Appendix B—Wiring the PM500
AC Input Power Supply (TB1-1, TB1-2)
The standard PM500 uses 115 VAC power. 230 VAC. Internal fusing is provided within the unit. The
recommended fuse size is a TR5 100 mA Slow-Blow for 115 VAC, TR5 50 mA Slow-Blow for 230 VAC.
485 communications (TB1-4 to TB1-6)
A two conductor shielded cable should be used for this connection. The shield should be tied to the PM500
common, not earth ground.
Switch inputs (T1-7 to TB1-9)
The switches are contact closure and require only 2 or 3 wires depending on number of switches used. Use of
signal wire and shielding is advised but is not mandatory.
4/20 mA Analog Input (TB2-10 to TB2-15)
A two conductor shielded cable should be used for this connection. The shield should be tied to the PM500
common, not earth ground.
4/20 mA Analog Output (TB1-16 to TB1-18)
A two/three conductor shielded cable should be used for this connection, depending on the number of outputs
used. The shield is not counted as a conductor. The shield is tied to the PM500’s common.
Relay Outputs (TB3-1 to TB3-18)
Relay wiring is dependent on user needs.
19
Page 26

Wiring Diagrams
Figure 3; PM500 Wiring diagram
20
Page 27

Wiring Diagrams continued.
Figure 4; 2 Relay outputs wiring diagram
Figure 5; 6 Relay outputs wiring diagram
21
Page 28

Power
Description
Input power
Standard: 115 VAC 50/60 Hz, 9 VA
Switchable: 230 VAC 50/60 Hz, 9 VA
Fusing (internal)
100mA TR5 Slow-Blow recommended for 115 VAC
50mA TR5 Slow-Blow recommended for 230 VAC
Sensor Supply
Description
Transducer Power Supply
+24 VDC regulated , 50 mA max, 2 channels
Fusing
Internal, resettable
(power down, remove short and wait 1 min)
Control I/O
Description
Standard Inputs
2 Switch inputs (contact closure).
Standard Outputs
2 standard or 4 optional
SPDT (form C) fully programmable relays,
250 VAC, 5 A, Resistive Load
30 VDC, 5 A, Resistive Load
Relay update rate
100mS
Relay setpoint hysteresis
2 %
Analog Inputs
Description
Quantity
2 channels
Type
4-20mA Input
Resolution
16 bit ADC (15½ bits of usable range)
Accuracy
0.02 % uncalibrated @ 25C typical
0.15 % uncalibrated @ 25 C max.
0.25 % uncalibrated for full temperature range max.
ADC update rate
50mS
Analog outputs
Description
Quantity
2 channels
Type
4-20mA outputs (one associated with each input)
Resolution
16 bit DAC
Accuracy
0.1 % uncalibrated, @ 25C maximum.
0.15 % uncalibrated, full temperature range maximum.
DAC update rate
25mS
Input to Output isolation
1000 VAC isolation Analog input to Analog output
Mechanical
Description
Enclosure
ABS Plastic 94V-0
Keypad
Polycarbonate Tactile Switch Pad, Chemical Resistant,
Splash Proof
Operating temperature
0–50 C (32–122 F)
Humidity
0–90% Non-Condensing
Operational Specifications
Description
Display
4 digits, 0.3”, seven-segment LED, 5 Status LEDs
Display update rate
500mS.
Appendix C—PM500 Specifications
22
Page 29

Variable
Number
Variable Name
Default
Value
User
Value
Range of
Values
DP
move
enabled
Modbus
Address
Page
Ref.
01
Set Point 1
0005
User units
limitation
Yes
41010
5
02
Set Point 2
0095
User units
limitation
Yes
41020
5
03
Set Point 3
0005
User units
limitation
Yes
41030
5
04
Set Point 4
0095
User units
limitation
Yes
41040
5
05
reserved
0000
User units
limitation
Yes
41050
06
reserved
0000
User units
limitation
Yes
41060
07
Relay ADC
select
0021
XXXX
X = 0, 1 or 2
No
41070
5
08
Relay function
0021
XXXX
X = 0-3
No
41080
5
09
Switched input
function
0000
No
41090
7
10
Analog input A
Min Value
0000
User units
limitation
Yes
41100
8
11
Analog input
A Max Value
0100
User units
limitation
Yes
41110
8
12
Analog input B
Min Value
0000
User units
limitation
Yes
41120
8
13
Analog input
B Max Value
0100
User units
limitation
Yes
41130
8
14
ADC Averaging
0000
No
41140
8
15
Analog Input
Enable
0001
00XX
X = 0 or 1
No
41150
8
16
ADC Factory
Calibration select
0000
000X
X = 0-1
No
41160
8
17
Display options
0000
000X
X = 0-8
No
41070
9
18-19
Reserved
20
Channel A 4mA
set-point
0000
User units
limitation
Yes
41200
10
21
Channel B
20mA set-point
0100
User units
limitation
Yes
41210
10
22
Channel B 4mA
setpoint
0000
User units
limitation
Yes
41220
10
23
Channel B
20mA setpoint
0100
User units
limitation
Yes
41230
10
24
Analog Select
41240
10
25
Analog output
Response
0000
000X
X = 0-1
No
41250
10
26-30
reserved
Variable Logs
User Variables Log
Table 11; User Variable Log
23
Page 30

Variable
Number
Variable Name
Default
Value
User
Value
Range of
Values
DP
move
enabled
Modbus
Address
Page
Ref.
30
Modbus Node
0001
000XX
X = 1-247
No
41300
10
31
Modbus Baud
0003
000X
X = 0-4
No
41310
10
32
Modbus Parity
0000
000X
X = 0-2
No
41320
10
33
Modbus Data
type
0005
000X
X = 0-5
No
41330
10
34
Modbus Integer
encoding
0000
0000-0002
No
41340
9
35
Faulty sensor A
Modbus value
0000
User units
limitation
Yes
41350
9
36
Faulty sensor B
Modbus value
0000
User units
limitation
Yes
41360
9
Variable
Number
Variable Name
Default
Value
User
Value
Range of Values
DP
move
enabled
Modbus
Address
Page
Ref
40
User ADC 1 offset
cal
10465
0000–FFFF
No
41400
41
User ADC 1 span
cal
52323
0000–FFFF
No
41410
42
User ADC 2 offset
cal
10465
0000–FFFF
No
41420
43
User ADC 2
span cal
52323
0000–FFFF
No
41430
44
Factory ADC 1
offset cal
* 0000–FFFF
No
41440
45
Factory ADC
1 span cal
* 0000–FFFF
No
41450
46
Factory ADC 2
offset cal
* 0000–FFFF
No
41460
47
Factory ADC
2 span cal
* 0000–FFFF
No
41470
48
Reserved
0000–FFFF
No
41480
49
Reserved
0000–FFFF
No
41490
50
Reserved
0000–FFFF
No
41500
51
Reserved
0000–FFFF
No
41510
Communication Variables Log
Table 12; Communications Variables Log
Calibration Variables Log
Table 13; Calibration Variables Log
24
Page 31

Security Variable Log
Variable
Number
Variable Name
Default
Value
User
Value
Range of Values
DP
move
enabled
Modbus
Address
Page
Ref.
PdEF
Password
Definition
0500
0001–9999
None
41520
4
Pin
Password
Input
0500
0001–9999
None
41530
4
SdEF
Security Definition
1001
X00X
(X is 0 or 1)
None
41540
4
Table 14; Security Variables Log
25
Page 32

Index
4
4-20mA input wiring, 17, 18
4-20mA output wiring, 18
A
AC input power wiring, 17, 18, 20
ADC Averaging, 6
Analog input enable, 6
Analog Input User Units Lower Cal Point, 6
Analog Input User Units Upper Cal Point, 6
Analog output maximum rate in user units, 8
Analog output minimum rate in user units, 8
Analog output response, 8
Analog output test, 12
Appendix
Panel cut out dimension, 15
Specifications, 20
Wiring the PM500, 17
C
Calibrating the input, 14
Communications Variable Log, 22
D
M
Modbus
Baud rate, 8
Data type, 8
Faulted sensor value, 9
Integer encoding, 9
Node address, 8
Parity, 8
P
Panel cut out dimension, 15
Programming the analog inputs, 11
Programming the analog outputs, 11
Programming the relay outputs, 11
R
Relay ADC Select, 5
Relay output function, 5
Relay output Setpoints, 5
relay test, 12
Relay wiring, 17, 18
Resetting the unit, 12
S
Diagnostic functions, 12
Display function selection, 7
F
Factory calibration selection, 6
Faulted sensor value, 9
H
How to
Calibrate the analog input offset, 13
Calibrate the analog input scale, 13
Check the Analog Output, 12
Check the Keypad, 12
Check the Relay Outputs, 12
Check the Switched Inputs, 12
Reset the unit, 12
I
Introduction to this manual, v
Introduction to this product, vi
L
List of figures, iv
List of tables, iv
LRC display, 11
Specifications, 20
Switch input functions, 6
T
Table of contents, iii, iv
The user interface, 1
U
User variable log, 21
V
Variable
01 Relay output Setpoint 1, 5
02 Relay output setpoint 2, 5
03 Relay output setpoint 3, 5
04 Relay output setpoint 4, 5
07 Relay ADC Select, 5
08 Relay output function, 5
09 Switch input function, 6
10 Analog Input User Units Lower Cal Point CH A, 6
11 Analog Input User Units Upper Cal Point CH A, 6
12 Analog Input User Units Lower Cal Point CH B, 6
13 Analog Input User Upper Cal Point Units CH B, 6
14 ADC Averaging, 6
15 Analog Enable, 4
15 Analog input enable, 6
16 Factory calibration selection, 6
17 Display function Selection, 7
20 Analog output minimum rate in user units CH A, 8
Page 33

21 Analog output maximum rate in user units CH A, 8
22 Analog output minimum rate in user units CH B, 8
23 Analog output maximum rate in user units CH B, 8
24 Analog selection, 8
25 Analog outpu response, 8
30 Modbus node address, 8
31 Modbus baud, 8
32 Modbus Parity, 8
33 Modbus data type, 8
34 Modbus integer encoding, 9
35 Modbus faulted sensor value, 9
36 Modbus faulted sensor value, 9
User Variable Log, 21
Version number, 3
W
Wiring diagram, 18
Wiring practices, 16
27
Page 34

NOTES
___________________________________________________________________
___________________________________________________________________
___________________________________________________________________
___________________________________________________________________
___________________________________________________________________
___________________________________________________________________
___________________________________________________________________
___________________________________________________________________
___________________________________________________________________
___________________________________________________________________
___________________________________________________________________
___________________________________________________________________
___________________________________________________________________
___________________________________________________________________
___________________________________________________________________
___________________________________________________________________
___________________________________________________________________
___________________________________________________________________
___________________________________________________________________
___________________________________________________________________
___________________________________________________________________
___________________________________________________________________
___________________________________________________________________
___________________________________________________________________
___________________________________________________________________
___________________________________________________________________
___________________________________________________________________
Page 35

29
Page 36

PM500 User’s Manual Back Cover
Part Number: 990-005700 REV E
Electro-Sensors, Inc.
6111 BLUE CIRCLE DRIVE
MINNETONKA, MN 55343–9108
www.electro-sensors.com
sales@electro-sensors.com
tech@electro-sensors.com
Local: 952.930.0100
Toll-Free: 800.328.6170
Fax: 952.930.0130
 Loading...