

Page 1
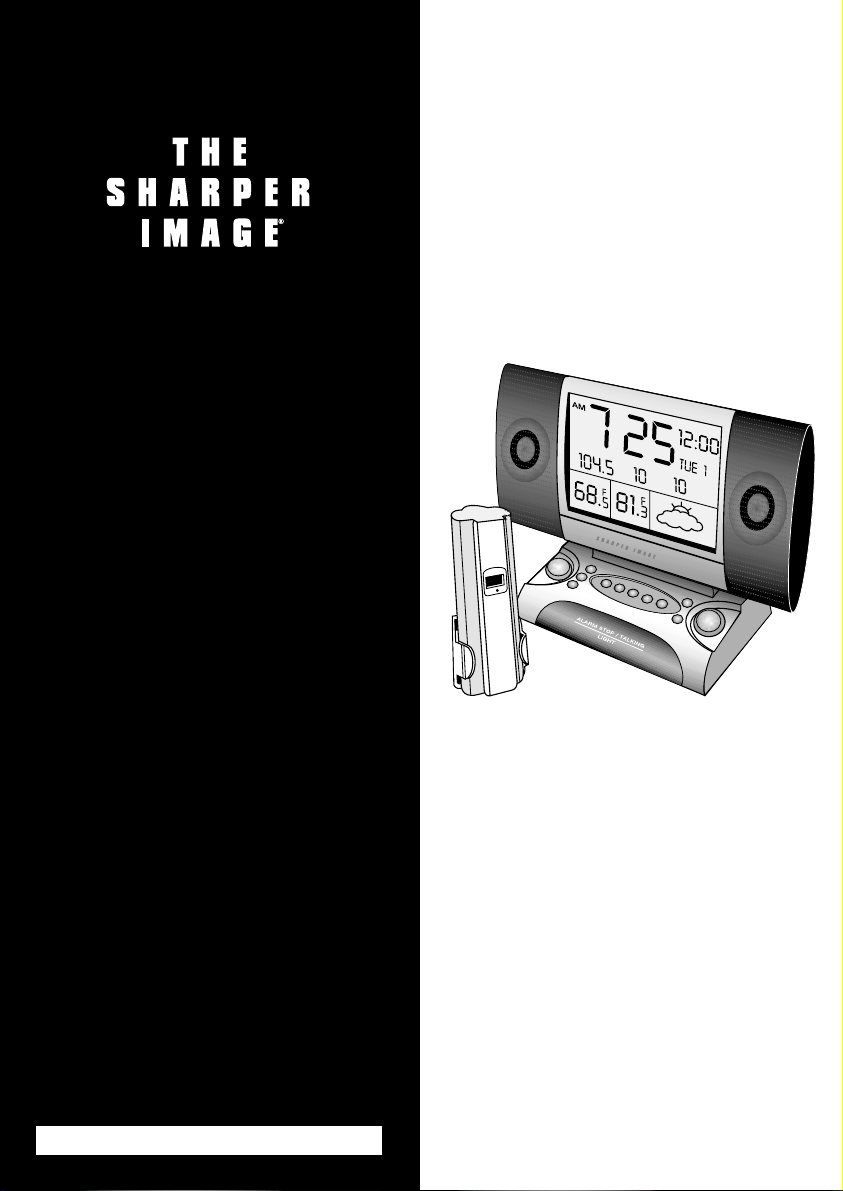
Talking Alarm
Clock/Radio &
Weather Center
MI603 Instructions
Read and save these instructions.
Page 2

2
Page 3

Call 1-800-344-4444 for 24-7 ordering and customer service,
or go to , our complete online store.
Dear Sharper Image Customer,
Thank you for your purchase of a Sharper Image product.
We appreciate your business very much.
Please accept my personal assurance of your complete satisfaction
with this product’s quality and performance. We offer generous
return privileges and excellent warranties on all our products.
For more than
25 years, The Sharper Image has shared the fun
of discovering innovative products that make life better and more
enjoyable. We’ve been in business a long time because we are an
exciting place to shop and — just as importantly — we strive to
deliver great customer service that exceeds your expectations.
Enjoy your purchase!
Respectfully,
Richard Thalheimer
Founder, Chairman and Chief Executive Officer
Page 4

4
Warnings
...........................................................................5
Caution ........................................................................5
Quick Start ........................................................................5
Synchronization of Remote Unit & Main Unit .................................6
Weather Forecast...............................................................7
General Instructions ...............................................................8
Location of Controls............................................................8
Buttons Under Front Panel .....................................................8
Buttons on the Base............................................................9
Button on the Back ............................................................9
Battery Installation .............................................................9
Setting the Clock..............................................................10
Setting the Alarm .............................................................10
Setting the Calendar ..........................................................10
Radio Operation..............................................................10
Weather Forecast .............................................................12
Weather Conditions ..........................................................12
Indoor and Outdoor/Remote Temperature ...................................13
Wireless Remote Temperature Transmission ..................................13
Transmission Troubleshooting .................................................14
Interference...................................................................14
Reset Button ..................................................................14
Voice-Memo Center ..........................................................15
Talking Clock..................................................................15
Alarm Functions ..............................................................16
Temperature-Sensing Backlight ...............................................16
General Troubleshooting......................................................17
Statement of FCC/DHHS Compliance ...........................................18
FCC Label Compliance Statement ...............................................18
Warranty ................................................................Back Cover
Table of Contents
Page 5

5
Warning: Changes or modifications to this unit not expressly approved by the
manufacturer will void the warranty.
Caution
1. Avoid exposing the wireless remote unit to extreme temperatures, water or
severe shock.
2. Do not expose the main unit to conditions of excessive force, shock, dust,
extreme temperature, direct sunlight or humidity. Any of these conditions may
shorten the life of the clock.
3. Do not tamper with any of the internal components of the unit. This will void
the warranty under the above conditions.
4. Use only fresh batteries. Mixing old and new batteries may cause battery leakage.
Quick Start
1. The unit comes with a plug-in adapter and 6 AA batteries. The batteries are
for backup in case of a power outage. (This allows the unit to keep the
time and other functions, although when on battery backup, the unit functions only as a clock. The radio, voice message and wake-up features will
not operate.) To start the unit, install the batteries, then plug the main unit
into a wall outlet using the included 10.5V adapter. If the radio is not working, check that the adapter has been plugged in properly.
2. Insert 2 AA batteries into the battery compartment on the remote unit, ensuring
proper polarities are observed. Once the batteries are installed, the temperature
appears on the remote unit’s LCD screen.
3. Once both units — main and remote — are operating, the main unit shows
the outdoor temperature that appears on the remote unit. This occurs within
a few minutes.
4. After this occurs, place the remote unit in the desired outdoor location within
100 feet of the main unit. This should be as close to the main unit as possible.
Ensure that it is not in direct sunlight. If necessary, screw the included wallmount bracket to a convenient outdoor location and place the remote unit
inside the bracket.
Note: For more details on synchronization, please refer to the section entitled,
“Wireless Remote Temperature Transmission.”
Warnings
Page 6

6
5. A weather icon appears on the display showing the weather with one of five
different icons from Sunny to Stormy. These icons project the next six hours
of weather and weather trends. The weather center must be acclimated to
the local area and altitude.
This process takes 48 hours.
Notes:
• The first weather reading will not be accurate.
• For more details on weather forecast icons and features, refer to the section entitled,
“Weather Forecast.”
6. To set the clock, slide the
LOCK/ALMSET/TIMESET/CALENDAR switch to
the
TIMESET position. The clock time blinks. Press the HR/MONTH and
MIN/DATE buttons until the desired time appears on the display. Slide the
LOCK/ALMSET/TIMESET/CALENDAR switch to the LOCK position.
7. To set the alarm time, slide the
LOCK/ALMSET/TIMESET/CALENDAR switch
to the
ALMSET position. The alarm time blinks. Press the HR/MONTH and
MIN/DATE buttons until the desired alarm time appears on the display. Slide
the
LOCK/ALMSET/TIMESET/CALENDAR switch to the LOCK position. (See
“Alarm Functions” section for more information.)
8. To set the calendar, slide the
LOCK/ALMSET/TIMESET/CALENDAR switch to
the
CALENDAR position. The date blinks. Press the HR/MONTH and MIN/DATE
buttons until the current date appears on the display. Slide the LOCK/ALM-
SET/TIMESET/CALENDAR
switch to the LOCK position.
Synchronization of Remote Unit & Main Unit
1. After inserting the batteries into the main unit and remote unit, plug in the
main unit using the 10.5V adapter. The LCD on the unit shows the indoor
temperature and, within minutes, shows the outdoor temperature — the same
temperature that appears on the remote unit. If at least 10 minutes pass and
the outside temperature field displays “---,” ensure that there is a temperature
appearing on the remote unit. If a temperature does appear on the remote
unit, press the
RE-SYNC button on the main unit and the RESET button on
the remote unit. The temperature will appear within a few minutes.
2. Once the units are in sync, place the remote unit in a desired outdoor location
within 100 feet of the main unit. Once you have located a place for the outdoor unit, ensure that the main unit continues to show an outdoor temperature. If it is not showing an outdoor temperature, the remote unit has been
placed either too far away or in an area where there is interference blocking
the signal. The outdoor unit should be placed as close as possible to the main
unit with as little interference as possible (walls, appliances, computers, etc.
Quick Start
Page 7

7
will reduce the range significantly). It is very important that the remote unit not
be placed in direct sunlight and should be protected from extreme weather.
This allows you to receive an accurate outside temperature reading and weather
forecast.
Note: For more details on synchronization, please refer to sections entitled,
“Wireless Remote Temperature Transmission” or “Transmission Troubleshooting.”
Weather Forecast
The main unit has a built-in barometer. The local weather forecast and weather
tendency are predicted using the rate of change in atmospheric pressure based
upon a norm.
When you first turn on the unit, it takes 48 hours for the unit
to sense and calculate the norm or the middle pressure level.
After this time,
the unit shows weather tendencies due to an increase or decrease in the barometric pressure. The icon on the unit shows what the weather tendency will be over
the next six hours.
Weather tendency is indicated by and up or down forecast arrow. (See table below.)
1. The up arrow indicates a significant increase in atmospheric pressure.
This normally means the weather is going to improve.
2. The down arrow indicates a significant decrease in atmospheric
pressure. This means the weather is going to get worse.
Note: If the unit continually gives incorrect forecasts, it can be corrected by
re-syncing the unit on a partly cloudy day. This allows the barometer to find the
right barometric pressure level without being too high or low.
3. The forecast icon without an arrow indicates a steady/insignificant
change of atmospheric pressure. This means the weather will remain unchanged.
Synchronization of Remote Unit & Main Unit
Page 8

8
General Instructions
Location of Controls
Front Panel Back Panel
Buttons on the Base Screen
Buttons Under Front Panel
1. RESET – Clears and resets the entire display.
2. °C/°F – Changes temperature display to either Celsius or Fahrenheit.
3. TEMP/MAX/MIN – Displays the maximum and minimum temperatures for
inside and outside temperatures.
4. CLEAR – Clears the maximum and minimum temperature data while the maxi-
mum and minimum temperature is shown on the LCD.
5. RE-SYNC – Resynchronizes the main unit with the remote unit.
6. HR/MONTH – Changes the hours or months when setting the clock or calendar.
7. MIN/DATE – Changes the minutes or day when setting the clock or calendar.
RESET
ºC/º
ALUMINUM-CONE
SPEAKER
F
TEMP/
MAX/MIN
CLEAR
RE-SYNC
MIC
HR/
MONTH
MIN/DATE
OFF
/BEEP/
VOICE
LOCK/ALMSET/TIME SET/
CALENDAR/
12/24HR/
YEAR
ADAPTER JACK
AA BATTERY X 4
BATTERY DOOR
BACKLIGHT
ADJUSTMENT
AC ADAPTER
ANT.
ERASE
REC
PLAY
BACKWARD
FORWARD
PRESET
SLEEP
MEMORY
SET
ALARM STOP/TALKING
LIGHT
BAND
AM/FM
TUNING UP
VOLUME
TUNING DOWN
RADIO
ON/OFF
FM/AM
RADIO
INDOOR TEMP
TIME
OUTDOOR TEMP
ALARM TIME
MEMORY
CALENDAR
VOICE
MEMO
WEATHER FORECAST
Page 9

9
8. 12/24 HR/YEAR – Changes from 12-hour time to 24-hour time when setting
clock or the year when setting the calendar.
9. LOCK/ALM SET/TIME SET/CALENDAR – Allows you to switch from locked to
alarm set to time set to calendar set.
10.OFF/BEEP/VOICE – Switches the alarm sound from off to beep to voice.
Buttons on the Base
1. REC – Records voice messages.
2. PLAY – Plays recorded messages.
3. ERASE – Erases recorded messages.
4. < BACKWARD – Scans backward through recorded messages.
5. > FORWARD – Scans forward through recorded messages.
6. SLEEP – Automatically turns the radio off after a certain amount of time. The
maximum is 90 minutes.
7. PRESET – Changes the preset stations.
8. MEMORY SET – Stores station as a preset station.
9. BAND/AM/FM – Changes between AM & FM band.
10.RADIO ON-OFF – Turns the radio on or off.
11.TUNING
▼/▲ – Tunes the radio station.
12.VOLUME
▼/▲– Controls the volume of the radio and messages.
13.ALARM STOP/TALKING/LIGHT – Stops alarm. It also announces the time, outside
temperature and forecast. This button also activates the automatic temperaturesensing backlight while the unit is running on battery power.
Button on the Back
• BACKLIGHT ADJUSTMENT – Adjusts the brightness of the LCD backlight.
Battery Installation
Main Unit
To enable the automatic temperature-sensing backlight, plug the main unit into
the wall outlet using the included 10.5V adapter. In case of a power outage, insert
4 AA batteries into the battery compartment on the rear of the main unit, ensuring
proper polarities are observed.
Remote Transmitter Unit
• Insert 2 AA batteries into the battery compartment on the remote unit, ensuring
proper polarities are observed.
Buttons Under Front Panel
Page 10

10
1. Slide the
LOCK/ALMSET/TIMESET/CALENDAR switch to the TIMESET position.
The clock time blinks.
2. To set the time, press the
HR/MONTH and MIN/DATE buttons until the
desired time appears on the display.
3. To change 12-hour time to 24-hour time, press the
12/24 HR/YEAR button.
4. Slide the
LOCK/ALMSET/TIMESET/CALENDAR switch to LOCK position.
Setting the Alarm
1. Slide the LOCK/ALMSET/TIMESET/CALENDAR switch to the ALMSET position.
The alarm time blinks.
2. To set the alarm time, press the
HR/MONTH and MIN/DATE buttons until the
desired alarm time appears on the display.
3. To change 12-hour time to 24-hour time, press the
12/24 HR/YEAR button.
4. Slide the
LOCK/ALMSET/TIMESET/CALENDAR switch to LOCK position. (See
“Alarm Functions” section for more information.)
Setting the Calendar
The calendar can be set to any date between January 01, 2002 and
December 31, 2051.
1. Slide the
LOCK/ALMSET/TIMESET/CALENDAR switch to the CALENDAR
position. The date blinks.
2. To set the calendar, press the
HR/MONTH and MIN/DATE buttons until the
current date appears on the display.
3. Press the
12/24 HR/YEAR button until the current year appears on the display.
4. Slide the
LOCK/ALMSET/TIMESET/CALENDAR switch to LOCK position.
Radio Operation
Tuner
1. For best reception, completely extend the antenna.
2. To turn the radio on, press the
RADIO ON/OFF button. The FM RADIO icon
appears on the display screen.
3. To select the desired band (AM or FM), press the
BAND button until the
desired band icon appears on the display.
4. To manually tune to the desired station frequency, press the
TUNING UP (▲)
or
TUNING DOWN (▼) button repeatedly until the desired frequency appears
on the display.
Setting the Clock
Page 11

11
5. To automatically scan for stations with clear signals, press and hold the
TUNING
UP
(▲) or TUNING DOWN (▼) button until the tuner begins searching for a
station. The tuner will automatically stop on the next clear station.
Note: The tuner automatically transmits stations in stereo if that particular station
is sending a stereo signal. The STEREO icon appears on the display.
Station Memory Presets
1. To turn the radio on, press RADIO ON/OFF button.
2. To select the desired band, press the
BAND AM/FM button.
3. To store a radio station in one of the 15 AM and 15 FM preset positions, tune
in the desired station.
4. Press the
MEMORY SET button. The preset number flashes.
5. To select the desired memory location, press the
PRESET button until the
desired preset position appears on the display.
6. To confirm, press the
MEMORY SET button again.
7. To scroll through all of the preset radio stations, repeatedly press the
PRESET
button. The unit will cycle through all preset stations in order.
Sleep Timer
The radio can be set to automatically turn off after a certain number of minutes
(from 10 to 90).
1. To set the sleep timer while the radio is on, press and hold the
SLEEP button
for 2 seconds. The radio turns off temporarily. “90 MINS” flashes on the display.
2. To select the duration of the sleep timer, press the
SLEEP button repeatedly
until the desired length of time appears. The timer decreases in 10-minute
increments between 90 and 10 minutes each time the
SLEEP button is
pressed. Two seconds after setting the desired length of time, the radio turns
on again. The sleep timer is now set.
Note:
• To turn off the sleep timer, press the SLEEP button until “00” appears. The radio
will not turn off automatically.
• The SLEEP mode only works when you manually turn on the radio.
Radio Operation
Page 12

12
The main unit has a built-in barometer. The local weather forecast and weather
tendency are predicted using the rate of change in atmospheric pressure based
upon a norm. When you first turn on the unit, it takes 48 hours for the unit to
sense and calculate the norm or the middle pressure level. After this time, the unit
shows weather tendencies, but increases or decreases in barometric pressure. The
icon on the unit shows what the weather tendency will be over the next six hours.
Weather tendency is indicated by and up or down forecast arrow. (See table below.)
1. The up arrow indicates a significant increase in atmospheric pressure.
This normally means the weather is going to improve.
2. The down arrow indicates a significant decrease in atmospheric
pressure. This means the weather is going to get worse.
Note: If the unit is continually giving wrong forecasts, it can be corrected by
re-syncing the unit on a partly cloudy day. This allows the barometer to find the
right barometric pressure level without being too high or low.
3. The forecast icon without an arrow indicates a steady/insignificant
change of atmospheric pressure. This means the weather will remain unchanged.
Weather Conditions
The current weather condition is displayed using one of five animated icons:
Sunny, Partly Cloudy, Cloudy, Rainy or Stormy. (See table below.) The Stormy icon
only appears when a sudden and serious drop in atmospheric pressure is detected.
Weather Forecast
Page 13

13
1. The indoor and outdoor temperatures can be displayed in either °F or °C. To
select °F or °C, press the
°C/°F button on the main unit or remote unit until the
desired display appears. The main unit converts the temperature if the remote
transmitter unit is set to a different temperature display. If the temperature
exceeds or falls below the unit’s range, the LCD shows either “HI” or “LO” in
place of the temperature.
2. To display the recorded minimum and maximum indoor and outdoor temperatures in succession, press the
TEMP/MAX/MIN button on the main unit
repeatedly. The temperature display returns to the current temperature after
5 seconds or after hitting the
TEMP/MAX/MIN button three times. To clear the
maximum and minimum temperature data, press the
CLEAR button while the
maximum and minimum temperature is shown on the LCD.
Wireless Remote Temperature Transmission
The Transmission frequency is 433MHz. The outdoor transmission range is 100
feet from the main unit. Obstacles, walls, etc. will reduce the transmission range.
Once the main unit is plugged in or the batteries have been installed, it will start
to receive signals for 10 minutes. Once batteries are placed in the remote unit, it
will start to transmit temperature data to the main unit every 3 minutes. Upon
successful reception, the remote/outdoor temperature will be shown in the
remote temperature field on the LCD. The main unit automatically updates the
remote reading in 3-minute intervals.
Receiver Signal Indicator Icons
The following icons indicate the signal transmission status on the LCD:
Indoor and Outdoor/Remote Temperature Readout
Page 14

14
1. If the main unit does not receive signals within the first 10 minutes, a blank
“--” appears in the OUT TEMP field on the LCD. If at any time during operation a signal is not received after five consecutive intervals, blank “--” appears.
The remote unit is either too far away or there is some interference between
the remote and the main unit. If this happens, bring the remote unit close to
the main unit and press the
RE-SYNC button. The main unit will receive signals
for 10 minutes. Move the remote unit to a new location closer to and in direct
line of the main unit.
2. If the remote unit’s batteries are running low, a low battery icon appears in the
OUT TEMP field. Replace the batteries.
3. If the display unexpectedly goes blank, press the
RE-SYNC button on the main
unit to force the main unit to receive a signal. If this does not work, check the
following:
• The remote unit is still in place.
• The batteries in both the remote unit and the main unit are still good.
Replace if necessary.
• The remote transmitter is within range and the path is clear of obstacles or
other interference. (See “Interference” section.) Shorten the distance if necessary.
Interference
Signals from other household devices such as garage-entry controls, doorbells and
home security systems may interfere with the temperature-data transmission and
may cause temporary reception failure. This is normal and does not affect the
general performance of the unit. The transmission and reception of the temperature
reading will resume once the interference has stopped.
Reset Button
Press the RESET button when either the main unit or remote transmitter unit is
not operating normally.
Transmission Troubleshooting
Page 15

15
Up to eight personal messages can be stored in the voice-memo center. The
Voice-Memo field on the LCD shows “0” until a message is recorded.
1. To record a message in the first memo position (or the next available position),
press and hold the
RECORD button. A beep sounds and “REC” appears on the
display. Speak in a normal voice 15 inches away from the microphone above
the LCD. Messages can be a maximum of 6 seconds long. A double-beep
sounds if your message reaches 6 seconds before you release the
RECORD
button.
Note: If you do not hear a beep after pressing the RECORD button, turn up the
volume and re-record your message.
2. Release the
RECORD button when you are finished recording your message. A
beep sounds and the message number is shown on the display in the memo field.
3. To record additional messages (up to eight), repeat steps 2 and 3. The message
number automatically increases in the memo field. If you try to record more
than eight messages, an “F” appears on the display to indicate the message center
is full.
4. To play a recorded message, press the
FORWARD or BACKWARD button until
the desired memo number appears on the display.
5. Press the
PLAY button. “PLAY” appears on the display.
Note: If the radio is on, pressing the PLAY button momentarily turns off the radio
to play the message. The radio turns back on after the message has played.
6. To erase a recorded message, press the
FORWARD or BACKWARD button
until the desired memo number appears on the display. Press the
ERASE button.
The remaining messages will be renumbered.
Talking Clock
To hear the current time, outdoor temperature and weather report, press the
ALARM STOP/TALKING/LIGHT button. If you press this button while the radio is
on, the radio turns off temporarily. Once the update has been played, the radio
automatically resumes play.
A
Voice-Memo Center
Page 16

16
Voice Alarm
The voice alarm wakes you to the following sequence: 5 seconds of beeping,
followed by “Good morning,” the current time, outdoor temperature, the weather
report, any personal messages you have recorded and then the radio plays for one
hour. If no outdoor temperature is recorded on the display, the alarm skips this
function. If there are no personal messages recorded, the alarm skips this feature.
1. To select the voice alarm, slide the
OFF/BEEP/VOICE switch to VOICE.
2. To turn off the voice alarm once it has sounded, press the
ALARM STOP/TALKING/
LIGHT
button.
Beeping Alarm with Snooze
The beeping alarm with snooze wakes you to one minute of beeping that repeats
every five minutes until the alarm is turned off.
1. To select the beeping alarm with snooze, slide the
OFF/BEEP/VOICE switch
to
BEEP.
2. To activate the snooze function after the alarm has sounded, you may either
wait for the alarm to turn off after one minute or you may press the
ALARM
STOP/TALKING/LIGHT
button. In both instances the alarm repeats every five
minutes until it is turned off.
3. To turn off the snooze alarm, slide the
OFF/BEEP/VOICE switch to OFF.
Temperature-Sensing Backlight
The LCD backlight color is automatically determined by the recorded
outdoor/remote temperature.
1. Cold (blue colored backlight): Below 50°F/10°C.
2. Normal (amber colored backlight): 50.1°F – 75°F/10.1°C – 23.9°C.
3. Warm (red colored backlight): Above 75°F/24°C.
• To enable the automatic temperature-sensing backlight to remain on at all times,
plug the main unit into a wall outlet using the included adapter.
• To activate the automatic temperature-sensing backlight while the unit is run-
ning on battery power, press the
ALARMSTOP/TALKING/LIGHT button. The
backlit LCD turns on for 3 seconds.
Alarm Functions
Page 17

Problem: It is raining outside, but the unit’s forecast shows the sunny icon.
Solution: The unit measures barometric pressure changes and gives forecasts
based on up or down trends over the next six hours, not what is going on at that
exact time. If the unit indicates it is sunny, but it is raining outside, this means the
weather will improve over the next six hours.
Problem: The weather icon has been incorrect for an extended period of time.
Solution: The unit may have been set during a period of high or low barometric
pressure, so the unit’s barometric point of reference is incorrect. Wait until a partly
cloudy day and re-sync the remote unit with the main unit. (See “Synchronization
of Remote Unit & Main Unit” section.) The unit will acclimate to the correct level
of barometric pressure.
Problem: The radio does not work.
Solution: Make sure that the 10.5V adapter is properly connected to the unit and
the wall outlet.
Problem: The main unit’s LCD panel is faint or hard to read.
Solution: Adjust the tilt angle of the LCD and adjust the brightness of LCD back-
light until the readout is clear from your viewpoint.
Problem: The outdoor temperature reading is extremely high when the temperature
is actually much colder.
Solution: The remote unit is sitting in direct sunlight. Move it to a shaded, protected
location.
For additional questions, please call the manufacturer:
1-800-526-0954
General Troubleshooting
17
Page 18

Page 19

19
Page 20

This warranty covers any defects in materials or workmanship, with the exceptions stated below.
How Long Coverage Lasts
This warranty runs for 90 days from the date of original purchase.
What Is Not Covered
This warranty does not cover damage caused by misuse or use other than as intended and described
in the product instruction manual, or loss or damage to batteries or removable parts.
What The Sharper Image Will Do
The Sharper Image will repair any defects in materials or workmanship. In the event repair is not
possible, The Sharper Image will either replace this product with one of similar features and price,
or refund the full purchase price of the product, whichever you prefer.
How to Obtain Service
Return the product and receipt, along with a brief explanation of the problem, to:
T.S.I. - Returns Department
2901-A West 60th Street
Little Rock, AR 72209
If you have questions, please feel free to contact our customer service representatives at
1-800-344-5555 or by email at care@sharperimage.com.
This warranty gives you specific legal rights, and you may have other legal rights that vary from state
to state.
Copyright 2003
Sharper Image Corporation
650 Davis St., San Francisco, CA 94111
(415) 445-6000
Shop online:
Warranty
Due to continuing improvements, actual product may differ slightly from the product described
herein.
V1 12/03
 Loading...