

Page 1
CAUTION
Read all warnings and instructions
in this manual before using the
scooter. Keep this manual for future
reference.
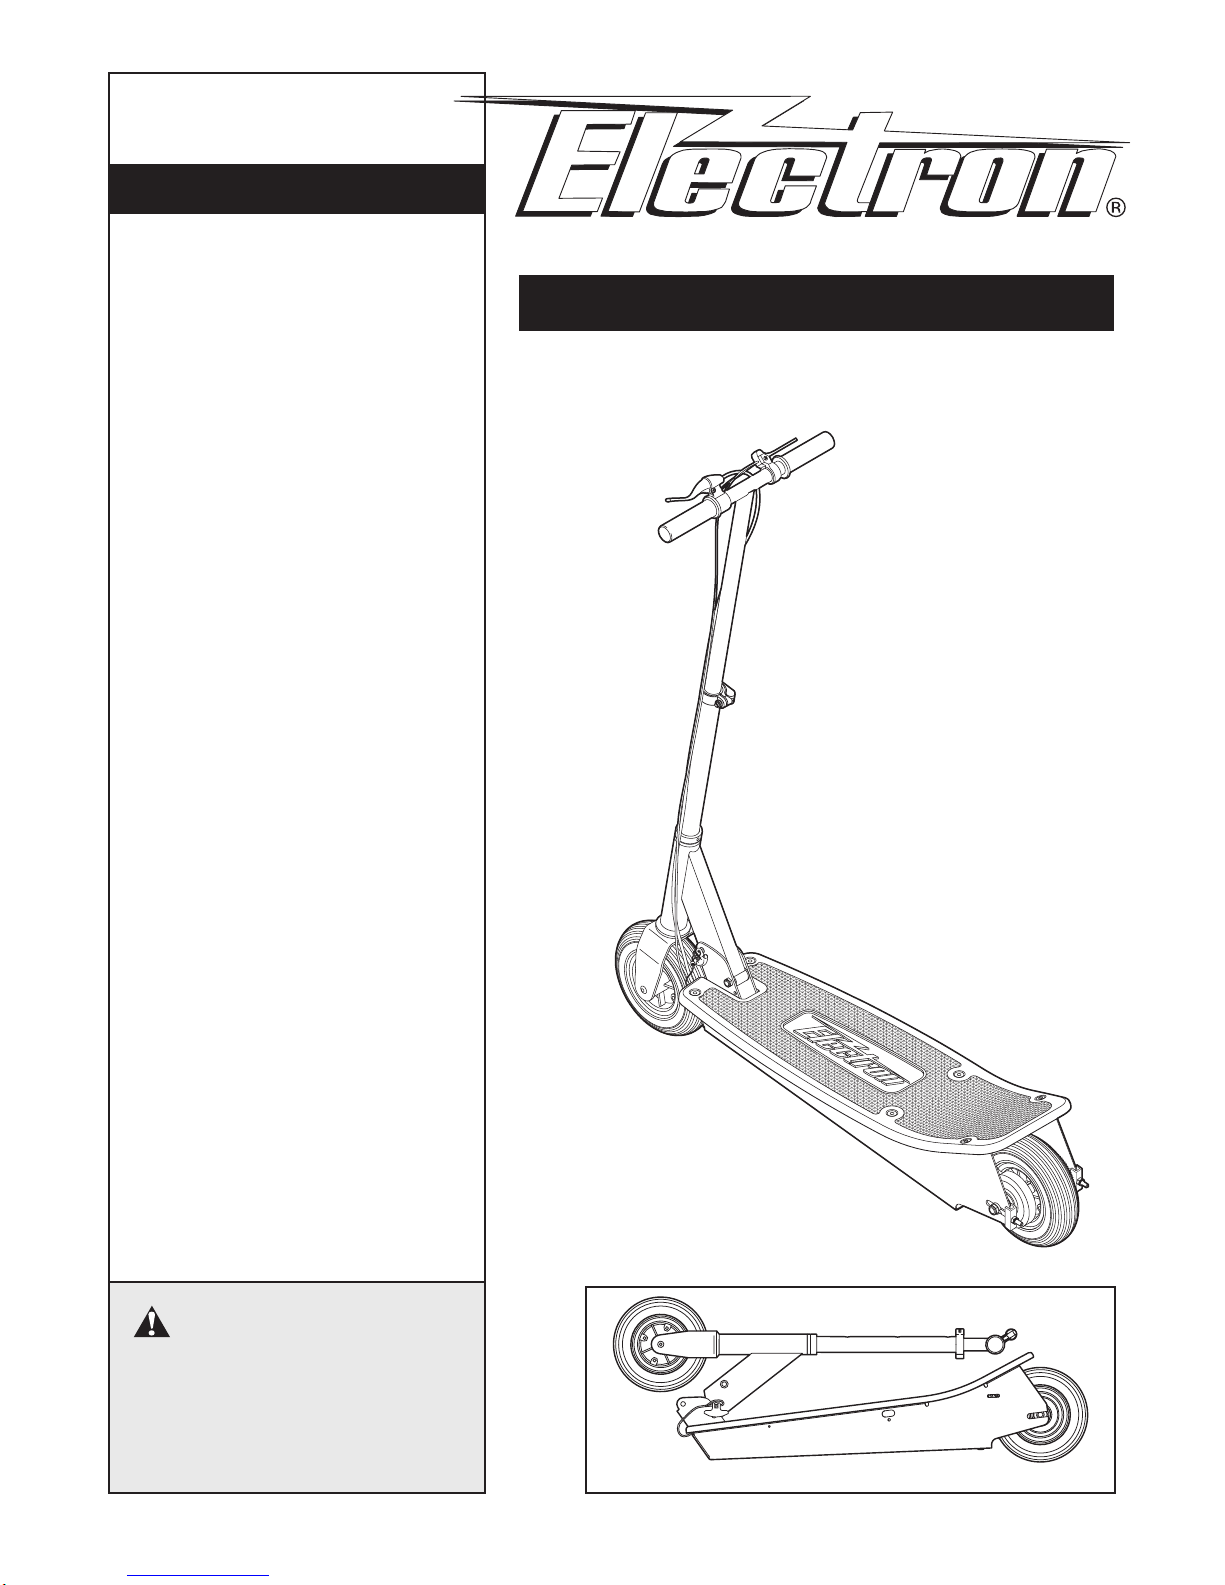
User ’s Manual
Model No. MTSC11701
Table of Contents
Important Precautions . . . . . . . . . .2
Before You Begin . . . . . . . . . . . . .3
How to Set Up and
Fold the Scooter . . . . . . . . . . . . . . .4
How to Operate the Scooter . . . . . .5
Part List . . . . . . . . . . . . . . . . . . . . .6
How to Order
Replacement Parts . . . . . . . . . . . . .6
Exploded Drawing . . . . . . . . . . . . .7
Maintenance and
Troubleshooting . . . . . . .Back Cover
Page 2

2
Important Precautions
WARNING:To reduce the risk of serious injury, read these warnings before using the scooter.
1. Read, understand, and follow all warnings and
instructions on the scooter and in this manual.
Save this manual for future reference.
2. It is the owner’s responsibility to ensure that all
users of the scooter are adequately informed of,
and follow, all warnings and instructions.
3. Inspect the scooter and tighten or replace any
loose or missing parts before each use. In addition, make sure the lock pin is fully inserted, the
wheels rotate freely, the wheel bolts are tight, the
drive belt is properly tensioned, and the brake is
properly adjusted and working. Keep the tires
properly inflated. Do not use the scooter if the
tires are underinflated; this can cause loss of control and can damage the motor or batteries.
4. Always wear protective equipment, including a
helmet, knee pads, wrist guards, elbow pads, and
closed-toed shoes, when using the scooter.
5. Keep children away from the scooter at all times.
Always move the on/off switch to the off position
when the scooter is not in use. Always store the
scooter in a protected area where unauthorized
use is prevented.
6. The scooter should not be used by children
under the age of eight. Aresponsible adult must
always supervise young riders.
7. Never ride the scooter on streets, roadways, or
driveways that enter vehicle traffic routes. Always
comply with all local laws and regulations.
8. The scooter is not recommended for riders
weighing more than 200 pounds. To prevent serious injury or damage to the scooter, do not
exceed this maximum user weight limit.
9. Never ride the scooter on wet or uneven surfaces
or when visibility is poor.
10. Never tow another person or vehicle behind the
scooter. Never allow the scooter to be towed
behind a bicycle, motorcycle, or vehicle.
11. Never place hands near moving parts when the
power is on. Make sure the on/off switch is in the
off position before performing any of the maintenance or troubleshooting procedures described
in this manual.
12. Do not ride the scooter on unpaved surfaces. Do
not leave the scooter in dusty, wet, or rainy
areas. Keep the batteries and electronics dry and
protected from dirt and contaminants. Charge
the scooter only in a dry, well-ventilated area
and follow all instructions.
13. Use only the supplied charger to charge the
scooter. Do not use the charger or the scooter if
any wires or electric components become damaged or frayed. Use only components or parts
supplied by the manufacturer for all repairs and
replacements.
14. Never remove the four locknuts holding the rims
together without first deflating the tires.
Page 3
3
Before You Begin
Thank you for selecting the new ELECTRON®motorized scooter. The ELECTRON scooter combines quiet electric
power with a sturdy, compact design to provide you with hours of enjoyment. And when you’re not using the ELECTRON scooter, it can be folded for easy storage or transport. For your safety and benefit, carefully read all of the
warnings and instructions in this manual before using the ELECTRON scooter.
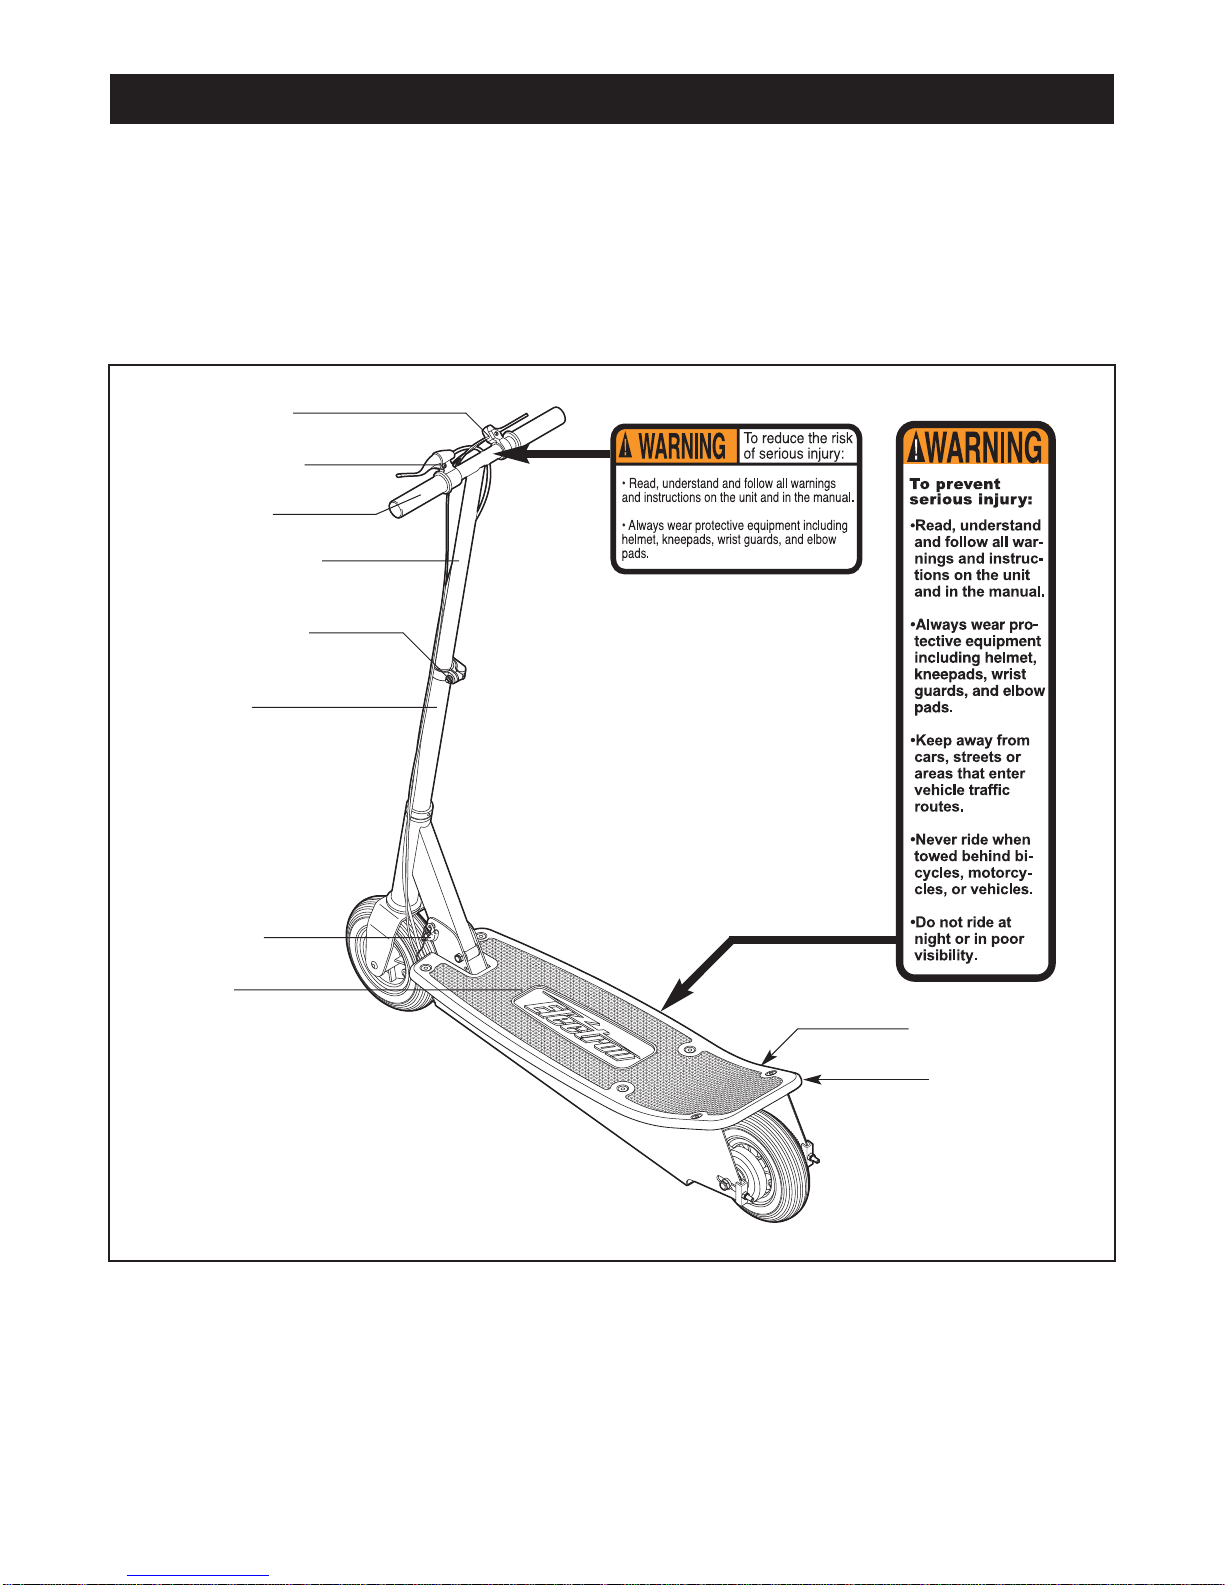
Before reading further, please take a moment to familiarize yourself with the parts of the scooter that are labeled in
the drawing below.
The warning decals shown above have been placed on the scooter. If a decal is missing or illegible, please call
our Customer Service Department toll-free at 1-800-999-3756, Monday through Friday, 6 a.m. until 6 p.m.
Mountain Time, to order a free replacement decal. Apply the replacement decal in the location shown.
Brake Handle
Quick Release
Upright
Handlebar Stem
Start Switch
Handlebar
Deck
Lock Pin
Charging Socket
On/Off Switch
Page 4

4
How to Set Up and Fold the Scooter
SETUP
The scooter is shipped in the compact storage position.
Follow the steps below to set up the scooter for use.
1. Pull the lock pin out of the frame. Raise the upright
until it is in a nearly vertical position. Reinsert the
lock pin fully into the frame.
2. Open the quick release lever. Press the push pin on
the stem of the handlebar and slide the stem up until
the push pin is visible in one of the three holes in the
upright. The handlebar should be at the height of the
user’s waist. Close the quick release lever so it is
tight against the upright.
Note: If the
quick release
doesn’t hold
the stem tightly, the quick
release should
be adjusted.
Open the
quick release
lever. Turn the
adjustment nut clockwise one half turn while keeping
the lever from turning. Close the lever. Repeat this
procedure until the stem is held tightly.
If the quick release cannot be closed, turn the adjustment nut counterclockwise one quarter turn while
keeping the lever from turning. Close the lever.
Repeat this procedure until the quick release closes
and the stem is held tightly.
Before using the scooter, make sure that the scooter is
set up as described and that all parts are securely
tightened.
The batteries must be charged before the scooter can
be used. Refer to page 5 for battery charging instructions.
FOLDING
When the scooter is not in use, it can be folded to the
storage position for compact storage or transport. Follow
the steps below to fold the scooter.
1. Make sure the on/off switch on the right side of the
scooter is in the off position. The on/off switch
should always be in the off position when the
scooter is not in use.
2. Open the quick release lever. Press the push pin on
the stem and slide the stem into the upright. Close the
quick release lever.
3. Pull the lock pin out of the frame. Pivot the upright
down to the horizontal position. Reinsert the lock pin
fully into the frame.
Lock Pin
Lock Pin
Frame
Quick
Release
Lever
Upright
Upright
Push Pin
Stem
Nut
Open
Close
Lever
Quick
Release
Page 5

5
How to Operate the Scooter
CHARGING THE BATTERIES
The scooter’s sealed lead-acid batteries should be
charged and stored at temperatures between 50°F and
100°F (10°C and 38°C). If the temperature is warmer,
the batteries will discharge more rapidly. If the temperature is cooler, the scooter should be moved to a warmer
area while the batteries are being charged. Follow the
steps below to charge the batteries.
1. Make sure the on/off switch on the right side of
the scooter is in the off position. Note: If the on/off
switch is in the on position and the start switch is
pulled while the batteries are being charged, the battery charger will switch off for a short period of time.
2. Locate the charging socket near the on/off switch.
Identify the cord on the battery charger that fits into
the charging socket and plug the cord into the charging socket. Plug the other cord on the battery charger
into a 110-volt outlet.
3. Allow the batteries to charge for about five to eight
hours. After the batteries are charged, unplug the battery charger from the 110-volt outlet first and then
unplug the battery charger from the charging socket
on the scooter.
For maximum battery life, avoid leaving the on/off
switch in the on position when the scooter is not in use.
Avoid draining the batteries. It is recommended that the
batteries be charged after each use. The batteries should
be charged at least once each month, even if the scooter
is not used.
If the batteries need to be replaced, refer to HOW TO
ORDER REPLACEMENT PARTS on page 6. Recycle
batteries according to federal and state laws.
THE ON/OFF SWITCH
The on/off switch on the right side of the scooter is the
main power switch (see the drawing at the left). Moving
the switch to the “on” position will turn on the power.
Moving the switch to the “off” position will turn off the
power. When the scooter is not in use, the on/off
switch should always be in the off position.
When you are ready to use the scooter, move the on/off
switch to the on position.
STARTING AND STOPPING THE SCOOTER
With the on/off
switch in the
on position, the
scooter can be
started with the
start switch on
the right side
of the handlebar. To start
the scooter,
hold the handlebars securely, step onto the deck with one
foot while using your other foot to maintain balance, and
pull the start switch with your right index finger. (To preserve the battery charge longer, you may wish to push
with your foot as you start the scooter.) The scooter will
immediately begin to move. When the start switch is
released, the motor will stop. Note: To prevent damage to
the motor, do not repeatedly pull and release the start
switch in an attempt to move the scooter at a slower
speed.
To stop the scooter, pull the brake handle on the left side
of the handlebar. Note: Any time the brake handle is
pulled, the motor will stop, even if the start switch is
being pulled at the same time.
Use the scooter only on paved, smooth, level surfaces.
Avoid using the scooter on grades steeper than 5% for
extended periods. The scooter is rated for a 200-pound
user on a hard, level surface with a surrounding temperature of 50°F; the batteries’ charge will be used faster by
heavier riders. Make sure the tires are inflated to the
pressure listed on the sides of the tires.
Start Switch
Brake Handle
On/Off
Switch
Cord
Charging
Socket
Page 6

6
1 1 Frame
2 1 Fork/Upright
3 1 Neck
4 1 Handlebar
5 2 Hand Grip
6 1 Deck
7 1 Push Pin
8 1 Quick Release
9 1 Upright Clamp
10 1 M6 x 39.5mm Screw
11 1 Upper Neck Bushing
12 1 Lower Neck Bushing
13 1 Lock Pin
14 1 Pivot Bolt
15 2 Pivot Bushing
16 2 M6 Flat Washer
17 1 Rear Wheel Assembly
18 1 Brake Handle/Speed Control
19 1 Brake Cable
20 1 Battery Bracket
21 2 Battery
22 1 Motor
23 1 Motor Bracket
24 1 Motor Brace
25 1 Control Board
26 1 Belt
27 1 Brake
28 1 Brake Disc
29 1 Brake Flange
30 1 Rear Axle
31 2 Adjustment Bracket
32 2 M6 Nylon Locknut
33 2 Eye Bolt
34 3 M6 x 9.5mm Button Screw
35 1 M10 Washer
36 1 Gear Spacer
37 1 M5 x 36mm Bolt
38 3 M5 Washer
39 1 Spacer
40 1 Cable Bracket
41 4 M5 Nylon Locknut
42 2 Front Wheel Spacer
43 3 Wheel Bearing
44 1 Front Axle
45 6 M8 x 23.5mm Bolt
46 10 M8 Nylon Locknut
47 4 M8 x 14mm Bolt
48 1 Charging Socket
49 1 On/Off Switch
50 1 Cable Clamp
51 2 #6 x 12.7mm Screw
52 4 Board Fastener
53 1 Battery Charger
54 1 Front Wheel Assembly
55 2 M5 x 16mm Bolt
56 1 M4 x 12mm Button Screw
57 2 #6 Flat Washer
58 1 Brake Disc Spacer
59 1 Brake Disc Bearing
60 2 M10 Nylon Locknut
61 1 M8 28mm Bolt
62 1 M8 Nut
63 1 Wire Tie
64 1 M3 x 6mm Screw
65 1 M4 x 7mm Screw
66 2 #6 Nylon Locknut
67 2 Thrust Washer
68 1 Thrust Bearing
69 1 Upright Bushing
70 1 Stem Bushing
71 1 M4 x 14mm Screw
72 2 M10 Nut
# 1 User’s Manual
Part List—Model No. MTSC11701 R0102A
Key No. Qty. Description Key No. Qty. Description
Note: “#” indicates a non-illustrated part. Specifications are subject to change without notice.
How to Order Replacement Parts
To order replacement parts, call toll-free 1-800-999-3756, Monday through Friday, 6 a.m. until 6 p.m. Mountain Time
(excluding holidays). When ordering parts, please mention the model number of the scooter (MTSC11701) and the
number and description of the needed parts.
Page 7

7
Exploded Drawing—Model No. MTSC11701 R0102A
5
67
68
67
64
12
10
5
70
65
34
13
9
11
15
69
45
45
6
4
71
18
22
46
47
46
19
38 38
24
23
47
25
7
14
46
47
66
57
48
57
51
49
20
46
21
52
8
3
15
45
46
41
55
53
63
2
42
54
34
42
43
16
44
43
16
56
37
50
41
38
55
34
38
60
39
72
35
40
58
1
41
31
52
62
60
26
61
59
29
28
27
3233
30
17
36
43
72
33
31
32
Page 8

Part No. 182559 R0102A Printed in China © 2002 ICON Health & Fitness, Inc.
Maintenance and Troubleshooting
Regularly check the scooter and make sure all parts are
properly tightened. If the scooter does not function properly, follow the steps below. If assistance is needed, call
our Customer Service Department toll-free at 1-800-999-
3756. IMPORTANT: Move the on/off switch to the off
position before performing any of the steps below.
Symptom 1—The motor does not start when the start
switch is pulled.
1. Make sure the on/off switch is in the on position.
2. Make sure the batteries are charged.
3. Make sure the brake handle is not being pulled.
4. To protect the motor, the PTC resistor has tripped;
allow the scooter to cool down.
Symptom 2—The batteries discharge quickly.
1. Make sure the tires are inflated to the pressure listed
on the sides of the tires.
2. Use the scooter on level, smooth surfaces. Avoid
using the scooter on grades steeper than 5%.
3. Charge and store the batteries at temperatures
between 50°F and 100°F (10°C and 38°C).
4. If the batteries still discharge quickly, new batteries
may be needed. Refer to page 6 for instructions.
Symptom 3—The brake is too loose or too tight.
1. Locate the locknut and adjustment barrel on the
brake handle. Turn the locknut counterclockwise to
loosen it. Next, turn the adjustment barrel counterclockwise to tighten the brake or clockwise to loosen
it. Then, turn the locknut clockwise to retighten it.
Repeat until the hand brake is properly adjusted.
If the hand brake requires further adjustment, the
lower end of the brake cable can be adjusted.
Remove the six M8 x 23.5mm bolts from the deck,
lift off the deck, and locate the adjustment barrel and
locknut near the lower end of the brake cable. Using
a small open-end wrench, loosen the locknut. Next,
turn the adjustment barrel counterclockwise to tighten the brake or clockwise to loosen it. Then, retighten the locknut. Repeat until the hand brake is properly adjusted. When the hand brake is properly adjusted, reattach the deck with the six bolts.
Symptom 4—The drive belt slips.
1. Locate the M10 nylon locknuts and the M6 nylon
locknuts near the rear wheel. Loosen the M10 nylon
locknuts. To tighten the drive belt, turn both M6 nylon
locknuts clockwise. Make sure the rear wheel is
straight and retighten the M10 nylon locknuts. Repeat
this procedure until the drive belt no longer slips.
Symptom 5—The quick release is too loose or too tight.
1. If the quick release doesn’t hold the stem tightly, or if
the quick release cannot be closed, refer to step 2 on
page 4 for adjustment instructions.
Barrel
Locknut
M10 Nylon
Locknut
M6 Nylon
Locknuts
M10 Nylon
Locknut
Barrel
Brake Cable
M8 x
23.5mm
Bolts
Locknut
Deck
 Loading...