

1
Operating Instructions
Digital Torque Wrench
DTL
ELECTROMATIC Equip’t Co., Inc.
600 Oakland Ave, Cedarhurst, NY 11516
Tel: 800-645-4330 / 516-295-4300
Web: www.CheckLine.com
Distributed by: ABQ Industrial LP USA
Tel: +1 (281) 516-9292 / (888) 275-5772 eFax: +1 (866) 234-0451
Web: https://www.abqindustrial.net E-mail: info@abqindustrial.net

2
Thank you!
Dea
r Customers,
Thank you for purchasing the DTL digital torque wrench. This
instruction manual will help you to use the many features of your
new digital torque wrench. Before operating the torque wrench,
please read this manual completely, and keep it nearby for
future reference.
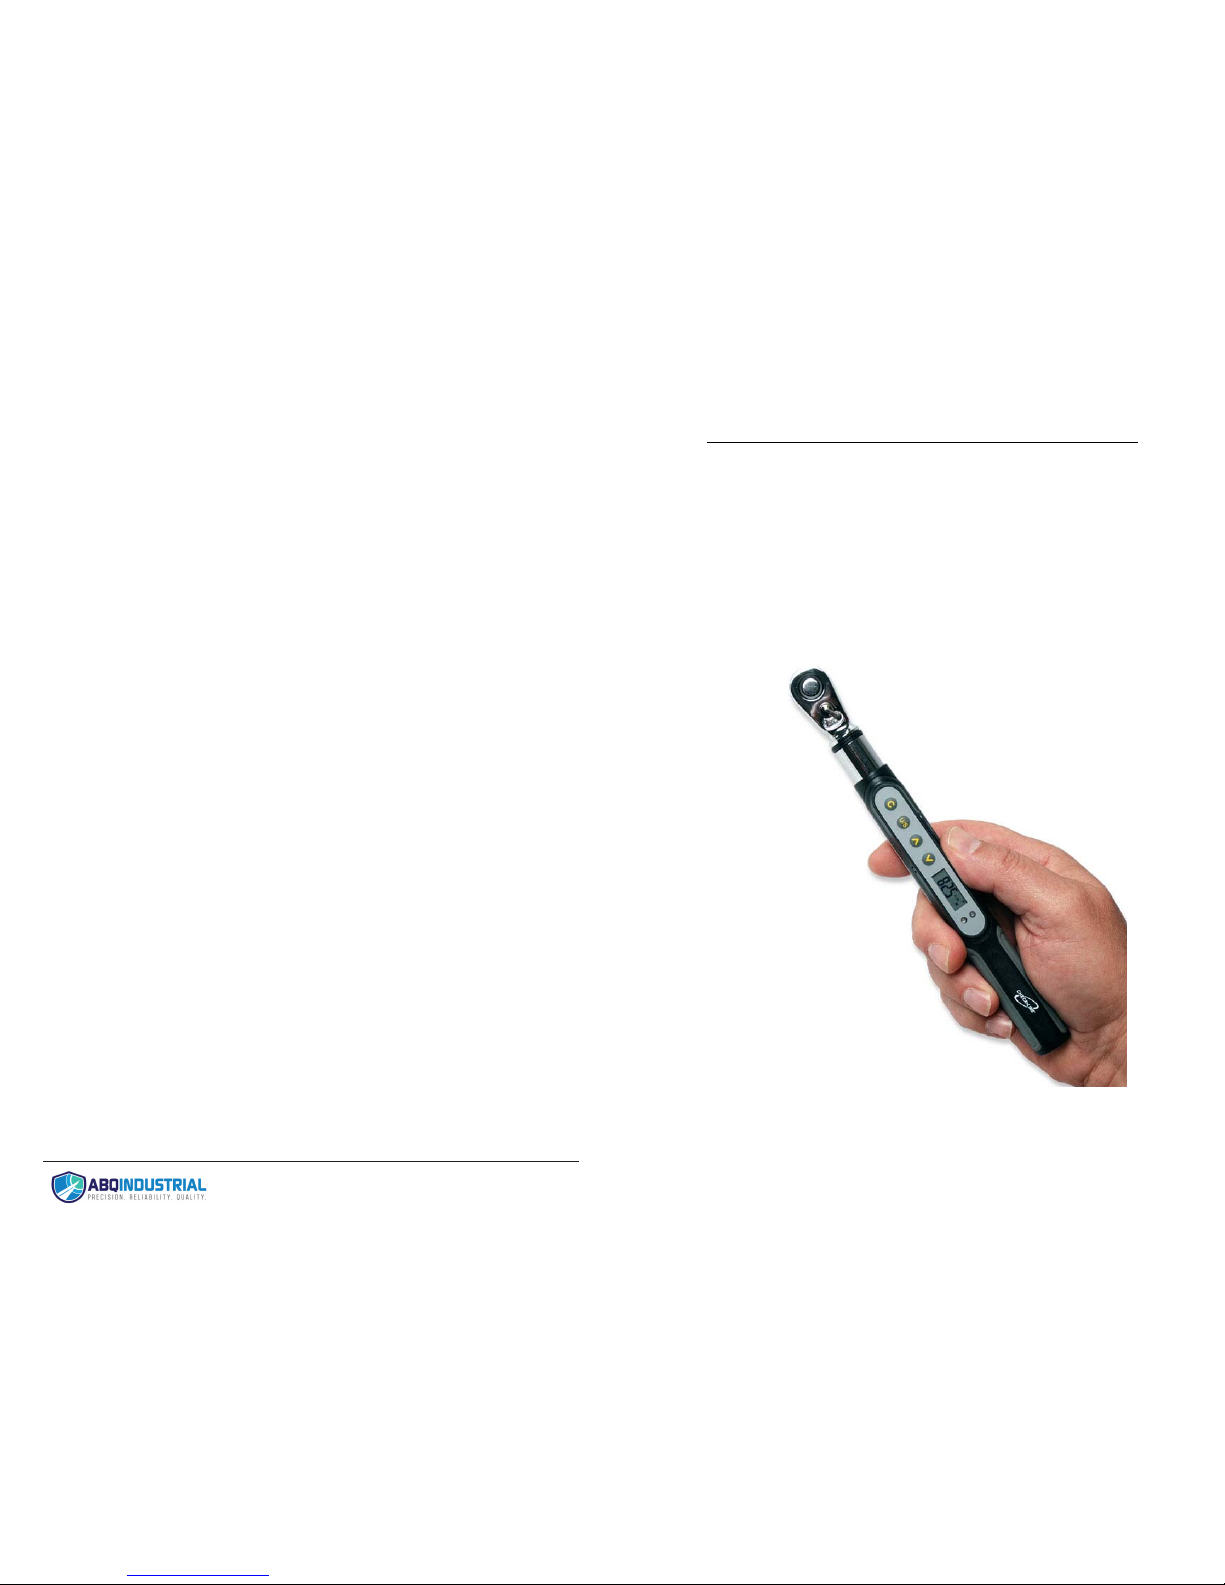
NAMES & FUNCTIONS OF PARTS
*The Calibration Mark is a small notch in the center of the
handl
e to indicate where force should be applied when chec
king
calib
ration accuracy.
7
CALIBRATION
We recommended annual calibration of the DTL Torque wrench to ensure
it is measuring according to factory specifications. For calibration service
please return to:
ELECTROMATIC Equipment Co., Inc.
Attn Calibration Department
600 Oakland Ave
Cedarhurst, NY 11516
Please visit www.checkline.com/repair for complete instructions and
services rates.
WARRANTY
ELECTROMATIC Equip’t Co., Inc. expressly warrants to its buyer for one
(1) year from the date of delivery that the goods sold are free from defects
in workmanship and materials. ELECTROMATIC Equip’t Co., Inc. will, at
its option, repair or replace or refund the purchase price of goods found to
be defective. This remedy shall be the buyer’s sole and exclusive remedy.
Any modification, abuse, exposure to corrosive environment or use other
than intended will void this warranty. This warranty is in lieu of all other
warranties, including implied warranties of merchantability and fitness for
an intended purpose. In no event shall ELECTROMATIC Equip’t Co., Inc.
be liable for any incidental and consequential damages in connection with
goods sold or any part thereof.

6
TARGET TORQUE INDICATION
The DTL torque wrench will alert you to reaching 90% of the target value
by an audible beep and a green LED light. When you reach 100% the
beep will change to a steady tone. When the torque applied is greater
than the target a red light will illuminate above the green.
MAINTENANCE AND STORAGE
1. Do not Over-torque (105% of Max. torque capacity). Over-torqueing
can damage torque wrench or cause it to lose accuracy.
2. If Er0 is displayed when the wrench is powered on, it indicates that it
has been overloaded and should be returned to the factory for
service.
3. Remove battery when storing for long period of time.
4. Do not use this torque wrench as a hammer.
5. Do not expose to excessive heat, humidity, or direct sunlight.
6. Do not use the torque wrench near water.
7. If the torque wrench gets wet, wipe it with a dry towel as soon as
possible. The saltwater can be especially damaging.
8. Do not use organic solvents, such as alcohol or paint thinner when
cleaning the torque wrench.
9. Keep this torque wrench away from magnets.
10. Do not expose this torque wrench to dust or sand as this could cause
serious damage.
11. Do not apply excessive force to the LCD panel.
3
SPECIFICATIONS
Accuracy*
Clockwise: ±2%
Counter-Clockwise: ±3%
From 20% to 100% of capacity,
±1 least significant digit
Capacity
12 Nm
106.2 lb-in
8.85 lb-ft
122.4 Kg-cm
Resolution
0.01 Nm
0.1 lb-in
0.01 lb-ft
0.1 Kg-cm
Presets
1 Programmable setpoint with both audible
beep and Green/Red LED indicator
Operating Modes
Peak and Track
Drive
1/4 Inch - 6.35 mm Male Square
Power Supply
1x AAA Battery (included)
Battery Life
12 Hours of continuous operation
Auto Off
Automatic power off after 5 minutes of non-use
Operating Temp.
-10°C - 60°C
Storage Temp.
-20°C - 70°C
Length
8 inches / 20 mm
Warranty
1 Year

4
BEFORE USING THE TORQUE WRENCH
Battery Installation
Remove the battery cover
Insert one (1) AAA batteries
with positive end facing the
front of the torque wrench
Reinstall battery cover and
rotate to lock it in place.
Take care to line up arrows
on cap and back of torque
wrench wh e n in s t a l l i n g .
POWER ON AND RESETTING
THE TORQUE WRENCH
Press C to power on the torque wrench
Press C to zero the torqu e torque wrench before use
NOTE: After pressing C the target torque val ue will be displayed
ATTENTION:
1. If an external force is applied to the torque wrench during power-on
or zeroing an initial torque offset will exist in memory.
2. The measuring unit and operating mode (track / peak) are stored in
memory. Once set they will be permanently stored.
SLEEP MODE
The torque wrench will automatically go to sleep after 5 minutes of nonuse. Press C to wake the torque wrench from sleep.
INSTALLING SOCKET
The DTL torque wrench uses standard 1/4” (6.35mm)
sockets. To remove the socket press the release
button on the top of the wrench head.
5
SELECTING UNITS OF MEASURE
The DTL torque wrench can display measurements in Newton Meters
(N-m), Pound-Inch (lb-in), Pound-Foot (lb-ft) and Kilogram Centimeter
(Kg-cm). The selected measuring unit is displayed right side of the
display.
Press the U/S to switch between measuring units.
SELECTING TRACK / PEAK MODE
The DTL can display torque in TRACK or PEAK mode. When in track
mode the torque wrench will display the target torque while there is no
torque applied, when torque is applied the torque wrench will display
real-time torque value until pressure is removed, then the display will
show the target value. In peak mode the torque wrench will display the
target torque while there is no pressure applied, when pressure is
applied the torque wrench will display and hold the highest value
measured until pressure is removed from the torque wrench then
applied again or the C (zero) key is pressed.
To select TRACK or PEAK mode press and hold the U/S key for 2
seconds, the display will show MODE, then press the up or down arrow
key to select between PEAK or TRACK mode (indicated by a small P or
T in the bottom right corner of the display). Then press the U/S key two
times to confirm your selection and return to measurement mode.
SETTING TARGET TORQUE
The DTL has 1 adjustable preset target value. The preset value is
displayed on the screen after C is pressed. To adjust the preset press
the UP / DOWN arrow keys to set the target value. The wrench saves
both target torque and unit of measure when the torque wrench is
powered off.
 Loading...