

Page 1
1
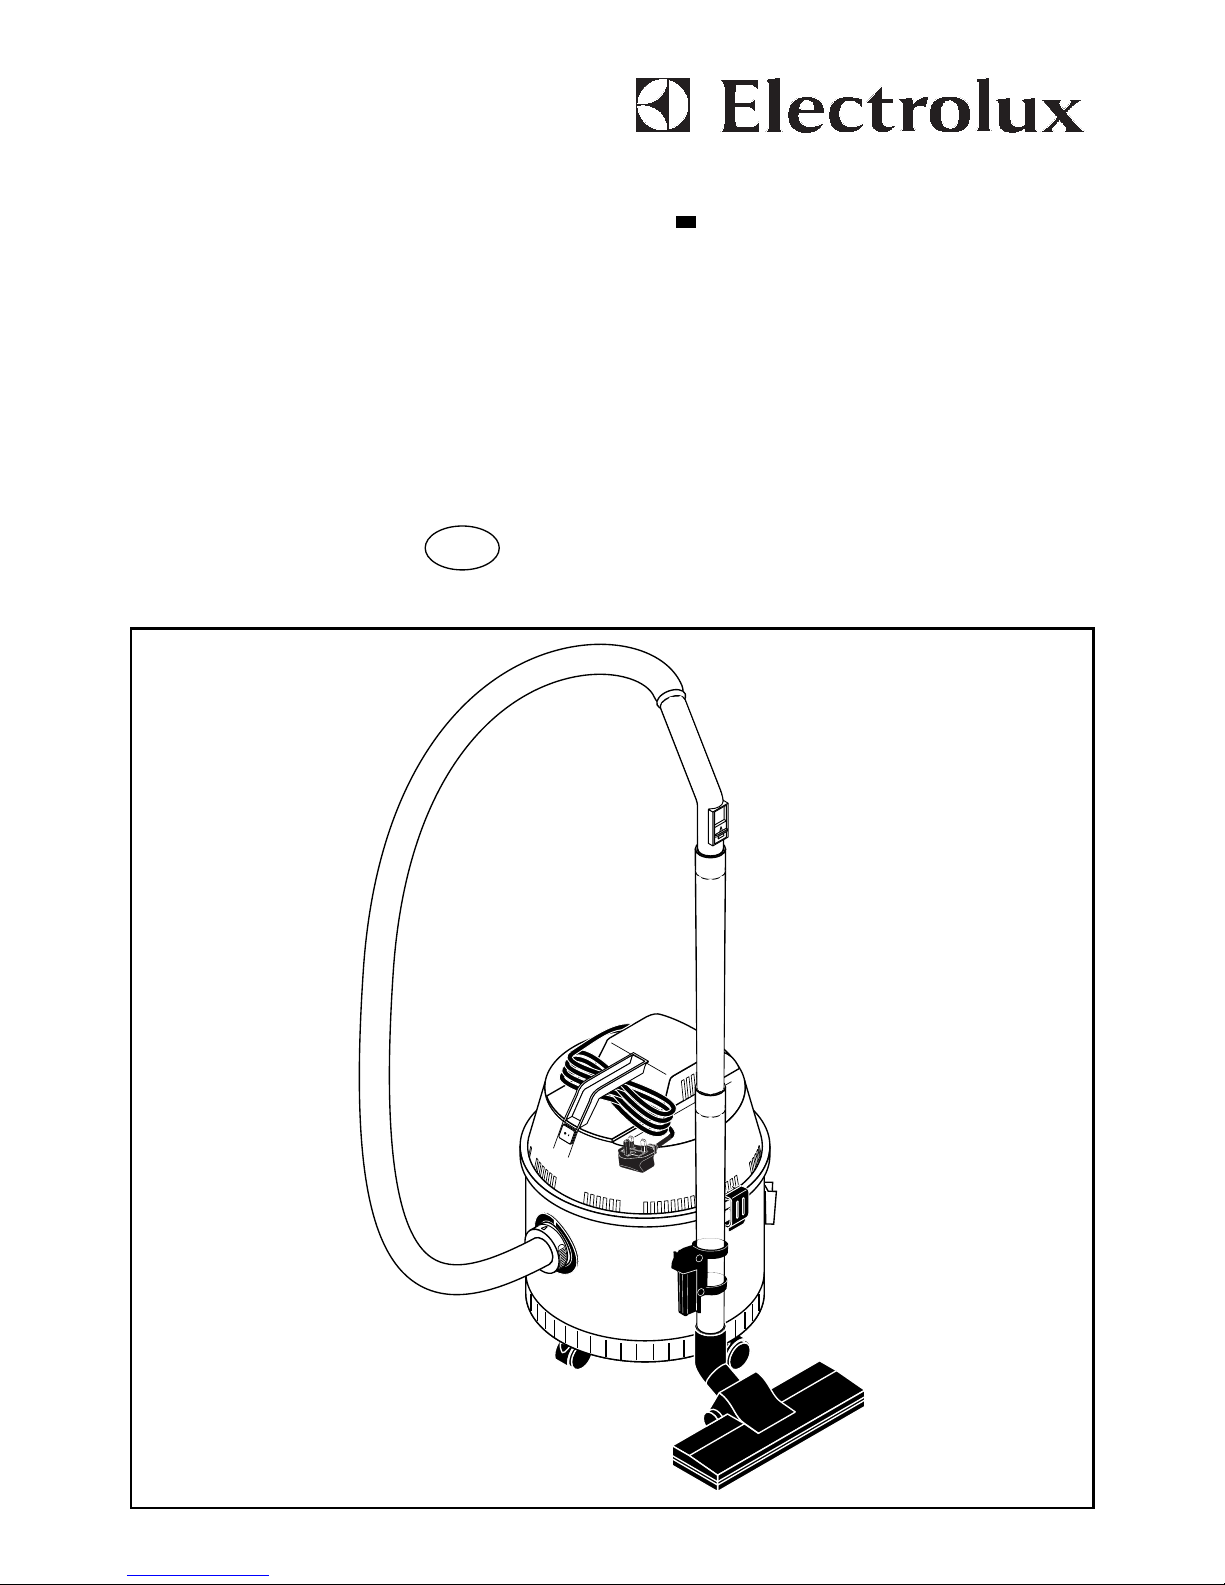
Electrolux JANITOR
DRY VACUUM CLEANER
Model Z1516
GB Instructions for use
Page 2
2
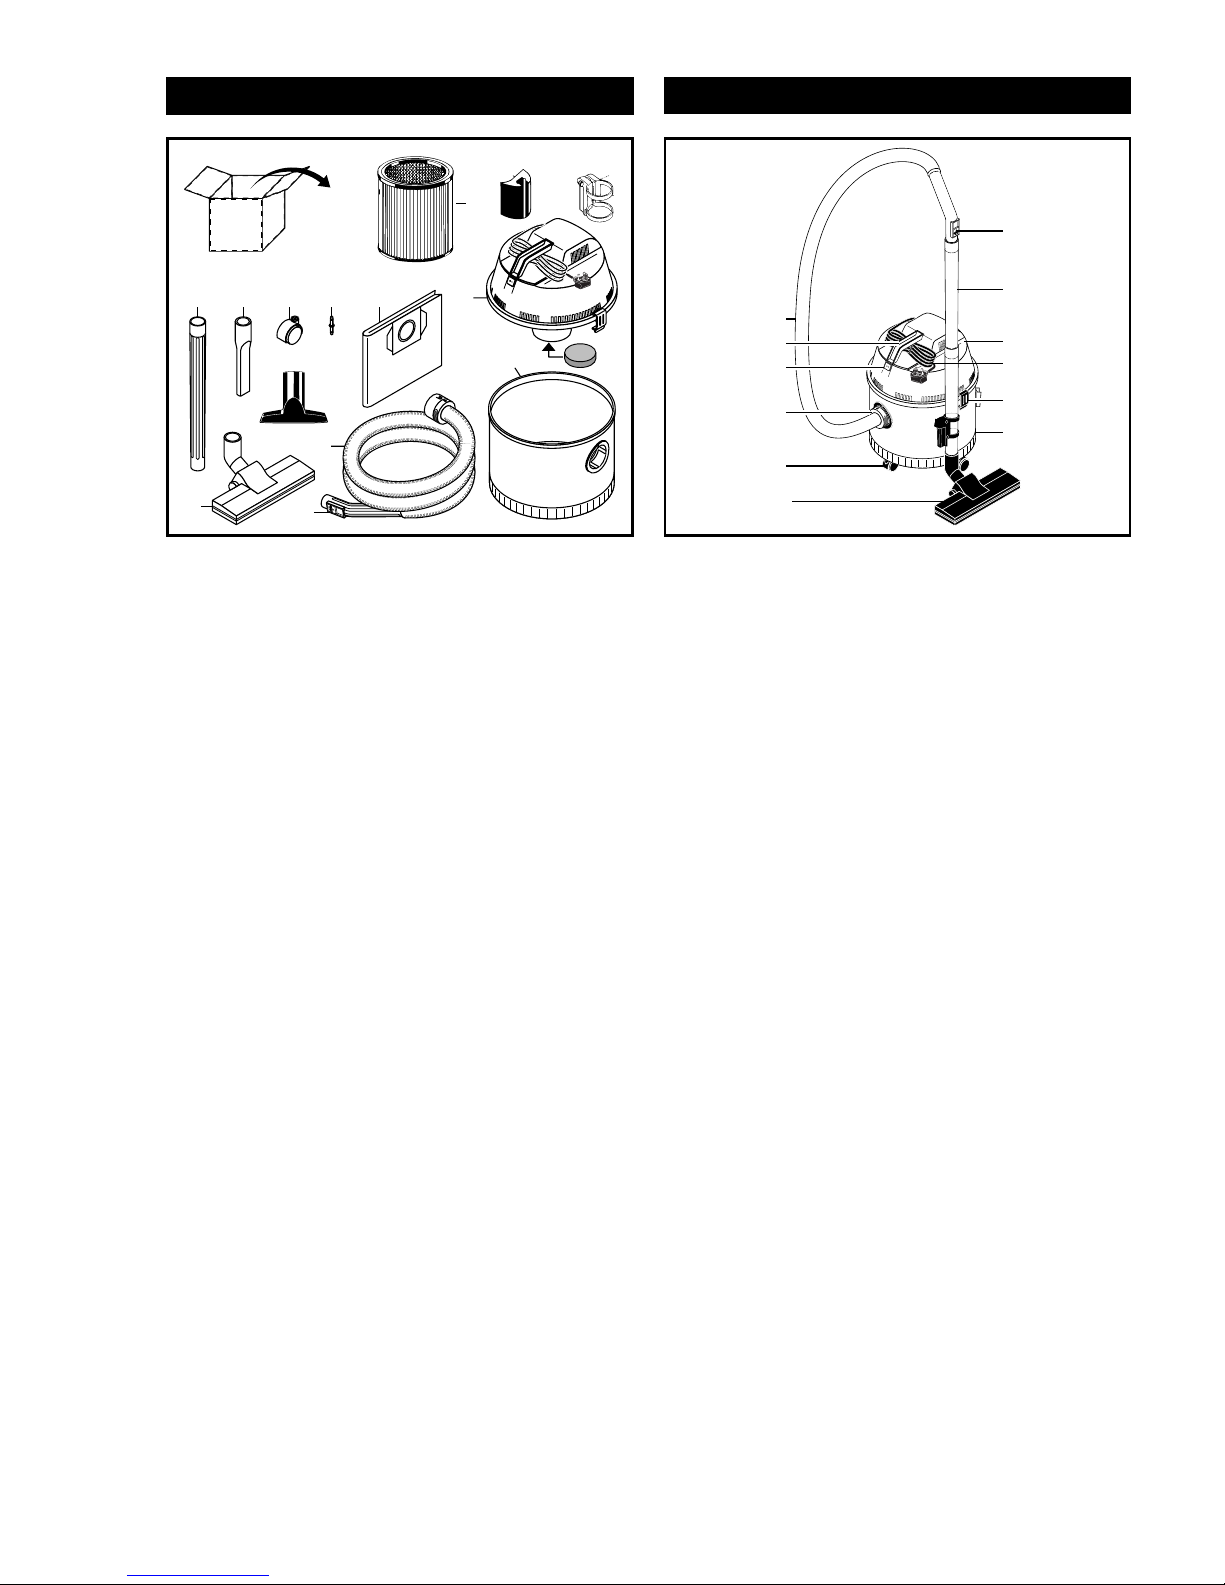
Package Contents
Fully Assembled
9171410
16
1
5
7
11
12
13
15
19
20
18
10
11
7
16
9
1
2
3
4
5
8
6
1 = Tank
2 = Hose Fitting
3 = ON/OFF Switch
4 = Carrying handle
5 = Suction Hose
6 = Cable
7 = Motor Housing
8 = Latches
9 = Castors (4 off)
10 = Metal Tube (2 ea.)
11 = Suction Regulator
12 = Paper Dustbag
13 = Cartridge Filter
14 = Crevice Tool
15= Upholstery Nozzle
16= Carpet and Hard Floor Nozzle
17 = Pin (4 ea.)
18= Motor Protection Filter (against coarse dirt)
19= Parking Mechanism
20= Locking Mechanism
Page
Package Contents . . . . . . . . . . . . . . . . . . . . . 2
Fully Assembled . . . . . . . . . . . . . . . . . . . . . . . 2
Assembling the Unit . . . . . . . . . . . . . . . . . . . . 3
Using the Unit . . . . . . . . . . . . . . . . . . . . . . . 4
SAFETY PRECAUTIONS . . . . . . . . . . . . . . . 4
Unpacking the Unit . . . . . . . . . . . . . . . . . . . 5
Page
Assembling the Unit . . . . . . . . . . . . . . . . . . . 5
Cleaning the Unit . . . . . . . . . . . . . . . . . . . . . . 5
Disposing of the Unit . . . . . . . . . . . . . . . . . . . 5
Troubleshooting . . . . . . . . . . . . . . . . . . . . . . . 6
Customer Service . . . . . . . . . . . . . . . . . . . . . . 6
Page 3
3
Assembling the Unit
7
8
1
3
2 mm
1
17
9
5
2
5
12
2
1.
2.
19
20
A E
F
G
B
C
D
Page 4

4
Dear Customer,
We thank you for the confidence you have
placed in us and our products. You have made
an excellent choice, since your Electrolux
JANITOR Dry Vacuum Cleaner with its 16-litre
plastic tank and high-performance, dual-stage
motor is ready for use around the clock at home
or in your workshop, cellar or garage. Take good
care of it and use it properly and it will give you
many years of service.
Please read this instruction manual carefully,
since it contains instructions on the safe, proper
use of the product.
This instruction manual is a part of the product
and should be kept handy at all times. If the
product involved should change hands, make
certain that its new owner receives this instruction manual.
Using the Unit
Your Electrolux JANITOR is a multi-purpose vacuum cleaner suitable for use in your home,
hobby room, cellar, workshop, garage, or yard,
wherever there is dirt or debris that needs to be
cleaned up.
SAFETY PRECAUTIONS
• Use the unit for its intended purposes only.
Using it for any other purposes is prohibited. Improper operation, abuse, or failure to
observe these safety precautions will relieve us of all liability and void its warranty.
• Connect the unit to a 240 V electrical outlet
protected by at least a 13-Amp. fuse or circuit
breaker. Refrain from using any multi-socket
taps or adapter plugs.
• Never touch any voltage-carrying components,
as they could be dangerous.
• Never touch or use the unit while your hands
are wet.
• Do not use the unit if its cable is damaged,
exhibits any visible damage, or is not in proper
working order, since that could result in electric-shock hazards.
• If the unit has become so severely damaged
that electrical components are exposed,
immediately disconnect it from the electrical
outlet and contact Customer Service on
08706 - 055 055.
• Keep its nozzle and the free end of its suction
hose well away from your face and others’
faces, otherwise you might injure your/their
eyes and/or ears.
• Never use the unit to vacuum up any toxic
substances, aggressive liquids, or any solutions containing solvents.
• Never operate the unit in rooms used for storing inflammable liquids or where gases or
vapours might have accumulated or formed.
Some substances, such as gasoline, paint
thinners, or heating oil may form explosive
vapours or mixtures if they become admixed
with inducted air, which could lead to fires or
explosions.
• Never use the unit to vacuum up hot ashes or
glowing objects.
• Never insert any foreign objects into the unit’s
induction or exhaust ports.
• Never leave the unit unattended while it is running and never allow children to play with it.
• Make certain that the electrical outlet where
the unit is plugged in is readily accessible at
all times while the unit is running in order that
it may be immediately unplugged in the event
of an emergency.
• Be extremely careful when vacuuming staircases. Position the unit such that it cannot fall
or tip over. Never overstretch its suction hose.
Hold onto its carrying handle at all times so
that it cannot fall downstairs or tip over.
• Immediately unplug the unit if it malfunctions
during operation and before undertaking
cleaning or maintenance operations or replacing its filter.
• Never unplug the unit by pulling on its cable.
• Keep the unit well isolated from sources of
heat or heaters or furnaces that might become
hot.
• Avoid using extension cords in wet or damp
areas.
• Never attempt to repair any damage to your
Electrolux JANITOR or any of its accessories
or to repair or replace its cable (a cable cord is
required) yourself. All such work should performed by an authorized customer service
engineer only, since improper repairs or modifications to the unit might cause health hazards.
Page 5

5
Unpacking the Unit
• Unpack the unit and check that all items that
should be included are present. Immediately
notify your dealer or our Customer Service
department if you find any damage or if any
items are missing.
• Save the original packing carton, since you
can use it for storing the unit and might need
it to return the unit to your dealer or an
Electrolux Customer Service engineer for servicing.
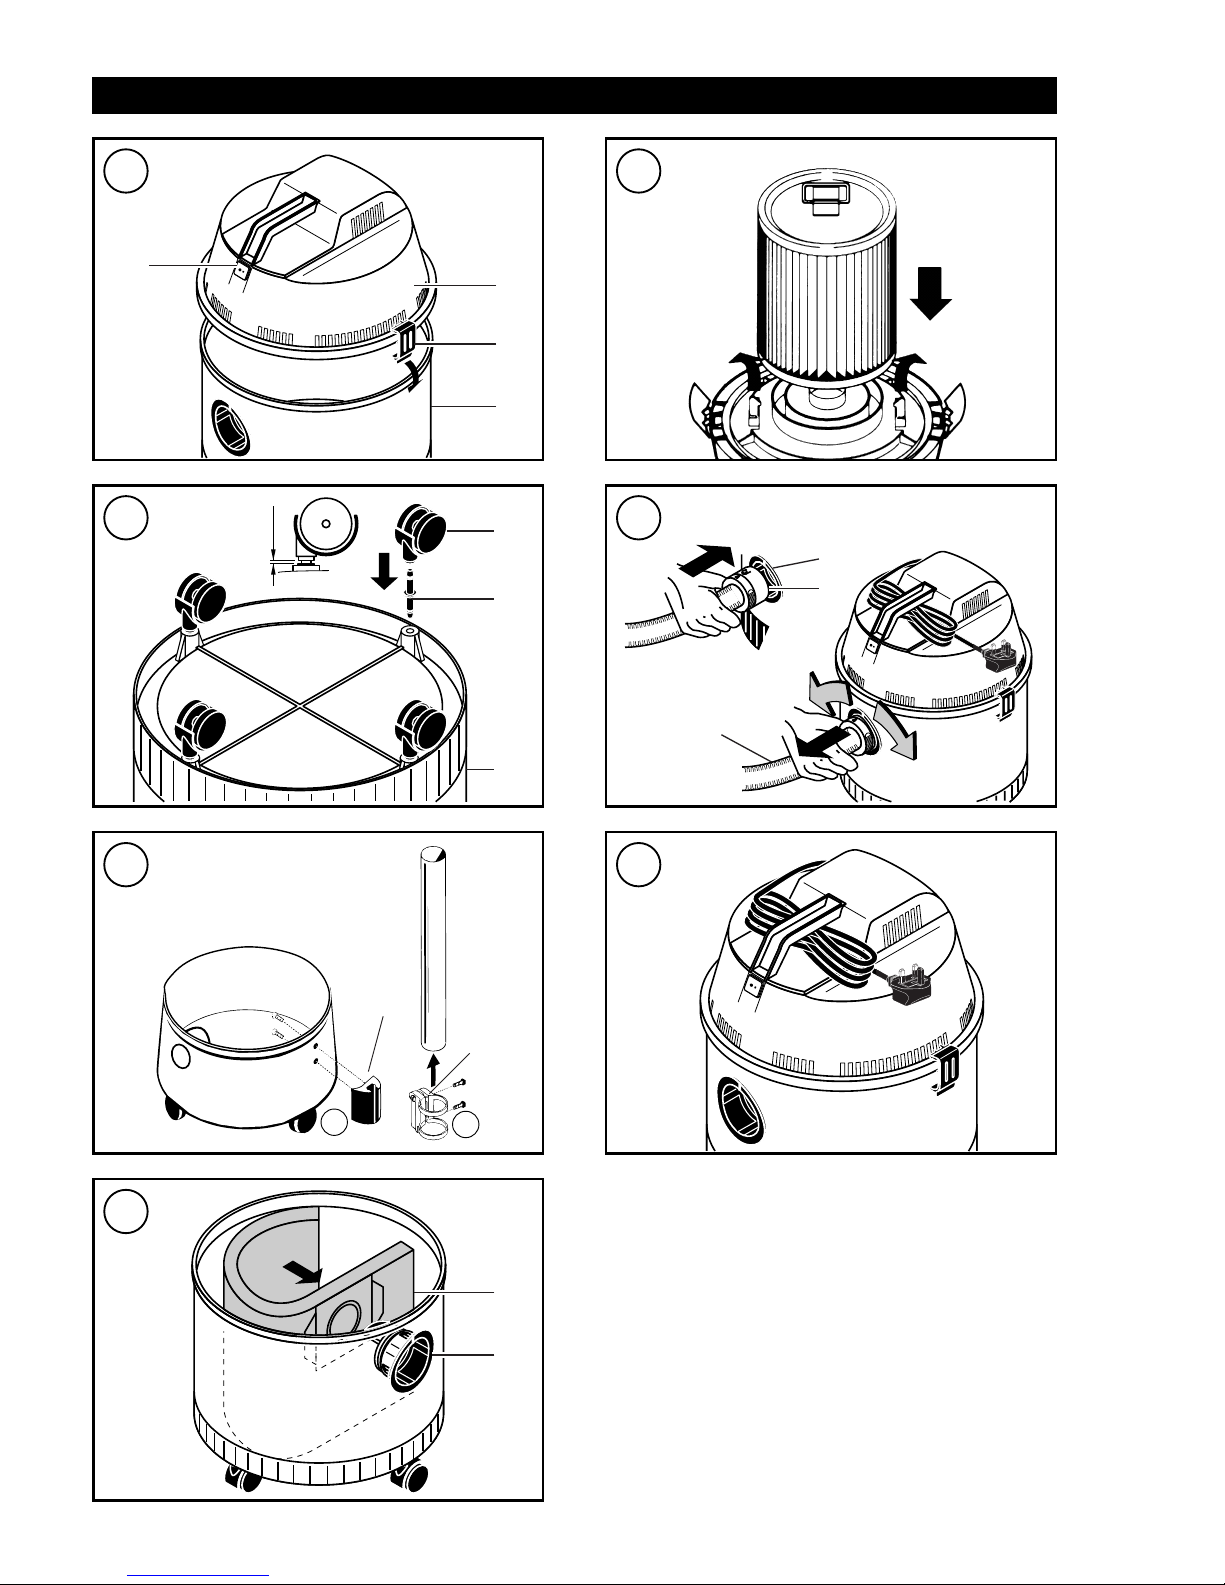
Assembling the Unit
• Fig. A: Open the latches (8), lift off the motor
housing (7), and remove the accessories from
inside the tank.
• Fig. B:
Insert the pins (17) into the holes in the
base of the tank (1) and then press the castors
(9) and pins in the holes until the necks of the
castors are flush with the base of the tank.
Set the tank (1) down on the castors and
check whether the castors are correctly seated
and working properly.
• Fig. C:
a Mounting of parking mechanism
(19). b Mounting height of locking mechanism
is to be determined depending on the size of
nozzles to be inserted (20).
• Fig. D:
Grasp the paper dustbag (12) by the
edges of its cardboard flap, press the bag
firmly onto the inner side of the hose fitting (2),
and then spread the paper dustbag out
against the inner wall of the tank (1).
• Fig. E:
Place the cartridge filter in an upright
position on the motor flange and gently but
firmly slide it into place on the filter mounting.
The pre-mounted retaining clips automatically
snap into place, thus securing the cartridge
filter.
• Fig. A:
Set the motor housing (7) onto the tank
(1) such that the switch (3) is above the hose
fitting and latch down both latches (8).
• Fig. F:
Align the index mark on the suction
hose (5) on that on the hose fitting (2) and then
insert the suction hose (5) into the hose fitting
(2) and press it home until the button snaps
into the hole. You may now install the accessories you intend to use on the free end of the
hose. To remove the suction hose (5), simply
give it a twist it and pull off the fitting (2) while
continuing to twist it.
• Fig. G:
Cable storage.
CAUTION
Never vacuum without the cartridge filter
installed.
Cleaning the cartridge filter (13)
Dismantle the cartridge filter (Fig.
E ).
You can clean it by simply brushing off the dust,
whilst holding it at its handle over a garbage bin.
If necessary, you can also clean it under a light
flow of running water. In this case, it must be
fully dried before being used again.
Replacing the Dustbag
Replacing the paper dustbag (12)
• Fig. C: Switch off the unit, unplug the cable,
and remove the motor housing (7) from the
tank (1). Grasp the cardboard flap on the
paper filter bag (12), pull if off the hose fitting
(2), press a new dustbag onto the hose fitting
(2), and replace the motor housing (7).
Cleaning the Unit
• Switch off the unit and unplug its cable. Do
not use abrasive or aggressive cleaning
agents. Wipe the motor housing and tank
clean using a damp cloth.
• Never use acetone, acids, or solvents for
cleaning, since they will attack the units finish
and components.
• Never immerse the unit in water.
• Replace the dustbag at regular intervals.
Unplug the unit before proceeding to replace
the dustbag.
Disposing of the Unit
• Units that are no longer serviceable may be
brought to a public collection point or refuse
dump for disposal.
• Normal household dust may be disposed of
along with other household waste.
Page 6

6
Troubleshooting
If your unit is inoperative or malfunctioning,
there may be no need to consult our Customer
Service department, since many common
problems can be solved on the spot using the
following troubleshooting procedures:
If ther
e is dust coming out of the unit while
vacuuming:
• Are the paper dustbag, and filter cartridge
correctly installed, tightly seated, and intact?
• Are you using an original filter?
If the unit gradually loses suction power:
• Is the tank full?
• Is the paper dustbag full?
• Are the suction hose or suction tubes clogged
with dirt or blocked by foreign objects? If so,
switch off the unit, remove the suction hose
and tubes, and clean them out. Stretching the
suction hose a bit should help dislodge any
dirt or foreign objects that may have become
trapped in the hose.
If the motor fails to run:
Unplug the unit before proceeding.
Never open the motor yourself.
• Are the cable, plug, and electrical outlet OK?
Customer Service
If your unit needs servicing, contact our
Customer Service department on
08706 - 055 055.
Have the model number and serial number on
the unit’s manufacturer’s identification plate
ready, whenever you contact Electrolux
Customer Services.
Page 7

7
CE Declaration of Conformity
We declare upon our sole liability that this product
conforms to the following norms or norm documents.
EC low voltage guideline (73/23/EEC),
modified by 93/68/EEC
EC guideline electromagnetic compatibility
(89/336/EEC), modified by 91/263/EEC, 92/31/EEC,
93/68/EEC
Applied harmonised norms:
DIN EN 60335-1, DIN EN 60335-2-2;
DIN EN 61000-3-2: 1995; DIN EN 61000-3-3: 1995;
DIN EN 55014-1: 1993; DIN EN 55014-2: 1997
Electrolux Customer Services
101 Oakley Road
Luton
Beds ·
LU4 9QQ
Tel: 0 87 06 - 055 055
Page 8

We reserve the right of technical modifications
without prior notice.
GA 09/01
Teile-Nr. 185 425
 Loading...